3
COMBINING COMMANDS

So far, you’ve been using the PowerShell console to call one command at a time. For simple code, this isn’t a problem: you run the command you need, and if you need one more, you call that too. But for bigger projects, having to call each command individually is too time-consuming. Luckily, you can combine commands so you can call them as a single unit. In this chapter, you’ll learn two ways of combining commands: by using the PowerShell pipeline and by saving your code in external scripts.
Starting a Windows Service
To illustrate why you’d want to combine commands, you’ll start by doing a simple example the old way. You’ll use two commands: Get-Service, which queries Windows services and returns information about them; and Start-Service, which starts Windows services. As shown in Listing 3-1, use Get-Service to make sure the service exists and then use Start-Service to start it.
PS> $serviceName = 'wuauserv'
PS> Get-Service -Name $serviceName
Status   Name               DisplayName
------   ----               -----------
Running  wuauserv           Windows Update
PS> Start-Service -Name $serviceName
Listing 3-1: Finding a service and starting it by using the Name parameter
You run Get-Service just to make sure PowerShell doesn’t throw any errors. Chances are the service is already running. If it is, Start-Service will simply return control to the console.
When you’re starting just one service, running the commands like this isn’t particularly taxing. But you can imagine how monotonous it might get if you were working with hundreds of services. Let’s look at how to simplify this problem.
Using the Pipeline
The first way to simplify your code is by chaining together commands by using the PowerShell pipeline, a tool that allows you to send the output of one command directly into another command as input. To use the pipeline, use the pipe operator (|) between two commands, like so:
PS> command1 | command2
Here, the output of command1 is piped into command2, becoming command2’s input. The final command in the pipeline will output to the console.
Many shell scripting languages, including cmd.exe and bash, use a pipeline. But what makes the pipeline in PowerShell unique is that it passes objects and not simple strings. Later in this chapter, you’ll look at how that happens, but for now, let’s rewrite the code in Listing 3-1 by using the pipeline.
Piping Objects Between Commands
To send the output of Get-Service into Start-Service, use the code in Listing 3-2.
PS> Get-Service -Name 'wuauserv' | Start-Service
Listing 3-2: Piping existing services to the Start-Service command
In Listing 3-1, you used the Name parameter to tell the Start-Service command which service to start. But in this example, you don’t have to specify any parameters because PowerShell takes care of that for you. It looks at the output of Get-Service, decides what values it should pass to Start-Service, and matches the values to the parameters that Start-Service takes.
If you wanted to, you could rewrite Listing 3-2 to use no parameters at all:
PS> 'wuauserv' | Get-Service | Start-Service
PowerShell sends the string wuauserv into Get-Service, and the output of Get-Service into Start-Service—all without you having to specify a thing! You’ve combined three separate commands into a single line, but you’ll still have to reenter that line for every service you want to start. In the next section, you’ll see how to use one line to start as many services as you want.
Piping Arrays Between Commands
In a text editor such as Notepad, create a text file called Services.txt that contains the strings Wuauserv and W32Time on separate lines, as shown in Figure 3-1.

Figure 3-1: A Services.txt file with Wuauserv and W32Time listed on separate lines
This file contains a list of services you want to start. I’ve used two services here for simplicity’s sake, but you could add as many as you like. To display the file to your PowerShell window, use the Get-Content cmdlet’s Path parameter:
PS> Get-Content -Path C:Services.txt
Wuauserv
W32Time
The Get-Content command reads in a file line by line, adding each line to an array and then returning that array. Listing 3-3 uses the pipeline to pass the array that Get-Content returns into the Get-Service command.
PS> Get-Content -Path C:Services.txt | Get-Service

Status   Name               DisplayName
------   ----               -----------
Stopped  Wuauserv           Windows Update
Stopped  W32Time            Windows Time
Listing 3-3: Displaying a list of services to a PowerShell session by piping Services.txt to Get-Service
The Get-Content command is reading in the text file and spitting out an array. But instead of sending the array itself through the pipeline, PowerShell unwraps it, sending each item in the array individually through the pipeline. This allows you to execute the same command for every item in the array. By putting every service you want to start in your text file, and tacking on an extra | Start-Service to the command in Listing 3-3, you have a single command that can start as many services as you need.
There’s no limit to how many commands you can stitch together using the pipeline. But if you find yourself going over five, you may need to rethink your approach. Note that although the pipeline is powerful, it won’t work everywhere: most PowerShell commands accept only certain types of pipeline input, and some don’t accept any at all. In the next section, you’ll dig a little deeper into how PowerShell handles pipeline input by looking at parameter binding.
Looking at Parameter Binding
When you pass parameters to a command, PowerShell initiates a process known as parameter binding, in which it matches each object you pass into the command to the various parameters specified by the command’s creator. For a PowerShell command to accept pipeline input, the person who writes the command—whether that’s Microsoft or you—has to explicitly build in pipeline support for one or more parameters. You’ll notice an error if you attempt to pipe information into a command that doesn’t have pipeline support on any parameter, or if PowerShell cannot find a suitable binding. For example, try running the following command:
PS> 'string' | Get-Process
Get-Process : The input object cannot be bound to any parameters for the command either...
--snip--
You should see that the command won’t accept pipeline input. To see if using the pipeline is even possible, you can look at a command’s full help content by using the Full parameter on the Get-Help command. Let’s use Get-Help to look at the Get-Service command you used in Listing 3-1:
PS> Get-Help -Name Get-Service –Full
You should get quite a bit of output. Scroll down to the PARAMETERS section. This section lists information about each parameter and gives you more information than you’d get by not using the Detailed or Full parameter at all. Listing 3-4 shows the information for Get-Service’s Name parameter.
-Name <string[]>
        Required?                    false
        Position?                    0
        Accept pipeline input?       true (ByValue, ByPropertyName)
        Parameter set name           Default
        Aliases                      ServiceName
        Dynamic?                     false
Listing 3-4: The Get-Service command’s Name parameter information
There’s a lot of information here, but we want to focus on the Accept pipeline input? field. As you can imagine, this field tells you whether a parameter accepts pipeline input or not; if the parameter didn’t accept pipeline input, you’d see false next to this field. But notice there’s more information here: this parameter accepts pipeline input both via ByValue and ByPropertyName. Contrast this with the ComputerName parameter for the same command, whose information is in Listing 3-5.
-ComputerName <string[]>
        Required?                    false
        Position?                    Named
        Accept pipeline input?       true (ByPropertyName)
        Parameter set name           (all)
        Aliases                      Cn
        Dynamic?                     false
Listing 3-5: The Get-Service command’s ComputerName parameter information
The ComputerName parameter allows you to specify which computer you’d like to run Get-Service on. Notice this parameter also accepts a string type. So how does PowerShell know that you mean the service name, and not the computer name, when you do something like the following?
PS> 'wuauserv' | Get-Service
PowerShell matches pipeline input to parameters in two ways. The first is via ByValue, which means that PowerShell will look at the type of object passed in and interpret it accordingly. Because Get-Service specifies that it accepts the Name parameter via ByValue, it will interpret any string passed to it as Name unless otherwise specified. Because parameters passed via ByValue depend on the type of input, only one parameter can be passed via ByValue.
The second way PowerShell will match a parameter from the pipeline is via ByPropertyName. In this case, PowerShell will look at the object passed in, and if it has a property with the appropriate name (ComputerName, in this case), then it will look at the value for that property and accept that value as the parameter. So if you wanted to pass in both a service name and a computer name to Get-Service, you could create a PSCustomObject and pass it in, as in Listing 3-6.
PS> $serviceObject = [PSCustomObject]@{Name = 'wuauserv'; ComputerName = 'SERV1'}
PS> $serviceObject | Get-Service
Listing 3-6: Passing a custom object into Get-Service
By looking at a command’s parameter specifications, and using a hashtable to cleanly store the ones you need, you’ll be able to use the pipeline to string together all sorts of commands. But as you start to write more complex PowerShell code, you’ll need more than the pipeline. In the next section, you’ll look at how to externally store your PowerShell code as scripts.
Writing Scripts
Scripts are external files that store a sequence of commands, which you can run by entering a single line in the PowerShell console. As you can see in Listing 3-7, to run a script, you simply enter the path to it in the console.
PS> C:FolderPathToScriptscript.ps1
Hello, I am in a script!
Listing 3-7: Running a script from the console
Although there’s nothing you can do in a script that you can’t do in the console, it’s much easier to run a single command using a script than it is to type several thousand commands! Not to mention that if you want to change anything in your code, or you make a mistake, you’ll need to retype those commands again. As you’ll see later in the book, scripting allows you to write complex, robust code. But before you start writing scripts, you have to change some PowerShell settings to make sure you can run them.
Setting the Execution Policy
By default, PowerShell does not allow you to run any scripts. If you try to run an external script in the default PowerShell installation, you’ll encounter the error in Listing 3-8.
PS> C:PowerShellScript.ps1
C:PowerShellScript.ps1: File C:PowerShellScript.ps1 cannot be loaded because
running scripts is disabled on this system. For more information, see about
_Execution_Policies at http://go.microsoft.com/fwlink/?LinkID=135170.
At line:1 char:1
+ C:PowerShellScript.ps1
+ ~~~~~~~~~~~~~~~~~~~~~~~
    + CategoryInfo          : SecurityError: (:) [], PSSecurityException
    + FullyQualifiedErrorId : UnauthorizedAccess
Listing 3-8: An error that occurs when you try to run scripts
This frustrating error message is the result of PowerShell’s execution policy, a security measure that decides which scripts can be run. The execution policy has four main configurations:
Restricted This configuration, which is the default, doesn’t allow you to run scripts.
AllSigned This configuration allows you to run only scripts that have been cryptographically signed by a trusted party (more on this later).
RemoteSigned This configuration allows you to run any script you write, and any script you download as long as it’s been cryptographically signed by a trusted party.
Unrestricted This configuration allows you to run any scripts.
To see which execution policy your machine is currently using, run the command in Listing 3-9.
PS> Get-ExecutionPolicy
Restricted
Listing 3-9: Displaying the current execution policy with the Get-ExecutionPolicy command
Chances are you get Restricted when you run this command. For the purposes of this book, you’ll change the execution policy to RemoteSigned. This will allow you to run any script you write, while also ensuring that you use only external scripts that come from trusted sources. To change the execution policy, use the Set-ExecutionPolicy command and pass in the policy you want, as in Listing 3-10. Note that you’ll need to be running this command as an administrator (see Chapter 1 for a refresher on running commands as an admin). You need to perform this command only once, as the setting is saved in the registry. If you’re in a large Active Directory environment, the execution policy can also be set across many computers at once by using Group Policy.
PS> Set-ExecutionPolicy -ExecutionPolicy RemoteSigned

Execution Policy Change
The execution policy helps protect you from scripts that you do not trust. Changing the
execution policy might expose you to the security risks described in the about_Execution
_Policies help topic at http://go.microsoft.com/fwlink/?LinkID=135170. Do you want to change
the execution policy?
[Y] Yes  [A] Yes to All  [N] No  [L] No to All  [S] Suspend  [?] Help (default is "N"): A
Listing 3-10: Changing your execution policy with the Set-ExecutionPolicy command
Run the Get-ExecutionPolicy command again in order to verify that you successfully changed the policy to RemoteSigned. As I said previously, you won’t need to set the execution policy every time you open PowerShell. The policy will stay at RemoteSigned until you want to change it again.
Scripting in PowerShell
Now that your execution policy is set, it’s time to write a script and execute it in the console. You can write PowerShell scripts in any text editor you like (Emacs, Vim, Sublime Text, Atom—even Notepad), but the most convenient way to write PowerShell scripts is by using the PowerShell Integrated Scripting Environment (ISE) or Microsoft’s Visual Studio Code editor. Technically, the ISE is deprecated, but it comes preinstalled with Windows so it will probably be the first editor you discover.
Using the PowerShell ISE
To start the PowerShell ISE, run the command in Listing 3-11.
PS> powershell_ise.exe
Listing 3-11: Opening the PowerShell ISE
An interactive console screen that looks like Figure 3-2 should open up.

Figure 3-2: The PowerShell ISE
To add a script, click File ▶ New. The screen should split, with a white panel opening above the console, as in Figure 3-3.
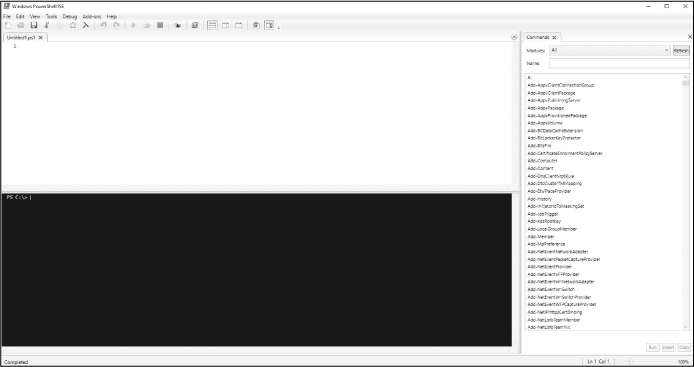
Figure 3-3: The PowerShell ISE with a script opened
Click File ▶ Save and save the new file as WriteHostExample.ps1. I’ll save my script at the root of my C: drive, so it’s located at C:WriteHostExample.ps1. Notice that you save your script with the extension .ps1; this extension tells your system that the file is a PowerShell script.
You’ll be entering all the text for your script in the white panel. The PowerShell ISE allows you to edit and run the script in the same window, which can save you a lot of annoying back and forth as you’re editing. The PowerShell ISE has many more features, although I won’t cover them here.
PowerShell scripts are simple text files. It doesn’t matter which text editor you use, so long as you use the correct PowerShell syntax.
Writing Your First Script
Using whatever editor you like, add the line in Listing 3-12 to your script.
Write-Host 'Hello, I am in a script!'
Listing 3-12: The first line in your script
Notice there’s no PS> at the start of the line. From here on out, that’s how you’ll know whether we’re working in the console or writing in a script.
To run this script, head over to your console and type the path to your script, as in Listing 3-13.
PS> C:WriteHostExample.ps1
Hello, I am in a script!
Listing 3-13: Executing WriteHostExample.ps1 in the console
Here, you use the full path to run WriteHostExample.ps1. If you’re already in the directory containing the script you want to run, you can use a dot to indicate the current working directory, like so: .WriteHostExample.ps1.
Congratulations, that’s it—you’ve created your first script! It might not look like much, but it’s a big step in the right direction. By the end of this book, you’ll be defining your own PowerShell modules in scripts with hundreds of lines.
Summary
In this chapter, you learned two valuable methods to combine commands: the pipeline and scripts. You also saw how to change your execution policy, and demystified some of the magic behind the pipeline by looking at parameter binding. We’ve laid the foundation for creating more-powerful scripts, but we need to cover a few more key concepts before we get there. In Chapter 4, you’ll learn how to make your code considerably more robust by using control flow structures such as if/then statements and for loops.