Chapter 9
Moving Right Along …
IN THIS CHAPTER
![]() Creating animation
Creating animation
![]() Mixing other people’s code with your own code
Mixing other people’s code with your own code
![]() Dragging widgets without dropping them or breaking them
Dragging widgets without dropping them or breaking them
If you’ve read other material in this book, you’re probably tired of my long chapter introductions, with all their personal stories and bad jokes. That’s why, for this chapter, I skip the preliminaries and get straight to the point.
This chapter is about animation — making things change right before the user’s eyes. When I think about animation, I immediately think of movement, but Flutter provides a much broader definition of animation. With Flutter, you can change almost any property of a widget on almost any time scale.
Setting the Stage for Flutter Animation
This chapter’s first listing has a bunch of reusable code. Subsequent listings contain code that works cooperatively with the code in the first listing. Thanks to Dart’s extensions feature, each new listing can create methods belonging to the first listing’s classes. You can read all about Dart extensions in Chapter 8.
The code in Listing 9-1 can’t do anything on its own. Instead, this code relies on declarations in the chapter’s other listings.
LISTING 9-1 Reuse This Code
// App09Main.dart

import 'package:flutter/material.dart';

import 'App0902.dart';  // Change to App0903, App0904, and so on.

void main() => runApp(App09Main());

class App09Main extends StatelessWidget {
  @override
  Widget build(BuildContext context) {
    return MaterialApp(
      home: MyHomePage(),
    );
  }
}

class MyHomePage extends StatefulWidget {
  @override
  MyHomePageState createState() => MyHomePageState();
}

class MyHomePageState extends State<MyHomePage>
    with SingleTickerProviderStateMixin {
  Animation<double> animation;
  AnimationController controller;

  @override
  void initState() {
    super.initState();
    controller =
        AnimationController(duration: const Duration(seconds: 3), vsync: this);
    animation = getAnimation(controller);
  }

  @override
  Widget build(BuildContext context) {
    return Material(
      child: SafeArea(
        child: Padding(
          padding: const EdgeInsets.all(8.0),
          child: Column(
            children: <Widget>[
              Expanded(
                child: Stack(
                  children: <Widget>[
                    buildPositionedWidget(),
                  ],
                ),
              ),
              buildRowOfButtons(),
            ],
          ),
        ),
      ),
    );
  }

  Widget buildRowOfButtons() {
    return Row(
      mainAxisAlignment: MainAxisAlignment.center,
      children: <Widget>[
        RaisedButton(
          onPressed: () => controller.forward(),
          child: Text('Forward'),
        ),
        SizedBox(
          width: 8.0,
        ),
        RaisedButton(
          onPressed: () => controller.animateBack(0.0),
          child: Text('Backward'),
        ),
        SizedBox(
          width: 8.0,
        ),
        RaisedButton(
          onPressed: () => controller.reset(),
          child: Text('Reset'),
        ),
      ],
    );
  }

  @override
  void dispose() {
    controller.dispose();
    super.dispose();
  }
}
Figure 9-1 illustrates the concepts that come together to make Flutter animation.

FIGURE 9-1: How Flutter animation works.
You want something to change as the user looks on. To do this, you need four things: an Animation, an AnimationController, a ticker, and a feature of the app that changes. Here’s how it all works:
-
An
Animationis a plan for changing a value.In Listing 9-1, the words
Animation<double>indicate that the changing value is a number with digits beyond the decimal point — a number like0.0,0.5, or0.75. The plan in Figure 9-1 is to change a value in the range from 1.0 to 200.0.The
Animationitself isn’t about movement of any kind. The value that goes from 1.0 to 200.0 may be a position, but it may also be a size, an amount of transparency, a degree of rotation, or whatever. For the animation variable in Listing 9-1, values like 1.0 and 200.0 are only numbers. Nothing else.By the way, if you’re looking in Listing 9-1 for a reference to an animation’s
doublevalue, stop looking. The code in Listing 9-1 makes no reference to such a value. If you peek ahead to the next section’s listing, you seeanimation.value. That’s your tangible evidence that anAnimationinstance holds a value of some kind.Flutter’s
Animationclass is nice, but anAnimationcan’t do much without anAnimationController. Here’s why: -
An
AnimationControllermakes the animation start, stop, go forward, go backward, repeat, and so on.Calls such as
controller.forward(),controller.animateBack(0.0), andcontroller.reset()push the animation in one direction or another.In Listing 9-1, the
AnimationControllerconstructor call says that the animation lasts for 3 seconds. If seconds aren’t good enough, you can use other parameters, such asmicroseconds,milliseconds,minutes,hours, anddays. Each of the following constructors describes 51 hours:Duration(hours: 51)
Duration(days: 1, hours: 27)
Duration(days: 2, hours: 3)
Duration(minutes: 3060) - In addition to its
duration, theAnimationControllerin Listing 9-1 has avsyncproperty. If you’re wondering what that is, keep reading. -
A ticker notifies the
AnimationControllerwhen each time interval passes.The words
with SingleTickerProviderStateMixinin Listing 9-1 makeMyHomePageStateinto a ticker. The ticker wakes up repeatedly and says, “It’s time to change a value.”But which value gets changed? What part of the code hears the ticker’s announcement? Making
MyHomePageStatebe a ticker doesn’t connectMyHomePageStatewith a particularAnimationController.To make that connection, the
AnimationControllerin Listing 9-1 has avsync: thisparameter. That parameter tells Flutter that “thisinstance ofMyHomePageStateis the ticker for the newly constructedAnimationController.” I’ve carefully worded my explanation of tickers and
 vsync: thisso that the explanation doesn’t offend anyone who knows all the details. The trouble is, precise explanations can be difficult to understand. If you don’t comprehend all the stuff aboutvsync: this, simply add those words to your own code, and then move on. None of this book’s examples requires an in-depth understanding of tickers andvsync. In Listing 9-1, the name
 SingleTickerProviderStateMixinsuggests that the Dart programming language has something called a mixin. A mixin is something like an extension, except that it’s not the same as an extension. For a comparison, see the later sidebar “Another way to reuse code.”Here’s the final ingredient in a Flutter animation:
-
Some feature changes as a result of the change in the
Animationvalue.In Figure 9-1, a balloon’s size changes with an
Animationinstance’sdoublevalue. But the code in Listing 9-1 makes no reference to a balloon’s size, or to any other use of theanimationvariable’s value. On this count, Listing 9-1 is somewhat lacking.The code to make things change is in the
buildPositionedWidgetfunction, and that function’s body is in Listings 9-2 through 9-6. Each of those listings does something different with theAnimationobject’sdoublevalues.
Listing 9-1 has one more interesting feature: It has a place where widgets can move freely. Imagine making an icon the child of a Center widget. The Center widget determines the icon’s position, and that’s the end of the story. A Center widget’s constructor has no parameters that let you wiggle its child in one direction or another. Don’t bother trying to make a Center widget’s child move. You have no vocabulary for moving it.
What you need is a widget that lets you mark its children’s exact coordinates within the available space. For that, Flutter has a Stack.
A Stack is like a Row or a Column, but a Stack doesn’t place its children in a straight line. Instead, a Stack has two kinds of children — Positioned widgets and all other kinds of widgets. Each Positioned widget can have top, bottom, left, and right properties, which determine the exact location of the Positioned widget’s child. The other widgets (the ones that aren’t Positioned) get stuffed into some default location.
Have a look at the following code:
Stack(
  children: <Widget>[
    Positioned(
      top: 100.0,
      left: 100.0,
      child: Container(
        width: 50.0,
        height: 50.0,
        color: Colors.black,
      ),
    ),
    Positioned(
      top: 120.0,
      left: 120.0,
      child: Container(
        width: 25.0,
        height: 25.0,
        color: Colors.white,
      ),
    ),
  ],
)
This code creates the drawing shown in Figure 9-2.

FIGURE 9-2: Two containers on a stack.
The drawing consists of two Container rectangles — one black and the other white. The white rectangle’s width and height are half those of the black rectangle. But notice this: The two rectangles overlap because the rectangles’ top and left edges are almost the same.
A Stack constructor has a children parameter, and that parameter’s value is a list. The order of the widgets in the list matters. If two widgets overlap one another, the widget that comes later in the list appears to be on top. In the code accompanying Figure 9-2, you don’t want to change the order of the two Positioned widgets in the list. If you do, the white rectangle becomes completely hidden behind the bigger black rectangle.
 You can download and run the little
 Stack app shown in Figure 9-2. It’s the project named app0900 in the files that you download from this book’s website.
Moving Along a Straight Line
“A meal without wine is like a day without sunshine.”
— AUTHOR UNKNOWN (AT LEAST, NOT KNOWN BY ME)
“Listing 9-1 without an extension is like a day without dessert.”
— AUTHOR KNOWN (KNOWN TO BE ME)
Listing 9-2 contains an extension for the code in Listing 9-1.
LISTING 9-2 Going Downward
// App0902.dart

import 'package:flutter/material.dart';

import 'App09Main.dart';

extension MyHomePageStateExtension on MyHomePageState {
  Animation getAnimation(AnimationController controller) {
    Tween tween = Tween<double>(begin: 100.0, end: 500.0);
    Animation animation = tween.animate(controller);
    animation.addListener(() {
      setState(() {});
    });
    return animation;
  }

  Widget buildPositionedWidget() {
    return Positioned(
      left: 150.0,
      top: animation.value,
      child: Icon(
        Icons.music_note,
        size: 70.0,
      ),
    );
  }
}
Taken together, Listings 9-1 and 9-2 form a complete Flutter app. Figure 9-3 shows you what the app looks like when it starts running. The dotted line is my way of illustrating the movement of the app’s Musical Note icon. (The dotted line doesn’t actually appear as part of the app.)
Listing 9-2 has the buildPositionedWidget method declaration that’s missing from Listing 9-1. In the method’s body, a Positioned widget tells Flutter where its child (the Musical Note icon) should appear. When the app starts running, the numbers
left: 150,
top: animation.value,
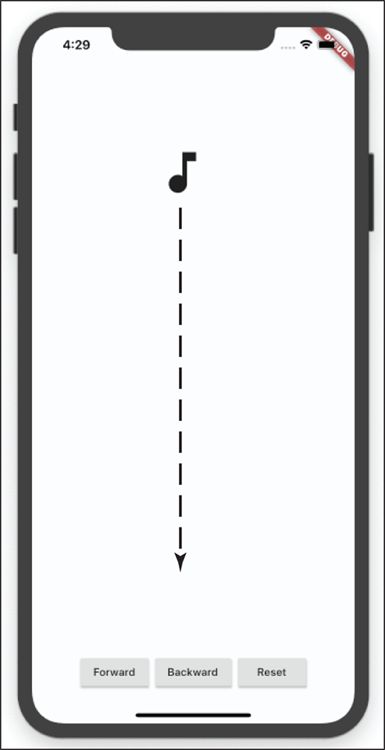
FIGURE 9-3: Drop me a note.
place the icon 150.0 dps from the left edge of the Stack, and 100.0 dps from the top of the Stack. The number 100.0 comes from the animation’s begin value, which is declared near the start of Listing 9-2. As animation.value increases, the Musical Note icon moves downward.
To find out what dps means, refer to Chapter 3.
Listing 9-2 also has a getAnimation method — a method that’s called in Listing 9-1 but not declared in Listing 9-1. The getAnimation method in Listing 9-2 creates a Tween — a thing that comes from the world of animated cartoons. Imagine a cartoon character moving an arm from left to right. A cartoonist draws the arm’s starting position and end position, and a computer creates the arm’s “between” images. In the same way, an instance of Flutter’s Tween class has begin and end values. When the animation moves forward, Flutter changes these values gradually from the begin value to the end value.
The rest of the getAnimation method’s code connects the Tween with all the other puzzle pieces:
-
The call to
tween.animate(controller)creates an actualAnimationinstance.The way I describe a
Tween, you may think that aTweenis the same as anAnimation. But it’s not. Fortunately, if you’ve created aTween, you can make anAnimationfrom it. In Listing 9-2, thetween.animate(controller)call creates anAnimationobject. That’s a step in the right direction. -
The call to
addListenertells theMyHomePageStateto rebuild itself whenever the animation’s value changes.In app development, a listener is a generic name for something that listens for events. The code in Listing 9-2 says,
Create a function that redraws the screen by calling
setState. Make that function listen for changes in the animation’s value. That way, Flutter redraws the screen whenever the animation’s value changes.Each call to
setStatemakes Flutter update theleftandtopvalues of thePositionedwidget in Listing 9-2. Becauseleftis always 150.0, the icon doesn’t move sideways. But theanimationobject’svalueproperty changes from moment to moment, so the icon moves up and down along the screen.
The AnimationController in Listing 9-1 determines the icon’s movement:
-
When the user presses the app’s Forward button, Listing 9-1 calls the
controller.forwardmethod.The icon moves downward if it’s not already at the bottom of its trajectory.
-
When the user presses the app’s Backward button, Listing 9-1 calls
controller.animateBack(0.0).The icon moves upward if it’s not already at the top.
In the world of animations, numbers from 0.0 to 1.0 are very useful. In an
animateBackcall, the number0.0means “roll the animation backward until it reaches itsbeginvalue.” To make the animation reach its midpoint, you’d callcontroller.animateBack(0.5). -
When the user presses the app’s Reset button, Listing 9-1 calls
controller.reset().The icon jumps to its starting position. (If it’s already at the starting position, it stays there.)
 You may never see the code in Listing 9-2 in any other book. This book’s version of the
 getAnimation method avoids a trick that Flutter developers commonly use. They summarize the entire method body in one statement:
return Tween<double>(begin: 100.0, end: 500.0).animate(controller)
  ..addListener(() {
    setState(() {});
  });
In this code, the pair of dots in front of addListener is Dart’s cascade operator. The operator calls addListener on the Animation instance that’s about to be returned. The use of this operator makes the code much more concise.
Bouncing Around
My big disappointment in writing this chapter is that the figures don’t do justice to the apps they’re supposed to illustrate. Figure 9-3 has a dotted line instead of real motion. Figure 9-4 is even worse because the dotted line isn’t really accurate.
In this section’s app, the Cake icon doesn’t move sideways. The dotted line in Figure 9-4 moves to the right only to show some up-and-down motion near the end of the animation. Even so, Flutter’s API calls this motion a curve. The code for Figure 9-4 is in Listing 9-3.

FIGURE 9-4: A cake made of rubber?
LISTING 9-3 Changing the Animation’s Velocity
// App0903.dart

import 'package:flutter/material.dart';

import 'App09Main.dart';

extension MyHomePageStateExtension on MyHomePageState {
  Animation getAnimation(AnimationController controller) {
    return Tween<double>(begin: 100.0, end: 500.0).animate(
      CurvedAnimation(
        parent: controller,
        curve: Curves.bounceOut,
      ),
    )..addListener(() {
        setState(() {});
      });
  }

  Widget buildPositionedWidget() {
    return Positioned(
      left: 150.0,
      top: animation.value,
      child: Icon(
        Icons.cake,
        size: 70.0,
      ),
    );
  }
}
Once again, to change the properties of an object, you enclose that object inside of another object. It’s a pattern that occurs over and over again in Flutter app development. Rather than call animate(controller) the way you do in Listing 9-2, you call
animate(
  CurvedAnimation(
    parent: controller,
    curve: Curves.bounceOut,
  )
You wrap the controller inside a CurvedAnimation object. In Listing 9-2, the object’s curve property is Curves.bounce.Out, which means “bounce as the animation ends.” Table 9-1 lists some alternative curve values.
The Flutter API has many more curve values. Each value comes from a precise equation and describes its own, special pattern for timing the animation. You can see the whole list of ready-made curve values by visiting https://api.flutter.dev/flutter/animation/Curves-class.html.
TABLE 9-1 Some Constants of the Curves Class
|
Value |
What It Does |
|
|
Bounces as the animation begins |
|
|
Slows down as the animation progresses |
|
|
Moves normally, and then slowly, and then normally |
|
|
(Can you guess?) |
|
|
Speeds up quickly but ends slowly |
|
|
Rushes in quickly enough to overshoot the |
|
|
Doesn’t change anything (used whenever you must use |
Animating Size and Color Changes
With Flutter’s Animation class, you’re not restricted to moving things. You can control the change of any value you think needs changing. This section’s example changes an icon’s size and color. The code is in Listing 9-4.
LISTING 9-4 Changing a Few Values
// App0904.dart

import 'package:flutter/material.dart';

import 'App09Main.dart';

extension MyHomePageStateExtension on MyHomePageState {
  Animation getAnimation(AnimationController controller) {
    return Tween<double>(begin: 50.0, end: 250.0).animate(controller)
      ..addListener(() {
        setState(() {});
      });
  }

  Widget buildPositionedWidget() {
    int intValue = animation.value.toInt();
    return Center(
      child: Icon(
        Icons.child_care,
        size: animation.value,
        color: Color.fromRGBO(
          intValue,
          0,
          255 - intValue,
          1.0,
        ),
      ),
    );
  }
}
When the app in Listing 9-4 starts running, a small, blue-colored baby face appears on the screen. (See Figure 9-5. If you’re reading the printed version of this book, ignore the fact that you don’t see the color.) When the user presses Forward, the baby face grows and turns color from blue to red. (See Figure 9-6. If you really care, find a crayon and paint the face yourself.)

FIGURE 9-5: Little baby.
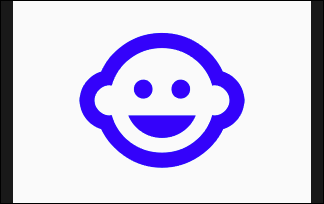
FIGURE 9-6: Big baby.
The icon in Listing 9-4 has two properties whose values can change.
-
The
sizeproperty changes along withanimation.value.The icon grows from 50.0 dps to 250.0 dps.
-
As the animation progresses, the
colorproperty’s redness shrinks and its blueness grows.Chapter 6 introduces Flutter’s
Color.fromRGBOconstructor. The constructor’s parameters areintvalues representing amounts of red, green, and blue and a double value that represents opacity. In Listing 9-4, the amount of red increases from 50 to 250, and the amount of blue decreases from 205 to 5.
This section is almost at an end. The moral of this section is, an Animation instance’s value can mean anything you want it to mean. In Listings 9-2 and 9-3, the animation’s value controls an icon’s position. But in Listing 9-4, the animation’s value controls an icon’s size and color.
What value would you like to animate? Rotation? Sound volume? Speed? Curvature? Shadow? Background color? Border shape? Mood? The price of a For Dummies book?
Be creative.
Moving Along a Curve
Life doesn’t always move along a straight line. Sometimes, fate takes bends and turns. To make this happen in Flutter, you don’t have to change anything about an animation. Instead, you change the way you use the animation’s value.
The Tween constructor call in this section’s example is almost identical to the calls in this chapter’s other listings. What’s different about this section’s example is the Positioned widget’s parameters. It’s all in Listing 9-5.
LISTING 9-5 Fancy Parabolic Motion
// App0905.dart

import 'dart:math';

import 'package:flutter/material.dart';

import 'App09Main.dart';

extension MyHomePageStateExtension on MyHomePageState {
  Animation getAnimation(AnimationController controller) {
    return Tween<double>(begin: 0.0, end: 400.0).animate(controller)
      ..addListener(() {
        setState(() {});
      });
  }

  Widget buildPositionedWidget() {
    double newValue = animation.value;
    return Positioned(
      left: 15 * sqrt(newValue),
      top: newValue,
      child: Icon(
        Icons.hot_tub,
        size: 70,
      ),
    );
  }
}
In Figure 9-7, the dotted line shows the path taken by the Hot Tub icon when the animation moves forward.

FIGURE 9-7: Since when do hot tubs move along a curve?
Have a look at the code in Listing 9-5. As the animation’s value increases, both the icon’s left and top parameter values change. The top parameter is the same as the animation’s value, but the left parameter is 15 times the square root of the animation’s value. How do I come up with the idea of taking 15 times the square root of the animation’s value? It’s partly knowing the math and partly trial-and-error.
 You can use Dart’s
 sqrt function only if you import dart.math. When you forget to import dart.math, Android Studio says, “Method ’sqrt’ isn’t defined.”
As I prepared this section’s example, I added some code to make the app print the values of left and top. Here’s what I got:
left:  top:
  0.0   0.0
  7.4  40.7
 22.1  70.5
 29.4  81.4
 41.2  96.2
 65.0 120.9
 71.8 127.1
 86.5 139.5
101.5 151.1
119.7 164.1
147.4 182.1
165.4 192.9
174.3 198.0
197.9 211.0
206.8 215.7
222.7 223.9
238.3 231.6
266.8 245.0
290.0 255.5
312.6 265.2
335.1 274.6
352.3 281.5
367.2 287.4
384.6 294.2
399.0 299.6
400.0 300.0
The Positioned widget’s left and top values both change. But, because of the square root formula, the left and top values change at different rates. That’s why the icon’s movement forms a curve.
Dragging Things Around
In this section’s app, the user drags a widget all around the screen. I’d like to create a figure to show you what happens, but I simply can’t do it. Maybe my next Flutter book will be a pop-up book with cardboard pieces that you can slide from place to place. Until then, you have to use your imagination. Picture an icon that looks like the infinity symbol (∞). As the user moves a finger, the icon changes position.
But wait! Rather than imagine a user dragging an icon, you can run the code in Listing 9-6 and see it in action.
LISTING 9-6 Exercise for a User’s Index Finger
// App0906.dart

import 'package:flutter/material.dart';

import 'App09Main.dart';

double distanceFromLeft = 100;
double distanceFromTop = 100;

extension MyHomePageStateExtension on MyHomePageState {
  Animation getAnimation(AnimationController controller) {
    return null;
  }

  Widget buildPositionedWidget() {
    return Positioned(
      top: distanceFromTop,
      left: distanceFromLeft,
      child: GestureDetector(
        onPanUpdate: (details) {
          setState(() {
            distanceFromLeft += details.delta.dx;
            distanceFromTop += details.delta.dy;
          });
        },
        child: Icon(
          Icons.all_inclusive,
          size: 70,
        ),
      ),
    );
  }
Like other listings in this chapter, Listing 9-6 relies on the code in Listing 9-1. Because of that, the app that’s generated by Listing 9-6 has Forward, Backward, and Reset buttons. Even so, pressing these buttons has no effect.
In the same way, Listing 9-6 has a getAnimation method. That’s necessary because the code in Listing 9-1 calls a getAnimation method. But to make a widget move along with the user’s finger, you don’t need an Animation instance. In a sense, the user is the app’s AnimationController, and the Animation instance is somewhere inside the user’s mind. So, in Listing 9-6, the getAnimation method returns null. In Dart, null stands for “nothing,” “nada,” “zip,” “goose egg,” “zilch,” “diddly,” “bupkis.”
Listing 9-6 has no Animation instance, so what part of the code makes the all_inclusive icon move? The icon lives inside of a GestureDetector — a widget that senses touches on the screen. A GestureDetector has tons of properties such as onTap, onDoubleTap, onTapUp, onTapDown, onLongPress, onLongPressStart, and onLongPressEnd. Other methods belonging to the GestureDetector class have names with less-than-obvious meanings. The following list has a few (somewhat oversimplified) examples:
onSecondaryTapDown: While holding one finger on the screen, the user places a second finger on the screen.onScaleUpdate: With two fingers, the user pinches in or out.onHorizontalDragUpdate: The user moves something sideways — a common gesture for dismissing an item.onPanUpdate: The user moves a finger in one direction or another.
The onPanUpdate parameter’s value is a method, and that method’s parameter is a DragUpdateDetails object. In Listing 9-6, the DragUpdateDetails object goes by the name details:
onPanUpdate: (details) {
  setState(() {
    distanceFromLeft += details.delta.dx;
    distanceFromTop += details.delta.dy;
  });
When the user moves a finger along the screen, Flutter fills details with information about the movement and calls the onPanUpdate parameter’s method.
The details variable contains some useful pieces of information:
details.globalPosition: The distance from the upper left corner of the app screen to the current position of the user’s fingerdetails.localPosition: The distance from the place where the user’s finger first landed on the screen to the current position of the user’s fingerdetails.delta: The distance from a finger’s previous position to its current position
Each piece of information has two parts: dx (the horizontal distance) and dy (the vertical distance). The Positioned widget in Listing 9-6 places the app’s all_inclusive icon at the points distanceFromLeft and distanceFromTop. When Flutter detects finger movement, the code changes the values of distanceFromLeft and distanceFromTop by adding the details.delta parameter’s dx and dy values. That’s what makes the icon move around. It’s pretty clever!
The GestureDectector in Listing 9-6 has a child. But, for any old GestureDectector constructor call, the child parameter is optional. A GestureDetector with no child grows to be as large as its parent widget. In contrast, a GestureDetector with a child shrinks to fit tightly around the child. With the app in Listing 9-6, the GestureDetector is about the same size as its child — the all_inclusive icon. To make the icon move, the user’s finger must start right on the icon. Otherwise, nothing happens.
You’re near the end of this book, so maybe it’s time to relax and have some raucous, carefree fun. Can destroying something be fun? Here are some ways to break Listing 9-6:
- Remove the
setStatecall.// Bad code:
onPanUpdate: (details) {
distanceFromLeft += details.delta.dx;
distanceFromTop += details.delta.dy;
}Removing a
setStatecall is almost never a good idea. If you remove the call in Listing 9-6, the values ofdistanceFromLeftanddistanceFromTopchange, but Flutter doesn’t redraw the screen. As a result, the icon doesn’t budge. - Move the
distanceFromLeftanddistanceFromTopdeclarations so that they’re immediately before thebuildPositionedWidgetmethod.// More bad code:
Animation getAnimation(AnimationController controller) {
return null;
}
double distanceFromLeft = 100;
double distanceFromTop = 100;
Widget buildPositionedWidget() {
// … etc.If you do this, you can’t even run the app. Dart’s rules include one about declaring top-level variables inside of extensions. You’re simply not allowed to do it.
Chapter 5 has some information about top-level variables. - Move the
distanceFromLeftanddistanceFromTopdeclarations so that they’re inside thebuildPositionedWidgetmethod.// Even more bad code:
Widget buildPositionedWidget() {
double distanceFromLeft = 100;
double distanceFromTop = 100;
return Positioned(
// … etc.The program runs, but the icon never moves. This happens because the code sets
distanceFromLeftanddistanceFromTopto 100 whenever Flutter redraws the screen. (Actually, the icon moves a tiny bit but not enough for you to notice. You get a tiny bit of movement from thedetails.deltavalues, but not the kind of movement you want.) - Rather than add to the
distanceFromLeftanddistanceFromTopvalues, set them equal to the position of the user’s finger:// You guessed it! Bad code!
onPanUpdate: (details) {
setState(() {
distanceFromLeft = details.globalPosition.dx;
distanceFromTop = details.globalPosition.dy;
});
}The app runs, but the icon jumps when the user’s finger starts moving. Throughout the dragging gesture, the icon stays half an inch away from the user’s finger. This happens because Flutter doesn’t use the middle of the icon as the
Positionedwidget’stopandleftpoints.Similar things happen if you try to use
details.localPosition.
Flutter’s animation features don’t end with simple movements and basic size changes. If you’re interested in making objects move, be sure to check Flutter’s physics.dart package. With that package, you can simulate springs, gravity, friction, and much more. You can get information about the package by visiting https://api.flutter.dev/flutter/physics/physics-library.html.
Where To Go From Here
Learning doesn’t end with the last page of a book. Keep coding and asking questions, and — by all means — keep in touch. My email is [email protected]. Send me a note, and let me know what you’re up to.