
Chapter 10: WebSocket
So far, most website and web application developers are accustomed to communicating exclusively with a server by making HTTP requests that are followed by HTTP responses.
The model of requesting a resource by specifying its URL, Content-Type, and other attributes that you saw in previous chapters works well if you keep in mind the use case that the World Wide Web was crafted to solve. The web was created to deliver documents that were heavily interlinked to each other. URLs have paths because documents typically have hierarchies in file systems. And each level of hierarchy can contain indexes with hyperlinks.
Consider the following, for example:
GET /animals/index.html
GET /animals/mammals/index.html
GET /animals/mammals/ferrets.html
With time, however, the web became more and more interactive. The traditional web that was about retrieving entire documents every time the user clicked is less common nowadays, especially with all the tools that HTML5 makes available. You can now create very sophisticated web applications that often have completely deprecated desktop application counterparts, games, text editors, and more.
AJAX
The Web 2.0 marked the uprise of the web application. One of its key ingredients was AJAX, which translated into a snappier user experience for a fundamental reason: you no longer had to retrieve an entire HTML document every time the user interacted with the server.
For example, if you are updating your profile on a social networking application, you can make an asynchronous POST request and get a simple OK in return. Then with one of the readily available JavaScript frameworks, you can alter the view to represent the user action.
Alternatively, when you click Remove on a table, you can send a DELETE request and erase the row (<tr>) element without having the browser fetch a lot of unnecessary data, images, scripts, and stylesheets and then rerender the entire page.
In essence, AJAX was important because it allowed you to get rid of a lot of data transfer and rendering overhead that you didn’t need for many of the things that web applications were trying to do with web applications.
In recent times, however, many applications have been transferring data in ways in which the traditional HTTP request+response model results in significant overhead. Consider the example of the application you are going to build in this chapter. Say you want to show where the cursors of every visitor of your website are in real time. Every time a visitor moves her mouse, you send her coordinates.
Say you use jQuery to send AJAX requests. The first idea that comes to mind is using $.post to send a POST request with the cursor location every time the mousemove event is triggered, as shown here:
$(document).mousemove(function (ev) {
$.post(‘/position’, { x: ev.clientX, y: ev.clientY });
});
This code, despite looking straightforward, has a fundamental problem: you have no control over the order in which the server receives requests.
When your code makes a request, the browser can send it through any of its available sockets because browsers open multiple sockets to the target server to enhance performance. For example, while an image is being downloaded, an AJAX request can still be sent. If the browser operates with only one socket, this is impossible and websites are extremely slow to interact with.
If three requests are made in parallel through three different sockets, you have no guarantee of the order in which they are received. As a result, you need to adjust your code to send only one request at a time and wait for the response to send the next one:
var sending = false;
$(document).mousemove(function (ev) {
if (sending) return;
sending = true;
$.post(‘/position’, { x: ev.clientX, y: ev.clientY }, function () {
sending = false;
});
});
Now consider what the TCP traffic would look like using Firefox as an example:
Request
POST / HTTP/1.1
Host: localhost:3000
User-Agent: Mozilla/5.0 (Macintosh; Intel Mac OS X 10.7; rv:8.0.1) Gecko/20100101 Firefox/8.0.1
Accept: */*
Accept-Language: en-us,en;q=0.5
Accept-Encoding: gzip, deflate
Accept-Charset: ISO-8859-1,utf-8;q=0.7,*;q=0.7
Content-Type: application/x-www-form-urlencoded; charset=UTF-8
X-Requested-With: XMLHttpRequest
Referer: http://localhost:3000/
Content-Length: 7
Pragma: no-cache
Cache-Control: no-cache
x=6&y=7
Response
HTTP/1.1 200 OK
Content-Type: text/plain
Content-Length: 2
Connection: keep-alive
OK
As you can see, a great amount of text surrounds a minimal amount of data. A lot of unneeded headers for this particular use case are sent back and forth, and they greatly outweigh how much data we’re sending.
Even if you could remove some of those headers, do you really need a response in this case? If you’re sending something as volatile and unimportant as the position of a mouse, you don’t really need to wait for an OK to send more.
The ideal case for this particular web application starts to resemble raw TCP (like that in the chat application in Chapter 6) more than it resembles HTTP. Ideally, you would want to write the positions to a socket sequentially with minimal framing (that is, the data that surrounds the data you care about).
If you think in terms of telnet, ideally you would like the browser to send
x=6&y=7
x=10&y=15
. . .
Now, thanks to HTML5, you have a solution: WebSocket. WebSocket is the TCP of the web, a low-level bidirectional socket that gives control of the communication back to you.
HTML5 WebSocket
When you discuss WebSocket, you’re talking about two distinct parts: the WebSocket API implemented by browsers, and the WebSocket Protocol implemented by servers. Both have been designed and developed in conjunction with other technologies as part of the HTML5 initiative and movement, but are not a formal part of the HTML5 specification. The former
is being standardized by the W3C, and the latter has been standardized by the IETF as
RFC 6455.
The API as it’s implemented by the browser looks like this:
var ws = new WebSocket(‘ws://host/path’);
ws.onopen = function () {
ws.send(‘data’);
}
ws.onclose = function () {}
ws.ondata = function (ev) {
alert(ev.data);
}
The simplicity of its API is, not coincidentally, reminiscent of the TCP client you wrote in Chapter 6. As you can see, unlike XMLHttpRequest (AJAX), it’s not oriented around requests and responses, but messages sent with the send method. You can send and receive messages in UTF-8 or binary encoding very easily, through the data event, and learn about the connection being opened or closed through the open and close events.
Connection must first be established with a handshake. The handshake looks like a normal HTTP request, but after the server responds to it, the client and server begin exchanging data with minimal framing:
Request
GET /ws HTTP/1.1
Host: example.com
Upgrade: websocket
Connection: Upgrade
Sec-WebSocket-Version: 6
Sec-WebSocket-Origin: http://pmx
Sec-WebSocket-Extensions: deflate-stream
Sec-WebSocket-Key: x3JJHMbDL1EzLkh9GBhXDw==
Response
HTTP/1.1 101 Switching Protocols
Upgrade: websocket
Connection: Upgrade
Sec-WebSocket-Accept: HSmrc0sMlYUkAGmm5OPpG2HaGWk=
WebSockets are still based on HTTP, which means it’s fairly easy to implement the protocol on top of existing servers. The main difference is that as soon as the handshake is complete, a minimalistic TCP-like socket is available to you.
To better understand these concepts, let’s write an example app.
An Echo Example
The first example will consist of a server and a client exchanging simple ping and pong strings. When the client sends a ping, you’ll record the time, and measure how many milliseconds it takes for the server to respond.
Setting it up
For this example, you use websocket.io, which I created while working at LearnBoost.
It’s important to keep in mind that websocket.io handles only the WebSocket requests. All the other requests in your website or application are still handled by a regular web server, which is why you also include express in your package.json file:
“name”: “ws-echo”
, “version”: “0.0.1”
, “dependencies”: {
“express”: “2.5.1”
, “websocket.io”: “0.1.6”
}
}
The server simply responds to messages by echoing them back to the browser. The browser measures how long it takes for the server to respond.
Setting up the server
The first thing you need to do is initialize express and attach websocket.io to it so that it can handle the WebSocket requests:
var express = require(‘express’)
, wsio = require(‘websocket.io’)
/**
* Create express app.
*/
var app = express.createServer();
/**
* Attach websocket server.
*/
var ws = wsio.attach(app);
/**
* Serve your code
*/
app.use(express.static(‘public’));
/**
* Listening on connections
*/
ws.on(‘connection’, function (socket) {
// . . .
});
/**
* Listen
*/
app.listen(3000);
Now focus on the connection handler. I explicitly designed websocket.io to closely resemble how you would implement a net.Server. Because you want to echo back messages, all you need to do is listen on the message event and send it back.
ws.on(‘connection’, function (socket) {
socket.on(‘message’, function (msg) {
console.log(‘ �33[96mgot:�33[39m ‘ + msg);
socket.send(‘pong’);
});
});
Setting up the client
Now you’re ready to move onto the code, which goes into the public folder:
index.html
<!doctype html>
<html>
<head>
<title>WebSocket echo test</title>
<script>
var lastMessage;
window.onload = function () {
// create socket
var ws = new WebSocket(‘ws://localhost:3000’);
ws.onopen = function () {
// send first ping
ping();
}
ws.onmessage = function (ev) {
console.log(‘ got: ‘ + ev.data);
// you got echo back, measure latency
document.getElementById(‘latency’).innerHTML = new Date – lastMessage;
// ping again
ping();
}
function ping () {
// record the timestamp
lastMessage = +new Date;
// send the message
ws.send(‘ping’);
};
</script>
</head>
<body>
<h1>WebSocket Echo</h1>
<h2>Latency: <span id=”latency”></span>ms</h2>
</body>
</html>
If you look at the HTML, it’s fairly self-explanatory. It just sets up a placeholder to display the latency (which is the number of milliseconds that a message takes to complete a round trip).
The JavaScript code is relatively straightforward also. You keep track of the last message timestamp:
var lastMessage
Initializing WebSocket opens the connection:
var ws = new WebSocket(‘ws://localhost:3000’);
You register the connection as open and send the first message to the server:
ws.onopen = function () {
ping();
}
When the server replies, you measure the latency and ping again:
ws.onmessage = function () {
console.log(‘ got: ‘ + ev.data);
// you got echo back, measure latency
document.getElementById(‘latency’).innerHTML = new Date – lastMessage;
// ping again
ping();
}
Finally, let’s define the ping function, which tracks the timestamp to measure the response against (so that we can determine the latency), and sends a simple string:
function ping () {
// record the timestamp
lastMessage = +new Date;
// send the message
ws.send(‘ping’);
};
Running the server
Now you run the server:
$ node server.js
Then you point the browser to http://localhost:3000 (see Figure 10-1). Make sure you test with a modern web browser that supports WebSocket, like Chrome 15+ or IE 10+. If unsure, go to http://websocket.org and look at the “Does your browser support WebSocket?” box.
You successfully created a single-user realtime application. Check the terminal output and your web browser’s console for a log of the messages exchanged. In most modern computers, it will take on average between 1 and 5 milliseconds to exchange this message. As an exercise, try writing this same example leveraging AJAX and Express routes, and compare how long it takes to complete a ping-pong cycle.
Figure 10-1: The time it takes for a packet to go to the server and back to the client
For the next example, you’ll write an application where the server’s role is to connect multiple users on a single screen.
Mouse cursors
You are going to display the image of a cursor representing the position of all the connected users in the screen.
Through this example, you learn the concept of broadcasting, which consists of one user relaying a message to everyone but himself.
Setting up the example
The requirements for this project are the exact same as for the previous example. In your package.json include:
{
“name”: “ws-cursors”
, “version”: “0.0.1”
, “dependencies”: {
“express”: “2.5.1”
, “websocket.io”: “0.1.6”
}
}
Setting up the server
The basic server setup is equivalent to the previous app. You serve static HTML with express, and you attach a websocket.io server to it in your server.js:
var express = require(‘express’)
, wsio = require(‘websocket.io’)
/**
* Create express app.
*/
var app = express.createServer();
/**
* Attach websocket server.
*/
var ws = wsio.attach(app);
/**
* Serve your code
*/
app.use(express.static(‘public’))
/**
* Listening on connections
*/
ws.on(‘connection’, function (socket) {
// . . .
});
/**
* Listen
*/
app.listen(3000);
In this case, however, you want to take a different action when a user connects. You want to keep track of everyone’s positions in memory in a simple object. You also keep track of the total number of clients that have connected so that you can give each client a unique ID. That ID identifies the client’s position in the positions object:
var positions = {}
, total = 0
ws.on(‘connection’, function (socket) {
// . . .
});
When a user first connects, you want to send everyone’s positions to him as the first message. That way, when the user first loads the page, he can see everyone who is connected.
To that end, you encode the positions object as JSON:
ws.on(‘connection’, function (socket) {
// you give the socket an id
socket.id = ++total;
// you send the positions of everyone else
socket.send(JSON.stringify(positions));
});
When a client sends a message, you assume he’s sending his position as JSON (as an object with x and y coordinates). You then store it in the positions object:
socket.on(‘message’, function (msg) {
try {
var pos = JSON.parse(msg);
} catch (e) {
return;
}
positions[socket.id] = pos;
});
Finally, when the user disconnects, you clear his position:
socket.on(‘close’, function () {
delete positions[socket.id];
});
What is missing here? Broadcasting, of course. When a position is received, you want to send it to everyone else. And when the socket closes, you want to notify everyone else that the user disconnected so his cursor is removed from the screen.
You declare a broadcast function to go through the rest of the clients and send them a message. Include it right after you register the ws connection listener:
function broadcast (msg) {
for (var i = 0, l = ws.clients.length; i < l; i++) {
// you avoid sending a message to the same socket that broadcasts
if (ws.clients[i] && socket.id != ws.clients[i].id) {
// you call ‘send’ on the other clients
ws.clients[i].send(msg);
}
}
}
Because you have two distinct types of data to send, you send a small JSON packet with a type identifier.
When you relay a position, you send an object that looks like this:
{
type: ‘position’
, pos: { x: <x>, y: <y> }
, id: <socket id>
}
When a user disconnects, you send
{
type: ‘disconnect’
, id: <socket id>
}
Therefore,
socket.on(‘message’, function () {
// . . .
broadcast(JSON.stringify({ type: ‘position’, pos: pos, id: socket.id }));
});
And upon close, you send
socket.on(‘close’, function () {
// . . .
broadcast(JSON.stringify({ type: ‘disconnect’, id: socket.id }));
});
Now you’re done with the server and can move on to the client.
Setting up the client
For the client, you start with a simple HTML document and an onload handler for the window in your index.html:
<!doctype html>
<html>
<head>
<title>WebSocket cursors</title>
<script>
window.onload = function () {
var ws = new WebSocket(‘ws://localhost’);
// . . .
}
</script>
</head>
<body>
<h1>WebSocket cursors</h1>
</body>
</html>
For this task, you want to concentrate on the two main events: open and message.
When the connection first opens, you attach a mousemove handler to start relaying the cursor position to others:
ws.onopen = function () {
document.onmousemove = function (ev) {
ws.send(JSON.stringify({ x: ev.clientX, y: ev.clientY }));
}
}
When a message is received, as you saw in the previous section, it can signal either someone’s cursor moving or someone disconnecting:
// we instantiate a variable to keep track of initialization for this client
var initialized;
ws.onmessage = function (ev) {
var obj = JSON.parse(ev.data);
// the first message is the position of all existing cursors
if (!initialized) {
initialized = true;
for (var id in obj) {
move(id, obj[id]);
}
} else {
// other messages can either be a position change or
// a disconnection
if (‘disconnect’ == obj.type) {
remove(obj.id);
} else {
move(obj.id, obj.pos);
}
}
}
You then declare the functions move and remove.
For the move function, you first want to make sure the element for the cursor exists. You look for a DOM element with the ID cursor-{id}. If the element is missing, you create the image element and set the image URL and a basic style to make it float around.
Then you adjust its position on the screen:
function move (id, pos) {
var cursor = document.getElementById(‘cursor-’ + id);
if (!cursor) {
cursor = document.createElement(‘img’);
cursor.id = ‘cursor-’ + id;
cursor.src = ‘/cursor.png’;
cursor.style.position = ‘absolute’;
document.body.appendChild(cursor);
}
cursor.style.left = pos.x + ‘px’;
cursor.style.top = pos.y + ‘px’;
}
For removing, you simply detach the element from the DOM:
function remove (id) {
var cursor = document.getElementById(‘cursor-’ + id);
cursor.parentNode.removeChild(cursor);
}
Running the server
As in the other example, all you need to do is run the server and point your browser to it. Make sure to open multiple tabs (shown in Figure 10-2) to fully experience the real-time interaction.
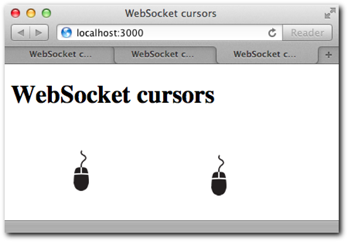
Figure 10-2: Several clients connected, relaying their cursor positions in real time.
cursor.png courtesy of http://thenounproject.com
The Challenges Ahead
Even though you got the basic example functioning, these applications need some more work to become ready for real-world usage.
Close doesn’t mean disconnect
When a close event fires on a WebSocket server or client, it means something specific: the TCP connection was appropriately close. In the real world, however, this is not always the case. Your computer can shut down unexpectedly, a network error can occur, or you spill a glass of water on your motherboard. In a lot of scenarios, close might never fire!
The solution for this problem is to rely on timeouts and heartbeats. For your application to handle these scenarios, you need to send dummy messages every number of seconds to make sure the client is alive and otherwise consider him forcefully disconnected.
JSON
As examples get more complicated, the variety of messages that the server and clients exchange increases.
The second example here relied heavily on encoding and decoding JSON packets manually. Because this is a common pattern in applications, that work should be done for you as part of another abstraction.
Reconnections
What happens if the client temporarily disconnects? Most applications try to get the user reconnected automatically. In these examples, if a disconnection occurs, the only way to reconnect is to refresh the browser.
Broadcasting
Broadcasting is a common pattern in real-time applications where interaction with other clients is expected. You shouldn’t need to define your own broadcasting mechanism manually.
WebSockets are HTML5: Older browsers
don’t support them
WebSocket is a recent technology. Many browsers, proxies, firewalls, and antivirus software are still not ready to work completely with this new protocol and way of communicating. A solution for older browsers is needed.
The solution
Fortunately, all these problems have solutions. In the next chapter, you work with a module called socket.io whose goal is to fix all the aforementioned issues while retaining the simplicity and speed of WebSocket-based communication.
Summary
You now understand the fundamentals of the WebSocket API and the WebSocket protocol, and how you can use Node.JS to leverage it for very fast message exchange. In the first example you familiarized yourself with its most basic usage.
You created a multi-user application that exhibits the strengths of WebSocket: its minimal framing allows for sending lots of short messages that arrive to other clients as fast as possible.
Finally, I described the weaknesses in terms of API and browser support that we can improve upon thanks to the socket.io framework, described in the next chapter.