
Chapter 9: Express
Whereas Connect provides the foundation for the common set of basic tasks that are normally performed on top of the HTTP module, Express provides convenient APIs on top of Connect to build entire websites and web applications.
Throughout the examples in Chapter 8, you might have noticed most of the tasks performed in the interaction between a web browser and web server are organized around methods and URLs. The combination of these two is what is sometimes referred to as routes, a concept that sets the foundation for an Express app.
Express builds on top of Connect and therefore on the idea that you can reuse middleware that performs certain basic tasks. This means you get an expressive API for your web applications, without sacrificing a rich ecosystem of reusable components that sit on top of the HTTP stack.
To see the expressiveness hands-on, write a small application powered entirely by Express to search the Twitter API.
A simple express app
This app, albeit simple, is by definition dynamic. When the user requests “tweets” for their search term, you need to produce HTML that contains them. Instead of concatenating strings that make up that HTML manually in our request handlers, you’ll be leveraging a simple template language that will split the logic of the controller from the view.
The first step will be to ensure we include the module requirements that satisfy these needs.
Creating the module
Create package.json as usual, but this time add two extra dependencies: ejs, the template engine for this example, and superagent, to simplify the HTTP requests for the Twitter searches.
{
“name”: “express-tweet”
, “version”: “0.0.1”
, “dependencies”: {
“express”: “2.5.9”
, “ejs”: “0.4.2”
, “superagent”: “0.3.0”
}
}
Please notice that even though I’m using Express 2 for this example, the code should be completely compatible with Express 3 (under development at the time of this writing).
The next step after defining the meta data for the project will be to create the templates that produce the HTML you need.
HTML
Unlike you did in the previous applications, you are going to use a simple template language to avoid having HTML code directly in the application logic (what is normally called controllers or route handlers). This template language is called EJS (or embedded js), and is similar to embedding PHP in HTML.
You start by defining index.ejs inside the views/ folder. The templates can live anywhere, but for the sake of project structure, put them in a separate directory.
The first template gets served for the default route (the home page). It prompts the user to submit a search term to crawl Twitter:
<h1>Twitter app</h1>
<p>Please enter your search term:</p>
<form action=”/search” method=”GET”>
<input type=”text” name=”q”>
<button>Search</button>
</form>
The other template is the search results, search.ejs. Highlight the current term and then walk through the results (if any) or otherwise display a message:
<h1>Tweet results for <%= search %></h1>
<% if (results.length) { %>
<ul>
<% for (var i = 0; i < results.length; i++) { %>
<li><%= results[i].text %> - <em><%= results[i].from_user %></li>
<% } %>
</ul>
<% } else { %>
<p>No results</p>
<% } %>
As you can see, all we did was embed JavaScript code between the special <% and %> EJS tags. In order to print out variables, you need to add extra “=” after <%.
Setup
As usual, you define your dependencies in a server.js file:
var express = require(‘express’)
After requiring Express, you want to initialize your web server with it. Express provides a shortcut method createServer just like Connect that returns an Express HTTP server. Add the following line:
var app = express.createServer()
Unlike other popular web frameworks, Express doesn’t require configuration or a specific filesystem structure. It’s flexible enough to let you customize every single aspect of its functionality.
For this app, specify the template engine (so that you don’t have to include it every time you reference your views) and where your views files (templates) are located. The method you called earlier, express.createServer, augments HTTP servers with a configuration system. You can call set to change configuration flags. Add these afterwards:
app.set(‘view engine’, ‘ejs’);
app.set(‘views’, __dirname + ‘/views’);
app.set(‘view options’, { layout: false });
The third parameter view options defines configuration options that are passed to every template when rendering a view. The value layout is set to false here, to match what will become a default with Express 3.
If you wanted to obtain a configuration setting, you would call app.set with just one flag. For example, if you wanted to print out the value of the setting views, you call it like this:
console.log(app.set(‘views’));
Moving forward, you’ll leverage additional methods Express adds to expressively define routes, something that you’ve done a lot quite a bit in Chapter 7 and Chapter 8.
Defining routes
Instead of defining middleware that checks the properties method and url manually every time, you can use Express to progressively define routes by calling the function corresponding to the HTTP method you want to handle and then supplying the URL and the handler middleware.
The methods Express adds to the server are get, put, post, del, patch, and head, matching HTTP verbs GET, PUT, POST, DELETE, PATCH, and HEAD, respectively. The following are examples of route definitions with them:
app.get(‘/’, function (req, res, next) {});
app.put(‘/post/:name’, function (req, res, next) {});
app.post(‘/signup’, function (req, res, next) {});
app.del(‘/user/:id’, function (req, res, next) {});
app.patch(‘/user/:id’, function (req, res, next) {});
app.head(‘/user/:id’, function (req, res, next) {});
The first parameter is the route, and the second is the route handler. Route handlers work just like middleware.
Note that routes can take a special format to define variables within them. In the example above /user/:id, id can take different values and the route will still match: for example /user/2, /user/3, and so on. You’ll learn more about them later in the chapter.
For now, you should first define your home page route: Add the following to server.js:
app.get(‘/’, function (req, res) {
res.render(‘index’);
});
The complete code for server.js should look like this so far:
/**
* Module requirements.
*/
var express = require(‘express’)
, search = require(‘./search’)
/**
* Create app.
*/
var app = express.createServer();
/**
* Configuration
*/
app.set(‘view engine’, ‘ejs’);
app.set(‘views’, __dirname + ‘/views’);
app.set(‘view options’, { layout: false });
/**
* Routes
*/
app.get(‘/’, function (req, res) {
res.render(‘index’);
});
/**
* Listen
*/
app.listen(3000);
Express adds a method called render to the response; it acts as shortcut to
1. Initializing the template engine
2. Reading the view file and passing it to the template engine
3. Getting the resulting HTML and sending it as a response
Because you specified the view engine to be ejs in the previous step, you don’t need to reference index.ejs.
As shown in Figure 9-1, test the route (don’t forget to call listen).
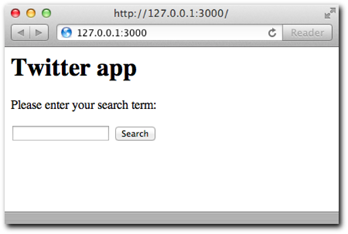
Figure 9-1: The route handler / renders the index view.
For the second route, call a function named search (which you define in a separate module):
app.get(‘/search’, function (req, res, next) {
search(req.query.q, function (err, tweets) {
if (err) return next(err);
res.render(‘search’, { results: tweets, search: req.query.q });
});
});
Next, add the search dependency after express:
var express = require(‘express’)
, search = require(‘./search’)
Notice that if an error is passed by the search function, you pass it to next. When you learn more about error handling later in the chapter you’ll understand why, but for now assume that Express takes care of informing the user of the error.
In this route, you also call render, but you pass an object as second parameters. The contents of that object get exposed to the view. Notice how you pass tweets and search, both of which get referenced directly in search.ejs. You call this object the locals object because its keys become local to the template.
Search
The search module exposes a simple function to query the Twitter Search API. The file this module will reside in, search.js, goes in the same directory as server.js for this example.
In the function call search above, you passed it the search term, and the function callback passed back an error (if any), and an array of tweets.
To write a module that does this, you start defining its dependencies. In this case, you’re only going to need superagent:
var request = require(‘superagent’)
Since the HTTP request made to the Twitter web service we make is essential to the functioning of your application, you want to make sure the search module does proper error handling.
For example, if the Twitter API is down or malfunctioning, you want to pass an error object so that ultimately the user sees an error page (for example, showing HTTP status code error 500).
/**
* Search function.
*
* @param {String} search query
* @param {Function} callback
* @api public
*/
module.exports = function search (query, fn) {
request.get(‘http://search.twitter.com/search.json’)
.data({ q: query })
.end(function (res) {
if (res.body && Array.isArray(res.body.results)) {
return fn(null, res.body.results);
}
fn(new Error(‘Bad twitter response’);
});
};
Similar to the other superagent examples, you want to make a GET request, sending the querystring data field q with the search term. The URL superagent hit for the search
term hello world will be something like http://search.twitter.com/search.json?q=hello+world.
In the response handler, you’re actively making sure that the request works and satisfies our expectations completely. Instead of looking at HTTP status codes and verifying you got 200 instead of something else, it’s smarter to ask the question: did I get an array of tweets as part of the response?
If you remember from Chapter 7, if superagent gets a JSON response, it will automatically decode it and place its contents as part of the res.body variable. Since the Twitter API responds with a JSON object with a key results containing an array of tweets, the following snippet from the code above is all you need for error handling:
if (res.body && Array.isArray(res.body.results)) {
return fn(null, res.body.results);
}
Run
Run the server and point your browser to http://localhost:3000 (see Figure 9-2) and try out a search term (see Figure 9-3).
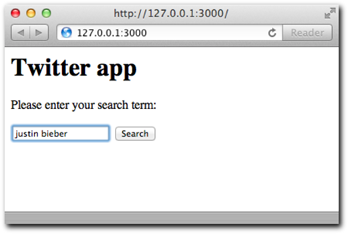
Figure 9-2: An example filling out a search term and submitting it.
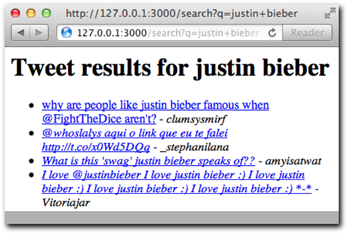
Figure 9-3: The results of querying the search term.
It works! After making the search to Twitter, you got back an array of tweets. It eventually made its way to the template search.ejs, which generated the dynamic list of tweets.
After the HTML was produced by the render functionality of Express, the /search route successfully served the complete page to the user as shown in Figure 9-3.
After this simple example, it’s time to analyze some of the Express features you used in depth, and learn new ones.
Settings
One of the interesting features Express provides that proves necessary for any type of web application is the ability to manage environments and settings.
For example, during production you can make a performance enhancement and let express cache the templates so that they get served faster. However, if you enable this feature during development, you would need to restart Node every time you make a change to a template to test the result.
Express lets you set this environment by calling configure:
app.configure(‘production’, function () {
app.enable(‘view cache’);
});
In this case, app.enable is the equivalent to calling app.set like you saw in the simple Express example above for the views config flag.
app.set(‘view cache’, true);
To know whether a configuration flag is enabled you can also call app.enabled. app.disable and app.disabled are also available.
When the environment variable NODE_ENV is set to production, the callback we defined with app.configure gets executed.
To test it, run
$ NODE_ENV=production node server
If node NODE_ENV is defined, the environment defaults to development:
app.configure(‘development’, function () {
// gets called in the absence of NODE_ENV too!
});
Some other useful built-in settings are
• case sensitive routes: Enable case-sensitive routing. By default, when you define a route as follows:
app.get(‘/my/route’, function (req, res) {}
Express will match that route for /my/route and /MY/ROUTE. By enabling this, routes will match if the cases match.
• strict routing: When enabled trailing slashes are no longer ignored. For example, the previous example route matches the URLs /my/route and /my/route/. If strict routing is enabled, however, only /my/route would match, since that’s how it was defined with app.get.
• jsonp callback: Enable res.send() / res.json() transparent jsonp support. JSONP is a technique for serving cross-domain JSON that consists in wrapping the response with the callback provided by the user.
• When JSONP is requested, the URL would look like this: /my/route?callback=. Express can automatically detect the callback parameter and wrap the response with the
myCallbackmyCallback text. To enable this behavior, call app.enable(‘. Please note that this only applies when you call
jsonp callback’)res.send or res.json in a route, which are described later in the chapter.
Template engines
To use ejs in the preceding example, you must take two steps:
1. You install the ejs module through NPM.
2. You declare the view engine as ejs.
In the same way many other templates are commonly used with Express:
• Haml
• Jade
• CoffeeKup
• jQuery Templates for node
Express tries to call require with the extension name of the template or the configured view engine.
For example, you can call
res.render(‘index.html’)
In this case, Express tries to require the html engine. Because it can’t find one, the call results in an error.
You can map extensions to known template engines by using the app.register API. For example, to map html extensions to the jade template engine, run
app.register(‘.html’, require(‘jade’));
Jade is one of the most popular template languages, and definitely worth learning. To find out more about it, refer to its website http://jade-lang.org.
Error handling
It’s natural in the Node environment to pass around error objects as the result of non-blocking I/O callbacks. In our example in this chapter, we expected the possibility of an Error object when we performed the Twitter API search.
What you normally want to do with them in the context of Express routes is pass these error objects to next. By default, Express will show an error page and send the status code 500.
Most web applications however will want to customize error pages, or even set up custom backend reporting.
You can define special handlers with app.error that act as middleware for errors:
app.error(function (err, req, res, next) {
if (‘Bad twitter response’ == err.message) {
res.render(‘twitter-error’);
} else {
next();
}
});
Notice that in that example I’m inspecting the error message to decide whether the middleware will handle the error or not, and call next otherwise.
You can set up multiple .error handlers that have different actions. For example, the last error handler can send a 500 Internal Server Error and render a generic error page:
app.error(function (err, req, res) {
res.render(‘error’, { status: 500 });
});
If you call next and another handler is not available, the default Express error handler will kick in.
Convenience methods
Express provides a series of extensions to Node’s Request and Response objects that greatly simplify different tasks.
The extensions to the Request object are
• header: This extension allows for easily retrieving a header as a function in a way that is not case sensitive:
req.header(‘Host’)
req.header(‘host‘)
• accepts: This extension analyzes the Accept header of the request according to the supplied value and returns true or false:
req.accepts(‘html’)
req.accepts(‘text/html’)
• is: This extension is similar to accepts, but it checks the Content-Type header:
req.is(‘json’)
req.is(‘text/html‘)
The extensions to the Response object are
• header: This extension takes one argument to check whether a header has been set for the response:
res.header(‘content-type’)
Or two arguments to set a header:
res.header(‘content-type’, ‘application/json’)
• render: You have learned most of the usage of render already. In the previous example, however, you might have noticed you passed the status local. This is a special type of local that, when set, also sets the status code of the response.
• In addition, you can supply a third parameter to render to obtain the HTML without sending it automatically as the response.
res.render(‘template’, function (err, html) {
// do something with html
});
• send: This magic method acts based on the type of the supplied argument.
• Number: Sends a status code:
res.send(500);
• String: Sends HTML:
res.send(‘<p>html</p>’);
• Object/Array: Serializes it into JSON, setting the appropriate Content-Type header:
res.send({ hello: ‘world’ }); res.send([1,2,3]);
• json: This extension is similar to send for most situations. It explicitly sends a value as JSON.
res.json(5);
You want to use this method when the type of the value is unknown. res.send relies on type checking for an object to decide whether to call JSON.stringify on it. If a number is supplied, it assumes you want to send a status code and finish the response. res.json, however, would pass the number through JSON.stringify.
Since most of the time you’ll want to encode objects, res.send is still the most common choice.
• redirect: Redirect offers a helper for sending the 302 (Moved Temporarily) status code and the Location header. The following:
res.redirect(‘/some/other/url’)
is effectively equivalent to:
res.header(‘Location’, ‘/some/other/url’);
res.send(302);
which in turn is equivalent to the following native Node.JS:
res.writeHead(302, { ‘Location’: ‘/some/other/url’ });
• redirect also takes a custom status code as its second parameter. For example, if you want to send Moved Permanently instead you would set it to 301:
res.redirect(‘/some/other/url’, 301)
• sendfile: This extension is similar in spirit to the Connect static middleware, but it is used for individual files:
res.sendfile(‘image.jpg‘)
Beyond our usage of routes in the simple example app, there’s a lot more to them that can be really useful for larger web applications.
Routes
Routes can define custom parameters:
app.get(‘/post/:name’, function () {
// . . .
})
In this case, the variable name is populated inside the req.params object. For example,
say you point your browser to ‘/post/hello-world’, the object req.params gets populated accordingly:
app.get(‘/post/:name’, function () {
// req.params.name == “hello-world”
})
You can make parameters optional by appending a question mark (?) symbol after them. In the previous route, if you point your browser to /post, there won’t be a match. The route is defined by the requirement of a parameter:
app.get(‘/post/:name?’, function (req, res, next) {
// this will match for /post and /post/a-post-here
})
Routes that include parameters like these compile down to regular expressions internally. That means for more advanced route matching you can also pass a RegExp object directly. For example, if you wanted to make that route match only for alphanumeric characters and dashes, you could use the following:
app.get(/^/post/([a-zd-]*)/, function (req, res, next) {
// req.params contains the matches set by the RegExp capture groups
})
In the same spirit as middleware, you can use next to control the flow of route matching. Even when a route is executed, you can still force Express to continue matching the request against other defined routes.
For example, make a route that accepts only parameters that start with an ‘h’:
app.get(‘/post/:name’, function (req, res, next) {
if (‘h’ != req.params.name[0]) return next();
// . . .
});
This fine-grained route flow control solves a variety of situations gracefully thanks to its flexibility.
For example, many web applications allow routes such as /home and /about, but they also want to have permalinks that point to dynamic content, such as vanity URLs.
After you define all your routes, you can define one that captures vanity usernames and makes a database call. If the username is not found, you can next and send a 404; otherwise, you render his profile:
app.get(‘/home’, function (req, res) {
// . . .
});
app.get(‘/:username’, function (req, res, next) {
// if you got here, no prior application routes matched
getUser(req.params.username, function (err, user) {
if (err) return next(err);
if (exists) {
res.render(‘profile’)
} else {
next();
}
});
}):
Express takes the concept of middleware you’re already familiar with and expands on it. Read on to learn more about it.
Middleware
Because Express is built on top of Connect, when you create an Express server, you can use it to enable Connect-compatible middleware. For example, to serve images under an images/ folder, you can leverage the static middleware like this:
app.use(express.static(__dirname + ‘/images’));
Or if you wanted to leverage connect sessions, you would do it just like we did for Connect:
app.use(express.cookieParser());
app.use(express.session());
Notice that you can access Connect middleware directly as part of the Express requirement. There’s no need to require(‘connect’) or add connect as a dependency to your package.json file. Middleware are easily accessible to you.
More interestingly, Express also allows for middleware that gets appended only after a certain route matched, as opposed to every request.
Imagine a situation in which you want to check that the user is authenticated, but only for certain protected routes. In this case, you can define a secure middleware that sends the status code 403 Not Authorized if the req.session.logged_in is not true:
function secure (req, res, next) {
if (!req.session.logged_in) {
return res.send(403);
}
next();
}
Then you can apply it to routes:
app.get(‘/home’, function () {
// accessible to everyone
});
app.get(‘/financials’, secure, function () {
// secure!
});
app.get(‘/about’, function () {
// accessible to everyone
});
app.get(‘/roadmap’, secure, function () {
// secure!
});
You can define more than one middleware function for each route:
‘’app.post(‘/route’, a, b, c, function () { });
In some situations, you want to call next from route middleware in such a way that the rest of the middleware for that route gets skipped, and Express resumes processing at the next route.
For example, if instead of sending 403, you want to let Express check other routes, you could use the following approach:
function secure (req, res, next) {
if (!req.session.logged_in) {
return next(‘route’);
}
next();
}
By calling next(‘route’), you ensure the current route gets skipped.
As applications grow and the number of routes and middleware increases, it’s useful to have some code organization strategies in mind. The next section describes the most fundamental ways of achieving this.
Organization strategies
The first rule for any Node.JS application, including Express web apps, is to always be modular. Node.JS gives us a very powerful code organization strategy through the simple require API.
For example, consider an application that has three distinct sections /blog, /pages, and /tags, each with other routes under their hierarchy. For example, /blog/search, /pages/list, or /tags/cloud.
A successful organization strategy would be to maintain a server.js file with the route map and then include the route handlers as modules blog.js, pages.js, and tags.js. First, you define the dependencies and initialize the app, include middleware, and so on:
var express = require(‘express’)
, blog = require(‘./blog’)
, pages = require(‘./pages’)
, tags = require(‘./tags’)
// initialize app
var app = express.createServer();
// here you would include middleware, settings, etc
Then you define what I refer to as the route map, which is simply laying out all the URLs that you want to handle in a single place:
// blog routes
app.get(‘/blog’, blog.home);
app.get(‘/blog/search’, blog.search);
app.post(‘/blog/create’, blog.create);
// pages routes
app.get(‘/pages’, pages.home);
app.get(‘/pages/list’, pages.list);
// tags routes
app.get(‘/tags’, tags.home);
app.get(‘/tags/search’, tags.search);
Then, for each specific file you would leverage exports. Consider the example for blog.js:
exports.home = function (req, res, next) {
// home
};
exports.search = function (req, res, next) {
// search functionality
};
Modules offer great flexibility. You could take this to a next level and divide modules by methods. For example:
exports.get = {};
exports.get.home = function (req, res, next) {})
exports.post = {};
exports.post.create = function (req, res, next) {})
The other way in which applications can be decoupled is what’s known as app mounting. You can export an entire Express app as a module (which you could also obtain from NPM), and mount it to your existing application, making the routes match seamlessly.
Consider the example of an application that needs a blog. You can define a blog with all its routes /, /categories, and /search, and export that as blog.js:
var app = module.exports = express.createServer();
app.get(‘/’, function (req, res, next) {});
app.get(‘/categories’, function (req, res, next) {});
app.get(‘/search’, function (req, res, next) {});
Notice that the routes are defined in absolute terms, without a prefix. Then, in your main app, all you have to do is require it and pass it to app.use:
app.use(require(‘./blog’));
With this, all the blog routes immediately become available to another application. In addition, you can set a prefix for them:
app.use (‘/blog’, require(‘./blog’));
Now the routes /blog/, /blog/categories, and /blog/search will seamlessly be handled by the other express application, which can have its own completely separate set of dependencies, middleware, configuration, and more.
Summary
In this chapter you learned how to leverage Express, the most popular Node.JS web framework.
The main benefit you’ll see from your usage and implementation of Express is that it’s simple, largely unopinionated but flexible, and it builds on top of other battle-tested and clean abstractions like Connect.
Unlike other web frameworks and libraries, Express can be easily molded to fit different needs, structures, and patterns. You learned how to use it with minimal implementation overhead in the first application example, just like the Node.JS Hello World.
As a matter of fact, you might have noticed that Express tries to stay close to the Node.JS core API and extend it, as opposed to creating a new world on top of it. That’s why route handlers still receive the native Node request and response objects, the same we received in the first HTTP server we wrote. You learned and appreciated the usefulness of these extensions, and how for example they make writing APIs that respond with JSON a breeze with res.send.
Finally, you learned how to put different pieces together to create maintainable code. Again, the main strategy of staying close to the Node.JS core APIs pays off: leveraging require is one of the most powerful tools for superior code organization.