
Creating and Hosting a Cloud Solution
For simple websites, users can leverage prebuilt templates as just discussed. For custom solutions, however, businesses will need developers to create the corresponding solution. Regardless of the specific processing the application performs, the steps to create and deploy a cloud-based solution are similar:
-
Use a programming language to create the solution.
-
Select a PaaS to house the solution.
-
Upload the solutions to the PaaS.
Looking at a Simple Solution
To let you see the cloud-development process, assume we want to create a webpage that displays the message Hello, Cloud World! To begin, we will create a simple HTML page using an editor, such as the Windows Notepad accessory that has our code, as shown in FIGURE 18-5.
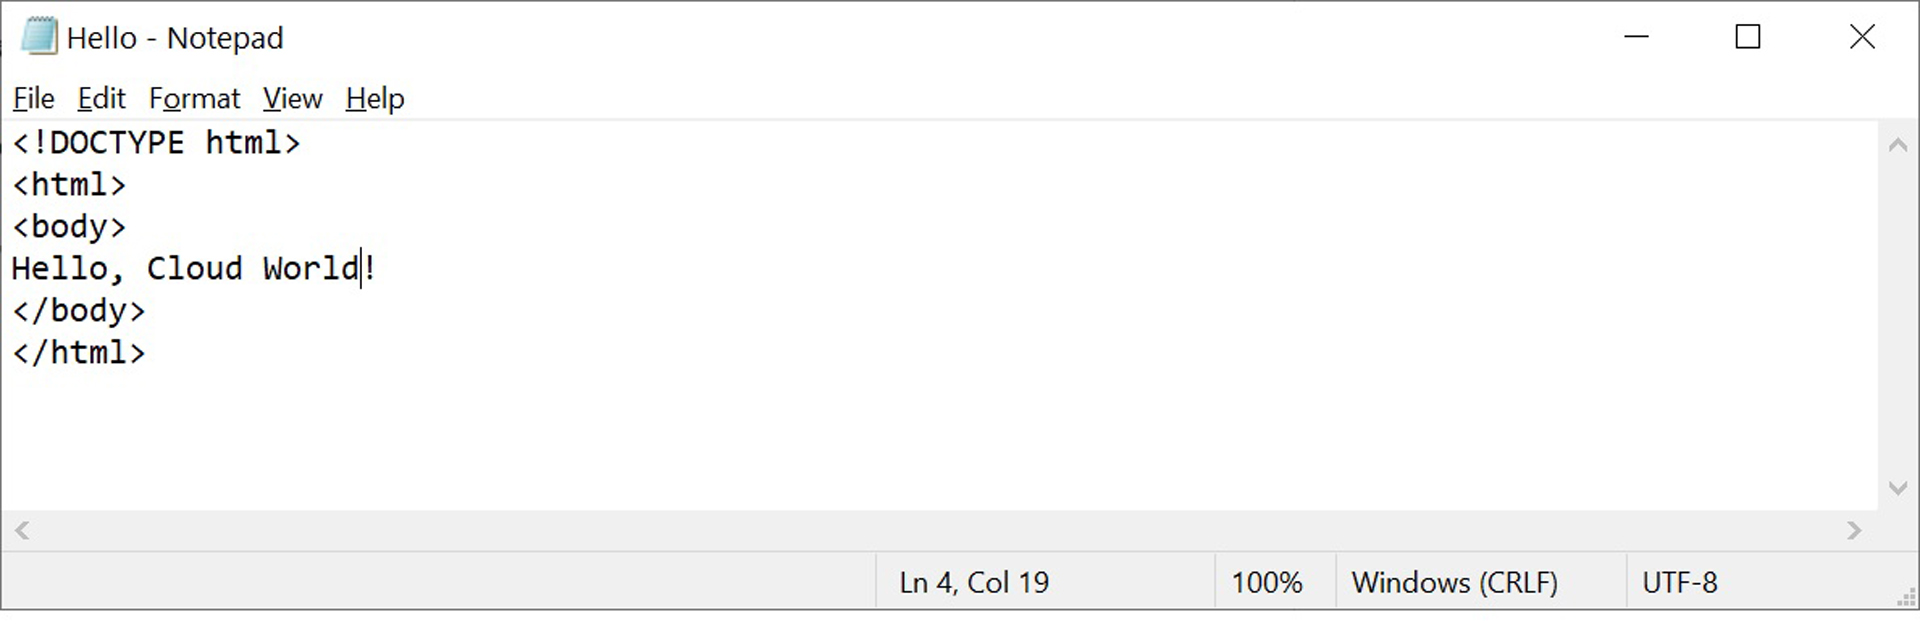
FIGURE 18-5 Creating the HTML code to display a Hello, Cloud World! message.
Next, we will want to house our solution at a specific domain name. To acquire the domain name, we can use a provider such as Godaddy.com. In this case, I selected the domain Class-Files.com.
I am now ready to select a PaaS to house my solution. As we have discussed, there are many PaaS providers in the cloud, which include the “big 3:” Amazon, Google, and Microsoft. Because my site is simple, I selected hostway.net, which also provides email support so I can send and receive emails using my Class-Files.com domain name.
When you use a PaaS provider to host you website, the PaaS will provide you within an Internet Protocol (IP) address, such as 143.31.22.1 that points to your site. In this case, I used to GoDaddy.com account to point that address to my Class-Files.com domain.
My final step is to upload my application code to my cloud server. To do so, I use FTP, the File Transfer Protocol. There are many FTP programs you can use to upload your solutions. For simplicity, I used the FTP application provided by Windows to upload my file as shown in FIGURE 18-6.
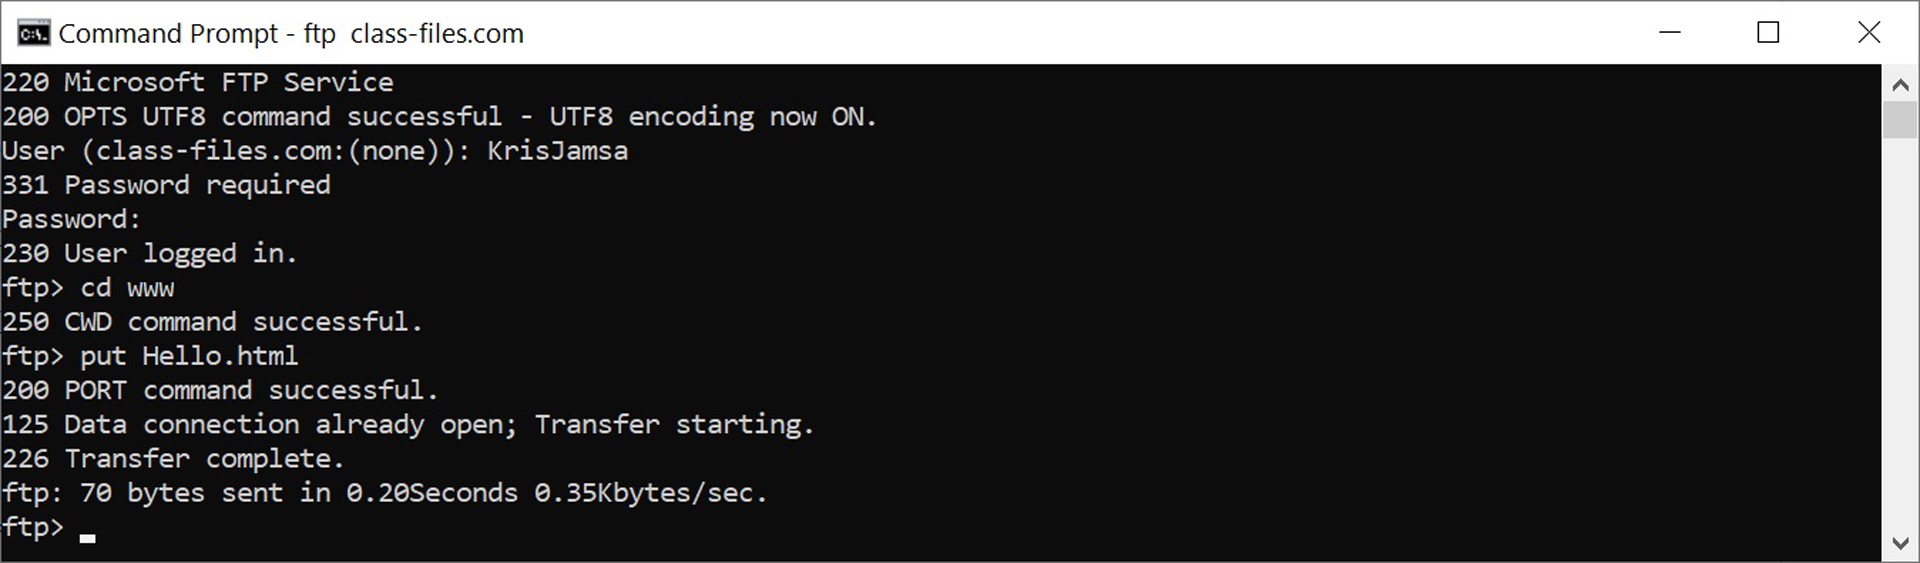
FIGURE 18-6 Using FTP to upload a solution to a server in the cloud.
After my upload completes, I can use my browser to display the solution, as shown in FIGURE 18-7.
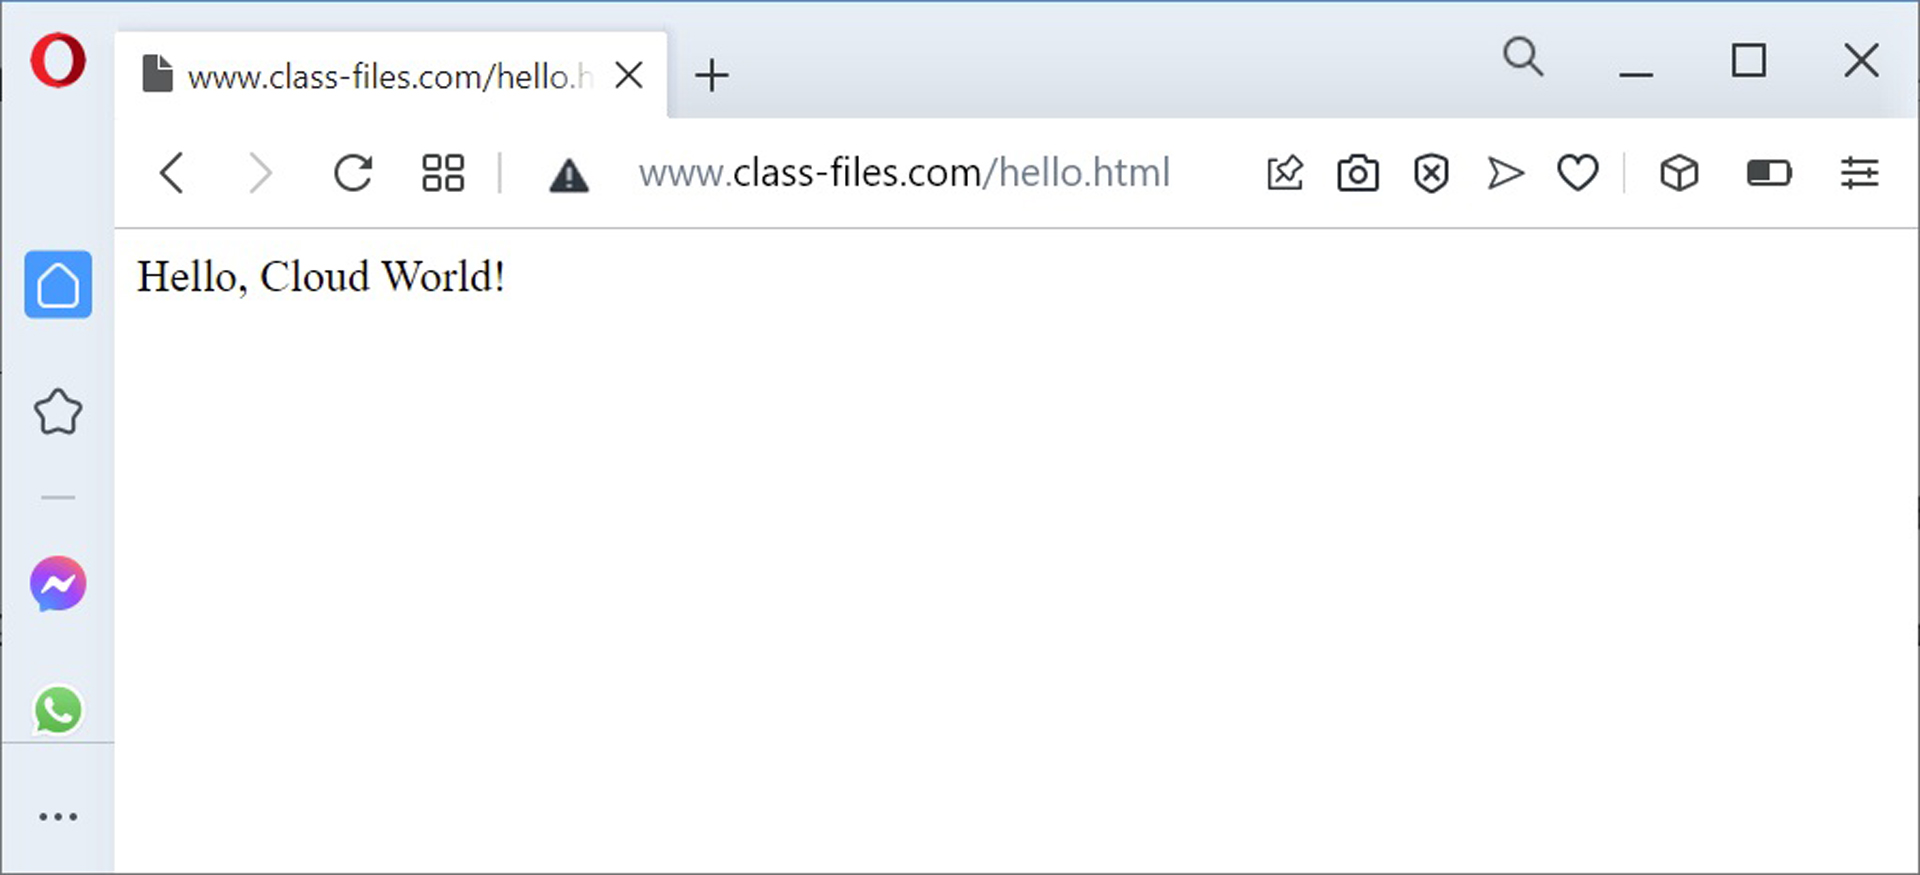
FIGURE 18-7 Using a browser to display a cloud-based solution.