
In-App Billing: Putting a Store in Your Application
In-app billing allows a developer to charge users for app features after their app has already been downloaded. Imagine charging users for more levels of your game or charging them for virtual goods (such as a magic sword in a game). For non-gaming apps, you could charge for special features or even per use if the use case is strong enough.
One example of in-app billing is Comics, by Comixology (see Figure 7-1). Comics is an application that is designed to give Android smartphone and tablet users access to digital versions of their favorite comic books. Downloading the application is free, but most of the comics cost the user. We’re sure that Comixology had to make some sort of deal with the comic book companies in order to offer this service, but after those companies receive their share of the profits, we’re also sure that Comixology makes a healthy profit from comic book readers paying for digital comic book content. All that is required of the user is to create an account online, and it syncs up very well.
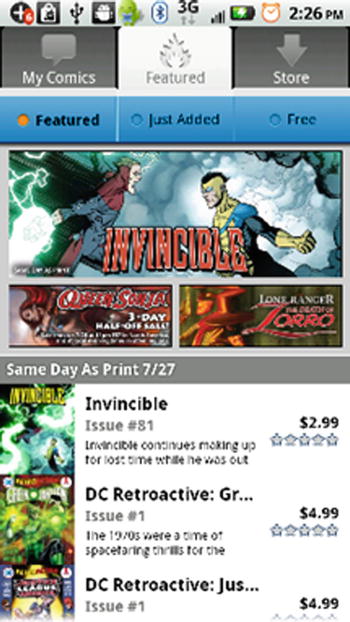
Figure 7-1. A screenshot from the store at Comixology, in which users can purchase their favorite digital comic books in digital form
Tap Tap Revenge also uses the same kind of marketing in order to sell tracks. Tap Tap Revenge (see Figure 7-2) is a music game in which players tap the screen to the rhythm of their favorite tunes. The game offers a few songs for free, but if you want more, you have to pay. We’re sure that the music industry gets its percentage along with the developers.
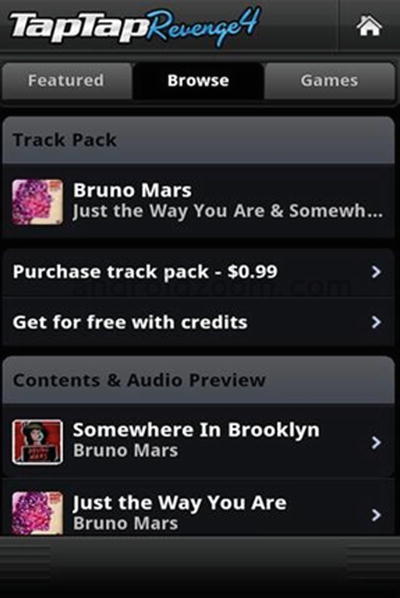
Figure 7-2. Tap Tap Revenge 4 uses in-app billing so the user can purchase more tracks for this music-based game
Many gaming applications, such as Tap Tap Revenge, have a sort of token economy that allows the user to play the game and then use their points or coins earned within the game to buy bonuses.
In Gun Brothers (see Figure 7-3), the user has the opportunity to play a shooting game and earn a lot of points. These points can be used to purchase gun upgrades, and so forth. If the user wants to take a shortcut and just buy the upgrades, however, he or she is more than welcome to do that thanks to in-app billing.

Figure 7-3. The in-app billing on Gun Brothers from Glu Mobile allows the user to buy War Bucks or Coins that can be used for armor, weapons, or power-ups
You may be surprised that there is a market for this type of gaming virtual goods, but people routinely pay money for game bonuses. This is the beauty of gaming applications; there are many gamers who are willing to lay their money down for things that exist only in a virtual gaming world. That certainly is a positive trend for developers.
If you want to use in-app billing, the Google Play Store is not the only game in town. Amazon is perhaps the best-known alternative, and there are others that we will discuss later in this chapter.
For now, we’ll talk briefly about the Google Play Store and the Amazon Appstore because they are the two largest players. In general, all in-app stores take 30 percent of your list price as their transaction fee for in-app purchases. This matches the transaction fee for app stores in general. As you can see, the main reason to use in-app stores other than the Play Store is not the transaction fee.
In fact, the main reason you’ll end up using other in-app stores is simply a matter of compatibility. Amazon doesn’t let you use anyone else’s in-app billing on apps downloaded from its store. Likewise, Google doesn’t let you use anyone else’s billing on apps downloaded from the Play Store. Smaller marketplaces such as SlideME have more permissive rules, but you generally have to support multiple in-app billing providers if your app needs in-app billing, and you plan to list your app in multiple marketplaces.
You might wonder why you’d even want to bother with the smaller app stores. The thing to remember is that some of these lesser-known app stores have exclusive deals or have a very high profile with certain devices. For example, the Amazon Appstore is the exclusive app store for all Kindles, which make up 33 percent of U.S. Android tablet sales. If your app works well on tablets, you give up a large part of the market if you don’t list your app on Amazon.
Likewise, the Samsung apps store is preinstalled on almost all Samsung Android devices. SlideME is the exclusive app store on more than 20 million Android devices. Nook Apps is the exclusive app store on all NOOK tablets, which make up 10 percent of the U.S. tablet market.
So not only do many of these app stores cater to a sizable audience but if you take the time to place your app in their ecosystem, you also have less competition than in the Google Play Store, and hence more visibility in that market.
We’ll have more to say about Google Play versus the Amazon Appstore later in the chapter, but for now, here is a bit of information on some of the other players.
GetJar ( http://developer.getjar.com ) is the largest independent cross-platform app store. It is also well known for operating the largest virtual currency on Google Play (Getjar Gold, available to more than 100 million users). If you want to get information on developing in-app purchases using the GetJar app store, you can find it here: https://developer.getjar.com/android/getjar-app-commerce-solutions/
SlideME ( http://www.slideme.org ) powers more than 140 Original Equipment Manufacturers (OEMs) preloaded with the slideME market. Conveniently for developers, the SlideME app store supports all in-app billing solutions other than Google Play and Amazon. Its developer site is here: http://slideme.org/developers
As the number one smartphone brand, Samsung ( http://apps.samsung.com/ ) offers a large market for Android applications, with support in more than 60 countries. Its in-app purchase library is called Plasma. Developers can learn more here: http://developer.samsung.com/android/tools-sdks/In-App-Purchase-Library
Android apps can be repackaged for the Blackberry 10 and Blackberry Tablet operating systems. Use of the Blackberry market ( http://appworld.blackberry.com ) assumes that you have ported your app to the Blackberry platform using the BlackBerry Runtime for Android. After you do that, you get access to in-app payments through Blackberry World. You can find more information here: http://developer.blackberry.com/android/apisupport/apisupport_inapp_payments_support.html
The Nook e-reader by Barnes and Nobles has an app store ( http://fortumo.com/nook ); and in partnership with Fortumo (a payment processing company), Nook has very recently begun offering in-app billing. You can learn more here: http://fortumo.com/countries
The SK T store ( http://www.skplanet.com/Eng/services/Tstore.aspx ) bills itself as Korea’s number one mobile contests open store. It has more than 18 million users and supports in-app billing. Its developer web site is here: http://dev.tstore.co.kr/devpoc/main/main.omp
Google Play Store versus Amazon Appstore
The Google Play Store supports both in-app purchases and subscriptions, so you can generate a recurring revenue stream. The Amazon Appstore also supports in-app purchasing and subscriptions.
Neither Google nor Amazon allow you to use in-app billing to sell real physical products, personal services, or anything else that requires physical delivery. To do that, you need to host your own store. For example, you could link your app to an online store you created with http://www.shopify.com or an equivalent provider. This isn’t all that difficult; just link to your store from within your app. Alternatively, you could integrate the PayPal SDK into your app. You can read more about doing so here: http://androiddevelopement.blogspot.co.il/2011/04/adding-paypal-payment-in-android.html
If you use Amazon, you benefit from the ubiquity of Amazon’s one-click payment system. Furthermore, Amazon’s Kindle e-books are all Android-enabled devices. If your app is a particularly good fit as an app on the Kindle, you should give the Amazon market extra consideration. Amazon’s solution may also be a bit easier to implement than the Google Play solution.
Realize, however, that Amazon in-app billing can’t be used within apps that have been downloaded from the Google Play Store. Likewise, Google Play in-app billing can’t be used within apps that have been downloaded from the Amazon Appstore. The Google Play Store is much more commonly used than the Amazon Appstore, so you’re likely to get many more downloads if you place your app there. On the other hand, there is some evidence that the Amazon Appstore generates higher revenue totals for in-app purchases.
Some developers have refused to settle for one or the other, and have implemented apps that use both in-app billing solutions, depending on where the app has been downloaded from. At the moment, that is the best (although also the most complicated) solution available. If you go that route, there are some open source helper functions that make it easier to write software that concurrently supports multiple app stores. This link details their use: http://www.techrepublic.com/blog/app-builder/juggling-in-app-purchasing-from-multiple-markets/1824
When Should You Use In-App Purchasing?
Now that you are familiar with the players of the in-app purchase markets, let’s think about when you should and shouldn’t use in-app purchasing.
When to Use In-App Purchasing
- When your app offers something really valuable, but you need to give your users a chance to realize that it’s worth the price. Like the freemium business model, you can let users try your app for free, but now you can get a continuous revenue stream each time they purchase something in your app. But remember that this works only if your users see the value in what you’re selling.
- When you have lots of related ideas for your app, but you want to start with just the first one. You can keep adding content to your existing app and charging for each piece of new content. Compare this with building lots of separate apps—they would each need to develop a user base on their own.
- When you’re offering a service that makes sense to subscribe to. Maybe you’re hosting content for your users, and it’s easy to justify an ongoing cost to them because you incur an ongoing cost to host their content.
When Not to Use In-App Purchasing
- In-app purchasing can be complicated to implement well. You need to do a lot of testing to be sure everything works right. Users will complain, loudly and rightfully, if they hand over money and things don’t work as expected. You will definitely want to consider targeting your app to Android version 2.2 and higher, which supports the simplified version 3.0 of Google’s in-app purchasing application programming interface (API). Fortunately, this includes nearly 98 percent of the Android user base.
- More user support is needed as compared with other business plans. Users might not be familiar with the in-app purchase process, so expect to spend more time answering their questions.
- Some users may be upset that your “free app” requires payments for additional features. This could result in bad reviews. You must be careful to fully explain this before they even download the app.
Requirements for In-App Purchasing
If you choose to implement in-app billing, there are a number of requirements. For Google Play in-app billing:
- You must have a Google Wallet Merchant account. This is where the revenue from user purchases will be placed.
- Android 1.6 or higher is required for version 2.0 of the in-app purchasing API. The easier-to-use and more-powerful version 3.0 of the API requires Android 2.2.
- You can sell only digital content. This means you can’t sell physical goods, personal services, or anything that requires physical delivery to your end user.
- Your users must have an active network connection in order to purchase in-app goods.
- You must deliver the content; Google does not provide integrated content delivery services. In many cases, you can simply build the extra content into your app to begin with and just expose the extra features after the user has purchased the right to access them.
For the Amazon in-app purchasing API:
- Android version 2.3.3 is required.
- You can sell only digital content. This means you can’t sell physical goods, personal services, or anything that requires physical delivery to your end user.
- Your users must have an active network connection in order to purchase in-app goods.
- You must deliver the content; Amazon does not provide integrated content delivery services. In many cases, you can simply build the extra content into your app to begin with and just expose the extra features after the user has purchased the right to access them.
Product Types
As already mentioned, both Google and Amazon support purchases and subscription-based models. Purchases can also be consumed in Google’s version 3.0 API and in the Amazon API. For example, perhaps you want users of your first-person shooter to buy extra lives, and those lives can be consumed during game play. Subscriptions can be renewed monthly or annually when using the Google API. Amazon allows renewals to occur weekly, biweekly, monthly, bimonthly, quarterly, semiannually, or annually.
Managed in-app products are products that have their ownership tracked by Google’s servers. Google stores the ownership status of these items so that your app can access them each time it is run. If the product is something that can be consumed, your app must alert the Google servers that the product has been used. This same capability is available through the Amazon service, although storing product state is the developer’s responsibility. If you purchase what is known as “entitled content,” the Amazon servers perpetually reflect your users’ right to use the content. This is the case for access to new levels of a game, for example. On the other hand, if your content can be consumed, your app still initiates the purchase, but Amazon does not record it as entitled content. You need to track usage of the product internally and simply request another purchase when it has run out. Of course, if your app does not correctly record the state of the consumable purchase, a user could lose access to it.
Delivering Your Own Content
You may have noticed that both Amazon and Play in-app billing require you to deliver your own content. When your customers’ in-app billing purchase goes through, they expect some new feature or content to appear. If you have already built that content into the app, you can simply enable it and you’re done. If you can do things this way, it’s certainly easier.
There are reasons why you may not be able to do things in this manner. Perhaps your content will be generated after the app is released. For example, maybe you’re planning to write more levels for your game and add them as in-app purchases later on. If so, you need to worry about delivering your content. This is typically done using a private remote server. As you can imagine, this requirement adds significantly to the complexity of your code base and cost of your app. A remote server requires some back-end development, and you also need to pay any costs associated with running a server.
One option to simplify content delivery is to use mobile back-end services. They are hosted solutions that provide developers with a mobile API that they can use to take advantage of back-end servers without actually having to deploy and maintain one.
Parse is one such service. Its basic plan is free and scales to up to one million requests per month. Parse was recently acquired by Facebook, but all signs are that it will continue offering its service to the public. You can learn more here: https://www.parse.com/products/data
Other mobile backend services include the following:
- Kinvey ( http://www.kinvey.com ).
- AWS SDK for Android ( http://aws.amazon.com/sdkforandroid/ ).
- StackMob: ( https://www.stackmob.com/ ).
Integrating Your App with the Google API
Google Play offers great online help to help you implement in-app billing in your application. A good place to start is with its sample application, which gives you a working model to start from. To get started with its sample application, go here:
http://developer.android.com/training/in-app-billing/preparing-iab-app.html#GetSample
The old version 2.0 API included a sample app called Dungeons. In Figure 7-4, you can see the purchase screen from that app, illustrating how you can purchase a potion (“Puts dragons to sleep.”).
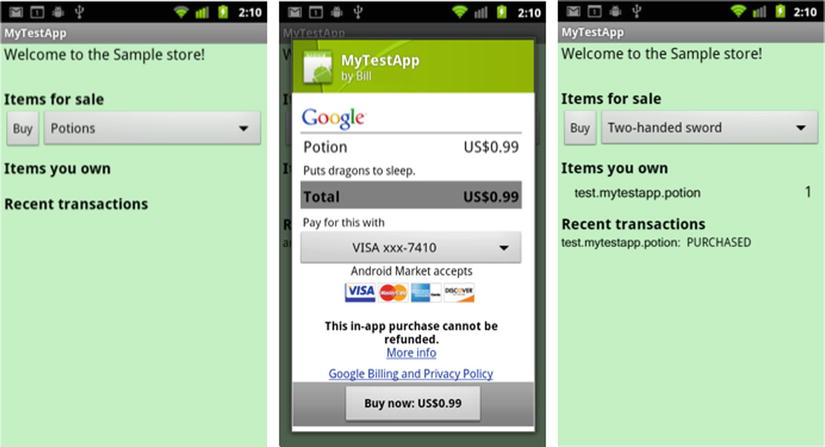
Figure 7-4. The example program illustrating the older version of the API for in-app purchases on Google Play
If at all possible, you should be integrating with the newer and simpler version 3.0 API, which uses a different sample app called Trivial Drive (see Figure 7-5)
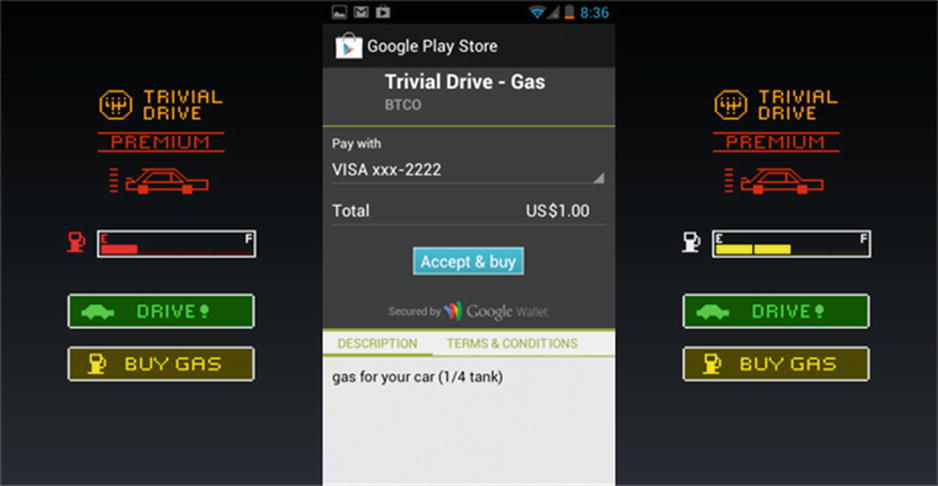
Figure 7-5. Version 3.0 of the in-app purchase API for Google Play is illustrated using an example program called Trivial Drive
As far as enabling in-app billing in your own application, the following sections spell out the steps to follow, beginning with downloading the in-app billing library. (We assume you have elected to use version 3.0 of the API.)
Enabling Your App to Use In-App Billing
To download the in-app billing library, open the Android SDK Manager. Expand the Extras section, select Google Play Billing Library, and install the Library.
Before you can use in-app billing, you must include a IinAppBillingService.aidl file in your project. This file is an Android Interface Definition Language file that defines the interface to Google’s billing service.
First, right-click the src directory of your project and select New ➤ Package. Name your new package com.android.vending.billing. Move the IinAppBillingService.aidl class (found in <sdk>/extras/google/play_billing/ as well as the previous sample app provided with the billing library) into this package.
Add your product to the Google Play Developer Console. To do this, select your application in the Developer Console and then select the In-app Products tab on the left side. You can then add a new product. The In-app Product ID must be unique in your application’s namespace. Your product type can be a Managed per user account, Unmanaged, or Subscription. You also need to add a description and price.
Initial Setup For In-App Billing In Your App
You can follow the detailed instructions here for the setup process: http://developer.android.com/training/in-app-billing/preparing-iab-app.html#GetSample
To summarize, you need to give your app permission to interact with the billing service via your manifest file. You also need to create an Iabhelper, which is the in-app billing helper class. This class enables a simplified synchronous style of communication that is one of the benefits of version 3.0 of the in-app billing API. The Iabhelper class uses callbacks to communicate with your code. In fact, the setup process uses an onIabSetupFinished callback function to return success or failure.
Using In-App Billing: Requesting a List of Items For Purchase
Again, the process is described here in great detail: https://developer.android.com/google/play/billing/billing_integrate.html
At a high level, you need to build a list of purchasable items that you are querying. The previous link uses this example:
List additionalSkuList = new List();
additionalSkuList.add(SKU_APPLE);
additionalSkuList.add(SKU_BANANA);
inAppBillingHelper.queryInventoryAsync(true, additionalSkuList,
   mQueryFinishedListener);
As you might expect, the mQueryFinishedListener is a callback function that is called with a list of available inventory, including their prices.
Using In-App Billing: Making the Purchase
Similarly, making a purchase involves a call the in-app billing helper, and the response is handled with a callback listener function:
inAppBillingHelper.launchPurchaseFlow(this, SKU_APPLE, REQUEST_CODE_VALUE,
   mPurchaseFinishedListener, "developerPayloadString");
SKU_APPLE is the item to be purchased. The REQUEST_CODE_VALUE is a positive integer that will be returned back to the caller. The developer payload string is a convenience string for use by developers to send supplemental information. It may be empty.
Using In-App Billing: Determining Which Items Have Already Been Purchased
Continuing the paradigm, you may determine which items have already been purchased with a query to the in-app billing helper that is captured by a callback listener:
inAppBillingHelper .queryInventoryAsync(mGotInventoryListener);
You need to determine which items have been purchased each time your app restarts so your users have access to capabilities that they have already purchased.
Using In-App Billing: Consumable Purchases
To consume an item that your user has purchased, you call the in-app billing helper as follows:
inAppBillingHelper .consumeAsync(inventory.getPurchase(SKU_APPLE),
   mConsumeFinishedListener);
Integrating Your App with the Amazon API
If you’ve played around with the Google Play in-app billing sample application for version 2.0 of its API (the Dungeons program), you have a great foundation to start learning how to integrate with the Amazon API. This link teaches you how to modify the Dungeons application to be compatible with the Amazon in-app purchasing API:
https://developer.amazon.com/sdk/in-app-purchasing/reference/google-to-iap.html
Amazon claims that its IAP solution requires less work and has a shorter development cycle. Note, however, that Amazon is not comparing its solution with the newer version 3.0 API.
Amazon provides a visual comparison of the two APIs in Figure 7-6:
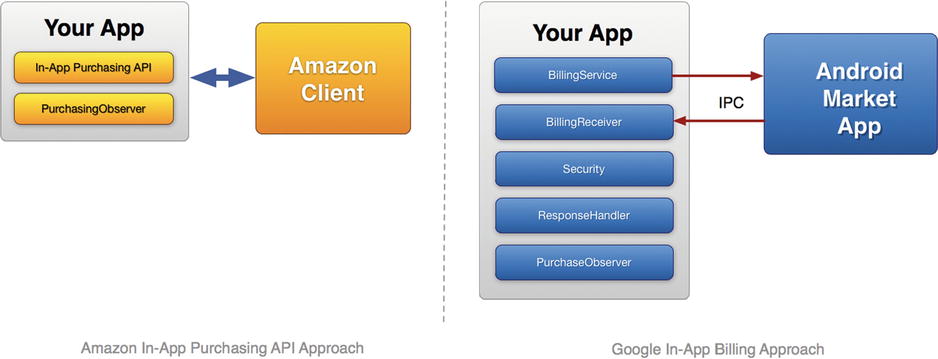
Figure 7-6. A visual comparison of the Amazon in-app billing API and the Google Play API
Enabling Your App to Use In-App Billing
Download the Amazon Mobile App SDK package from here: https://developer.amazon.com/sdk.html
Extract the ZIP file into a directory on your computer. Within this directory, you find an /In-App-Purchasing/lib folder. This folder contains a JAR file called in-app-purchasing, which is the in-app purchasing library and must be added to your eclipse project’s library path. You can do this by accessing the Project Properties menu and going to the Java Build Path. There you can select the Libraries tab and add the JAR file.
Before you can purchase a product from within an app, you must add your product to Amazon’s distribution portal by signing into the Distribution Portal and selecting the My Apps tab. Choose the Manage In-App Items option from the app drop-down menu. Now you must choose whether you will be creating a Consumable, Entitlement, or Subscription product. You also need to add a price, description, and thumbnail image.
Initial Setup For In-App Billing In Your App
As you might expect, your application must be given access to the Amazon in-app purchasing library. The purchasing library is implemented as a broadcast receiver, and you declare it in your manifest by adding the following to the <application> section:
<receiver android:name = "com.amazon.inapp.purchasing.ResponseReceiver" >
    <intent-filter>
        <action android:name = "com.amazon.inapp.purchasing.NOTIFY"
                android:permission = "com.amazon.inapp.purchasing.Permission.NOTIFY" />
    </intent-filter>
</receiver>
Within your Java code, you access the broadcast receiver by registering with com.amazon.inapp.purchasing.PurchasingManager
This class initiates all in-app billing requests. To capture callbacks from the PurchasingManager, you must create a PurchasingObserver class and register it with the PurchasingManager. To do this, you subclass BasePurchasingObserver. (We will discuss each of the methods that need to be subclassed later in the chapter.) The registration with PurchaseManager occurs in your onStart and looks like this: PurchasingManager.registerObserver(new MyPurchasingObserver());
You also need to register the user using your app with the Amazon service. This also occurs in your onStart: PurchasingManager.initiateGetUserIdRequest()
You must implement a callback for this request in your PurchasingObserver class: PurchasingObserver.onGetUserIdResponse(GetUserIdResponse)
Using In-App Billing: Requesting a List of Items for Purchase
Similarly, a call using the PurchasingManager requests the list of items for purchase: PurchasingManager.initiateItemDataRequest(java.util.Set skus)
You need to implement the following callback in the PurchasingObserver: PurchasingObserver.onItemDataResponse(ItemDataResponse itemDataResponse)
Using In-App Billing: Making the Purchase
To make a purchase, call the following: PurchasingManager.initiatePurchaseRequest(java.lang.String sku)
The callback function you need to implement is the following: PurchasingObserver.onPurchaseResponse(PurchaseResponse purchaseResponse)
Using In-App Billing: Determining Which Items Have Already Been Purchased
The PurchaseResponse field in the callback to the following is set to ALREADY_ENTITLED when an item has already been purchased (of course, the item in question must be an ENTITLEMENT product as set in the distribution portal):
Using In-App Billing: Consumable Purchases
Consumable purchases are simply non-entitled purchases. Once they are bought, the app must track their use. They can be repurchased at any time.
Supporting In-App Billing with Multiple App Stores
As of this writing, there is no good solution that acts to abstract away the issues of dealing with multiple app stores for in-app purchasing. However, an open-source project called OpenIAB is in the works that may change that. OpenIAB is a part of the One Platform Foundation, a global initiative to help developers submit their apps across multiple alternative app stores.
Although the code is not yet ready for prime time (or even finalized), you should track its development because once the API is released, it will dramatically simplify the problems of dealing with multiple in-app purchasing stores. You can learn more at the following web sites:
- One Platform Foundation: http://www.onepf.org/
- OpenIAB (Open In-App Billing): http://www.onepf.org/openiab
Summary
Android developers have an opportunity to monetize their applications in novel ways using in-app billing. In-app billing is perfect for selling virtual goods within the application and it works well if developers can create a subscription for their goods. It isn’t for every type of application, but it is a great way to build a relationship with customers before requiring them to open their wallets.
Setting up an application for in-app billing can be complicated, both because the implementation details are nontrivial and because there is a lot of fragmentation in the market, with different app stores requiring their own in-app billing solution. Particularly if your in-app billing application is intended primarily for tablets, you cannot address a large chunk of your customer base if you don’t deploy your app in at least a few different app stores.
Although there are early efforts to simplify the process of writing in-app billing solutions for multiple marketplaces, at the moment it’s a nontrivial proposition, and the benefits of in-app-billing should be weighed against the complexity and overhead of the solution.
Checklist: In-App Purchasing
- Does your app benefit from product or subscription in-app purchases? Ideally, your app should be one that builds a relationship with the user, delivers significant value, and creates an opportunity for multiple purchasing events.
- Does your app meet the requirements for in-app purchasing? Network access? Digital content?
- Have you thought about which app store is best suited to your app? Will you need to support multiple app stores?
- Will you need to host purchasable content for your app?