
![]()
Binding an HTTP Request into CLR Objects
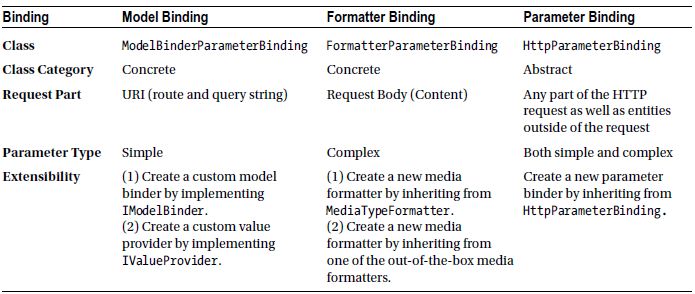
The ASP.NET Web API framework reads each incoming HTTP request and creates the parameter objects for your action methods in the controller. This is one of the powerful features of the ASP.NET Web API framework that keeps the code in the controller classes free of the repetitive work related to HTTP infrastructure and helps you, the developer, focus on implementing the business requirements at hand. Table 5-1 shows the different types of bindings possible with ASP.NET Web API, the corresponding out-of-the-box class associated with the binding, the part of the request from which data is used for binding, the type of the parameter bound, and the extensibility options available.
The ASP.NET Web API framework reads the route data and the query string of the request URI and sets the parameters of the action methods that are simple types (primitives, DateTime, Guid, and so on) by a process called model binding. The parameters that are complex types are set based on the HTTP request body with the help of the media type formatters that we saw in Chapter 3. In Chapter 3, our focus was serialization: translation of CLR types into a format that can be transmitted over HTTP. In this chapter, we focus on deserialization: translation of an HTTP request message into CLR types. A media formatter can enlist itself in serialization and/or deserialization by returning true when the framework calls the CanWriteType(Type) and CanReadType(Type) methods respectively.
5.1 Reading the Raw HTTP Request
In this exercise, you will read the raw HTTP request without any help from the ASP.NET Web API framework. You will see that doing so is a lot of work and is error-prone. It is highly recommended to use the help that the ASP.NET Web API provides to read the requests so that you get nice, clean CLR objects to work with. This exercise is just to show you that it is possible to read the raw requests and help you appreciate the heavy lifting the framework does for you.
- Create a new ASP.NET MVC 4 project with a name of RequestBinding, using the Web API template.
- Create a new empty API controller with a name of EmployeesController.
- Implement an action method to handle HTTP POST, as shown in Listing 5-1.
Listing 5-1. An Action Method Reading a Raw HTTP Request
using System;
using System.Diagnostics;
using System.Linq;
using System.Net.Http;
using System.Web.Http;

public class EmployeesController : ApiController
{
    public void Post(HttpRequestMessage req)
    {
        var content = req.Content.ReadAsStringAsync().Result;
        int id = Int32.Parse(req.RequestUri.Segments.Last());

        Trace.WriteLine(content);
        Trace.WriteLine(id);
    }
} - Rebuild the solution and run the project in Visual Studio by pressing F5.
- Fire-up Fiddler and issue a POST request to http://localhost:55778/api/employees/12345 from the Composer tab. Remember to replace the port 55778 with the actual port that your application runs on. Copy and paste Content-Type: application/json into the Request Headers text box and the JSON {"Id":12345,"FirstName":"John","LastName":"Human"} into the Request Body text box. Click Execute.
- This writes the following into the Output window of Visual Studio.
{"Id":12345,"FirstName":"John","LastName":"Human"}
12345
In Listing 5-1, we read the request message content as a string using the ReadAsStringAsync method and take the ID from the URI. The code is naïve. It does not handle any of the rainy-day scenarios such as the ID not being a number, ID absent, and so on. Also, we get the request message content as JSON. We will need to parse this into a CLR object. If a client sends XML, we need to handle that as well. Obviously, it is a lot of painful work.
PARTIAL UPDATES
There is one good thing with taking control from ASP.NET Web API. In Chapter 1, we saw that partial updates are possible with PATCH using Delta<T>.
The challenge we have with partial updates is that when a request comes in without a value, it will be the same as if the request had the field present but with a null value. We now have the visibility to determine whether a request has a specific field absent or present but containing null without using Delta<T>. This is especially useful for partial updates. If a request comes in with a content of {"FirstName":"Jon"}, it basically means we need to update only the first name of the employee with ID of 12345 to Jon without touching any other properties. By leaving out the rest of the properties, a client can indicate that only the property in the request content must be updated.
So the request {"FirstName":"Jon"} can be distinguished from {"FirstName":"Jon", "LastName":null}. The first request asks for only the first name to be updated, and the second one asks for the first name to be updated to a new value and the last name to be cleared out. If you have used an object of type Employee as the parameter, you will not be able to distinguish these two requests, since in both the cases the LastName property will be set to null.
5.2 Reading the HTTP Request into a CLR Type
In this exercise, you will read the HTTP request with the help of the ASP.NET Web API framework. It is one step in the right direction yet you will see how beneficial it is.
- Change the action method from the previous exercise, as shown in Listing 5-2.
Listing 5-2. An Action Method Reading a Raw HTTP Request into a CLR Type
public void Post(HttpRequestMessage req)
{
    //var content = req.Content.ReadAsStringAsync().Result;
    var content = req.Content.ReadAsAsync<Employee>().Result;
    int id = Int32.Parse(req.RequestUri.Segments.Last());

    Trace.WriteLine(content.Id);
    Trace.WriteLine(content.FirstName);
    Trace.WriteLine(content.LastName);
    Trace.WriteLine(id);
} - Add the Employee class that we have been using all along in this book, into your project in the Models folder. Listing 5-3 shows the Employee class, for your easy reference.
Listing 5-3. The Employee Model Class
public class Employee
{
    public int Id { get; set; }
    public string FirstName { get; set; }
    public string LastName { get; set; }
} - In the EmployeesController class, right-click Employee, which is shown with a red wavy underline, and select Resolve ➤ using RequestBinding.Models;. That will add the necessary using directive.
- Rebuild the solution and run the project in Visual Studio by pressing F5.
- Make a POST to http://localhost:55778/api/employees/12345 from the Fiddler Composer tab. Remember to replace the port 55778 with the actual port that your application runs on. Copy and paste Content-Type: application/json into the Request Headers text box and the JSON {"Id":12345,"FirstName":"John","LastName":"Human"} into the Request Body text box. Click Execute.
- This outputs the ID, first name, and last name of the employee from the request body.
- Right click the Output window content and select Clear All.
- Make another POST to http://localhost:55778/api/employees/12345. Copy and paste Content-Type: application/xml in the Request Headers text box and the XML shown in Listing 5-4 into the Request Body text box. Click Execute. The indentation of the XML is only for readability. If you have chosen a project name other than RequestBinding or created the Employee class with a namespace other than RequestBinding.Models, make sure you adjust the XML accordingly.
Listing 5-4. The Request XML
<Employee xmlns=" http://schemas.datacontract.org/2004/07/ RequestBinding.Models ">
       <FirstName>John</FirstName>
       <Id>12345</Id>
       <LastName>Human</LastName>
</Employee> - Even with XML, the ID, first name, and last name of the employee from the request body are written out correctly. Now, we are able to handle requests with different media types without writing a single line of infrastructure code parsing JSON or XML!
- However, the code we have in Listing 5-2 is still suboptimal. One obvious problem is the extraction of route data. Also, the action method is dependent on an HTTP request. Automated unit-testing of this action method will be difficult.
- Change the action method from the previous exercise as shown in Listing 5-5.
Listing 5-5. Action Method Reading Raw HTTP Request into Parameters
public void Post(int id, Employee employee)
{
    Trace.WriteLine(employee.Id);
    Trace.WriteLine(employee.FirstName);
    Trace.WriteLine(employee.LastName);
    Trace.WriteLine(id);
} - Rebuild the solution and run the project in Visual Studio by pressing F5.
- Make a POST to http://localhost:55778/api/employees/12345 from the Fiddler Composer tab. Remember to replace the port 55778 with the actual port that your application runs on. Copy and paste Content-Type: application/json into the Request Headers text box and the JSON {"Id":12345,"FirstName":"John","LastName":"Human"} into the Request Body box. Click Execute.
This outputs the ID, first name, and last name of the employee from the request body, exactly the same as before. Regardless of the request media-type, XML or JSON, ASP.NET Web API correctly populates the parameter of type Employee as well as the int parameter. If a nonnumeric value is sent in the URI route, the framework catches it correctly, and you don't need to write code to handle any of those scenarios.
- Since there is no dependency on the HTTP request, automated unit-testing is very easy. Of course, there is not much to unit-test in the current implementation but if there is, it will be easily unit-testable. You can vary the input, which consists of normal CLR types, and test all the conditions.
5.3 Binding the HTTP Request to Simple Types
In this exercise, you will see how ASP.NET Web API creates simple type parameters—the parameters of type such as primitives, DateTime, Guid, and so on—from the HTTP request message. By default, simple types are bound from the URI route data and query string.
- Change the action method from the previous exercise, as shown in Listing 5-6. The parameters of the action method are all simple types.
Listing 5-6. An Action Method with Simple Type Parameters
public void Post(int id, string firstName, int locationId, Guid guid)
{
    Trace.WriteLine(id);
    Trace.WriteLine(firstName);
    Trace.WriteLine(locationId);
    Trace.WriteLine(guid);
} - Rebuild the solution and run the project in Visual Studio by pressing F5.
- From the Fiddler Composer tab, make a POST request to the URI http://localhost:55778/api/employees/12345?firstName=John&locationId=12&guid=31c9359d-d332-4703-a896-7e9655eff171. Remember to replace the port 55778 with the actual port that your application runs on. Copy and paste Content-Length: 0 in the Request Headers text box and leave Request Body empty. Click Execute.
- The parameter ID is bound from the URI route data of 12345, and the rest of the parameters are bound from the query string. The corresponding values are written to the output as follows.
12345
John
12
31c9359d-d332-4703-a896-7e9655eff171 - Make another POST to the same URI as you did in the previous step. This time leave out the locationId from the query string but include it in the request body. So, the URI will be http://localhost:55778/api/employees/12345?firstName=John&guid=31c9359d-d332-4703-a896-7e9655eff171. Copy and paste Content-Type: application/json into the Request Headers text box and "locationId":12 into the Request Body text box. Click Execute.
You get a 404 - Not Found with an error message that No HTTP resource was found that matches the request URI. The reason for the 404 is that ASP.NET Web API is unable to bind the locationId parameter. There is nothing in the URI path or the query string to match the parameter, and the framework is unable to find the right action method for the request, so it fails with a 404. Though locationId field is present in the request body JSON, ASP.NET Web API does not try to bind it, because the action method parameters are simple types. By default, the simple types are bound from the URI path and query string only.
- To alter this default behavior, apply the FromBody attribute to the locationId parameter so that the action method signature is as follows:
void Post(int id, string firstName, [FromBody]int locationId, Guid guid) { ... }
- Rebuild the solution and press F5 to run the project in Visual Studio. Repeat Step 3. You will still get an error, but it is no longer a 404 - Not Found but a 400 - Bad Request, indicating that something is wrong with the request format.
- We need to make one more adjustment to get the binding to work correctly. Repeat Step 3 but have just 12 in the Request Body text box. The request body must have only the number, like so:
POST http://localhost:55778/api/employees/12345?firstName=John&guid=31c9359d-d332-4703-a896-7e9655eff171 HTTP/1.1
Content-Type: application/json
Host: localhost:55778
Content-Length: 2

12
The framework starts binding the values correctly.
THE WHOLE BODY BINDING
In the preceding exercise, we had to pass the integer 12 in the request body because of the way ASP.NET Web API binding is designed. The whole request body, not a piece of the body, is bound to a parameter. For this reason, you cannot have multiple parameters with the FromBody attribute in an action method. If that is the need, use a complex type such as a class with properties equivalent to the parameters. For example, instead of using [FromBody]int locationId, [FromBody]string locationName, use a class, as follows.
public class LocationDto
{
        public int LocationId {get; set;}
        public string LocationName {get; set;}
}
5.4 Binding the HTTP Request to Complex Types
By default, complex types are bound from the request message body and simple types are bound from the URI path and the query string. In Exercise 5.3, you saw how ASP.NET Web API binds a simple type from the URI and query string. Then we changed this default behavior by applying the FromBody attribute on a simple type parameter to let the framework bind the message body to a simple type.
In this exercise, you will see how a complex type parameter is bound from the HTTP request message. It is the default behavior of ASP.NET Web API to bind the request body to a complex type but just as we used the FromBody attribute to change that behavior, in this exercise, we will use the FromUri attribute to bind a complex type from the URI and query string.
ASP.NET Web API uses media formatters to bind the request body to complex types. Chapter 3 covered media type formatters from the perspective of the response message being mapped to a CLR object. In this chapter, we again see the media formatters in action but for mapping the request to a CLR object.
- Change the Post action method from the previous exercise and place a breakpoint in the starting curly brace of the method, as shown in Figure 5-1.
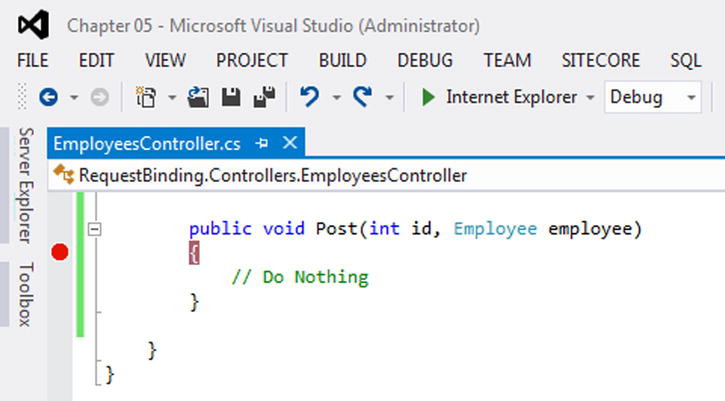
Figure 5-1. The POST method of EmployeesController
- Rebuild the solution and run the project in Visual Studio by pressing F5.
- Make a POST to http://localhost:55778/api/employees/12345 from the Fiddler Composer tab, after changing the port number in the preceding URI to reflect the port used by your application. Copy and paste Content-Type: application/json into the Request Headers text box and the JSON {"Id":12345,"FirstName":"John","LastName":"Human"} into the Request Body text box. Click Execute.
- When the breakpoint is hit, put the mouse cursor over the action method's parameters and inspect the values, as shown in Figure 5-2. You will see that the request body JSON is bound to the complex type Employee, with the properties showing the correct values.
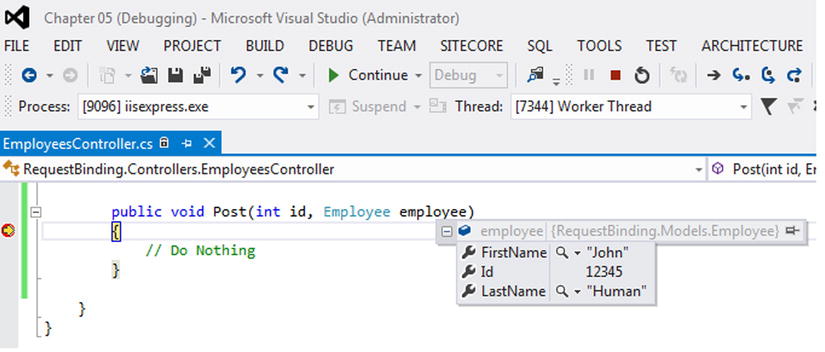
Figure 5-2. POST method parameters when the breakpoint is hit
- Make another POST to http://localhost:55778/api/employees/12345. Copy and paste Content-Type: application/xml into the Request Headers text box and the XML shown in Listing 5-4 into the Request Body text box. The following XML repeats Listing 5-4, for your easy reference. Click Execute. Inspect the action method's parameters when the execution hits the breakpoint. It works this time, too, with the Employee parameter being bound correctly from the request body XML.
<Employee xmlns=" http://schemas.datacontract.org/2004/07/RequestBinding.Models ">
       <FirstName>John</FirstName>
       <Id>12345</Id>
       <LastName>Human</LastName>
</Employee> - Based on the Content-Type request header, conneg is able to find the correct formatter to deserialize the request body. It uses JsonMediaTypeFormatter and XmlMediaTypeFormatter, respectively, for JSON and XML.
Everything works fine so far because the action method parameter Employee is a complex type and ASP.NET Web API binds the parameter from the request body with the help of formatters based on the content type. Let us now change the request data coming in the body to a query string and see how it works.
- Ensure that the project is running in Visual Studio. If it is not running, run the project by pressing F5.
- Make a POST to http://localhost:55778/api/employees/12345?firstname=John&lastname=Human. Copy and paste Content-Length: 0 in the Request Headers text box and leave the Request Body text box empty. Click Execute.
- When the execution breaks, inspect the Employee parameter. It is null. That is because the ASP.NET Web API framework, by default, tries to populate the Employee parameter, which is a complex type, from the request body, and in our case the request body is empty.
- We can override the default behavior by applying the FromUri attribute to the Employee parameter so that the action method signature is as follows:
void Post(int id, [FromUri]Employee employee) { ... }
- Rebuild the solution and run the application by pressing F5.
- Repeat the previous POST request from Step 8. When the execution breaks, inspect the Employee parameter.
It works now with the Employee parameter being populated from the query string.
THE BODY CAN BE READ ONLY ONCE
The request body is a non-rewindable stream; it can be read only once. Modify the POST action method, as shown in the following code. It now takes two parameters: the first is the raw HTTP request and the second is Employee type.
public void Post(int id, HttpRequestMessage req, Employee employee)
{
    var content = req.Content.ReadAsStringAsync().Result;
    var employeeContent = req.Content.ReadAsAsync<Employee>().Result;
} // Place the break point here
Place a breakpoint on the ending curly brace. Rebuild the solution and run the project. Make a POST to http://localhost:<port>/api/employees/12345 from Fiddler with Content-Type: application/json in the Request Headers text box of the Composer tab and the JSON {"Id":12345,"FirstName":"John","LastName":"Human"} in the Request Body text box.
When the breakpoint is hit, inspect the variables content and employeeContent. The values are an empty string and null, respectively. Inspect the Employee type parameter. You will see that it is deserialized correctly with all the data from the request body. The reason we cannot read the HTTP request content inside the action method is that the stream can be read only once. The formatter has already read the stream and populated the Employee parameter object. So we are not able to read the stream again. This is an important point to understand.
5.5 Binding the HTTP Request to a Collection
In this exercise, you will see how a collection parameter such as List<T> is bound from the HTTP request message. List<T> is a complex type and by default, complex types are bound from the request message body.
- Change the action method from the previous exercise as shown in Listing 5-7.
Listing 5-7. The Action Method with a Collection Parameter
public void Post(int id, List<string> nickNames)
{
    Trace.WriteLine(String.Join(", ", nickNames));
} - Rebuild the solution and run the project in Visual Studio by pressing F5.
- Make a POST to http://localhost:55778/api/employees/12345 from the Fiddler Composer tab. Copy and paste Content-Type: application/json into the Request Headers text box and the JSON ["Liz","Beth","Lisa"] into the Request Body text box. Click Execute.
- The nicknames from the message body are bound correctly to the List<string> parameter, and the action method writes Liz, Beth, Lisa to the Output window.
- With the project running in Visual Studio, make another POST request but this time to http://localhost:55778/api/employees/12345?nicknames=Liz&nicknames=Beth from the Fiddler Composer tab. Copy and paste Content-Length: 0 into the Request Headers text box and leave the Request Body text box empty. Click Execute.
This throws an exception, since the nickNames parameter is null this time around. Since List<string> is a complex type, ASP.NET Web API tries to bind the request body to this parameter. Since the request body is empty, the nickNames parameter is null.
- Apply the FromUri attribute to the nickNames parameter so that the action method signature is as follows: void Post(int id, [FromUri]List<string> nickNames).
- Rebuild the solution and run the project in Visual Studio by pressing F5. Repeat Step 5. This time around, ASP.NET Web API populates the nickNames parameter correctly.
An HTML form is a section of a document containing normal content, markup, special elements called controls (text boxes, checkboxes, radio buttons and so on), and labels on those controls. A form is submitted to a server-side program that processes the user-entered data.
When a web browser sends an HTTP POST of an HTML form, it specifies a media type of application/x-www-form-urlencoded. The data in the HTML form is sent as name-value pairs. For example, take the case of the HTML form shown in Listing 5-8.
Listing 5-8. An HTML Form
<form action=" http://localhost:55778/api/employees " method="post">
    <div>
        <label for="firstname">First Name:</label>
        <input type="text" name="firstname"/>
    </div>
    <div>
        <label for="lastname">Last Name:</label>
        <input type="text" name="lastname"/>
    </div>
    <input type="submit" value="Submit"/>
</form>
When I enter John in the First Name text box and Human Being in the Last Name text box and click Submit, the browser I use, Internet Explorer, posts the form data to the URI that I have specified in the action attribute of the form element. Listing 5-9 shows the HTTP request message (with some of the headers removed for brevity). The data I entered are encoded and sent in the form of name-value pairs.
Listing 5-9. Form Data
POST http://localhost:55778/api/employees HTTP/1.1
Content-Type: application/x-www-form-urlencoded
Host: localhost:55778
Content-Length: 35

firstname=John& lastname=Human+Being
Form-URL-encoded data is a widely used media type for submitting data from a browser to a server-side program. ASP.NET Web API is capable of handling requests with form-URL-encoded data. However, it is important to note that a browser posting a form directly to an ASP.NET Web API endpoint as in Listing 5-9 is not a likely scenario, for the simple reason that ASP.NET Web API does not typically produce HTML that can be rendered by the browser directly. The most likely use case for the form-URL-encoded data will be a JavaScript library such as jQuery posting a form through an AJAX call, or a client-side library used by a native application formatting user-entered data as name-value pairs and posting them to ASP.NET Web API as form-URL-encoded data.
ASP.NET Web API can bind form-URL-encoded data to a special class FormDataCollection in the System.Net.Http.Formatting namespace. It can also bind the form-URL-encoded data to custom classes like our Employee class. In the former case, the out-of-the-box media formatter FormUrlEncodedMediaTypeFormatter is used and in the latter case, JQueryMvcFormUrlEncodedFormatter is used.
5.6.1 Binding to FormDataCollection
In this exercise, you will see how ASP.NET Web API binds form-URL-encoded data to FormDataCollection . I start by showing you the media type formatters that handle the form-URL-encoded data (application/x-www-form-urlencoded).
- Use the same project from Exercise 5.5. Modify the Register method of WebApiConfig in the App_Start folder, as shown in Listing 5-10.
Listing 5-10. Listing Media Formatters
using System.Diagnostics;
using System.Linq;
using System.Net.Http.Formatting;
using System.Web.Http;
using RequestBinding.Models;

public static class WebApiConfig
{
    public static void Register(HttpConfiguration config)
    {
        config.Routes.MapHttpRoute(
            name: "DefaultApi",
            routeTemplate: "api/{controller}/{id}",
            defaults: new { id = RouteParameter.Optional }
        );

        foreach (var formatter in config.Formatters.Where(f => f.SupportedMediaTypes
                                            .Any(m => m.MediaType.Equals(
                                                "application/x-www-form-urlencoded"))))
        {
            Trace.WriteLine(formatter.GetType().Name);
            Trace.WriteLine("	CanReadType Employee: " + formatter
                                                            .CanReadType(typeof(Employee)));
            Trace.WriteLine("	CanWriteType Employee: " + formatter
                                                            .CanWriteType(typeof(Employee)));
            Trace.WriteLine("	CanReadType FormDataCollection: " +
                                                            formatter
                                                            .CanReadType(
                                                                typeof(FormDataCollection)));
            Trace.WriteLine("	CanWriteType FormDataCollection: " +
                                                        formatter
                                                            .CanWriteType(
                                                                 typeof(FormDataCollection)));
            Trace.WriteLine("	Base: " + formatter.GetType().BaseType.Name);
            Trace.WriteLine("	Media Types: " +
                                    string.Join(", ", formatter.SupportedMediaTypes));
        }

    }
} - The preceding code lists the media type formatters that support the media type application/x-www-form-urlencoded. Listing 5-11 shows the content of the Output window of Visual Studio, as you run the project by pressing F5.
Listing 5-11. Media Type Formatters Supporting Form Data
FormUrlEncodedMediaTypeFormatter
     CanReadType Employee: False
     CanWriteType Employee: False
     CanReadType FormDataCollection: True
     CanWriteType FormDataCollection: False
     Base: MediaTypeFormatter
     Media Types: application/x-www-form-urlencoded
JQueryMvcFormUrlEncodedFormatter
     CanReadType Employee: True
     CanWriteType Employee: False
     CanReadType FormDataCollection: True
     CanWriteType FormDataCollection: False
     Base: FormUrlEncodedMediaTypeFormatter
     Media Types: application/x-www-form-urlencoded
There are two out-of-the-box formatters that support the media type application/x-www-form-urlencoded:
- FormUrlEncodedMediaTypeFormatter: Supports reading the data into FormDataCollection.
- JQueryMvcFormUrlEncodedFormatter: Supports reading the data into both FormDataCollection and custom types such as our Employee class. JQueryMvcFormUrlEncodedFormatter derives from FormUrlEncodedMediaTypeFormatter.
Neither of these two formatters serializes CLR types into the media type of application/x-www-form-urlencoded, as you can infer from the false returned by the CanWriteType method.
- Modify EmployeesController as shown in Listing 5-12. Note the parameter of the Post action method, which is FormDataCollection.
Listing 5-12. The Revised POST Action Method
using System.Diagnostics;
using System.Net.Http.Formatting;
using System.Web.Http;

public class EmployeesController : ApiController
{
    public void Post( FormDataCollectiondata)
    {
        Trace.WriteLine(data.Get("firstName"));
        Trace.WriteLine(data.Get("lastName"));
    }
} - Add a breakpoint in the starting brace of the preceding action method.
- Copy and paste the code in Listing 5-13 into the /Home/Index view of the same project where you have the web API. The file corresponding to this view will be Index.cshtml in the ViewsHome folder. It is not mandatory to use an ASP.NET MVC controller and a view. You can even have this as a static HTML file.
Listing 5-13. Home/IndexView
<form action="/api/employees" method="post">
    <div>
        <label for="firstname">First Name:</label>
        <input type="text" name="firstname"/>
    </div>
    <div>
        <label for="lastname">Last Name:</label>
        <input type="text" name="lastname"/>
    </div>
    <input type="submit" value="Submit"/>
</form> - Rebuild the solution and run the project in Visual Studio. The home page is displayed.
- Enter your first and last name and click Submit.
- The breakpoint will be hit. Inspect the FormDataCollection parameter. It will have the data you entered in the form. Press F10 twice to verify that the two Trace statements inside the action method write the first and the last names.
- To bind the form data to the FormDataCollection, ASP.NET Web API uses FormUrlEncodedMediaTypeFormatter. You can verify this by turning on tracing using System.Diagnostics. Go to Tools ➤ Library Package Manager ➤ Package Manager Console. At the prompt PM>, type the command shown in Listing 5-14 and press Enter.
Listing 5-14. Installing the NuGet Package
Install-Package Microsoft.AspNet.WebApi.Tracing - In the Register method of WebApiConfig in the App_Start folder, add the line shown in Listing 5-15.
Listing 5-15. Enabling Tracing
config.EnableSystemDiagnosticsTracing(); - With this change, post the form again. Review the lines that are written into the Output window of Visual Studio. Listing 5-16 shows the output. All the lines are trimmed and some of the lines are removed for brevity. You can see that ASP.NET Web API uses FormUrlEncodedMediaTypeFormatter to read the request into FormDataCollection.
Listing 5-16. Trace Output
Message='Employees', Operation=DefaultHttpControllerSelector.SelectController
Message='HelloWebApi.Controllers.EmployeesController',
Operation=DefaultHttpControllerActivator.Create
Message='HelloWebApi.Controllers.EmployeesController',
Operation=HttpControllerDescriptor.CreateController
Message='Selected action 'Post(FormDataCollection data)'',
Operation=ApiControllerActionSelector.SelectAction
Message='Value read='System.Net.Http.Formatting.FormDataCollection'',Operation= FormUrlEncodedMediaTypeFormatter.ReadFromStreamAsync
Message='Parameter 'data' bound to the value 'System.Net.Http.Formatting.FormDataCollection'',
Operation=FormatterParameterBinding.ExecuteBindingAsync
Message='Model state is valid. Values: data=System.Net.Http.Formatting.FormDataCollection',
Operation=HttpActionBinding.ExecuteBindingAsync
Message='Action returned 'null'',Operation=ReflectedHttpActionDescriptor.ExecuteAsync
Operation=ApiControllerActionInvoker.InvokeActionAsync, Status=204 (NoContent)
Operation=EmployeesController.ExecuteAsync, Status=204 (NoContent)
Response, Status=204 (NoContent), Method=POST, Url= http://localhost:55778/api/employees ,
Message='Content-type='none', content-length=unknown'
Operation=CultureHandler.SendAsync, Status=204 (NoContent)
Operation=EmployeesController.Dispose
This exercise is similar to Exercise 5.6.1, but instead of using the FormDataCollection parameter, it uses a custom model class Employee that we have been using all along in this book as the action method parameter.
- Modify the POST action method of EmployeesController, as shown in Listing 5-17. Also, add a breakpoint in the starting brace of the Post action method.
Listing 5-17. POST Action Method Using a Complex Type Parameter
public int Post( Employeeemployee)
{
    return new Random().Next();
} - Rebuild the solution and run the project in Visual Studio. The home page is displayed.
- Enter the first and last names and click Submit.
- Inspect the action parameter when the breakpoint is hit. You will see that the form data is used to populate the corresponding properties of the Employee parameter correctly.
- From the trace written to the Output window, you can see that ASP.NET Web API uses JQueryMvcFormUrlEncodedFormatter this time to read the request body into the Employee type parameter.
FormatterParameterBinding      ExecuteBindingAsync      Binding parameter 'employee'
JQueryMvcFormUrlEncodedFormatter      ReadFromStreamAsync      Type='Employee',
content-type='application/x-www-form-urlencoded'     JQueryMvcFormUrlEncodedFormatter
ReadFromStreamAsync      Value    read='HelloWebApi.Models.Employee'
In the previous steps we posted an HTML form from the browser by clicking the Submit button and making a web API call. This was only for illustration. In practice, you will never be posting by submitting a page. Instead, you will use a client-side script library like jQuery. Let us now modify our page to submit the form using jQuery AJAX.
- Replace the existing markup in /Home/View by copying and pasting the code from Listing 5-18.
Listing 5-18. /Home/Index View Making an Ajax Call
@section scripts{
    <script type="text/javascript">
        $.support.cors = true; // Needed for IE

        $(document).ready(function () {
            $('#btnPost').click(function () {
                $.post(" http://localhost:55778/api/employees ",
                                $('#employeeForm').serialize())
                    .done(function (data) { alert("New employee created. ID is " + data); })
                        .fail(function () { alert("Error creating employee"); });
            });
        });
    </script>
}

<form id="employeeForm" action=" http://localhost:37276/api/employees " method="post">
    <div>
        <label for="firstname">First Name:</label>
        <input type="text" name="firstname" />
    </div>
    <div>
        <label for="lastname">Last Name:</label>
        <input type="text" name="lastname" />
    </div>
    <input type="submit" value="Submit" />
    <input id="btnPost" type="button" value="jQuery POST" />
</form> - Rebuild the solution and run the project in Visual Studio. The home page is displayed. Enter a first and last name and click jQuery POST.
- The breakpoint in the action method is hit. Inspect the Employee parameter and press F5 to continue.
- The alert box is displayed with the ID of the newly added employee. Of course, it is just a random number that we generate inside the action method for illustration.
- jQuery serializes the form and makes a POST with Content-Type: application/x-www-form-urlencoded. Because Accept: */* is sent, the response comes back as JSON, which jQuery is able to parse and get the new ID.
Request POST http://localhost:55778/api/employees HTTP/1.1
Accept: */*
Content-Type: application/x-www-form-urlencoded
X-Requested-With: XMLHttpRequestContent-Length: 35
firstname=John&lastname=Human+BeingResponse HTTP/1.1 200 OK
Content-Type: application/json; charset=utf-8
Content-Length: 9
544421176
5.6.3 Binding to a Simple Type
ASP.NET Web API can bind the form-URL-encoded data into a simple type parameter as well. We have seen in the previous exercises that the [FromBody] attribute will need to be applied to an action method parameter to let ASP.NET Web API bind the request body to a simple type. In Exercise 5.6.2, to bind to a complex type (our Employee type), we sent two name-value pairs: firstname=John&lastname=Human+Being. In the case of binding to a simple type, only one value can be sent, since the body must be used as a whole for binding. Also, a name-value pair cannot be sent; the value prefixed with an equal sign is all that can be sent.
- Modify the POST action method of EmployeesController as shown in Listing 5-19. The action method has a parameter of type string.
Listing 5-19. POST Action Method Accepting a Simple Type
public void Post([ FromBody]string lastName)
{
    Trace.WriteLine(lastName);
} - Rebuild the solution and press F5 to run the project in Visual Studio.
- From Fiddler's Composer tab, make a POST to http://localhost:55778/api/employees. Remember to replace the port 55778 with the actual port that your application runs on. Copy and paste Content-Type: application/x-www-form-urlencoded into the Request Headers text box and =Human+Being into the Request Body box. Click Execute. The request message will be as follows:
POST http://localhost:55778/api/employees HTTP/1.1
Host: localhost:55778
Content-Type: application/x-www-form-urlencoded
Content-Length: 12

=Human+Being - When the execution breaks, inspect the lastName parameter. ASP.NET Web API should have set it to Human Being.
You can also use jQuery to submit a single value, as shown in Listing 5-20.
Listing 5-20. jQuery Posting a Single Value (/Home/Index View)
@section scripts{
    <script type="text/javascript">
        $.support.cors = true; // Needed for IE

        $(document).ready(function () {
            $('#btnPost').click(function () {
                $.post(" http://localhost:55778/api/employees ",
                                $('#employeeForm').serialize())
                    .done(function (data) { alert("New employee created. ID is " + data); })
                        .fail(function () { alert("Error creating employee"); });
            });

            $('#btnPostPartial').click(function () {
                $.post(" http://localhost:55778/api/employees ",
                                { "": $('#lastname').val() })
                    .done(function (data) { alert("Success"); })
                        .fail(function () { alert("Error creating employee"); });
            });
        });
    </script>
}

<form id="employeeForm" action=" http://localhost:55778/api/employees " method="post">
    <div>
        <label for="firstname">First Name:</label>
        <input type="text" id="firstname" name="firstname" />
    </div>
    <div>
        <label for="lastname">Last Name:</label>
        <input type="text" id="lastname"name="lastname" />
    </div>
    <input type="submit" value="Submit" />
    <input id="btnPost" type="button" value="jQuery POST" />
    <input id="btnPostPartial" type="button" value="jQuery POST Partial" />
</form>
![]() Note ASP.NET Web API can bind form-URL-encoded data to a collection such as List<int>, which is a complex type. By default, ASP.NET Web API binds the request body to a complex type and hence there is no need for the [FromBody] attribute. For example, if you have an action method public void Post(List<int> numbers) {}, by making an HTTP POST with the request body of =1&=2&=3&=4, you can make ASP.NET Web API set the numbers parameter to a list of four integers: 1, 2, 3, and 4.
Note ASP.NET Web API can bind form-URL-encoded data to a collection such as List<int>, which is a complex type. By default, ASP.NET Web API binds the request body to a complex type and hence there is no need for the [FromBody] attribute. For example, if you have an action method public void Post(List<int> numbers) {}, by making an HTTP POST with the request body of =1&=2&=3&=4, you can make ASP.NET Web API set the numbers parameter to a list of four integers: 1, 2, 3, and 4.
5.7 Binding dd/MM/yyyy Dates
In this exercise, you will see how to make ASP.NET Web API bind the message content to a DateTime parameter. By default, ASP.NET Web API returns the date in ISO 8601 format; for example 2nd June 1998 is 1998-06-02T00:00:00. If the incoming request payload contains the date in the same format, the Web API will have no trouble correctly binding the parameter. When the client sends a date in some other format, say dd/MM/yyyy, a bit more work is required. This exercise is related to Exercise 3.4.3, Internationalizing the Dates, which demonstrated the formatting of the date into the response content This exercise covers deserialization; that is, binding the date from the request message to a DateTime parameter.
- Continue to use the same project from the previous exercise.
- Add a property to the Employee class representing the date the employee joined the organization, with a name of Doj of type DateTime, as shown in Listing 5-21.
Listing 5-21. Employee Class with Date of Joining
using System;

namespace RequestBinding.Models
{
    public class Employee
    {
        public int Id { get; set; }
        public string FirstName { get; set; }
        public string LastName { get; set; }

        public DateTime Doj { get; set; }
    }
} - Modify the Post action method of EmployeesController as shown in Listing 5-22. Put a breakpoint on the opening brace of the action method.
Listing 5-22. Action Method Handling POST
public void Post(Employee employee)
{
    // Do Nothing
} - Rebuild the solution and run the project in Visual Studio.
- From Fiddler's Composer tab, make a POST to http://localhost:55778/api/employees. Remember to replace the port 55778 with the actual port that your application runs on. Copy and paste Content-Type: application/json into the Request Headers text box and {"Id":12345,"FirstName":"John","LastName":"Human","Doj":"1998-06-02T00:00:00"} into the Request Body box. Click Execute.
- When the execution breaks, inspect the Employee parameter. You will notice that ASP.NET Web API has correctly bound the request to the Doj property, which is set to June 02, 1998.
- Repeat the POST, changing only the Doj:
{"Id":12345,"FirstName":"John","LastName":"Human","Doj": "06/02/1998"}
ASP.NET Web API has again correctly bound the request to the Doj property, which is set to June 02, 1998. Of course, the correctness depends on which side of the Atlantic you are on! I have regional settings of English (United States) in my computer, so this interpretation is not surprising. But if you are used to dd/MM/yyyy format, it is not correct and you will be expecting February 06, 1998 instead.
- To let ASP.NET Web API use the dd/MM/yyyy format while binding, change the SerializerSettings of JsonFormatter in the Register method of WebApiConfig in the App_Start folder, as shown in Listing 5-23. You might have a few more lines of code from the previous exercises in this class, but those lines will have no bearing on the outcome of this exercise. You can leave them as they are or comment them out.
Listing 5-23. Registering the Value Provider
public static class WebApiConfig
{
    public static void Register(HttpConfiguration config)
    {
        config.Routes.MapHttpRoute(
            name: "DefaultApi",
            routeTemplate: "api/{controller}/{id}",
            defaults: new { id = RouteParameter.Optional }
        );

        config.Formatters.JsonFormatter .SerializerSettings.Culture =                                            new System.Globalization .CultureInfo("en-GB");
    }
} - Rebuild the solution and run the project in Visual Studio. Reissue the same POST. When the execution breaks in the action method, inspect the Doj property of the Employee parameter. Now, the Doj property is February 06, 1998.
This is great as long as your application can work with only one culture. It is not a scalable solution if you must handle multiple cultures at the same time on a per-request basis. As an alternative, we saw the request header Accept-Language being used for localization in the exercises in Chapter 4. We can use the same header to decide on the fly how the model should be bound.
- Create a new class DateTimeConverter deriving from DateTimeConverterBase, as shown in Listing 5-24.
Listing 5-24. The DateTimeConverter Class
using System;
using Newtonsoft.Json;
using Newtonsoft.Json.Converters;

public class DateTimeConverter : DateTimeConverterBase
{
    public override object ReadJson(JsonReader reader, Type objectType,
                                         object existingValue, JsonSerializer serializer)
    {
        return DateTime.Parse(reader.Value.ToString());
    }

    public override void WriteJson(JsonWriter writer, object value, JsonSerializer serializer)
    {
        writer.WriteValue(((DateTime)value).ToString());
    }
} - For the converter to work correctly, Thread.CurrentCulture must be set correctly and based on Accept-Language. We will use the same message handler created in Chapter 3 for this purpose. Create a new class with a name of CultureHandler and copy and paste the code from Listing 5-25, which shows the earlier code here for your easy reference.
Listing 5-25. A Culture Message Handler
using System;
using System.Collections.Generic;
using System.Globalization;
using System.Linq;
using System.Net.Http;
using System.Threading;
using System.Threading.Tasks;

public class CultureHandler : DelegatingHandler
{
    private ISet<string> supportedCultures = new HashSet<string>() { "en-us", "en", "fr-fr", "fr" };

    protected override async Task<HttpResponseMessage> SendAsync(HttpRequestMessage request,
                                                            CancellationToken cancellationToken)
    {
        var list = request.Headers.AcceptLanguage;
        if (list != null && list.Count > 0)
        {
            var headerValue = list.OrderByDescending(e => e.Quality ?? 1.0D)
                                    .Where(e => !e.Quality.HasValue ||
                                                e.Quality.Value > 0.0D)
                                    .FirstOrDefault(e => supportedCultures
                                            .Contains(e.Value, StringComparer.OrdinalIgnoreCase));

            // Case 1: We can support what client has asked for
            if (headerValue != null)
            {
                Thread.CurrentThread.CurrentUICulture =
                                CultureInfo.GetCultureInfo(headerValue.Value);

                Thread.CurrentThread.CurrentCulture = Thread.CurrentThread.CurrentUICulture;
            }


            // Case 2: Client is okay to accept anything we support except
            // the ones explicitly specified as not preferred by setting q=0
            if (list.Any(e => e.Value == "*" &&
                    (!e.Quality.HasValue || e.Quality.Value > 0.0D)))
            {
                var culture = supportedCultures.Where(sc =>
                                        !list.Any(e =>
                                                e.Value.Equals(sc,                                                        StringComparison.OrdinalIgnoreCase) &&
                                                    e.Quality.HasValue &&
                                                        e.Quality.Value == 0.0D))
                                                            .FirstOrDefault();
                if (culture != null)
                {
                    Thread.CurrentThread.CurrentUICulture =
                                        CultureInfo.GetCultureInfo(culture);

                    Thread.CurrentThread.CurrentCulture = Thread.CurrentThread.CurrentUICulture;
                }
            }
        }

        return await base.SendAsync(request, cancellationToken);
    }
} - Add the converter to the list of converters and the handler to the handlers collection in WebApiConfig in the App_Start folder, as shown in Listing 5-26. Also, comment out the line of code that hard-coded the culture to en-GB.
Listing 5-26. WebApiConfig with Converter and Handler Added
public static class WebApiConfig
{
    public static void Register(HttpConfiguration config)
    {
        config.Routes.MapHttpRoute(
            name: "DefaultApi",
            routeTemplate: "api/{controller}/{id}",
            defaults: new { id = RouteParameter.Optional }
        );

       //config.Formatters.JsonFormatter
       //    .SerializerSettings.Culture = new System.Globalization.CultureInfo("en-GB");

        config.Formatters.JsonFormatter
            .SerializerSettings
                .Converters.Add(new DateTimeConverter());

        config.MessageHandlers.Add(new CultureHandler());
    }
} - Rebuild the solution and run the project in Visual Studio.
- From Fiddler's Composer tab, make a POST to http://localhost:55778/api/employees. Remember to replace the port 55778 with the actual port that your application runs on. Copy and paste the two headers Content-Type: application/json and Accept-Language: fr-fr into the Request Headers text box and {"Id":12345,"FirstName":"John","LastName":"Human","Doj":" 06/02/1998"} into Request Body. Click Execute.
- When the execution breaks in the action method, inspect the Doj property of the Employee parameter. Now, the property is February 06, 1998.
- Repeat the request with Accept-Language: en-us, the Doj property becomes June 02, 1998. As you can see, our solution is flexible now. ASP.NET Web API binds the value in the request to Doj based on the Accept-Language header.
In this exercise, you will use a custom TypeConverter to convert a single query string parameter to a complex type, which is a custom class named Shift. The Shift class has a DateTime property, which needs to be bound correctly from the query string parameter. Since the data is read from the query string, the binding type is model binding. In the previous exercise, the data was read from the request body and hence it was parameter binding.
For this exercise, our use case is to get a list of employees based on a shift on a given day. A shift starts and ends the same day. So the search criteria model, which is the Shift class, has a DateTime component which stores the day and two TimeSpan components representing the start and end times. You can model this in multiple ways, but that is not the point of this exercise. Assume this will be the model to which the query string data must be bound.
The query string value is in the form of a date, followed by a T, followed by hours and minutes of the start time, followed by a T and then the hours and minutes of the end time. For example, a request with Accept-Language: en-us with query string of shift=06/02/2012T0800T1700 needs to be bound to a Shift object with a Date of June the 2nd and Start and End properties of 8 hours and 17 hours respectively. When the Accept-Language header is fr-fr, the date will be February the 6th.
- Continue to use the project from the previous exercise.
- Add the model class Shift to the Models folder, as shown in Listing 5-27.
Listing 5-27. The Shift Model
public class Shift
{
    public DateTime Date { get; set; }

    public TimeSpan Start { get; set; }

    public TimeSpan End { get; set; }
} - Add an action method to EmployeesController to handle GET, as shown in Listing 5-28.
Listing 5-28. The GET Action Method
public HttpResponseMessage Get(Shift shift)
{
    // Do something with shift

    var response = new HttpResponseMessage(HttpStatusCode.OK)
    {
        Content = new StringContent("")
    };

    return response;
} - Rebuild the solution. Set a breakpoint in the starting brace of the Get action method. Run the project in Visual Studio.
- From Fiddler's Composer tab, make a GET to http://localhost:55778/api/employees?shift=06/02/2012T0800T1700. Copy and paste the header Accept-Language: en-us into the Request Headers box and click Execute.
- As expected, the Shift parameter is null, since ASP.NET Web API will not be able to create the complex type out of the query string parameter.
- Now, create a new class ShiftTypeConverter that derives from TypeConverter, as shown in Listing 5-29. Notice two things about this code:
- a. The overridden CanConvertFrom method accepts a Type. We check whether this is string and return true. The framework calls this to see if our converter can be used.
- b. The overridden ConvertFrom method does the actual conversion: parse the data from the query string, which is of type value, and return a new Shift object.
Listing 5-29. The ShiftTypeConverter Class
using System;
using System.ComponentModel;
using System.Globalization;
using RequestBinding.Models;

public class ShiftTypeConverter : TypeConverter
{
    public override bool CanConvertFrom(ITypeDescriptorContext context, Type sourceType)
    {
        if (sourceType == typeof(string))
            return true;

        return base.CanConvertFrom(context, sourceType);
    }

    public override object ConvertFrom(ITypeDescriptorContext context,
                                                    CultureInfo culture, object value)
    {
        if (value is string)
        {
            var parts = ((string)value).Split('T'),

            DateTime date;
            if (DateTime.TryParse((string)parts[0], out date))
            {
                return new Shift()
                    {
                        Date = date,
                        Start = parts[1].ToTimeSpan(),
                        End = parts[2].ToTimeSpan()
                    };
            }
        }

        return base.ConvertFrom(context, culture, value);
    }
} - ToTimeSpan is an extension method I have written for parsing the time part; it is shown in Listing 5-30.
Listing 5-30. The ToTimeSpan Extension Method
public static class TimeHelper
{
    public static TimeSpan ToTimeSpan(this string time)
    {
        int hour = Int32.Parse(time.Substring(0, 2));
        int min = Int32.Parse(time.Substring(2, 2));

        return new TimeSpan(hour, min, 0);
    }
} - To plug the converter in, apply the TypeConverter attribute to the Shift class, at the class level, as shown in Listing 5-31.
Listing 5-31. The Shift Class with TypeConverter
using System;
using System.ComponentModel;

[TypeConverter(typeof(ShiftTypeConverter))]
public class Shift
{
        public DateTime Date { get; set; }

        public TimeSpan Start { get; set; }

        public TimeSpan End { get; set; }
}
We are all set. For the converter to read and parse the date correctly, we need Thread.CurrentThread.CurrentCulture to be set correctly to the locale sent in the Accept-Language header. The CultureHandler method we saw earlier takes care of this for you when plugged into the pipeline.
- Rebuild the solution. Set a breakpoint in the starting brace of the Get action method, if it is not already set. Run the project in Visual Studio.
- From Fiddler's Composer tab, make a GET to http://localhost:55778/api/employees?shift=06/02/2012T0800T1700. Copy and paste the header Accept-Language: en-us into the Request Headers text box and click Execute.
Now, the Shift parameter is correctly set, with the Date property set to June the 2nd.
- Issue another GET to the same URI with Accept-Language changed to fr-fr. The Shift parameter is correctly set this time as well, with Date property set to February the 6th.
We saw in Exercise 5.4 earlier that a complex type can be bound from a query string. What is the difference here? In Exercise 5.4, the complex type was mapped from multiple query string parameters, with property names matching exactly the query string parameter field name. But in this exercise, we converted the value from one query string parameter into a complex Shift type, hence the use of TypeConverter.
5.9 Creating a Custom Value Provider
In the preceding exercises of this chapter, I showed how the ASP.NET Web API framework binds the incoming HTTP request message, specifically the route data and the query string part of the URI. This is called model binding, the same concept you will be familiar with if you have ASP.NET MVC experience. There are two entities in action here: the model binder and the value provider . The job of a value provider is to get data from the HTTP request message and feed the values into a model binder to build the model. The value provider abstraction ensures that a model binder is decoupled from the details of the request message. There are two extensibility options associated with model binding:
- A custom Value Provider, implementing IValueProvider
- A custom Model Binder, implementing IModelBinder
The value provider reads a value and maps that to a simple type, typically without any conversion. The model binder builds a model, typically a complex type, based on the values provided by the value providers. Though it is possible to build a model based on entities outside of the request message URI, it is typical for a model binder to limit the scope to the request URI. After all, model binding is limited to the request URI. For binding a model based on entities outside the URI and even outside the request itself, you can use parameter binding.
![]() Note A custom value provider or a model binder is applicable only for model binding. If you have experience with ASP.NET MVC, where there is only model binding, it might be difficult at times to realize that model binding is for the URI path and query string only and not for the message body, which is bound by formatter binding.
Note A custom value provider or a model binder is applicable only for model binding. If you have experience with ASP.NET MVC, where there is only model binding, it might be difficult at times to realize that model binding is for the URI path and query string only and not for the message body, which is bound by formatter binding.
In this exercise, you will create a custom value provider that gets the value from an HTTP header. To create a new custom value provider, you need to implement the IValueProvider interface and subclass the abstract class ValueProviderFactory.
By default, the model binding acts on the URI path and query, while the formatter binding acts on the request message body. There is no binder out of the box for reading headers. So this exercise shows the steps to create a value provider that does the same thing. A value provider does nothing fancy. As the name indicates, it just provides a value based on some part of the HTTP request message, for the out-of-the-box binders or your own custom binder to bind the values to a model, which could very well be a complex type. A value provider, however, just provides value for simple types.
Before we start writing code, it is important to understand that a request can contain multiple headers of same name but with different values. Not all, but some of them can. The multiple values can also be put into one header with a comma separating them. For example, the following two requests are the same and are valid.
Request 1
GET http://localhost:55778/api/employees HTTP/1.1
Host: localhost:55778
Accept: application/xml; q=0.2
Accept: application/json; q = 0.3

Request 2
GET http://localhost:55778/api/employees HTTP/1.1
Host: localhost:55778
Accept: application/xml; q=0.2, application/json; q = 0.3
Our custom value provider must handle these cases. If there are multiple values, they will be bound to a list, as in IEnumerable<T>. If one value, it will be bound to just a simple type. Another point for consideration is the naming convention. HTTP headers typically contain hyphens, while C# variables do not. The value provider must be able to ignore the hyphens and retrieve the value from the header.
- Continue to use the same project from the previous exercise.
- Comment out the public HttpResponseMessage Get(Shift shift) { ... } action method in EmployeesController from the previous exercise.
- Add an action method to EmployeesController to handle HTTP GET, as shown in Listing 5-32. The ModelBinder attribute is applied to the ifmatch parameter. By doing this, we are telling Web API that this parameter must be populated using model binding. Web API will figure out the correct value provider, which is HeaderValueProvider, our custom provider, since we will register the corresponding factory. Or we can tell Web API explicitly to use our value provider, like so:
Get([ValueProvider(typeof(HeaderValueProviderFactory))]IEnumerable<string> ifmatch)
Listing 5-32. The GET Action Method with ModelBinder Applied to the Parameter
public HttpResponseMessage Get(
                      [System.Web.Http.ModelBinding.ModelBinder]IEnumerable<string> ifmatch)
{
    var response = new HttpResponseMessage(HttpStatusCode.OK)
    {
        Content = new StringContent(ifmatch.First().ToString())
    };

    return response;
} - Place a breakpoint in the starting curly brace of the Get action method.
- Create a class HeaderValueProvider implementing IValueProvider, as shown in Listing 5-33.
- a. The ContainsPrefix method will be called by the model binder to see if our value provider can provide a value. If this method returns true, our value provider will be chosen by the model binder to provide the value through the GetValue method.
- b. The GetValue method gets the value from the headers based on the key passed in and returns it as a new ValueProviderResult object. The basic objective of the method is to map the incoming key, which is the name of the parameter, to a request header. There are three possible scenarios: (1) if the GetValues method of HttpHeaders returns a list with more than one item, it returns that list as IEnumerable. (2) If the list contains only one item but the value is a comma separated list of values, it splits the individual values and returns them as IEnumerable. (3) If the value is just a normal and a single value, GetValue returns it as-is.
Listing 5-33. A Custom Value Provider Class
using System;
using System.Collections.Generic;
using System.Globalization;
using System.Linq;
using System.Net.Http.Headers;
using System.Web.Http.ValueProviders;

public class HeaderValueProvider : IValueProvider
{
    private readonly HttpRequestHeaders headers;

    // The function to test each element of the header, which is a KeyValuePair
    // for matching key ignoring the dashes. For example, the If-Match header
    // will be chosen if the parameter is defined with a name ifmatch, ifMatch, etc.
    private Func<KeyValuePair<string, IEnumerable<string>>, string, bool> predicate =
        (header, key) =>
        {
            return header.Key.Replace("-", String.Empty)
                                .Equals(key, StringComparison.OrdinalIgnoreCase);
        };

    public HeaderValueProvider(HttpRequestHeaders headers)
    {
        this.headers = headers;
    }

    public bool ContainsPrefix(string prefix)
    {
        return headers.Any(h => predicate(h, prefix));
    }

    public ValueProviderResult GetValue(string key)
    {
        var header = headers.FirstOrDefault(h => predicate(h, key));

        if (!String.IsNullOrEmpty(header.Key))
        {
            key = header.Key; // Replace the passed-in key with the header name

            var values = headers.GetValues(key);

            if (values.Count() > 1) // We got a list of values
                return new ValueProviderResult(values, null, CultureInfo.CurrentCulture);
            else
            {
                // We could have received multiple values (comma separated) or just one value
                string value = values.First();
                values = value.Split(',').Select(x => x.Trim()).ToArray();
                if (values.Count() > 1)
                    return new ValueProviderResult(values, null, CultureInfo.CurrentCulture);
                else
                    return new ValueProviderResult(value, value, CultureInfo.CurrentCulture);
            }
        }

        return null;
    }
} - Create a class HeaderValueProviderFactory inheriting from ValueProviderFactory, as shown in Listing 5-34. Override the GetValueProvider method to return an instance of our custom value provider.
Listing 5-34. A Value Provider Factory
using System.Web.Http.Controllers;
using System.Web.Http.ValueProviders;

public class HeaderValueProviderFactory : ValueProviderFactory
{
    public override IValueProvider GetValueProvider(HttpActionContext actionContext)
    {
        var request = actionContext.ControllerContext.Request;

        return new HeaderValueProvider(request.Headers);
    }
} - Register the value provider factory in the Register method of WebApiConfig in the App_Start folder, as shown in Listing 5-35. You might have few more lines of code from the previous exercises in this class but those lines have no bearing on the outcome of this exercise. You can leave them as they are or comment them out.
Listing 5-35. Registering the Value Provider
public static class WebApiConfig
{
    public static void Register(HttpConfiguration config)
    {
        config.Routes.MapHttpRoute(
            name: "DefaultApi",
            routeTemplate: "api/{controller}/{id}",
            defaults: new { id = RouteParameter.Optional }
        );

        //config.Formatters.JsonFormatter
        //    .SerializerSettings.Culture = new System.Globalization.CultureInfo("en-GB");

        config.Services.Add(typeof(
                           System.Web.Http.ValueProviders.ValueProviderFactory),
                                                new HeaderValueProviderFactory());

        config.Formatters.JsonFormatter
            .SerializerSettings
                .Converters.Add(new DateTimeConverter());

        config.EnableSystemDiagnosticsTracing();

        config.MessageHandlers.Add(new CultureHandler());

    }
} - Rebuild the solution and run the project in Visual Studio.
- Issue a GET request using Fiddler for http://localhost:55778/api/employees, specifying the request header: If-Match:hello in the Request Headers text box.
- Inspect the action method's ifmatch parameter when the execution breaks. It is now a list of one value, which is hello.
- Issue another GET request to the same URI. Have two headers, as follows:
If-Match:hello
If-Match:world - The action method ifmatch parameter is now a list of two values, which are hello and world.
- Issue another GET request using Fiddler for http://localhost:55778/api/employees, specifying the request header If-Match:hello, world in the Request Headers text box.
- The action method's ifmatch parameter continues to be a list of two values, which are hello and world.
- You can change the parameter type from IEnumerable<string> to string and pass a single header for the value to be mapped correctly. If you pass multiple values, the first one will be mapped to the parameter.
![]() Note At this point, you might wonder why we bother creating a value provider, when the headers can be directly read from the request in the action method. First of all, the value provider encapsulates the logic of getting the value from the header. We can reuse it in all the places we need the data from the headers. Second, the action method has no dependency on the request object, and unit-testing the action method will be easier.
Note At this point, you might wonder why we bother creating a value provider, when the headers can be directly read from the request in the action method. First of all, the value provider encapsulates the logic of getting the value from the header. We can reuse it in all the places we need the data from the headers. Second, the action method has no dependency on the request object, and unit-testing the action method will be easier.
5.10 Creating a Custom Model Binder
In this exercise, you will create a custom model binder. We saw in the preceding exercises that a type converter reads a value and performs some conversion steps before creating a complex type, whereas a value provider reads a value and maps that to a simple type, typically without any conversion. A model binder, on the other hand, builds a model, typically a complex type, based on the values provided by one or more value providers.
To understand the custom model binder, consider an analogy. If a chef is making the Italian dessert tiramisu, she needs ladyfingers (Savoiardi). She need not make the ladyfingers herself. The chef can have someone else provide it, and she can concentrate on the core business of making tiramisu using the ladyfingers and other ingredients. Now, the chef is the model binder. Whoever provides the ladyfingers is the value provider, and the value is the ladyfinger. The model binder creates the model, which is tiramisu! (This is just an analogy though, so don't read too much into it!)
Let us get on with creating the custom model binder. The URI from which our custom model binder will extract data is http://localhost:55778/api/employees?dept=eng&dept=rch&doj=06/02/2012. The request message has a custom header X-CTC-Based, which will need to be bound to the model as well. We will create a custom model binder that will cook up a nice single model based on the URI as well as the header.
- Continue to use the same project from the previous exercise.
- Comment out the public HttpResponseMessage Get([ModelBinder]IEnumerable<string> ifmatch) { ... } action method in EmployeesController from the previous exercise.
- Add an action method to handle HTTP GET, as shown in Listing 5-36. Since the parameter is a complex type, we apply the ModelBinder attribute to the parameter and also let the framework know that the custom binder provided by TalentScoutModelBinderProvider must be used.
Listing 5-36. The GET Action Method with Custom Model Binder
using System.Net;
using System.Net.Http;
using System.Web.Http;
using System.Web.Http.ModelBinding;
using RequestBinding.Models;

public class EmployeesController : ApiController
{
    public HttpResponseMessage Get(
                              [ModelBinder(typeof(TalentScoutModelBinderProvider))]
                                   TalentScout scout)
    {
        // Do your logic with scout model
        var response = new HttpResponseMessage(HttpStatusCode.OK)
        {
            Content = new StringContent("")
        };

        return response;
    }
} - Place a breakpoint in the starting curly brace of the Get action method.
- Create a model class named TalentScout in the Models folder, as shown in Listing 5-37. The Departments list and Doj will be bound from the query string, whereas IsCtcBased will be based on the header. As in the other exercises, the date will be parsed according to the thread culture.
Listing 5-37. The TalentScout Model
public class TalentScout
{
        public IList<string> Departments { get; set; }
        public bool IsCtcBased { get; set; }
        public DateTime Doj { get; set; }
} - Create the provider class TalentScoutModelBinderProvider deriving from ModelBinderProvider, as shown in Listing 5-38.
Listing 5-38. A Binder Provider
using System;
using System.Web.Http;
using System.Web.Http.ModelBinding;

public class TalentScoutModelBinderProvider : ModelBinderProvider
{
    public override IModelBinder GetBinder(HttpConfiguration configuration, Type modelType)
    {
        return new TalentScoutModelBinder();
    }
} - Create the custom model binder class that implements IModelBinder, as shown in Listing 5-39. The BindModel method is the heart of the model binder. This code takes the following steps:
- a. We get the value using context.ValueProvider. If you add a breakpoint and check out its type, it will be CompositeValueProvider. It routes the call to all the registered value providers, including the one we registered as part of Exercise 5.9. This is how we can get the value from different parts of the request message using just one call.
- b. When the call context.ValueProvider.GetValue("dept") is made, the value will be provided by QueryStringValueProvider. We split the values by comma and create a list out of the values.
- c. When the call context.ValueProvider.GetValue("xctcbased") is made, the value will be provided by HeaderValueProvider, the custom value provider we created in Exercise 5.9.
- d. When the call context.ValueProvider.GetValue("doj") is made, the value will be provided once again by QueryStringValueProvider. We parse the value using DateTime.TryParse method. The culture in the thread will be used for this. Since the message handler CultureHandler we created in the previous exercise runs in the ASP.NET Web API pipeline, it will make sure the culture is set in the thread, before execution comes here.
- e. We did not use any value bound from the route. If necessary, we can simply call, for example, context.ValueProvider.GetValue("id"), and change the URI to send the ID in. That value will be returned to us by RouteDataValueProvider.
Listing 5-39. A Custom Model Binder
using System;
using System.Linq;
using System.Web.Http.Controllers;
using System.Web.Http.ModelBinding;
using RequestBinding.Models;

public class TalentScoutModelBinder : IModelBinder
{
    public bool BindModel(HttpActionContext actionContext, ModelBindingContext context)
    {
        var scoutCriteria = (TalentScout)context.Model ?? new TalentScout();

        var result = context.ValueProvider.GetValue("dept");
        if (result != null)
            scoutCriteria.Departments = result.AttemptedValue
                                                    .Split(',')
                                                         .Select(d => d.Trim()).ToList();

        result = context.ValueProvider.GetValue("xctcbased");
        if (result != null)
        {
            int basedOn;
            if (Int32.TryParse(result.AttemptedValue, out basedOn))
            {
                scoutCriteria.IsCtcBased = (basedOn > 0);
            }
        }

        result = context.ValueProvider.GetValue("doj");
        if (result != null)
        {
            DateTime doj;
            if (DateTime.TryParse(result.AttemptedValue, out doj))
            {
                scoutCriteria.Doj = doj;
            }
        }

        context.Model = scoutCriteria;

        return true;
    }
} - Rebuild the solution and run the project in Visual Studio.
- Issue a GET request from the Fiddler Composer tab for http://localhost:55778/api/employees?dept=eng&dept=rch&doj=06/02/2012, specifying two request headers, Accept-Language: fr-fr and X-CTC-Based: 1, in the Request Headers text box.
- When the execution breaks, inspect the TalentScout parameter. The values are bound, as follows:
- a. Departments will be a list of values: eng and rch. The values are taken directly from the query string for the parameter dept.
- b. IsCtcBased will be true. The value is set based on the numeric value in the header X-CTC-Based. Any value greater than zero is considered true.
- c. Doj will be February 06, since we specify fr-fr in the Accept-Language header. The value is taken from the query string parameter doj but parsed based on the culture in the thread. This is done automatically by the .NET framework.
- Reissue the previous request with Accept-Language as en-us and leaving out the X-CTC-Based header. IsCtcBased will be false now. Also, Doj will be June 02.
5.11 Creating a Custom Parameter Binder
The two major types of parameter binding in ASP.NET Web API are model binding and formatter binding, respectively represented by the classes ModelBinderParameterBinding and FormatterParameterBinding. You've seen that model binding binds request URI parts to the action method parameter (simple types, by default) whereas formatter binding binds the request body to the action method parameter (complex types, by default) using media type formatters. Both ModelBinderParameterBinding and FormatterParameterBinding derive from the abstract class HttpParameterBinding.
It is possible to create your own parameter binder by subclassing this abstract class. Typically, a custom parameter binder is created only when the out-of-the-box binding (even after customizing using the extensibility points) is not able to meet your requirements. One good example use case for a custom parameter binder is binding a value that is totally unrelated to the request message. Another example is building your model from multiple request parts: URI, request body, and headers. Out of the box, you can bind from either URI or the request message body but not both. In this exercise, You'll see how to create a custom parameter binder that builds a model from all the three parts: URI, request body, and headers.
For the purpose of this exercise, the incoming request is a PUT request, shown in Listing 5-40.
Listing 5-40. A Request Message
PUT http://localhost:55778/api/employees/12345?doj=6/2/1998 HTTP/1.1
Host: localhost:55778
Content-Length: 41
Content-Type: application/json
X-Affiliation: Green Planet

{"FirstName":"John", "LastName":"Human" }
The model we will bind this request to is the Employee class. The mapping of the request parts to the model will happen as follows:
- The route data 12345 will be mapped to Employee.Id.
- The value 6/2/1998 for the parameter doj in the query string will be mapped to Employee.Doj.
- The value Green Planet in the custom header X-Affiliation will be mapped to Employee. Xaffiliation.
- The values John and Human in the request body will be mapped to Employee.FirstName and LastName respectively.
Take the following steps to create and use a custom parameter binder:
- Continue to use the same project from the previous exercise.
- Implement an action method in EmployeesController to handle HTTP PUT, as shown in Listing 5-41. The method does nothing, but our focus here is to see how the employee parameter is populated from different request parts. Set a breakpoint in the starting brace of the action method and when the execution breaks here, inspect the employee parameter.
Listing 5-41. A PUT Action Method
public void Put(int id, Employee employee)
{
     // Does nothing!
} - Modify the Employee model class to add a new property, as shown in Listing 5-42. I've used the slightly odd name Xaffiliation for the property to match the custom header. This can be fixed by improving the HeaderValueProvider that we created in Exercise 5.9. I'll skip that part, since it is not the focus of this exercise.
Listing 5-42. The Employee Class
public class Employee
{
        public int Id { get; set; }

        public string FirstName { get; set; }

        public string LastName { get; set; }

        public DateTime Doj { get; set; }

        public string Xaffiliation { get; set; }
} - Create a class AllRequestParameterBinding deriving from HttpParameterBinding, as shown in Listing 5-43. There are two private fields, modelBinding and formatterBinding, respectively for model binding and formatter binding. In the constructor, we receive the HttpParameterDescriptor, which we use to get the corresponding binding by calling the GetBinding method on new instances of ModelBinderAttribute and FromBodyAttribute. The first GetBinding method call on the ModelBinderAttribute object returns us an object of type ModelBinderParameterBinding, and the second call returns an object of type FormatterParameterBinding. Of course, for both types, the base type is HttpParameterBinding.
Listing 5-43. The AllRequestParameterBinding Class (Incomplete)
using System.Threading;
using System.Threading.Tasks;
using System.Web.Http;
using System.Web.Http.Controllers;
using System.Web.Http.Metadata;
using System.Web.Http.ModelBinding;
using RequestBinding.Models;

public class AllRequestParameterBinding : HttpParameterBinding
{
    private HttpParameterBinding modelBinding = null;
    private HttpParameterBinding formatterBinding = null;

    public AllRequestParameterBinding(HttpParameterDescriptor descriptor)
                                                                       : base(descriptor)
    {
        // GetBinding returns ModelBinderParameterBinding
        modelBinding = new ModelBinderAttribute().GetBinding(descriptor);

        // GetBinding returns FormatterParameterBinding
        formatterBinding = new FromBodyAttribute().GetBinding(descriptor);
    }

    // other methods go here
} - Override the ExecuteBindingAsync method, as shown in Listing 5-44. The step-wise comments are in the listing.
- a. First, we call the ExecuteBindingAsync method of the formatter binder and retrieve the Employee object that was created based on the request body from the context.
- b. Then we call the ExecuteBindingAsync method of the model binder and retrieve the Employee object that was created based on the URI from the context.
- c. Finally, we merge them both and set the merged object that contains the properties from all the request parts back in the context.
- d. Set a breakpoint anywhere inside the method.
Listing 5-44. The ExecuteBindingAsync Method
public override async Task ExecuteBindingAsync(ModelMetadataProvider metadataProvider,
                                                   HttpActionContext context,
                                                        CancellationToken cancellationToken)
{

    // Perform formatter binding
    await formatterBinding.ExecuteBindingAsync(metadataProvider, context, cancellationToken);

    // and store the resulting model
    var employee = GetValue(context) as Employee;

    // Perform model binding
    await modelBinding.ExecuteBindingAsync(metadataProvider, context, cancellationToken);

    // and store the resulting model
    var employeeFromUri = GetValue(context) as Employee;

    // Apply the delta on top of the employee object resulting from formatter binding
    employee = Merge(employee, employeeFromUri);

    // Set the merged model in the context
    SetValue(context, employee);
} - Listing 5-45 shows the Merge method. It uses reflection to compare the properties and sets the changes to the base model and return that as the merged model. Since we use the C# keywords as variable names, we use the @ symbol to make the compiler happy. There is no other special meaning or importance for the use of @.
Listing 5-45. The Merge Method
private Employee Merge(Employee @base, Employee @new)
{
    Type employeeType = typeof(Employee);

    foreach (var property in employeeType.GetProperties(
                                    BindingFlags.Instance | BindingFlags.Public))
    {
        object baseValue = property.GetValue(@base, null);
        object newValue = property.GetValue(@new, null);

        object defaultValue = property.PropertyType.IsValueType ?
                                    Activator.CreateInstance(property.PropertyType) :
                                        null;

        if(baseValue == null || baseValue.Equals(defaultValue))
            property.SetValue(@base, newValue);
    }

    return @base;
} - Modify the Register method of WebApiConfig in the App_Start folder, as shown in Listing 5-46. Ensure that the line that we added to this method as part of the preceding exercise, to add the HeaderValueProviderFactory, still remains in the method. This is needed by the model binder to bind the value from the header.
Listing 5-46. Registering the Binder
public static class WebApiConfig
{
    public static void Register(HttpConfiguration config)
    {
        config.Routes.MapHttpRoute(
            name: "DefaultApi",
            routeTemplate: "api/{controller}/{id}",
            defaults: new { id = RouteParameter.Optional }
        );

        config.Services.Add(typeof(System.Web.Http.ValueProviders.ValueProviderFactory),
                                                new HeaderValueProviderFactory());

        config.Formatters.JsonFormatter
            .SerializerSettings
                .Converters.Add(new DateTimeConverter());

        config.EnableSystemDiagnosticsTracing();

        config.MessageHandlers.Add(new CultureHandler());

        var rules = config.ParameterBindingRules;
        rules.Insert(0, p =>
        {
            if (p.ParameterType == typeof(Employee))
            {
                return new AllRequestParameterBinding(p);
            }

            return null;
        });
    }
} - Rebuild the solution and run the project in Visual Studio.
- Issue a PUT request from the Fiddler Composer tab for http://localhost:55778/api/employees/12345?doj=6/2/1998, specifying two request headers, Content-Type: application/json and X-Affiliation: Green Planet, in the Request Headers text box. Copy and paste the JSON {"FirstName":"John", "LastName":"Human"} in the Request Body text box. Click Execute.
- Execution must break at the breakpoint you have set in the ExecuteBindingAsync method. Hover the mouse pointer over the modelBinding field. Keep expanding to ModelBinderParameterBinding to ValueProviderFactories. You will see that there are three, and the third one is HeaderValueProviderFactory. Only with the help of this is the model binder able to bind the X-Affiliation header to the Xaffiliation property.
- Press F5 and let execution continue until it breaks again in the action method.
- Inspect the employee parameter. All the properties will be correctly populated from the various parts of the request.
5.12 Creating a Custom Media Formatter
In Chapter 3, we created a custom media formatter for serialization. In this exercise, you will extend the same formatter to bind the request body, which is the fixed-width text, to the action method's Employee type parameter.
The incoming fixed-width text request will take this format: Employee ID will be 6 digits and zero-prefixed, followed by the first name and the last name. Both the names will have a length of 20 characters padded with trailing spaces to ensure the length. Thus, a record for an employee John Human with ID of 12345 will be 012345John<followed by 16 spaces>Human<followed by 15 spaces>.
- Continue to use the same project from the previous exercise.
- Make sure the EmployeesController class has the action method to handle PUT, which we added in Exercise 5.11. Also make sure the breakpoint is still there in the starting brace of the action method.
- Add a new FixedWidthTextMediaFormatter class to the project, as shown in Listing 5-47. This class is taken from Chapter 3. The CanReadType method is modified to return true if the type is Employee.
Listing 5-47. The FixedWidthTextMediaFormatter Class
public class FixedWidthTextMediaFormatter : MediaTypeFormatter
{
    public FixedWidthTextMediaFormatter()
    {
        SupportedEncodings.Add(Encoding.UTF8);
        SupportedEncodings.Add(Encoding.Unicode);

        SupportedMediaTypes.Add(new MediaTypeHeaderValue("text/plain"));
    }

    public override bool CanReadType(Type type)
    {
        //return false;
        return typeof(Employee) == type;
    }

    public override bool CanWriteType(Type type)
    {
        return typeof(IEnumerable<Employee>)
                            .IsAssignableFrom(type);
    }

    public override async Task WriteToStreamAsync(
                                    Type type,
                                        object value,
                                            Stream stream,
                                                HttpContent content,
                                                    TransportContext transportContext)
    {
        using (stream)
        {
            Encoding encoding = SelectCharacterEncoding(content.Headers);

            using (var writer = new StreamWriter(stream, encoding))
            {
                var employees = value as IEnumerable<Employee>;
                if (employees != null)
                {
                    foreach (var employee in employees)
                    {
                        await writer.WriteLineAsync(
                                        String.Format("{0:000000}{1,-20}{2,-20}",
                                                            employee.Id,
                                                                employee.FirstName,
                                                                    employee.LastName));
                    }

                    await writer.FlushAsync();
                }
            }
        }
    }

    // ReadFromStreamAsync method goes here
} - Override the ReadFromStreamAsync method to read the request message body, parse and create an Employee object out of it, as shown in Listing 5-48. We call the SelectCharacterEncoding method from the MediaTypeFormatter base class to get the most appropriate encoding (either the one the client has specifically asked for or the default) and use it to create the StreamReader. Place a breakpoint on the line that creates the new StreamReader.
Listing 5-48. The ReadFromStreamAsync Method
public async override Task<object> ReadFromStreamAsync(
                                Type type,
                                    Stream readStream,
                                        HttpContent content,
                                            IFormatterLogger formatterLogger)
{
    using (readStream)
    {
        Encoding encoding = SelectCharacterEncoding(content.Headers);

        using (var reader = new StreamReader(readStream, encoding))
        {
            string messageBody = await reader.ReadToEndAsync();

            var employee = new Employee();

            employee.Id = Int32.Parse(messageBody.Substring(0, 6));
            employee.FirstName = messageBody.Substring(6, 20).Trim();
            employee.LastName = messageBody.Substring(26, 20).Trim();

            return employee;
        }
    }
} - Register the formatter in the Register method of WebApiConfig in the App_Start folder, as shown in Listing 5-49.
Listing 5-49. Adding the Formatter to the Collection
config.Formatters.Add(
new FixedWidthTextMediaFormatter()); - Rebuild the solution and run the project from Visual Studio.
- Make a PUT request
to http://localhost:55778/api/employees/12345 from the Composer tab of Fiddler. Remember to include Content-Type: text/plain;charset=utf-16, to indicate to the Web API that you are sending fixed-width format text encoded in UTF-16. Copy and paste the following string without quotes into the Request Body text box and click Execute: "012345John Human".
Request PUT http://localhost:55778/api/employees/12345 HTTP/1.1
Host: localhost:55778
Content-Type: text/plain;charset=utf-16 Content-Length: 92
012345John HumanResponse HTTP/1.1 204 No Content - When the execution breaks in the ReadFromStreamAsync method of the media formatter class, inspect the encoding variable. It will be System.Text.UnicodeEncoding, which is UTF-16. So, the MediaTypeFormatter base class is giving us the encoding coming in the request so we can construct the StreamReader object correctly and read the stream.
- Press F5 to let the execution continue. When the execution breaks in the action method, inspect the parameter. It will be set in accordance with what we have sent in the request body.
![]() Note If you leave out charset=utf-16 from the Content-Type header, you will not see any difference other than the encoding returned by the SelectCharacterEncoding method changing to UTF-8. Since we use all English characters and numbers (ASCII characters), it makes no difference, but it is always the best practice to respect the charset in Content-Type header of the request and read the request body accordingly. When you start dealing with charsets corresponding to other languages, this does make a difference.
Note If you leave out charset=utf-16 from the Content-Type header, you will not see any difference other than the encoding returned by the SelectCharacterEncoding method changing to UTF-8. Since we use all English characters and numbers (ASCII characters), it makes no difference, but it is always the best practice to respect the charset in Content-Type header of the request and read the request body accordingly. When you start dealing with charsets corresponding to other languages, this does make a difference.
Summary
One of the powerful features of the ASP.NET Web API framework is binding, the process that creates the parameter objects for your action methods in the controller classes. Binding allows a developer to leave the repetitive work related to HTTP infrastructure to the framework and focus on implementing the business requirements at hand.
The ASP.NET Web API framework reads the route data and the query string of the request URI and sets the parameters of the action methods that are simple types (primitives, DateTime, Guid and so on) by the process called model binding. The out-of-the-box class that performs model binding is ModelBinderParameterBinding. The parameters that are complex types are set based on the HTTP request message body with the help of media type formatters by the process called formatter binding. The out-of-the-box class that performs formatter binding is FormatterParameterBinding. Both classes derive from an abstract class called HttpParameterBinding. By deriving our own custom class from HttpParameterBinding, we can create both simple and complex type parameters from any part of the HTTP request as well as entities outside of the request.
Media formatters have a role to play in both serialization and deserialization. A media formatter can enlist itself in serialization and/or deserialization by returning true when the framework calls the CanWriteType(Type) and CanReadType(Type) methods respectively.
There are various extensibility points available for us to hook our custom code into the binding process, such as creating a custom model binder by implementing IModelBinder, creating a custom value provider by implementing IValueProvider, creating a new media formatter by inheriting from MediaTypeFormatter, extending the capabilities of the out-of-the-box media formatters, creating a new parameter binder by inheriting from HttpParameterBinding, and so on.