
![]()
Using Grunt for Your Build Process
A key factor behind the success of any language is the amount of tooling that is available to automate repetitive tasks. C has makefiles, Java has Ant and Maven, and Ruby has rakefiles. It was only a matter of time before the right tool came along for JavaScript, and that seems to be Grunt. In this chapter, we’ll introduce you to Grunt and explain how you can use it to improve quality, generate production-ready code, and much more. Continuing from the previous chapter, you will also see how you can automate the execution of your unit tests with Grunt.
An Introduction to Grunt
The aim of continuous integration is to improve software quality and reduce the time it takes to deliver production-ready applications by ensuring tests are executed as code changes. Of course, many other tasks happen in a continuous process, but running unit tests is considered the most important.
Grunt (http://gruntjs.com, see Figure 9-1), created by Ben Alman in 2012, has become the default continuous integration tool for JavaScript web applications. Rather than writing your own custom build scripts to execute from the shell or adopting another languages’ build tools, Grunt scripts are written in JavaScript. It is a task-based system that is simply executed from the command line. The only dependency it has is Node.js.
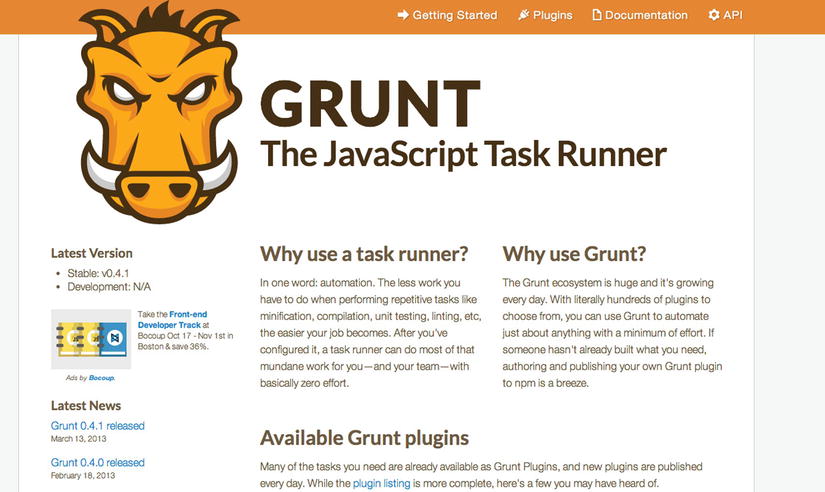
Figure 9-1. Grunt web site at http://gruntjs.com
There is already a huge ecosystem of plug-ins available so that you can run almost any task you need from Grunt. If you find it lacking any functionality, you can even write your own, custom tasks.
Some Reasons to Choose Grunt
There are a number of good reasons to use Grunt, besides that you get to use JavaScript to define your build scripts.
Grunt follows a philosophy of using configuration over scripting, meaning you create your tasks in a declarative way, rather than needing to use any low-level JavaScript. However, if you prefer, writing your own tasks will allow you to use a scripting approach. This is the type of freedom that every developer would like to enjoy.
The plug-in ecosystem is huge, and as you’ll see later in this chapter, there is a plug-in available for everything that you’d want to do in a web project. With so many packages available in the Node.js ecosystem to help with web-related tasks, Grunt makes it easy to wrap these packages and have the functionality available as a Grunt task.
Even if you don’t download additional plug-ins, there are enough built-in tasks to cover the basic continuous integration requirements for a JavaScript project.
Throughout this chapter you will see how Grunt can revolutionize the way you write and deliver your web applications.
If you want to use Grunt, you will need to install Node.js first. If you’ve been following the examples in this book, you will already have Node.js installed. If you haven’t, go to http://nodejs.org and follow the installation steps for your operating system.
The Grunt command-line interface (CLI) is installed through the Node Package Manager by executing the following on the command line, using the -g flag to ensure it is installed globally. Note that you will need to execute this with admin rights; on Mac OS X this means prefixing the command with sudo.
npm install -g grunt-cli
To check that it has successfully installed, run grunt --help from the command line.
Adding Grunt to Existing Projects
Running the grunt command from your terminal will result in an error message stating that the Gruntfile could not be found. This file, Gruntfile.js, is the main build script for your project. Written in JavaScript (or CoffeeScript), it will contain the tasks that are required in your build.
Let’s see an example of using Grunt for our Twitter application. Because we already have unit tests available from the previous chapters source, we can just make a copy of that directory.
Next, create a file named Gruntfile.js in the root of that directory, alongside the index.html file used for the app. The structure of this file should look as follows:
module.exports = function(grunt) {
    //All grunt tasks here..
};
This is known as a wrapper function, and every Gruntfile you create will need to use this format. We’ll add some tasks to this throughout this chapter.
Every project should have a package.json file that lists the dependencies for the script. At a minimum, this should contain the project name, the version, and a dependency on the Grunt package. At the time of writing, the current version of Grunt is 0.4.1, so that is used in the package.json code here:
{
 "name": "Beginning_Backbone",
 "version": "0.1.0",
 "devDependencies": {
   "grunt": "∼0.4.1"
 }
}
Node.js will look after installing all the dependencies for your project if you run the following from the command line, in the same directory as package.json:
npm install
This script reads the contents of package.json and installs all the packages listed in devDependencies locally. As new tasks are added to the Gruntfile, you should add an entry in the devDependencies section of this file.
Note that you can also use the --saveDev flag in the install command to have a plug-in downloaded locally and also have its name and version saved along with the other dependencies in your package.json. The following command adds the appropriate entry for the latest version of Grunt to the .json file:
npm install grunt --save-dev
This can be a useful way to both install plug-ins locally and update the dependency configuration for other developers in your team in one simple command. If using a version control system, you will typically want to exclude the node_modules folder, leaving other developers who check out your code to reinstall the modules locally.
As well as providing details on the dependencies, any other project-related attributes can be stored in package.json. Usually, this file is read as a JSON object during the initialization of the Grunt script.
All of this initial configuration takes place in the grunt.initConfig function, which is also used for task configuration, as we’ll see shortly. The attributes stored in this file, especially the version, may also be useful for your build script. Grunt provides a file API to allow you to easily read the JSON into your script.
module.exports = function(grunt) {

grunt.initConfig({
   pkg: grunt.file.readJSON('package.json'),
 });

};
We’re still not at a place where the Gruntfile will execute properly. If you run grunt from the command line now, you’ll be informed that you are missing a default task.
Warning: Task "default" not found. Use --force to continue.
Adding a Task
Let’s now look at how to add a default task for our build script to execute. We’ll use the same sample as at http://gruntjs.org, which uses the JavaScript uglify plug-in. The uglify plug-in provides the ability to minify (compress) all your JavaScript source into one file. Any of the scripts that you have downloaded from third parties will usually have such a version, appended with .min.js, named as the production version.
The uglify task is available from GitHub at https://github.com/gruntjs/grunt-contrib-uglify. It provides the instructions you need to get started, but let’s go through this step-by-step.
First you will need to install the uglify task using the Node Package Manager, with the --save-dev flag.
npm install grunt-contrib-uglify --save-dev
This results in package.json being updated as follows, with the addition of uglify in the dependencies:
{
 "name": "Beginning_Backbone",
 "version": "0.1.0",
 "devDependencies": {
   "grunt": "∼0.4.1",
   "grunt-contrib-uglify": "∼0.2.4"
 }
}
Now that the task is available, it needs to be loaded in the Gruntfile. Any task contained in a node module can be loaded using the grunt.loadNpmTasks function, as in the following code snippet:
// Load the plugin that provides the "uglify" task.
grunt.loadNpmTasks('grunt-contrib-uglify'),
The next step is to set up the configuration for the uglify task. This, along with the configuration for any task, takes place in the initConfig block. There are lots of different configuration options for the uglify task, but we’ll just use the simplest.
First the uglify plug-in’s configuration object needs to be included in the initConfig, with an options property, which defines the banner (comment) to use in the minified file. All tasks allow an options property to be included to override any built-in defaults.
Note how the <%= %> tag allows configuration properties to be included in the task. In this case, pkg.name is read from package.json. Meanwhile, Grunt provides other configuration variables such a grunt.template.today to print a formatted date.
The build object contains details of the source files to use with the src property, in this case all JavaScript files stored within js/app. It also contains a dest property, which defines where the output file will go.
grunt.initConfig({
   pkg: grunt.file.readJSON('package.json'),
   uglify: {
     options: {
       banner: '/*! <%= pkg.name %> <%= grunt.template.today("yyyy-mm-dd") %> */
'
     },
     build: {
       src: 'js/app/**/*.js',
       dest: 'build/<%= pkg.name %>.min.js'
     }
   }
 });
Every task you encounter will have different configuration objects. If you define a property that is not required, it will just be ignored by the script. You can even add complete JavaScript to the configuration, if you find that simple properties do not suffice.
The bare minimum of any Gruntfile dictates that a default task must exist. This can be added using the grunt.registerTask function, which takes the name of the task and takes an array of subtasks that will be executed as part of the task. In this case, there is just one task to include: uglify.
grunt.registerTask('default', ['uglify']);
The complete listing of the Gruntfile is now as follows:
module.exports = function(grunt) {

grunt.initConfig({
   pkg: grunt.file.readJSON('package.json'),
   uglify: {
     options: {
       banner: '/*! <%= pkg.name %> <%= grunt.template.today("yyyy-mm-dd") %> */
'
     },
     build: {
       src: 'js/app/**/*.js',
       dest: 'build/<%= pkg.name %>.min.js'
     }
   }
 });

 // Load the plugin that provides the "uglify" task.
 grunt.loadNpmTasks('grunt-contrib-uglify'),

 // Default task(s).
 grunt.registerTask('default', ['uglify']);

};
Executing grunt on the command line will now execute the uglify task, generating a file named Beginning_Backbone.min.js in the build directory. Throughout this chapter we will continue to extend this Gruntfile to create a complete build script for continuous integration.
Task Configuration
We’ve already covered the basics of task configuration, including the definition of an options object. You might find that you need to have different targets available in each task. This can be achieved by defining additional subtasks as properties in the configuration object. To illustrate this, let’s add a subtask to the uglify target.
For example, let’s imagine we want to minify just one single JavaScript file, app.js. We could define a new property within the uglify task for this.
grunt.initConfig({
   pkg: grunt.file.readJSON('package.json'),
   uglify: {
     options: {
       banner: '/*! <%= pkg.name %> <%= grunt.template.today("yyyy-mm-dd") %> */
'
     },
     build: {
       src: 'js/app/**/*.js',
       dest: 'build/<%= pkg.name %>.min.js'
     },
     singleFile: {

       src: 'js/app/app.js',
       dest: 'build/appmin.js'
     }
   }
 });
If we wanted to call only the uglify subtask, we could register the task as follows:
grunt.registerTask('default', ['uglify:singleFile']);
This will run only the subtask, but if we had used the old uglify target instead when registering the task, both the build and singleFile targets would have been executed.
Dealing with Files
Given the nature of continuous integration, most of the tasks you use in Grunt will have some interaction with the file system. The most common pattern is to have source and destination file mappings, which can be expressed in a number of ways. Source files appear after the src property, and destination files appear after the dest property.
Compact Format
The compact format is when both the src and dest properties are expressed as an array of files. Here’s an example using the uglify task to compress two particular files:
models: {
       src: ['js/model/Profile.js','js/model/Tweet.js'],
       dest: ['build/models.min.js']
     }
This is used in cases where you need multiple src-dest mappings for a target. The list of files is put into a files property, which contains an array of mappings between a destination file and an array of source files.
An example of this could be used when you want to explicitly create a different file for each of the models, views, and collections in the application during the uglify task.
uglify: {
     options: {
       banner: '/*! <%= pkg.name %> <%= grunt.template.today("yyyy-mm-dd") %> */
'
     },
     individuals: {
       files : {
         'build/models.min.js'       : ['js/app/model/Profile.js', 'js/app/model/Tweet.js', 'js/app/Search.js'],
         'build/collections.min.js'  : ['js/app/collection/Timeline.js'],
         'build/views.min.js'        : ['js/app/view/ProfilePopupView.js', 'js/app/view/ProfileView.js',
                              'js/app/view/ResultsView.js', 'js/app/view/SearchView.js', 'js/app/view/TimeView.js'],
         'build/routers.min.js'      : ['js/app/router/AppRouter.js'],
         'build/util.min.js'         : ['js/app/util/Helpers.js']
       }
     }
A number of destination files are created, each of which takes a list of source files. Note that you cannot use additional properties, which we will cover shortly, with this format.
This format is quite similar to the previous object format, except in place of a string per mapping, there is an object containing a list of src files and a list of dest files. Each entry is an object rather than a string, with the src and dest properties explicitly tagged.
uglify: {
     options: {
       banner: '/*! <%= pkg.name %> <%= grunt.template.today("yyyy-mm-dd") %> */
'
     },
     individuals: {
       files : {
{dest:'build/models.min.js', src:['js/app/model/Profile.js', 'js/app/model/Tweet.js', 'js/app/Search.js']},
{dest: 'build/collections.min.js', src: ['js/app/collection/Timeline.js']}
       }
     }
Additional Properties
You can add a number of properties to a file listing, in both the compact and files array formats, that help focus in on which files to use. These are listed in Table 9-1.
Table 9-1. Additional File Properties in Grunt
Property |
Description |
|---|---|
filter |
Accepts a function that accepts the src filepath and returns true or false. Usually an fs.Stats method name is used, which can include the following: isFile isDirectory |
nonull |
When a match is not found, returns a list containing the pattern itself. This is useful for debugging filepath issues when the script is executed with the --verbose flag. |
dot |
Allows a pattern to match filenames that are prefixed with a dot. |
expand |
When set to true, allows you to build the file object dynamically, as described in Table 9-2. |
Using the expand property allows a number of other optional parameters to be set, giving even more control over file objects, as listed in Table 9-2.
Table 9-2. Properties That Can Be Used When expand = true
Property |
Description |
|---|---|
cwd |
A path that any src files will need to be relative to. |
src |
The pattern to match, relative to the cwd setting. |
dest |
Destination path. |
ext |
The extension to use in the destination files. If used, this will replace any extension that has already been defined for the dest file. |
flatten |
Removes all path parts from the dest paths. |
rename |
A function that can be used to rename the files. This will execute after the ext and flatten parts are complete. |
Rather than listing all the files you need to work with individually, Grunt allows wildcards to find sets of files. This is also known as globbing. The original build target that we specified used one of these patterns in the src property.
build: {
     src: 'js/app/**/*.js',
     dest: 'build/<%= pkg.name %>.min.js'
   },
Table 9-3 lists the most common patterns that are available.
Table 9-3. Globbing Patterns for Files in Grunt
Pattern |
Description |
|---|---|
* |
Matches any number of characters, but not /. For example, js/app/model/*.js would accept all JS files within the model package. |
? |
Matches a single character but not /. |
** |
Matches any number of characters, including /. For example, js/app/**/*.js would accept all JS files in the app directory and its subdirectories. |
{ } |
Allows for a comma-separated set of patterns. |
! |
Negates the match. |
Using Grunt for Your Project
Now that we’ve looked at the basics behind Grunt, we can put together a more comprehensive build script for our project. At a minimum, you will want the following steps to happen continuously in your Backbone project:
- Run static analysis on the code using a lint plug-in.
- Minify your JavaScript and CSS source.
- Automate your unit tests against the resulting source code.
JSHint (www.jshint.com) is a static analysis tool that helps detect potential errors in your JavaScript code. The tool is a fork of Douglas Crockford’s JSLint tool and is maintained by the community. The belief behind the JSHint project is that it deals with errors that might actually break your code, rather than the stricter enforcement that is applied by JSLint.
By running JSHint on your source code, you will avoid any typos or syntax errors. Any such quality checks are worth it, especially when creating production code. You can find the Grunt plug-in for JSHint at https://github.com/gruntjs/grunt-contrib-jshint.
The Importance of Static Analysis
As JavaScript has matured over the years, most browsers have added measures that make them more lenient and make them accept “bad” code. Because JavaScript is a dynamic language, there is a high chance of unruly code that might cause problems hidden to code reviewers and inexperienced developers. Most mature languages have static analysis tools, and with JavaScript it’s even more important, given the chance of sloppy code. By adding an automated check, you can help ensure that your code is given every chance to shine. Although sometimes the errors that static analysis uncovers may be uncomfortable to address at first, you will end up with a much cleaner code base by using a lint tool.
Installation and Configuration
To install JSHint and add the dependency to your project, run the following from the command line:
npm install grunt-contrib-jshint --save-dev
Now, in the Gruntfile we’ll need to load the node module for JSHint.
grunt.loadNpmTasks('grunt-contrib-jshint'),
The configuration of the jshint task takes place mostly in the options configuration object, which accepts a number of different lint checks to carry out. Any checks that you want to carry out should be set to true. Table 9-4 lists some of the most commonly used JSHint checks. A complete list of these checks is available at www.jshint.com/docs/options/.
Table 9-4. Commonly Used JSHint Checks
Option |
Purpose |
|---|---|
curly |
Requires curly braces are placed around blocks in loops and conditionals |
eqeqeq |
Requires that all equality operations are carried out using precision equals (=== or !==) |
eqnull |
When true, suppresses warnings about == null comparisons |
browser |
Defines globals exposed by modern browsers, such as window, document, and navigator |
globals |
A list of <library>:<expose> pairs that defines that libraries have globals defined, including jQuery, MooTools, Phantom, and more |
latedef |
Prohibits use of a variable before it is defined |
plusplus |
Prohibits use of ++ or -- |
undef |
Prohibits use of undeclared variables; can be very useful for spotting typos |
unused |
Prohibits use of variables that are defined but never used in the source |
maxdepth |
Accepts a number of how many levels of nesting should be allowed; can be useful to manage complicated code |
The options for this task also include an ignores attribute, where you can specify a list of files to ignore. Typically, you will ignore any external libraries you have included in your project.
The initConfig section should now include a JSHint task defined similar to the following. Note that not all of the checks listed earlier have been enforced.
grunt.initConfig({
   pkg: grunt.file.readJSON('package.json'),

   jshint: {
     options: {
       curly: true,
       eqeqeq: true,
       eqnull: true,
       browser: false,
       globals: {
         jQuery: true
       },
       ignores: ['js/external/**/.*.js']
     },
     files: {
       src: ['js/app/**/*.js']
     },
 },
});
Finally, the task needs to be added to the default task. The registerTask function takes two parameters: the alias for the task and an array of tasks that will be executed under that alias.
grunt.registerTask('default', ['jshint']);
Some formatting errors may appear in your source such as mixed spaces and tabs. You have the choice to fix them by using a JavaScript source formatter, such as JSFormat in Sublime Text. You can also just choose to remove the check from your JSHint configuration.
After formatting the source code, you might still have some remaining errors, which will get output to the console, as in Figure 9-2. Most of the errors that JSHint throws up are pretty easy to follow, but if you have any trouble, you can find explanations at http://jslinterrors.com/.
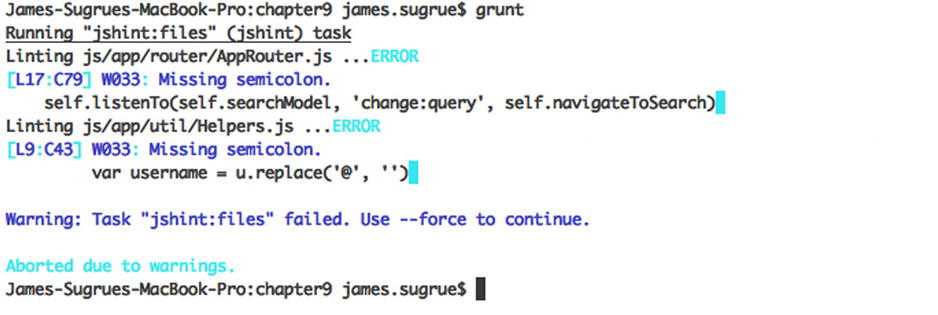
Figure 9-2. Output from JSHint
If you are running on your local machine, printing to the console is OK. However, when running on continuous integration servers, it is more desirable to have the output go to a file. Naturally, the task has a configuration option for this eventuality, by using the reporterOutput attribute that takes a filepath as its parameter.
jshint: {
  options: {
    curly: true,
    eqeqeq: true,
    eqnull: true,
    browser: false,
    globals: {
      jQuery: true
    },
    ignores: ['js/external/**/.*.js'],
    reporterOutput : 'reports/jshint.txt'
  },
  files: {
    src: ['js/app/**/*.js']
  },
The previous code snippet shows how the report of the JSHint run will now be written to a jshint.txt file in the reports directory.
A number of plug-ins are available to help you to minify your JavaScript source. As we mentioned earlier in this chapter, minification is the process of merging all your JavaScript into one file to reduce the overhead when loading the script. Because we used Uglify earlier, we’ll stick with that choice here. As part of its compression flow, UglifyJS (http://lisperator.net/uglifyjs/) removes whitespace and shortens variables names.
The Grunt plug-in for Uglify is at https://github.com/gruntjs/grunt-contrib-uglify.
The Importance of Code Compression
While running your JavaScript code on your development machine, your focus is on getting everything working. There’s nothing wrong with this, but when your code goes into production, you will need to take performance into consideration. Running tools such as YSlow (http://developer.yahoo.com/yslow/) will analyze your web app for any performance issues and give you suggestions on how to fix these issues.
One of the most common problems is the inclusion of too many external JavaScript scripts. Each of the HTTP requests required to load one of these scripts takes time. As well as the network overhead, uncompressed JavaScript will also mean more data is being transferred. By minifying your JavaScript, you ensure that you are avoiding one of the most common performance issues in web apps.
Installation and Configuration
To install uglify and add the dependency to your project, run the following from the command line:
npm install grunt-contrib-uglify --save-dev
Now, in the Gruntfile we’ll need to load the node module for uglify:
grunt.loadNpmTasks('grunt-contrib-uglify'),
Table 9-5 lists some of the options available when configuring the uglify task.
Table 9-5. UglifyJS Task Configuration Options
Option |
Purpose |
|---|---|
banner |
The string that will be prepended to the top of the minified file. |
mangle |
Turns mangling, the process of shortening variable names, on or off. |
report |
Reports the results of the uglify process. Possible values include false (default), min (minification results), and gzip (gzip results). |
preserveComments |
Specifies whether comments should be discarded. Possible values include false (default; strips all comments), all (preserves all comments), and some (preserves comments that start with !). |
wrap |
Wraps all of the code in a closure to ensure nothing is leaking. |
footer |
A string to be appended to the end of the minified output. |
To ensure your minification is successful, you will first need to consider the order in which the uncompressed scripts are loaded. In our app example, all the external scripts were loaded first, in a particular order, before we loaded our own Backbone code.
While you can choose to use minified versions of the external libraries, we’ll include them in a separate minified file. This results in the number of scripts loaded going from 18, as in the following code snippet, to 2.
<!-- General Includes -->
<script src="js/external/jquery-1.10.2.js"></script>
<script src="js/external/underscore.js"></script>
<script src="js/external/backbone.js"></script>
<script src="js/external/handlebars.js"></script>
<script src="js/external/moment.js"></script>
<script src="js/external/dialog.js"></script>

<!-- Model -->
<script src="js/app/model/Tweet.js"></script>
<script src="js/app/model/Profile.js"></script>
<script src="js/app/model/Search.js"></script>
<!-- Collections -->
<script src="js/app/collection/Timeline.js"></script>
<!-- View -->
<script src="js/app/view/TimelineView.js"></script>
<script src="js/app/view/ProfileView.js"></script>
<script src="js/app/view/ProfilePopupView.js"></script>
<script src="js/app/view/SearchView.js"></script>
<script src="js/app/view/ResultsView.js"></script>
<!-- Router -->
<script src="js/app/router/AppRouter.js"></script>
<!-- Util -->
<script src="js/app/util/Helpers.js"></script>
<!-- The 'main' for this app -->
<script src="js/app/app.js"></script>
As we can create subtasks within any of our tasks, we’ll split uglify into two: one for external scripts and one for our own JavaScript source.
uglify: {
     options: {
       banner: '/*! <%= pkg.name %> <%= grunt.template.today("yyyy-mm-dd") %> */
'
     },
     externalLibraries: {
        //WILL DEAL WITH EXTERNAL
         },
     individuals: {
        //WILL DEAL WITH OUR SOURCE
         }
   }
The file listing to be used for the externalLibraries section should be explicit to ensure that the source files are minified in the order that they are loaded. All of these files are minified into external.min.js in the build directory.
externalLibraries: {
       files:{
         'build/external.min.js' : ['js/external/jquery-1.10.2.js',
                                   'js/external/underscore.js',
                                   'js/external/backbone.js',
                                   'js/external/handlebars.js',
                                   'js/external/moment.js',
                                   'js/external/dialog.js']
       }
     },
The minification task for our own source code can be slightly different. There are no interdependencies between the files that exist in the same subdirectory. For example, no model object depends on another. Therefore, we can using the ** pattern to include all the files, one subdirectory at a time.
app: {
       files : {
         'build/app.min.js'       : ['js/app/model/*.js', 'js/app/collection/*.js',
                                     'js/app/view/*.js', 'js/app/router/*.js',
                                     'js/app/util/.*.js', 'js/app/*.js' ],
       }
     }
Now the uglify task needs to be included to the list of default tasks.
grunt.registerTask('default', ['jshint','uglify' ]);
Once run, you can change the index.html file of your app to use the minified files. The following should be the only script includes required by the application:
<script src="build/external.min.js"></script>
<script src="build/app.min.js"></script>
As you try your application with the minified scripts, you may find some JavaScript errors happen during loading. Ensure that you have included all the required files in the correct order if this happens.
For reference, the complete code listing for the uglify task should look as follows:
uglify: {
     options: {
       banner: '/*! <%= pkg.name %> <%= grunt.template.today("yyyy-mm-dd") %> */
',
       report: 'min'
     },

     externalLibraries: {
       files:{
         'build/external.min.js' : ['js/external/jquery-1.10.2.js',
                                   'js/external/underscore.js',
                                   'js/external/backbone.js',
                                   'js/external/handlebars.js',
                                   'js/external/moment.js',
                                   'js/external/dialog.js']
       }
     },
     app: {
       files : {
         'build/app.min.js'       : ['js/app/model/*.js', 'js/app/collection/*.js',
                                     'js/app/view/*.js', 'js/app/router/*.js',
                                     'js/app/util/.*.js', 'js/app/*.js' ],
       }
     }
   }
Note the addition of the report property in the options of the task. This results in the minification savings being printed to the console after the task executed. Figure 9-3 shows the savings made by running uglify on our source.
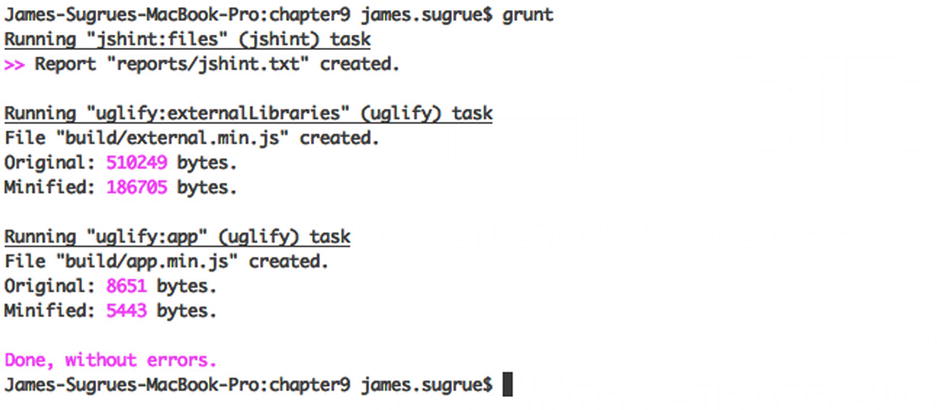
Figure 9-3. Output of the uglify Grunt task
Just as it’s important to minify your JavaScript code, it is worth minifying the CSS in your application for the same reasons. Again, a number of plug-ins are available to achieve this. CSSMin (https://github.com/gruntjs/grunt-contrib-cssmin) is one such plug-in.
Installation and Configuration
To install CSSMin and add the dependency to your project, run the following from the command line:
npm install grunt-contrib-cssmin --save-dev
Now, in the Gruntfile we’ll need to load the node module.
grunt.loadNpmTasks('grunt-contrib-cssmin'),
CSSMin is a simple tool, so just a few options are available for the configuration of the task. Table 9-6 lists some of the options available when configuring the CSSMin task.
Table 9-6. CSSMin Task Configuration Options
Option |
Purpose |
|---|---|
banner |
Prefixes the compressed source with a particular banner. |
report |
Reports the results of the uglify process. Possible values include false (default), min (minification results), and gzip (gzip results). |
keepSpecialComments |
Keeps or removes special comments. By default special comments are kept. Using 1 as the value will keep the first one, and 0 will remove all of them. |
The application we have created has a limited amount of CSS included, but it’s still worth compressing in order to make the files smaller, and reduce the loading overhead. Currently index.html includes references to two style sheets.
<link rel='stylesheet' href='css/modern.css'>
<link rel="stylesheet" href="css/style.css">
The Grunt task configuration is quite simple, containing a combine object with the list of files that needs to be included to generate the app.min.css file.
cssmin:{
     combine:{
         files: {
           'build/app.min.css' : ['css/**.css']
         }
     }
}
Now the CSSMin task needs to be included in the list of default tasks.
grunt.registerTask('default', ['jshint','uglify','cssmin' ])
Following the minification process, the two CSS files can be replaced by this single minified CSS:
<link rel='stylesheet' href='css/app.min.css'>
Automating Your Test Suite
In the previous chapter, we covered two test libraries, QUnit and Jasmine. The following section will show how you can add a task for each of these.
QUnit Task
The QUnit Grunt plug-in (https://github.com/gruntjs/grunt-contrib-qunit) allows you to automate the execution of the QUnit test suite created in the previous chapter. When you download the plug-in, it will automatically download PhantomJS as a dependency. This means that the task can run in the background without a standard browser.
Installation and Configuration
To install QUnit and add the dependency to your project, run the following from the command line:
npm install grunt-contrib-qunit --save-dev
Now, in the Gruntfile we’ll need to load the node module for QUnit.
grunt.loadNpmTasks('grunt-contrib-qunit'),
The configuration of our QUnit task is quite simple. All that is really required is to pass the URL of the QUnit test suite to the urls property.
qunit:{
     all: {
       options: {
         urls: ['http://localhost/backbone/chapter9/js/test/app.html']
       }
     }
}
Table 9-7 lists other configuration options for the QUnit task. Finally, the QUnit task needs to be included as part of the default task.
Table 9-7. QUnit Task Configuration Options
Option |
Purpose |
|---|---|
timeout |
Time in milliseconds that Grunt will wait for a QUnit start() before failing the task. The default is 5,000 milliseconds. |
urls |
The test suite URLs to be passed to PhantomJS. |
force |
When set to true, this allows the task to ignore failures and continue running. The default is false. |
grunt.registerTask('default', ['jshint', 'uglify', 'cssmin', 'qunit']);
Running the script will end with the QUnit tests being executed, with the results of the tests being written to console. Figure 9-4 shows the results of the updated Grunt script.
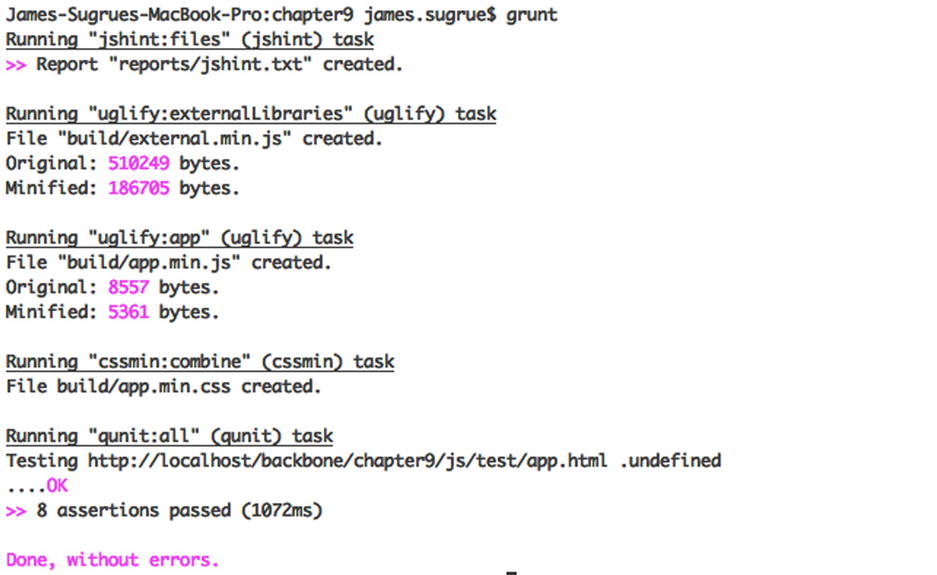
Figure 9-4. Output from Grunt script following the addition of QUnit tests
Note that it would be useful to amend the test script to load the minified versions of your tests rather than the developer versions.
Continuous integration servers such as Hudson and Jenkins allow you to schedule builds to run nightly or at a particular elapsed time after code has been committed to source control. These systems also allow you to view your unit test results, provided the reports are generated in a particular format. Just as we covered in the previous chapter on testing, the JUnit report format is considered the standard.
Although the QUnit task has no report configuration included, there is a separate task available to create these reports, called QUnit-JUnit (https://github.com/sbrandwoo/grunt-qunit-junit).
To install the plug-in, just run the usual command.
npm install grunt-qunit-junit --save-dev
In your Gruntfile, load the npm task.
grunt.loadNpmTasks('grunt-qunit-junit'),
Now you can create a configuration for the reporting task in the initConfig block. The main parameter is the destination to save the reports to.
//qunit reports
    qunit_junit: {
           options: {
              //the location to generate reports to
              dest: 'reports/'
           }
     }
The task needs to be executed ahead of the QUnit testing task itself. This is so that the reporting listens for any tests.
grunt.registerTask('default', ['jshint', 'uglify', 'cssmin', 'qunit_junit', 'qunit']);
When you run your script, all the test results should be in a TEST-app.xml file within the reports directory. This report file should be easily processed by any continuous integration system.
In the previous chapter, we also explored using Jasmine to write your tests, as an alternative to QUnit. A grunt task exists to execute Jasmine tests (see https://github.com/gruntjs/grunt-contrib-jasmine). Just as with the QUnit task, Jasmine has a dependency on PhantomJS and will install it if required.
Installation and Configuration
To install the Jasmine plug-in and add the dependency to your project, run the following from the command line:
npm install grunt-contrib-jasmine --save-dev
Now, in the Gruntfile we’ll need to load the node module for Jasmine.
grunt.loadNpmTasks('grunt-contrib-jasmine'),
In your Gruntfile, load the jasmine task.
grunt.loadNpmTasks('grunt-contrib-jasmine'),
Now you can configure your Jasmine test run. Because we’re not using the SpecRunner created in the previous chapter, you’ll need to put a bit of extra work into this configuration.
We’ll only pass through the source files that were under test and also use the vendor property to load the additional external libraries such as Sinon, our compressed external dependencies, and jasmine-jquery. A full list f configuration options is listed in Table 9-8.
Table 9-8. Jasmine Task Configuration Options
Option |
Purpose |
|---|---|
src |
A string or array of files that are being tested. |
specs |
A string or array of files pointing to the specs that are being used. This should be the .js specs rather than the SpecRunner.html ones. |
vendor |
A string or array of third-party libraries that should be loaded before the tests execute. |
junit.path |
The path to output the JUnit XML to. |
junit.consolidate |
Whether to consolidate all JUnit XML into one file. |
host |
The host to run the tests against. |
template |
Custom template used to generate your SpecRunner, parsed as Underscore.js templates. |
You’ll notice that we’ve left out ProfileView.js. The reason for this is that views are a little more complex to get tested from the Jasmine plug-in, so it’s easier to focus on the data tests.
 //jasmine tests
 jasmine: {
   main: {
   src: ['js/app/model/Profile.js', 'js/app/model/Tweet.js', 'js/app/collection/Timeline.js'],

   options: {
        specs: 'js/test/jasmine/spec/ProfileSpec.js',
        vendor : ['js/test/sinon.js', 'build/external.min.js', 'js/test/jasmine/lib/jasmine-jquery.js'],
        junit :{
         path: 'reports/'
        }
       }
     }
 }
We’ve also added the path for the JUnit reports to be exported to. These will all be named according to the suite, so in this case we’ll have two suites.
Finally, we just need to add the task to our default list.
grunt.registerTask('default', ['jshint', 'uglify', 'cssmin', 'qunit_junit', 'qunit', 'jasmine']);
The additional tasks we have created are not always suitable for all machines. A developer workspace will need to run a different set of tasks to an continuous integration server. This can be controlled quite simply with the registerTask function in Grunt.
For example, let’s say the developers would run grunt dev on the command line, while the continuous integration server would run grunt build. We’ll create two different task sets for each of these.
grunt.registerTask('dev', ['jshint',  'qunit_junit', 'qunit', 'jasmine']);
 grunt.registerTask('build', ['jshint',  'uglify', 'cssmin', 'qunit_junit', 'qunit', 'jasmine']);
 grunt.registerTask('default', ['jshint', 'uglify', 'cssmin', 'qunit_junit', 'qunit', 'jasmine']);
On developer machines, the static analysis and test tasks are run, while the build machine will also run the minification tasks. This way of running tasks can be extremely useful because different users of the build file will have different targets.
Grunt has excellent support for starting up a new project using its grunt-init module. Rather than needing to write a lot of boilerplate code, you can simply take advantage of this functionality.
To get started, you’ll need to install the grunt-init plug-in through the Node Package Manager. It’s useful to do this globally using the -g flag.
npm install -g grunt-init
When running grunt-init, you’ll need to provide a template to use for the project. There are a number of templates available, including a standard jQuery plug-in template at https://github.com/gruntjs/grunt-init-jquery. You can download the source, or you can clone the Git repository using the following command:
git clone https://github.com/gruntjs/grunt-init-jquery.git ∼/.grunt-init/jquery
The template is now available and can be used by the grunt-init task by using the following:
grunt-init ∼/.grunt-init/jquery
After following a series of questions, you’ll have a complete starting template for a jQuery plug-in ready. Figure 9-5 shows the output after running the previous code.
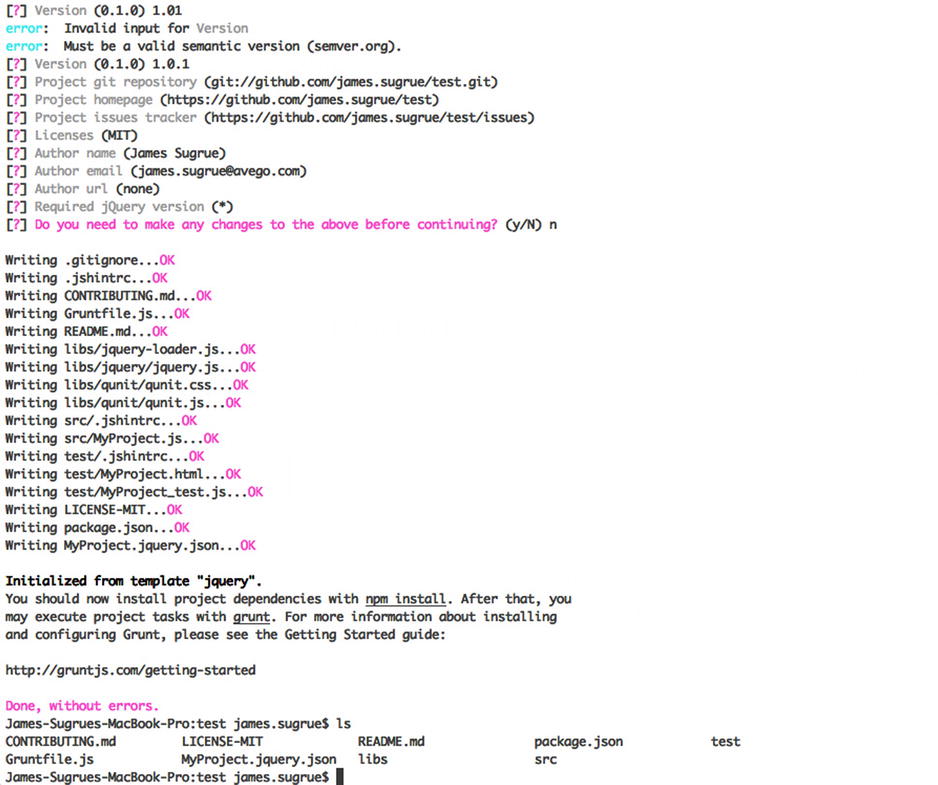
Figure 9-5. Output following grunt-init task
Of course, there are many templates to help get started with Backbone projects, including https://bitbucket.org/nicopigelet/grunt-init-backbone. To download the template, run the following command to clone the Git repository:
git clone https://bitbucket.org/nicopigelet/grunt-init-backbone.git ∼/.grunt-init/backbone
Then all you need to do is run the following command to create the basics that you need to build your Backbone project.
grunt-init backbone
Some Useful Grunt Plug-Ins
This chapter just barely scratched the surface of the wide array of plug-ins that are available. Table 9-9 describes some other plug-ins you might find useful.
Table 9-9. Useful Grunt Plug-Ins
Plugin |
Description |
|---|---|
Grunt Watch Task (https://github.com/gruntjs/grunt-contrib-watch) |
Watches a set of files for changes on your machine and runs Grunt tasks when changes are detected. This can also force a live reload on your browser so changes are immediately visible. |
SAAS Preprocessor (https://github.com/gruntjs/grunt-contrib-sass) |
CSS preprocessor task to convert SASS files in to CSS. SASS allows you to define styles for your application in a less verbose way than plain CSS. |
Handlbars (https://github.com/gruntjs/grunt-contrib-handlebars) |
Grunt task for precompilation of Handlebars templates. Template precompilation, paired with the use of the Handlebars engine library (rather than the complete version), can greatly improve application performance. |
Backbone Boilerplate (https://github.com/backbone-boilerplate/grunt-bbb) |
Pairs with grunt-init to help generate all boilerplate code and structure required for a Backbone project. |
Summary
This chapter introduced the Grunt task runner system and explained how it can help add huge levels of quality to your project by enabling continuous integration. The typical tasks for any JavaScript project were covered including compression and minification of JavaScript and CSS source, unit testing, and static analysis. The Grunt ecosystem is huge, and there will always be a task available for any given problem. I really encourage adopting Grunt for your application, even if you are already using another build system. Because the tasks and configuration are all written in pure JavaScript, it reduces the learning curve.