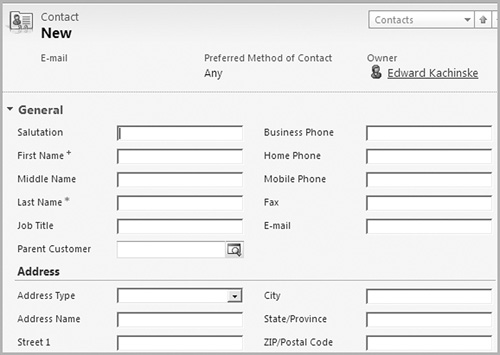
Accounts are companies. In the hierarchy of customer records, accounts are usually at the top. Within an account, you may have multiple associated contacts. Microsoft is an account. Bill Gates is a contact.
Creating most new records in Microsoft Dynamics CRM follows the same general process. In Outlook 2010/Internet Explorer, you’ll see a New button on the ribbon in the Records group. In Outlook 2003/2007, the New button is on the Record menu. You can follow the process below to create a new record in Internet Explorer or Outlook 2003/2007.
Internet Explorer:
On the File tab, click New Record, then select a record type.
Enter field data for your account.
On the ribbon in the Save group, click the Save & Close button.
Outlook 2003/2007:
On the toolbar, click the New Record drop-down and select a record type.
Enter field data for your account.
Click the Save & Close button.
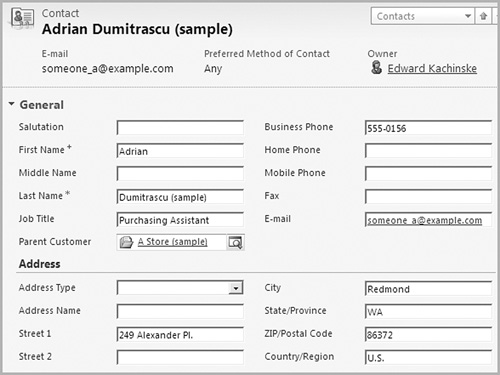
Anytime you see a list of records in Microsoft Dynamics CRM, you can double-click the record. This brings up an edit window, where you can edit the record. While you’re editing a record, notice the options on the left. You can add additional addresses, activities, connections, and more.
Outlook 2003/2007/2010/Internet Explorer:
In the Navigation Pane, click on a record type.
A record list should appear.
If necessary, use the Search field, alphabet bar, or the View drop-down to locate the record you’d like to edit.
After finding the record you’d like to edit, double-click it in the list.
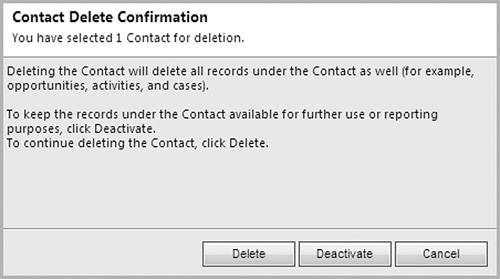
When a record is no longer needed, you have two basic options: You can delete the record, or you can deactivate it. Deactivating a record removes it from your list of active records, and removes it from most search results. Deactivating a record does not, however, permanently remove the record from your database.
Outlook 2010/Internet Explorer:
In the Navigation Pane, click on a record type.
A record list should appear.
Highlight the record you’d like to deactivate.
On the ribbon in the Records group, click the Delete or Deactivate button.
Click OK to confirm the deactivation or deletion.
Outlook 2003/2007:
In the Navigation Pane, click on a record type.
A record list should appear.
Highlight the record you’d like to deactivate.
On Record menu, click the Deactivate button.
Click OK to confirm the deactivation.
In addition to deleting records from the list views, you can also perform a bulk deletion based on query. This will allow you to delete a group of records based on particular criteria. System administrators should be extremely cautious when granting users this privilege. It’s really easy to delete your entire data set with this feature. And whoops! There’s no undo, and CRM Online users likely won’t have a backup.
Outlook 2010/Internet Explorer:
On the ribbon in the Records group, click the Delete drop-down, then Bulk Delete.
Configure your search criteria.
Follow the wizard’s instructions to complete the bulk deletion job.
Outlook 2003/2007:
On the Record menu, highlight Delete, then click Bulk Delete.
Configure your search criteria.
Follow the wizard’s instructions to complete the bulk deletion job.

Most of your record data will be entered into fields, but sometimes you may have important bits of information that don’t logically fit in a field. For these situations, you can enter notes for a record.
Outlook 2003/2007/2010/Internet Explorer:
In the Navigation Pane, click a record type.
Your current record list should appear.
Locate the record and double-click it in the list.
Click the Notes form section.
Click the option to add a new note and type the note.

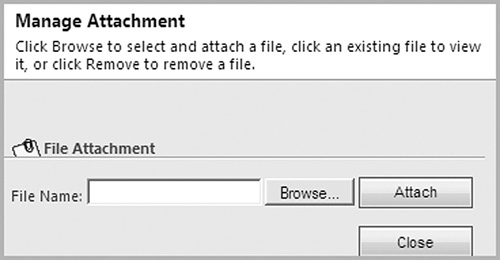
You have an important proposal. That proposal needs to be shared with the other Microsoft Dynamics CRM users that have access to an account. You’d like that proposal to be available every time you access the account record. Add the proposal as an attachment to the account, and you’ll have all of this.
Outlook 2003/2007/2010/Internet Explorer:
In the Navigation Pane, click Sales and then Accounts.
Your current accounts list should appear.
Locate the account and double-click it in the list.
On the Create Related tab of the ribbon in the Include group, click the Attach File button.
Browse and select the file.
Click the Attach button.
Click Close.
Once you’ve entered records into Microsoft Dynamics CRM, it will be helpful to know how to find and display information for these records.
Most of your searches will follow this quick lookup procedure. You need to call someone at XYZ Company, and you need to bring up the account record to get a main phone number. For this type of situation, use this procedure to find a record.
Outlook 2003/2007/2010/Internet Explorer:
In the Navigation Pane, click on a record type. (For example, you could click on Contacts.)
Your current record list should appear.
Enter a search term into the Quick Search field and press Enter.
Microsoft Dynamics CRM will search for your search term in all record fields.
The list of matching records will appear on the screen. To remove the search filter, click the X button to the right of the Search field.

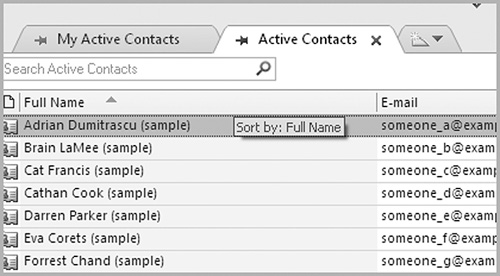
When you go to the record list, the records that appear are defined by the current view. By default, you will see your active accounts, but you can switch views to see deactivated accounts, all active accounts, accounts that have not ordered anything in the last six months, and so on.
Internet Explorer/Outlook 2003:
In the Navigation Pane, click on a record type.
A record list should appear.
In the upper-left corner of the record list, choose a view from the View drop-down.
All matching accounts that match the view’s query will appear.
Outlook 2007/2010:
Go to a list of records. For example, you might go to your list of Accounts.
The tabs at the top of the list show the views that have been pinned. To add a new view/tab to the list of tabs, click the furthest tab to the right and select a view from the list that appears.
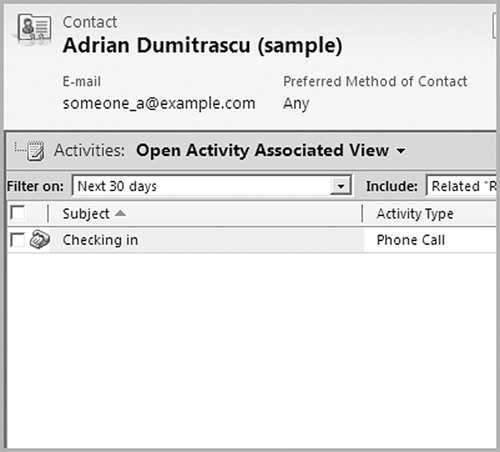
When you complete activities with a record, Microsoft Dynamics CRM creates a history of the activity having been completed. For example, if you write a letter, send an e-mail, or complete an appointment, an activity history is created. If you’re looking for a chronological list of everything that has happened with a record, check the Closed Activities area.
Outlook 2003/2007/2010/Internet Explorer:
In the Navigation Pane, click on a record type. For example, you might click on Leads.
A record list should appear.
Locate the record and double-click it in the list.
On the left, click the Activities option to see pending activities. Click the Closed Activities option to see a list of completed activities.
Having information about a record in Microsoft Dynamics CRM is useful, but you may sometimes want the ability to print that information and take it to an appointment. For most records, you can click the Print Preview button on the File tab to print a quick report of relevant information for that record.
Outlook 2003/2007/2010/Internet Explorer:
In the Navigation Pane, click on a record type. For example, you might click on Cases.
A record list should appear.
Double-click a record.
On the File tab, click the Print Preview button. This will generate a printable list of all account data, including notes.

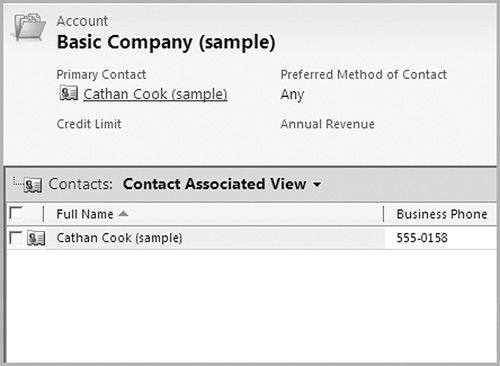
You can associate contacts with an account. After bringing up an account for editing, the buttons on the left of the account screen will show all of the associated records.
Outlook 2003/2007/2010/Internet Explorer:
In the Navigation Pane, click Sales and then Accounts.
Your current accounts list should appear.
Double-click an account.
On the left, click the Contacts option to see associated contacts.
A list of all related contacts will appear.
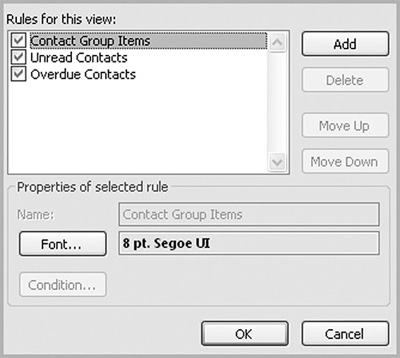
The conditional formatting feature allows you to set the font type, size, and color for a record based on a query that you configure. So, in your list of opportunities, you might want high-priority opportunities to show in red. This conditional format makes it easier to spot the opportunities that require your first attention. This feature is only available to CRM users in Outlook 2010.
Outlook 2010:
In the Navigation Pane in Outlook 2010, click on a record type. For example, you might click on Contacts.
On the View tab, in the Current View group of the ribbon, click the View Settings button.
Click the Conditional Formatting button.
Click Add to create a new rule, and click the Font button to specify the font formatting for that rule.
Click OK to confirm the new conditional formatting rule.
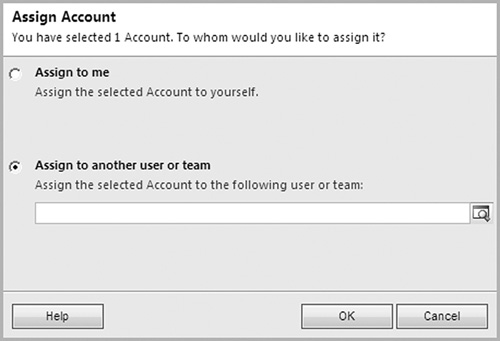
If you are using Microsoft Dynamics CRM in a multi-user environment, you may set up the system so that everyone sees everything. You can also configure the database to only allow specific levels of access to individual users or teams.
If you enter a record into Microsoft Dynamics CRM, you own that record by default. After double-clicking a record, you can click the Administration form section (on the left) to see the current owner for any record. You can easily transfer ownership, provided that you have sufficient rights within the system.
Outlook 2010/Internet Explorer:
In the Navigation Pane, click on a record type.
A record list should appear.
Highlight a record.
On the ribbon in the Collaborate group, click the Assign button.
Choose the Assign to another user or team option.
Click the Search button and choose a user.
Click OK.
Outlook 2003/2007:
In the Navigation Pane, click on a record type.
A record list should appear.
Highlight a record.
On the Record menu click the Assign button.
Choose the Assign to another user or team option.
Click the Search button and choose a user.
Click OK.
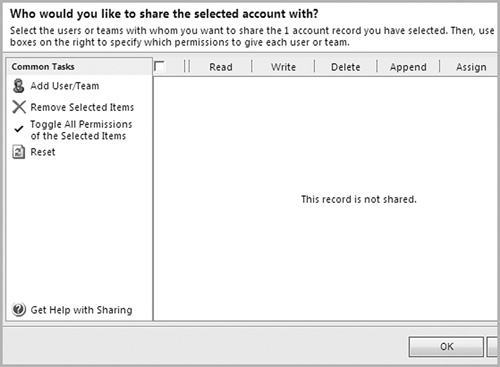
If your database is configured so that each user only has access to specific records, you may find the need to share a record with another user. Following this procedure will share access with another user, but you can also share access with a team of users.
Outlook 2010/Internet Explorer:
In the Navigation Pane, click on a record type.
A record list should appear.
Highlight a record.
On the ribbon, in the Collaborate group, click the Share button.
Click the Add User/Team option to add new users or teams to the access list.
Click OK.
Outlook 2003/2007:
In the Navigation Pane, click on a record type.
A record list should appear.
Highlight a record.
On the Record menu click the Share button.
Click the Add User/Team option to add new users or teams to the access list.
Click OK.
On each record, you may have specific permissions granted. For example, even though you may have access to modify accounts, the record owner of a specific account might have restricted your ability to edit that record. At any point, you can check your permissions for a record, and then you’ll know exactly what you can do with the record.
Outlook 2003/2007/2010/Internet Explorer:
In the Navigation Pane, click on a record type.
A record list should appear.
Locate the record and double-click it in the list.
On the File tab, click on the Properties button.
A list of permissions for the record will appear. A checkmark will appear next to any permission you have for the current record.

Connections allow you to track relationships between records in your database. If you are about to call a customer, you can check the connections area within CRM to see if any other people within your organization have some kind of connection to this customer. You’ll also see connections that your customer has with other contacts, accounts, opportunities, or other records. Basically, the connections feature allows you to relate any record to another record within CRM.
John Smith is a contact in your database. Jane Doe is also a contact in your database. Jane is John’s ex-wife. You’re about to meet with John, and you look in the connections area to see what kind of connections John has defined. In the connections area, you see that John and Jane were married, and you now know that bringing up the big project you just finished for Jane might not be your best selling strategy.
Outlook 2010/Internet Explorer:
In the Navigation Pane, click on a record type.
A record list should appear.
Locate the contact and double-click it.
On the ribbon in the Records group, click the Connect drop-down, then To Another.
Click the Search button next to the Name field.
Find your record.
Give the new connection a connection role.
On the ribbon in the Save group, click Save & Close.
Outlook 2003/2007:
In the Navigation Pane, click Sales and then Contacts.
Your current contacts list should appear.
Locate the contact and double-click it.
Click the Search button next to the Parent Customer field to bring up a list of accounts.
Highlight an account record and click OK.
The contact is now linked with an account.
Let’s say you work for XYZ Company. You used to work for ABC Company, an important account in your current organization’s database. By connecting yourself to your old organization, you can clue your current company in on your special relationship to this account.
Outlook 2010/Internet Explorer:
In the Navigation Pane, click on a record type.
A record list should appear.
Locate the contact and double-click it.
On the ribbon in the Records group, click the Connect drop-down, then To Me.
Select a connection role.
On the ribbon in the Save group, click Save & Close.

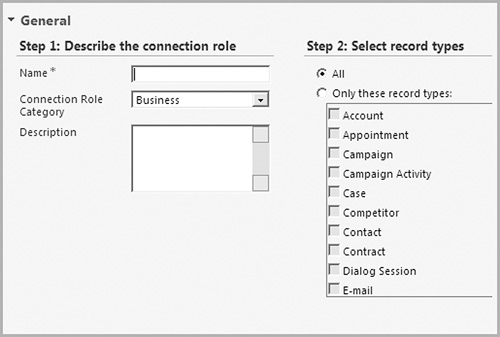
Before you establish connections between records in your database, you need to define the various connection roles that your organization wants to apply. These roles are then applied when you establish connections between different records in your database.
Outlook 2010/Internet Explorer:
On the Navigation Pane, click Settings, then Business Management.
Click Connection Roles.
Click the New button.
Specify a name and any other important information about your connection role.
Click the Save and Close button.
