![]()
Audio-Video Capture, Conversion, and Editing Software
The prevalence of video hosting sites such as YouTube affords the opportunity for small businesses to get their message out in a way not possible in the not-too-distant past. It’s possible to digitize old radio commercials from cassette tapes or make your own commercials, tutorials, or slide shows for posting on the Web. For the business owner who is a novice when it comes to working with audio and video, there are some no-cost options for capturing, converting, and editing audio and video files.
Here’s a quick look at the software programs covered in this chapter:
- fre:ac (Free Audio Converter): An open source program for ripping audio files from compact discs and converting WAV files into compressed audio files
- Audacity: An easy-to-use yet powerful open source audio editing tool for capturing and editing audio files
- MPEG Streamclip: A handy freeware tool for video format conversion
- Windows Movie Maker: A free video editing tool for Windows
- VirtualDub: A free open source video capture and processing tool for Windows
- Kdenlive: A powerful open source video editor for Linux and Mac OS
fre:ac (Free Audio Converter): An Open Source Audio CD Ripping Program
fre:ac is a handy, lightweight program for extracting the audio files from compact discs so they can be archived on your computer. It’s primarily used for backing up files from music CDs, but it certainly has potential business applications such as archiving files from company training CDs, orientation CDs, etc.
Here are a few facts about fre:ac at a glance:
- Alternative to: illustrate dBpoweramp CD Ripper
- Website: www.freac.org
- License: GPL
- Operating Systems: Windows, Mac OS X, Linux, and Free BSD
- Potential Savings: $39.00 (single user)
![]() Note It’s important to make sure you are working within the law when using this type of software. For example, if you own a business and are the legal copyright owner of the contents of an old training CD that was produced years earlier, then you are within your rights to copy and distribute the contents. If someone else owns the rights, then you need to obtain written permission to copy and use those files. When in doubt, check with your attorney.
Note It’s important to make sure you are working within the law when using this type of software. For example, if you own a business and are the legal copyright owner of the contents of an old training CD that was produced years earlier, then you are within your rights to copy and distribute the contents. If someone else owns the rights, then you need to obtain written permission to copy and use those files. When in doubt, check with your attorney.
Upon launching the program, a Tip of the day window pops up (Figure 5-1). You can disable it if you wish, but it’s a good idea to read the tips to help familiarize yourself with the functions and features fre:ac offers.

Figure 5-1. The Tip of the day window displays upon launching fre:ac. (Used with permission © Robert Kausch 2015)
Feature Highlights
This program is a lightweight application with the primary functions of ripping files from CDs and converting audio files. Here’s rundown of its features as listed on the fre:ac website:
- Converter for MP3, MP4/M4A, WMA, Ogg Vorbis, FLAC, AAC, WAV, and Bonk formats
- Integrated CD ripper with CDDB/freedb title database support
- Portable application, so you can install on a USB stick and take it with you
- Multicore optimized encoders to speed up conversions on modern PCs
- Full Unicode support for tags and file names
- Easy to learn and use, and still offers expert options when you need them
- Multilingual user interface available in 40 languages
- Completely free and open source without a catch
Figure 5-2 shows the workspace, displaying the files of royalty-free production music contained on a CD. By default, all of the tracks are selected but you can deselect the boxes of the files you don’t want to rip.

Figure 5-2. You can rip all of the files from a CD at once, or deselect the ones you don’t need. (Used with permission © Robert Kausch 2015)
Audio files can be converted from one format into another. There are spaces to add information such as the artist, track title, album, and music genre. Figure 5-3 shows the progress of converting a file into a LAME MP3 file. LAME refers to a free software codec used to compress audio into the lossy MP3 format.

Figure 5-3. A file being converted into the LAME MP3 format (Used with permission © Robert Kausch 2015)
fre:ac Support
Unfortunately, there’s not much in the way of documentation on the website other than the FAQ page. For that matter, there are only a handful of tutorial videos on YouTube. However, there is a Beginner’s Manual as a PDF that can be downloaded from ftp://193.169.37.88/Soft/PortableSoft/LiberKey/Apps/Freac/App/Freac/manual/en/beginner.html.
Of course, this application is lightweight and easy to use. What the web site’s documentation lacks should be well covered in the PDF manual.
Audacity®: A Powerful, Open Source Audio Editor
Audacity is a very popular open source program for editing audio files. It’s not in the same league as professional audio editing packages used in the music industry, but it is certainly a great program for importing, exporting, and improving audio files.
Here are a few facts about Audacity at a glance:
- Alternative to: Apple Logic Pro
- Website: http://web.audacityteam.org
- License: GPL
- Operating Systems: Windows, Mac OS, Linux
- Potential Savings: $199.99
Audacity is an easy-to-use multitrack editor. It’s availability for use on Windows, Mac OS, and Linux, making it a widely used program by enthusiasts and pros on a budget.
Feature Highlights
To see the long list of Audacity’s features, click the Features tab on the website (http://web.audacityteam.org/about/features). The following is a quick rundown of several features as described on the website:
- Record live audio
- Record computer playback on any Windows Vista or later machine
- Convert tapes and records into digital recordings or CDs
- Edit WAV, AIFF, FLAC, MP2, MP3, or Ogg Vorbis sound files
- AC3, M4A/M4R (AAC), WMA, and other formats supported using optional libraries
- Cut, copy, splice, or mix sounds together
- Numerous effects including changing the speed or pitch of a recording
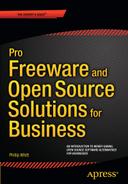
Audacity is primarily a tool used for music production. However, it has other practical applications beneficial to the business owner. Some businesses recycle advertisements from years past. If the advertisement is generic enough, it’s possible to use it indefinitely. Audacity is a great tool to digitize radio spots that are stored on old audio cassettes (Figure 5-4). The audio files can be incorporated with video or still images, posted on your company website, Facebook, YouTube, or any number of sites to further extend the advertisement’s usefulness.
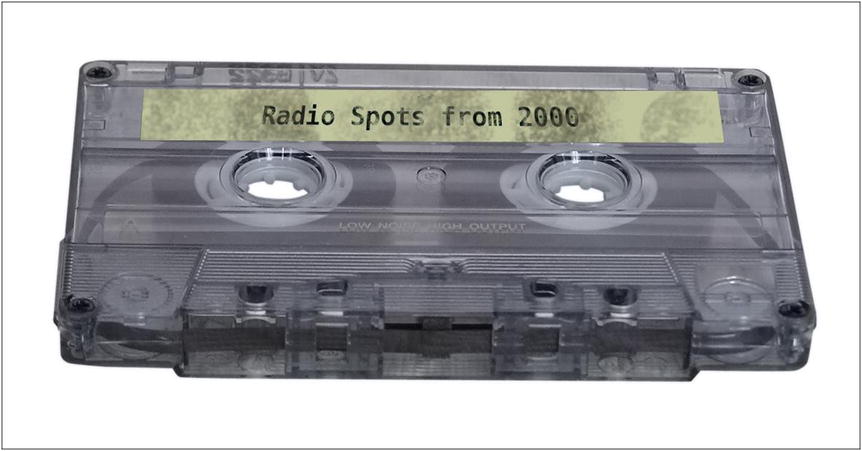
Figure 5-4. Audacity can digitize old radio ad spots for reuse
Of course, it’s also great for archiving your old personal music collection and childhood audio recordings.
![]() Note If you plan to repurpose old radio spots, it’s best make sure you own the rights to those spots. If it is unclear, obtain (written, if possible) permission from the manager of the station that produced and broadcasted them. When in doubt, check with an attorney.
Note If you plan to repurpose old radio spots, it’s best make sure you own the rights to those spots. If it is unclear, obtain (written, if possible) permission from the manager of the station that produced and broadcasted them. When in doubt, check with an attorney.
Audacity can record audio by connecting one end of a patch cord to the line-in jack of your computer, and the other to a play-back device (such as a cassette player). Figure 5-5 show the record button used to capture audio once the playback equipment is connected.

Figure 5-5. Audacity’s Record button for recording audio from playback devices (Used with permission © The Audacity Team 2015)
Editing Capabilities
With Audacity, you can perform a number of editing tasks, such as importing audio, trimming away unwanted portions, and applying filters to modify or clean up the sound. There are many audio filters available for a wide range of purposes (Figure 5-6).

Figure 5-6. The Effects menu in Audacity contains many filters. (Used with permission © The Audacity Team 2015)
![]() Note Audacity does not import or rip files from compact discs. Also, Audacity does not directly support MP3 conversion and an additional library must be installed to export MP3 files.
Note Audacity does not import or rip files from compact discs. Also, Audacity does not directly support MP3 conversion and an additional library must be installed to export MP3 files.
Mono tracks can be split into stereo tracks. Although it’s not true stereo, the file will exist on a left and right channel, each of which can be independently edited. Conversely, stereo tracks can be merged into a single track and can be output as mono.
Audacity can also generate click tracks, which are audio cues to aid in timing in recording music. Click tracks are also used as a means of synchronizing audio to moving images (Figure 5-7).

Figure 5-7. Audacity’s Click Track dialog offers many options. (Used with permission © The Audacity Team 2015)
Audacity Support
Audacity is a popular program, so there’s plenty of help available. The User Manual on the Audacity website (http://manual.audacityteam.org/o/quick_help.html) is the best starting point to familiarize yourself with the basics (Figure 5-8). There are beginning tutorials, and the FAQ page provides a lot of information. YouTube has numerous tutorial videos as well, but some of them may be for older versions. Up-to-date tutorials can be found here: http://wiki.audacityteam.org/wiki/Category:Tutorial#external.
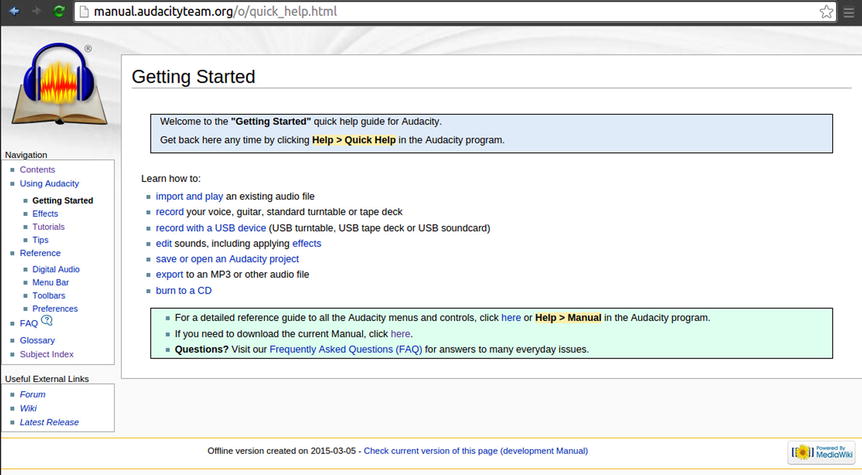
Figure 5-8. The Audacity User Manual is a great starting point to get familiar with this program. (Used with permission © The Audacity Team 2015)
MPEG Streamclip: A Handy, Free Video Conversion Tool
MPEG Streamclip is a useful, lightweight program primarily for converting standard definition video files from one format into another. It also offers some rudimentary editing features. One of this program’s uses is converting larger video files (such as AVI) into formats suitable for playback on mobile devices.
Here are a few facts about MPEG Streamclip at a glance:
- Alternative to: AVS Video Converter
- Website: www.squared5.com
- License: Proprietary Freeware
- Current Version: 1.2
- Operating Systems: Windows, Mac OS
- Potential Savings: $69 (annual subscription to AVS4You.com)
It should be mentioned that there is one caveat that accompanies the use of MPEG Streamclip; it requires that QuickTime Alternative is installed on your computer. This, however, isn’t a huge obstacle. QuickTime Alternative can be downloaded (for free) from the following link on Codecs.com: www.free-codecs.com/download/quicktime_alternative.htm.
Feature Highlights
MPEG Streamclip’s are listed in detail on the Squared 5 website. Here is the abridged version (and reformatted into a bullet list) of this program’s features from the website:
- Play and edit file formats such as QuickTime, DV, AVI, MPEG-4, MPEG-1, MPEG-2, or VOB.
- Transport streams with MPEG, PCM, or AC3 audio to QuickTime, DV, AVI/DivX, and MPEG-4 with high quality encoding and even uncompressed or HD video.
- Video conversion is performed in the YUV color space.
- Other optional video processing features include a powerful motion-adaptive deinterlacer, a field dominance converter, a chroma reinterlacer, and an option to perform interlaced scaling instead of progressive scaling.
- Audio can be converted to uncompressed or to IMA, AAC, MP2, or AMR using the high-quality MP1/MP2/AC3/PCM built-in decoders of MPEG Streamclip; it is also kept in perfect sync with video using a timekeeping system.
- Save edited movies as MOV files, and (when possible) as AVI or MP4 files. Edited MPEG-1 or MPEG-2 files are saved as MPEG or TS files.
- Convert MPEG-2 transport streams into muxed MPEG-2 files for immediate burning at full quality with most DVD authoring applications.
- Handle files and streams larger than 4 GB, split in any number of segments, or with multiple audio tracks, and can also optionally handle timecode breaks. It is compatible with MPEG-1 and MPEG-2 video, MPEG layer 1/2 (MP1/MP2) audio, AC3/A52 audio, and PCM audio.
- The player lets you preview the files and transport streams before doing the conversion; it also lets you visually set the In and Out points for the conversion so you can convert just the part of the file you are interested in.
Once QuickTime Alternative is installed, upon launching MPEG Streamclip the workspace window appears with the Squared 5 logo in the center (a square with five small circles).
For file conversions, it’s essentially a matter of choosing the output format you want. There is a menu with choices of frame size, compression quality, and others options depending on the format chosen. MPEG Streamclip can come in handy for converting larger video formats into MPEG-4 files, commonly used on mobile devices (Figure 5-9)

Figure 5-9. Larger video formats can be converted to MPEG-4, which is used on mobile devices
Editing Capabilities
MPEG Streamclip offers only limited editing functions. It is possible to set In and Out points so that only the desired portions of the movie are converted to the new file. There is an Adjustments dialog box for adjusting the brightness, contrast, saturation (Figure 5-10), and volume of the movie. There is also an option to add basic text as a watermark that appears in the lower right hand corner of the video frame.

Figure 5-10. Brightness is improved using the Adjustments dialog box
MPEG Streamclip Support
There’s no real documentation on the Squared 5 website to speak of (other than the Features page and the website itself), but there is an MPEG Streamclip User’s Guide available as a downloadable PDF from https://people.ok.ubc.ca/creative/Mbtemp/MPEG%20Streamclip%20User%27s%20Guide.pdf.
Fortunately, YouTube has plenty of instructional videos, many of which are introductory tutorials. MPEG Streamclip is a simple enough program to ensure there’s no shortage of learning resources for it.
Windows Movie Maker: The Free Microsoft Video Editing Tool
Many of the small business owners I come into contact with are, by their own admission, not technically inclined. I’m often surprised at how often I talk with Windows uses who aren’t aware that Movie Maker may already installed on their computer, or that it can be downloaded for free from Microsoft. Although those people are probably a small minority, I felt it important to touch on this program.
Movie Maker has made some notable strides since its early days. It can be a valuable tool for creating videos to output to DVD or post on Facebook and YouTube.
Here are a few facts about Windows Movie Maker at a glance:
- Alternative to: Adobe Premier Elements
- Website: http://windows.microsoft.com/en-US/windows-live/movie-maker
- License: Proprietary Freeware
- Current Version: 12
- Operating Systems: Windows
- Potential Savings: $99.99
If Microsoft Movie Maker is not currently installed on your computer, it can be acquired from the Movie Maker download page at http://windows.microsoft.com/en-us/windows-live/movie-maker.
Feature Highlights
Movie Maker offers a variety of features to help you create a polished production. The following list provides an overview:
- Import existing video files, audio files, and pictures into Movie Maker
- Import video files from your from digital video camera
- Add a variety transitions and effects to your production
- Add titles and credits to your production
- Output your movie in a variety of ways, such as on DVD or YouTube
Editing Capabilities
With Movie Maker, you can give your movies a professional look by adding titles and text (Figure 5-11). Effects and transitions can be added to further refine your movie production. Although it doesn’t have any adjustments for color correction (although there are a few work-around solutions on YouTube), Movie Maker has a rudimentary brightness adjustment to brighten dark, underexposed video.

Figure 5-11. A title similar to this can be added to a video production for a professional touch
Movie Maker allows you to choose the resolution of your video, which is helpful for posting your movie on sites such as Facebook or YouTube (Figure 5-12).
Figure 5-12. Windows Movie Maker offers several options for choosing the resolution of your movie; a few example resolutions are shown here
There are several output options for your movie production available, such as DVD (Figure 5-13) high definition display, computer display, e-mail, and mobile devices.

Figure 5-13. Windows Movie Makers offers numerous choices to output your movie, including DVD
Windows Movie Maker is a fairly easy program to use, but there are several good resources to help you if you encounter problems using this application, or if you have a desire to be more creative with your productions. Blaine’s Movie Maker Blog (http://movies.blainesville.com/) is a helpful resource, with just about all the information you’d need to make the most of your videos using Movie Maker (Figure 5-14). There are also a number of good tutorial videos on YouTube to help get you up and running.

Figure 5-14. Blaine’s Movie Maker Blog is a great learning resource for becoming familiar with Movie Maker to make the most of your video
VirtualDub: Open Source Video Processing for Windows
We looked at the features offered in Windows Movie Maker, which are probably sufficient for many people making their own business videos. VirtualDub offers a few features not found in Movie Maker, and this makes it an excellent companion program (but it can be used as a basic editor in its own right).
Here are a few facts about VirtualDub at a glance:
- Alternative to: Adobe Premier Elements
- Website: www.virtualdub.org
- License: GPL
- Current Version: 1.10.4
- Operating Systems: Windows
- Potential Savings: $99.99
VirtualDub is really more of a video capture and processing tool than it is a general purpose video editor. Among its strengths are filters such as Levels, Hue/Saturation/Value, and many others. VirtualDub can make color enhancements and improve exposure in less-than-perfect video clips (Figure 5-15).

Figure 5-15. Improving a dark video using the Levels filter within VirtualDub
![]() Note It’s helpful to have a video capture card or device that captures video as AVI files to your computer. Otherwise, you can use a free program like MPEG Streamclip (also covered in this chapter) to convert other formats to an AVI file in order to use VirtualDub.
Note It’s helpful to have a video capture card or device that captures video as AVI files to your computer. Otherwise, you can use a free program like MPEG Streamclip (also covered in this chapter) to convert other formats to an AVI file in order to use VirtualDub.
Feature Highlights
VirtualDub has a an extensive list of features primarily for managing AVI files. I’ve listed them here as they are shown on the website, although a couple of them are slightly abridged:
- Fractional frame rates
- Optimized disk access for more consistent hard disk usage
- Create AVI2 (OpenDML) files to break the AVI 2GB barrier and multiple files to break the FAT32 4GB limit
- Integrated volume meter and histogram for input level monitoring
- Real-time downsizing, noise reduction, and field swapping
- Verbose monitoring, including compression levels, CPU usage, and free disk space
- Access hidden video formats your capture card may support but not have a setting for, such as 352x480
- Keyboard and mouse shortcuts for faster operation (such as just hit F6 to capture)
- Clean interface layout: caption, menu bar, info panel, status bar
- Read and write AVI2 (OpenDML) and multi-segment AVI clips
- Integrated MPEG-1 and Motion-JPEG decoders
- Remove and replace audio tracks without touching the video
- Extensive video filter set, including blur, sharpen, emboss, smooth, 3x3 convolution, flip, resize rotate, brightness/contrast, levels, deinterlace, and threshold
- Bilinear and bicubic resampling so no blocky resizes or rotates here
- Decompress and recompress both audio and video
- Remove segments of a video clip and save the rest without recompressing
- Adjust frame rate, decimate frames, and 3:2 pulldown removal
- Preview the results with live audio
Editing Capabilities
VirtualDub is somewhat limited when compared to a more full-featured program. For example, video processed using this software requires a separate authoring program to write a DVD. Another limitation is the fact that it only handles Microsoft AVI files. Although it does have some editing features, it could be used to augment Movie Maker.
However, it does offers a generous filter set to improve video quality and to add a variety of effects. The preview window provides a side-by-side comparison of the original dark video (Figure 5-16).

Figure 5-16. Side-by-side comparison of original video and the clip with a filter applied
![]() Note Although VirtualDub already has a large filter set, there are even more third-party filters available to download from providers such as majorgeeks.com.
Note Although VirtualDub already has a large filter set, there are even more third-party filters available to download from providers such as majorgeeks.com.
VirtualDub also allows the placement of logos or images over a video clip. In Figure 5-17, I placed a simplified version of my logo over a sample clip of a film transfer done recently (I post sample clips on YouTube to help me promote my film conversion services). I created the logo using GIMP 2.8, and exported it in the PNG file format with a transparent background.

Figure 5-17. A logo added to a video clip in VirtualDub
VirtualDub also allows you to remove unwanted sections of video to create a new, edited clip by using the Mark In and Mark Out feature. You can also remove existing audio tracks and replace them with new ones if needed. After the video clip has been processed and edited, you can save it as a new AVI file.
VirtualDub Support
There are quite a few video tutorials on YouTube that will help the new user get acquainted with VirtualDub. I recommend taking some time to watch these if you are new to video editing. There is also a support forum on the official VirtualDub website.
Kdenlive: The Open Source Video Editor for Linux and Mac OS
Kdenlive is feature-rich, free, open source video editor developed primarily for several Linux distributions, but is also available for Mac and FreeBSD (a derivative of UNIX).
Here are a few facts about Kdenlive at a glance:
- Alternative to: Adobe Premier, Final Cut Pro X
- Website: www.kdenlive.org
- License: GPL
- Current Version: 15.04.0 (0.9.10 recommended for Ubuntu Linux)
- Operating Systems: Linux, Mac OS, FreeBSD
- Potential Savings: $99.99
Kdenlive is capable of producing basic video clips, but is also powerful enough for semi-professional work. It supports DV, AVCHD, and HDV editing. Figure 5-18 shows a video clip in the timeline of Kdenlive.

Figure 5-18. A video clip in the Kdenlive timeline
Feature Highlights
Kdenlive boasts functions for the creative film maker. The full list can be found on the Features page of the Kdenlive website. The following list is a condensed, quick overview of the features from the Kdenlive website:
- Mix video, audio, or image files supported by Kdenlive
- Support for a wide range of cameras including RAW and DV editing, MPEG2, MPEG4, and H264 AVCHD
- Multitrack edition with a timeline and unlimited number of video and audio tracks
- Video and audio tracks organized in layers
- Tools to create, move, crop and delete video clips, audio clips, text clips, and image clips
- Configurable keyboard shortcuts and interface layouts
- A wide range of effects and transitions plus the ability to add custom effects and transitions
- Non-blocking rendering using a rendering separate application which allows you to stop, pause, and restart rendering so you can continue to work on your project without any possible loss of data
- Export to standard formats: DV (PAL and NTSC); MPEG-2 (PAL, NTSC, and HDV) and AVCHD (HDV); High-quality h264; and non-destructive formats
Editing Capabilities
Kdenlive offers some tools normally found in high-end video editing programs. There are tons of effects for working with audio, adjusting contrast, adding fun effects, etc. Figure 5-19 shows the Effect list (clicking the small triangle reveals the functions nested under each effect heading).
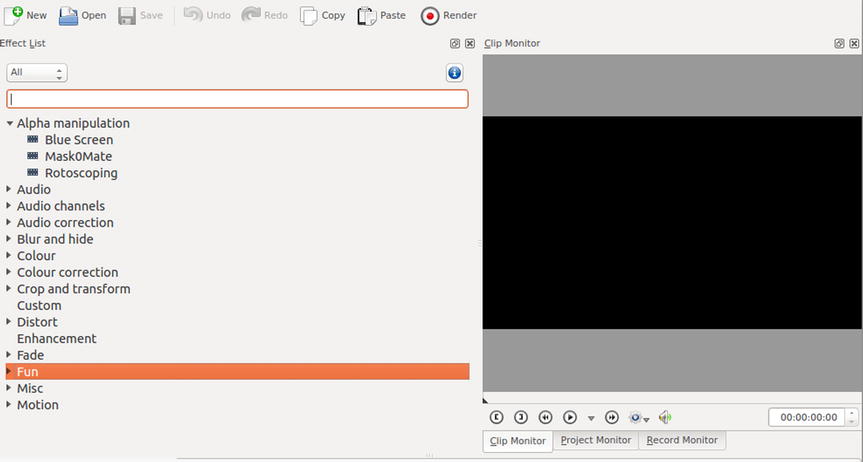
Figure 5-19. A video clip in the Kdenlive timeline
More often than not, the quality of the video shot with consumer camcorders and video cameras can stand improvement. The Color Correction effect is especially useful for polishing up video by improving colors and exposure in footage.
The Curves feature (Figure 5-20) helps bring out detail in dark footage. Color can be enhanced by using the 3 point balance or the white balance effect.

Figure 5-20. Detail can be brought out of dark footage using Curves
When your movie is completed, there are numerous video format choices available for output. It can be output to various formats such as MPEG-2, MPEG-4, Raw DV, just to name a few (Figure 5-21). It can also output to DVD using your computer’s DVD authoring software.

Figure 5-21. Kdenlive offers numerous video formats for output of your movie
Kdenlive Support
The Kdenlive/Manual is the best place to start. It can be found on the Kde UserBase Wiki (Figure 5-22). The link to the wiki is https://userbase.kde.org/Kdenlive/Manual. There are plenty of Kdenlive video tutorials on YouTube as well, everything from beginning tutorials to advanced editing techniques. There is also an active forum where you can ask your questions.

Figure 5-22. The Kdenlive Manual
Summary
This chapter looked at several no-cost solutions for working with audio and video files. This can be especially useful for the small business looking to create marketing messages to get on to platforms like YouTube, social media, and other avenues where audio and video is effective.
The first software title, fre:ac (Free Audio Converter), is a free and effective tool for ripping CDs and converting audio files from one format to another. Audacity also converts audio files, but it also captures analog audio from sources such as audio tapes and LP records. Audacity offers effects filters and editing capabilities for audio.
MPEG Streamclip is a handy tool with rudimentary editing abilities primarily used for converting video files from one format to another. Windows Movie Maker (often already installed on Windows computers) is a free video editing program that offers a number of transitions and effects to polish up your video productions. VirtualDub is a video capture and processing application for Windows that can work well as a companion program to Movie Maker. It offers a wealth of effects filters, including color and exposure correction. Kdenlive is a feature-rich video editing program for use with Linux and Mac OS. It boasts a number of effects and transition styles. It can also edit HD video.
For additional no-cost programs, there are several other audio and video programs as well as disc burning software listed in Appendix B of this book.
In the next chapter, you’ll look at some free options for project planning, inventory management, and time tracking.