![]()
Installing Windows 10!
Wait what? Windows 10? Isn’t this a Linux book? Well, yes, the focus of this book is firmly on learning Linux with the Raspberry Pi, but one of the neat features that has a lot of people excited is its new found ability to run Windows 10. Now if you’re starting to think that we’re being just a little bit heretical, then don’t worry, we’re only going to scratch the surface in this book. In fact we’re going to show you how to install it, get it up and running, and that’s basically it.
So why then are we taking up precious space with this? Well, we want you to be aware of all the capabilities of the Raspberry Pi, and even though you might not want to use Windows 10 now, who knows what Microsoft will come out with in the future? In short, as much as we love Linux and Open Source, we are also pragmatic and that means using the best tools at our disposal. In this chapter, we’re simply providing you with a new tool for your toolbox.
I Thought Windows couldn’t Run on the Pi?
For those of you that have read the first edition (thank you by the way!), you might recall that we spent quite a bit of time in the Introduction explaining that although the Raspberry Pi is an ARM based device, it can’t actually run Windows RT (Microsoft’s ARM based version of Windows commonly found on tablets and the like). Needless to say if you check the Introduction in this edition that particular boxout has been replaced!
Now before you get too excited about running Windows on a Pi, the first thing you need to know is that the version of Windows that supports the Pi is not the one that you may be looking forward to running on your PC (especially if you have previously “upgraded” to Windows 8). Instead it is a highly cut down version of Windows that really just makes the basics available to you. You get a powerful API for writing software but it’s really meant to be powering data collection devices or remote sensors – not a desktop.
Okay, so the lack of a full on desktop environment is a bit disappointing. I’m not a big Windows user, and even I was disappointed that I wouldn’t be able to turn my Pi into a handy remote desktop machine. However there is some good news to be had – the Internet of Things edition of Windows 10 will be completely free to download and use on the Pi!
![]() Note All of this stuff covered in this chapter has been taken from the Internet and is based on what is believed to be the best current sources. It’s quite possible that by the time you read any of this the platform will have moved on and this won’t be so relevant.
Note All of this stuff covered in this chapter has been taken from the Internet and is based on what is believed to be the best current sources. It’s quite possible that by the time you read any of this the platform will have moved on and this won’t be so relevant.
Why include it? Well, this turn of events (Windows on the Pi) deserves mentioning and from what I can tell, some of the instructions and requirements listed on Microsoft’s own page aren’t actually correct. So use this as a guide, but you may find newer and more accurate stuff available by the time you get to read this.
Check out their main site for the latest and greatest:
The Internet of what Now?
The Internet of Things (or IoT for short) has been taking the world by storm, especially in the last year or so. Previously the Internet was full of data. You could search for restaurants, send and receive messages and do some online banking without any trouble at all but ultimately you were just moving bits of data around. Useful for sure but not terribly exciting.
Step in the IoT. With this way of looking at the Internet, rather than it being simply machines sharing data, it instead a collection of things such as sensors or devices that can be communicated with and controller over the network.
For example, you could add a temperature sensor to your Raspberry Pi, put it in a cupboard somewhere and it will happily sit there reporting the current temperature. That might be useful if you’re doing something like brewing your own beer where you want to track and control temperature. In fact I actually use the Pi I bought for the first edition of this book to control the boiler in a building using a solid state relay.
So when we talk about the Internet of Things, what we’re really talking about is letting computers interact with the world around them. From sensing (such as temperature, light and even radiation) to doing (turning a boiler on and off or opening or closing a gate), this opens a whole new way of using the Internet.
One of the challenges with the IoT is the fact that you need things to actually do the sensing or do the doing. You could use a big box PC, but that’s not really ideal. They draw a lot of power (especially if you just want to read a temperature sensor), require cooling, are generally noisy, take up a lot of space and are well, somewhat unsightly in modern homes. Add to that the fact they’re heavy, they’re really not the kind of thing you want to place in a tree or the top shelf in the garage.
What you need is something small, portable and reliable. Ideally you want no moving parts (so no fan that can die on you in the middle of the night, 50 miles from where you live), low power requirements and given that it could be in a harsh environment, you don’t really want to be paying too much for it. If that sounds like a Raspberry Pi, then you’re not the only one who thinks so – in fact the Pi’s ability to interface with such a wide range of sensors and devices has made it a very popular system for IoT development. Not only do you get access to all those devices but you also get to do it with a full operating system, something that something like Arduino can’t offer you.
But why Windows?
Personally, I’d be unlikely to use Windows but that’s because I’ve been working with Linux for nearly two decades. I’m comfortable with Linux and I like how it works. However one of my best friends didn’t follow my lead and stayed with Windows. Now he’s a Windows expert, he’s unlikely to want to use Linux, and especially when starting out with something new people are keen to use something that’s familiar to them.
If you don’t buy that as a good enough reason, perhaps the fact that the IoT version of Windows provides a full and comprehensive API (.NET access to hardware anyone?) and integrates very nicely with Microsoft’s Azure cloud platform could persuade you. One of the key benefits that you get with this platform is that everything comes available out of the box (or at least will by the time the full version is released). With Linux, you need to piece the bits together yourself. Now that might not be an issue for you, but there’s something to be said for having someone else take care of all of that for you.
Microsoft is also putting a lot of effort into building a community around the Internet of Things. Even though it’s still in the tech preview stage, there are projects online that you can try out already. We’re not going to cover those here, but if for no other reason than knowing your enemy (or getting insights on how other people are solving problems) it’s worth checking out.
Getting Started
Like using the Pi itself, we need to get a few things set up if we’re going to have any luck in getting your Pi to boot up with Windows. Here’s a quick list of what you’re going to need (adapted from the developer site):
- Machine running Windows 8
- Your Pi 2
- An 8GB mico SD card (at least 8GB) – class 10
- HDMI cable
- Ethernet cable
Windows 8
Now if you look at the developer’s site, it claims that you need Windows 10 on your PC in order to use these tools. It also makes the claim that you must be running directly on hardware rather than running in a virtual machine (i.e. you need Windows as your main operating system – you can’t use Virtualbox or VMWare).
This didn’t seem to be true from my testing. In fact it the tools ran just fine under Windows 8.1 on VMWare and I had no trouble writing the flash image to the SD card. Thus, you’ll probably be fine if you do this as well. It could be that Microsoft changes something in the future that does require Windows 10, but VMWare at least had no trouble dealing with an SD card reader.
Your Pi 2
Okay, this is an important one. Windows 10 needs the latest and greatest Pi. The original Pi (all versions) simple isn’t up to the task and Windows won’t work. You need at least the Pi 2 although presumably later version of the Pi will continue to be supported. Microsoft seems to be pretty keen on IoT and I expect they’ll be supporting the Pi for a long time to come.
8GB SD Card
You should already have this from your initial set up. Of course you’re probably quite happy with the way things have been set up and aren’t that keen on trashing it just to give Windows a spin. In that case you’re going to need a second card.
The minimum requirements from Microsoft state that 8GB is needed and should be at least a class 10. The class refers to the speed of the card, but these days class 10 cards are more the norm than the exception. Most cameras need high speed cards so they can quickly get their large images stored safely, otherwise it makes the camera feel slow. Because of this you really shouldn’t have any trouble finding a class 10 card in your favourite local store.
![]() Caution When I first tried to test this, I used an SD card that apparently isn’t a class 10. It was able to write the image, and although it would boot the Pi, it would end up in a black screen and never continue. A bit of web searching later, I discovered this is a known issue with slow SD cards, which is why a class 10 is required. So save yourself a lot of frustration and make sure your card is a class 10 before you spend a few hours trying to debug it.
Caution When I first tried to test this, I used an SD card that apparently isn’t a class 10. It was able to write the image, and although it would boot the Pi, it would end up in a black screen and never continue. A bit of web searching later, I discovered this is a known issue with slow SD cards, which is why a class 10 is required. So save yourself a lot of frustration and make sure your card is a class 10 before you spend a few hours trying to debug it.
HDMI Cable
Not too much to say about this one. If you’ve been following along with this book you already have it and if not, well, you only need it to “see” that Windows has booted on the Pi. There is a tool included with the Windows IoT download that lets you detect a Pi on your local network, so if your cable is busy elsewhere, you can get away with just using Ethernet.
Ethernet Cable
Similar to the HDMI cable, you can get away with this one if you don’t really care about seeing the Pi on the network and you’re really just curious to see if a Pi can really boot Windows. If you don’t have an HDMI cable, detecting the Pi on the network will really be the only way to know for sure that it has worked.
Downloading the Tools
For some reason best known to themselves, Microsft has made the IoT download available as an ISO image. This means it looks and feels like a CD or a DVD and in fact you could burn it to a DVD if you wanted to. However it only contains a single executable file, so why they went to all this trouble is beyond me. In any case you’re going to need the ISO image and tools to access it. On Windows 8.1, (it won’t work on Windows 7 and below) Windows will take care of this for you and will open the ISO image as a virtual DVD – you don’t need to actual burn it to disc.
At the time of writing, you can download the image from the Internet of Things dev centre found here:
http://go.microsoft.com/fwlink/?LinkId=616847
If that link doesn’t work for you, searching Google for “Windows 10 Raspberry Pi 2 download” will find the link for you.
Installing the IoT tools
Once you’ve downloaded the image you should end up with a file that looks like Figure 12-1.
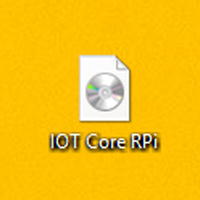
Figure 12-1. Windows can see it’s an ISO image
If you see this icon then you know that Windows is able to open it. You’ll need at least Windows 8.1 to get this to work, though.
When you double click on this icon, Windows will mount the image as a virtual device and will pretend that it’s a real DVD. There’s only a single file on the image and that’s the one that we need to run. You should see something like Figure 12-2:
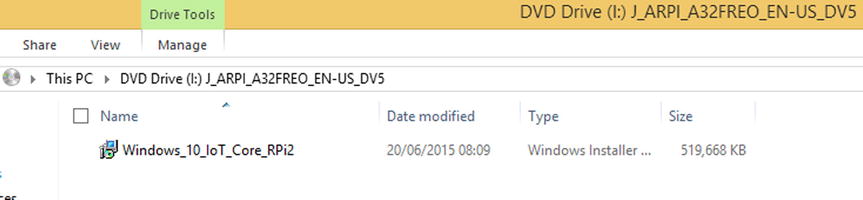
Figure 12-2. Opening the ISO image
I don’t actually have a DVD drive attached to this machine (it’s a virtual machine in any case) so you can see that Windows is taking care of that behind the scenes. Let’s get the tools installed by double clicking on the installer. You should get this installer as in Figure 12-3:
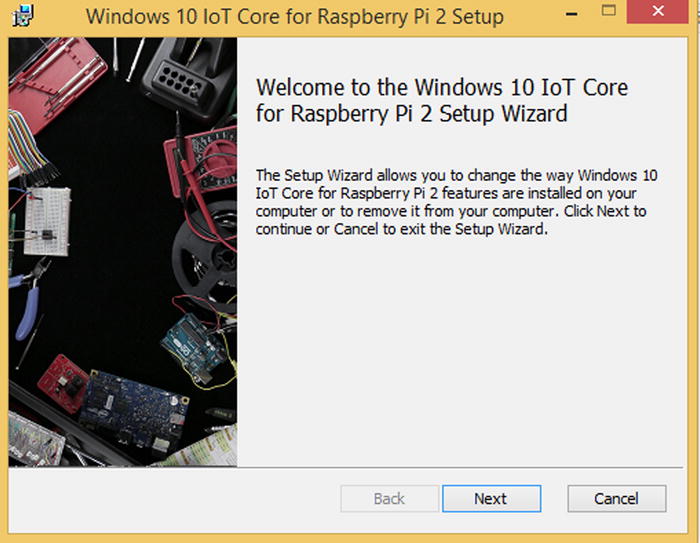
Figure 12-3. Installing the IoT tool set
As with most Windows installers (though whether you should or not is debatable) you can get through simply by pressing Next and agreeing to everything. After spinning about for a bit, the installer should tell you that everything has been properly installed and you can exit. Everything is now ready for use.
What do you Get in the Box?
Well so far as I can tell, you get three things of interest. First is a handy tool for writing out the firmware image to your SD card. The second is the firmware image that you want to actually write and contains the IoT version of Windows 10. Lastly is a dinky little tool that detects an IoT Pi on the network and tells you its status.
Let’s take them for a spin…
Writing the Firmware to the SD Card
You’ve already done this under Linux when you initially installed NOOBS or Raspbian onto your Pi. Back then though you were using a different set of (tried and tested) tools and potentially did it under Linux or a Mac. The firmware image seems to be just that, a simple image that we write to the SD card, but just in case Microsoft does something special, we’re going to use their tools for this one.
First we need to find it. On my machine, it was installed in the following location:
- C:Program Files (x86)Microsoft IoT
If you browse to that directory you should see something like Figure 12-4.
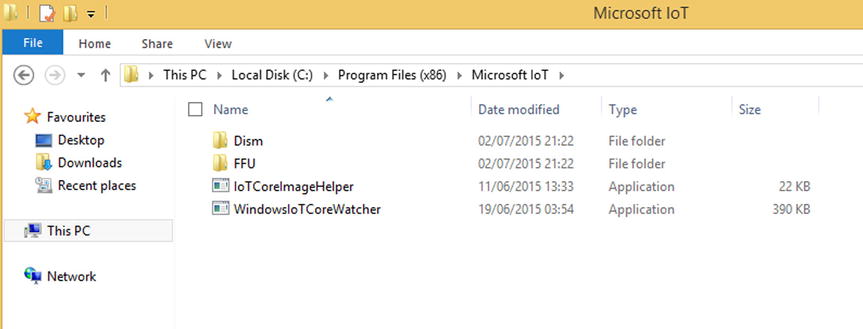
Figure 12-4. Finding the IoT tools
The application we’re interested in is “IoTCoreImageHelper” which is really just a fancy sounding name for “Image Writer”. Double click on this app to start it up and you’ll get a nice little app with a simple and clean interface (Figure 12-5):
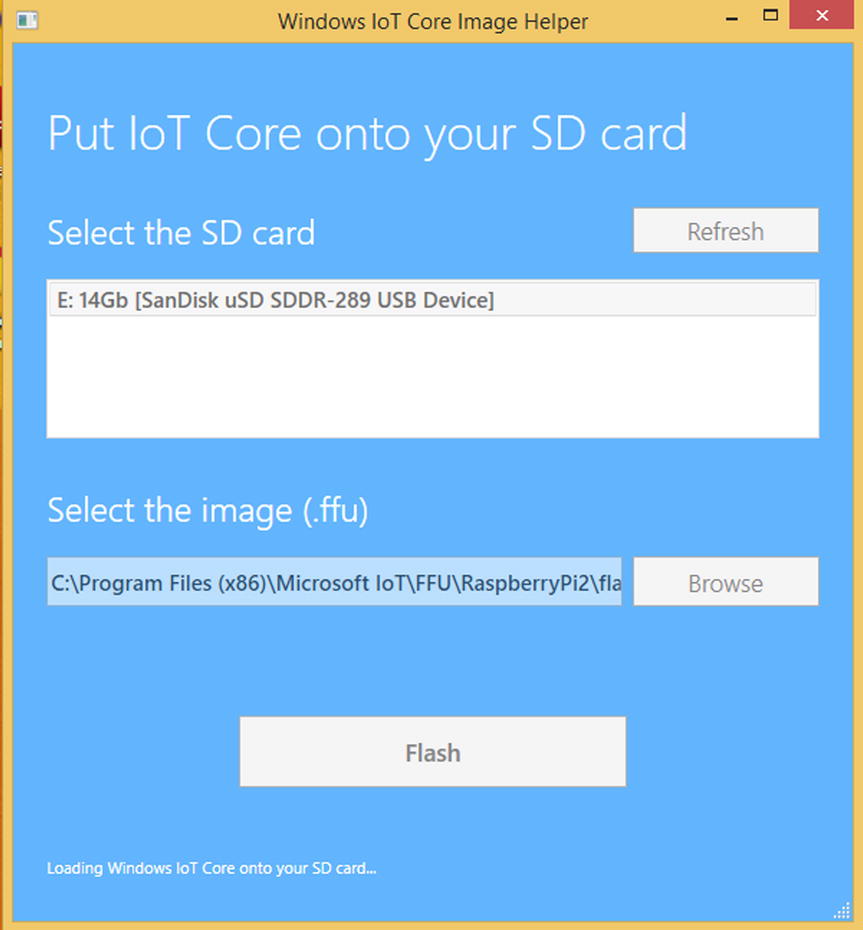
Figure 12-5. Burning the image onto your SD card
As you can see, I took the screenshot after I’d already filled in the basics. It’s worth noting that originally, the SD card didn’t show up and I was beginning to wonder whether the Microsoft site had in fact been correct in that it would require a real physical machine to write to the card. However it turned out that I had simply neglected to plug the SD card reader in (whoops) and as soon as VMWare detected it, I was able to press the Refresh button and see the card right away. So do make sure that Windows can see the device and it shows up under “This PC” (although it will always by “My Computer” for me). I also had to reinsert the SD Card for Windows to see it, even though it had properly detected the card reader. Why? Who knows, but sometimes wiggling the wires actually does fix things.
The last thing you need is to select the flash image file that you want to write to the card. This is located in the same folder as the tools under FFU (Figure 12-6):
- C:Program Files (x86)Microsoft IoTFFURaspberryPi2
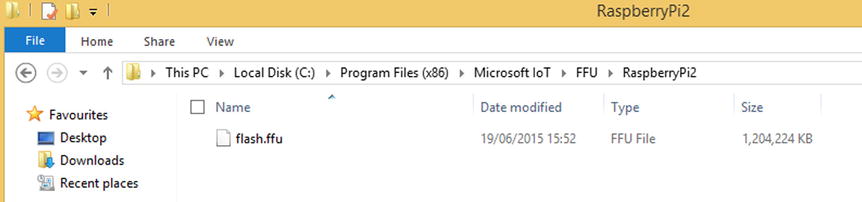
Figure 12-6. The rather originally named flash file
Once you’ve selected the path, all you have to do is press the “Flash” button and it will write to your card. You will get a final reminder that you’re about to pulverize your SD card (see Figure 12-7):
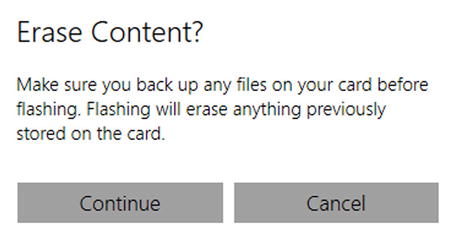
Figure 12-7. Are you sure you want to erase the card?
Now depending on which version of Windows you’re using, you will get an alert asking you if it is okay to “make changes to this computer”. In reality it won’t change the machine, but it does need elevated privileges in order to write directly to a device (Linux also requires elevated privileges if you want to work directly with devices). So if you get the following warning, just say “Yes” and carry on (Figure 12-8):
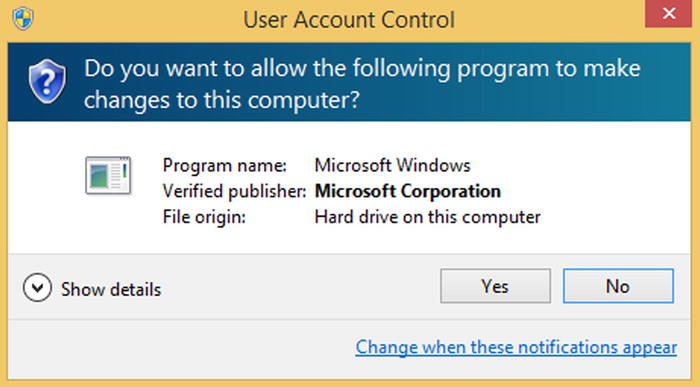
Figure 12-8. You need to give the program a higher level of access so it can write directly to the SD Card
It looks like this shiny new tool is actually a frontend for an older console (text based) application as when it is writing you will see updates in a console screen. Although you can run this command manually yourself and avoid using the graphical interface, you’d need to work out the flags and options by yourself. In any case don’t be surprised or concerned when you see the following window pop up (Figure 12-9):
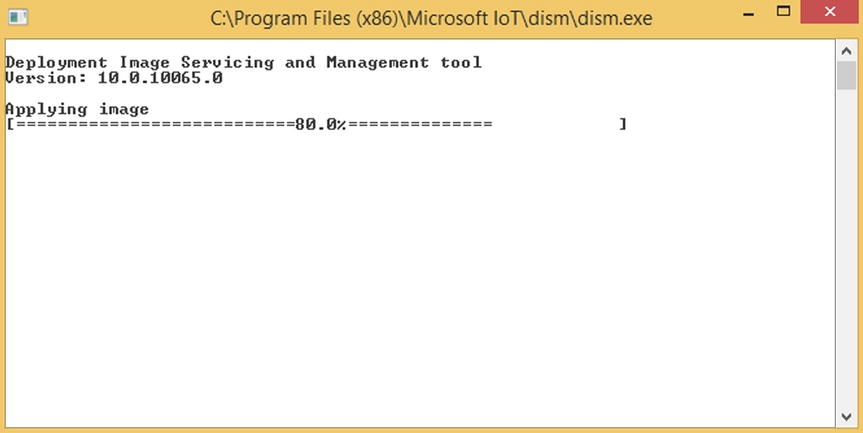
Figure 12-9. Writing the image to the SD card
It can take quite some time to write the image file, especially if you’re using USB 2. Even when using USB 3, it still took a good ten minutes for this image to be written successfully. Don’t worry if it seems to be taking its time, it’ll get there in the end.
Once it is complete, you’re now ready to boot up your Pi.
Firing up the Pi
Now that you’ve got Windows on to the SD card, it’s time to actually put it to work. Like NOOBS or Raspbian, this bit is really straight forward – all you have to do is insert the SD card and power up the Pi. That’s really all there is to it.
After you power it on you should see a black screen with the following logo in the middle of it and all being well, a little “busy please wait” logo will follow just beneath it (Figure 12-10):
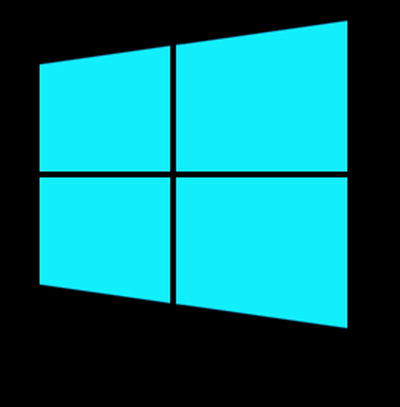
Figure 12-10. Windows boot logo
After a bit of spinning the screen will go black for a while. This is perfectly normal and lasts for a couple of minutes. Once it has done what it needs to do (like Raspbian, there is some initial set up done during the first boot such as expanding the partition size), it will reboot and start up the default testing application.
Before we get to that though, there is something else you might encounter. When the screen goes black, rather than rebooting after a few minutes, it instead stays, well, black. Now it’s not really clear how long you should wait, but I managed to get through an entire episode of Mythbusters without so much as a peep from the Pi. I decided that I should reboot it and give it another go. This time it did reboot after a minute or so, but instead of loading the default app, it just went back to the same logo, did a bit of spinning before going black and rebooting. Rinse and repeat.
As I mentioned briefly earlier, this turns out to be a known issue if you don’t use a high speed (specifically at least a class 10) SD card. I hadn’t noticed that the card I was using was not in fact class 10 and as I always buy class 10, I didn’t occur to me to check.
So, if you end up with your Pi in a rebooting time loop, or it just sits there in stubborn blackness, it’s probably your SD card. As soon as I replaced mine with a real class 10, it worked first time. To paraphrase the Mythbusters, I make these mistakes so you guys don’t have to.
Configuration Time
Now assuming you don’t get the black screen of death, you should instead end up with a screen that looks something like this (Figure 12-11):
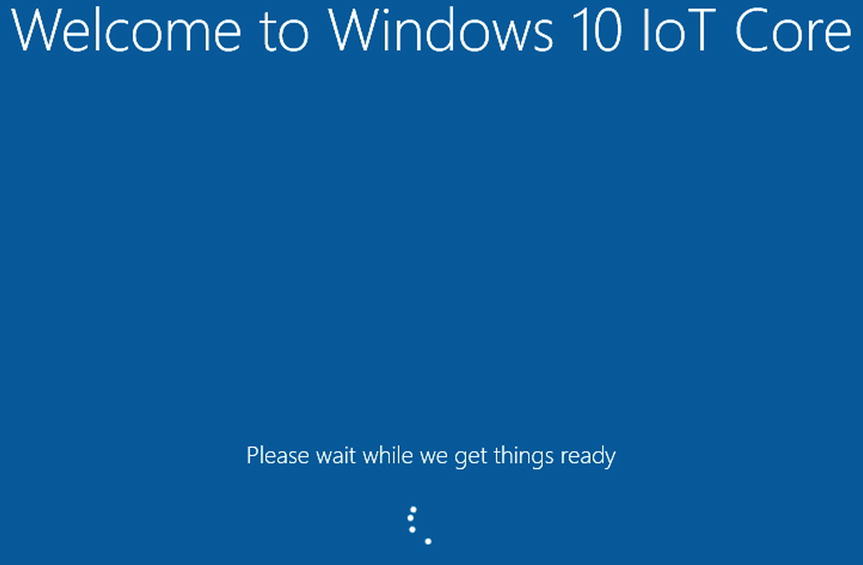
Figure 12-11. Windows getting things ready
Given the time wasted with the other SD card, you can probably imagine how happy I was to see this particular screen. If you see this too, then your Pi is only a few minutes away from being ready for you to configure it. Here’s the screen that follows this one (Figure 12-12):
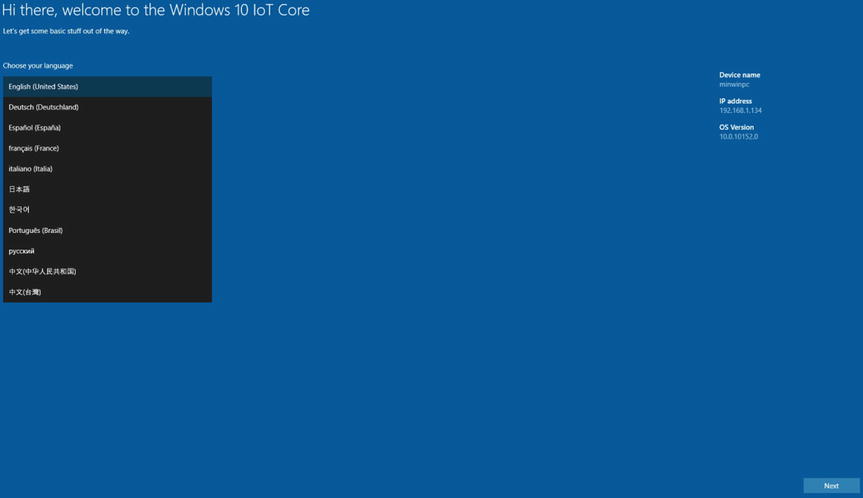
Figure 12-12. Welcome to Windows on Pi
Now this screenshot is a little hard to read, but it’s here mostly to show you the screens that I went through. On the left we have a list of languages and on the bottom right a next button. Fortunately for me, English is what I wanted and so all I had to do was hit the next button. Of course if you prefer another language this is where you can set it up.
On the top right are some basic pieces of information about the Pi such as its name, IP address and the OS version that it’s running. Once you press Next, you’ll be take to the final screen which shows your Pi fully operational (Figure 12-13):

Figure 12-13. Fully booted Pi
To save space, I’ve taken a snippet from the middle of the page. The options on the top are fairly self explanatory, so I will leave those for you to explore. This page gives a little bit more information than the configuration page, but really not that much of interest to us at this stage. In fact the only real difference is a pretty picture of the Pi and a list of connected devices.
One useful feature about this page though is that it provides you with a link to the Microsoft “Windows on Devices” page which will help you get started with developing software for your Pi. Whilst browsing around I even came across tutorials for writing your own device drivers, so there’s really something for everyone on there. In any case congratulations are in order – you’re one of the first people to run Windows on a Raspberry Pi! I have to admit it was pretty cool to see this booting the first time and even I am interested in seeing where Microsoft takes this platform!
Sensing the Pi on the network.
Before we wrap up, let’s take a step back to the other tool in the toolbox, “WindowsIoTCoreWatcher”. What it really is is a way for you to detect the Pi over the network. If you go back to the folder (check out the first part of this chapter for a reminder of where it is) you can fire it up by double clicking its icon.
If your Pi is alive and well you should see something similar to this (Figure 12-14):
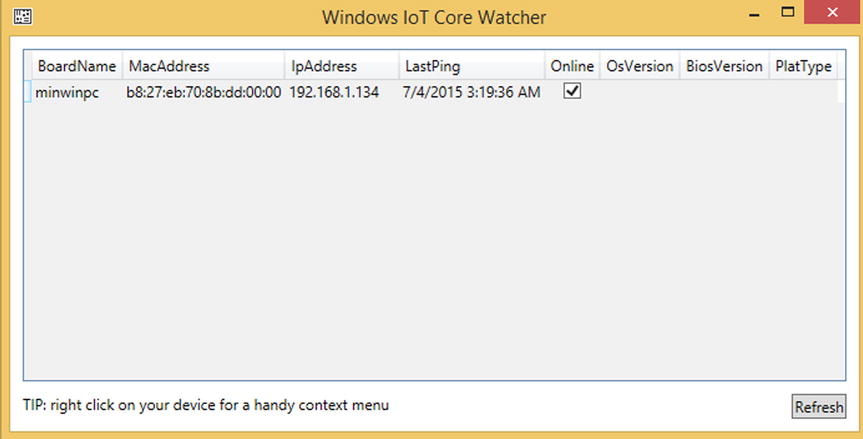
Figure 12-14. IoT Core Watcher lets you spy on your Pi
This was how I was able to determine that my Pi was half alive after all the black screen and rebooting issues – it showed up in this list. Now granted it doesn’t tell you very much but it does at least let you know that the Pi is up and running and most importantly what its IP address is. Once you develop your own apps and start deploying systems, being able to quickly find your Pi (and specifically finding the right Pi as you could well have a number of them) this application could become very handy indeed.
What next?
So now you have Windows installed what can you do with it? Well with the basic set up, honestly not a lot. However on the main application screen in the top left hand corner there is a tab for “Tutorials”. If you click that, you will be able to find some projects that you can try to get yourself started. These are hardware based projects such as “Blinky” which involves turning an LED on and off. There are of course far more complicated projects available.
As mentioned before, there is a developer site that you can visit:
https://dev.windows.com/en-us/iot
This site contains a wealth of information, tutorials and advice on building devices with Windows. As this is primarily a Linux book we won’t go into any more detail on this, but hopefully this piqued your interest in the Internet of Things and just maybe added an extra string to your bow.
Summary
This chapter was a quick walkthrough on setting up Windows 10 for Internet of Things on a Raspberry Pi. This stuff is still in preview and so things are subject to change but the basics are likely to very similar.
We walked through downloading the ISO image containing the toolset and firmware, extracting and installing that toolset and then using the provided tools to write the image to your SD card.
We then booted up the Pi, did some basic configuration and used the IoT watcher application from the toolset to verify that the Pi was up and running. We tied off that section by highlighting the best website to visit for Windows on the Pi.
Windows on the Pi is still a bit controversial but I think it is a big step forward in the adoptance of the Raspberry Pi as a compute platform. Sure it was initially intended just for learning how a computer works but it has far and away exceeded those initial goals. It has great Linux support and now Microsoft is added their own support for the platform. This really can’t be bad for the Raspberry Pi or us and users and developers.