![]()
Doing it by Hand – Writing an SD Card Image
In the first chapter of the book, we highlighted how today it is no longer necessary to write the operating image directly to an SD card because NOOBS will take care of that for you. In fact NOOBS makes it so easy, you might be wondering why we’re still including this information at all.
Well, the thing is NOOBS is all well and good when it works and does what you want. Specifically if you’re a new user and want to install Raspbian or easily try a different operating system then NOOBS has you covered. But if you want to do anything else such as install a different operating system a number of times without having to redownload the image ten times or you want to put Raspbian on a hundred SD cards (well, who knows, you might), it would be much faster and ironically more straight forward to simply write the SD card yourself and bypass NOOBS altogether. You might recall from Chapter 1 that our Pi refused to play nice with NOOBS and would not go online without a lot of persusion – in this case, downloading the image by hand would probably be your best bet.
Getting Some Images
First before we can write an image to an SD card we need to get our hands on the image. Fortunately the most popular operating systems of choice for the Pi (including of course Raspbian) have images on the main download page here:
http://raspberrypi.org/downloads/
This is the same place where you downloaded NOOBS from earlier, and you’ll find the raw images just below the NOOBS offering. In this example we’ll cover Raspbian again, but of course you can do this with any of the choices on the page shown in Figure A-1.
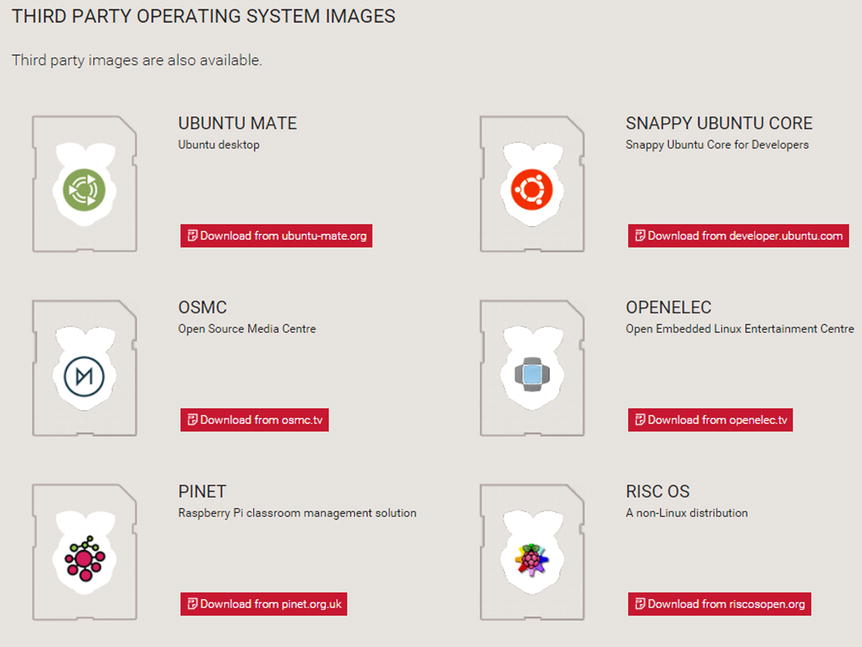
Figure A-1. Plenty to choose from!
For Raspbian (not shown in the last screenshot) you can choose to either download it directly or download it via Bit Torrent. Bit Torrent is the preferred means of downloading Raspbian as it eases the load on the project’s servers and mirrors. However, you’ll need a Bit Torrent client and there are some places where you probably shouldn’t be firing one up (i.e., at work), and some connections that tend to perform very badly due to the way BitTorrent works (such as mobile 3G). Also at least in Hong Kong, the download performance is nowhere near as good as a local mirror. If you can, try to use Bit Torrent but otherwise, it’s perfectly acceptable to use the direct links.
Remember we are downloading an image that is a direct representation of what should be on the card. If you just copy the image onto the card, it will still just be a card with a copy of the Raspbian image on it. What we need to do is write the image directly to the card, and for that we’re going to need some of those handy tools we briefly mentioned earlier.
![]() Note The image file you downloaded is a compressed ZIP file. On Windows 8.1, double-clicking this file will open a Compressed Folder. You will need to copy the image file itself to another location such as My Documents or your Desktop. On the Mac, simply double-clicking the file will extract the image and place it in the Downloads folder.
Note The image file you downloaded is a compressed ZIP file. On Windows 8.1, double-clicking this file will open a Compressed Folder. You will need to copy the image file itself to another location such as My Documents or your Desktop. On the Mac, simply double-clicking the file will extract the image and place it in the Downloads folder.
The tool recommended for writing images on Windows is the somewhat predictably named Image Writer. You can find the link on the Raspberry Pi downloads page or you can visit this link and select “External Downloads” which will cause it to download automatically (see Figure A-2):
https://launchpad.net/win32-image-writer
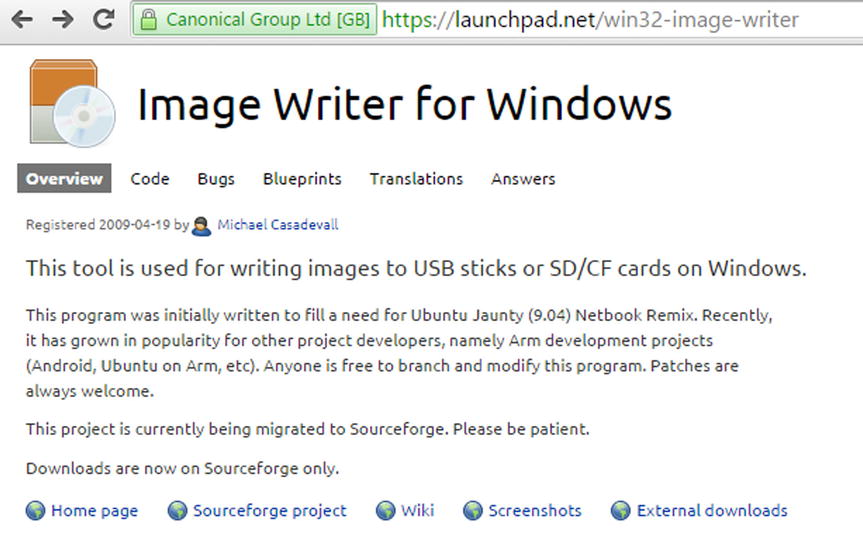
Figure A-2. Downloading Image Writer
At the time of writing, Image Writer is known not to work with Windows 10, although this may be resolved by the time you read this. If you need to use Windows 10, you can also take a look at the Windows IoT (Internet of Things) release for the Raspberry Pi 2. This toolkit contains an alternative image writing tool that should be able to write this images to the SD card without any trouble and as it’s from Microsoft, it should work without problems on Windows 10.
Once you’ve downloaded Image Writer, you’ll notice that it’s an executable ready to run. Previously it was provided as a zip file and needed extracting first, but it looks like they’ve written a nice installer for you to use instead. So first things first – run the installer to get Image Writer installed. The first thing you’ll get is a helpful warning from Windows (see Figure A-3).
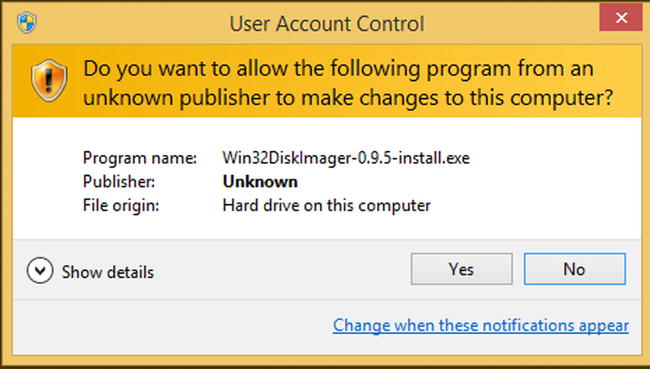
Figure A-3. The usual Windows warning
We didn’t notice any problems from installing and using this software, but as always, make sure you’re comfortable installing unsigned third party software being using this tool.
So far so good – we have our imaging tool ready. Now we just need to extract the image file. As it’s a zip file, just double click it and you’ll see the image file inside. You can see that the compression (at least on the version we’re looking at) is 69% which is pretty impressive. It’s important to extract this file before writing it, otherwise you will end up simply writing out a zip file onto your SD card which wouldn’t work well at all. You can either press the “Extract” button or you can drag the image onto your Desktop. Either solution works just as well.
Okay, now you just have to find Image Writer. The easiest way is to press the Start Button and start typing “win32DiskImager” and Windows should auto complete it for you (see Figure A-4).
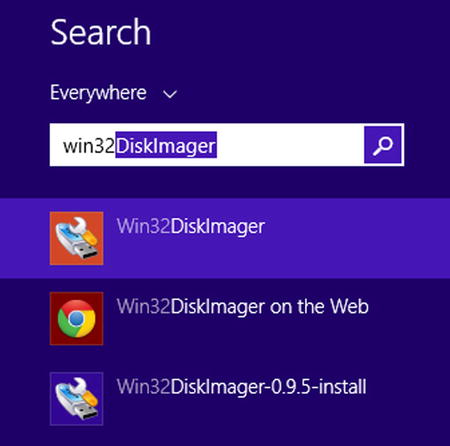
Figure A-4. Finding image writer in the start menu
Once you get it running it will look like Figure A-5.
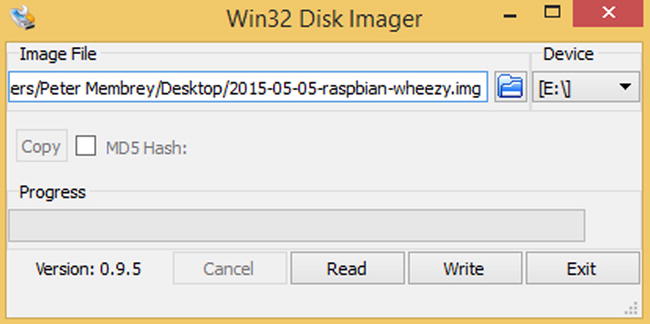
Figure A-5. Image Writer reader to go
As you can see in Figure A-5, it already has the relevant details filled in. You can see the path to the image (which I did actually extract to the desktop) and you can see the device that it will be written to (in this case E). This version of Disk Imager seems to be able to detect devices that are added after the application started. Once you’ve filled in the details, you just need to press the “Write” button. That should give you a warning prompt as per Figure A-6.
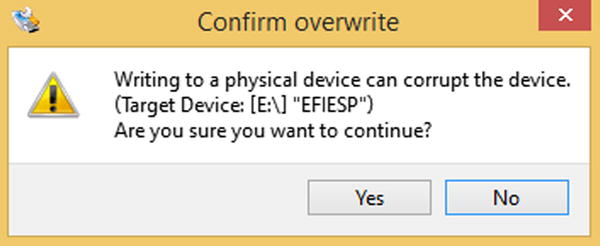
Figure A-6. Last chance to change your mind
It is definitely worth checking the device name here and ideally making sure that you don’t have any other external devices plugged in. You really don’t want to accidentally write the image onto a camera’s SD card for example. We’ve seen it happen before, so it certainly can happen!
Once you start writing, you’ll get the screen shown in Figure A-7.
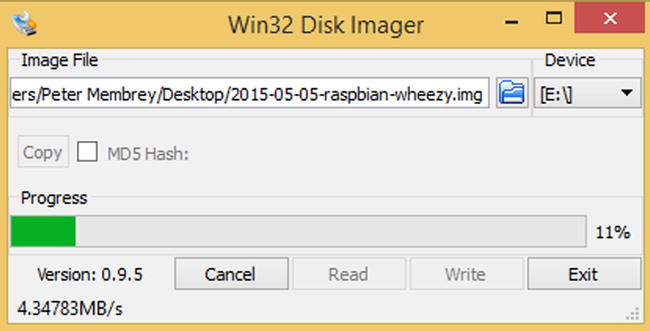
Figure A-7. Writing in progress
And ultimately the one shown in Figure A-8.
Figure A-8. Just what it says on the tin
Once you get the above pop up, you know it’s safe to remove the SD card and use it in the Pi. Normally when writing to this sort of media, you need to eject the device to make sure that everything that should have been written has been (so yes there is a good reason why Windows complains when you remove a device “improperly”). When writing a disk image though you’re bypassing the file system and writing directly to the device.
Right, that’s it, you’re done! If you picked Raspbian and are looking for some help setting it up (maybe NOOBS didn’t work for you for some reason), you can head back to Chapter 1 and follow on from the first boot.
Using dd on the Mac
If you are using a Mac, we want to show you how simple it is to write an image to your SD card. Alas, we can’t do that because there isn’t a simple, easy way to do it (although there might be some by the time you read this, so do check with Google if you would rather not use dd). Disk Utility, which excels at so many other things, simply does not know how to handle our standard image files. We tried converting it to a .dmg file (the native image format for a Mac), which didn’t work, either. We also looked at online tools that you might have been able to download to help with the problem, but we didn’t find anything that made the task significantly easier than doing it by hand in the first place.
So we’re going to get our hands dirty on the command line a little bit earlier than planned. We’re not going to go into too much depth about what it is we’re actually doing because most of these commands you’ll see a little later in their Linux incarnations. For now, you’ll just have to trust us.
Finding the Terminal
First, we need to open the terminal. You can find it in the Utilities directory under Applications. To put the following into context, we end this section with a complete transcript of all the commands that we used. The process is reasonably straightforward; it just has a fair number of moving parts.
We opened the terminal and now we need to use sudo to become the root user, the equivalent of Administrator on a Windows machine.
Now, tinkering with low-level devices is dangerous for security reasons (you don’t want a virus being able to write directly to a hard disk, for example), so a normal user is not allowed to issue commands at that level. Because we need to write our Raspbian image directly onto an SD card, we simply have no choice: we need direct access to the card. Fortunately, root has effectively unrestricted access to the machine, so as root we can write the image to the card. The command we need to use is this:
sudo –i
This command opens an interactive prompt as the root user and gives “super user” privileges. You can use sudo to execute commands directly, but because we are going to be executing a few of them, it’s more convenient to do it this way. sudo will then prompt you for your password (the one you normally use for your user account). Once sudo can confirm that it really is you sitting at the keyboard, you will end up at a root prompt.
![]() Caution We now have permission to do anything we like on the system and although that means we can now make our image, it also means that we could really mess things up if we aren’t careful. Under Unix it is assumed that root knows what it is doing and there is very little in the way of safe guards. Be very careful when running any command as root, double check it (and then do it again) and only when you’re completely sure should you hit the Enter key. As soon as you’re done, you should also close the Terminal window, just in case.
Caution We now have permission to do anything we like on the system and although that means we can now make our image, it also means that we could really mess things up if we aren’t careful. Under Unix it is assumed that root knows what it is doing and there is very little in the way of safe guards. Be very careful when running any command as root, double check it (and then do it again) and only when you’re completely sure should you hit the Enter key. As soon as you’re done, you should also close the Terminal window, just in case.
Okay, so what now? Well one of the challenges with writing to the SD Card is knowing which device on the system that card actually is. You don’t want to accidentally mistake your main hard disk for it because that would have some rather unpleasant consequences. There are generally some assumptions you can make (for example we know that /dev/disk0 is pretty much always going to be the system disk so you never ever want to write to this) but in order to limit the risk, we’re going to do this one by the numbers.
First, make sure your SD Card is not attached to your Mac and then run the mount command like so:
mbp:~ root# mount
/dev/disk0s2 on / (hfs, local, journaled)
devfs on /dev (devfs, local, nobrowse)
map -hosts on /net (autofs, nosuid, automounted, nobrowse)
map auto_home on /home (autofs, automounted, nobrowse)
mbp:~ root#
Now, you will probably see something similar to this but it might be a little different. We can ignore devfs and the map lines as they’re really just parts of the operating system. What we’re interested in here is the first line that identifies /dev/disk0s2 on /. This is the system disk and we want to make sure we don’t touch this one. You might have additional entries in your list if you have any network drives mapped or disk images attached. That’s okay because we’re not really looking for anything in particular at this stage, we just want to establish a base line for your system.
Okay, now it’s time to slot in your SD Card. SD Cards come preformatted for use in cameras (although these days many cameras will reformat them anyway) and so you should see it show up in Finder under Devices. For our particular card, it looked like Figure A-9.
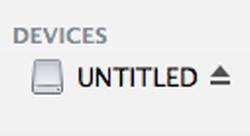
Figure A-9. What you’ll see in Finder after inserting your SD Card
As the card has been automatically mounted, we can now go back and re-run our mount command to see how things have changed. Here’s what we got when we reran it:
mbp:~ root# mount
/dev/disk0s2 on / (hfs, local, journaled)
devfs on /dev (devfs, local, nobrowse)
map -hosts on /net (autofs, nosuid, automounted, nobrowse)
map auto_home on /home (autofs, automounted, nobrowse)
/dev/disk2s2 on /Volumes/UNTITLED (msdos, local, nodev, nosuid, noowners)
mbp:~ root#
What we care about here is the addition of a new disk, in this case disk2. We can see from where it is mounted (/Volumes/UNTITLED) that this is the disk we are interested in. So now we know where we want to write our image.
![]() Info BSD systems split disks out in slices. In our example, the mounted file system was on disk2s2. This translates to disk2, slice 2. This allows you to reference a slice directly, but for our purposes here we want to write to the device itself. So in our case we will be writing to /dev/disk2.
Info BSD systems split disks out in slices. In our example, the mounted file system was on disk2s2. This translates to disk2, slice 2. This allows you to reference a slice directly, but for our purposes here we want to write to the device itself. So in our case we will be writing to /dev/disk2.
There is one little wrinkle though. We can’t write to the SD Card directly whilst we have it mounted and usable. If we eject it from within Finder, it will not only unmount the filesystem but it will also eject the device as well. That doesn’t help us because we still need the device to be present in order to write to it. To solve this issue, we will unmount the filesystem manually using a Mac specific command called ‘diskutil’. The Mac does have the general Unix umount command (which we’ll cover in later chapters) but if anything on your Mac happens to be looking at the SD Card, umount will fail and claim that the device is busy. Diskutil on the other hand is aware of this and can usually unmount the device without any problems. For us we ran the following command:
mbp:~ root# diskutil unmount /dev/disk2s2
Volume UNTITLED on disk2s2 unmounted
mbp:~ root#
So after all that, we’ve gained super-user privileges, we’ve isolated the device that we want to write to and we’ve unmounted the filesystem so that we can write directly to the card itself. All we have to do now is actually go ahead and do the writing!
The tool of choice for this task is called ‘dd’. This tool is a bit old school in that it only cares about reading from a device and writing to a device. It has no interest in filesystems nor is it aware of any of the subtle differences between say a hard disk and an SD Card. It just reads and writes without caring where it reads from or writes to. This is a fundamental Unix principle that we will be revisiting in later chapters. For now, we’re going to take advantage of this to make an exact copy of our image file on your SD Card.
dd only needs to know two things, where to read from (the if= argument) and where to write to (the of= argument). We’ve figured out the writing bit (it’s going to be /dev/disk2) but what about the source? If you followed the instructions earlier, you should have the image file sitting in the Downloads directory in your home area. The easiest way to get the information we need into Terminal is to type this in:
dd if=
and then, going to your Downloads directory in Finder (or wherever you extracted the image file to), click and hold on the image file and then drag it on to your Terminal window. This should then paste in the full path for you without you needing to type anything in. This should mean you end up with something pretty similar to this:
dd if=/Users/myuser/Downloads/2012-08-16-wheezy-raspbian.img
Now we have our input file specified, all we need to do is specify where exactly we want dd to write it. Thanks to our earlier experimentation we know that this will be /dev/disk2. We’re also going to add “bs=1M”which lets dd write the image in bigger chunks (meaning you won’t have to wait four hours for it to complete). So the full command we need for dd looks like this:
dd if=/Users/miggyx/Downloads/2012-08-16-wheezy-raspbian.img of=/dev/disk2 bs=1M
Running this command might take some time (i.e. hours not seconds). The image itself is around 2GB in size and your average smart card reader is not particularly fast. With our USB adapter, our recent MacBook Pro took a good 25 minutes. After coming back later, you should find that dd has completed its task and you’re back at the command prompt.
Okay, admittedly this wasn’t quite as simple or straight forward as writing the image on Windows, but if you look at everything we had to do, using the command line allowed us to express what we wanted in a very compact and precise way. This is something we come back to in Chapter 4 where we look at the various benefits of learning to use the command line.
Here is the full transcript of the commands we entered in order to write the image to the disk. If something in our explanation above didn’t quite click or you’re not entirely sure what the end result should look like, you can use the transcript below as a reference to compare your version with ours:
Last login: Wed Sep 19 13:48:40 on ttys000
mbp:~ pmembrey$ sudo -i
Password:
mbp:~ root# mount
/dev/disk0s2 on / (hfs, local, journaled)
devfs on /dev (devfs, local, nobrowse)
map -hosts on /net (autofs, nosuid, automounted, nobrowse)
map auto_home on /home (autofs, automounted, nobrowse)

<<SD Card inserted>>

mbp:~ root# mount
/dev/disk0s2 on / (hfs, local, journaled)
devfs on /dev (devfs, local, nobrowse)
map -hosts on /net (autofs, nosuid, automounted, nobrowse)
map auto_home on /home (autofs, automounted, nobrowse)
/dev/disk2s1 on /Volumes/UNTITLED (msdos, local, nodev, nosuid, noowners)
mbp:~ root# diskutil unmount /dev/disk2s1
Volume UNTITLED on disk2s1 unmounted
mbp:~ root# dd if=/Users/pmembrey/Downloads/2012-08-16-wheezy-raspbian.img of=/dev/disk2 bs=1M
mbp:~ root#
Right, with our (painstakingly) prepared SD Card, we can finally boot the Pi! If you’ve installed Raspbian and you want to follow along with the initial configuration, you can jump back to Chapter 1 and follow the instructions from the first boot. Good luck!