The automation of configuration management is not a particularly new practice in the world of software delivery. However, scripted approaches of the past suffered from a lack of common standards, documentation, and understanding. A team member would select a preferred scripting language, adopt their own patterns, and implement it in their own unique way. This approach required an in-depth knowledge of the dependencies for all the software to be installed and configured on a machine and often made assumptions about the initial state of the machine before applying changes. Upgrades to software were rarely considered, and because the knowledge was invested in a single person it was difficult to support and maintain. Not everything would or could be automated, and so there would also generally be an amount of manual tweaking required to achieve the desired state, so it wasn’t entirely automated and left scope for human error.
Modern configuration management tools such as Chef aim to solve these problems by abstracting away the actions to be taken on a target resource from their actual implementation. We utilize a common domain-specific language (DSL) across all resources to describe the desired state of the system, and behind the scenes Chef takes care of the rest.
Chef has enjoyed enormous success and adoption since its creation in 2008, with companies such as Facebook and Microsoft using the product to manage their infrastructure. At the heart of this success is the global community it has built. By open sourcing the core product and working hard on the cross-platform story, Chef has enlisted thousands of potential contributors to help drive innovation and to support each other with the challenges of automating infrastructure at scale. The culture and community permeate through all aspects of the Chef offering and draws yet more contributions into the ecosystem, making it a powerful force in the world of automation.
In this chapter we will discuss the principles and purpose of automated provisioning and configuration management, walk through an overview of Chef, and go through the steps required to set up a Chef workstation environment that can be used to automate configuration management in the cloud.
The Purpose and Principles of Automated Provisioning and Configuration Management
It would be remiss of me not to mention the DevOps movement early on in this book. While there are many definitions, I tend to go along with the definition of DevOps being a cultural and technical movement that focuses on building organizations that are able to operate with stability at high velocity. The term itself targets the silos that these groups have traditionally found themselves in.
Automation is one of the pillars of the DevOps movement because it can provide quality assurance, consistency, and repeatability across the realms of both development and operations. This is especially true in the case of infrastructure automation where manually building individual servers, configuring their base applications, applying their updates, and patching them was not only a time-consuming task but also complex and prone to human error. Minor deviations would occur between resources that should be configured identically, causing unforeseen issues and brittle setups that were hard to reproduce. The term snowflake serveris often used to reflect the uniqueness of those systems.
Many large enterprises have met with challenges scaling their on-premises infrastructure, teams, and processes to meet the demands of the high-velocity, agile development teams they now service. Organizational structures would introduce multiple hand-offs into the process with a set of project requirements being agreed upon up front (generally by a designated architect before the development team is even assembled). The environments would be designed and scheduled into the pipeline of work across a large team of disparate skillsets to complete their relevant tasks and then hand over to the development team on the scheduled date, sometimes weeks and months after the initial requirements were agreed upon.
In the initial days and weeks of using the environment the development team, struggling to run their application on the delivered environment, would identify new requirements or issues in configuration. After an indisputable root cause had been established the correcting actions would be scheduled again through the same waterfall process, elongating the feedback loop, preventing QA activities in the environments, and often delaying the project launch.
A more incremental, automated approach to provisioning can drastically reduce the feedback loop on configuration changes and allow development teams to operate at velocity without environment impediments. By describing your infrastructure platform as code it can be updated frequently as the requirements of the application evolve over time and because Chef recipes are idempotent, once the desired state is achieved, future executions of the recipe will result in a no-op (i.e., no changes will be made). Automation also removes the opportunity for human error to introduce unwanted deviations between environments and “configuration drift” over time into an unknown state.
Many organizations are moving away from on-premises infrastructure into a cloud environment; and as they do so, the opportunities to leverage Infrastructure as Code practices greatly increase. Using a cross-platform provisioning and configuration management tool such as Chef you can now provision an application architecture consisting of IaaS, PaaS, and SaaS services across a global distribution of data centers using a common language and framework. Although many examples in this book will focus on IaaS scenarios, I encourage you not to overlook the many PaaS and SaaS options available in Azure, some of which may prevent you from reinventing the wheel.
Figure 1-1 shows the separation of Provisioning from Configuration Management from Release Management. Often in the cloud sense, these terms are used interchangeably whereas I prefer to draw out the separation of each area as a separate concern. This is because different tooling and artifacts are involved for each layer of the architecture:
Provisioningis concerned with the specification of the guest and operating system on top of a host. The host could be a virtualization layer such as a hypervisor or a cloud platform such as Microsoft Azure. The point is that in this layer we know nothing about the application that is going to run on top of it.
Configuration Managementis concerned with the configuration of the Operating System after it has been provisioned, as well as any applications and their configuration that sit on top of that Operating System.
Release Managementis concerned with the releasing of an application payload on top of the application that has been deployed.

Figure 1-1. Provisioning vs. Configuration Management vs. Release Management
One other huge advantage of using Infrastructure as Code practices in a cloud environment is the ability to provide ephemeral environments in a fast, repeatable, and consistent way. With the right automation in place you could potentially spin up a new environment for a day, or even for a few minutes, at a minimal cost and with a negligible lead time. Compare this to the increased complexity and overhead you would experience if trying to achieve the same in an on-premises, manual setup, and it becomes clear that the cloud was made for automation.
Chef Architecture
Let’s quickly cover some of the core terminology of Chef as (hopefully) a refresher for you.
Note
If this isn’t a refresher for you, I highly recommend you spend a couple of days going through the excellent resources and hands-on labs available at http://learn.chef.io to familiarize yourself with the Chef platform and terminology.
Chef is built around the concepts of converging toward desired state and modeling Infrastructure as Code via resources that are building blocks. Simply put, a cookbookis made up from a collection of recipes, which in turn are an ordered set of instructions you would like to perform on a node (a node being defined as any server or device capable of running a Chef client). Recipes themselves are written in the Chef domain-specific language (DSL) built on top of the Ruby language. Cookbooks can also contain Resources, which do the work behind the scenes to take the code specified in the recipe, detect the current state of the system, and make the necessary changes to converge the system toward the correct target state.
Along with recipes and resources, a cookbook contains all the files and configuration templates required, as well as supporting artifacts such as any data that is used by the component being deployed. It also contains unit tests that can be used to ensure we have written our recipes correctly.
Nodescommunicate with a Chef Server, which is the repository for all the cookbooks that need deploying. The most common deployment approach is to use a central Chef server; this can be downloaded and installed yourself, however there are other options available including Hosted Chef - a full Chef environment hosted on servers managed by Chef themselves, or you can even boot up an image from your cloud provider’s Marketplace in the case of Microsoft Azure and Amazon Web Services.
Chef Server distributes cookbooks to the nodes based on their configuration. So on your nodes, you need to install the Chef Client and configure it so that it can connect to the server and retrieve the cookbooks. This installation process is commonly referred to as ‘bootstrapping’.
The relationships between the Chef components are presented in Figure 1-2.

Figure 1-2. Chef components overview - see https://docs.chef.io/chef_overview.html
Note
Chef Analytics is a premium feature of Chef and while it has a role to play in an enterprise Chef deployment, we won’t cover it in detail in this book.
Chef Client and Chef Server-supported Platforms
One of the greatest advantages of using Chef is that it provides a consistent approach to configuration management in a cross-platform environment. Chef can be installed on a huge variety of platforms, which makes it easier to build and manage hybrid platforms utilizing multiple technologies in a single deployment architecture. This allows teams to select the best technology for the job from an ever-increasing number of available options, without diverging on the administration tools and practices used to manage those applications.
Table 1-1 lists the operating platforms the Chef Client is aimed at and an indication whether or not that platform is supported in Azure.
Table 1-1. Chef Client-supported platforms
Platform | Azure Support | Version |
|---|---|---|
AIX | N | 6.1, 7.1 |
CentOS | Y | 5, 6, 7 |
FreeBSD | Y | 9, 10 |
Debian | Y | 7 (Wheezy), 8 (Jessie) |
Mac OS X | N | 10.8, 10.9, 10.10 |
Oracle Linux | Y | 5, 6, 7 |
Red Hat Enterprise Linux | Y | 5, 6, 7 |
Solaris | N | 10, 11 |
Ubuntu | Y | 12.04, 14.04 |
Microsoft Windows | Y (servers) | 2008, 2008r2, 2012, 2012r2, 2016, 7, 8, 8.1, 10 |
Note
Chef has a categorization of platforms into support tiers. The definitions of Tier 1 support, Tier 2 support, and Not supported can be found in the Chef RFC021 – see https://github.com/chef/chef-rfc/blob/master/rfc021-platform-support-policy.md
For the Chef Server, the platforms listed in Table 1-2 are supported:
Table 1-2. Chef Server-supported platforms
Platform | Azure Support? | Version |
|---|---|---|
CentOS | Y | 5, 6, 7 |
Oracle Linux | Y | 5, 6 |
Red Hat Enterprise Linux | Y | 5, 6, 7 |
Ubuntu | Y | 12.04 LTS, 14.04 LTS |
With the announcement in November 2015 that Microsoft and Red Hat are partnering to provide access to Red Hat Enterprise on Azure, you are now able to run a completely supported environment with Chef Server running in Azure on the Red Hat Enterprise Linux platform if you wanted to. This demonstrates Microsoft’s commitment to providing a fully supported, industry-leading cloud platform, whether you are running Windows or not.
Getting Ready for Chef Development
Now that we’ve had a brief refresher of Chef architecture, let’s look at what it takes to set up a workstation for use with Chef and to execute a very basic recipe locally. Many of these setup tasks are prerequisites for exercises later in the book, so even if you are already using Chef I suggest using this section as a helpful checklist to run through and ensure you have everything you need to get started.
Note
In chapter 2 we’ll look at the tools needed to work with the Microsoft Azure platform; for now let’s focus on getting our Chef environment set up correctly.
Installing the Chef Development Kit (ChefDK)
The Chef Development Kit (hereafter known as ChefDK) includes everything you need to develop and test for the Chef platform. There are a number of components included, and I’ll just pull out the key ones:
Chef Client (including Chef-Zero, a way of simulating a Chef server without a deployment footprint)
Chef Provisioning (a set of tools and drivers that let you provision machines and compute resources for both on-premises deployment and cloud providers such as Microsoft Azure)
Berkshelf and Policyfiles (dependency management solutions)
Cookbook generators
Tools such as Knife for working against the Chef Server
Test-Kitchen (tooling that lets you test your Chef cookbooks and recipes across a matrix of operating system platforms and client versions)
ChefDK runs on Microsoft Windows, Mac OSX, and Linux (Debian, Ubuntu, Red Hat Enterprise Linux and CentOS) and thanks to the hard work of the maintainers it works in mostly the same way on all of them. We’ll take a look at how to install on Windows, OSX, and Ubuntu in this chapter.
Installing ChefDK on Windows
To download the ChefDK for a Windows machine, we need to visit http://downloads.chef.io in a browser, navigate to Chef Development Kit, and press the button marked Get It (as shown in Figure 1-3).

Figure 1-3. Accessing the Chef Development Kit (ChefDK) downloads area at http://downloads.chef.io
After selecting the correct version of the installer for your platform (as shown in Figure 1-4) and downloading it, we can progress to running the installer.

Figure 1-4. Selecting the correct platform for the ChefDK download
Launch the installer from your Downloads folder (or alternatively, wherever you have saved it). The Welcome screen is shown and allows you to proceed through the installation. Accept all defaults when prompted and press Install. Installation should now progress (as seen in Figure 1-5).

Figure 1-5. ChefDK installer on Microsoft Windows
Once installation has completed, you may wish to reboot or log off and back on to your machine, to ensure that the path variables are correctly set up and ready to use.
Installing ChefDK on Mac OS X
The installation process on OS X is similar to the Windows package in that there’s a package to download and execute as part of the setup. The installer is a standard package that can be launched after mounting the downloaded image file. Figure 1-6 shows the Welcome screen of the package installer.

Figure 1-6. ChefDK installation dialog
Launch the package and accept all the defaults, inputting your local credentials at the correct time, of course.
Once the installation has completed as shown in Figure 1-7, exit the installer and then unmount/eject the image file.

Figure 1-7. Installation completed on Mac OS X
Once the installation completes, proceed to the verification steps.
Installing ChefDK on Linux
On Ubuntu and Debian, you need to download the correct .deb file for your platform and then at a Terminal prompt, locate your .deb file and type:
$ sudo dkpg -i chefdk_0.10.0.1_amd64.deb Installation will take a few moments and complete as shown in Figure 1-8.
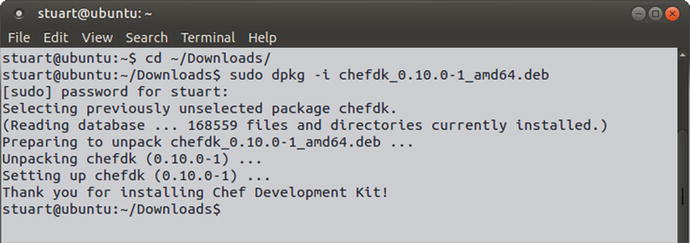
Figure 1-8. Installing the .deb on Ubuntu Linux
On the RedHat and CentOS platforms, ChefDK is provided in the RPM format and you will need to download the correct .rpm file for your platform (noting there are different versions for RedHat 6 and RedHat 7, for example). Once you have the correct file, from the same directory type:
$ sudo rpm -Uvh chefdk-0.10.0-1.el7.x86_64.rpm[sudo] password for stuart:warning: chefdk-0.10.0-1.el7.x86_64.rpm: Header V4 DSA/SHA1 Signature, key ID 83ef826a: NOKEYPreparing... ################################# [100%]Updating / installing...1:chefdk-0.10.0-1.el7 ################################# [100%]Thank you for installing Chef Development Kit!
Installation will take a few moments. Once the installation completes, proceed to the verification steps.
Verifying the ChefDK Installation
To verify the installation, we can use the chef -v command. This will let us know which versions of all the tools are installed.
PS C:UsersStuartPreston> chef -v You should see the following output or similar:
Chef Development Kit Version: 0.10.0chef-client version: 12.5.1berks version: 4.0.1kitchen version: 1.4.2
If the ChefDK was successfully installed on your system, you have all the files required on your system that support you in the Chef development cycle. However, before we can start developing our recipes, we need to initialize our environment. Put simply this means ensuring that Chef and Ruby paths and environment variables are correctly pointing at the location ChefDK installed them to. The command chef shell-init lets you achieve this by generating the correct initialization script for your environment, and so all we need to do is run this command whenever we start a new session by placing a call to this command in the shell’s start up (i.e., in the file located at $PROFILE on Windows and in ∼/.bash_profile or ∼/.zshrc on Mac OS X and Linux).
Initializing the environment (Windows)
To initialize our environment on Windows, we use the chef shell-init powershell command to our $PROFILE file (this is usually a file named C:Users<username>DocumentsWindowsPowerShellMicrosoft.PowerShell_profile.ps1). When any PowerShell commands are added to this file, they are loaded at the start of each PowerShell session. So to configure things correctly, we need to create a $PROFILE file if one doesn’t exist already:
PS C:UsersStuartPreston> if(!(Test-Path $PROFILE)) { New-Item -Force -ItemType File $PROFILE } We can then add the output of chef shell-init powershell to it as follows:
PS C:UsersStuartPreston> chef shell-init powershell | Add-Content $PROFILE Now, every time you open a new PowerShell session, your paths and environment variables will be set up correctly.
Warning
On new Windows installations, Windows PowerShell scripts will not work until an administrator sets the local execution policy for PowerShell scripts using the following command:
PS C:UsersStuartPreston> Set-ExecutionPolicy RemoteSigned -Force Initializing the environment (Bash/Zsh)
To use the ChefDK version of Ruby as the default Ruby on a system with bash as your shell, edit the $PATH and GEM environment variables to include paths to the ChefDK. To accomplish this, run:
$ echo 'eval "$(chef shell-init bash)"' >> ∼/.bash_profile If you use zsh as your shell, then you can use the following line to set up your environment:
$ echo 'eval "$(chef shell-init zsh)"' >> ∼/.zshrc Installing Git
The Chef toolset uses Git and its related tools extensively, so we need to ensure we have a working Git client on the machine in our path. On Windows the installation procedure has a few options so I’ve covered the installation process in detail.
Installing Git on Windows
To install Git on Windows, navigate to https://git-scm.com/downloads as shown in Figure 1-9 and download the Windows installer.

Figure 1-9. Git download page as seen when accessed using Windows
After downloading the installer, the Git Setup Wizard will launch. You will be prompted to accept the general public license, select a directory, identify the components you wish to install, select a start menu folder, adjust your PATH environment, configure your terminal emulator to use with Git Bash, and configure performance tweaks. It is tempting to select the default option for all of these but I recommend you adjust a few of these options to ensure you get the optimal set up for Chef development.
When given the option to adjust your PATH environment you should select the option to Use Git from the Windows Command Prompt to ensure Git is available to all processes on the system, as shown in Figure 1-10:

Figure 1-10. Git installer on Windows
When asked to configure the terminal emulator to use with Git Bash, select Use Windows’ default console window as shown in Figure 1-11 as this is most compatible with the command-line tools used in Chef development.

Figure 1-11. Git installer on Windows
Finally, I would also recommend enabling the experimental performance tweaks when reaching the screen shown in Figure 1-12, which based on my experience speed up Git performance on Windows.

Figure 1-12. Git installer on Windows
After pressing Next, the installation will proceed. When it is complete you will need to either reboot or log out and back in to your desktop for the settings to apply correctly.
Git on Mac OS X
The OS X platform already has a few ways of distributing Git. If you have XCode installed already you may already have the Git client installed. To find out, open a new Terminal window and type git --version. If you get a version number in response then you don’t need to install anything to work with source control and Git/GitHub repositories.
If you need to install Git you can download the installer from https://git-scm.com/downloads and follow the onscreen instructions, providing your password at the appropriate stage. I had no problems with the default options provided in the installer so I recommend you stick with those settings unless you have a specific reason not to.
When you launch the installer, you may be blocked due to OS X security requirements, if you then visit Security & Privacy you are able to launch the installer from there, as shown in Figure 1-13:

Figure 1-13. Security dialog on Mac OS X, allowing launch of a “blocked” package
Once you have installed the Git package, you can proceed to the next section.
Git on Linux
To configure Git on Linux, simply use your package manager (e.g., apt-get or yum) to install the git-all package. The following commands will automatically install and configure Git on the respective Linux builds:
Ubuntu/Debian
$ sudo apt-get install git-allOutput not shown
RedHat/CentOS
$ sudo yum install git-allOutput not shown
Developing Your First Recipe Using Chef
In this section, we’re going to generate a blank repository and add a simple recipe to it. This is a basic example to ensure local setup is working how it should be and to demonstrate how Chef recipes can be used to bring your machine to a desired state and keep it in that state.
Code Editors
Before you start to develop your first recipe I recommend you review the code editor you are using. A good visual code editor is not a requirement, but it can be very helpful for working with Chef and selecting the right one can save you time. Selecting one is very much a matter of personal taste, and I encourage you to make sure you have one that supports some basic features.
When selecting a code editor , make sure it supports the following: Themes and Plugins, Snippets, Syntax coloring/highlighting for the Ruby language, Multiple cursors, a tree view of the entire folder/repository you are working with, and ideally Git integration.
Here’s a list of three editors I’ve tried recently and had success with:
Sublime Text - ($70 USD) - http://sublimetext.com
GitHub Atom - (free/open source) - http://atom.io
Visual Studio Code (free/open source) - http://code.visualstudio.com
Of course, if you have many years’ experience of systems administration, you’ve probably grown used to an editor by now, but I would still encourage you to take the opportunity to download and try out some of the newer editors on the scene. You spend a lot of time in the editor and the longer you leave it, the harder it is to change.
I recommend using Visual Studio Code - it’s a lightweight code editor based on the GitHub Electron framework, supports all the features I’ve listed above, runs on Windows, OS X and Linux, and it’s open source. Figure 1-14 shows the main window of Visual Studio Code. There is also a Chef Extension for Visual Studio code available on the Visual Studio Code Marketplace ( https://marketplace.visualstudio.com/items/Pendrica.Chef ), which enables many of the features listed above.

Figure 1-14. Visual Studio Code main window on the Windows platform
Initializing a Chef Repository
Let’s get started by using one of the ChefDK features, a Chef generator, to generate us a complete application using the chef generate app command, specifying our name and e-mail address (these values can obviously be substituted with your own):
PS C:UsersStuartPreston> chef generate app chefazure-ch01 --copyright "Stuart Preston" --email "[email protected]" After a few seconds, you should see output similar to the following (note I have truncated the output).
Compiling Cookbooks...Recipe: code_generator::app* directory[C:/Users/StuartPreston/chefazure-ch01] action create- create new directory C:/Users/StuartPreston/chefazure-ch01[...]* directory[C:/Users/StuartPreston/chefazure-ch01/cookbooks] action create- create new directory C:/Users/StuartPreston/chefazure-ch01/cookbooks* directory[C:/Users/StuartPreston/chefazure-ch01/cookbooks/chefazure-ch01] action create- create new directory C:/Users/StuartPreston/chefazure-ch01/cookbooks/chefazure-ch01[...]* directory[C:/Users/StuartPreston/chefazure-ch01/cookbooks/chefazure-ch01/recipes] action create- create new directory C:/Users/StuartPreston/chefazure-ch01/cookbooks/chefazure-ch01/recipes* template[C:/Users/StuartPreston/chefazure-ch01/cookbooks/chefazure-ch01/recipes/default.rb] action create- create new file C:/Users/StuartPreston/chefazure-ch01/cookbooks/chefazure-ch01/recipes/default.rb- update content in file C:/Users/StuartPreston/chefazure-ch01/cookbooks/chefazure-ch01/recipes/default.rb from none to 7358b0(diff output suppressed by config)* directory[C:/Users/StuartPreston/chefazure-ch01/cookbooks/chefazure-ch01/spec/unit/recipes] action create- create new directory C:/Users/StuartPreston/chefazure-ch01/cookbooks/chefazure-ch01/spec/unit/recipes[...]* execute[initialize-git] action run- execute git init .* cookbook_file[C:/Users/StuartPreston/chefazure-ch01/.gitignore] action create- create new file C:/Users/StuartPreston/chefazure-ch01/.gitignore- update content in file C:/Users/StuartPreston/chefazure-ch01/.gitignore from none to 33d469(diff output suppressed by config)
We can see from the output that we created a new directory chefazure-ch01 and generated some files there. We can also see that git init . was executed in that directory, which means it is ready for use with Git commands executed locally.
Tip
If you would like to learn more about Git basics, there’s a great reference available online at http://git-scm.com/book/en/v2/Git-Basics-Getting-a-Git-Repository
Modifying and Running the Default Recipe
If we open up the directory chefazure-ch01 within our code editor and navigate to cookbooks/chefazure-ch01/recipes/default.rb we are now looking at our default recipe for the cookbook chefazure-ch01.
Let’s add a file resource that writes a file to our home directory. Edit the file so that it looks similar to the below. On OS X and Linux platforms change the file name (chefazure.txt) to a writable location (e.g., /tmp/chefazure.txt)
## Cookbook Name:: chefazure-ch01# Recipe:: default## Copyright (c) 2015 Stuart Preston, All Rights Reserved.file 'chefazure.txt' doaction :createcontent 'Using Chef with Azure'end
Tip
The Ruby language style guide encourages the use of two spaces per indentation level. Many editors have 4 spaces or a Tab as the default setting. This can usually be changed in your code editor’s settings. For further discussion see https://github.com/bbatsov/ruby-style-guide#source-code-layout
This recipe should create a file with the specified contents. We can run the recipe on our local machine and manually inspect the file to ensure this recipe is working as expected. When we installed the ChefDK on our machine, a Chef Client was also installed and we can use this in ‘local mode’, which allows us to execute recipes without the use of a Chef server.
Ensuring you are running PowerShell “as Administrator” on Windows or via sudo on OS X and Linux we can run chef-client --local-mode from the root of the chef repository:
PS C:UsersStuartPrestonchefazure-ch01> chef-client --local-mode .cookbookschefazure-ch01 ecipesdefault.rb[2015-11-14T13:45:29+00:00] WARN: No config file found or specified on command line, using command line options.Starting Chef Client, version 12.5.1resolving cookbooks for run list: []Synchronizing Cookbooks:Compiling Cookbooks...[2015-11-14T13:45:48+00:00] WARN: Node DESKTOP-TIDJ3S8 has an empty run list.Converging 1 resourcesRecipe: @recipe_files::C:/users/stuartpreston/chefazure-ch01/cookbooks/chefazure-ch01/recipes/default.rb* file[chefazure.txt] action create- create new file chefazure.txt- update content in file chefazure.txt from none to 7ba0df--- chefazure.txt 2015-11-14 13:45:48.000000000 +0000+++ ./chefazure.txt20151114-6260-1z0avyn 2015-11-14 13:45:48.000000000 +0000@@ -1 +1,2 @@+Using Chef with AzureRunning handlers:Running handlers completeChef Client finished, 1/1 resources updated in 19 seconds
Let’s find this file (it will have been created at the root of the first drive on your system) and modify it using a text editor (remembering to run this text editor as Administrator or via sudo). Change the text in the file to read 'Using Chef with Microsoft Azure'
Now let’s run the chef-client again to see what happens:
PS C:UsersStuartPrestonchefazure-ch01> chef-client --local-mode .cookbookschefazure-ch01 ecipesdefault.rbConverging 1 resourcesRecipe: @recipe_files::C:/users/stuartpreston/chefazure-ch01/cookbooks/chefazure-ch01/recipes/default.rb* file[chefazure.txt] action create- update content in file chefazure.txt from 2331dd to 7ba0df--- chefazure.txt 2015-11-14 13:51:43.000000000 +0000+++ ./chefazure.txt20151114-6776-fy5dz7 2015-11-14 13:52:10.000000000 +0000@@ -1,2 +1,2 @@-Using Chef with Microsoft Azure+Using Chef with AzureRunning handlers:Running handlers completeChef Client finished, 1/1 resources updated in 20 seconds
We can see that the Chef client restored our file back to the desired state as described in our recipe. The corrective action taken was based on the state of the machine at the time of recipe execution. This was a simple example, but it demonstrates that being able to describe configuration in terms of a desired state is very powerful as we will see throughout the book.
We have seen how we can execute recipes in local mode but what if we want to run that recipe on a target machine, or across tens, hundreds or thousands of machines? We need to upload our recipes so others can consume them. We need an account on a Chef Server.
Getting Started with Hosted Chef
As we mentioned earlier in the chapter Chef Server can be hosted locally, in a cloud provider or we can use an account on servers that are hosted by Chef themselves. For the purpose of this this section we’re going to sign up for a Hosted Chef account and connect our local Chef Client to it; that way we can upload our cookbooks to it and execute them using our local machine as a node, exactly how we would in a production scenario.
First of all we need to visit https://manage.chef.io/signup in a browser as shown in Figure 1-15.

Figure 1-15. Signing up for Hosted Chef via https://manage.chef.io/signup
You’ll be asked to provide some details such as your name and e-mail address. After pressing the Get Started button you will immediately be sent an e-mail as shown in Figure 1-16.

Figure 1-16. Validation e-mail that is received when you sign up to Hosted Chef
After clicking the link in the e-mail you are taken to a page as shown in Figure 1-17 where you can associate a password with your account.

Figure 1-17. Associating a password with your Hosted Chef account
After pressing Create User, you are signed in to the Chef Manage site and a message is displayed (as shown in Figure 1-18):

Figure 1-18. Welcome to Chef Manage (Hosted Chef)
Tip
I recommend creating an Organization with the name <CompanyName>-<OrganizationName> as this is a shared service and Organizations are named on a first-come-first-served basis.
Press the Create New Organization button and enter the requested details as shown in Figure 1-19.

Figure 1-19. Creating an Organization within Hosted Chef
Once the Organization has been created you’ll be taken to a page where you can download a ‘Starter Kit’ as shown in Figure 1-20.

Figure 1-20. Getting Started page on Hosted Chef
The Starter Kit is a zip file that contains a number of files and is by far the quickest way to get your generated keys from the Chef Server. The kit contains:
A user private key file (file name: username.pem) that allows you to perform actions against the organization.
An organization validator private key file (file name: orgname-validator.pem) that allows you to join nodes to the organization.
A Knife configuration file called knife.rb that is used with all commands that talk to the hosted Chef server.
A ‘starter’ cookbook.
Note
Do not download the starter kit more than once as this will reset your access to this Chef organization!
We’re not too interested in the starter cookbook as we’ve already shown we can generate one for ourselves, but download the chef-starter.zip and extract the contents into your home folder. You will now have a directory called chef-repo containing a .chef folder inside it, where all the configuration files are located. We will be taking the contents of this folder and using them as we progress through the book, so keep it safe.
Warning
Be sure not to check the .chef folder into source control, especially not a publicly hosted Git solution such as GitHub.
In later chapters, we’ll be using these keys to connect our repository to the Chef Server, uploading a cookbook, and working through a more advanced scenario in Azure. For now, you have everything you need locally to progress through the rest of the examples in this book.
Summary
In this chapter we familiarized ourselves with Chef’s architecture, installed all the tools required for day-to-day development with Chef, and had a brief refresher on recipe development. I could write a whole book on using Chef but it would be of little value as the resources available online at http://learn.chef.io are comprehensive and very usable. Later in this book we will be stepping through a number of more advanced examples in detail, so don’t worry if you are not at expert level yet.
In the following chapters we will be focusing in on how we can use Chef with Microsoft Azure, including some of the best practices for building quality into your Infrastructure as Code pipeline while building a scalable and secure platform in Azure.