SharePoint Server 2016 has significantly improved the application of patches, along with the size of patches. This provides a faster, more reliable experience for SharePoint Administrators.
The Basics of Patching
Each patch will be delivered in an executable format. There will typically be one or two executables per month, called Public Updates . The primary executable is called “sts” while the secondary is “wssloc.” The “sts” patch is the primary patch file, while the wssloc patch file contains locale-specific files for all languages. In Figure 17-1, we are installing the base patch, sts.msp.

Figure 17-1. Beginning the installation of sts2016-kb3115088-fullfile-x64-glb.exe
When the base patch has been installed, install the locale-specific patch.
SharePoint does not require a specific order for servers to patch; for example, the server running Central Administration does not need to be patched first. Identify the order that suits your farm the best as installing the binaries involves downtime for each particular SharePoint server.
Patching may require a reboot of the SharePoint Server, as shown in Figure 17-2. By having two or more SharePoint Servers running the same services, SharePoint Servers can be rebooted without incurring any downtime for end users, provided proper availability scenarios are in place, for example, at least two web servers which can be rotated in and out of a load balancer.

Figure 17-2. Many SharePoint Server 2016 patches require reboots in order to complete
Microsoft is making a “best effort” to prevent schema upgrades from being required; however, each SharePoint Server may be noted as "Upgrade Available" or "Upgrade Required" after installing a patch, as shown in Figure 17-3. If you see either of these messages, either one or more databases requires an upgrade, or the SharePoint Server requires the Configuration Wizard or psconfig.exe to be executed.

Figure 17-3. Upgrade Required indicates the Configuration Wizard must be run
If using psconfig.exe, run it from the SharePoint Management Shell (which puts psconfig.exe in the PATH). Use the following command.
psconfig -cmd upgrade -inplace b2b -wait -cmd applicationcontent -install -cmd installfeatures -cmd secureresourcesOtherwise, use the Configuration Wizard to complete the upgrade, as shown in Figures 17-4, 17-5, and 17-6.
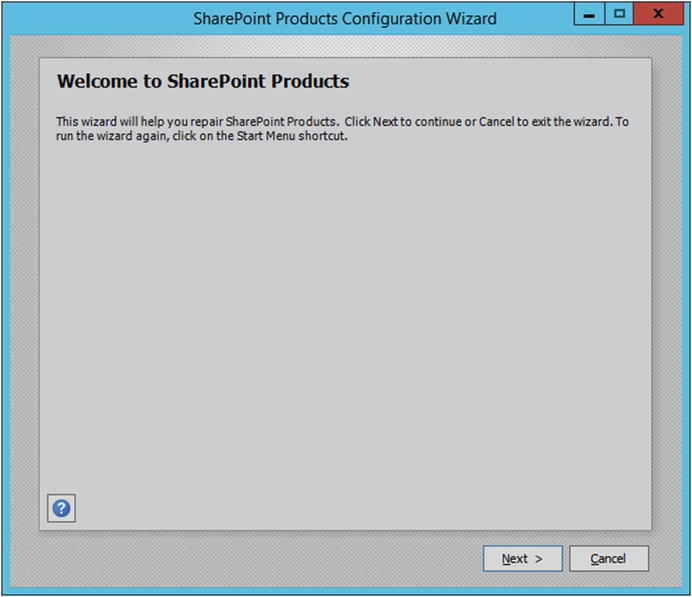
Figure 17-4. Initiating the Configuration Wizard

Figure 17-5. Completing the Configuration Wizard, which will begin the upgrade
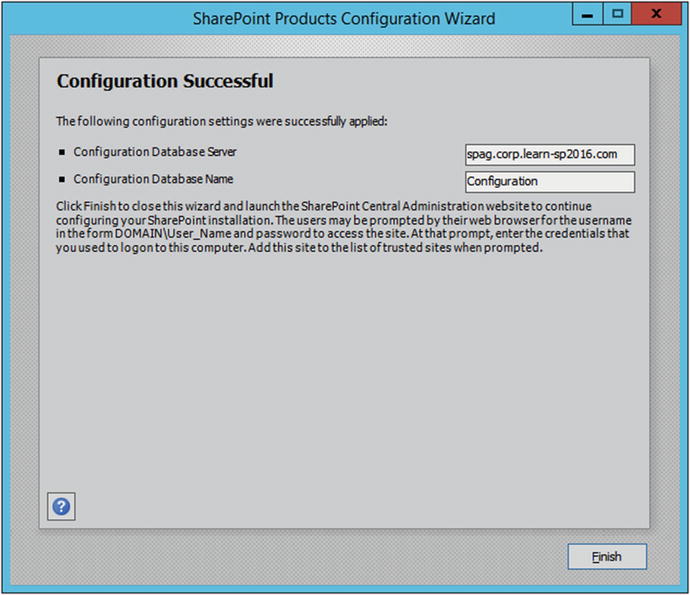
Figure 17-6. The Configuration Wizard is complete and the SharePoint Server is now online
With the completion of a SharePoint Server patch installation and configuration, let’s examine the log files that provide additional information with the patching process. These logs will also provide information on any errors that may have taken place during the installation or configuration process.
Upgrade Log Files
There are two primary log files to work with. The PSConfig file and the Upgrade log file. PSConfig file is the format of PSCDiagnostics_mm_dd_YYYY_HH_mm_ss_fff while the Upgrade log file has a format of Upgrade-YYYYmmdd-HHmmss-fff-<SPUpgradeSession_GUID>.log ('fff' stands for millisecond). As an example, the PSCDiagnostics log file might be named PSCDiagnostics_03_20_2016_14_02_39_180.log, which ran on the 20th of March 3rd at 2:02:39.180 PM.
Log Files are located within the ULS log directory . In the environment outlined in this book, that is E:ULS for each farm member, while by default, it would be located at %CommonProgramFiles%Microsoft SharedWeb Server Extensions15LOGS.
If an error is encountered during the upgrade process, there will also be an Upgrade-YYYYmmdd-HHmmss-fff-<SPUpgradeSession_GUID>-error.log file. This will help identify what errors and corrective actions need to be taken to successfully complete an upgrade. The ULS logs can provide additional details about any errors, as well.
Unlike previous versions of SharePoint, many patches will not increment the Farm Build number. Instead, under Upgrade and Migration in Central Administration, go to Check product and patch installation status to see the current state of patched products. In Figure 17-7, we can see that Microsoft SharePoint Foundation 2016 Core has been patched twice. The base build, 16.0.4306.1002, was patched by build 16.0.4336.1000. 16.0.4336.1000 was subsequently patched by 16.0.4339.1000, superseding 16.0.4336.1000.
Figure 17-7. Patches applied to LSSPAP01
As with any SharePoint highly available farm, performing highly available upgrades is key. We will take a look at a strategy to maintain the high availability of the farm while patching.
Long Patch Times
SharePoint Server 2013 and 2016 suffer from long binary installation times. This is due to running services on the SharePoint server where in-use files cannot be replaced. To reduce the amount of time a patch takes to install, shut down the following services prior to running the patch.
SharePoint Timer Service
SharePoint Search Service
SharePoint Search HostController Service
IIS (use iisreset /stop)
Once the patches have been installed, restart the services to bring them online.
Tip
Additional information is available from Russ Maxwell at https://blogs.msdn.microsoft.com/russmax/2013/04/01/why-sharepoint-2013-cumulative-update-takes-5-hours-to-install/ .
Note
Trevor Seward has updated Russ Maxwell’s script. The updated script is available for SharePoint Server 2013 and 2016 at https://github.com/Nauplius/SharePoint-Patch-Script .
Highly Available Upgrades
To upgrade a farm without taking it offline, follow this upgrade procedure for SharePoint patches.
Identify each server and the assigned role. Only one server for a given role will be offline at any given time. In the environment outlined by this book, we have the following configuration, as shown in Table 17-1.
Table 17-1. Roles and Servers in the SharePoint Farm
Application | WebFrontEnd | Search | DistributedCache |
|---|---|---|---|
LSSPAP01 | LSSPFE01 | LSSPSR01 | LSSPDC01 |
LSSPAP02 | LSSPFE02 | LSSPSR02 | LSSPDC02 |
Tip
Microsoft produced a video on the details of Zero Downtime Patching which also covers this process, available on TechNet at https://technet.microsoft.com/EN-US/library/mt767550(v=office.16).aspx .
For the purposes of this environment, we will work out way down and across Table 17-1, starting with the Application servers and finishing with the Distributed Cache servers. But as noted, the order is not important. With the exception of special handling for Distributed Cache, the process will be as follows.
Run the sts patch. Do not restart if prompted. Run the next patch if applicable, wssloc. Restart if either patch prompted you to do so.
These patches may also be run silently by passing the /passive switch to the patch
sts2016-kb3115088-fullfile-x64-glb.exe /passive /norestartwssloc2016-kb2920690-fullfile-x64-glb /passive /norestart
This will install the Sts and wssloc patches with a basic user interface and does not restart the computer. The patches are installed in the order specified. While a patch is being installed, one or more IIS Resets may occur. Restart the computer manually through the UI or by using the Restart-Computer cmdlet once the patch installations have completed.
Tip
If you interrupt an MSP installation, IIS Application Pools or Sites may be in a Stopped state. Manually start them as required.
Once the server is back online, add it back to the Load Balancer. Note the status of the SharePoint server in Central Administration under Manage servers in farm.
As you can see in Figure 17-8, LSSPAP01 has been patched, but no further action is required. With a majority of SharePoint 2010 and 2013 patches, this would have indicated "Upgrade Required," which would prompt us to run the Configuration Wizard. As no schema upgrade has taken place, we do not need to perform that action.
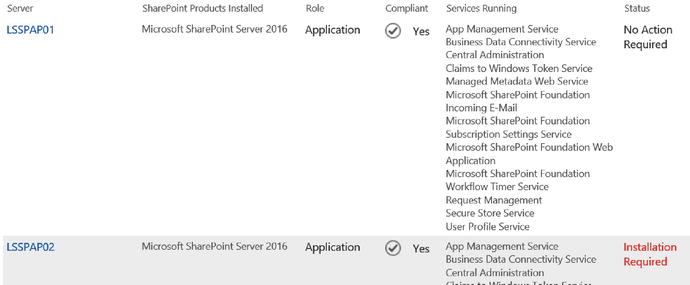
Figure 17-8. LSSPAP01 has been patched, and LSSPAP02 is prompting to install the same patch
Moving onto LSSPAP02, repeat the preceding steps; take the server out of the Load Balancer, run prerequisiteinstaller.exe, install the patches, restart the server, then add it back to the Load Balancer.
LSSPFE01 and LSSPFE02 will follow the same process. Add and remove them from the Load Balancer as necessary.
For the Search Servers , as they are using the Topology Manager to maintain Search availability to detect unhealthy or unavailable Search components, the Load Balancer is not involved in Search high availability. However, in order to keep Search online, at least one server must be running any particular Search role at any one time. In Figure 17-9, LSSPSR01 is being patched, yet end users continue to be able to search for content.

Figure 17-9. LSSPSR01 is offline, while LSSPSR02 is still online and providing Search services
When a Search Server is back online from a reboot, validate in the Search Administration that all components are online. If you receive an HTTP 503 while viewing the Search Administration page, it may take the Topology Manager a few minutes to “fail over” the Search Administration component to the SharePoint Server that is online.
Distributed Cache servers may take longer to put in a position to patch. Prior patching a Distributed Cache server, the Distributed Cache must first be gracefully shutdown. To start the graceful shutdown process, run the following cmdlets from the SharePoint Management Shell.
Use-CacheClusterStop-CacheHost -HostName FQDN -CachePort 22233 -Graceful
For example, to gracefully stop Distributed Cache on LSSPDC02, we would run the following:
Stop-CacheHost -HostName LSSPDC02.CORP.Learn-SP2016.com -CachePort 22233 -GracefulTo monitor the drain of Distributed Cache for the particular host, run Get-CacheHost. Even in farms with little traffic, it may take up to 15 minutes for Distributed Cache to shut down. As soon as the server shows as "DOWN," it is safe to run Remove-SPDistributedCacheServiceInstance on that host, as shown in Figure 17-10.
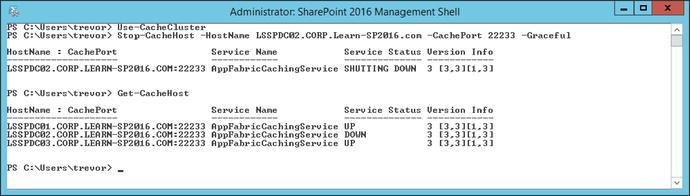
Figure 17-10. The process of shutting down and removing a cache host from Distributed Cache
Once a host has been patched and is back online, run Add-SPDistributedCacheServiceInstance. Distributed Cache may take a few minutes to start. Use Get-CacheHost to validate the host reports as "UP" before moving onto the next Distributed Cache server.
If at any point in time, a SharePoint server has been patched but the status shows something other than "No Action Required" in Manage servers in farm, run Get-SPProduct -Local. The cmdlet may take a couple of minutes, but the status should then accurately reflect the state of the server.
As SQL Server also has security hotfixes, rollups, and Service Packs, it will be important to maintain the highest availability possible. The next section briefly covers patching the SQL Servers that support the SharePoint Server farm.
Patching SQL Server
When patching SQL Server in a high-availability scenario, first patch the node that is currently in a secondary role (e.g., AlwaysOn Secondary Replica or the SQL Cluster passive node). Once completed, begin the failover process to that secondary SQL Server. Once the failover has completed, patch what was the primary SQL Server. You may or may not choose to failback to the original primary SQL Server. Note that as the Usage database is only active on the primary SQL Server, during the SQL Server outage, the Usage database will be unavailable.
Next Steps
Now that you know how SharePoint can be patched in a highly available configuration, the next stage of administering is monitoring and maintenance of the SharePoint farm.