Cloud technology provides a serverless solution to many IT problems. It eliminates the effort required to provide hardware and software. These services could be SaaS (Software as Service), PaaS (Platform as Service), or IaaS (Infrastructure as Service). In this chapter, we will integrate Contiki-NG with Cloud servers. We will also review several Cloud platforms and then try to work with them.
Introduce Cloud server
What is Cloud computing?
Types of Cloud-computing deployments
Review of Cloud server platforms
Working with Contiki-NG and Microsoft Azure
Working with Contiki-NG and Amazon AWS
Introduce Cloud Server
If you have experience with the software development cycle, you know it starts with getting requirements and ends with developing and deploying to the production machine servers. We should provide a server location, called a data center, which is used to house the machine servers.
Building a data center is not easy. Technically, a data center has class levels. Each class level has some criteria that should be met. We also should factor in electricity usage. The physical security of the server can be one of the key factors when you build your own data center.
You can also bring your machine servers to commercial data centers. In this option, you should think about security and policy. Whether you put your machine servers in your own data center or in a commercial data center, you still should manage all software within the machines yourself. Decide whether you should manage all your machines in one location.
Cloud computing can solve some issues related to configuring and deploying applications on machines. Several Cloud-computing companies provide automatic deployment and configuration for your application. They also provide geo-location server services that enable your application to deploy only in some regions. These services can serve all requests from different locations. You can optimize customer relationships by bringing your application to a customer’s local region.
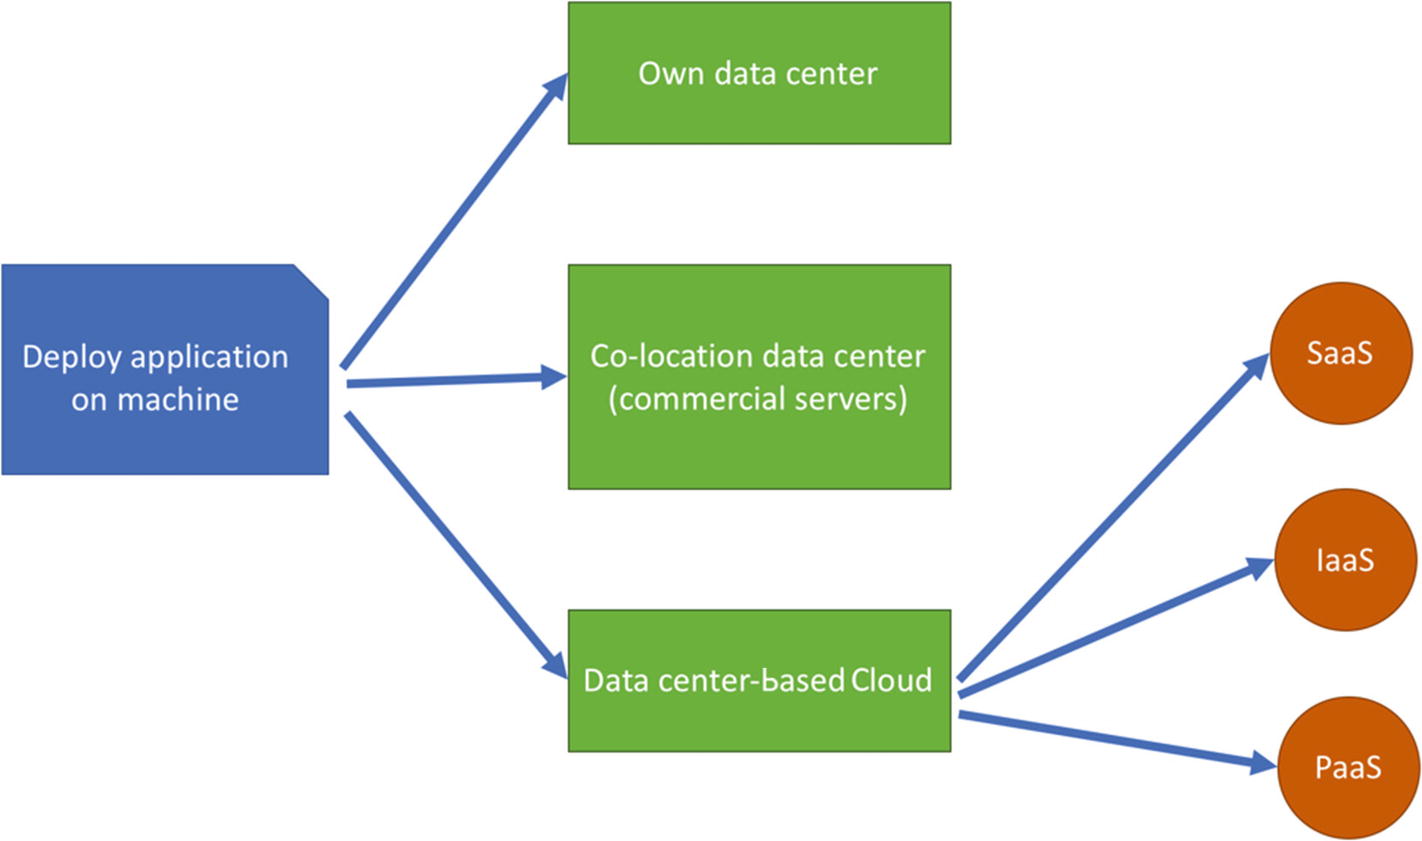
Application deployment strategies on physical machine
Why Use Cloud Computing?
Cloud computing is designed to offer high flexibility for computing processes performed over the Internet. One of the big questions related to Cloud computing is why do we use it? This is a challenging question, especially for those who have already deployed an application or system on on-premises servers (local servers). For newcomers, bringing a deployment to Cloud computing is new ground.
Cloud-Computing Services
Infrastructure-as-a-service (IaaS)
Platform-as-a-service (PaaS)
Software-as-a-service (SaaS)
Infrastructure-as-a-service (IaaS) provides a rent infrastructure, such as virtual machines (VMs), storage, networks, and operating systems. These providers serve your needs for machine servers, which are included in its managing dashboard. In general, you just pay for the resources you have already used.
Platform-as-a-service (PaaS) supplies an on-demand environment for developing and testing. You can create server and mobile applications without worrying about setting up or managing resource infrastructure.
Software-as-a-service (SaaS) provides all delivering software for your daily activities or certain projects. Providers usually offer subscription schemes for all delivering software. We can subscribe to and stop SaaS at any time.
Types of Cloud-Computing Deployments
Public Cloud
Private Cloud
Hybrid Cloud
Public Cloud is a common type of Cloud deployment. You install and configure your application/platform on a provider’s Cloud. Your data will be stored into their storage. Some companies probably decline to store their data on public storage servers due to compliance policies.
A private Cloud enables your solution to be deployed into local servers. Cloud providers usually provide software to build a private Cloud with their platform.
Last, a hybrid Cloud combines the public and private Cloud approaches. You can work with a hybrid Cloud to ensure your business is run well.
Review Cloud Server Platforms
In this section, we will review several Cloud platforms that provide Cloud services–based IoT (Internet of Thing). This is a brief review so you are familiar with them when we implement IoT by enabling Cloud technology.
Microsoft Azure
Microsoft is a well-known company that provides software services. We all know Microsoft products, such as Windows, Microsoft Office, and SQL Server. Now, Microsoft has expanded its software business by implementing Cloud services, called Microsoft Azure.
You can easily set up Windows servers on Microsoft Azure. All configurations are done though the Azure portal. You can access it at https://azure.microsoft.com . If you are a developer or a consultant with a Microsoft technology background, Microsoft Azure is a good choice to deploy Cloud computing.
Microsoft Azure is a global Cloud provider that provides Cloud services in several country regions. It can serve your needs locally.
Amazon AWS
Amazon started with its e-Commerce business. To support that business, Amazon built an IT business with Cloud technology, called Amazon AWS. Now Amazon AWS is a leading Cloud provider worldwide, available in most IT market segments. Storage and push notification services from Amazon AWS can be integrated with your mobile application. There are a lot of AWS services for your project needs. You can learn more about Amazon AWS, including registration, from the official website at https://aws.amazon.com .
You can integrate IoT projects with Amazon AWS. It provides a Cloud service, called AWS IoT. This service can serve your IoT needs. You can find it at https://aws.amazon.com/iot/ .
Google Cloud
If you want to search for something online, you probably use Google. That’s Google. Google Cloud provides a solution for your Cloud needs. You can find Google Cloud services at https://Cloud.google.com .
If you are an Android developer, Google Cloud is probably the best choice to integrate with your mobile application.
IBM Cloud
IBM has long history with servers and software. This software provides most IT services. In the Cloud-computing era, IBM now offers Cloud services, called IBM Cloud, to leverage your business. To get more information about IBM Cloud, you can visit the IBM Cloud site at https://www.ibm.com/Cloud/ .
Comparing Features of All Global Clouds
If you are interested in Cloud services from various worldwide Cloud providers, I recommend to read this site: http://compareCloud.in . You can see a feature comparison among Cloud providers such as AWS, Azure, Google Cloud, IBM Cloud, Oracle Cloud, and Alibaba Cloud.
Connecting Contiki-NG Motes to Cloud Servers
Contiki-NG is designed for IPv6 networks. Several Contiki-NG hardware devices have network protocol capabilities to connect to Cloud servers directly. In general, we need a 6LoWPAN router as a bridge between Contiki-NG motes and a Cloud server.
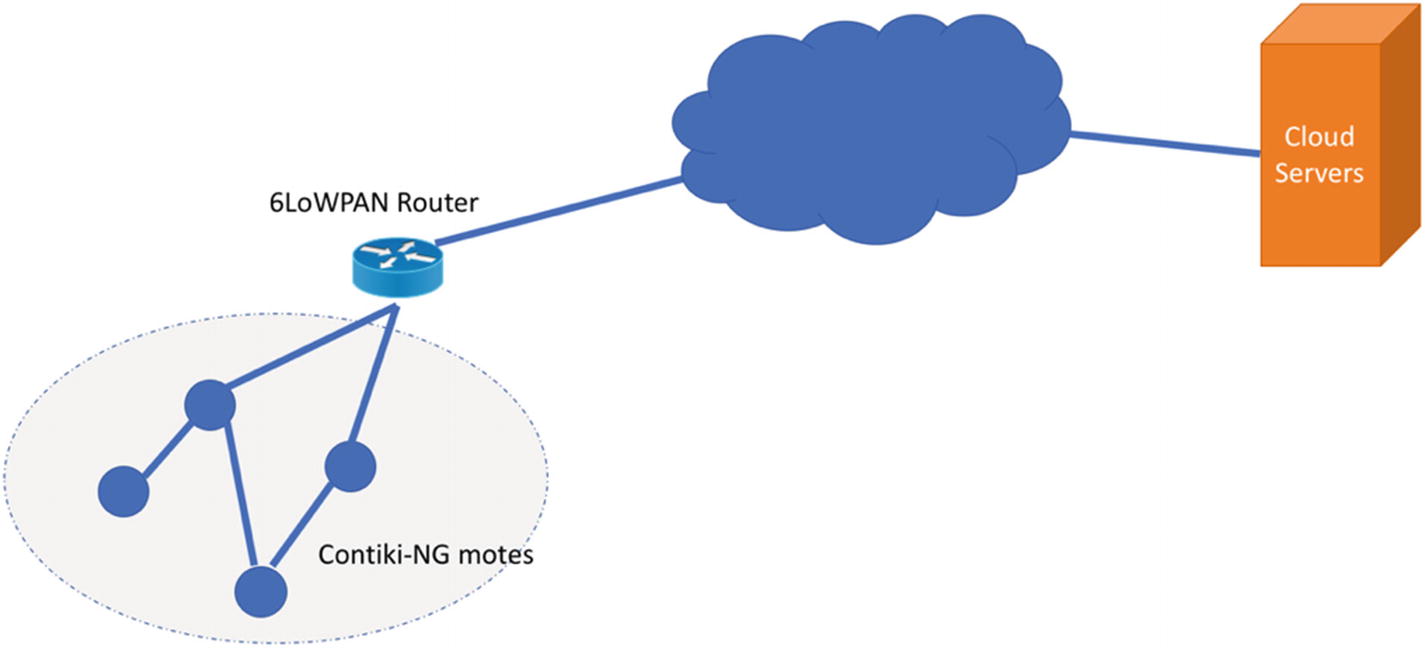
Communicating between Contiki-NG and Cloud server
In the next section, we will build two demos to perform a communication between Contiki-NG and Cloud servers. For these demos, we will use Microsoft Azure and Amazon AWS.
Demo 1: Contiki-NG and Microsoft Azure
Sensor application on Contiki-NG
6LoWPAN router application on Contiki-NG and computer
Middleware application
Azure IoT Hub application

Contiki-NG motes communicate with AWS IoT Hub
Prepare to set up Azure IoT.
Develop application for Contiki-NG and middleware application.
Test all programs.
Each task will be implemented in the next section.
Preparation
Create Azure IoT Hub.
Add a new IoT device for Azure IoT.
Copying IoT device keys for developing program.
Each step will be performed in the next section.
Creating Azure IoT Hub
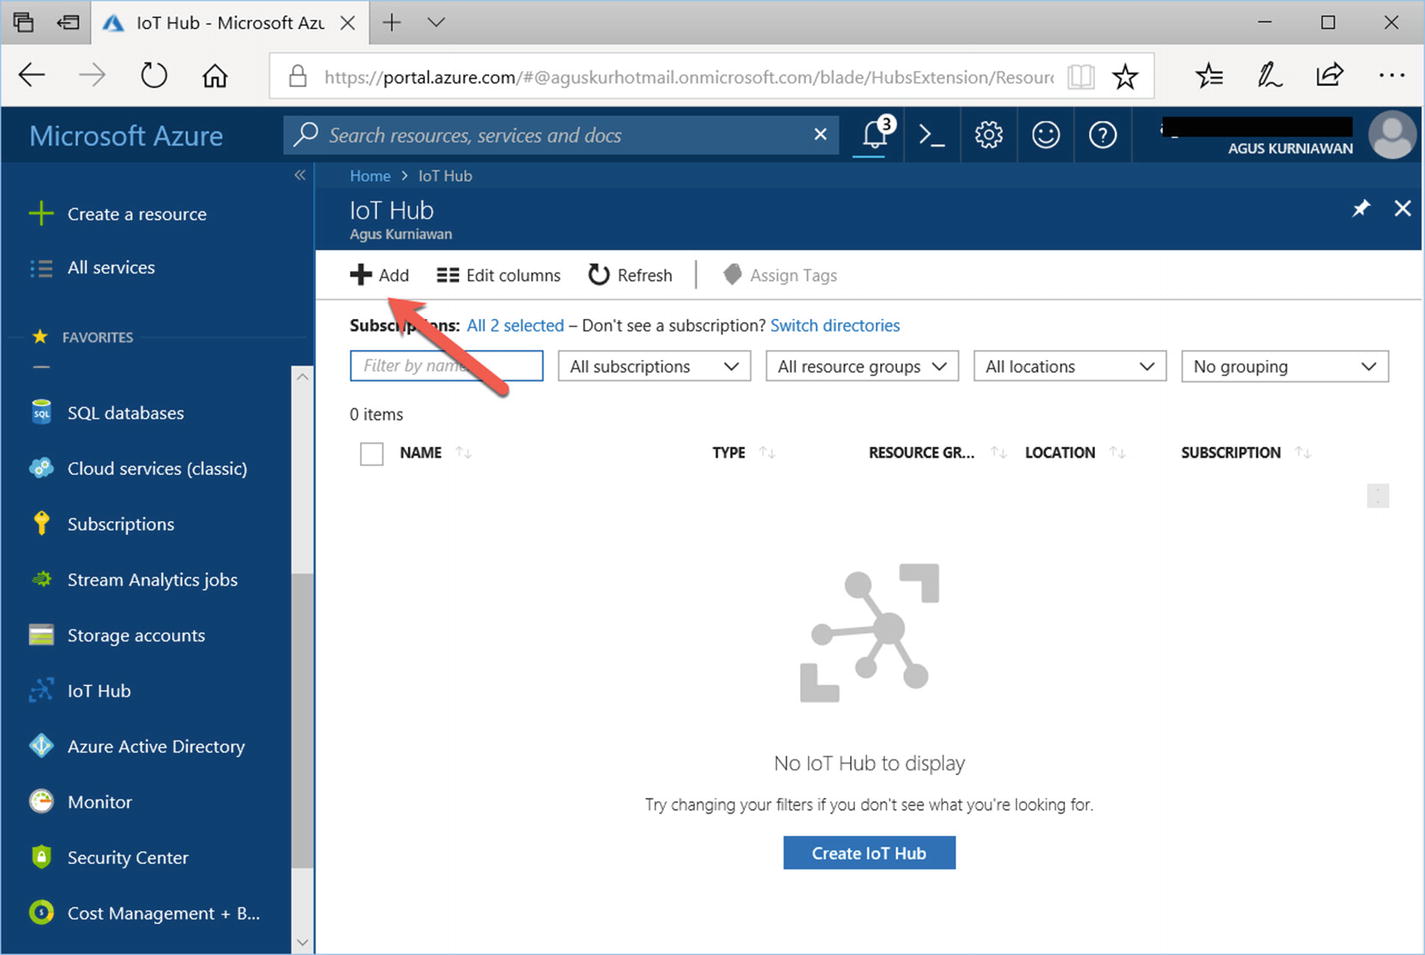
Azure IoT Hub dashboard
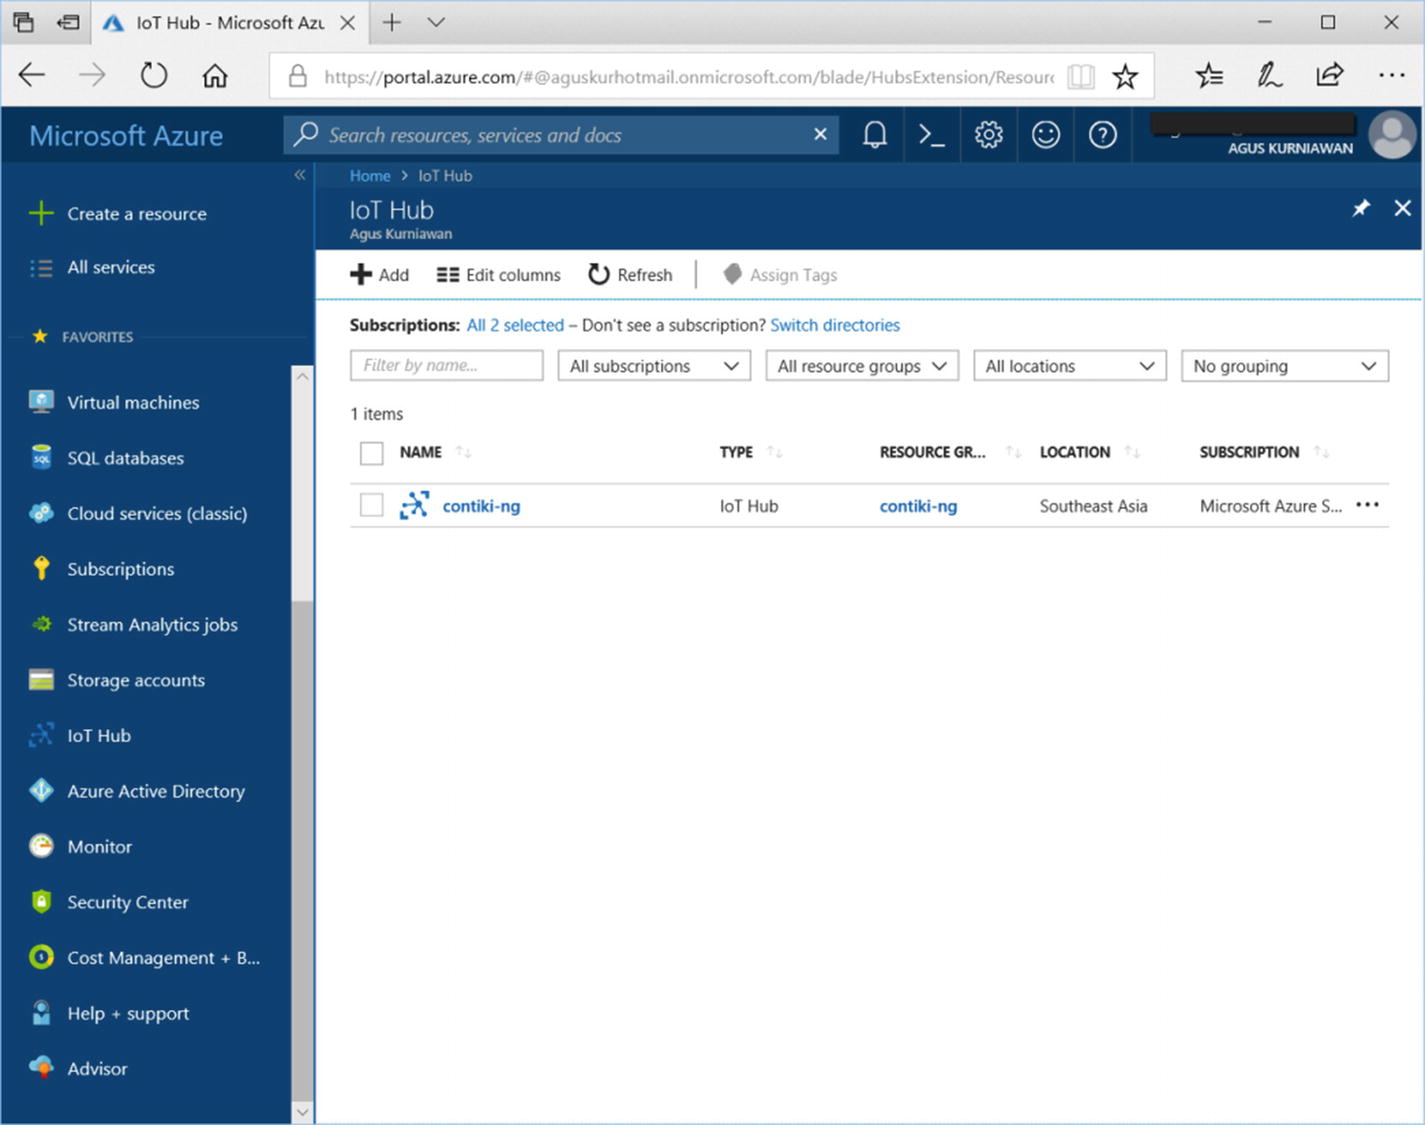
Created Azure IoT Hub for Contiki-NG
The next step is to register a new IoT device in order for it to access Azure IoT Hub. We will perform this task in the next section.
Registering a New IoT Device
Each IoT device that will access Azure IoT Hub should be registered in order to get an access key. Open your Azure IoT Hub and then click the “IoT Devices” menu so you see a list of IoT devices.
You can register a new IoT device by clicking the “+ Add” icon. You should get a registration form, shown in Figure 8-6.
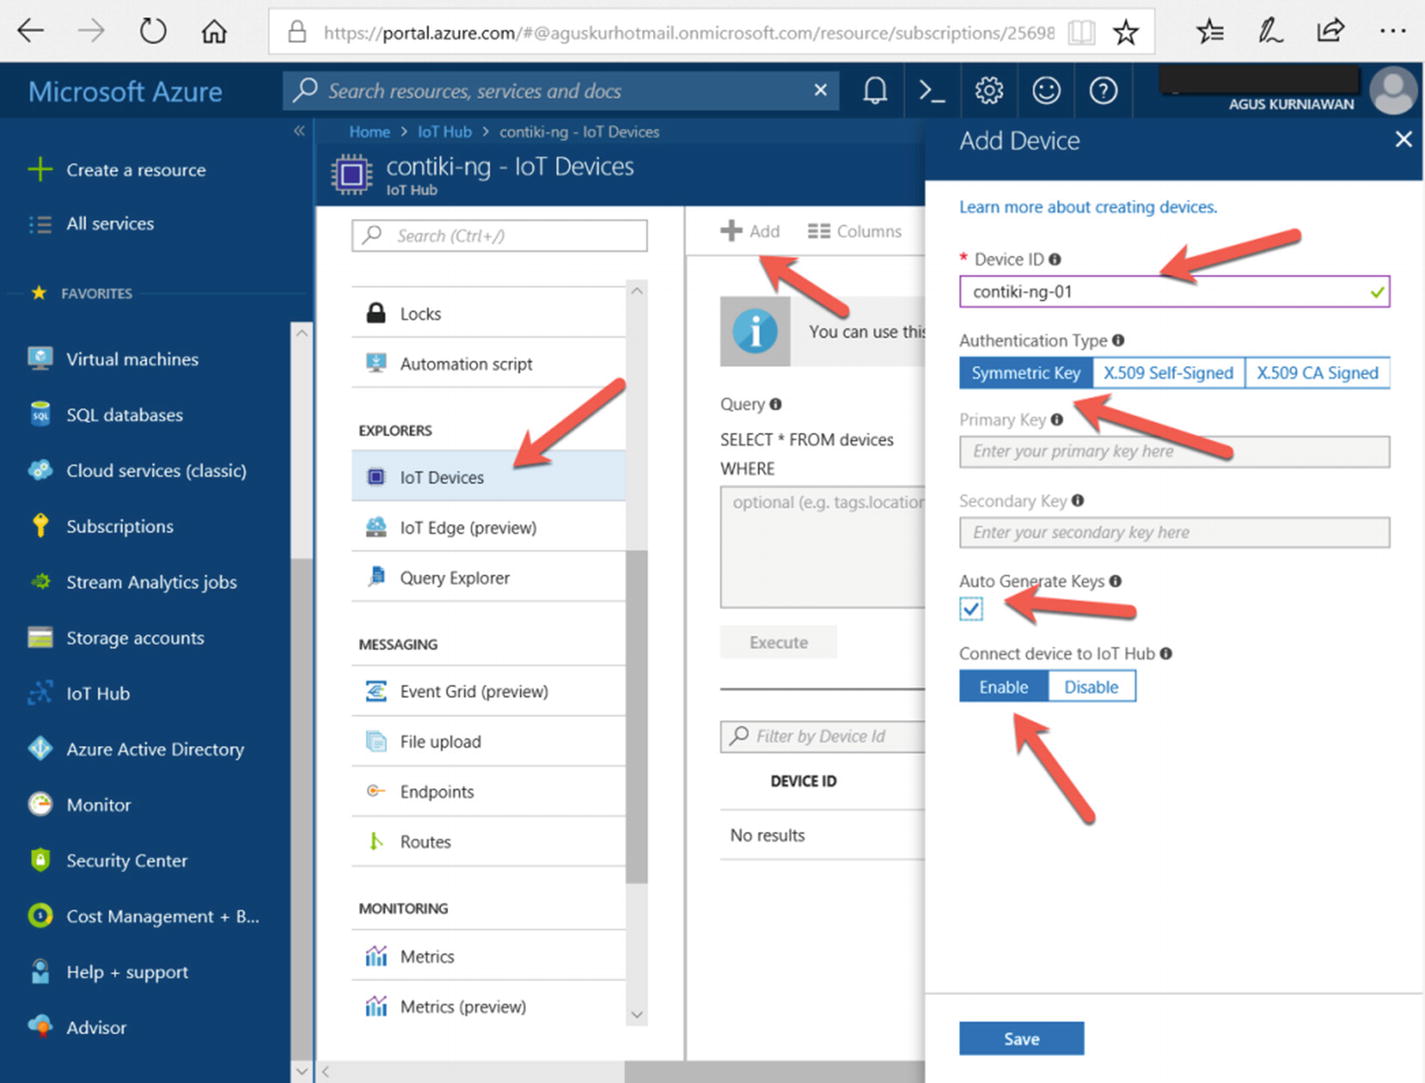
Creating a new IoT device
Copying Device Keys
After you have registered all IoT devices that will access Azure IoT Hub, you need to copy all IoT device keys. To obtain these keys, you can click your IoT devices on the Azure IoT Hub to get detailed information from the device.
You should see the IoT device key in the “Primary key” and “Connection string” fields. You can see it in Figure 8-7. You can copy the text that is indicated by an arrow. We will use these keys in our program.
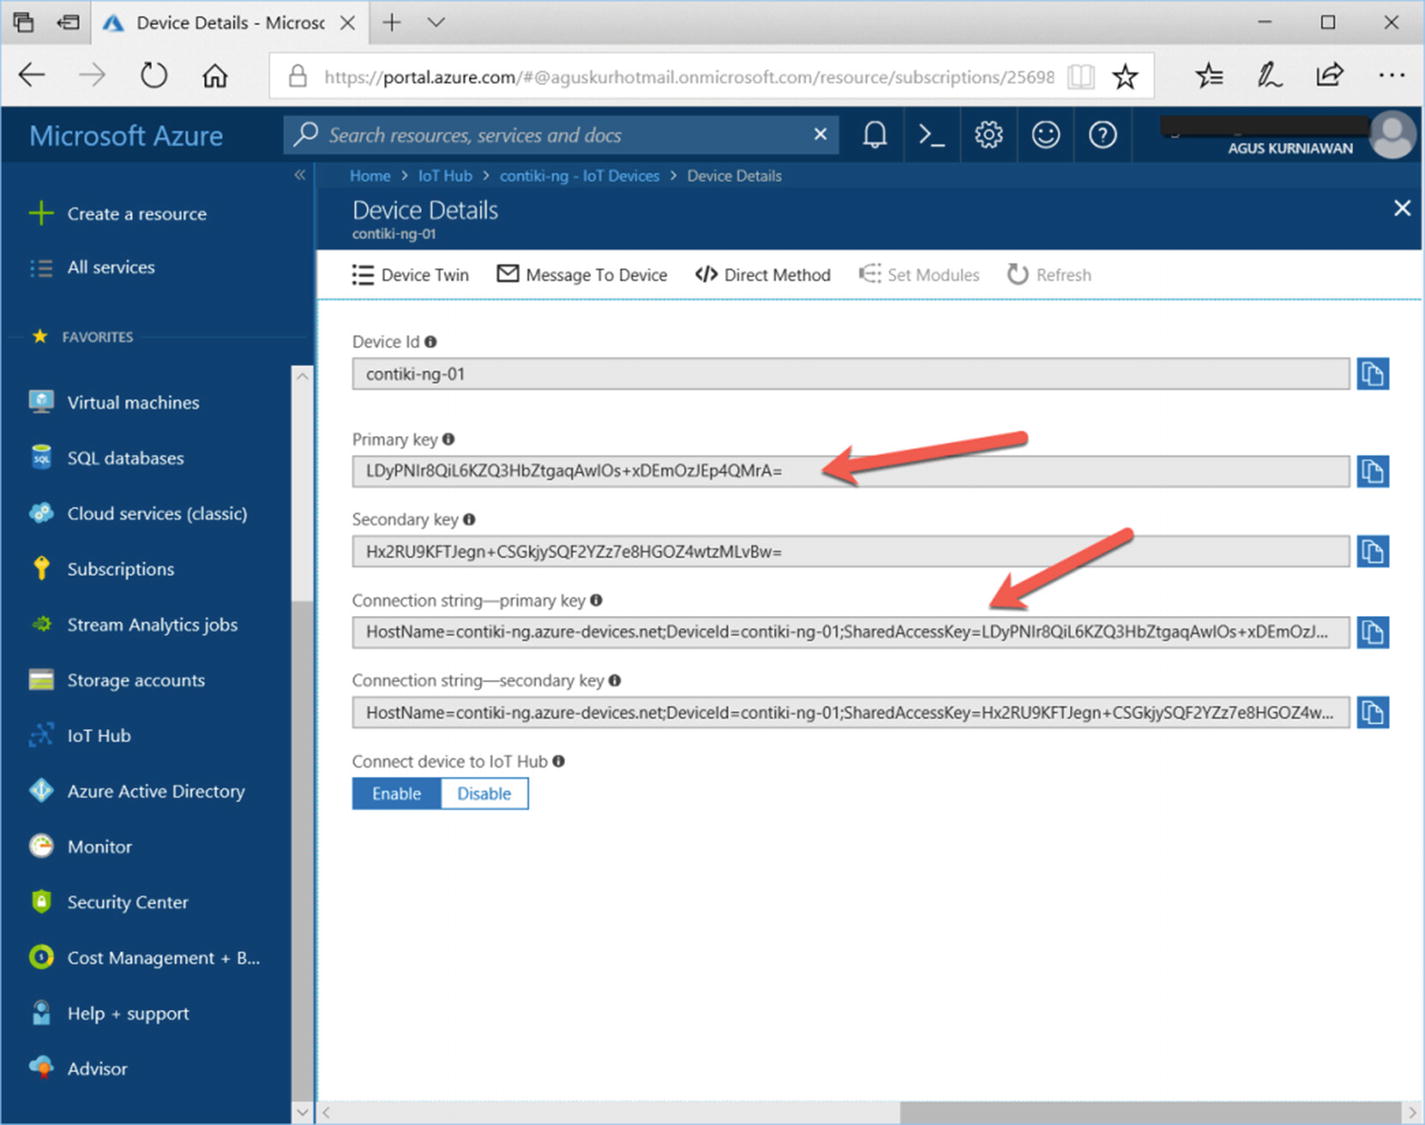
Copy the IoT device key and its connection string
Developing Application
There are three applications that we are going to develop. First, we will develop two programs for Contiki-NG, starting with the 6LoWPAN router and sensor application. A 6LoWPAN router will be implemented by deploying an rpl-border-router program to the Contiki-NG mote. The sensor application runs a web server that waits for incoming requests from the sensor.
The second program that we will develop is a middleware application. This program will request sensor data from Contiki-NG. Then, this program will push it to the Azure IoT Hub.
The last program is a sensor consumer program. The program will subscribe to the Azure IoT Hub to get sensor data from Contiki-NG. Once the middleware application pushes the sensor data to the Azure IoT Hub, the sensor consumer program will get the sensor data that is pushed by the Azure IoT Hub.
We will implement these programs in the next section.
Developing Programs for Contiki-NG
On the Contiki-NG side, we develop two programs for Contiki-NG, starting with the rpl-border-router and sensor program. You can find the rpl-border-router in the Contiki-NG program samples. You should compile and upload rpl-border-router to one of the Contiki-NG motes. You can read how to implement rpl-border-router in Chapter 6.
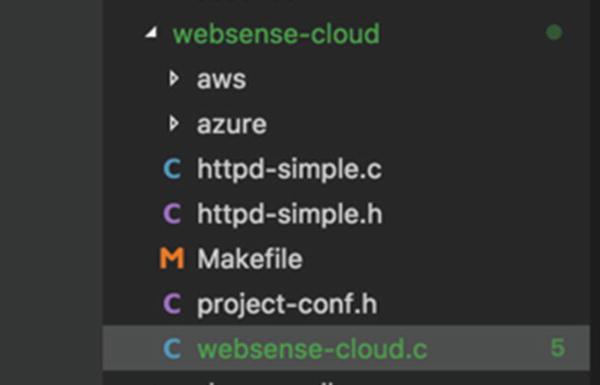
Project structure for Contiki-NG and Azure
In the Makefile file, you can configure the demo project to include http-simple.c and the Contiki-NG project. You can write these scripts:
We also modify the websense-Cloud.c file that is copied from the websense.c file (Chapter 6). In the generate_routes() method, we modify code in order to serve requests for sensor data. You can write this code:
Save all changes. Compile the rpl-border-router and websense-Cloud programs. Then, upload those to your Contiki-NG motes.
Next, we will develop the middleware application using Node.js.
Building Azure Middleware Application
We will develop an Azure middleware application to request sensor data from Contiki-NG and push sensor data to Azure IoT Hub. For implementation, we use Node.js.
First, create a folder for your project. Open Terminal and navigate to your project folder. Then, initialize your project, including required libraries. Type these commands:
Now, we will start to write a middleware application for Azure. Create a file, called middleware-azure.js. Initialize all required libraries and run the web server on port 3000. You also need information such as hostname, device ID, and shared access key. Write this code:
{youriothostname} is your domain address (IP address) from your Azure IoT Hub
myFirstNodeDevice and mydeviceId are your registered device ID
{yourdevicekey} is a shared access key. You can find it in the primary key field from your registered IoT device; see Figure 8-7.
Next, we declare two functions. One of these functions, printResultFor() , is used to print all messages to Terminal. The other is the callback function, connectCallback, which requests sensor data from Contiki-NG motes:
You should replace the value [fd00::212:4b00:797:6083] with the IPv6 address from the Contiki-NG mote that runs the websense-Cloud application.
Finally, we call our callback function from the Azure object:
Save all these codes.
Developing Sensor Consumer Program
The last step is to develop a sensor consumer program to subscribe to Azure IoT Hub in order to retrieve sensor data.
We use the same project from the previous section. We need the azure-vent-hubs library to create the subscription. Type this command:
Then, we create a file, called azure-sensor-subscriber.js. We initialize a required library and configure a connection string for the Azure IoT Hub. Write this code:
Change connectionString to the previous value.
Now, we subscribe and listen to incoming messages from Azure IoT Hub. Write this code:
Save all files.
We have written all programs for this demo. Next, we will test our project.
Testing Contiki-NG and Azure Application
In this section, I will assume you have already deployed all programs into your Contiki-NG motes. First, run the rpl-border-router program on the 6LoWPAN router. For instance, I run it on a TI LaunchPad CC2650. Then, navigate to the rpl-border-router project folder. Then, run this:
After execution, that command will run tunslip6. Change TARGET to your Contiki-NG platform. If it succeeds, you can turn on another Contiki-NG mote that has installed the sensor application.
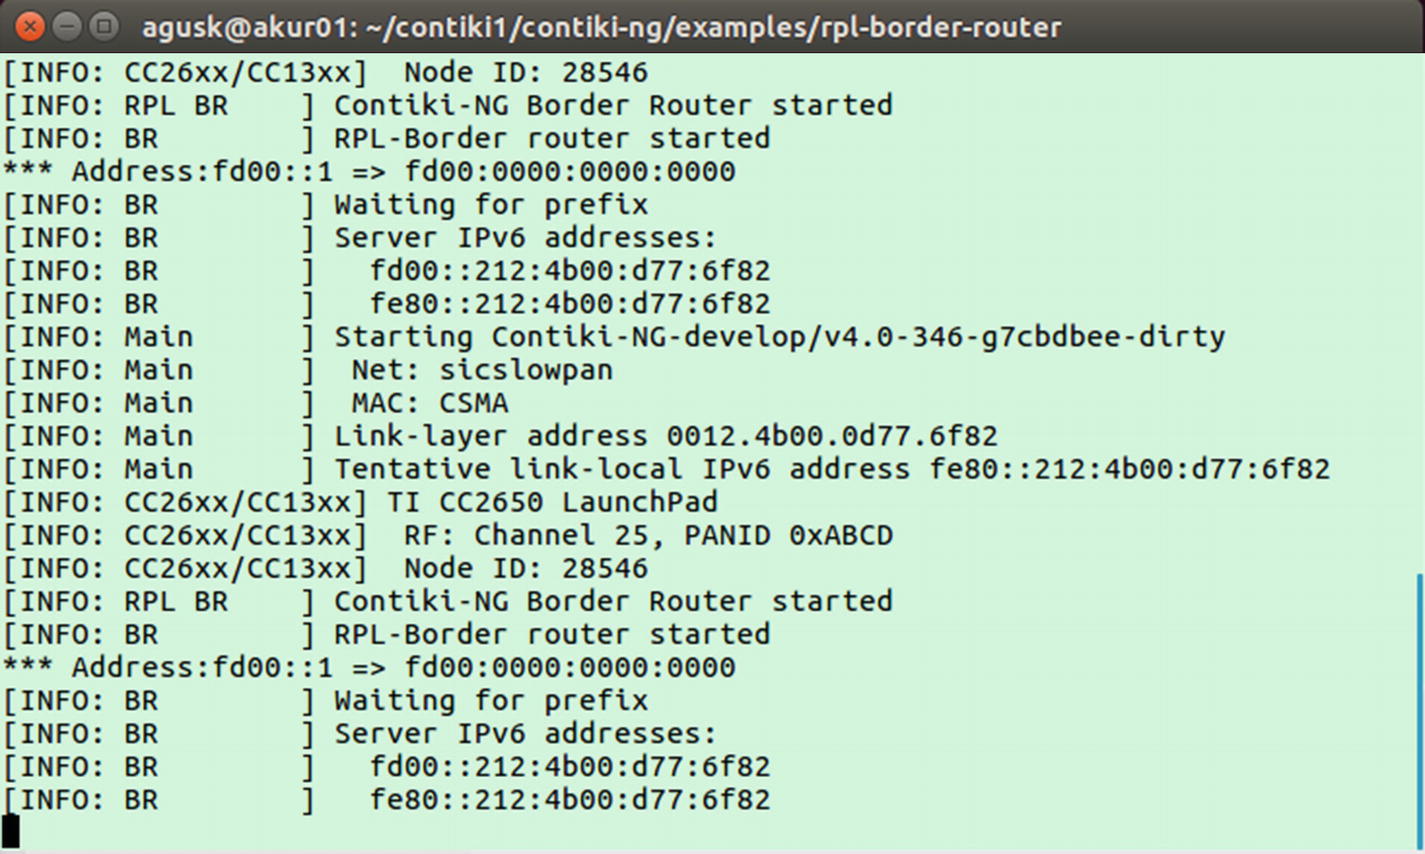
Running 6LoWPAN router application
Now, you can run the middleware application in Terminal. You can type this command:
Then, you can run the sensor application to listen for incoming sensor data from Azure IoT Hub. Open a new Terminal and then type this command:
The middleware application will request sensor data from the Contiki-NG mote every three seconds. After obtaining sensor data, the middleware application will push the data to the Azure IoT Hub.
Once sensor data has reached the Azure IoT Hub, it will be distributed to all subscribers.
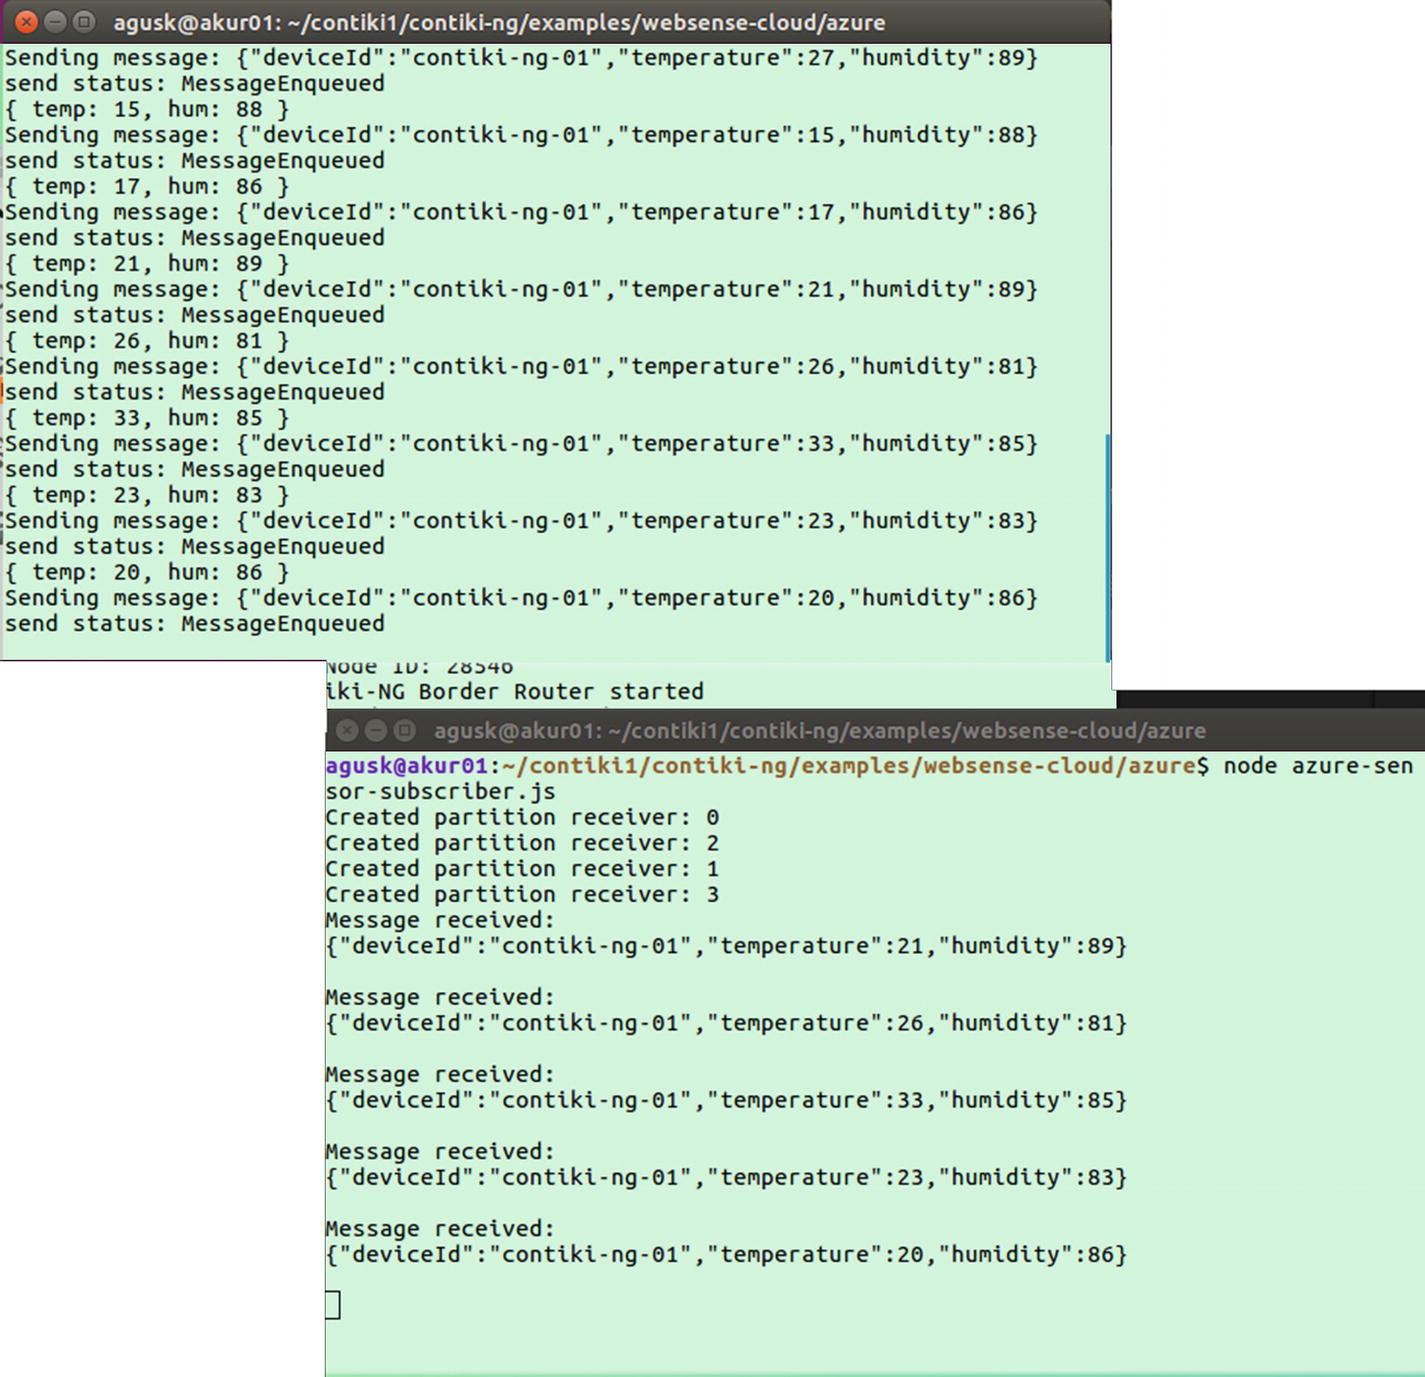
Running middleware application and sensor program
Demo 2: Contiki-NG and Amazon AWS
In this demo, we will perform the same scenario as in the first demo. We will use Amazon AWS. To communicate with IoT devices, Amazon AWS provides a service called AWS IoT. You can read about it at https://aws.amazon.com/iot/ .
Our demo scenario can be seen in Figure 8-11. This is similar to the first demo. A middleware application will get sensor data from Contiki-NG and then push it to Amazon AWS IoT.
Prepare to set up AWS IoT.
Develop applications for Contiki-NG and middleware.
Test all programs.

Demo project scenario for Contiki-NG and Amazon AWS IoT
Preparation
Create a new IoT thing.
Create a policy for AWS IoT.
Attach a policy and a thing to a certificate.
These tasks will be explained in the next section.
Creating a New IoT Thing
Each IoT device that wants to access AWS IoT should be registered so as to obtain the access keys included with the security certificate.
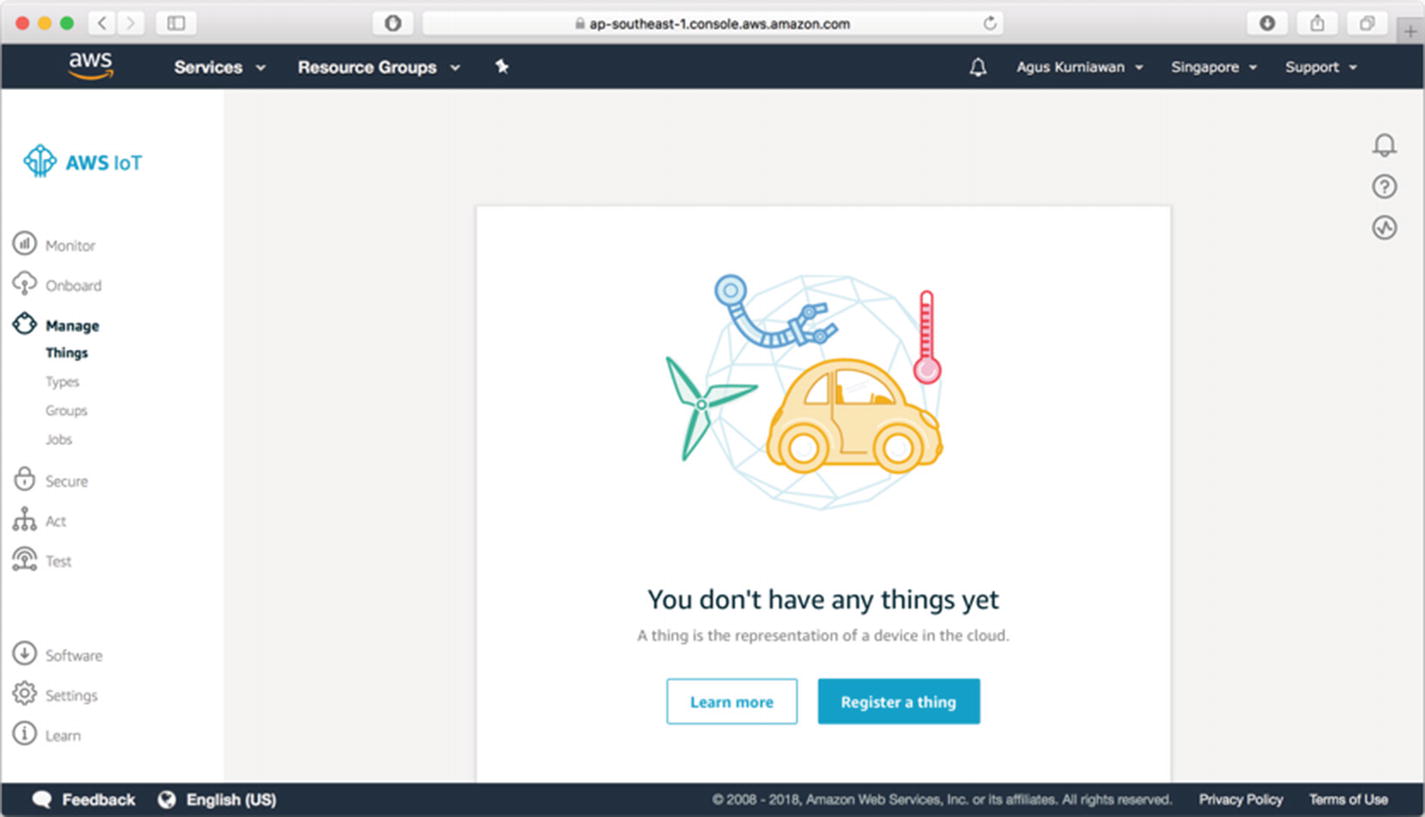
AWS IoT console management
On the left-hand menu, click “Manage Things.” If you don’t create things yet, you can click “Register a thing” to register a new IoT device.
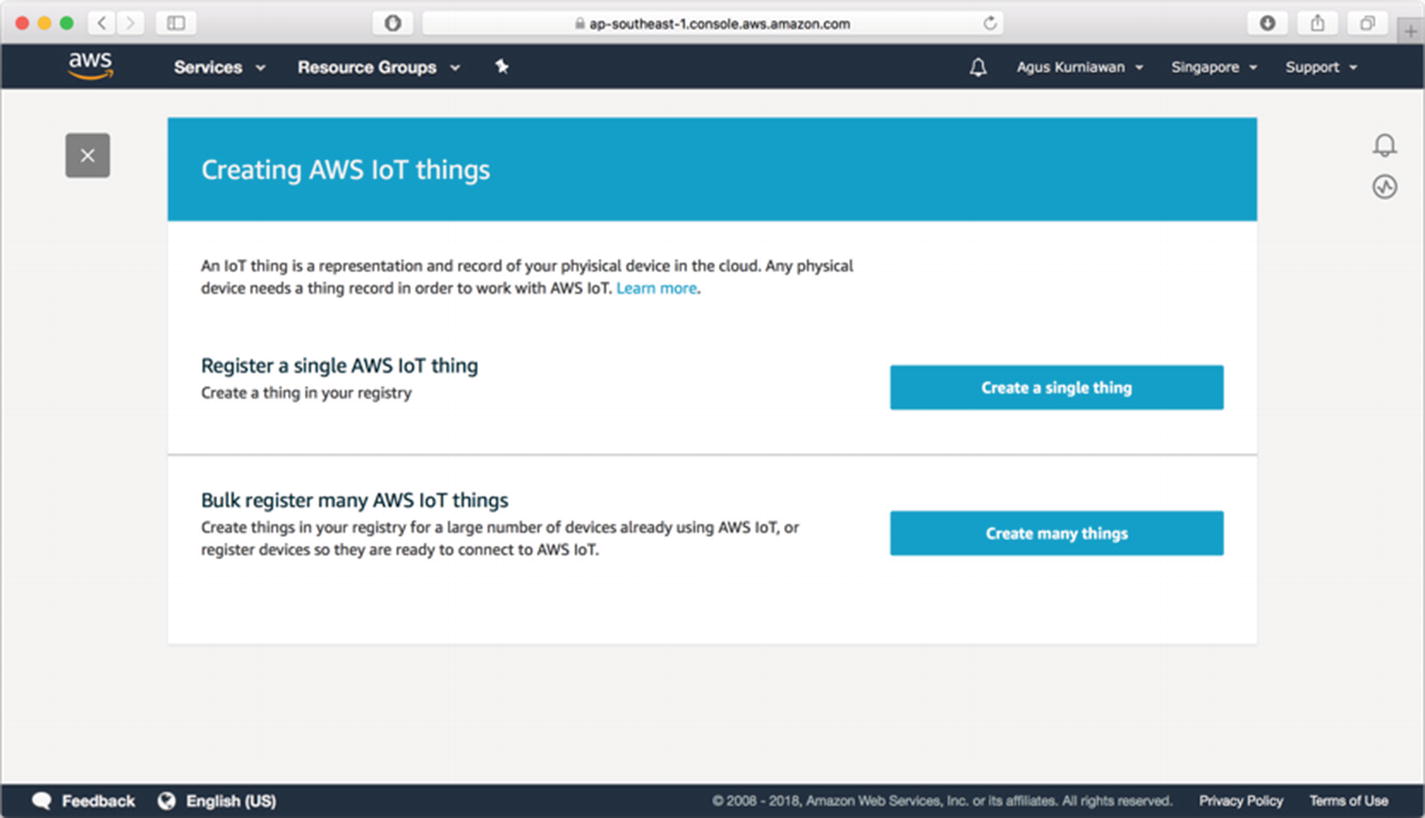
Creating AWS IoT things
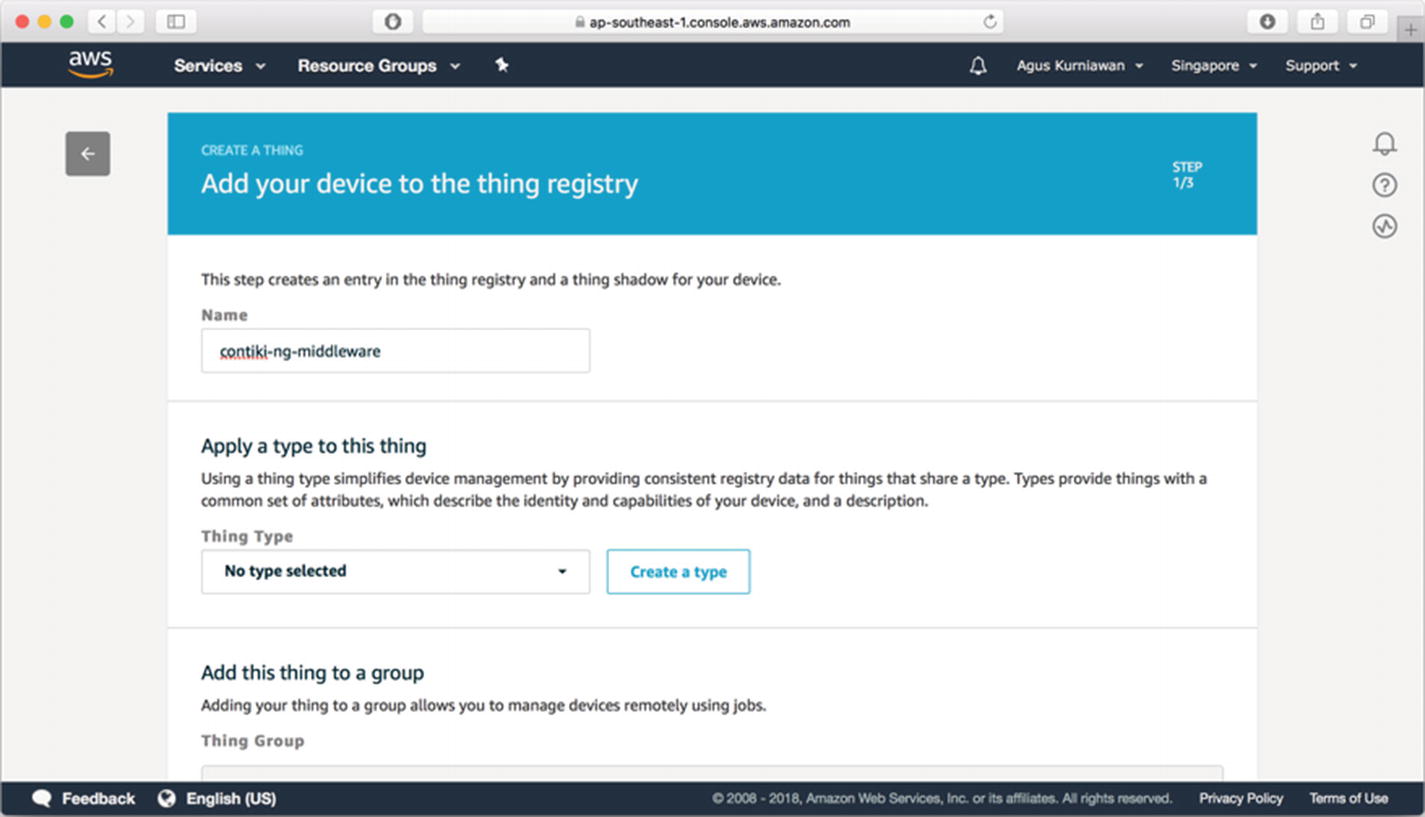
Setting an IoT device
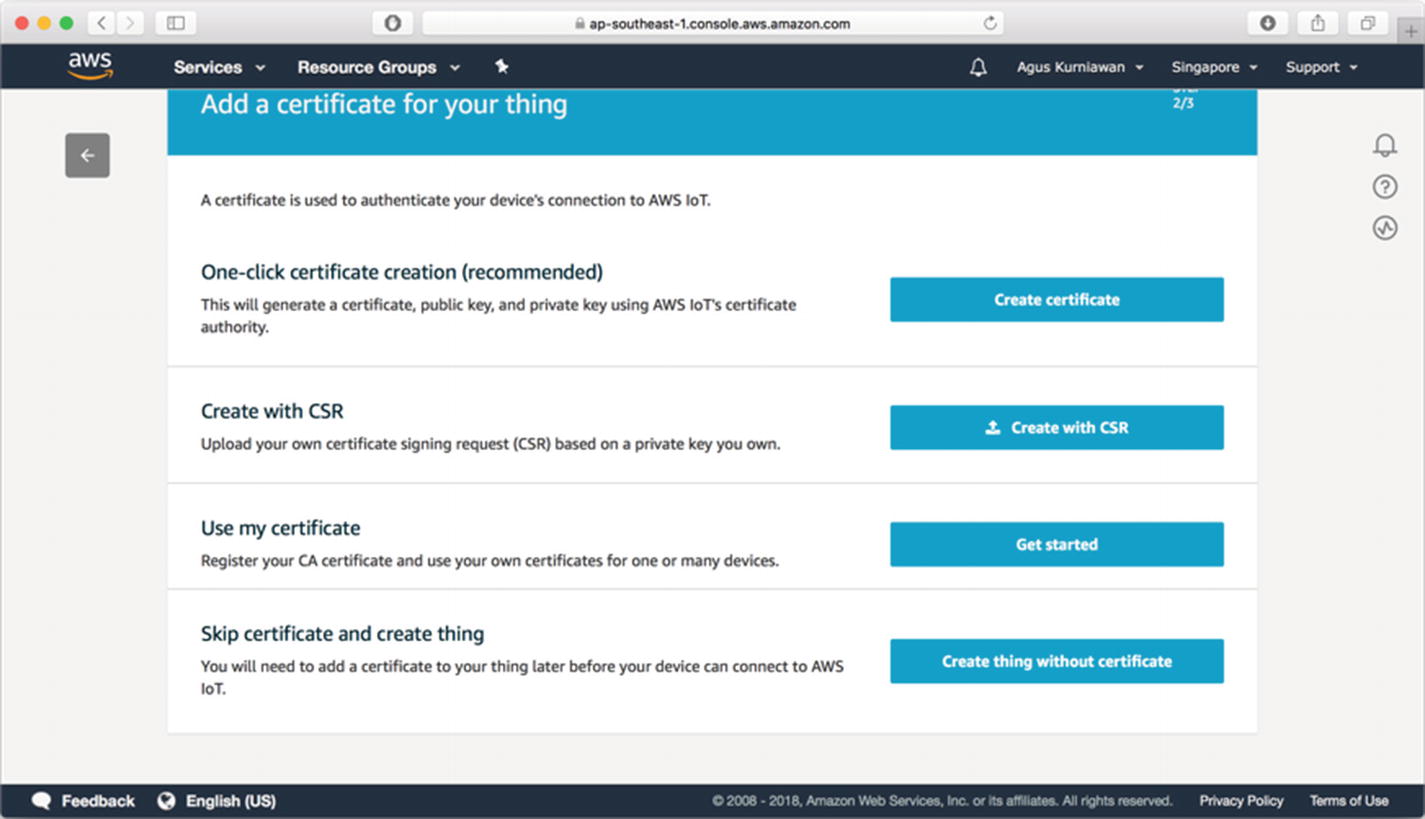
Adding a certificate
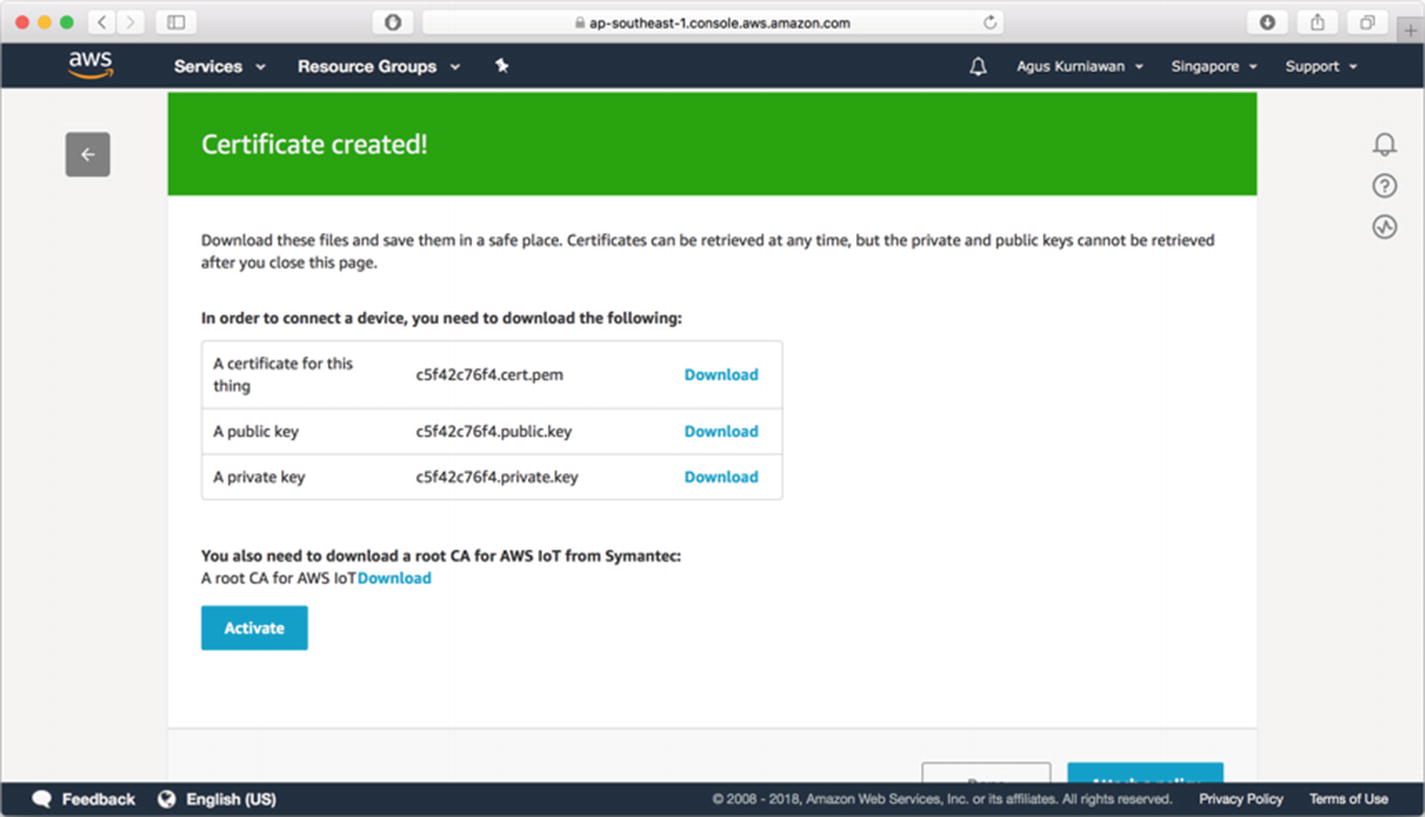
Generating certificate and keys
Download certificate and key files
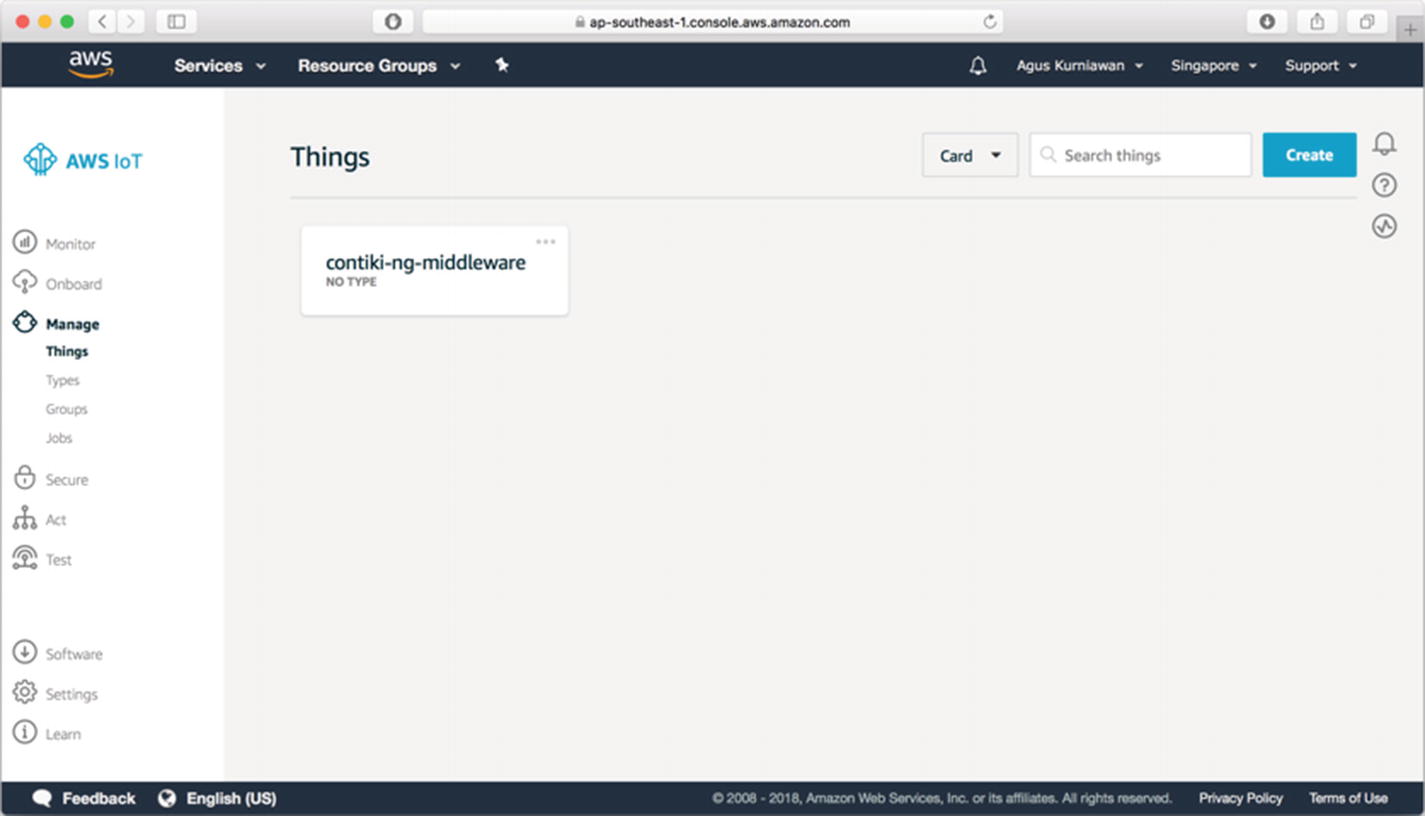
A new thing shown on Manage Things dashboard
Next, we will create a policy to enable our thing to access the AWS IoT Hub.
Creating a Policy for AWS IoT
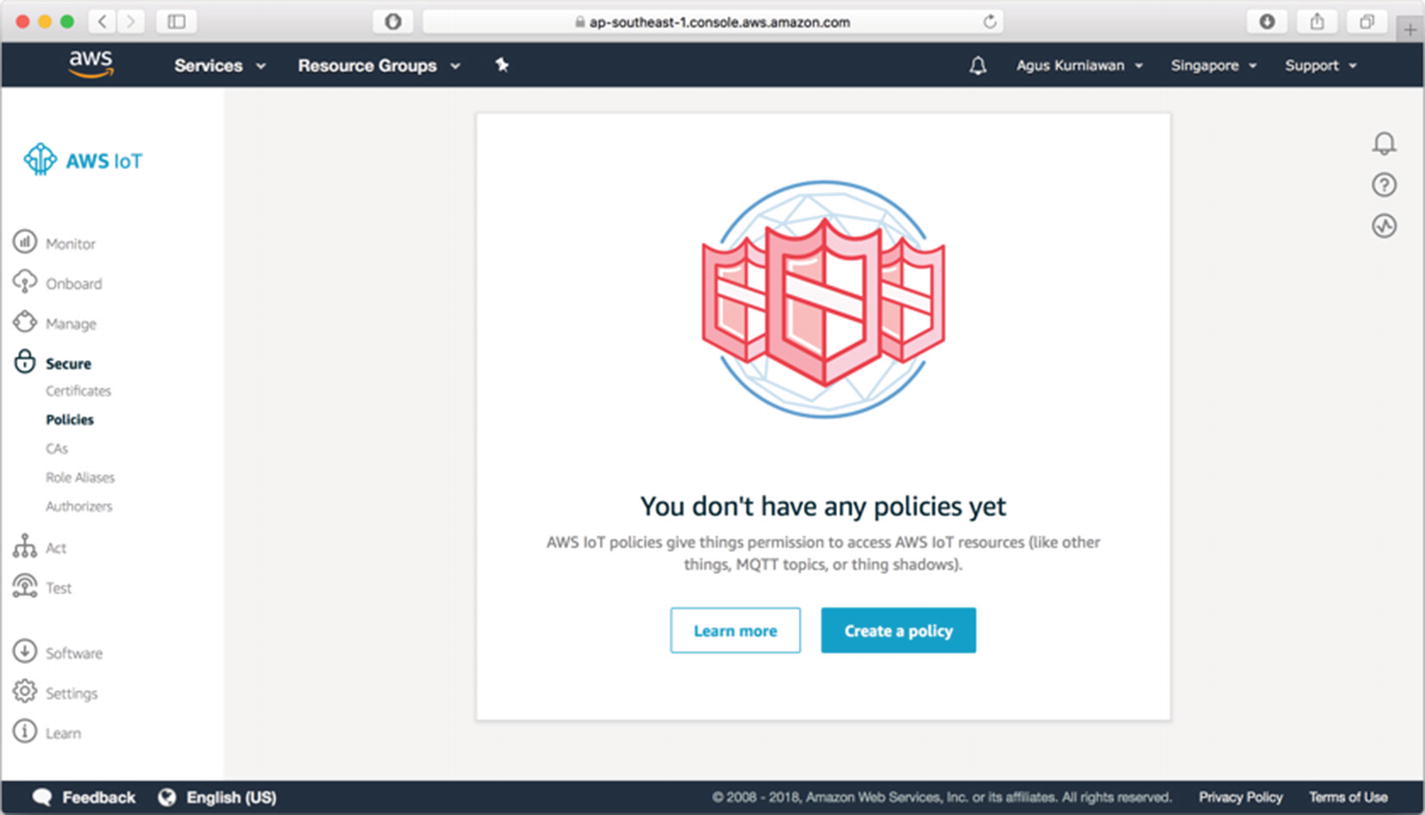
AWS IoT policy dashboard
Click “Create a policy.” Then, you should see the form shown in Figure 8-20. Fill in the policy name. Next, you should add statements to work with AWS IoT. You should add resource, action, and effect for four items, as follows:
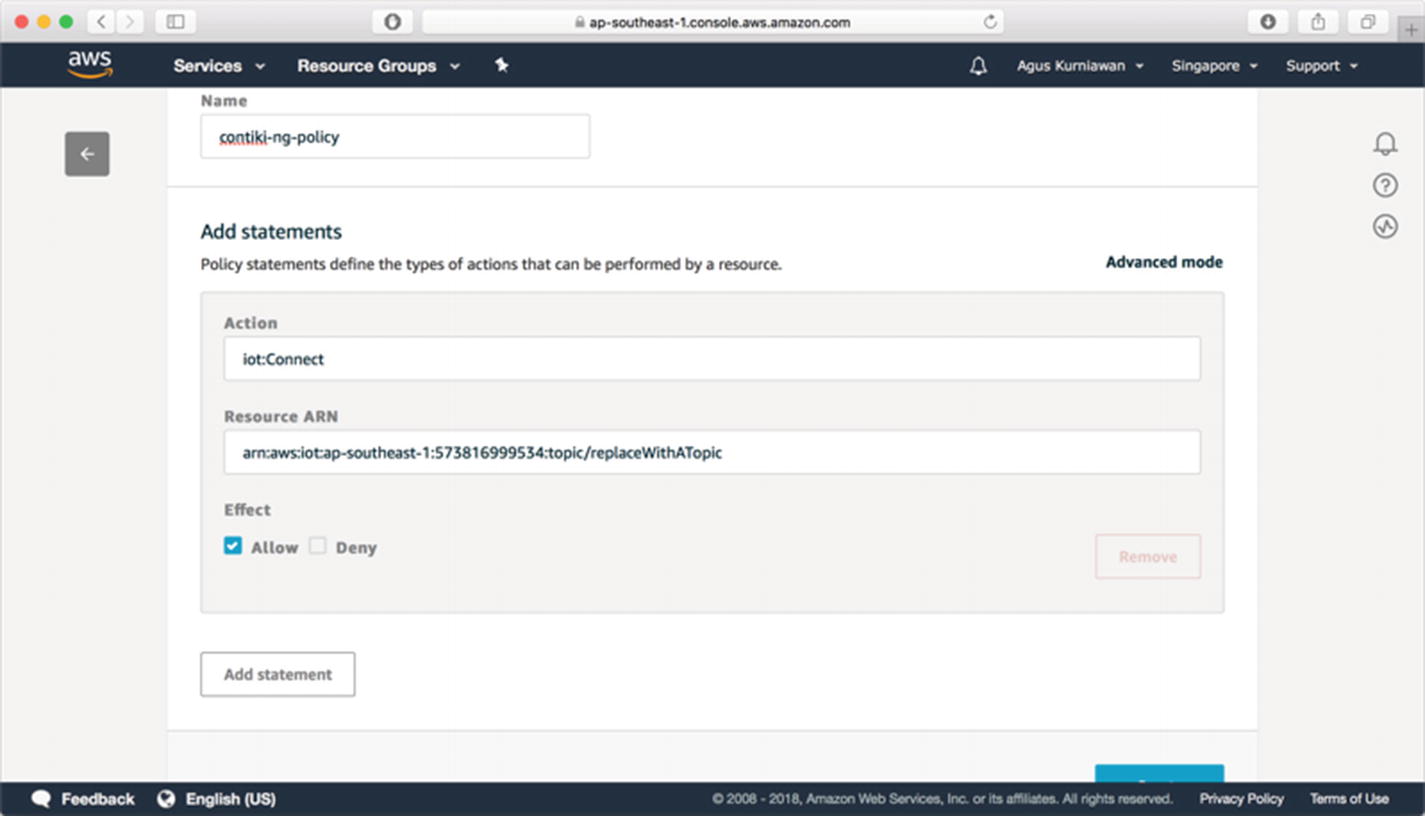
Adding a new policy for AWS IoT
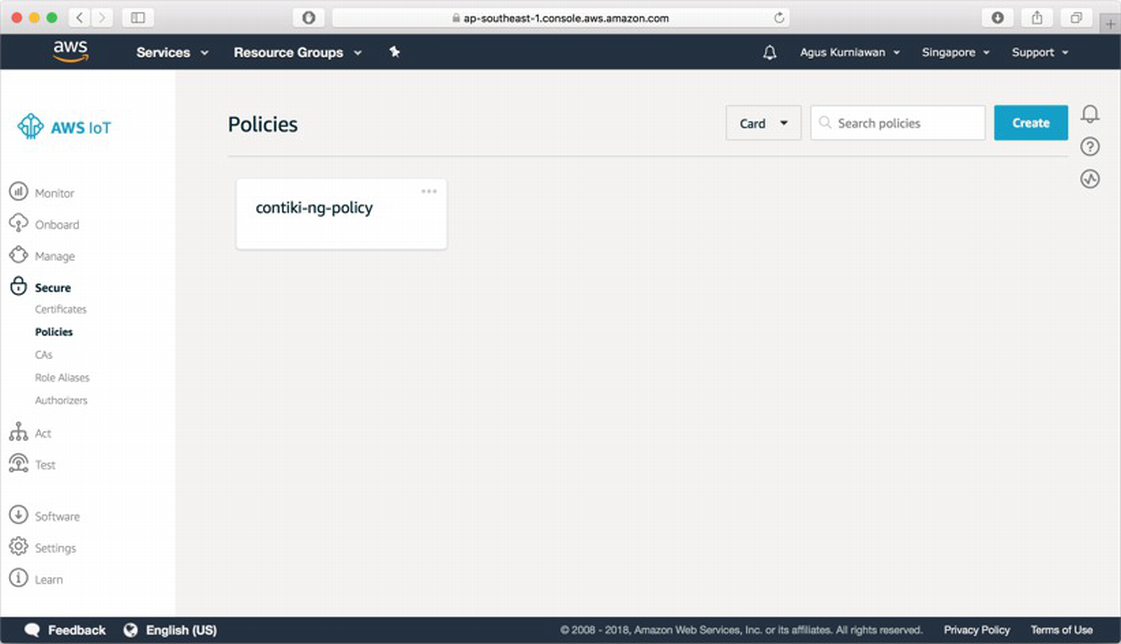
A created policy shows up in Policies dashboard.
Next, we map a policy and a thing to a certificate. We will perform this in the next section.
Attaching a Policy and a Thing to a Certificate
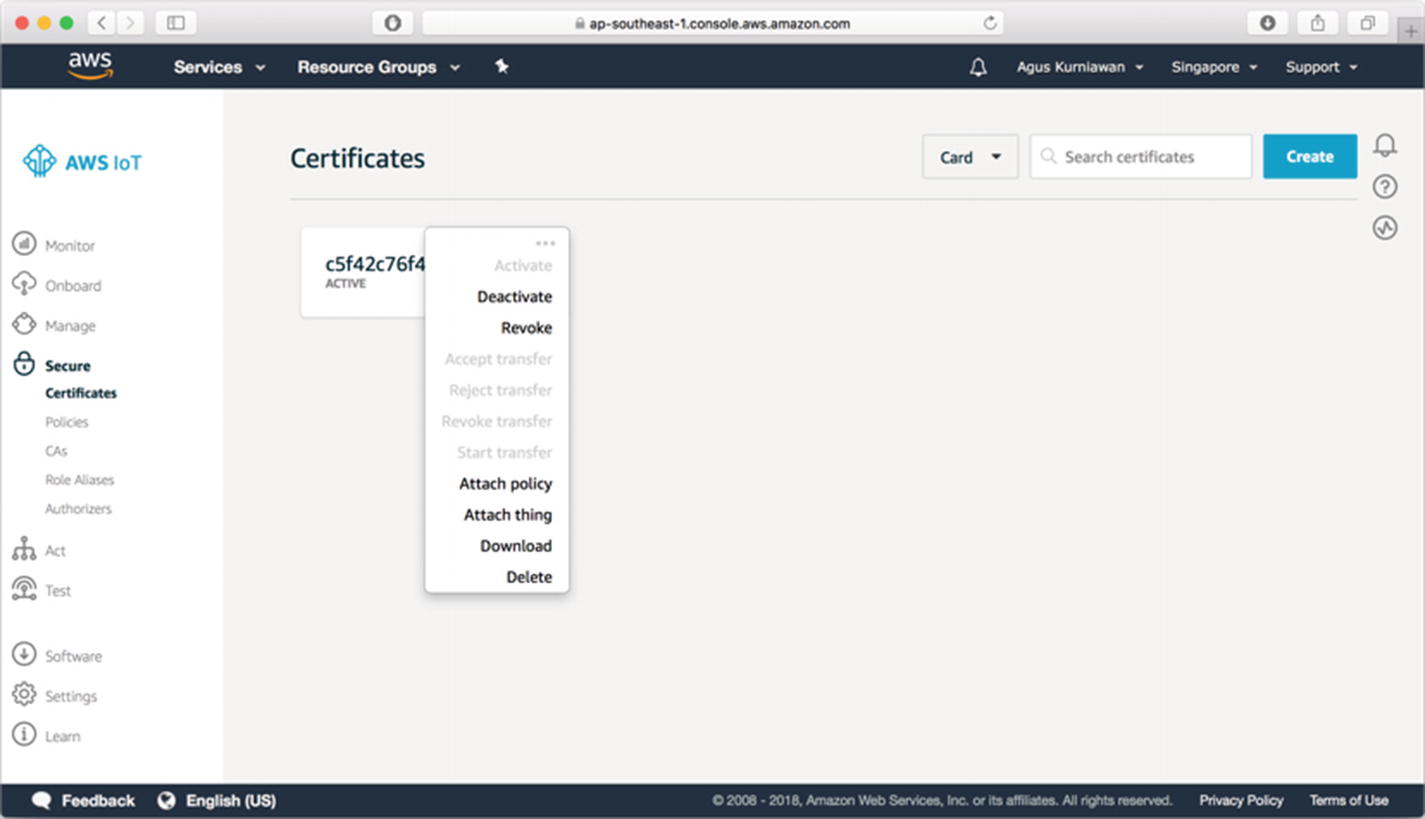
Open context menu of a certificate of AWS IoT
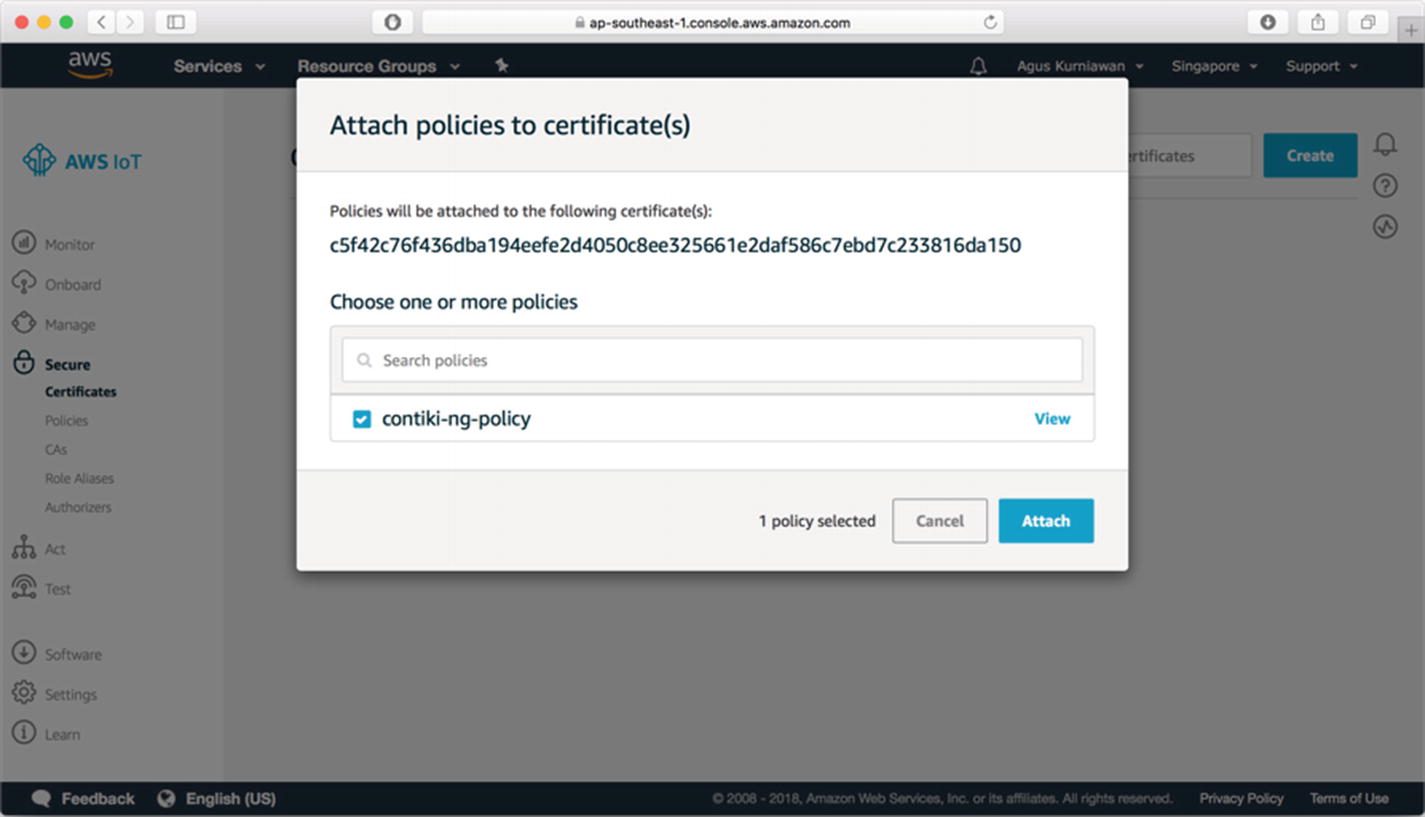
Attach a policy to a certificate
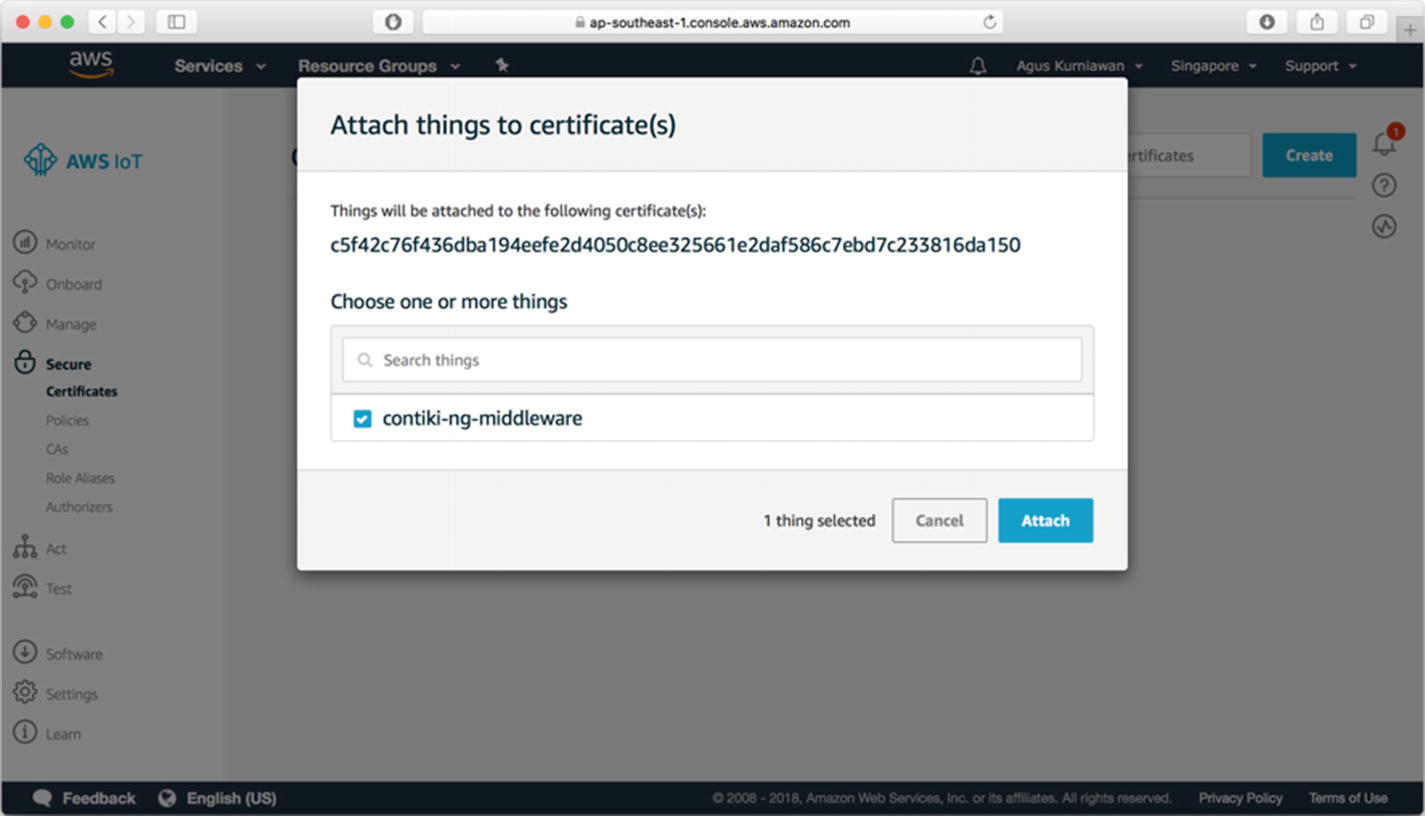
Add an IoT device (thing) to a certificate
Select your thing that was already created.
Finally, you have to set up AWS IoT. Next, we will develop programs for Contiki-NG and the middleware application.
Developing Application
In this section, we will develop applications for Contiki-NG and Node.js to access AWS IoT.
Developing Programs for Contiki-NG
Since our demo scenario is similar to the previous demo, we use the same configuration. You need one Contiki-NG mote as the 6LoWPAN router. Other Contiki-NG motes run the sensor application.
Please read the first demo to build programs for Contiki-NG.
Building Middleware Application for AWS IoT
We build an AWS middleware application to request sensor data from Contiki-NG and push sensor data to AWS IoT. For implementation, we use Node.js.
To create a project, you can create a folder. Then, open Terminal and navigate to your project folder. Then, initialize your project, including the required libraries. Type these commands:
Now, we start to write a middleware application for AWS. Create a file, called middleware-aws.js. We now call the required libraries and configure AWS IoT. You can write this code:
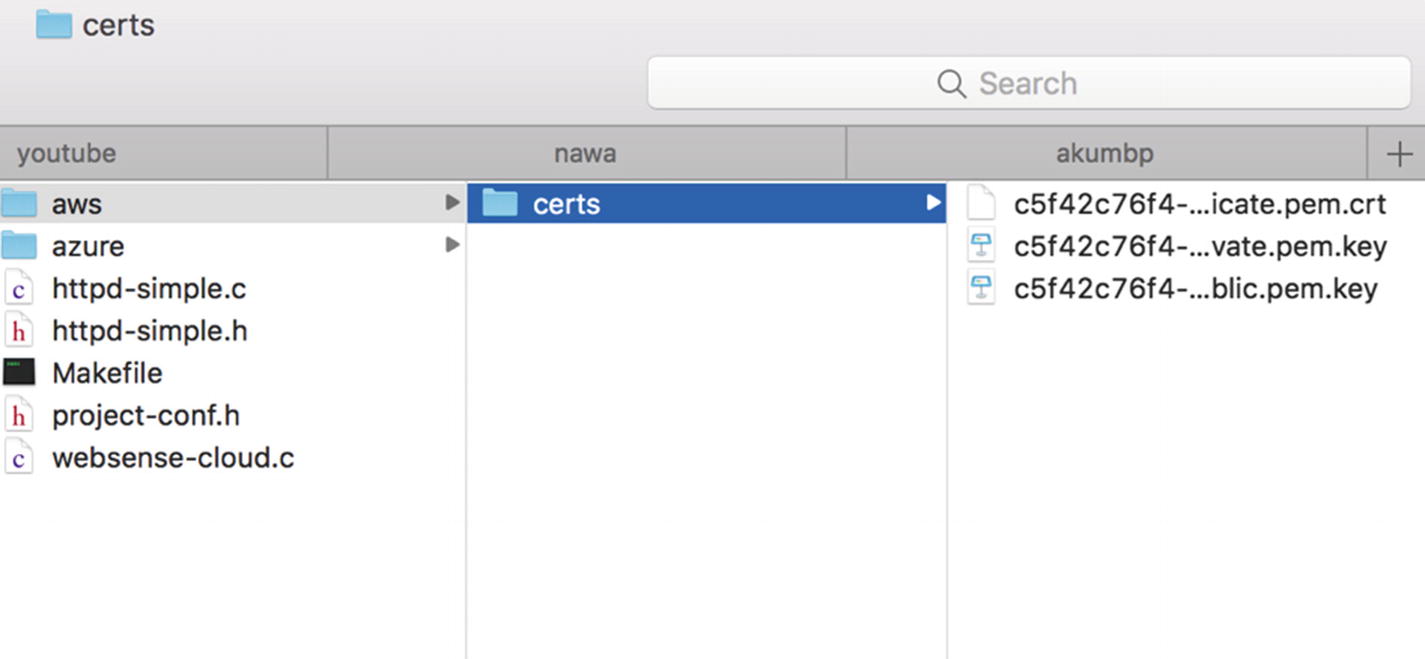
You should change the values for keyPath, certPath, caPath, and region to those for AWS IoT.
We also run a web server using Express on port 3000:
Next, we listen for the connect event from AWS IoT. Once the middleware application is connected to AWS IoT, we request sensor data from Contiki-NG every three seconds. For testing, I request data from Contiki-NG with the IPv6 address [fd00::212:4b00:797:6083]. You can change it. You also can change mydeviceId:
Last, we can subscribe to the contiki-ng-sensor channel:
Save all code.
Next, we will test this project.
Testing Contiki-NG and AWS IoT
Deploy all programs to Contiki-NG. Then, run the 6LoWPAN router and the middleware application:
This program will connect to AWS IoT. After connecting, this application will retrieve sensor data from Contiki-NG. It will then push the sensor data to AWS IoT.
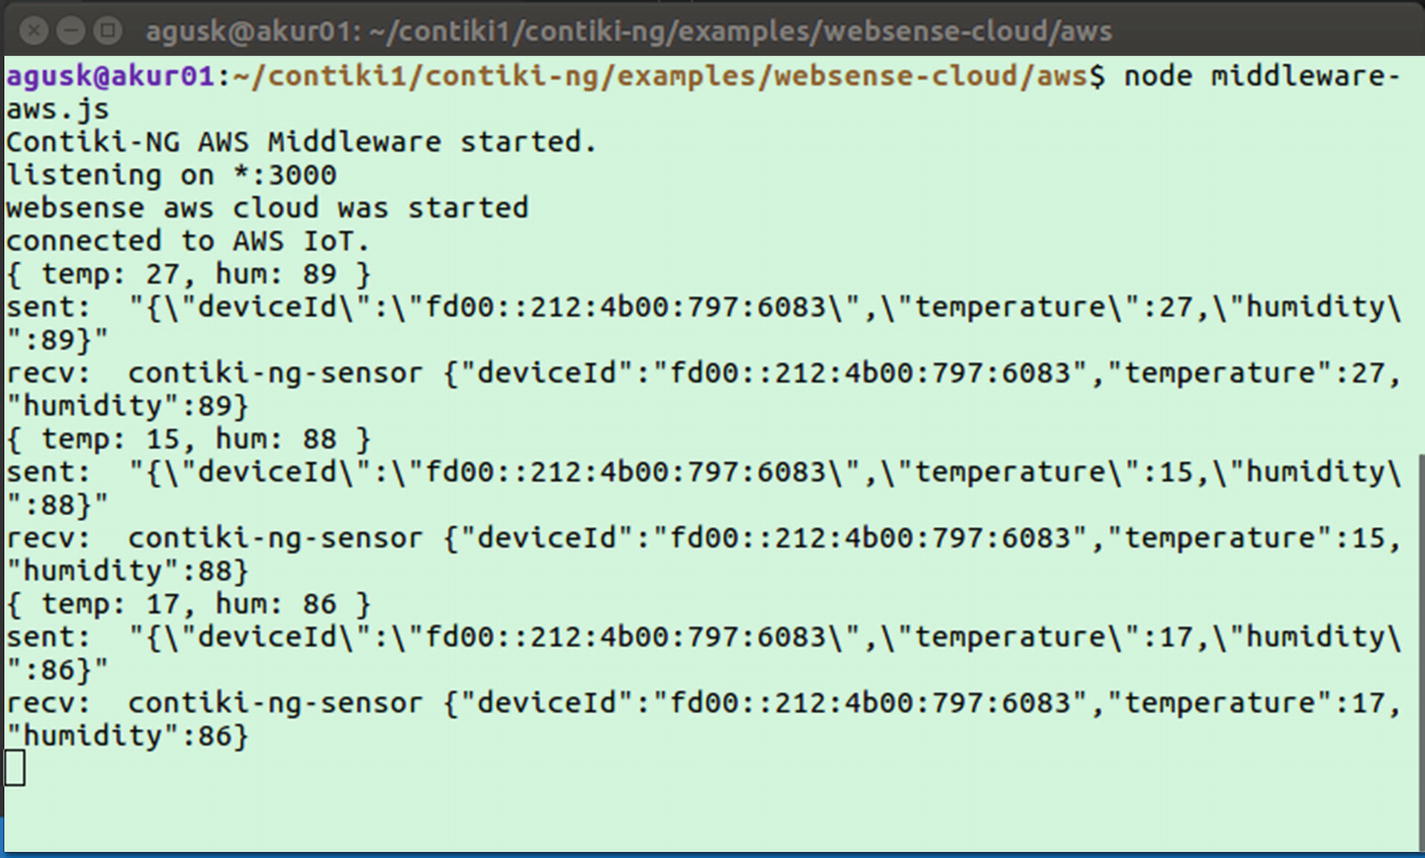
Program output from executing middleware application
For a subscriber tool, you can use the Subscription test application. You can find it on the Test menu.
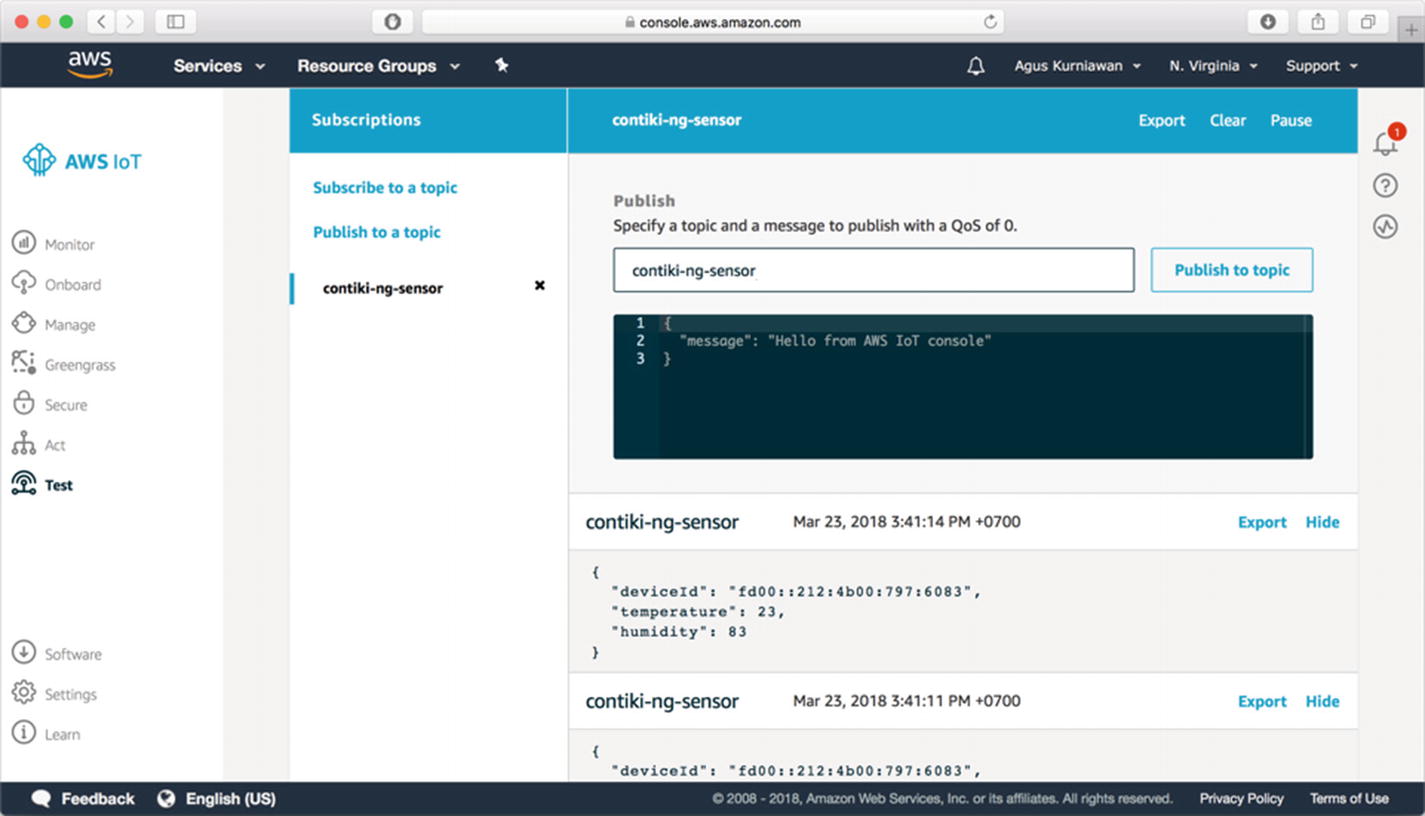
Listening for incoming messages from AWS IoT Test
You have finished integrating between Contiki-NG and the Cloud server. You practice more to hone your skills.
Summary
We have learned what Cloud computing is. We also developed programs to allow interaction between Contiki-NG motes and Cloud servers. We tested these programs using Microsoft Azure and Amazon AWS. Next, you could explore various features in Azure and AWS. You can use other Cloud platforms to integrate with Contiki-NG.