Wireless Sensor Networks (WSN) are a research and technology topic for which researchers, developers, and makers develop applications for specific purposes. In this chapter, we will learn and explore what a WSN is and try to develop one using the WSN platform Contiki and its update, Contiki-NG.
Introduce Wireless Sensor Networks.
Introduce Contiki OS.
Explore WSN hardware and platform.
Introduce Contiki-NG project.
Set up Contiki-NG development environment.
Build a simple Contiki application.
Work with Contiki simulator.
Debug Contiki application.
Introduction to Wireless Sensor Networks
A Wireless Sensor Network (WSN) is a board system with the connectivity capability to sense data and/or to perform actions. Sometimes the WSN board is called a WSN mote. The main objective of implementing a WSN mote is to capture physical objects in digital form and then transfer them to a certain server. Research on WSN topics is an intense study area since there are a lot of problems in need of solving, such as mote hardware design, networking, infrastructure, and security.
Nowadays, hardware manufacturers grow up fast. You will find that there are a lot of new boards on the market, such as Arduino, Raspberry Pi, BeagleBone, Intel Edison, NodeMCU, Teensy, Tessel, and so on. This is the era of the Internet of Things (IoT). It’s estimated that there are billions of IoT devices connected to the Internet, based on Gatner’s report. Since IoT board demand is high, the board price could be quite cheap. Furthermore, the open source hardware movement has had an impact on the growing board industry. People can design and make their own boards for special purposes.
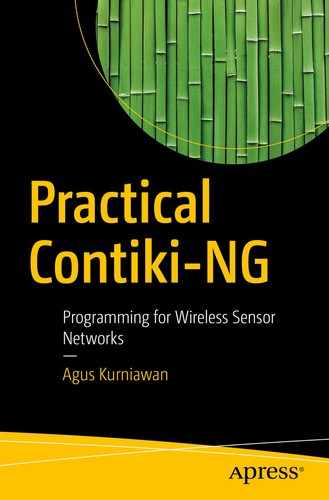
General model of Wireless Sensor Network (WSN) mote
Sometimes makers will build WSN devices in several forms based on their roles. A WSN mote may only consist of an MCU and a radio module, without sensor and actuator devices. Some WSN motes will provide an MCU, sensor/actuator devices, and a radio module.

A connectivity model for several WSN motes
Introduction to Contiki OS
Contiki is a WSN platform that provides software and hardware. Contiki was created by Adam Dunkels in 2002. Now, the Contiki project involves both companies and contributors. This project has released open source software and hardware. The operating system (OS) in Contiki uses Protothread, which combines multithreading and event-driven programming. On the hardware side, the Contiki project provides hardware schemes so that we can build our own Contiki boards. You can reach the official website for Contiki at http://www.contiki-os.org .
The programming model of the Contiki platform implements a preemptive multithreading architecture and an event-driven model. The Contiki programming language uses C syntax for writing programs.
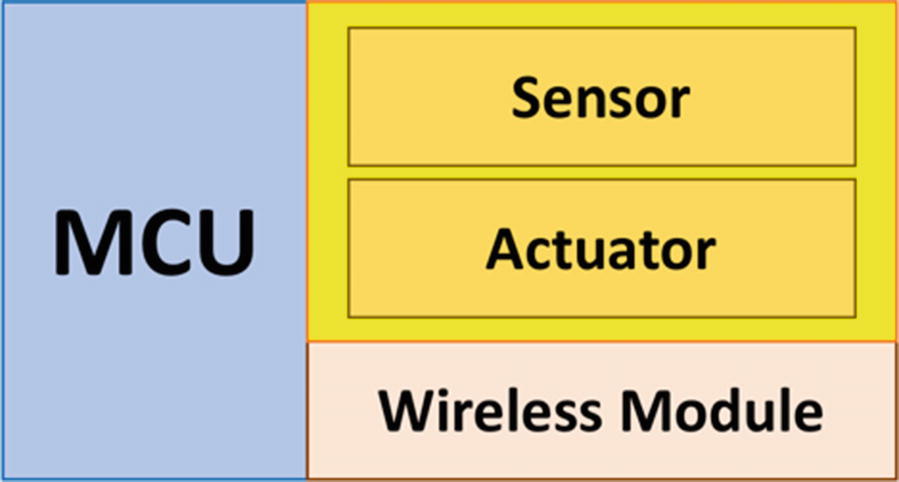
Contiki general architecture
Kernel, the program loader, the language run-time, and the communication service are static modules within the ROM of Contiki OS. All user programs will be loaded into Loaded Program. Only the kernel and the communication service will be used by the Contiki OS RAM.

Programming flow for Contiki
Reviewing WSN Hardware for Contiki
To run Contiki on top of hardware, that hardware needs to fulfill some requirements, especially about the MCU and network module. In this section, we will explore various WSN hardware types that we can use to implement Contiki. A box that consists of a WSN board that has some sensors or actuators is called a WSN mote. If you have a TinyOS mote, you can use that mote to run a Contiki application.
In general, a list of supported Contiki OS can be found on the official website at this link: http://www.contiki-os.org/hardware.html . For Contiki-NG, you can see a list of Contiki-NG boards at https://github.com/contiki-ng/contiki-ng/wiki#the-contiki-ng-platforms . We will next review some famous WSN mote models that you can use for experimental purposes.
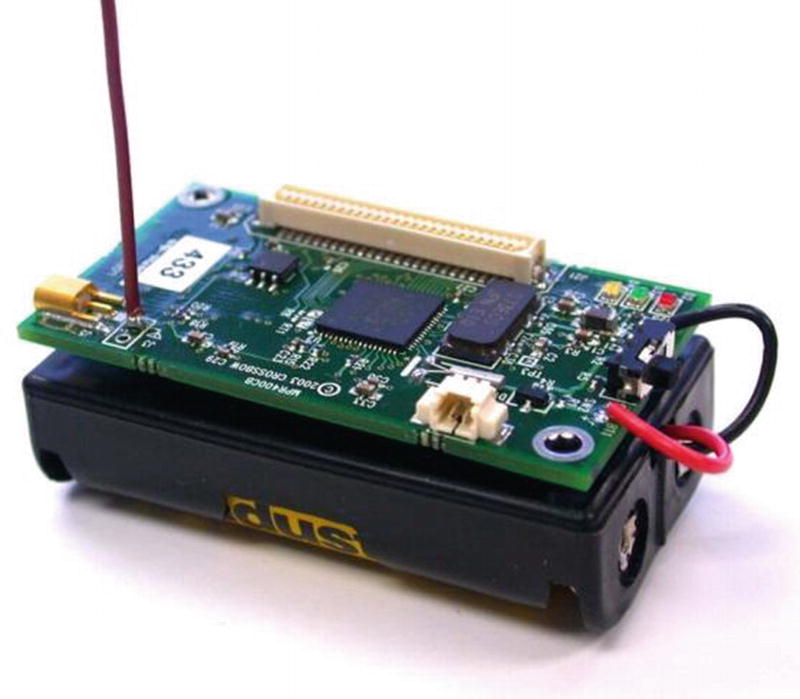
MICAz
MICAz is a mote from Crossbow Technology, MEMSIC. This mote uses an ATmega128L microcontroller and the CC2420 radio chip. ATmega128L is an 8-bit microcontroller from Atmel. This MCU has capabilities such as 128K of in-system, self-programmable flash program memory, 4K of EEPROM, and 4K of internal SRAM. You can explore this MCU by reading its datasheet at http://www.atmel.com/images/doc2467.pdf .
MICAz mote model
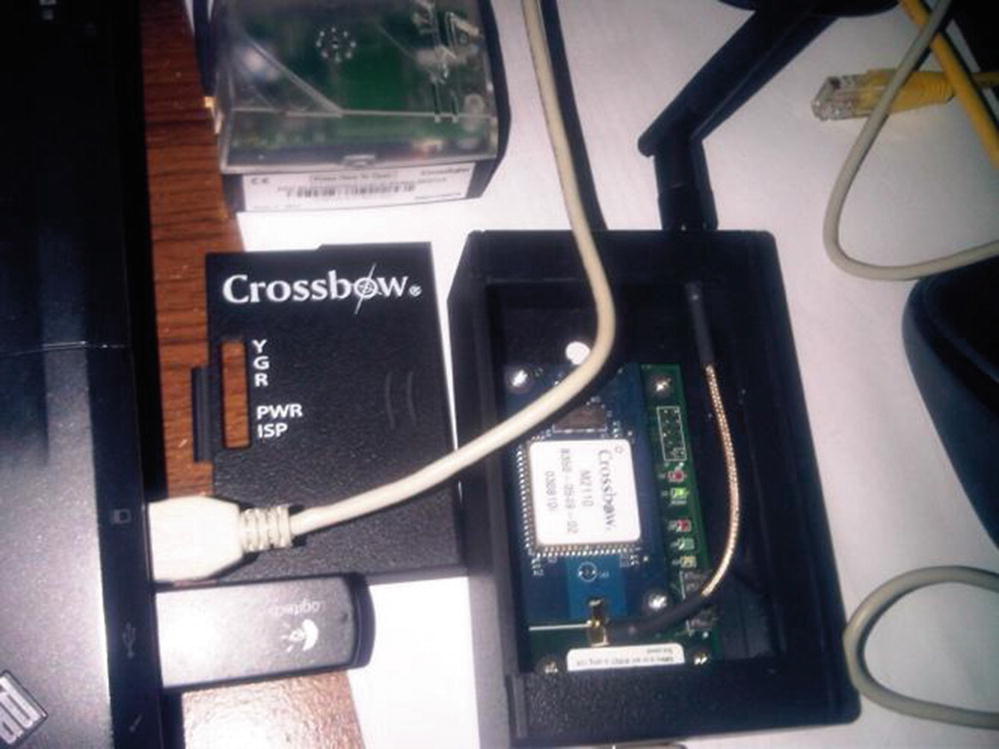
Mica2
Mica2 mote model
TelosB
MTM-CM5000-MSP board based on TelosB from Advanticsys
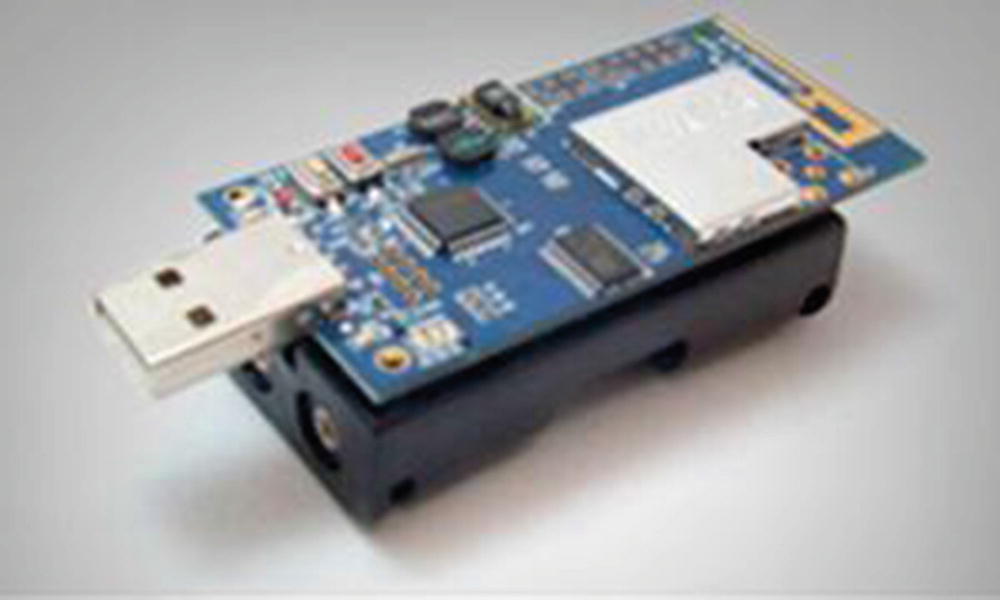
Iris
Iris mote from Crossbow
Custom TinyOS Motes
Independent makers or manufacturers can build their own TinyOS motes, including sensors with specific purposes. The scheme and layout of the TinyOS mote have already been shared so it’s not difficult to build your own.
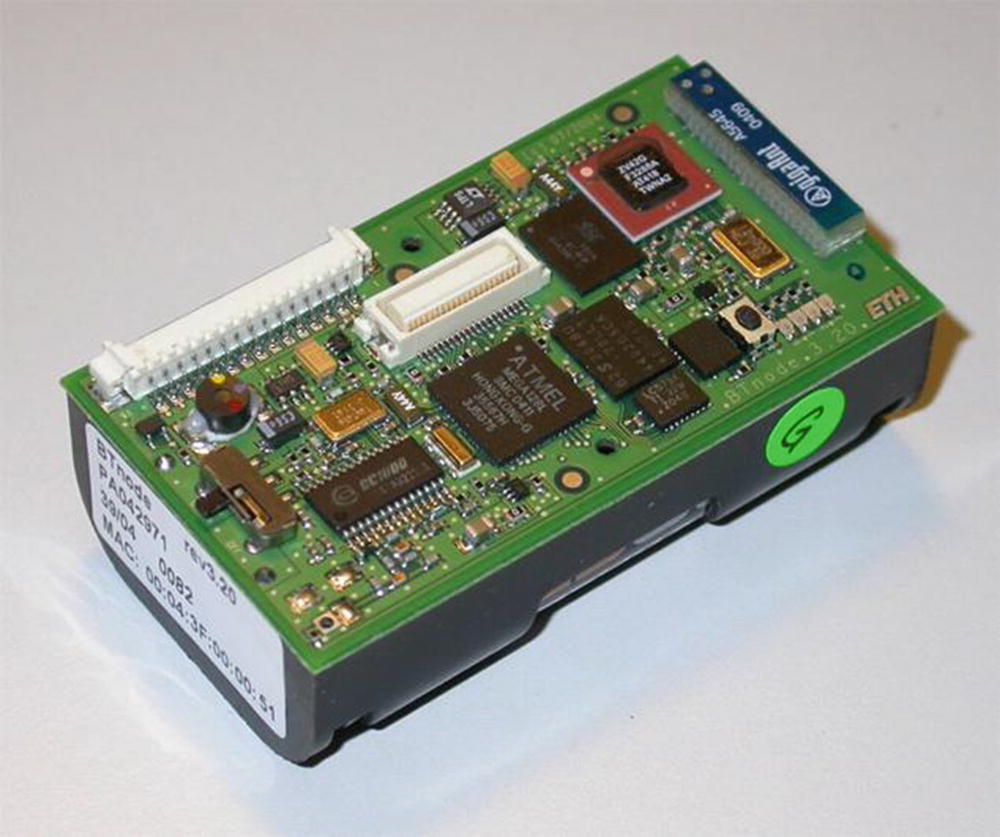
BTnode revision 3 from ETH Zurich
For more information, you can get a list of compatible TinyOS and Contiki motes at https://en.wikipedia.org/wiki/List_of_wireless_sensor_nodes . You can review some WSN motes for your own development.
Z1 Platform
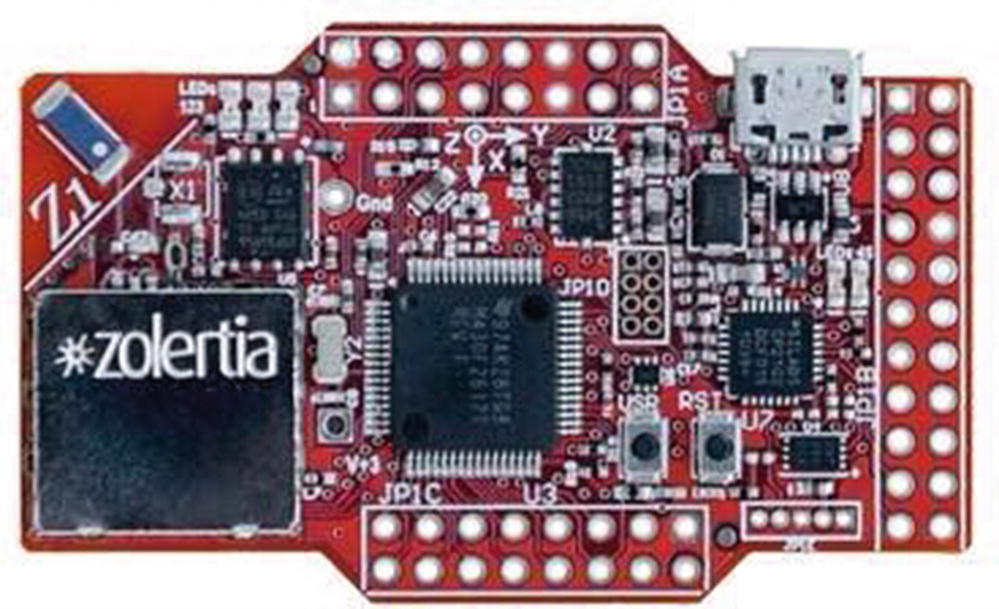
Z1 platform hardware
Contiki-NG ARM-based Boards
cc2538dk: TI cc2538 development kit
jn516x: NXP jn516x series
nrf52dk: Nordic Semiconductor nRF52 development kit
openmote-cc2538: OpenMote cc2538
srf06-cc26xx: TI cc26xx and cc13xx platforms
zoul: Zolertia Zoul platforms: Firefly, RE-mote, and Orion
In this book, I use five board models: Telosb, TI CC2650 LaunchPad, TI CC2650 Sensortag, TI CC1350 LaunchPad, and TI CC1350 Sensortag.
Introducing Contiki-NG
Contiki-NG is a new version of the Contiki project. Contiki-NG provides an RFC-compliant, low-power IPv6 communication stack, enabling Internet connectivity. If you are working with Contiki, I recommend using the latest version—Contiki-NG. This project can be found at https://github.com/contiki-ng/contiki-ng .
One advantage of Contiki-NG is that it supports many hardware platforms, including MCU-based ARM. You can bring your favorite boards to build applications for Contiki-NG. This book will cover Contiki-NG for developing and implementing.
Set Up Development Environment for Contiki
To build a Contiki application, we need to prepare our development environment. Currently, the Contiki development environment can be deployed on the Linux platform. There are two methods: instant Contiki and manual installation. Then, we will set up a Contiki-NG development environment.
We will review deployment for both Contiki and Contiki-NG in the next section.
Instant Contiki
Contiki provides a complete development environment under Ubuntu Linux that is available in virtual-machine form. This approach is easy and low risk without breaking your current OS.
Download instant Contiki from http://sourceforge.net/projects/contiki/files/Instant%20Contiki/ .
Download VMWare Workstation player (Free) or VMWare Workstation (not free). For VMWare player, you can download it from http://www.vmware.com/go/downloadplayer/ . You can also use Virtualbox instead of VMWare.
- After downloading Instant Contiki, you can extract it to a specific folder. You should see some files as shown in Figure 1-11.
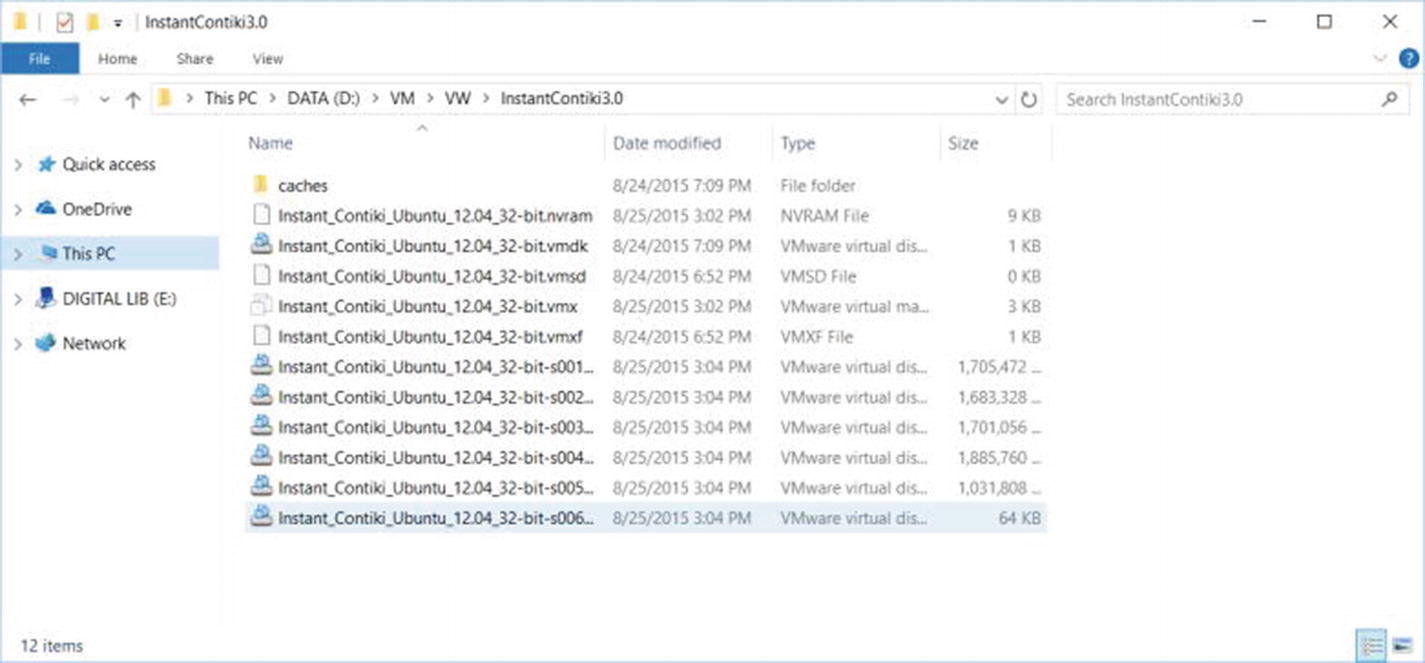 Figure 1-11
Extracted instant Contiki files
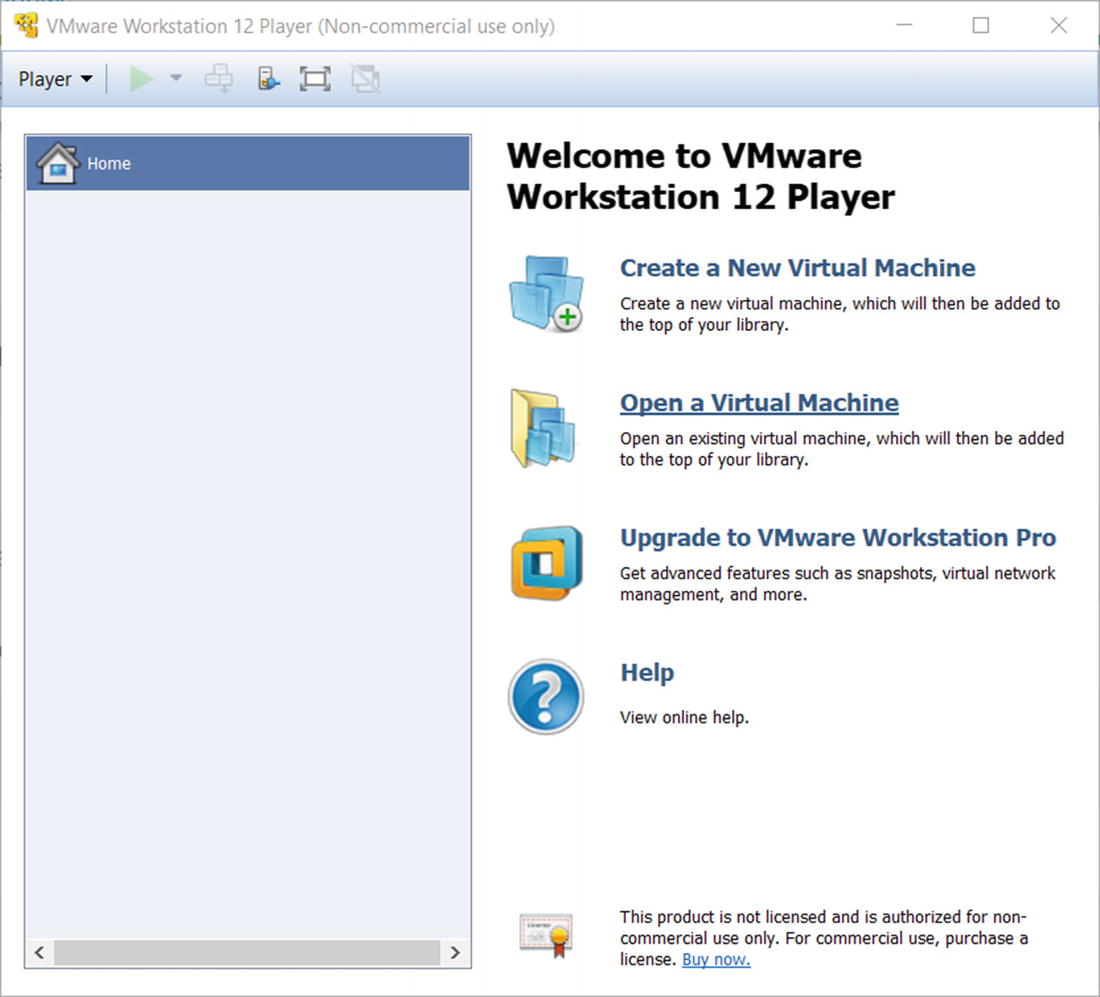
VMWare Workstation player 12 on Windows 10
Now, you can open Instant Contiki using VMWare Workstation Player by clicking Open a Virtual Machine. Navigate to the *.vmdk file in the folder to which Instant Contiki file was extracted.

Instant Contiki has loaded on VMWare Workstation Player
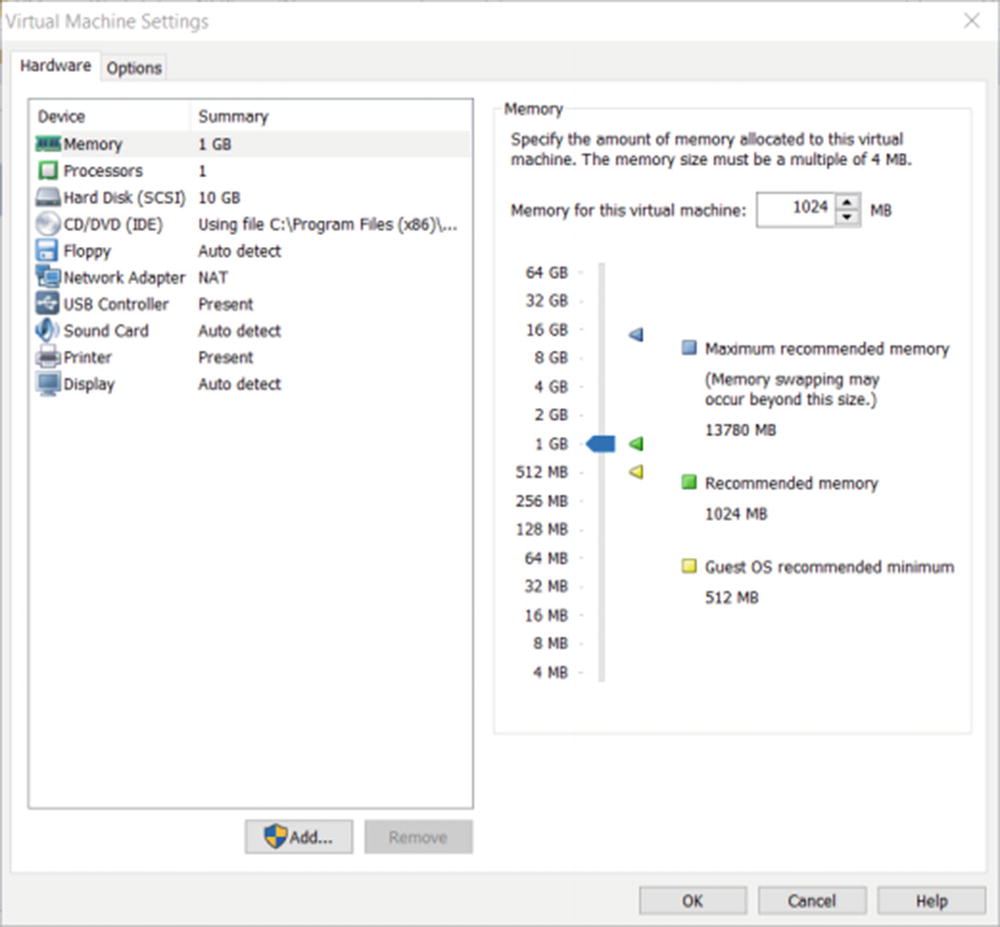
Customizing Instant Contiki
Since my computer has 16GB of RAM, I set my Instant Contiki with 4GB of RAM. If you are done, click the OK button to save and close the dialog.
Now, you can run Instant Contiki by clicking Play virtual machine; you should see the Ubuntu desktop. You can see it in Figure 1-15.
If your WSN mote has an MSP430-based MCU such as Sky and Telosb, you should install the ggc-msp430 library in order to develop your Contiki application. You can type this command in Ubuntu Terminal:
Contiki OS is running on VMWare Workstation Player
Troubleshooting
If you are running VMWare Workstation Player on Windows 8.1/10 or later, you may get problems due to conflicts with Hyper-V. Since VMWare Workstation and Hyper-V cannot run together on one computer, you should uninstall and disable Hyper-V on Windows 8.1/10.
From my experience, I use Windows 10 with installed Hyper-V. When I use the VMWare application, I disable my Hyper-V. You do so using command prompts with the Administrator level. Type this command:
Then, you can restart Windows.
If you want to reenable Hyper-V, you can type this command:
Manual Installation
If you have a computer with installed Linux, you can install the Contiki development environment on your platform.
First, you should install all required libraries to run Contiki OS. You can type these commands in Terminal:
You also need the Java run-time and SDK to run the Contiki OS simulator. In this case, we use Open JDK. You can use Java from Oracle. Type this command:
Since Contiki OS runs a 32-bit environment, if you have Linux OS with 64-bit, you can install these libraries:
Now, you can download the Contiki OS source code. Open Terminal and navigate to the specific folder where Contiki OS files will be extracted:
Your computer is ready for Contiki OS development.
Set Up Contiki-NG Development Environment
Currently, Contiki-NG does not provide an Instant Contiki, so it must be installed manually. The installation process can be found here: https://github.com/contiki-ng/contiki-ng/wiki/Toolchain-installation .
Install required libraries.
Install compiler and its dependences for specific hardware platform.
Download and configure Contiki-NG.
The first step to deploy Contiki-NG is to install all required libraries for development. In this section, I use Ubuntu Linux for development testing. I use Ubuntu LTS 16.04 with x64 platform. Type these commands on Linux Terminal to install libraries:
While you are installing Wireshark, you should enable the feature that allows non-superuser capture packets (select “yes”). Add your account into the wireshark group. You can type this command, substituting <user> with your Linux account:
The next step is to install the compiler and its dependencies, based on the Contiki mote hardware. If you have a Contiki mote based on MSP430, you can install the compiler and libraries for MSP430. You can type this command:
If you want to install the latest version of the MSP430 compiler, you can read how at https://github.com/tecip-nes/contiki-tres/wiki/Building-the-latest-version-of-mspgcc .
For Contiki mote–based ARMs such as CC2538DK and Zoul, you can install the ARM compiler by typing these commands:
We also install JDK and Ant for the Contiki simulator, COOJA, that are built from Java. You can install these libraries by typing this command:
If you have several Java versions within Linux, you should set your Java preference. It is done by calling update-alternatives:
Cooja needs to have the environment variable JAVA_HOME set to work with native Contiki motes. You should set JAVA_HOME with the path found above in the .profile file:
Most Contiki motes are attached to the computer via USB. When we access them, we probably need administrator privileges. To be able to access the USB without using the administrator level, your account should be part of the groups plugdev and dialout. You add them by typing these commands. Be sure to change <user> to your Linux account:
This is the case for an x64 platform. You probably will get an error when connecting via serial communication on a serial tool from Contiki-NG. You can install the following required libraries:
After finishing all tasks, you can reboot your computer.
Now, you can download Contiki-NG by cloning using git. Perform the following commands in Terminal:
Now, you are ready to develop Contiki-NG.
Connect WSN Hardware to Computer
After all required libraries for Contiki are installed, you can connect the WSN hardware to the computer. Depending on the WSN hardware model, your WSN mote should be recognized by the computer. Some WSN hardware may need a hardware driver so your computer detects it. You can see my WSN mote, TelosB, connected to the computer in Figure 1-16.
After connecting to the WSN mote, you can verify whether the WSN mote is recognized by the computer. Type this command:

TelosB mote is connected to computer through USB cable
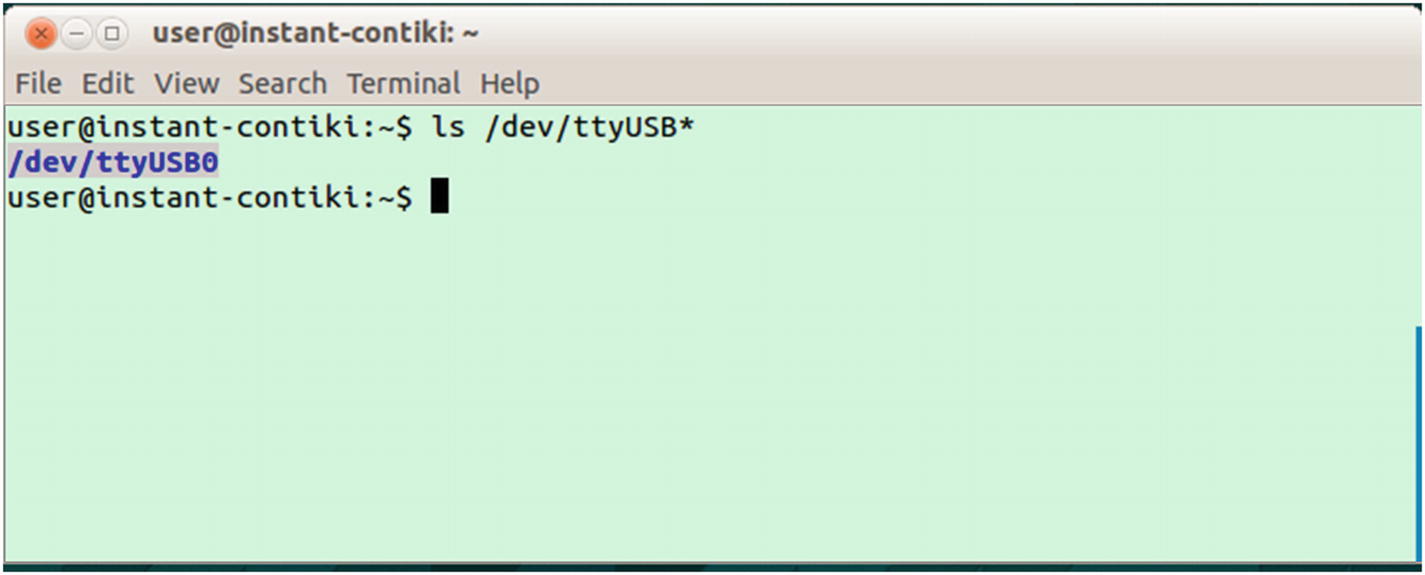
WSN mote is detected on /dev/ttyUSB0
If you use Instant Contiki, your WSN mote may be detected on Host OS. For instance, I use Windows 10 to run Instant Contiki. The detected WSN mote can be viewed on Device Manager, shown in Figure 1-18.
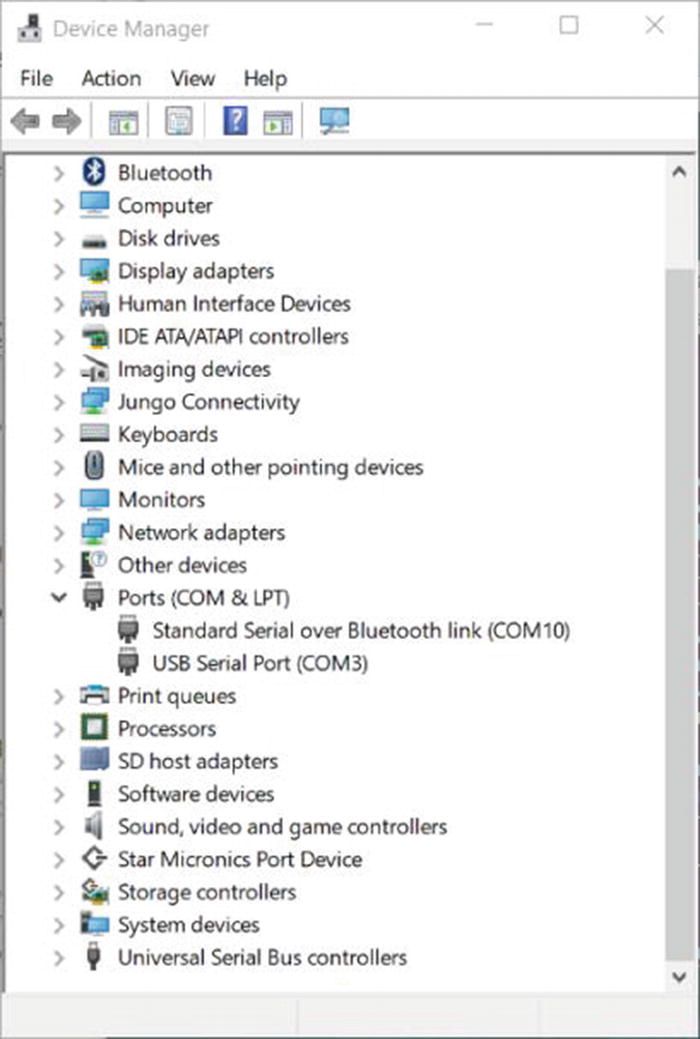
WSN mote is detected by Device Manager

Connect WSN mote from Ubuntu in virtual machine
After connecting, you can perform Contiki development as usual on Ubuntu. You can verify the connected mote using Terminal.
Contiki and Raspberry Pi
Raspberry Pi is a very small computer. This board can run several operating systems. There are many Raspberry Pi models that you can use for development. The official OS is Raspbian OS, which is based on Debian Linux.
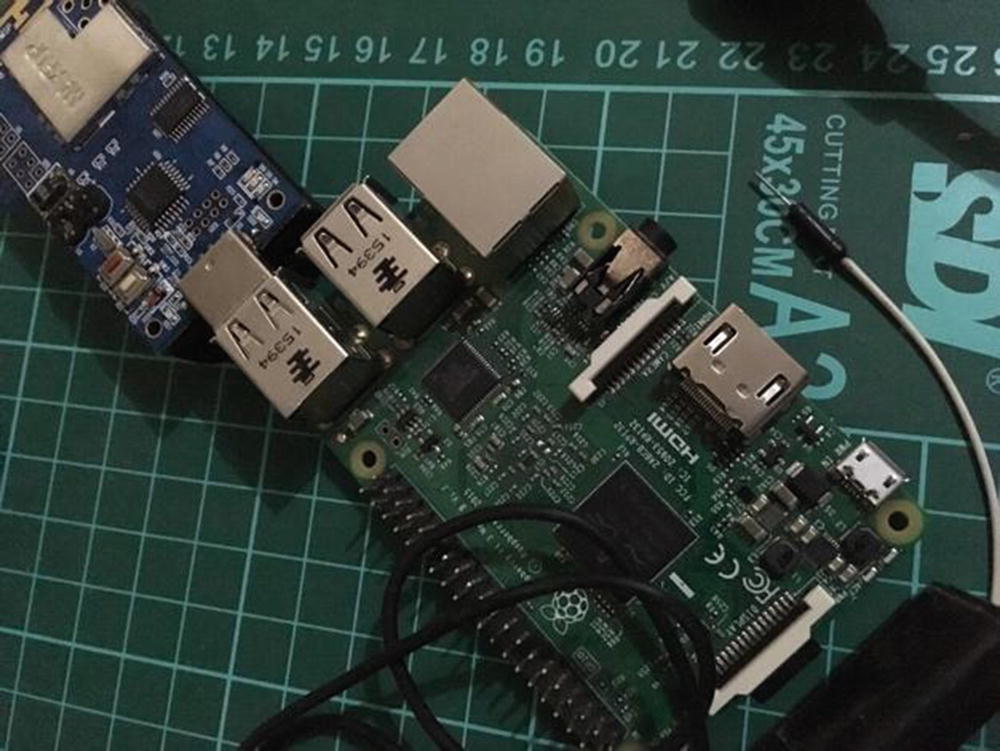
Attach WSN mote to a Raspberry Pi
Hello World Application for Contiki
In this section, we will learn to build the first program for Contiki. We use the existing program sample from Contiki or Contiki-NG. It’s a hello-world program, which is located in the <contiki_folder>/examples/hello-world folder. The Hello World program displays simple words—“Hello, world”—in the WSN mote’s Terminal. This program consists of hello-world.c and Makefile files. After the program is compiled, you should see several files, such as *.obj and *.hex files.
To write a C program, use your favorite editor, such as vi, vim, and nano. Also, use a visual editor; for instance, Eclipse, Sublime Text, and Visual Studio Code. I use Visual Studio from Microsoft. You can download it on https://code.visualstudio.com . It is available for Linux, Mac, and Windows. Figure 1-21 shows Visual Studio Code to open the Blink application.
To start to write a Contiki program from scratch, you create a folder called hello-world. Then, you create hello-world.c within the hello-world folder. You also can run a program sample, hello-world, from <contiki_folder>/examples/hello-world folder. Navigate to your Terminal and then build that program.
If you want to build a project from scratch, you must continue your development. The following is the complete code for the hello-world.c file.
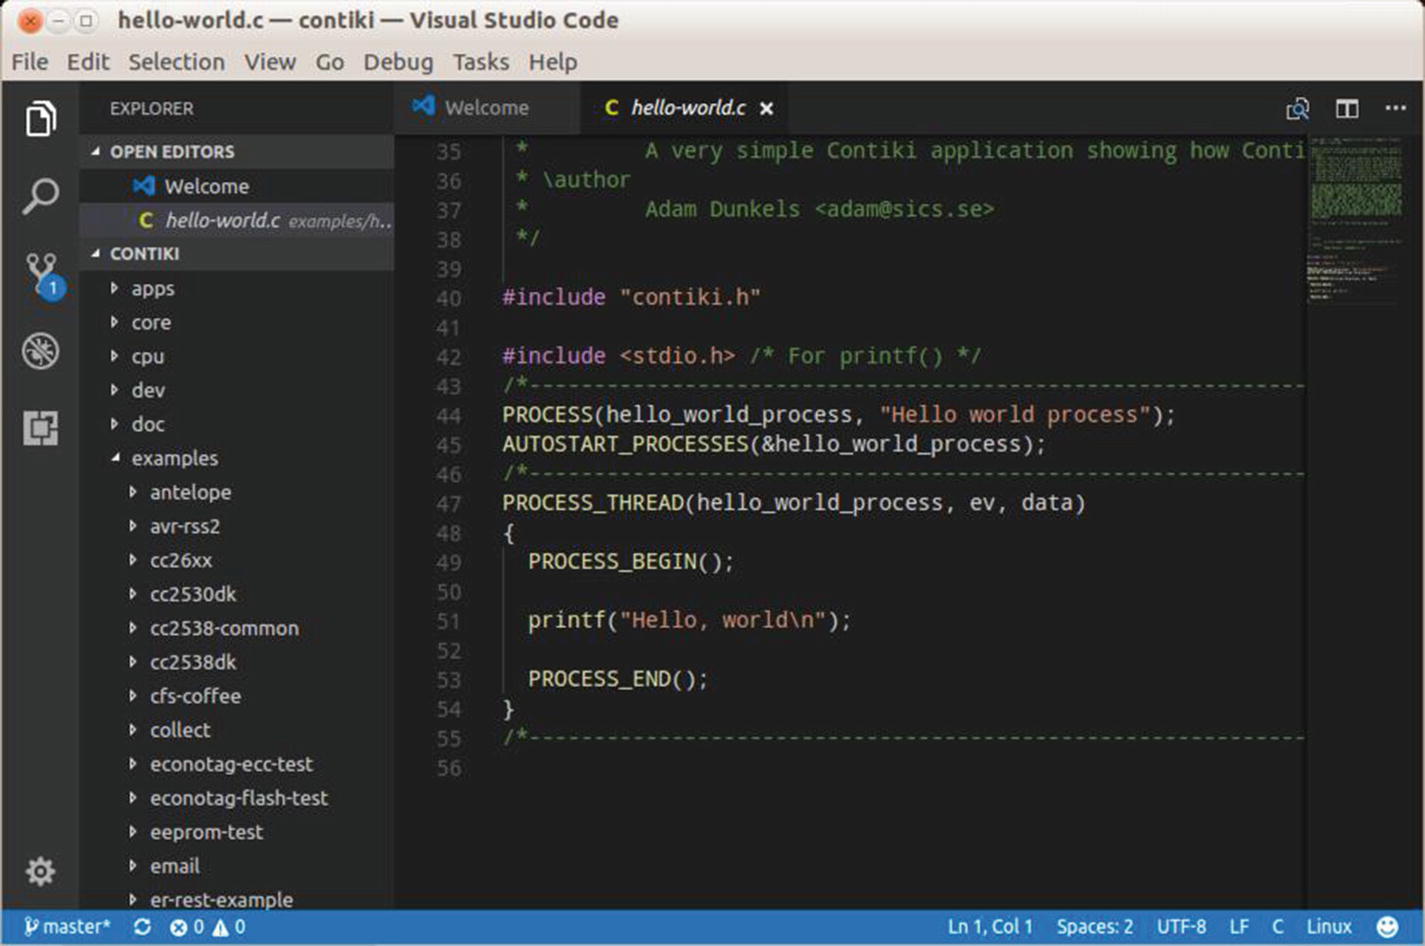
Visual Studio code on Ubuntu Linux
Explanation
This program declares a Contiki process thread, called hello_world_process. To print message to Terminal, use the printf() function:
hello_world_process will be executed automatically using AUTOSTART_PROCESSES().
AUTOSTART_PROCESSES(&hello_world_process);
Last, you should make a Makefile file. The following is the content of the Makefile file:
CONTIKI_PROJECT is used to declare our project name.
CONTIKI is a Contiki root directory where Contiki libraries are.
We include $(CONTIKI)/Makefile.include file in our program.
Change CONTIKI for your Contiki root folder where the Contiki source code files, https://github.com/contiki-os/contiki or https://github.com/contiki-ng/ for Contiki-NG, are located.
If all required program setup is done, we can compile C program using make by passing in the WSN platform. For our demo, we use the native app as the target, so we pass native while compiling:
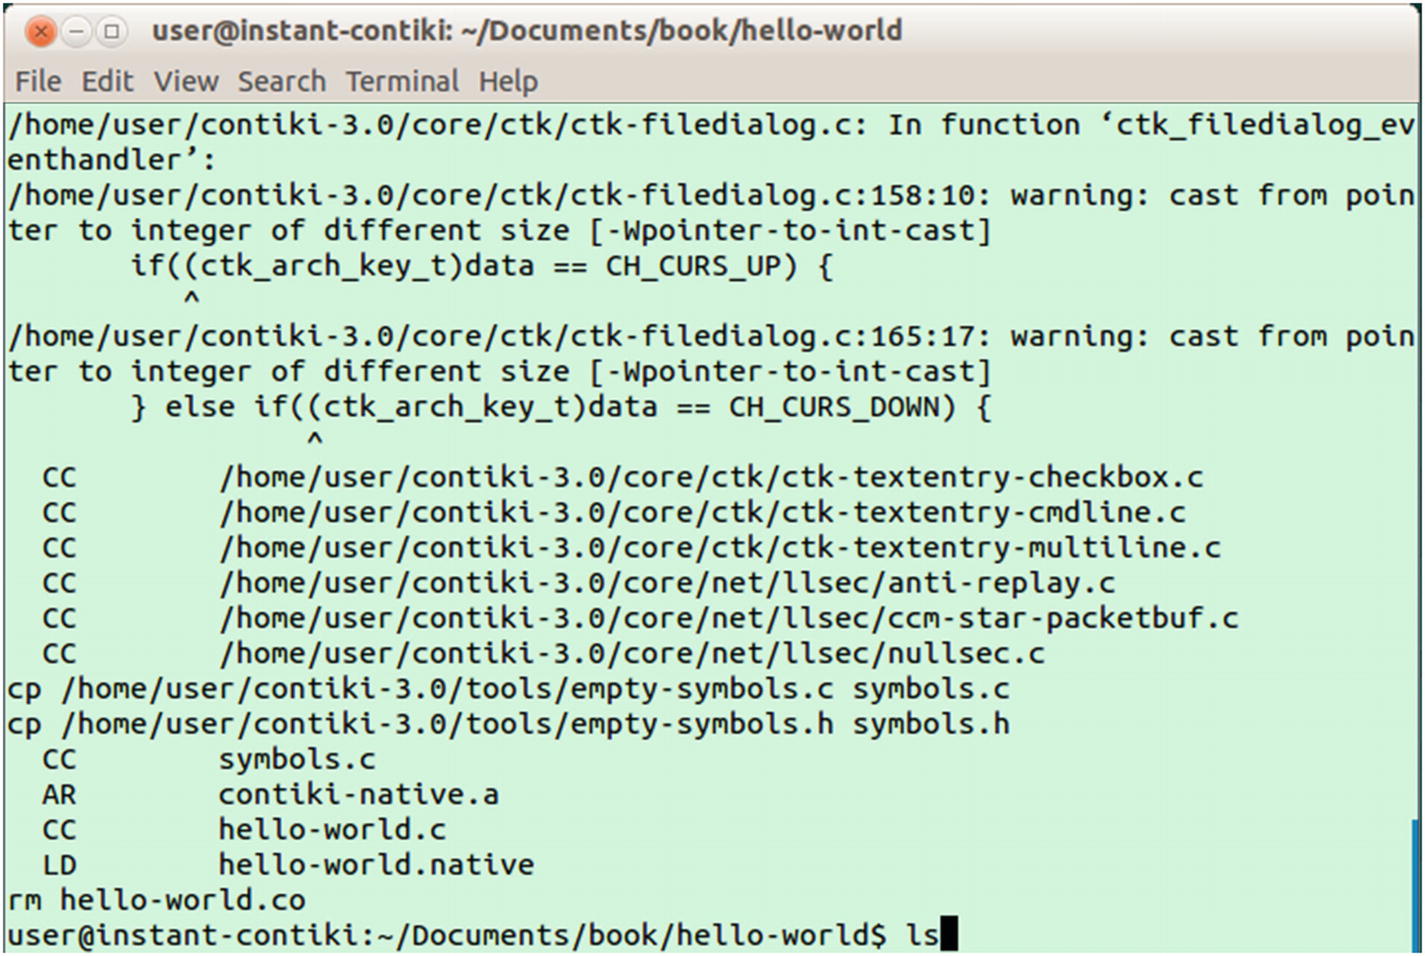
Compiling Contiki application on native target
To run the Contiki app, you can type this command:
If you get an error due to security issues, you probably need to run this program with administrator privilege. You can type this command:

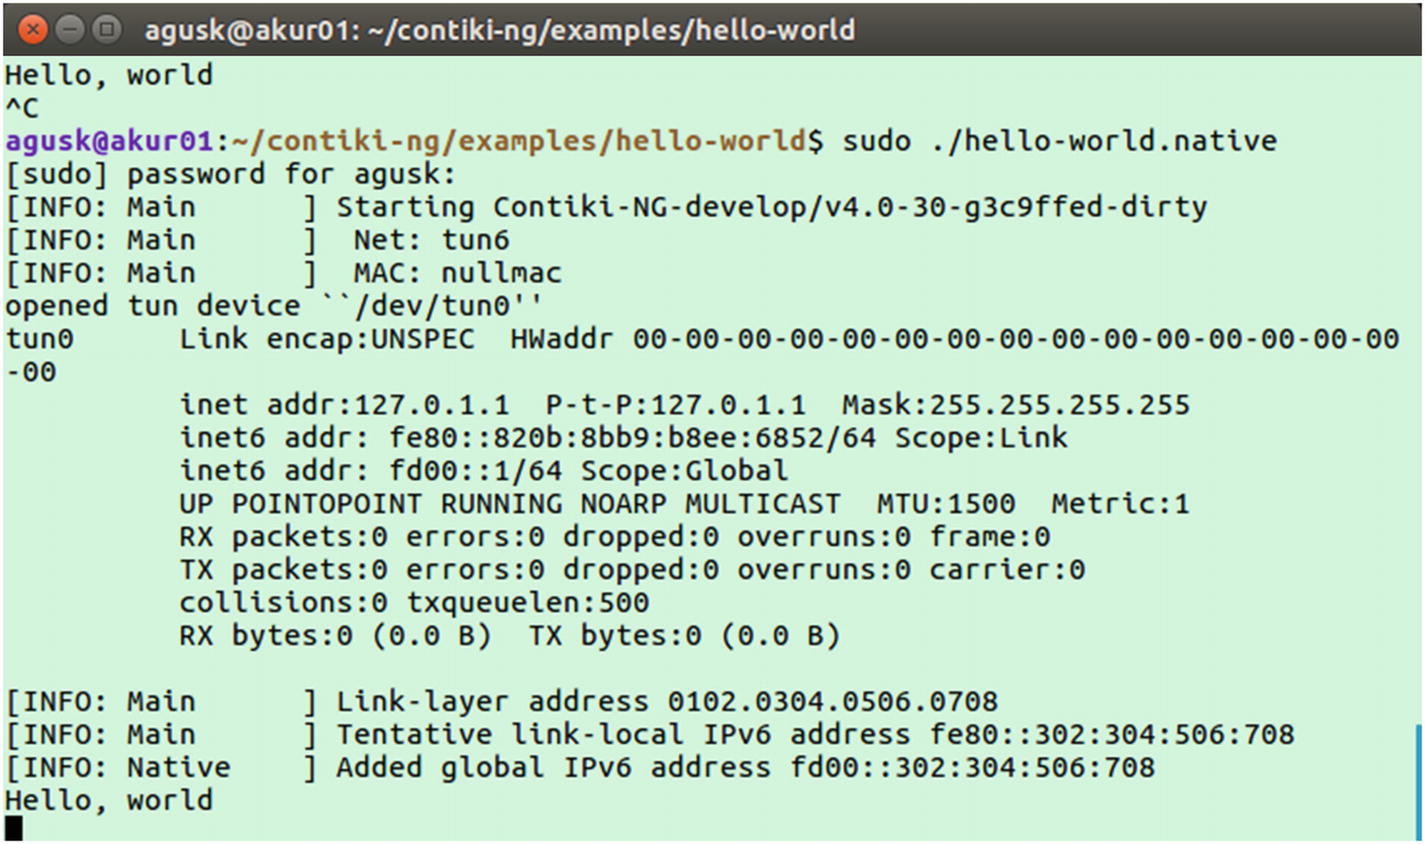
Running Contiki application as native, (a) Contiki app and (b) Contiki-NG app
Next, we deploy the Contiki application to the Contiki hardware. For instance, I use TelosB as my WSN mote target. TelosB is a Sky platform from Contiki because TelosB uses MSP430 MCU.
Before deploying the Contiki program to the Contiki mote, make sure your Contiki mote is already attached to your computer. For instance, my Contiki mote, TelosB, is detected as /dev/ttyUSB0. You can verify the attached Contiki mote using the following command:
Now, you can compile and save the target platform by typing this command:
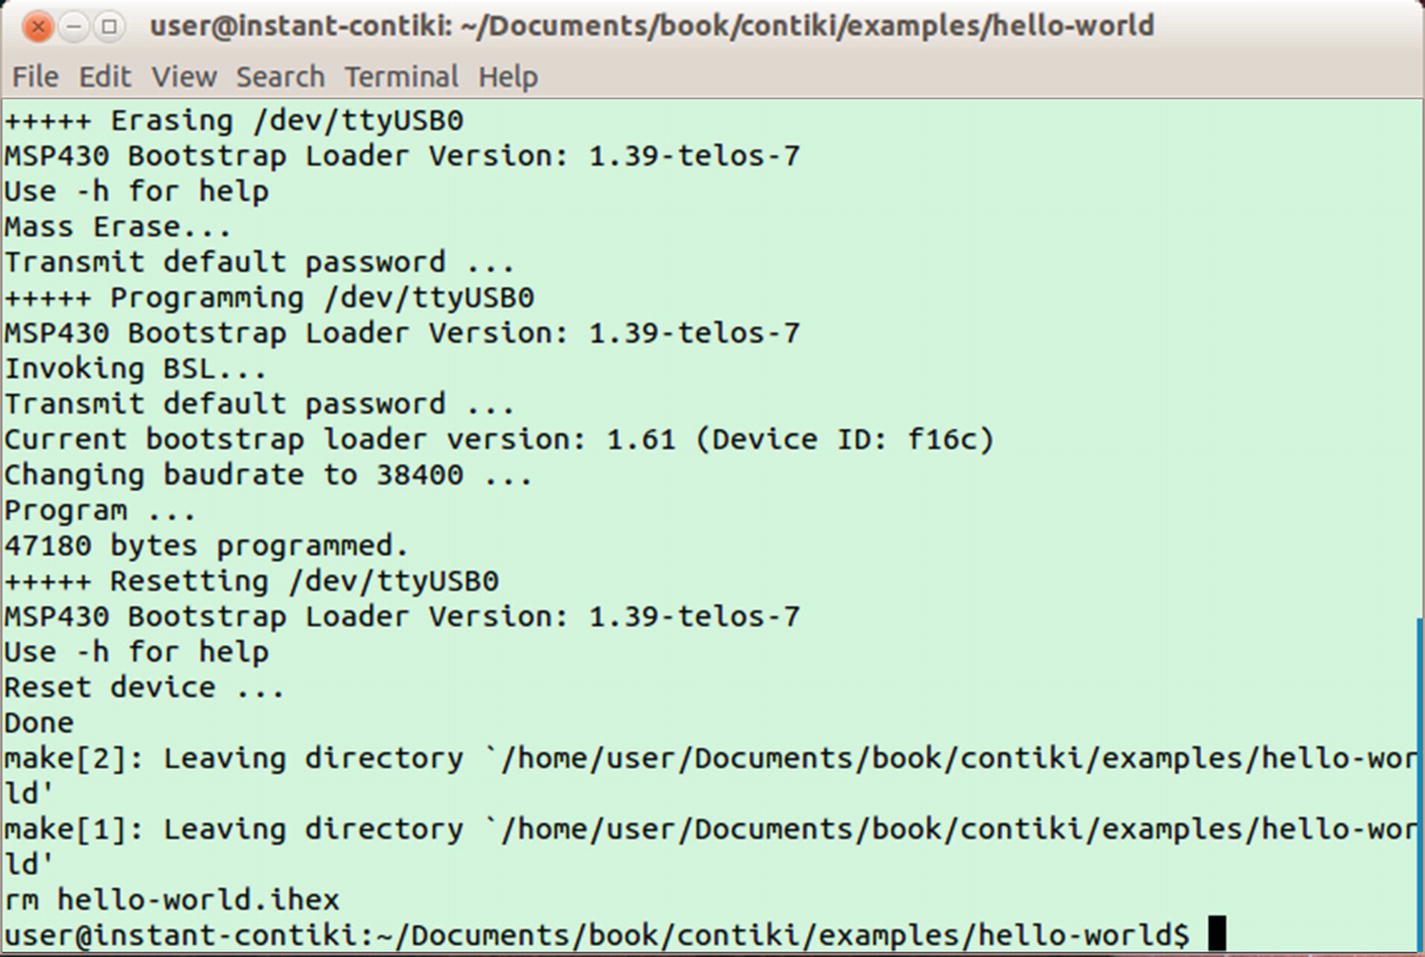
Flashing Contiki program to Sky platform on TelosB hardware
This compiling will generate a <project_name>.<platform> file. In my case, this will generate a hello-world.sky.ihex file:
If you get a permission error, you can run it using the administrator level:
This program will be flashed to Contiki hardware. It may take several minutes.
For Contiki-NG motes from Texas Instruments, you will probably get errors while uploading a program to the board. You can use SmartRF Flash Programmer. You can download it from http://www.ti.com/tool/FLASH-PROGRAMMER . Unfortunately, this tool currently only runs on Windows platforms.
To see the program output from the Contiki hardware, we listen to incoming messages from the serial port of the Contiki hardware. You can type this command:
You also can specify a serial port of the Contiki hardware. For instance, Contiki hardware on serial port /dev/ttyUSB0. You can type this command:

Listening to messages from Contiki hardware
You may not get any message from the hello-world program. Since this program runs the first process, we may miss this process. Try to reset the Contiki hardware so Contiki OS will reboot. Then, run the program.
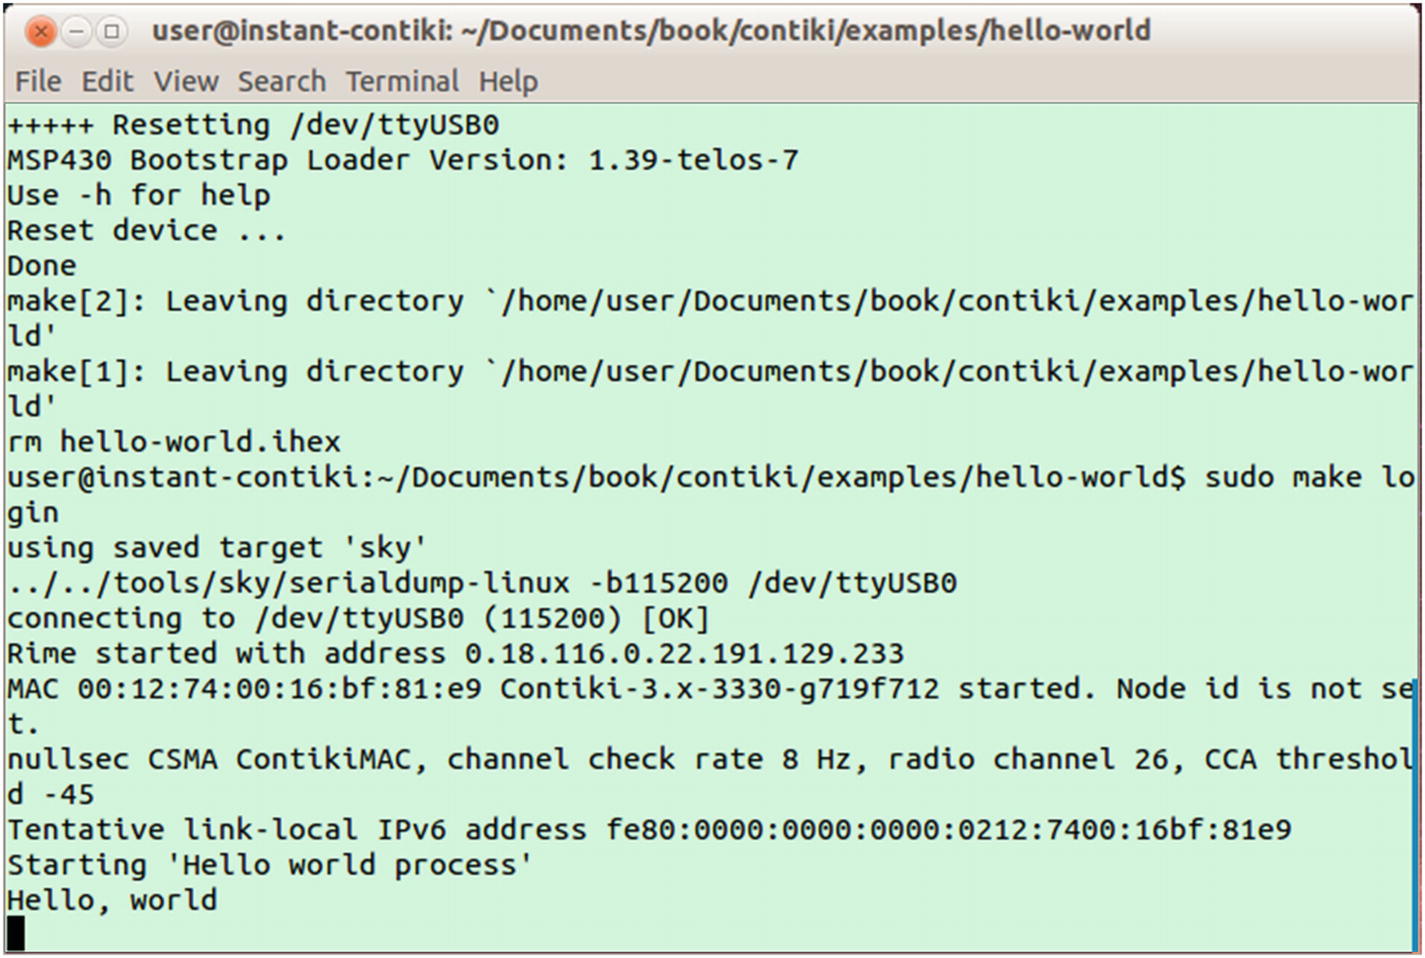
Getting messages from Contiki hardware
Contiki Simulator
If you don’t have a WSN mote on which to run the Contiki program, you can use the Contiki simulator, COOJA. Although COOJA has limitations, it's still useful for reviewing and debugging. COOJA is a part of the Contiki tools. Its location is <contiki_root>/tools/cooja; see Figure 1-27. Further information about COOJA can be found at https://github.com/contiki-os/contiki/wiki/An-Introduction-to-Cooja .
In this section, we will set up COOJA. Then, we will run a simple Contiki program on COOJA.

Contiki simulator, COOJA, path on Contiki-NG
Setting Up
Before you run COOJA, you should configure your computer to update and check missing libraries for the COOJA application. Your computer should connect to the Internet.
You can configure COOJA by typing these commands:
If this succeeds, you can run the COOJA application by typing this command:
Running COOJA for Contiki simulator
Running Contiki Application
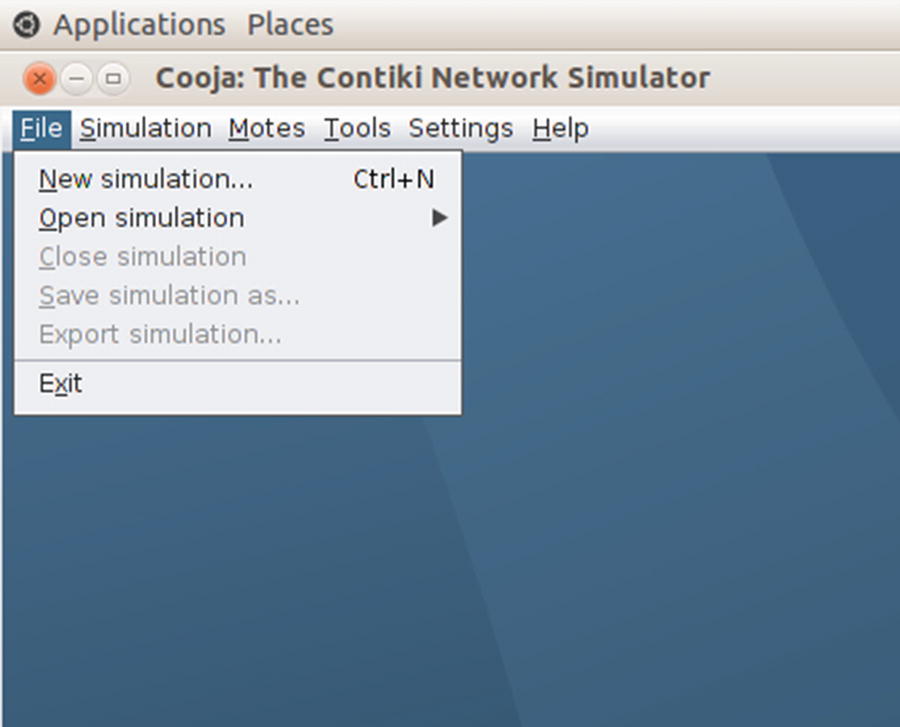
Add a new simulation for Contiki
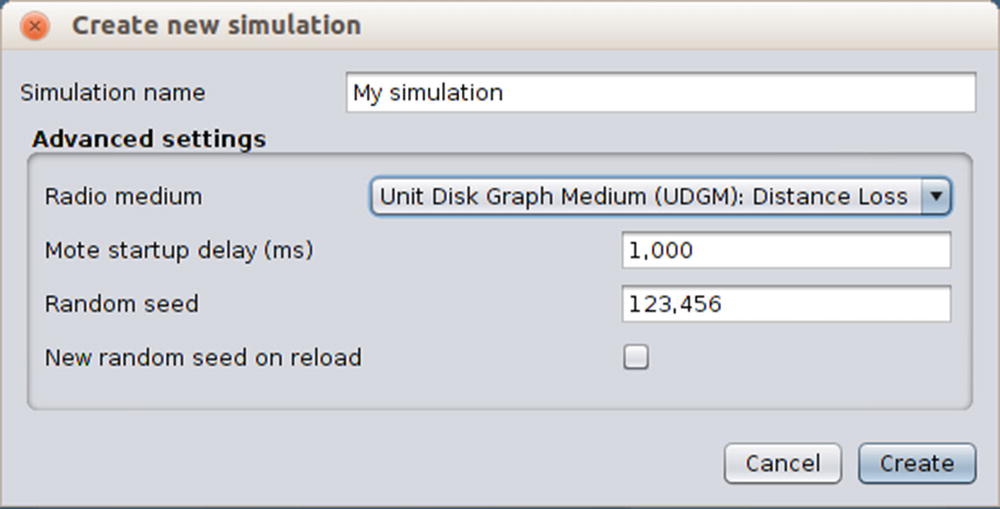
Filling in simulation name
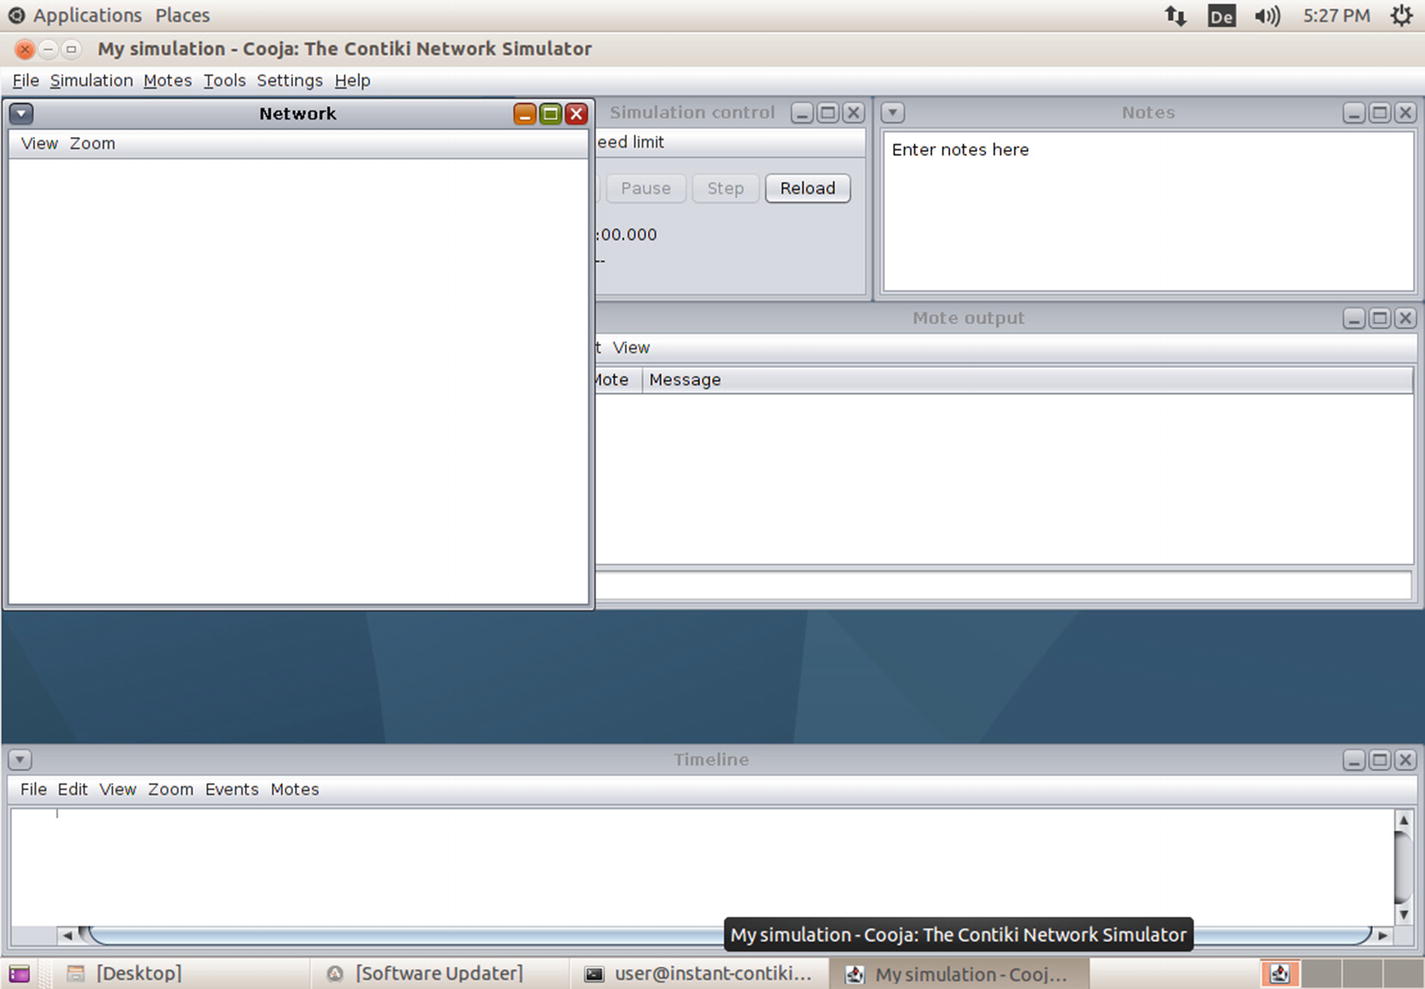
Contiki simulator with Cooja

Adding WSN motes
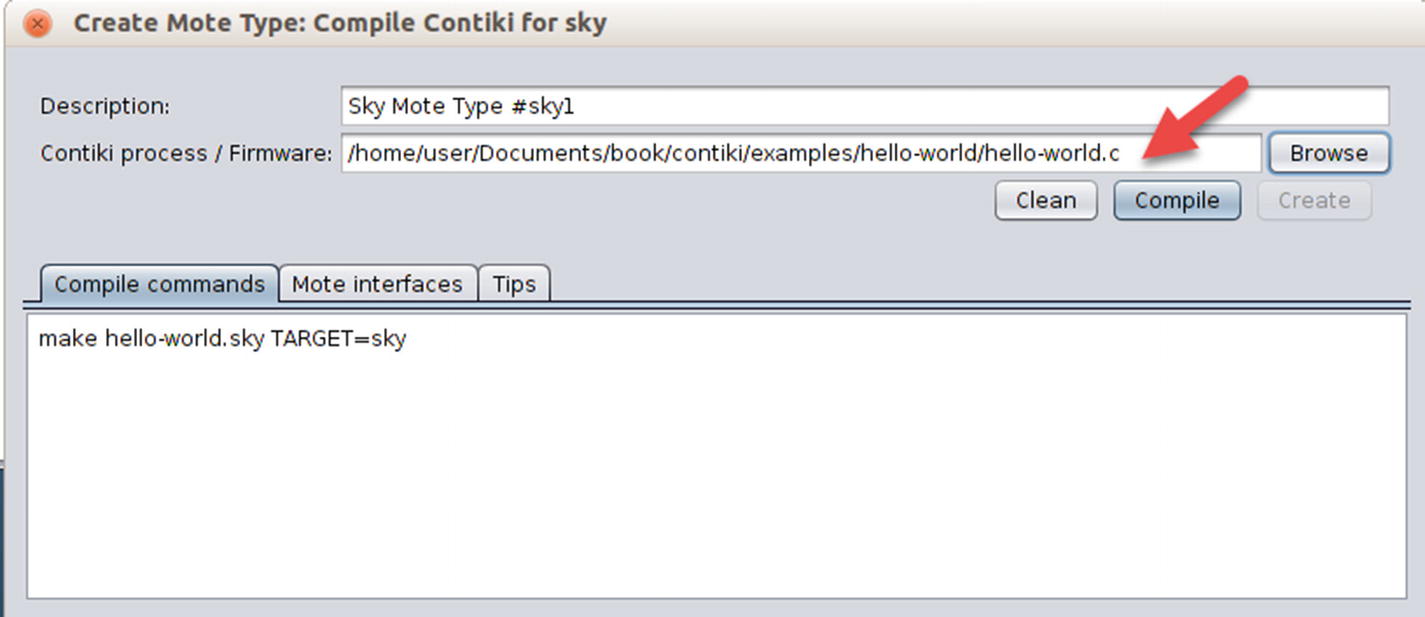
Select Contiki program for running
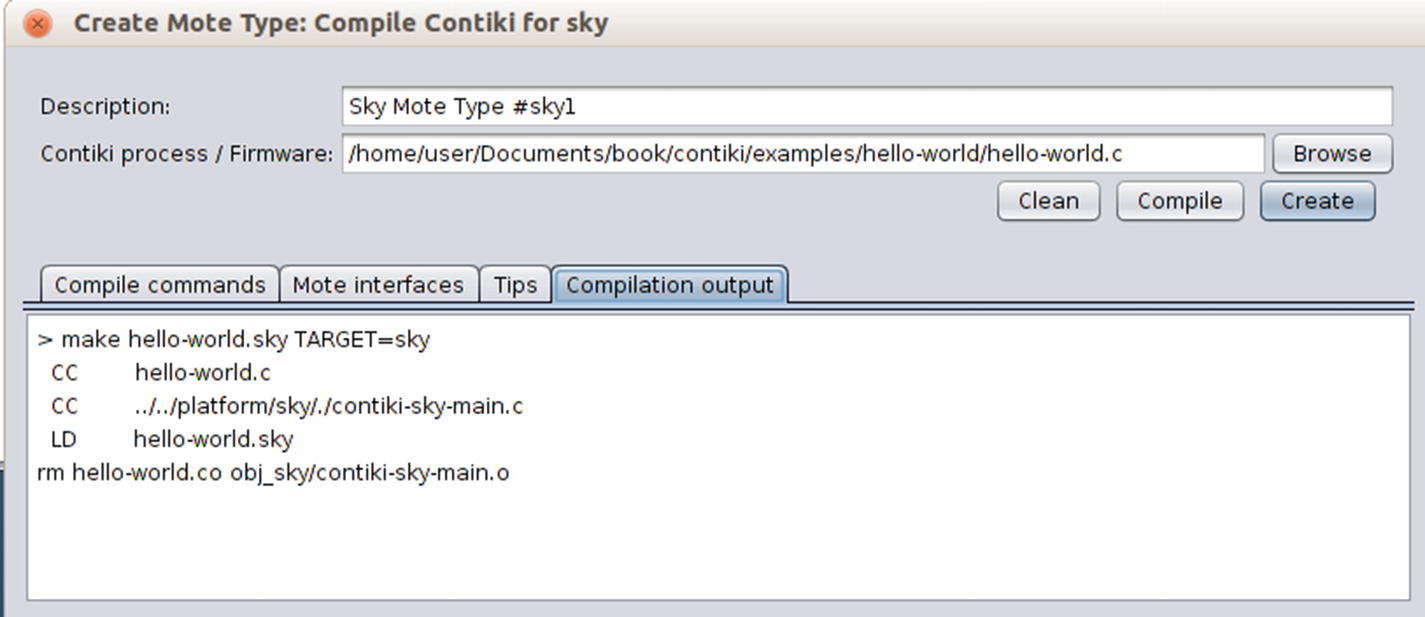
Compiling Contiki program on COOJA
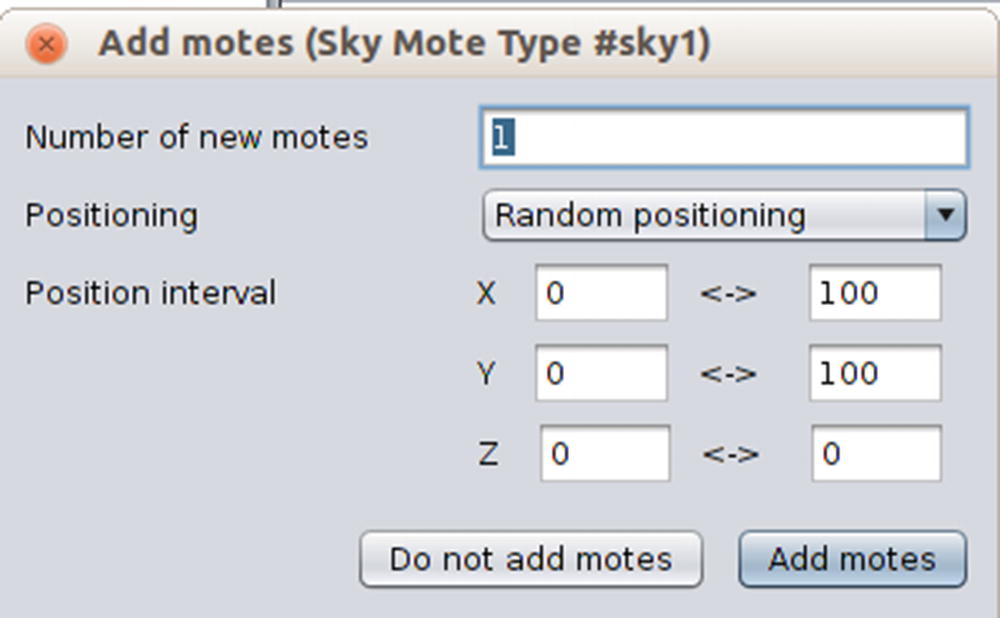
Filling in number of WSN motes
If done, click the Add motes button.

A WSN mote on COOJA Contiki simulator
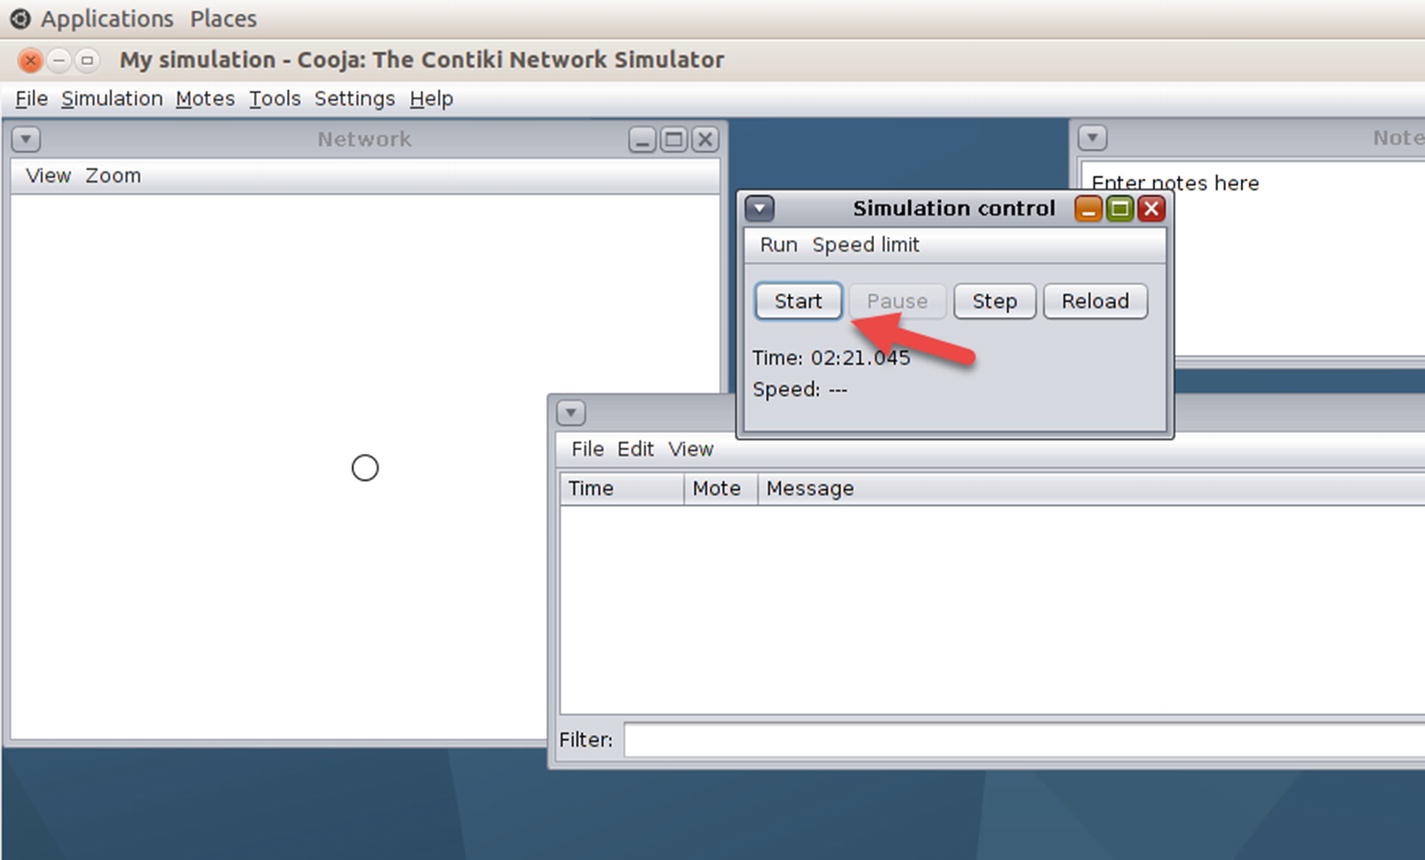
Running Contiki simulator by clicking Start button
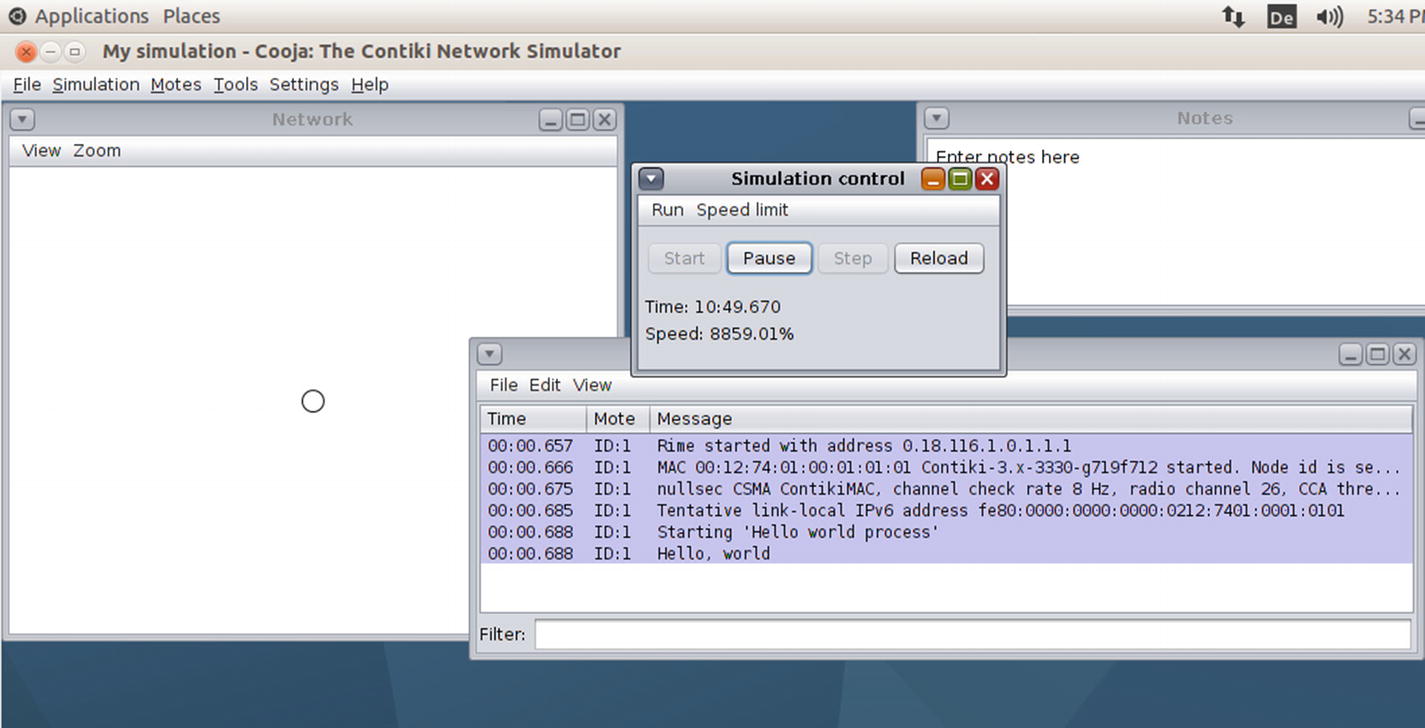
Running hello-world Contiki program on COOJA
Debugging Contiki Application
Sometimes you want to trace your program after the program has been deployed into a WSN mote. In another scenario, you may want to investigate your Contiki program before deploying it to a WSN mote. Debugging is one solution for investigating your Contiki program.
In this section, you will learn various debugging methods with which to check your program. You can choose the best method that fits your case.
Hardware Debugger
Most WSN motes do not provide built-in hardware debuggers, so if you want to debug a Contiki-NG program through the hardware approach, you need additional hardware. Regarding what WSN mote model you want to perform debugging on, you should check your MCU model.
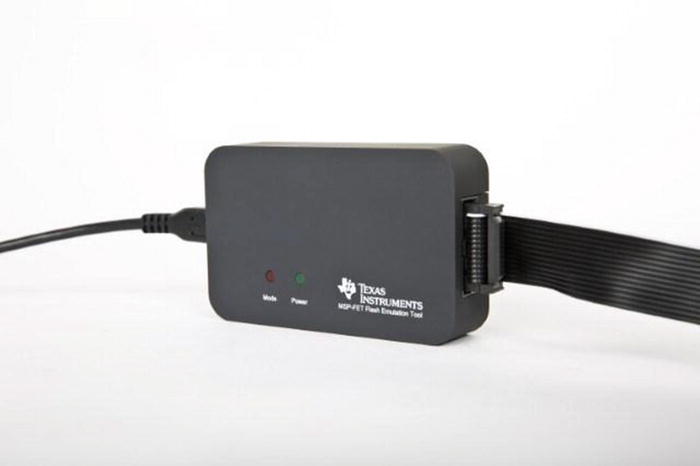
MSP430 USB debugging interface
Hardware debuggers usually have capabilities in a remote debugger. For professional purposes, I recommend you use this tool.
LED Indicators
In general, a WSN mote is equipped with several LEDs. We can use these LEDs to indicate a specific task; for instance, we turn on a specific LED to inform us that the WSN mote performs sensing. You can find an LED library in the <contiki>/core/dev/leds.h header file. In the next chapter, we will try to develop a Contiki application utilizing GPIO (General Purpose Input/Output).
Based on my experience, this approach is easy to implement. The downside of this method is having no more information; for instance, you might want to get a certain value from a specific task on your program.
Debugging Using Contiki Simulator
With the third approach, you can use the Contiki simulator, COOJA. You can compile and attach a Contiki program to the Contiki simulator. You can see messages that are generated using the printf() method. For instance, the hello-world application prints messages using printf().
The Contiki printf( ) Function
The last method that I like is using the printf() function. The idea is that our program writes messages using printf(), and then the messages will pass through to the serial port. To listen to incoming messages from the serial port, we can use the login command on Terminal.
This approach is easy and low cost for debugging your Contiki application. Just place a printf() function on the code you are investigating.
Summary
We have learned what Wireless Sensor Networks (WSN) and Contiki are. We also have set up Contiki and Contiki-NG development environments and run a sample program to the WSN mote and a simulator. Last, we learned how to debug the Contiki program.
In the next chapter, we will focus on the Contiki-NG programming language. We will learn how to build a Contiki-NG program and run it on Contiki-NG hardware and a simulator.