© Agus Kurniawan 2018
Agus KurniawanPractical Contiki-NGhttps://doi.org/10.1007/978-1-4842-3408-2_2

2. Basic Contiki-NG Programming

Agus Kurniawan1 
(1)
Depok, Jawa Barat, Indonesia
 

Contiki-NG uses the C programming language to develop applications for WSN motes. In this chapter, you will learn this basic language for creating Contiki-NG programs. Program samples are provided to accelerate your learning speed.

The following is a list of topics that will be covered:
  • Contiki-NG programming model

  • Contiki-NG basic syntax

  • reviewing protothreads

  • extending the Contiki-NG library

  • Contiki-NG coding conventions

  • showing a demo for building a Contiki-NG application

Contiki-NG Programming Model

Contiki-NG uses the C programming language, which is component-driven. You build some components and then connect each component. Most WSN motes work in sleep mode. If there is any task to be executed, the program will perform the task through hardware interrupts. If the task is completed, the Contiki-NG program will go back to sleep mode.

Contiki-NG programming applies protothreads. In general, you can develop Contiki-NG applications using the approach shown in Figure 2-1. Start by creating a project. Then, create a C program and apply the protothreads approach for developing a Contiki-NG program. When finished writing the program, compile and upload it to the WSN mote.
../images/456327_1_En_2_Chapter/456327_1_En_2_Fig1_HTML.jpg
Figure 2-1

Programming flow of a Contiki-NG program

If you open the source code of Contiki-NG OS, you can see several folders, shown in Figure 2-2. Information about these folders can be read in Table 2-1.
../images/456327_1_En_2_Chapter/456327_1_En_2_Fig2_HTML.jpg
Figure 2-2

Contiki-NG program structure

Table 2-1

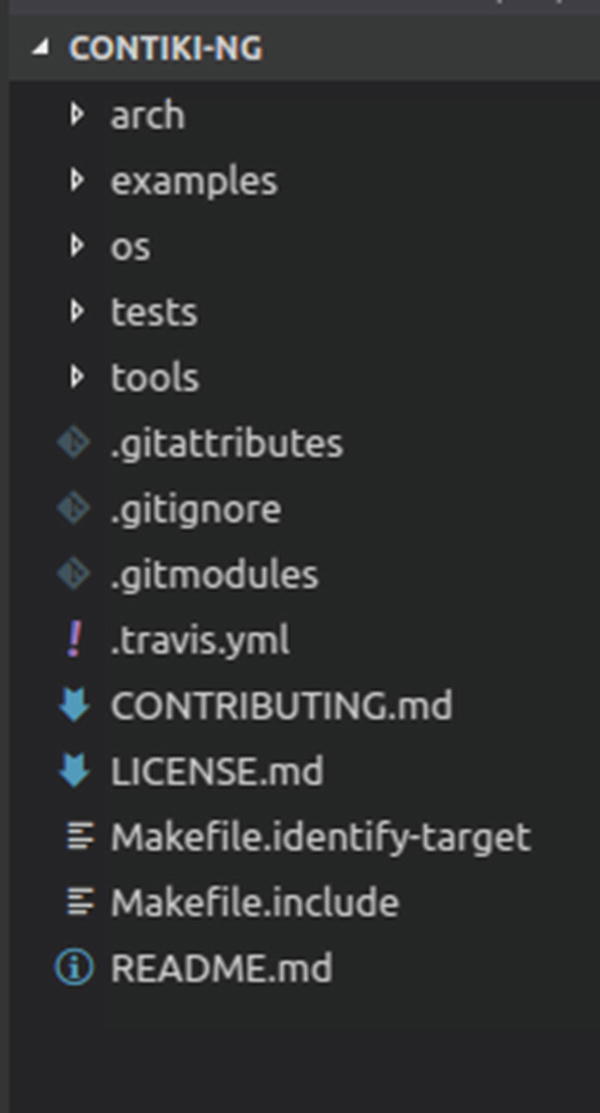
Information for Contiki-NG OS Folders

Folder

Description

arch

Contains CPU, platform, and dev for development

arch/cpu

Specific MCU information

arch/dev

External chip and devices

arch/platform

Specific files and platform drivers

os

Contiki-NG core files and libraries

tools

Tools for flashing, debugging, simulating

examples

Several Contiki-NG program samples

tests

Several test programs

In the next section, we will review the basics of C programming, such as the language syntax used to develop Contiki-NG programs.

Contiki-NG Basic Syntax

In general, Contiki-NG adopts the C programming language. In this section, we will review some C programming language basics. You can use any text editor to write C code.

Creating a Project

The Contiki-NG program does not provide project templates to build a program. If you want to create a new project, you start by creating a new folder and a Makefile file. Figure 2-3 shows a collection of Contiki-NG project samples.
../images/456327_1_En_2_Chapter/456327_1_En_2_Fig3_HTML.jpg
Figure 2-3

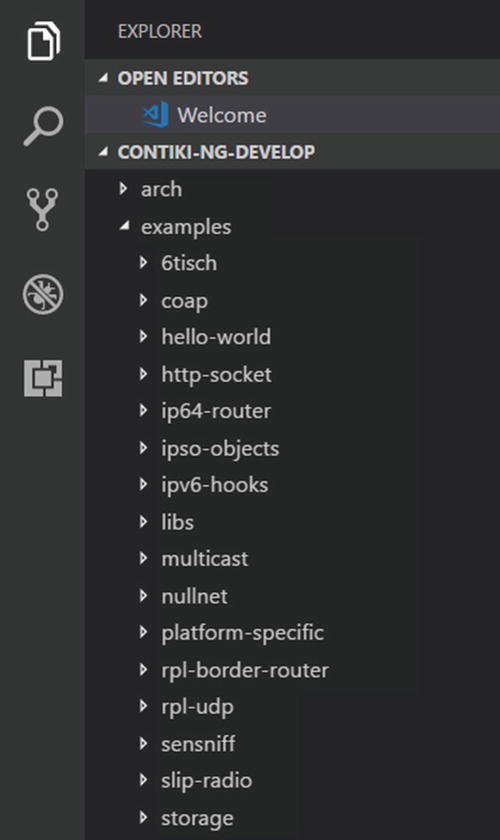
A collection of Contiki-NG project samples

You also can use program samples from the Contiki project ( https://github.com/contiki-os/contiki ). You should check if the one you choose is compatible with the Contiki-NG project ( https://github.com/contiki-ng/contiki-ng ).

Contiki-NG Basic Programming Language

Contiki-NG adopts the C general programming language for implementation. If you have experience in C programming, it won’t require much effort to learn Contiki-NG programming. Contiki-NG programming is similar to C as far as declaring variables and using conditional statements and looping. You can see samples of the C programming language in Table 2-2.
Table 2-2

Basic Programming for C Language

C Basic Programming

Example

Declare variables

int num;

int_t a, b, c;

unsigned int isDone;

Assign variables

num = 3;

isDone = 0;

unsigned int m = 10;

If-conditional

if(running){

doSomething();

}else {

perform();

}

Looping

int len = 10;

for(int i=0;i<len;i++) {

foo();

}

Comment codes

// this comment

/*

this is also comment

*/

To improve your skills in the Contiki-NG programming language, I recommend you practice writing Contiki-NG programs.

Review Protothreads

Protothreads are lightweight threads designed for memory-constrained systems, such as small embedded systems or WSN nodes. You can see a protothreads implementation for Contiki-NG at <contiki_root>/os/sys/pt.h.

The following is the content of the pt.h file:

#ifndef PT_H_
#define PT_H_
#include "sys/lc.h"
struct pt {
  lc_t lc;
};
#define PT_WAITING 0
#define PT_YIELDED 1
#define PT_EXITED  2
#define PT_ENDED   3
#define PT_INIT(pt)   LC_INIT((pt)->lc)
#define PT_THREAD(name_args) char name_args
#define PT_BEGIN(pt) { char PT_YIELD_FLAG = 1; if (PT_YIELD_FLAG) {;} LC_RESUME((pt)->lc)
#define PT_END(pt) LC_END((pt)->lc); PT_YIELD_FLAG = 0;
                   PT_INIT(pt); return PT_ENDED; }
#define PT_WAIT_UNTIL(pt, condition)          
  do {                                        
    LC_SET((pt)->lc);                         
    if(!(condition)) {                        
      return PT_WAITING;                      
    }                                         
  } while(0)
#define PT_WAIT_WHILE(pt, cond)  PT_WAIT_UNTIL((pt), !(cond))
#define PT_WAIT_THREAD(pt, thread) PT_WAIT_WHILE((pt), PT_SCHEDULE(thread))
#define PT_SPAWN(pt, child, thread)          
  do {                                       
    PT_INIT((child));                        
    PT_WAIT_THREAD((pt), (thread));          
  } while(0)
#define PT_RESTART(pt)                       
  do {                                       
    PT_INIT(pt);                             
    return PT_WAITING;                       
  } while(0)
#define PT_EXIT(pt)                          
  do {                                       
    PT_INIT(pt);                             
    return PT_EXITED;                        
  } while(0)
#define PT_SCHEDULE(f) ((f) < PT_EXITED)
#define PT_YIELD(pt)                         
  do {                                       
    PT_YIELD_FLAG = 0;                       
    LC_SET((pt)->lc);                        
    if(PT_YIELD_FLAG == 0) {                 
      return PT_YIELDED;                     
    }                                        
  } while(0)
#define PT_YIELD_UNTIL(pt, cond)             
  do {                                       
    PT_YIELD_FLAG = 0;                       
    LC_SET((pt)->lc);                        
    if((PT_YIELD_FLAG == 0) || !(cond)) {    
      return PT_YIELDED;                     
    }                                        
  } while(0)
#endif /* PT_H_ */
The following is a list of function descriptions based on the pt.h header:
  • PT_INIT(pt) function is used to initialize a protothread.

  • PT_THREAD(name_args) is a macro that is used to declare a protothread.

  • PT_BEGIN(pt) is used to declare the starting point of a protothread.

  • PT_END(pt) is used to end a protothread.

  • PT_WAIT_UNTIL(pt, condition) is used for blocking the protothread until the specified condition is true.

  • PT_WAIT_WHILE(pt, cond) is used for blocking and waiting while the condition is true.

  • PT_WAIT_THREAD(pt, thread) is used to schedule a child protothread. The current protothread will block until the child protothread completes.

  • PT_SPAWN(pt, child, thread) is used to spawn a child protothread and waits until it exits.

  • PT_RESTART(pt) will block and cause the running protothread to restart its execution at the place of the PT_BEGIN() call.

  • PT_EXIT(pt) is used to exit from a protothread.

  • PT_SCHEDULE(f) is used to schedule a protothread. The return value of the function is non-zero if the protothread is running or zero if the protothread has exited.

  • PT_YIELD(pt) yields from the current protothread.

  • PT_YIELD_UNTIL(pt, cond) yields from the protothread until a condition occurs.

Extending the Contiki-NG Library

Contiki-NG OS consists of several libraries and apps that you can extend based on your case. To extend Contiki-NG OS functionalities, you can follow the same approach used while building C programs.

You add additional libraries by adding a C header and source code. Our Contiki-NG program will consume our libraries. For this demo, we create a header file called mycounter.h with the following code:

#ifndef MYCOUNTER_H
#define MYCOUNTER_H
int next_counter(int current);
#endif

This C header provides one function, next_counter(). This function will be implemented into the mycounter.c file. We perform a counterincrement with a maximum value of 99. You can write the complete code as follows:

#include "mycounter.h"
int next_counter(int current)
{
    if(current>99)
        current = 1;
    else
        current++;
    return current;
}

To access the extended library, we declare that header file. Then, we call library functions from our code. The following is a skeleton code sample to access the header file in a C program:

#include "mycounter.h"
...
static int counter = 0;
counter = next_counter(counter);
printf("Counter: %d ", counter);

Next, we will implement our extended library and use it in a Contiki-NG program.

Contiki-NG Demo: Threading App

Now, we will try to build a Contiki-NG program that uses a header file. We create a folder called demo-counter . Then, we create several files as follows:
  • mycounter.h

  • mycounter.c

  • demo-counter.c

  • Makefile

You can see the project structure in Figure 2-4.
../images/456327_1_En_2_Chapter/456327_1_En_2_Fig4_HTML.png
Figure 2-4

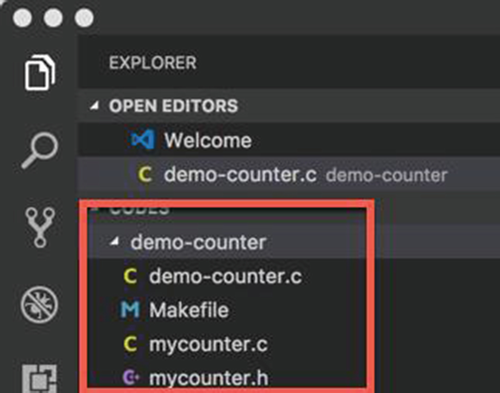
Project structure for demo-counter project

In this demo, we create a header file called mycounter.h. This C header provides one function, next_counter(), that generates an incremented number based on the input. The next_counter() function will be implemented into the mycounter.c file. In the previous section, we declared this library.

Next, we access mycounter.h in our main program. It’s implemented in the demo-counter.c file. We use an event timer library from Contiki-NG, etimer. We generate an incremented number every three seconds.

The following is the complete code for demo-counter.c:

#include "contiki.h"
#include "sys/etimer.h"
#include "mycounter.h"
#include <stdio.h> /* For printf() */
PROCESS(counter_process, "Counter process");
AUTOSTART_PROCESSES(&counter_process);
static struct etimer timer;
static int counter = 0;
PROCESS_THREAD(counter_process, ev, data)
{
  PROCESS_BEGIN();
  printf("Demo Counter ");
  while(1) {
    etimer_set(&timer, 3 * CLOCK_SECOND);
    PROCESS_WAIT_EVENT_UNTIL(etimer_expired(&timer));
    counter = next_counter(counter);
    printf("Counter: %d ", counter);
  }
  PROCESS_END();
}

We also create a Makefile to configure our compiling. You can write these scripts for the Makefile. Change the CONTIKI value with your Contiki-NG root folder:

CONTIKI_PROJECT = demo-counter
all: $(CONTIKI_PROJECT)
PROJECT_SOURCEFILES += mycounter.c
CONTIKI = /home/user/Documents/book/contiki
include $(CONTIKI)/Makefile.include

Save the program.

For testing, we run this program with a native target. You can open Terminal and navigate to the project folder. Then, you can compile and run the program. Type these commands:

$ make TARGET=native
$ ./demo-counter.native
If it succeeds, you will see an incremented number in Terminal. You can see a sample of the program output in Figure 2-5.
../images/456327_1_En_2_Chapter/456327_1_En_2_Fig5_HTML.jpg
Figure 2-5

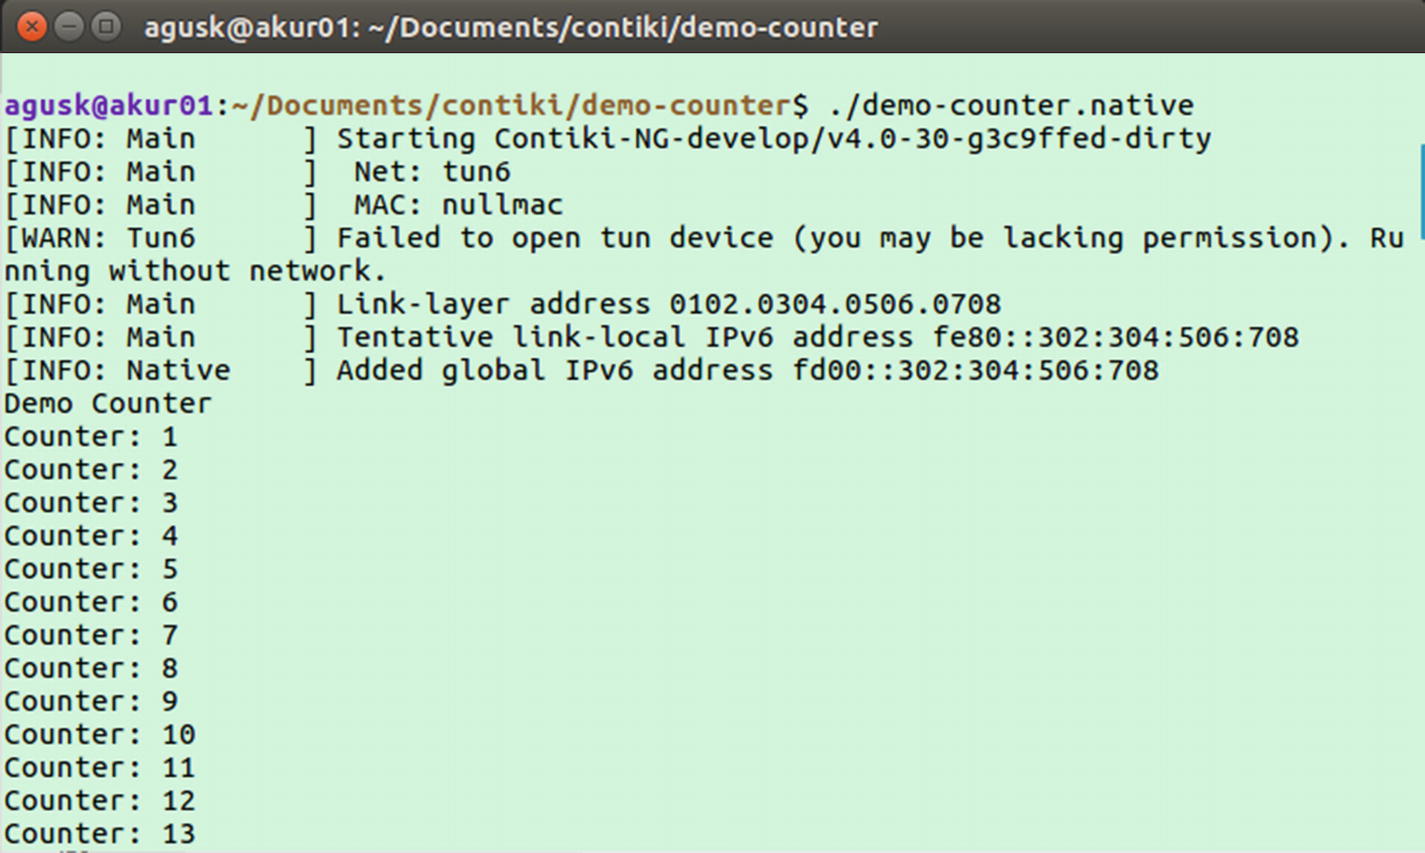
Program output for demo-counter

How does it work?

This program is simple. First, we declare our Contiki-NG process, counter_process. We also declare our event timer and number variable:

PROCESS(counter_process, "Counter process");
AUTOSTART_PROCESSES(&counter_process);
static struct etimer timer;
static int counter = 0;
PROCESS_THREAD(counter_process, ev, data)
{
}

Inside the counter_process function, we perform looping with the event timer. After raising an event, we call the next_counter() function to get an incremented number. Then, we print this value in Terminal:

PROCESS_THREAD(counter_process, ev, data)
{
  PROCESS_BEGIN();
  printf("Demo Counter ");
  while(1) {
    etimer_set(&timer, 3 * CLOCK_SECOND);
    PROCESS_WAIT_EVENT_UNTIL(etimer_expired(&timer));
    counter = next_counter(counter);
    printf("Counter: %d ", counter);
  }
  PROCESS_END();
}

Contiki-NG Coding Conventions

Imagine you’re developing a program with a team of more than three developers. Each developer has a programming style and method. When the codes are merged, it may raise problems since the codes are not consistent in writing style. This problem could be solved if the code was written in the same style.

Contiki coding conventions are rules for a writing style. They consist of guidelines for how to write Contiki-NG programs. You can read the full coding conventions for Contiki at https://github.com/contiki-os/contiki/blob/master/doc/code-style.C .

Demo: Build Contiki-NG Application

In this section, we are going to develop a Contiki-NG application called virtual-sensor. We will use the general library for the sensor, which will be used for temperature and humidity readings. We will create a virtual sensor in a header file that exposes two functions, read_temperature() and read_humidity(). You can see this in Figure 2-6.
../images/456327_1_En_2_Chapter/456327_1_En_2_Fig6_HTML.jpg
Figure 2-6

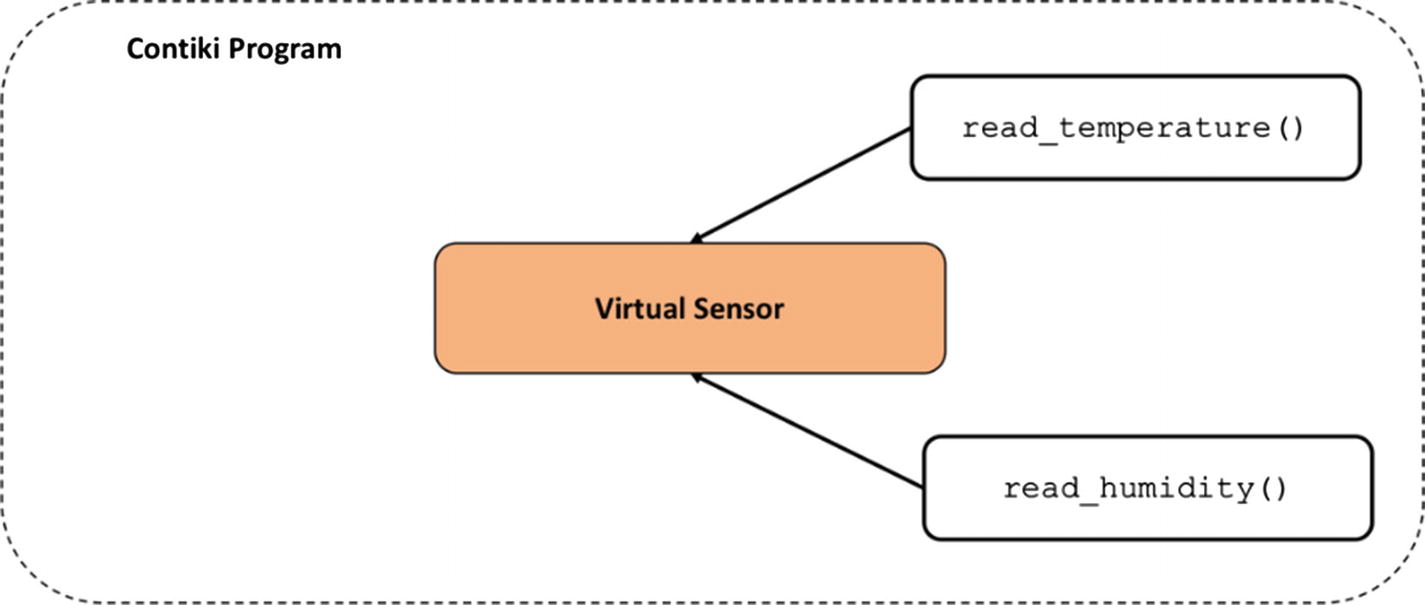
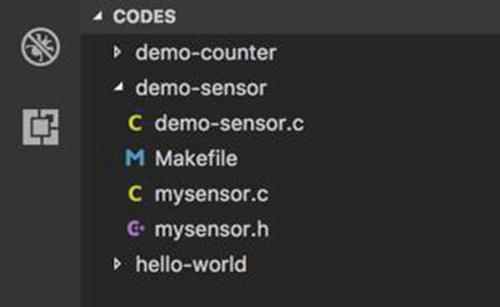
A simple library for virtual sensor

Now, we can start to develop. Create a project folder called demo-sensor. Then, create files as follows:
  • mysensor.h is a header file that declares read_temperature() and read_humidity() functions.

  • mysensor.c implements read_temperature() and read_humidity() functions.

  • demo-sensor.c is the main program that uses mysensor library.

  • Makefile is used for compiler parameters.

This project structure is shown in Figure 2-7.
../images/456327_1_En_2_Chapter/456327_1_En_2_Fig7_HTML.jpg
Figure 2-7

Project structure for demo-sensor

Now, we implement all files, starting with mysensor.h. It's a header file that exposes two functions:

// mysensor.h
#ifndef MYSENSOR_H
#define MYSENSOR_H
struct Sensor {
    char  name[15];
    float value;
 };
struct Sensor read_temperature();
struct Sensor read_humidity();
#endif

These sensor functions will be used as a general sensor that is implemented for temperature and humidity in the mysensor.c file. The following is the complete code for mysensor.c:

// mysensor.c
#include "mysensor.h"
#include <string.h>
#include <stdlib.h>
float random_value(float min, float max)
{
    float scale = rand() / (float) RAND_MAX;
    return min + scale * (max - min);
}
struct Sensor read_temperature()
{
    struct Sensor temp;
    strncpy(temp.name, "Temperature", 15);
    temp.value = random_value(0, 35);
    return temp;
}
struct Sensor read_humidity()
{
    struct Sensor humdidty;
    strncpy(humdidty.name, "Humidity", 15);
    humdidty.value = random_value(40, 80);
    return humdidty;
}

We generate a random number for our functions. Moreover, we use the Sensor library in our main program, demo-sensor.c. We use an event timer for the reading period. The following is the complete code for demo-sensor.c:

// demo-sensor.c
#include "contiki.h"
#include "sys/etimer.h"
#include "mysensor.h"
#include <stdio.h>
PROCESS(sensor_process, "Sensor process");
AUTOSTART_PROCESSES(&sensor_process);
static struct etimer timer;
PROCESS_THREAD(sensor_process, ev, data)
{
  PROCESS_BEGIN();
  printf("Demo Virtual Sensor ");
  while(1) {
    etimer_set(&timer, 3 * CLOCK_SECOND);
    PROCESS_WAIT_EVENT_UNTIL(etimer_expired(&timer));
    struct Sensor temp = read_temperature();
    printf("%s: %.2f ", temp.name, temp.value);
    struct Sensor hum = read_humidity();
    printf("%s: %.2f ", hum.name, hum.value);
    printf("------------ ");
  }
  PROCESS_END();
}

Last, we create a Makefile for compiler parameters. We set PROJECT_SOURCEFILES with mysensor.c. Change the CONTIKI value to your Contiki root folder. The following is the content of the Makefile:

CONTIKI_PROJECT = demo-sensor
all: $(CONTIKI_PROJECT)
PROJECT_SOURCEFILES += mysensor.c
CONTIKI = /home/user/Documents/book/contiki
include $(CONTIKI)/Makefile.include

Now, we can compile and upload the program into the WSN mote. We can compile and run it for targeting native. Open Terminal and navigate to the project folder. Then, type these commands:

$ make TARGET=native
$ ./demo-sensor.native
This program will display sensor values after the event timer is raised. You can see my program output in Figure 2-8.
../images/456327_1_En_2_Chapter/456327_1_En_2_Fig8_HTML.jpg
Figure 2-8

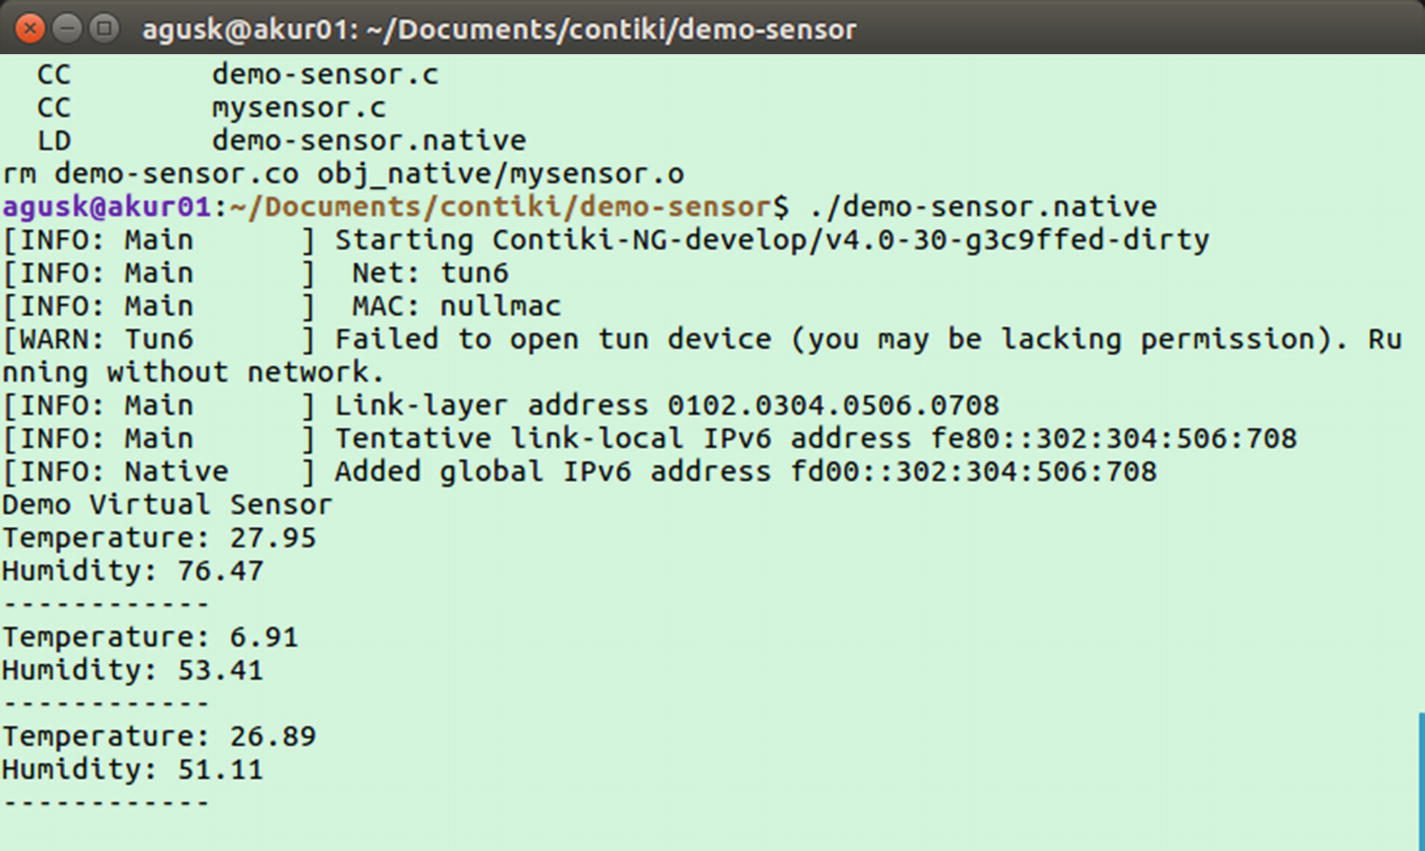
Program output for demo-sensor application

Summary

We have explored the Contiki-NG basic programming language. This is a core language based on the C programming language that will help you to develop a Contiki-NG application. We built a Contiki-NG application that utilized a header library and event timer with Contiki-NG program features.

In the next chapter, we will learn how to work with concurrency in Contiki-NG programs in order to deal with multiple jobs.

..................Content has been hidden....................

You can't read the all page of ebook, please click here login for view all page.
Reset
18.222.196.175