© Sanjib Sinha 2019
S. SinhaBeginning Laravel https://doi.org/10.1007/978-1-4842-4991-8_4

4. Working with Models

Sanjib Sinha1 
(1)
Howrah, West Bengal, India
 

The model is the most critical part of any web application; you could even call it the “brain” of your application. A good web application will be model-centric, with each resource being a representation of the model. In other words, the model sets the business logic for every resource, such as user, task, and so on.

In Laravel, you will usually use Eloquent ORM when building applications. Eloquent is a simple yet beautiful ActiveRecord implementation for working with a database. Each database table has a corresponding model, and without this model, you cannot query the data in the database table. Not only that, but the model plays a pivotal role in building relations between different tables.

For this reason, a model is also called an Eloquent model , and you use a flag like --migration, or simply --m, while creating a model through the terminal. In the previous chapter, you saw how to create a Task model along with the tasks table. You also have used a TaskController to manage the task resource. In the next sections, you will see how you can create tasks, and you will also see how you can use route model binding to edit your task resource.

Route Model Binding: Custom and Implicit

A model is of no use if you don’t have any underlying table associated with it. In a larger sense, you will often have a database query related to a model representing the resource. A query, whether it handles all records of a table or a single record, always points to one or many IDs. Whenever you perform a database operation, you actually do it through the model. Let’s consider the TaskController show method to display the specified resource, as shown here:
//code 4.1
//app/HTTP/Controllers/TaskController.php
    public function show($id)
    {
        $task = Task::findOrFail($id);
        return view('tasks.show', compact('task'));
    }

Here you inject a model ID to this controller action to retrieve the model that corresponds to that ID.

Now if you issue the php artisan route:list command, you will see the following output for this particular action:
GET|HEAD  | tasks/{task}               | tasks.show        | AppHttpControllersTaskController@show

In the previous output, you can see that Method is GET, URI is tasks/{task}, and Name is tasks.show. This means the view Blade page is show.blade.php, and it belongs to the tasks folder. Finally, Action is AppHttpControllersTaskController@show.

This means Laravel has automatically injected the model instances directly into the routes. The route lists show that you can inject an entire Task model instance that matches the given ID.

This route model binding is best understood when you use the form template in edit.blade.php belonging to the resources/views/tasks folder, as shown here:
//code 4.2
//resources/views/tasks/edit.blade.php
<div class="card-body">
{!! Form::model($task, ['route' => ['tasks.update', $task->id], 'method' => 'PUT']) !!}
<div class="form-group">
{!! Form::label('title', 'Title', ['class' => 'awesome']) !!}
{!! Form::text('title', $task->title, ['class' => 'form-control']) !!}
</div>
<div class="form-group">
{!! Form::label('body', 'Body', ['class' => 'awesome']) !!}
{!! Form::textarea('body', $task->body, ['class' => 'form-control']) !!}
</div>
<div class="form-group">
{!! Form::submit('Edit Task', ['class' => 'btn btn-primary form-control']) !!}
</div>
{!! Form::close() !!}
</div>
In the previous code, this line is important:
{!! Form::model($task, ['route' => ['tasks.update', $task->id], 'method' => 'PUT']) !!}

Why does the route point to tasks.update, instead of tasks.edit? You can understand it better if you look at route:list, which tells you the action verb or method is tasks.update. Also, it points to the action TaskController@update.

This is part of the RESTful action on the resource model Task. What is happening here is that the generated controller will already have methods stubbed for each of these actions. Laravel is smart enough to include notes in its service container, informing you which URIs and verbs they handle. So, you don’t have to create the view page tasks.update in the resource/views/tasks folder. Through the RESTful resource controller, Laravel handles it.

You bind the route with the model Task. To understand this, you need to watch the edit method of TaskController.
//code 4.3
//app/HTTP/Controllers/TaskController.php
    public function edit($id)
    {
      if(Auth::user()->is_admin == 1){
        $task = Task::findOrFail($id);
        return view('tasks.edit', compact('task'));
      }
      else {
        return redirect('home');
      }
    }

Here you pass the task object as $task to tasks.edit, and Laravel is smart enough to guess that it is an instance of the Task model.

Now if you want to edit the first task that has an ID of 1, the URI is http://localhost:8000/tasks/1/edit, as shown in Figure 4-1.
../images/435350_2_En_4_Chapter/435350_2_En_4_Fig1_HTML.jpg
Figure 4-1

Route model binding through form

Implicit Route Binding

You can achieve the same route model binding effect with implicit binding. In the previous code, you saw how to get the ID of the task resource. Now go ahead and change the code to the following:
//code 4.4
//app/HTTP/Controllers/TaskController.php
    public function edit(Task $task)
    {
      if(Auth::user()->is_admin == 1){
        return view('tasks.edit', compact('task'));
      }
      else {
        return redirect('home');
      }
    }

Laravel automatically resolves Eloquent models defined in routes or controller actions, as in public function edit(Task $task){}, whose type-hinted variable names match a route segment name. Since the $task variable is type-hinted as the AppTask Eloquent model and the variable name matches the {task} URI segment, Laravel will automatically inject the model instance that has an ID matching the corresponding value from the request URI.

Now if you want to edit the task with an ID of 2, the URI is http://localhost:8000/tasks/2/edit, and you get the same effect.

Custom Route Binding

By the way, you can customize the key name also. Suppose you have another database column other than ID and that database column is named slug .

In that case, you can override the getRouteKeyName method on the Eloquent model in the following way:
//code 4.5
    /**
     * Get the route key for the model.
     *
     * @return string
     */
    public function getRouteKeyName()
    {
        return 'slug';
    }

Now instead of the ID, you can pass slug as an instance of the task resource like before.

Model Relations

An application in Laravel mainly depends on model relations. Therefore, this section is one of the most important sections in the book. Up to now, you were trying to understand how the Laravel Model-View-Controller logic works. Now the time has come to build a small article management application. While building this application, you will learn about some other key components of Laravel. In the next chapter, I will go deeper into the database and Eloquent ORM components, and you will see how these relational operations work through models and how controllers control the workflow between models and views.

Building models from scratch is, no doubt, a cumbersome job, so Laravel has taken care of this in an elegant way. By default, Laravel comes with only the User model, but you can configure it according to your requirements. In most applications, however complicated they are, you do not have to touch the default User model installed by Laravel. You can add any extra columns in the users database table. According to the MVC pattern, the model talks to the database, either retrieves data from the database or inserts it, updates the data, and passes it to the controller. Then, the controller can pass it to the views. Conversely, the controller takes input from the views and passes it to the model to process data.

The User model interacts with the users database, and in the same way, other models will work in tandem with the other tables to run the article management application smoothly. In this application, you have many separate resources, such as articles, users, profiles, comments, and so on. These resources will interact with each other through models. Laravel has made the process super simple and expressive.

Behind the scenes, Laravel handles a huge task, which is evident from these simple expressive functions. Consider a few scenarios where a user has many comments. It is obvious that a user should be able to comment as much as they want. They should also be able to comment on another user’s profile. So, the comment object may have a polymorphic relationship with two model objects: Article and Profile. One user may have many articles too. Now, each article may have many tags, and many tags may belong to many articles.

Therefore, you can see many types of relations here: article to user and the inverse (one-to-one), one user to one profile (one-to-one), one article to many tags (one-to-many), many articles to many tags (many-to-many), and comments to articles and profiles (polymorphic).

Note

A polymorphic relationship is where a model can belong to more than one other model on a single association, such as comments belonging to the articles and profiles table records at the same time.

Before taking a look at the models, you must perform your migrations, covered next.

How Migrations Work with the Laravel Model

For the sake of building the example application, let’s start with the database. I could have started with controllers and views or I could have discussed the model, but database migration is a good option because you are going to see how to create a completely database-driven application. This migration has a direct relation with the models.

You will see how it works in a minute.

Laravel supports four databases currently: MySQL, PostgreSQL, SQLite, and Microsoft SQL Server. The config/database.php file defines MySQL as the default database connection.
'default' => env('DB_CONNECTION', 'mysql'),
You can change this to match your requirements. Next, you will take a look at the database connection setup in the config/database.php file so that you have a proper understanding of how Laravel has designed this beautifully, as shown here:
'connections' => [
        'sqlite' => [
            'driver' => 'sqlite',
            'database' => env('DB_DATABASE', database_path('database.sqlite')),
            'prefix' => '',
        ],
        'mysql' => [
            'driver' => 'mysql',
            'host' => env('DB_HOST', '127.0.0.1'),
            'port' => env('DB_PORT', '3306'),
            'database' => env('DB_DATABASE', 'forge'),
            'username' => env('DB_USERNAME', 'forge'),
            'password' => env('DB_PASSWORD', ''),
            'unix_socket' => env('DB_SOCKET', ''),
            'charset' => 'utf8mb4',
            'collation' => 'utf8mb4_unicode_ci',
            'prefix' => '',
            'strict' => true,
            'engine' => null,
        ],
        'pgsql' => [
            'driver' => 'pgsql',
            'host' => env('DB_HOST', '127.0.0.1'),
            'port' => env('DB_PORT', '5432'),
            'database' => env('DB_DATABASE', 'forge'),
            'username' => env('DB_USERNAME', 'forge'),
            'password' => env('DB_PASSWORD', ''),
            'charset' => 'utf8',
            'prefix' => '',
            'schema' => 'public',
            'sslmode' => 'prefer',
        ],
        'sqlsrv' => [
            'driver' => 'sqlsrv',
            'host' => env('DB_HOST', 'localhost'),
            'port' => env('DB_PORT', '1433'),
            'database' => env('DB_DATABASE', 'forge'),
            'username' => env('DB_USERNAME', 'forge'),
            'password' => env('DB_PASSWORD', ''),
            'charset' => 'utf8',
            'prefix' => '',
        ],
    ],

Here, I would like to add one key concept: object-relational mapping (ORM). As an intermediate PHP user, you are probably already acquainted with this concept; yet, a few lines about it won’t hurt you, as Laravel has managed this feature magnificently via Eloquent ORM. Mapping the application object to the database tables has been one of the greatest challenges of using Laravel; however, Eloquent ORM has solved this problem completely. It provides an interface that converts application objects to database table records and does the reverse too.

The next line in the file is also important:
'migrations' => 'migrations',

What does this mean? It is a default name of the table used for the project’s migration status. Don’t change it.

The next lines of code look like this:
'redis' => [
        'client' => 'predis',
        'default' => [
            'host' => env('REDIS_HOST', '127.0.0.1'),
            'password' => env('REDIS_PASSWORD', null),
            'port' => env('REDIS_PORT', 6379),
            'database' => 0,
        ],
    ],

Redis is an open source, fast, key-value store; among other things, you can manage cache and session data with it.

After studying the config/database.php file , you will look at the .env file. It’s an important file that plays a major role in building an awesome application. You will find it in the root directory. When you build a database-driven application, you can locally create a database called laravelmodelrelations in MySQL. The environment file .env just points it to the database name, including your MySQL username and password. You are interested in these lines:
DB_DATABASE=laravelmodelrelations
DB_USERNAME=root
DB_PASSWORD=********

By default, the database is homestead; you can use this one, or you can change it accordingly. I have created a database called laravelmodelrelations and connected it with my Laravel application through this .env file.

Now, using migration, I can build my database tables and relate them with each other using some simple default methodology.

Keeping your application logic in your mind, you need to design the tables. Laravel comes up with two tables: users and password-resets . You do not need to change the second one. However, if needed, you can change the users table. Here, you don’t do that, because you will have a separate Profile table where you will add some more information about a user. Besides, you need to build other tables as your application demands.

Let’s see the database/migrations/create_password_resets_table.php file first.
// code 4.6
//  database/migrations/create_password_resets_table.php
public function up()
    {
        Schema::create('password_resets', function (Blueprint $table) {
            $table->string('email')->index();
            $table->string('token');
            $table->timestamp('created_at')->nullable();
        });
    }
public function down()
    {
        Schema::dropIfExists('password_resets');
    }
I didn’t paste the whole code here for brevity. Let me explain the first chunk: through the up() method , the Schema class creates the table password_resets, and it is created dynamically in your database using a closure, where the Blueprint table object takes charge. Inside this function, you can add extra functionalities. In database/migrations/create_password_resets_table.php, you don’t have to do that. Next, you will build the Profile model and table by issuing a single command, as shown here:
// code 4.7
$ php artisan make:model Profile -m
Model created successfully.
Created Migration: 2018_09_16_235301_create_profiles_table

The first model, called Profile, has been created under the app folder. Next, you should work on the profiles table before running the migration.

The profiles table has the following code inside database/migrations folder ; the file name is generated by Laravel, prefixed by the data in which it is generated:
// code 4.8
//profiles table comes up by default
public function up()
    {
        Schema::create('profiles', function (Blueprint $table) {
            $table->increments('id');
            $table->timestamps();
        });
    }
In fact, whenever you create a model with the respective table, it already has a skeleton like this. So, for the next tables, I won’t repeat this skeleton anymore. You need to add some more functionality in this code. So, it looks like this:
// code 4.9
public function up()
    {
        Schema::create('profiles', function (Blueprint $table) {
            $table->increments('id');
            $table->integer('user_id');
            $table->string('city', 64);
            $table->text('about');
            $table->timestamps();
        });
    }

I could have added more functionalities such as first name, last name, and so on, but I didn’t do that for brevity. Currently, our purposes will be served by only city and about. The interesting part is of course user_id. Each profile is connected with a single user.

Therefore, you can say that each user has one profile, and one profile belongs to one user. You can define that relationship in two respective models : User and Profile. I will cover that relationship later; right now let’s create other models and tables by issuing these commands one after another:
// code 4.10
$ php artisan make:model Profile -m
Model created successfully.
Created Migration: 2018_09_17_233619_create_profiles_table
$ php artisan make:model Tag -m
Model created successfully.
Created Migration: 2018_09_18_013602_create_tags_table
$ php artisan make:model Article -m
Model created successfully.
Created Migration: 2018_09_18_013613_create_articles_table
$ php artisan make:model Comment -m
Model created successfully.
Created Migration: 2018_09_18_013629_create_comments_table
$ php artisan make:migration create_article_tag_table --create=article_tag
Created Migration: 2018_09_17_094743_create_article_tag_table

Let me explain what you are doing here. By using a single command like php artisan make:model Comment -m, you create a model comment, and at the same time Laravel creates a related comments table for it.

Now, before running the migration, you should plan your application and add functionalities to your newly created tables based on code 4.9.

You have the users and profiles tables , and you have a corresponding key that may attach one profile to one user. So, you will add these methods to the User and Profile models, respectively.
// code 4.11
// app/User.php
public function profile() {
        return $this->hasOne('AppProfile');
    }
This means one user has one profile, and it attaches to the AppProfile model . This is a one-to-one relationship between the User and Profile models. Now it has an inverse in the Profile model.
// code 4.12
// app/Profile.php
public function user() {
        return $this->belongsTo('AppUser');
    }

This code does the same thing, only in an inverse way. Each profile should belong to one User model. To speed up your application, let’s add functionalities to other tables and after that define the relationship accordingly.

Next, you have the tags and articles tables . They have an interesting relationship between them. Many tags belong to many articles, and the inverse is also true. With some simple logic, you can say they have a many-to-many relation. So, you need a pivot table to maintain that relationship. Let’s see the functionalities of those tables first, shown here:
// code 4.13
// tags table
public function up()
    {
        Schema::create('tags', function (Blueprint $table) {
            $table->increments('id');
            $table->string('tag');
            $table->timestamps();
        });
    }
At the same time, I mentioned the relationship with article at the Tag model , as follows:
//Tag.php
<?php
namespace App;
use IlluminateDatabaseEloquentModel;
class Tag extends Model
{
    //
    protected $fillable = [
        'tag'
    ];
    public function articles() {
        return $this->belongsToMany('AppArticles');
    }
}
Next you have articles table, as shown here:
// code 4.14
// articles table
public function up()
    {
        Schema::create('articles', function (Blueprint $table) {
            $table->increments('id');
            $table->integer('user_id');
            $table->string('title');
            $table->text('body');
            $table->timestamps();
        });
    }
I will also mention the relationship with other resource models and related tables including Tag , as shown here:
//Article.php
<?php
namespace App;
use IlluminateDatabaseEloquentModel;
class Article extends Model
{
    //
    protected $fillable = [
        'user_id', 'title', 'body',
    ];
    public function user() {
        return $this->belongsTo('AppUser');
    }
    /**
     * Get the tags for the article
    */
   public function tags() {
       return $this->belongsToMany('AppTag');
   }
   /**
   * Get all of the profiles' comments.
   */
   public function comments(){
     return $this->morphMany('AppComment', 'commentable');
   }
}
Also, now you have the pivot table article_tag , as shown here:
// code 4.15
// article_tag table
public function up()
    {
        Schema::create('article_tag', function (Blueprint $table) {
            $table->increments('id');
            $table->integer('article_id');
            $table->integer('tag_id');
            $table->timestamps();
        });
    }

You’ll also want to create a Role model and roles table because you want your users to have some certain privileges such as Administrator, Moderator, and Member. Therefore, you need a pivot table like role_user.

Let’s create the roles. The commands are simple, as shown here:
$ php artisan make:model Role -m
To create a role_user table, you issue this command:
$ php artisan make:migration create_role_user_table –create=role_user
The Role model has some methods that allow it to have a relationship with the User model. Let’s take a look at the code:
// app/Role.php
<?php
namespace App;
use IlluminateDatabaseEloquentModel;
class Role extends Model
{
    protected $fillable = [
      'name'
  ];
  public function user() {
      return $this->belongsTo('AppUser');
  }
  public function users() {
      return $this->belongsToMany('AppUser');
  }
}
One role may belong to one user, and at the same time it may belong to many users. So, you need to add two methods in your User model , as shown here:
//app.User.php
public function role() {
        return $this->belongsTo('AppRole');
    }
    public function roles() {
        return $this->belongsToMany('AppRole');
    }

One user may have one role or many roles at the same time.

Now you need to work on the tables you have just created. First, add a name column to the roles table , as shown here:
// database/migrations/roles table
public function up()
    {
        Schema::create('roles', function (Blueprint $table) {
            $table->increments('id');
            $table->string('name');
            $table->timestamps();
        });
    }

At the same time in your pivot table role_user, add two columns, as shown here:

role_id and user_id.
// database/migrations/roles table
public function up()
    {
        Schema::create('role_user', function (Blueprint $table) {
            $table->increments('id');
            $table->integer('role_id');
            $table->integer('user_id');
            $table->timestamps();
        });
    }

I have not touched the comment table currently, for one reason. You will work on that table at the end phase of building your content management application. This is because the comment table will have polymorphic relations with other tables. I will discuss it in the next chapter.

So, you have most of the tables ready to migrate from Laravel to your database. You can run the migration by using this command:
// code 4.16
$ php artisan migrate
Migrating: 2018_09_17_233619_create_profiles_table
Migrated:  2018_09_17_233619_create_profiles_table
Migrating: 2018_09_18_013602_create_tags_table
Migrated:  2018_09_18_013602_create_tags_table
Migrating: 2018_09_18_013613_create_articles_table
Migrated:  2018_09_18_013613_create_articles_table
Migrating: 2018_09_18_013629_create_comments_table
Migrated:  2018_09_18_013629_create_comments_table
Migrating: 2018_09_18_013956_create_article_tag_table
Migrated:  2018_09_18_013956_create_article_tag_table
...
the list is incomplete

Since you have migrated your tables, you can now populate them with fake data. It can be a tedious job to add fake data manually. Laravel has taken care of that so you are able to test your application with fake data.

Model and Faker Object

To populate the database with fake data, open your database/factory/UserFactory.php file. You will use the Faker object to define the model and add some fake data into it.
// code 4.17
//  database/factory/UserFactory.php
$factory->define(AppUser::class, function (Faker $faker) {
    return [
        'name' => $faker->name,
        'email' => $faker->unique()->safeEmail,
        'password' => '$2y$10$TKh8H1.PfQx37YgCzwiKb.KjNyWgaHb9cbcoQgdIVFlYg7B77UdFm', // secret
        'remember_token' => str_random(10),
    ];
});
$factory->define(AppArticle::class, function (Faker $faker) {
    return [
        'user_id' => AppUser::all()->random()->id,
        'title' => $faker->sentence,
        'body' => $faker->paragraph(random_int(3, 5))
    ];
});
$factory->define(AppProfile::class, function (Faker $faker) {
    return [
        'user_id' => AppUser::all()->random()->id,
        'city' => $faker->city,
        'about' => $faker->paragraph(random_int(3, 5))
    ];
});
$factory->define(AppTag::class, function (Faker $faker) {
    return [
        'tag' => $faker->word
    ];
});
$factory->define(AppRole::class, function (Faker $faker) {
    return [
        'name' => $faker->word
    ];
});
Let me explain this code a little bit. Here, you are using the faker object to populate the database tables with some dummy data. You will run the database seeds through database/seeds/DatabaseSeeder.php. The code looks like this:
// code 4.18
// database/seeds/DatabaseSeeder.php
public function run()
    {
        factory(AppUser::class, 10)->create()->each(function($user){
            $user->profile()->save(factory(AppProfile::class)->make());
        });
        factory(AppTag::class, 20)->create();
        factory(AppArticle::class, 50)->create()->each(function($article){
          $ids = range(1, 50);
          shuffle($ids);
          $sliced = array_slice($ids, 1, 20);
          $article->tags()->attach($sliced);
        });
        factory(AppRole::class, 3)->create()->each(function($role){
          $ids = range(1, 5);
          shuffle($ids);
          $sliced = array_slice($ids, 1, 20);
          $role->users()->attach($sliced);
        });
    }
You are going to create 10 users, 20 tags, and 50 articles. One single command will handle the whole operation. In the last two factory() methods , you attached tags with the article object, and role with users. While populating the tables with fake data, it will automatically attach some tags with some articles. The same is true for roles and users.
// code 4.19
$ php artisan migrate:refresh –seed
This will give you some long output where it rolls back all the tables and migrates them instead. Remember, any time you issue this command, it will populate the database tables with a new combination of data. This enhances the testability, because you can always add some new columns in a table and run this command, and it will roll back the old tables and migrate the new.
// output
Rolling back: 2018_09_18_013956_create_article_tag_table
Rolled back:  2018_09_18_013956_create_article_tag_table
Rolling back: 2018_09_18_013629_create_comments_table
Rolled back:  2018_09_18_013629_create_comments_table
Rolling back: 2018_09_18_013613_create_articles_table
Rolled back:  2018_09_18_013613_create_articles_table
Rolling back: 2018_09_18_013602_create_tags_table
Rolled back:  2018_09_18_013602_create_tags_table
Rolling back: 2018_09_17_233619_create_profiles_table
Rolled back:  2018_09_17_233619_create_profiles_table
Rolling back: 2014_10_12_100000_create_password_resets_table
Rolled back:  2014_10_12_100000_create_password_resets_table
Rolling back: 2014_10_12_000000_create_users_table
Rolled back:  2014_10_12_000000_create_users_table
Migrating: 2014_10_12_000000_create_users_table
Migrated:  2014_10_12_000000_create_users_table
Migrating: 2014_10_12_100000_create_password_resets_table
Migrated:  2014_10_12_100000_create_password_resets_table
Migrating: 2018_09_17_233619_create_profiles_table
Migrated:  2018_09_17_233619_create_profiles_table
Migrating: 2018_09_18_013602_create_tags_table
Migrated:  2018_09_18_013602_create_tags_table
Migrating: 2018_09_18_013613_create_articles_table
Migrated:  2018_09_18_013613_create_articles_table
Migrating: 2018_09_18_013629_create_comments_table
Migrated:  2018_09_18_013629_create_comments_table
Migrating: 2018_09_18_013956_create_article_tag_table
Migrated:  2018_09_18_013956_create_article_tag_table
...
this list is incomplete
To watch the real actions in your database tables, you don't have to use phpMyAdmin always. You can check it on your terminal also in this way:
// code 4.20
mysql> use laravelmodelrelations
Reading table information for completion of table and column names
You can turn off this feature to get a quicker startup with -A
Database changed
mysql> show tables;
+---------------------------------+
| Tables_in_laravelmodelrelations |
+---------------------------------+
|  article_tag                     |
| articles                        |
| comments                        |
| migrations                      |
| password_resets                 |
| profiles                        |
| role_user                       |
| roles                           |
| tags                            |
| users                           |
+---------------------------------+
10 rows in set (0.00 sec)
mysql> select * from users;
This will also give you a long listing of all ten users on your terminal, as shown in Figure 4-2.
../images/435350_2_En_4_Chapter/435350_2_En_4_Fig2_HTML.jpg
Figure 4-2

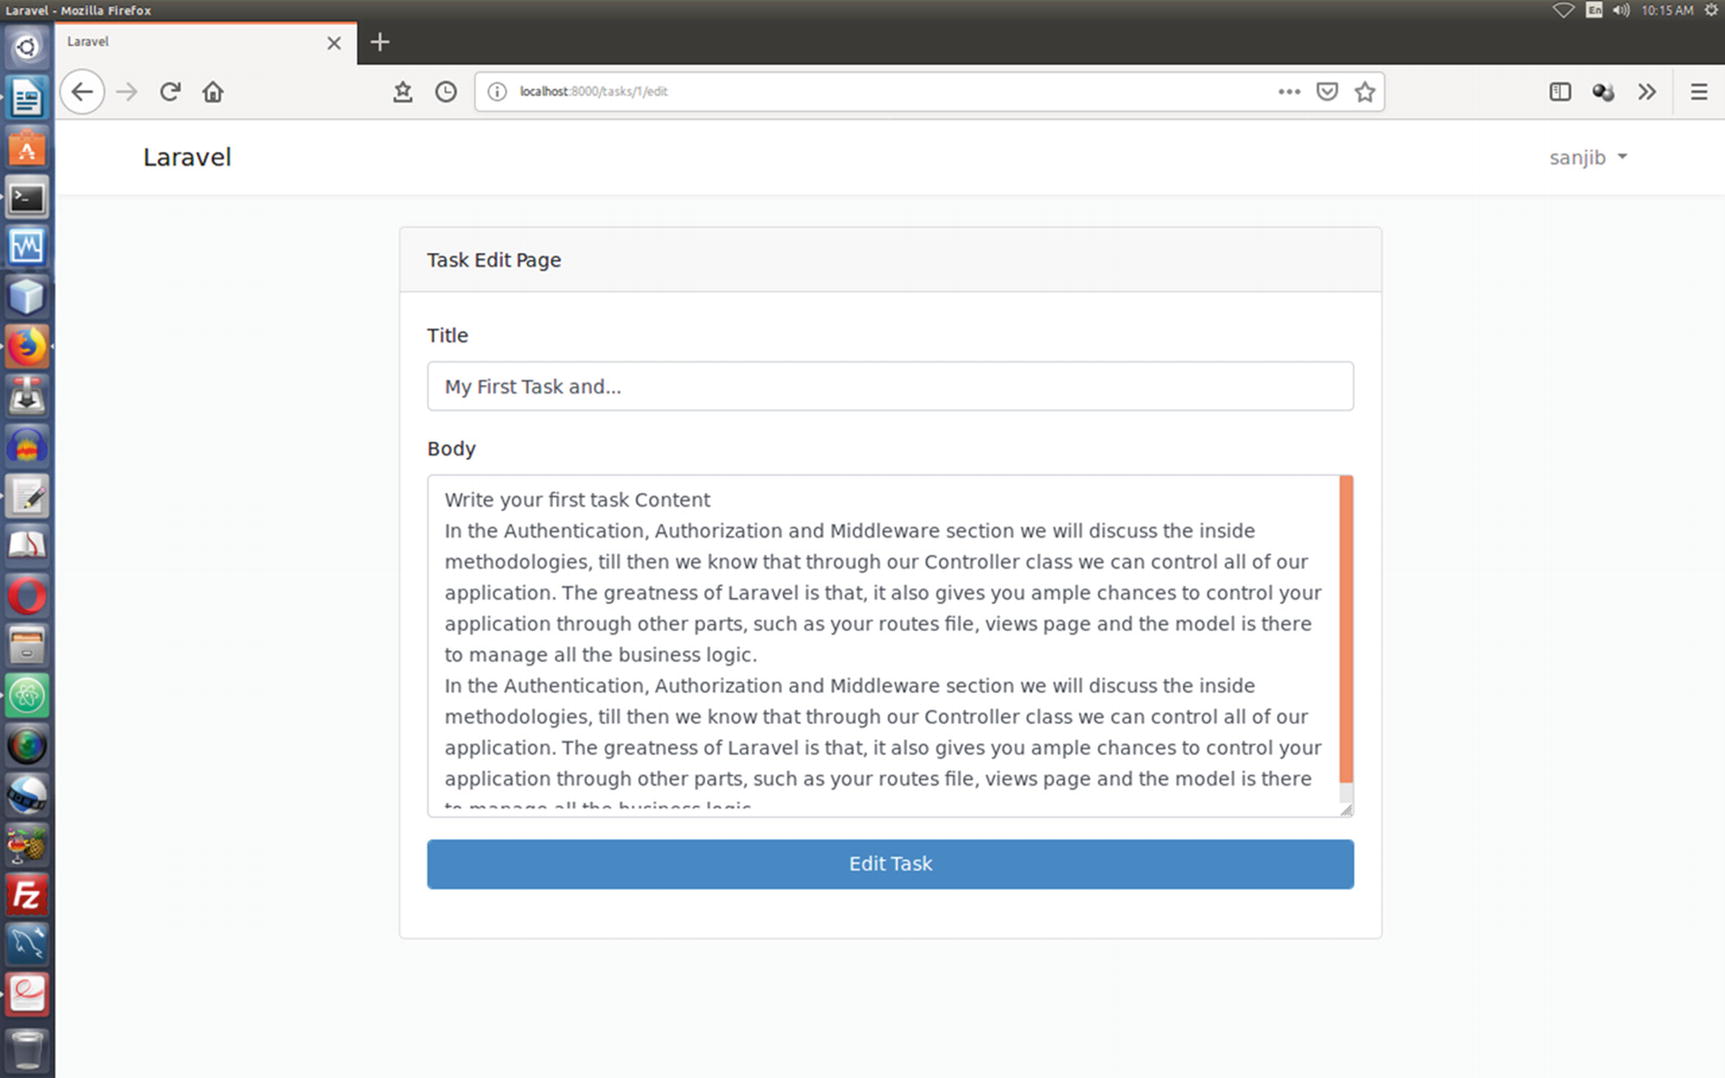
All dummy users in the users table

Take the third user; the user’s name is Van Gorczany, and the e-mail ID is [email protected]. Now through that dummy e-mail, you can log in to your application. Every user has one password, which is secret.

You have migrated all tables except Comment. You have dummy data inside the tables; therefore, you can now build the relations, and after that, you can use resource controllers and views to show how these model relations work perfectly.

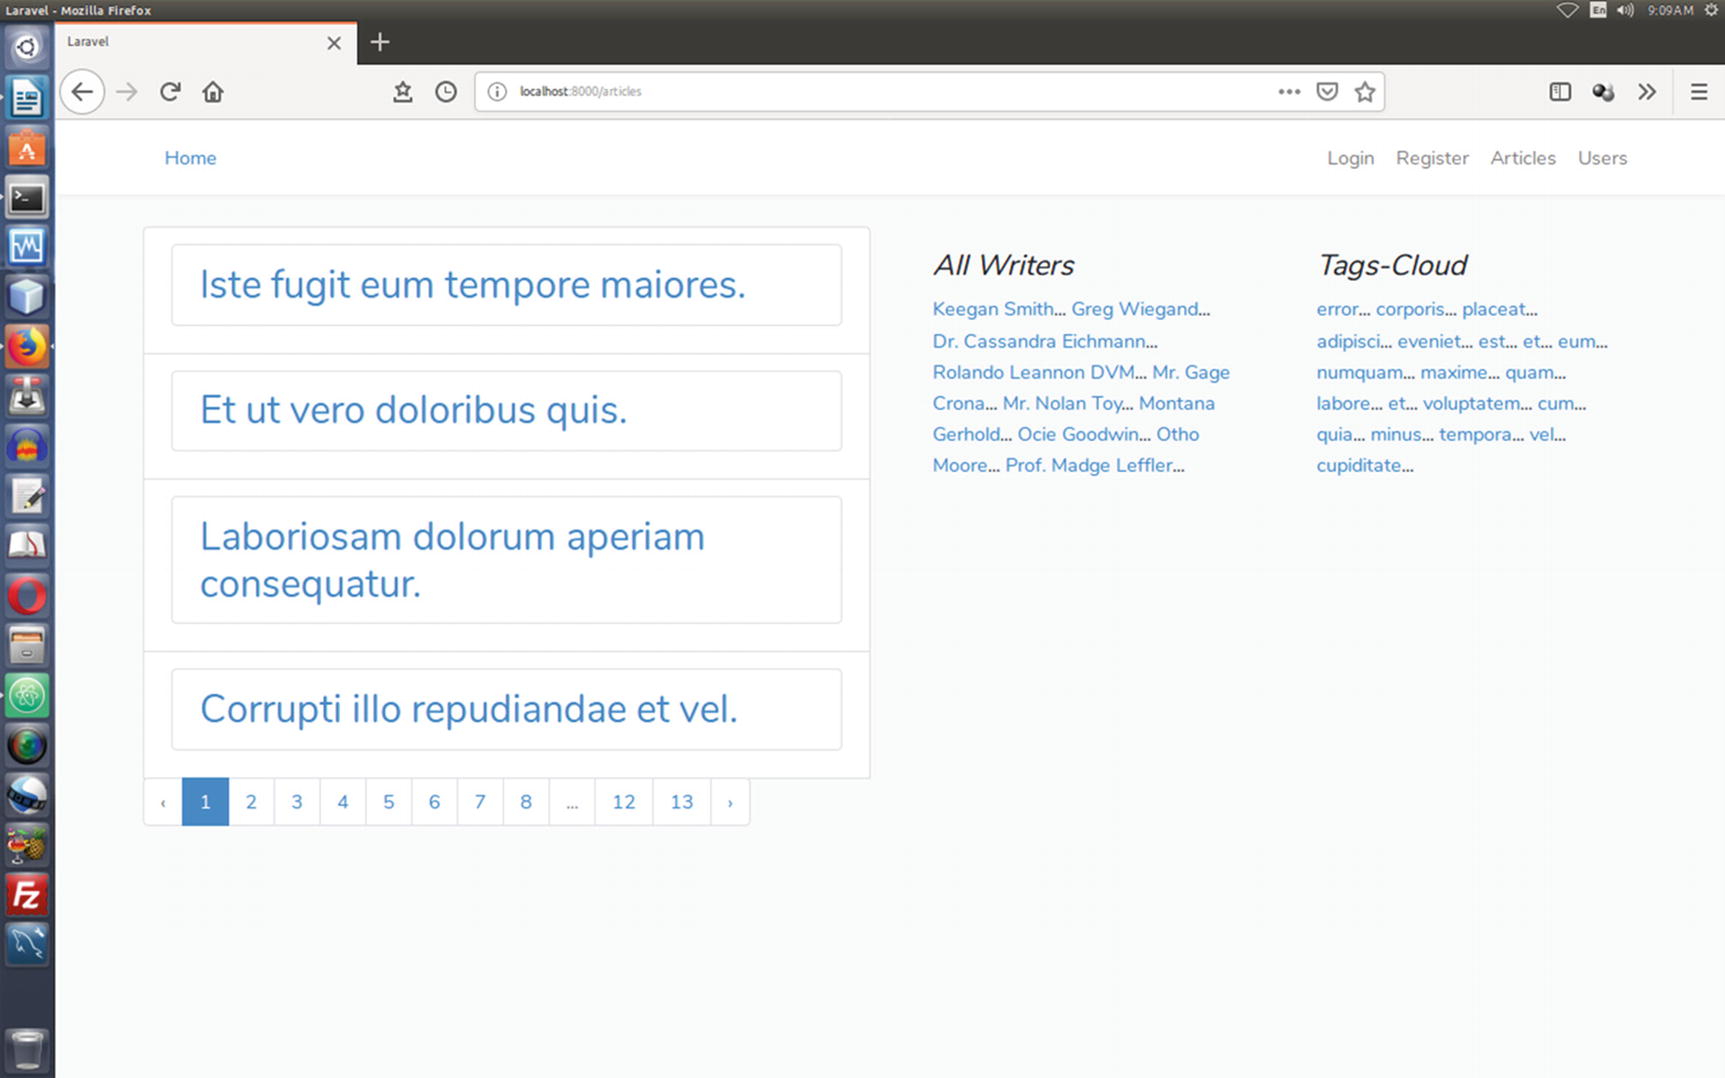
Examining the Home Page

Before proceeding, let’s take a look at what your home page will look like, as shown in Figure 4-3.
../images/435350_2_En_4_Chapter/435350_2_En_4_Fig3_HTML.jpg
Figure 4-3

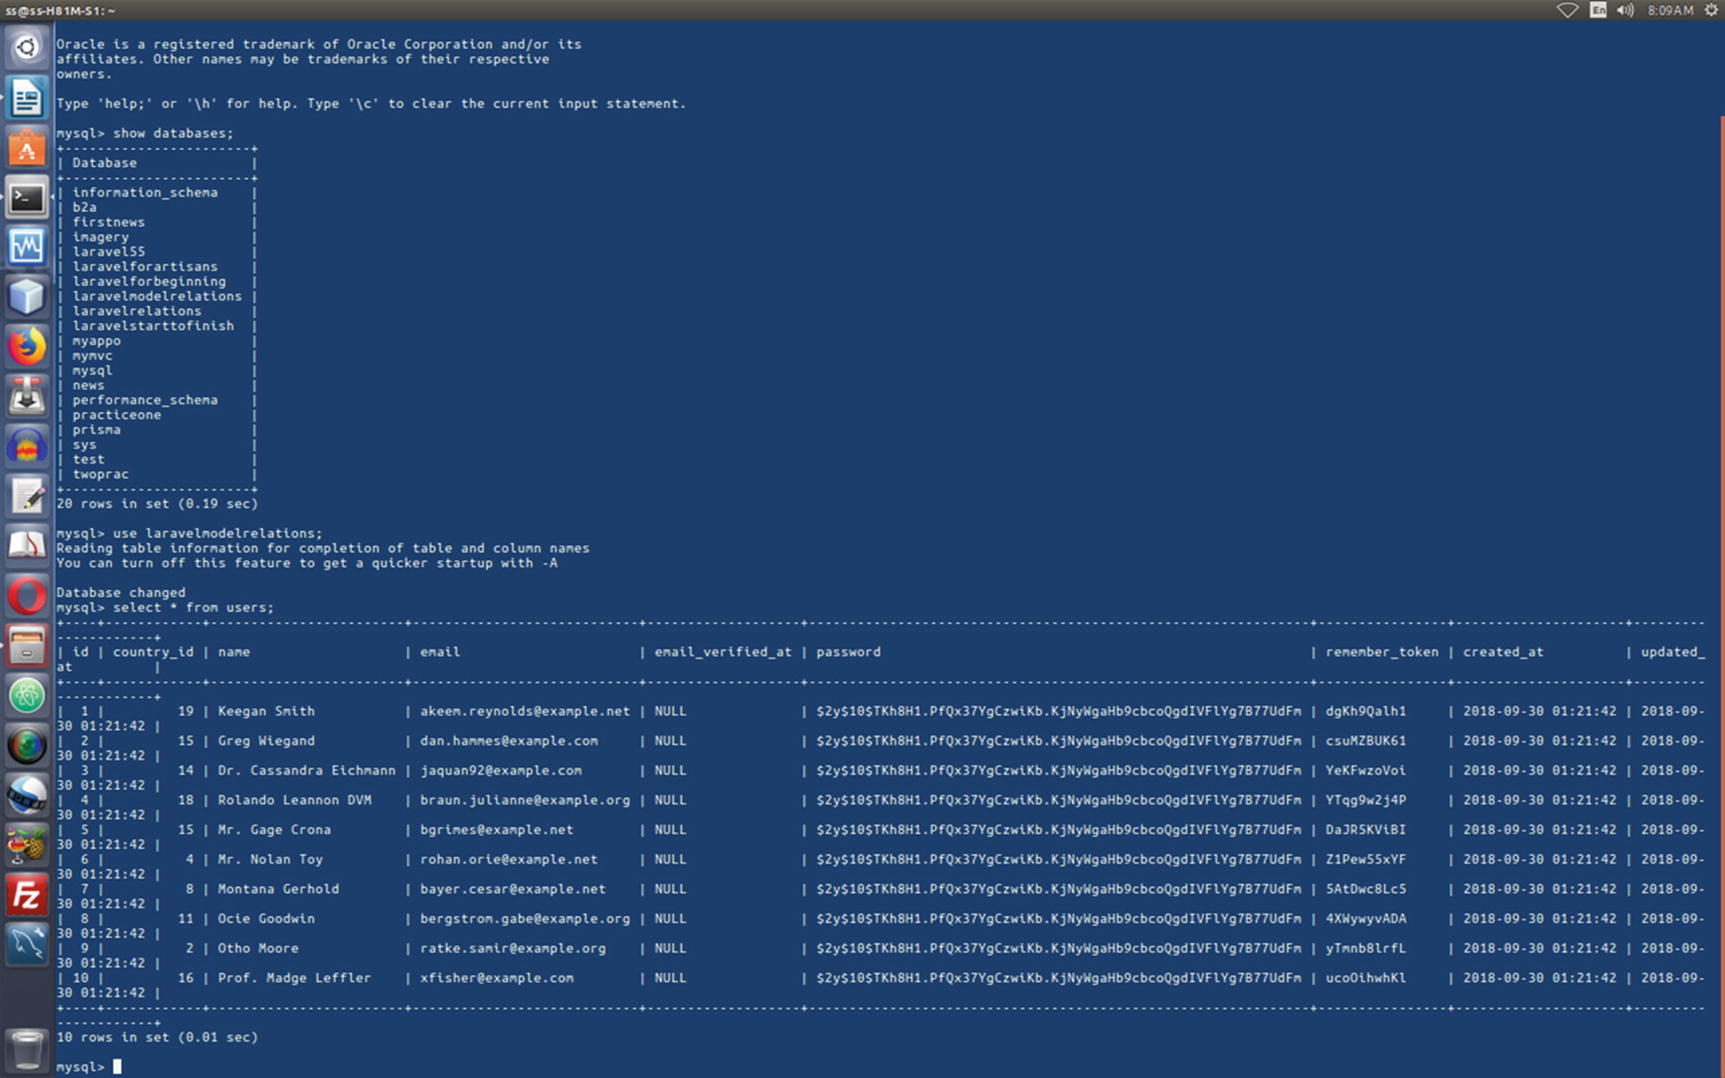
The home page of the article management application

To create the home page of your content management system (Figure 4-3), you need to slightly change the default routes/web.php page, and you can also change the code of the resource/views/welcome.blade.php file.
// code 4.21
//  routes/web.php
use AppArticle;
use AppTag;
Route::get('/', function () {
    $articles = Article::all();
    $tags = Tag::all();
    return view('welcome', ['articles' => $articles, 'tags' => $tags]);
});
All you have done here is to pass articles and tags separately. Now in the welcome.blade.php file, you will get the following output:
// code 4.22
// resources/views/welcome.blade.php
@extends('layouts.app')
@section('content')
<div class="container">
    <div class="row">
        <div class="col-md-8 blog-main col-lg-8 blog-main col-sm-8 blog-main">
          <div class="blog-post">
    <ul class="list-group">
         @foreach($articles as $article)
         <li class="list-group-item">
             <h2 class="blog-post-title">
                 <li class="list-group-item"><a href="/articles/{{ $article->id }}">{{ $article->title }}</a>
             </h2>
             Written by <a href="/users/{{ $article->user_id }}/articles">{{ $article->user->name }}</a>
         </li>
         @endforeach
    </ul>
            </div>
          <nav class="blog-pagination">
            <a class="btn btn-outline-primary" href="#">Older</a>
            <a class="btn btn-outline-secondary disabled" href="#">Newer</a>
          </nav>
        </div>
        <aside class="col-md-4 blog-sidebar">
          <div class="p-3">
              <h4 class="font-italic">Tags Cloud</h4>
            @foreach($tags as $tag)
            <font class="font-italic" color="gray"> {{ $tag->tag }}...
            @endforeach
          </div>
        </aside>
    </div>
</div>
@endsection
Let’s look at this line from the previous code:
Written by <a href="/users/{{ $article->user_id }}/articles">{{ $article->user->name }}</a>

The article object directly accesses the user object and gets the respective name associated with that article. How does this happen? This is a good example of a one-to-one relationship. If you click the link, you will reach the user’s page and can read all the articles written by that user. You need to understand one thing: every article belongs to one user, and you can access that user from that article. Laravel model relations handle that behind the scenes. To make them work properly, you have to define them in the models.

The next step will be to check all the models and finally define the relationship between them so that they can talk to each other to fetch the respective data. After that, you will build the resource controllers and views to complete the whole setup.

Next, you will see a series of code listings from your models so that you can associate these relational ideas with the models.
// code 4.23
// app/Article.php
<?php
namespace App;
use IlluminateDatabaseEloquentModel;
class Article extends Model
{
    protected $fillable = [
        'user_id', 'title', 'body',
    ];
    public function user() {
        return $this->belongsTo('AppUser');
    }
    public function users() {
        return $this->belongsToMany('AppUser');
    }
    public function tags() {
        return $this->belongsToMany('AppTag');
    }
}
I have not included the comment methods here. I will do that as you progress through the book. Initially, the Article model has one-to-one, one-to-many, and many-to-many relations with the User and Tag models.
// code 4.24
// app/Profile.php
<?php
namespace App;
use IlluminateDatabaseEloquentModel;
class Profile extends Model
{
    /**
     * The attributes that are mass assignable.
     *
     * @var array
     */
    protected $fillable = [
        'user_id', 'city', 'about',
    ];
    public function user() {
        return $this->belongsTo('AppUser');
    }
}
The Profile model has one method called user that defines the relationship with one User. You will see later how you can access the profile of any user from the user object.
// code 4.25
// app/Tag.php
<?php
namespace App;
use IlluminateDatabaseEloquentModel;
class Tag extends Model
{
    //
    protected $fillable = [
        'tag'
    ];
    public function articles() {
        return $this->belongsToMany('AppArticles');
    }
}
Next, you will take a look at the User model. It is important to note that the User model plays a vital role in this application.
// code 4.26
// app/User.php
<?php
namespace App;
use IlluminateNotificationsNotifiable;
use IlluminateFoundationAuthUser as Authenticatable;
class User extends Authenticatable
{
    use Notifiable;
    /**
     * The attributes that are mass assignable.
     *
     * @var array
     */
    protected $fillable = [
        'name', 'email', 'password',
    ];
    /**
     * The attributes that should be hidden for arrays.
     *
     * @var array
     */
    protected $hidden = [
        'password', 'remember_token',
    ];
    public function profile() {
        return $this->hasOne('AppProfile');
    }
    public function article() {
        return $this->hasOne('AppArticle');
    }
    public function articles() {
        return $this->hasMany('AppArticle');
    }
}

Currently, this model has one component missing, which is Comment. You will add it in the last stage. From the previous code, it is evident that the user has one profile, has one article, and many articles.

You have your database tables ready with dummy data. You have made your models ready to maintain the relationship among the objects. So, the time has come to make resource controllers. After that, you will build your views to test that your application works.

Relations Between Model, Database, and Eloquent

PHP database integration is a tedious process. It usually takes four essential steps to complete the database integration.
  1. 1.

    Laravel creates a connection.

     
  2. 2.

    Laravel selects a database; you know these parts, such as user name, password, etc have been defined in the .env file.

     
  3. 3.

    Usually, the third step is the most complicated one: performing a database query. Laravel’s Eloquent ORM handles that complicated part in such a decent manner that you don’t have to worry about it.

     
  4. 4.

    After that, Laravel automatically closes the connection. I have already discussed this topic in great detail.

     
There are some advantages to using a resource controller. With a single command, you can attach the controller to the associated model. Moreover, you can have every necessary method in one place. Let’s create the resource Comment controller and associate it with the Comment model. A single command will do this, as shown here:
// code 4.27
$ php artisan make:controller CommentController --resource --model=Comment
Let’s look at the newly created Comment controller. Now it is empty. However, it provides all the essential methods.
// code 4.28
// app/HTTP/Controllers/CommentController.php
<?php
namespace AppHttpControllers;
use AppComment;
use IlluminateHttpRequest;
class CommentController extends Controller
{
    public function index()
    {
    }
    public function create()
    {
        //
    }
    public function store(Request $request)
    {
        //
    }
    public function show(Comment $comment)
    {
        //
    }
    public function edit(Comment $comment)
    {
        //
    }
    public function update(Request $request, Comment $comment)
    {
        //
    }
    public function destroy(Comment $comment)
    {
        //
    }
}

The index() method will present the home page where you can show every comment in one place. Through the show() method , you can show each comment. While showing each comment, you can also show who the commenter is. The possibilities are endless. At the same time, by using this resource controller, you can create/store, edit/update, and finally destroy the comment object.

So, you create other resource controllers in the same way.
// code 4.29
$ php artisan make:controller UserController --resource –model=User
$ php artisan make:controller ArticleController --resource –model=Article
$ php artisan make:controller TagController --resource –model=Tag
Now you can define the routes in your routes/web.php file.
// code 4.30
//  routes/web.php
Auth::routes();
Route::get('/home', 'HomeController@index')->name('home');
Route::resource('users', 'UserController');
Route::resource('profiles', 'ProfileController');
Route::resource('articles', 'ArticleController');
Route::resource('comments', 'CommentController');
Route::get('/users/{id}/articles', 'ArticleController@articles');
Route::get('/', 'ArticleController@main');

I have also changed the main route. In the previous process, you used an anonymous function to return the view; now you are taking that view under the main() method of ArticleController.

Creating Views to Show Relationships

For the first phase of your application, you are ready to create the views. You have seen the welcome.blade.php page. To articles along with other associated objects, you are going to learn how to create three more view pages. They are index.blade.php, show.blade.php, and articles.blade.php.

Here’s the code of the index() method in ArticleController.php :
// code 4.31
// app/HTTP/Controllers/ArticleController.php
    public function index()
    {
        $articles = Article::orderBy('created_at','desc')->paginate(4);
        $users = User::all();
        $tags = Tag::all();
        return view('articles.index', compact('articles', 'users', 'tags'));
    }
You are passing all articles with pagination links, users, and tags to the index page of all articles so that you can move to other pages easily. You can do that because of the Eloquent ORM, which provides you with a simple yet elegant ActiveRecord implementation for working with your database. Here you might have noticed that each database table has a corresponding model, and I have used that to get all the records, as follows:
$articles = Article::orderBy('created_at,'desc')->paginate(4);
Here, the model Article allows you to query data in the tables, and you have just passed that data to the views with pagination links (here showing four articles per page). In the same way, later you will insert the data into the database. Next, you will get those values in the index page, so the code of resources/views/articles/index.blade.php looks like this:
// code 4.32
// resources/views/articles/index.blade.php
@extends('layouts.app')
@section('content')
<div class="container">
    <div class="row">
        <div class="col-md-6 blog-main col-lg-6 blog-main col-sm-6 blog-main">
            <div class="blog-post">
    <ul class="list-group">
         @foreach($articles as $article)
         <li class="list-group-item"><h2 class="blog-post-title">
                 <li class="list-group-item"><a href="/articles/{{ $article->id }}">{{ $article->title }}</a>
             </h2>
         </li>
         @endforeach
         {{ $articles->render() }}
    </ul>
            </div>
          <nav class="blog-pagination">
          </nav>
        </div>
        <aside class="col-md-3 blog-sidebar">
          <div class="p-3">
              <h4 class="font-italic">All Writers</h4>
            @foreach($users as $user)
                 <a href="/users/{{ $user->id }}">{{ $user->name }}</a>...
         @endforeach
          </div>
        </aside>
        <aside class="col-md-3 blog-sidebar">
          <div class="p-3">
              <h4 class="font-italic">Tags-Cloud</h4>
            @foreach($tags as $tag)
                 <a href="/tags/{{ $tag->id }}">{{ $tag->tag }}</a>...
         @endforeach
          </div>
        </aside>
    </div>
</div>
@endsection

You loop through the articles item and grab four articles on each page, and the code {{ $articles->render() }} gives you the pagination links.

Now, if you type http://localhost:8000/articles in your browser, it will show the page in Figure 4-4 with pagination in place.
../images/435350_2_En_4_Chapter/435350_2_En_4_Fig4_HTML.jpg
Figure 4-4

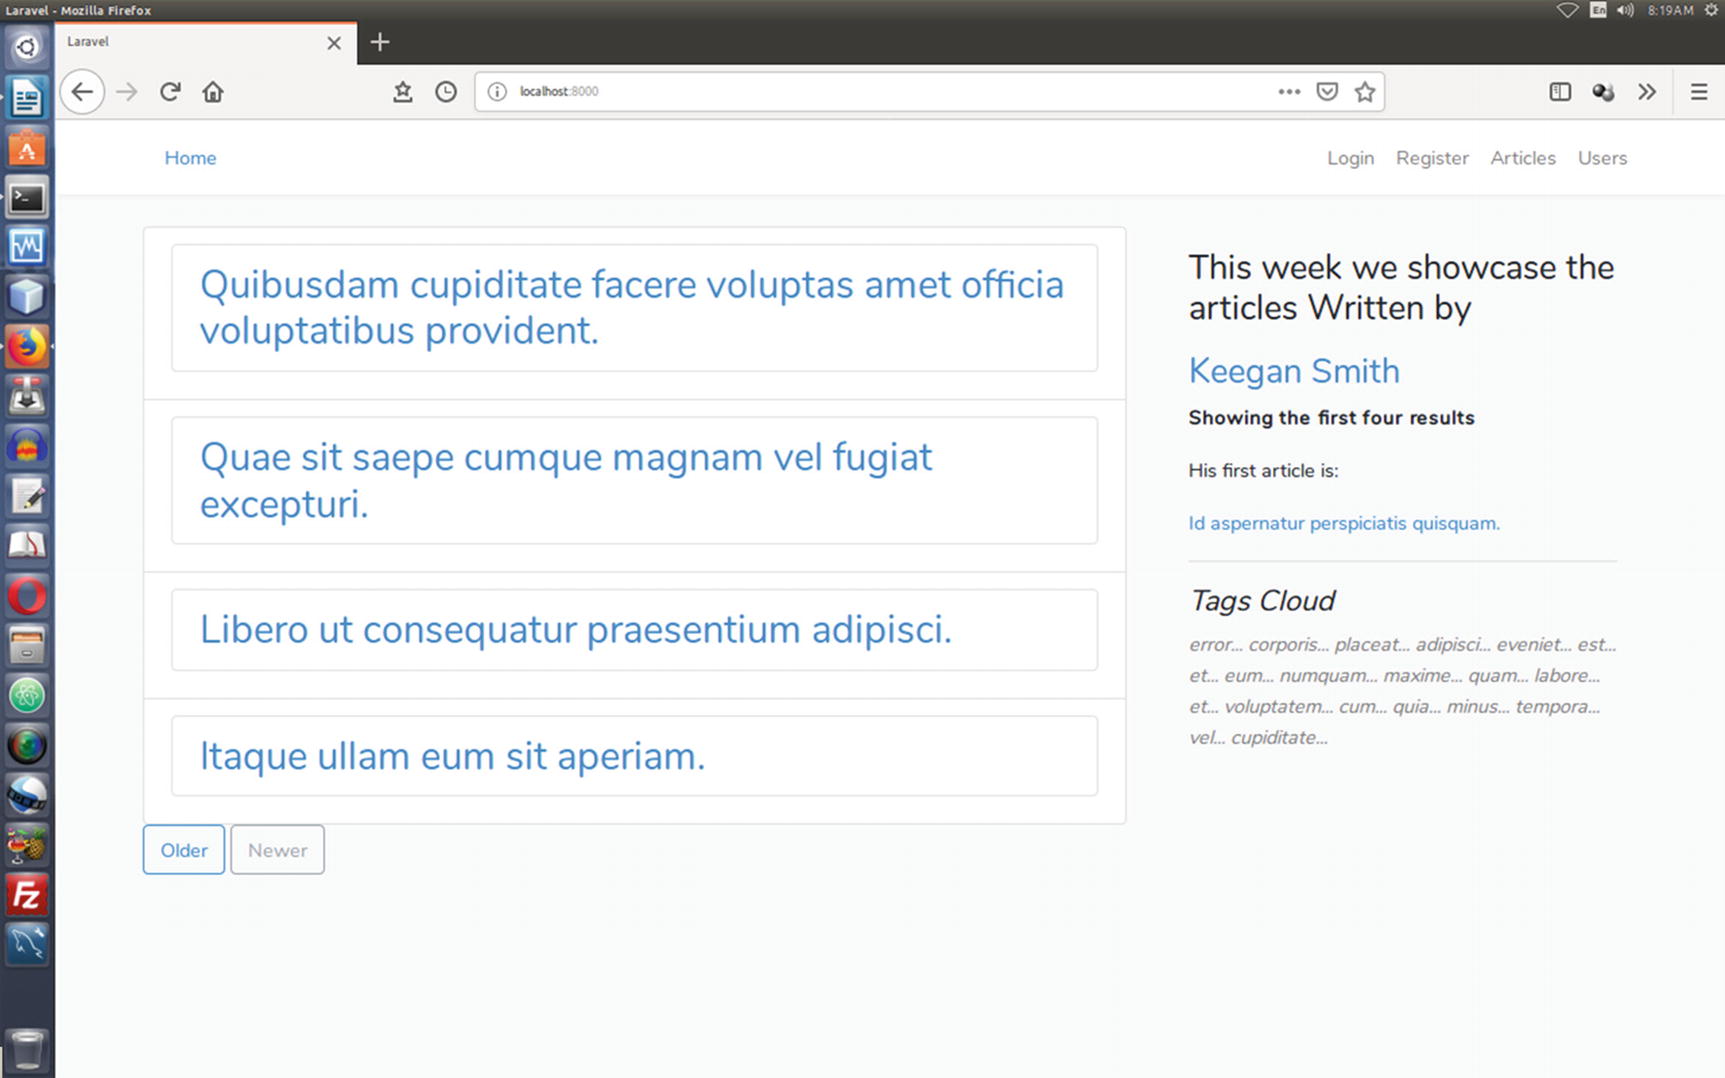
The Articles page of the article management application

This is where you find all the tables related to the respective models. You must understand the naming conventions that Eloquent ORM follows. When you create the model on the command line, Laravel creates a table for that. By convention, the snake_case plural name of the class has been used as the table name. You saw that for the Article model, a table articles has been created. You didn’t tell Eloquent which table to use for your Article model. By default, it has chosen the name. First, in the ArticleController using the index() method , you start retrieving data from the database. Here the Eloquent model has acted as a powerful query builder allowing you to fluently query the database associated with the database.

Instead of writing this code in the main() method :
$articles = Article::all();
you can add constraints to queries and then use the get method to retrieve the results in this way:
$articles = Article::where('user_id', 1)->orderBy('title', 'desc')->take(5)->get();

This has brought a massive change in the whole structure of the main page at http://localhost:8000. You have used constraints to choose the user_id set to 1 and ordered the titles in descending order. The four records have been taken from the database.

Finally, your main() method of ArticleController looks like this:
// code 4.33
// app/HTTP/Controllers/ ArticleController.php
public function main()
    {
        $articles = Article::where('user_id', 1)->orderBy('title', 'desc')->take(4)->get();
        $tags = Tag::all();
        return view('welcome', ['articles' => $articles, 'tags' => $tags]);
    }
The welcome.blade.php file now looks like this:
// code 4.34
//resources/views/ welcome.blade.php
<ul class="list-group">
         @foreach($articles as $article)
         <li class="list-group-item">
             <h2 class="blog-post-title">
                 <li class="list-group-item"><a href="/articles/{{ $article->id }}">{{ $article->title }}</a>
             </h2>
         </li>
         @endforeach
    </ul>
...
<aside class="col-md-4 blog-sidebar">
          <div class="p-3">
              <h3 class="blog-post-title">This week you have showcased only the articles
                  Written by <a href="/users/{{ $article->user_id }}/articles">{{ $article->user->name }}</a>
        </h3>
              <strong>Showing the first four results</strong>
              <hr class="linenums" color="red">
              <h4 class="font-italic">Tags Cloud</h4>
            @foreach($tags as $tag)
            <font class="font-italic" color="gray"> {{ $tag->tag }}...
            @endforeach
          </div>
        </aside>

You saw before how this logic looks in the home page (Figure 4-3). In the left sidebar panel, you are showcasing the articles by the user (with an ID of 1).

As you see, methods like all() and get() retrieve multiple results. Actually, an instance of IlluminateDatabaseEloquentCollection has been returned. This Collection class provides many helpful methods for working with the Eloquent results. In this case, you can loop over the collection like an array.

However, the most interesting line in the code is as follows:
<h3 class="blog-post-title">This week we have showcased only the articles
                  Written by <a href="/users/{{ $article->user_id }}/articles">{{ $article->user->name }}</a>
        </h3>
Why is this the most fascinating line of all? The $article object directly accesses the $user object and gets its name property. In the ArticleController main() method , you have directed the Article model to select the articles belonging to the user with an ID of 1. In addition, in the Article model, you are defining the method in this way:
// code 4.35
// app/Article.php
public function user() {
        return $this->belongsTo('AppUser');
    }

It is true that a user has many articles; likewise, it is true that a particular article belongs to a particular user.

In the next chapter, you will see those relations in great detail.

..................Content has been hidden....................

You can't read the all page of ebook, please click here login for view all page.
Reset
18.118.163.207