So far we have created our entities and their metadata to instruct Entity Framework Core 5 what to create. As you will soon see, the process of taking those instructions and having them be interpreted by Entity Framework Core 5 to create your database is as simple as creating an initial migration and running that migration using Visual Studio. We will primarily be using the Microsoft SQL Server provider for Entity Framework Core in this book and thus will be creating a SQL Server database.
Setting the Connection String
Adding a Connection String to appsettings.json
Startup Class That Points to the SQL Server Database
Now that our application is pointed to the database, we can actually create the database through adding a migration.
Creating the Initial Migration
The next step in creating a database through code in Entity Framework Core 5 is to create an initial migration.
To create the initial migration, we can use the NuGet Package Manager Console and run the “Add-Migration” command passing in the name of our migration as the second parameter.
Let us now create the initial migration and name it “InitialCreate”. Open the NuGet Package Manager Console and change the Default project dropdown to your DAL project and run this command: “Add-Migration InitialCreate”. Also make sure your web project is set as the Startup project in your solution.

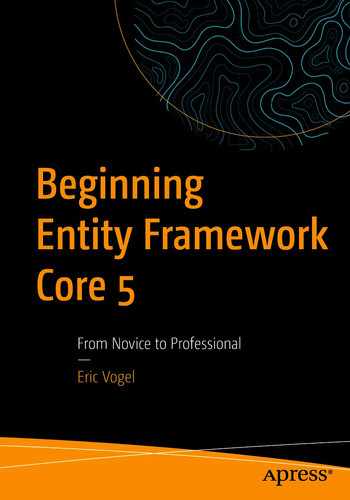
Migrations Folder and Class File Created
InitialCreate Migration Class
I will go over how to decipher this file and delve deeper into migrations in Chapter 14. Now that the migration is created, let’s run it to create our “EfCore5WebApp” database in the SQL Server instance defined in our appSettings.config file in our web project.
Creating the Database from the Migration

Running Our Migration
The “Update-Database” command is what we will use to update the database whenever we add a new migration to our project.
Connect to the New Database from Visual Studio
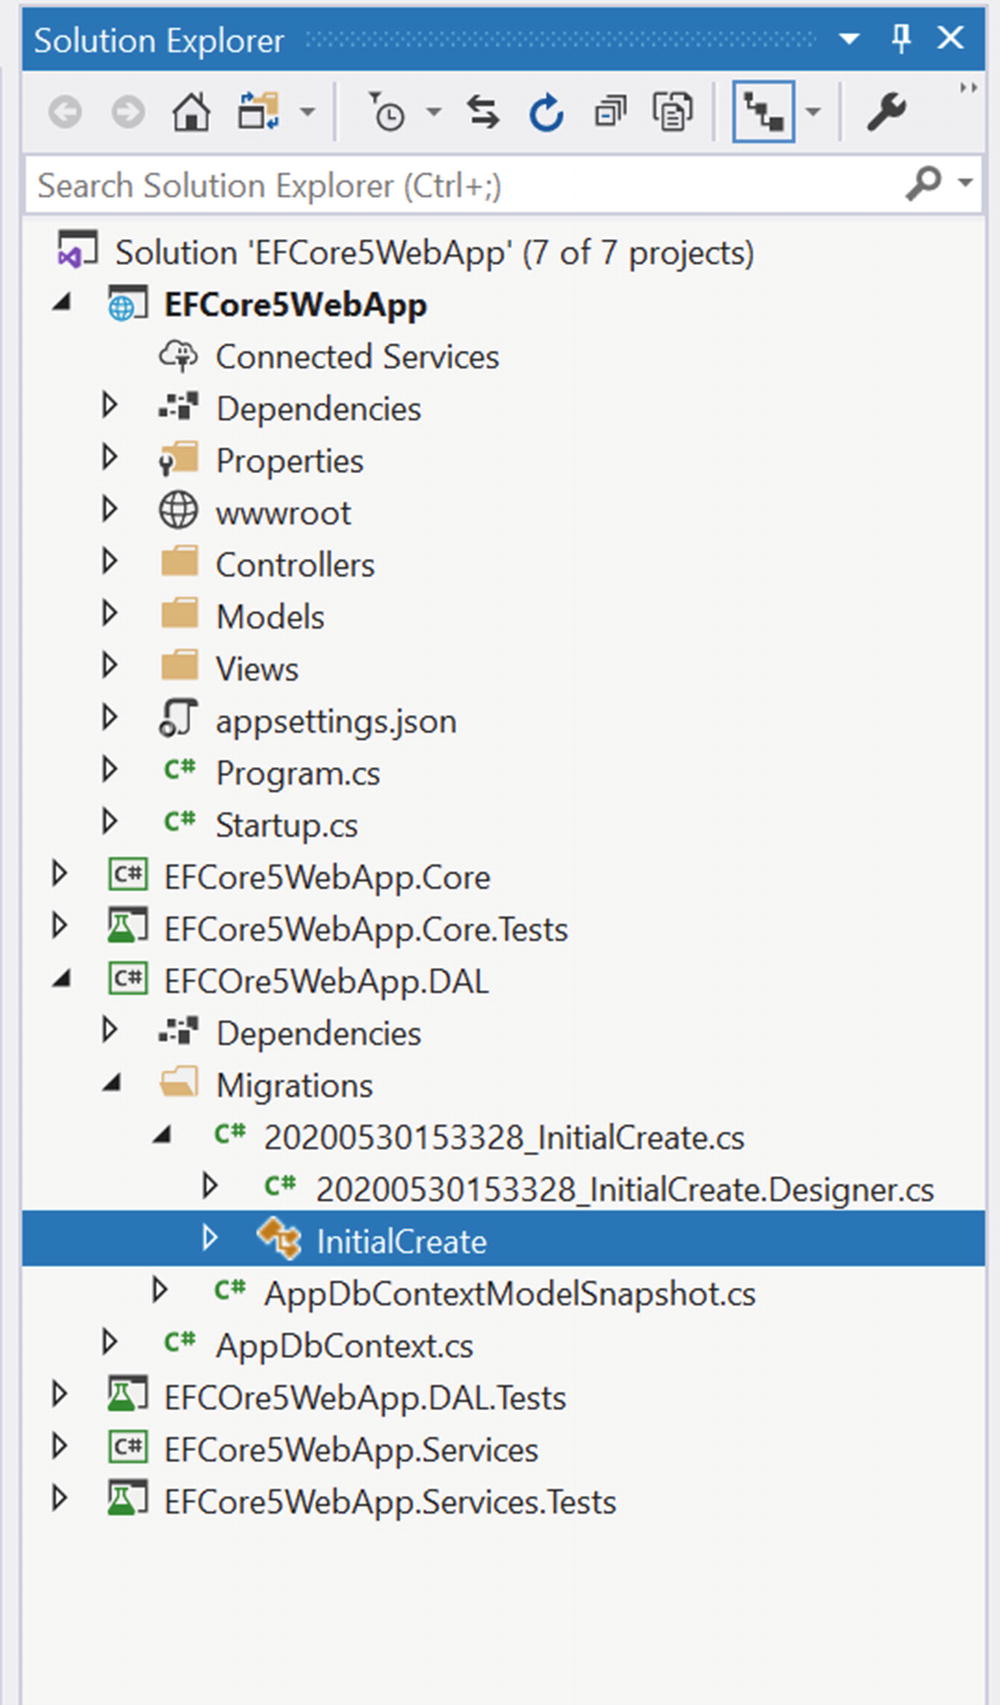
Starting a LocalDb SQL Server Instance
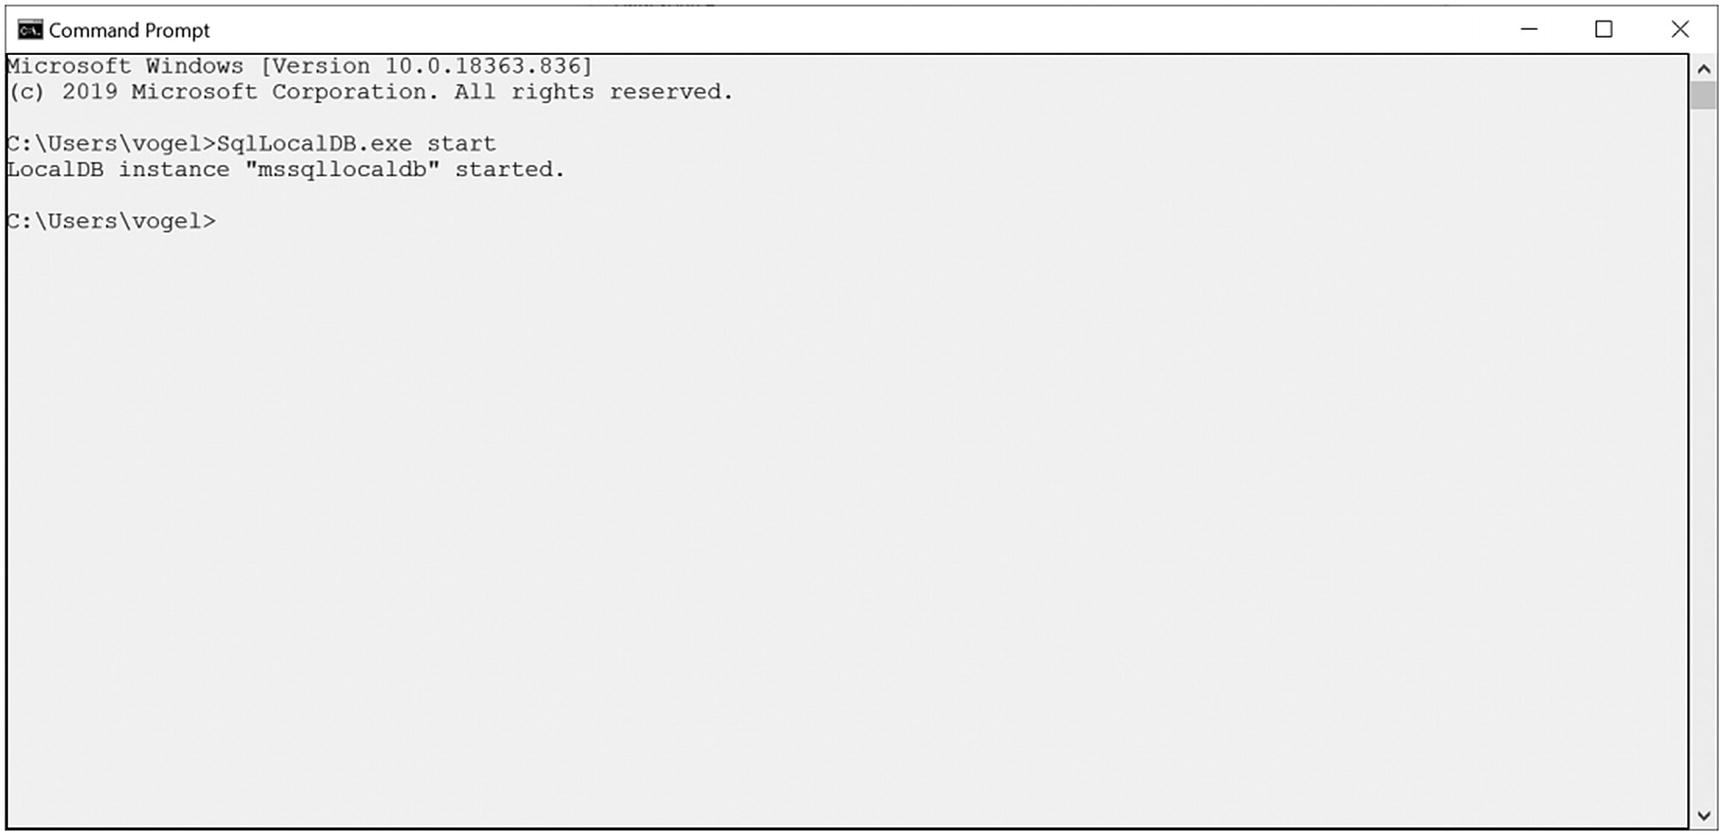
Adding a Database Connection
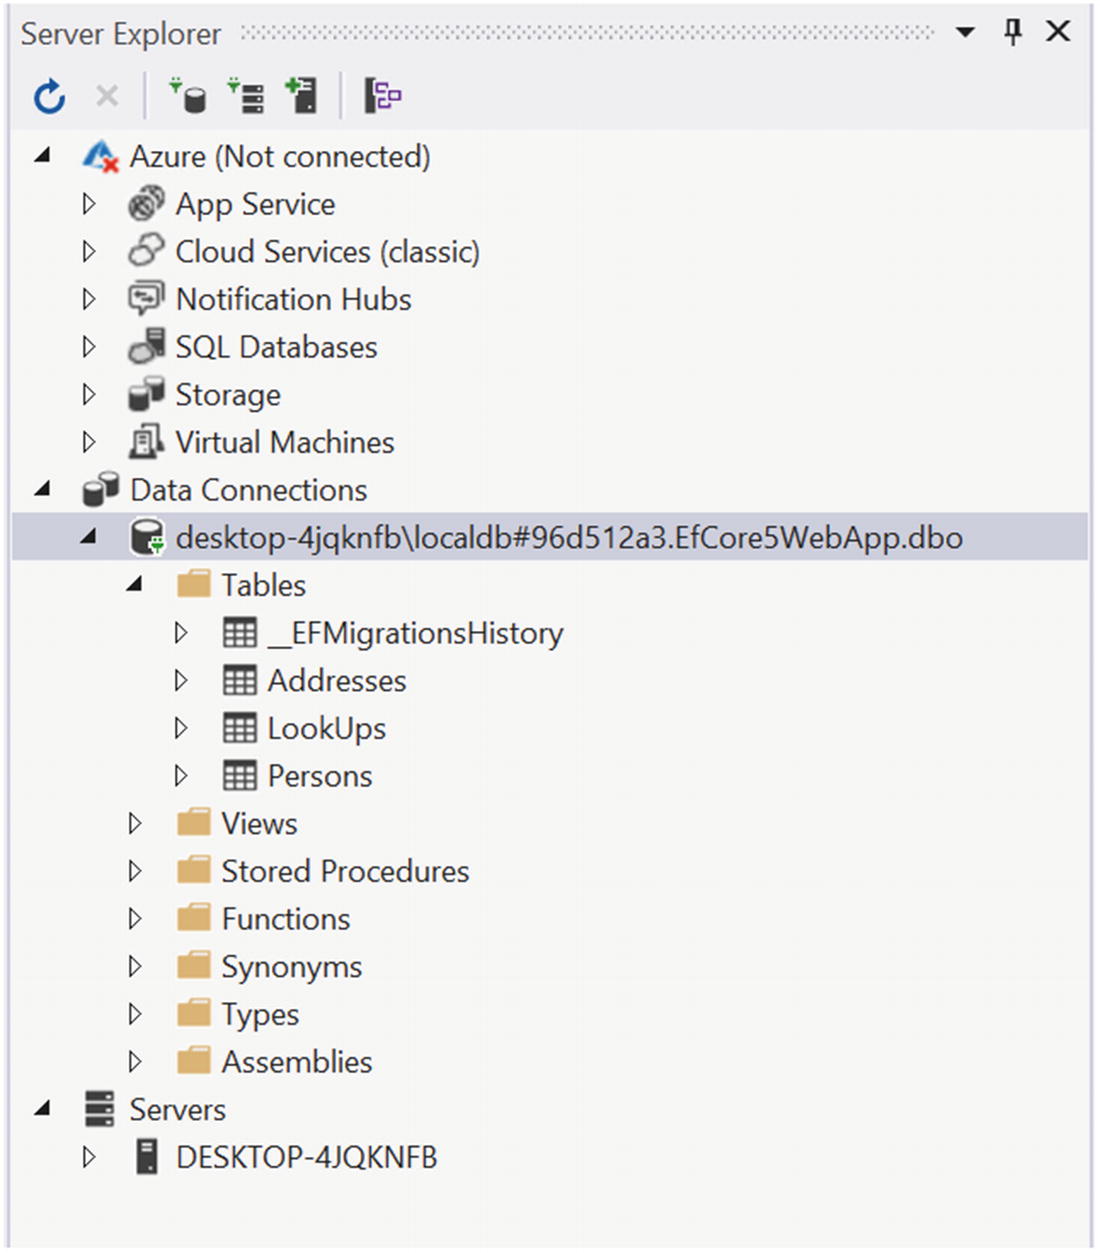
Browsing Our Database
Summary
In this chapter, we have gone through the journey of creating a database using Entity Framework Core 5. First, we created the connection string that tells our app how to connect to a SQL Server database. Then we used Entity Framework tooling to create a migration by using the “Add-Migration” command that generated all the code to create our database schema. After that, we used Entity Framework tooling through the “Update-Database” command to run the migration code. Lastly, we started and connected to our created database. In the next chapter, we will see how to seed our newly created database with data.