Problem Overview
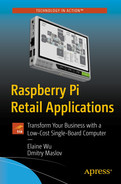
A touchscreen directory at a shopping mall
In addition to location data and map listings, digital catalogs can also provide local information, including weather, transportation options, and digital advertisements. The most advanced directories can even send map data to mobile phones.
Interactive digital media help retail businesses interact better with and help their customers. Most retailers have begun to use touchscreen, retail, digital signage solutions and creative interactive content to attract customers and improve their in-store experiences. This includes using interactive mirrors, videos, touchscreens, and more. It can be cost effective and easy to set up a robust interactive digital solution with a credit card-sized SBC, such as Raspberry Pi.
You can use touchscreen navigation solutions to help your visitors and customers easily navigate your store. You can design the most advanced digital signage path-finding solution on a very small budget using Raspberry Pi. Furthermore, you can remotely update directory information. Interactive way-finding maps provide three-dimensional navigation to help customers locate events, promotions, businesses, or other destinations at your facility.
Business Impact
Interactive directories and mobile robots with touchscreens are changing the way retail stores advertise and help customers. Way-finding touchscreen signage enables the retail industry to create a more efficient shopping experience by meticulously drawing a map of a mall. Through interactive experiences, retail screens can modernize the store’s image and create a lasting, positive experience. The most important thing is to provide customers with the most convenient and immediate way to obtain the information they are looking for in a mall or store.
Traditionally, visitors may have used a printed brochure of a shopping mall map to guide them. However, a one-page flyer cannot include everything you want to reach out to every customer. An interactive touchscreen-enabled directory—or perhaps even a mobile directory robot—can provide guidance to customers and promotion opportunities to retailers.
By simply using a single-board Human Machine Interface (HMI), you can easily promote in-store offers, display current information about events, and deliver other important messages to customers. With Raspberry Pi-based interactive devices integrated with a touchscreen and customized using dashboard software, retailers can display all kinds of mall activities. You can design a multitude of scenarios to meet customers’ shopping demands in different areas of your store, help them find the right routes, and reach them with advertisements.
Interactive maps with routes
Best sales catalogs
Facilities
Upcoming promotions
Event calendars
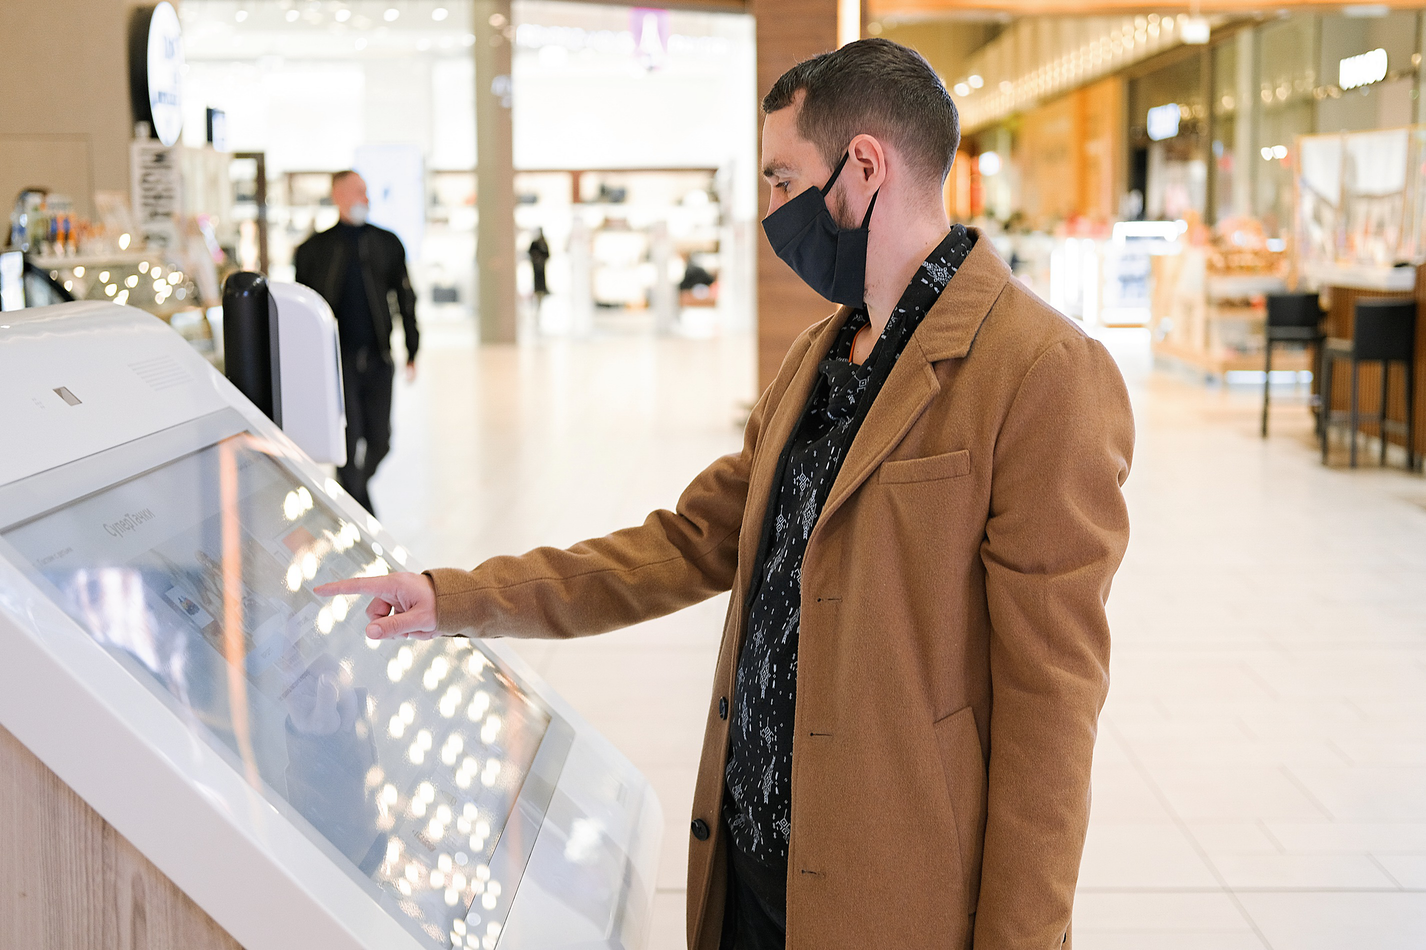
A touchscreen directory being used for indoor navigation
A touchscreen directory allows shoppers to find information about outlets and amenities and allows business owners to advertise special promotions in order to attract more customers.
A touchscreen directory embedded with a Raspberry Pi can be installed anywhere. You can set it up in the lobby of the mall or you can install it at the entrance of your shop. It can also be used for internal purposes if you are looking for a simple directory to guide employees through your offices. You can display anything you like on this directory, such as information about holidays, employee contact details, or anything else that is important to you and your company. Raspberry Pi has many applications in retail environments because it is small and inexpensive, yet versatile enough to handle all kinds of tasks that come your way. This chapter provides a step-by-step guide to building a touchscreen directory using a Raspberry Pi-powered HMI device with a high-resolution touchscreen display.
Related Knowledge

An example of HMI device interface
HMIs, also known as user interfaces (UIs) or operator interface terminals (OITs), include hardware and software solutions. They are used between systems/machines and human operators to exchange information and communication. HMIs can handle the control, management, and/or visualization of equipment processes, ranging from simple touchscreen inputs to control panels of highly complex industrial automation systems.
HMIs come in various form factors, from built-in screens on machines, to panel PCs, to tablets, but no matter what their format or the terminology you use, their purpose is to provide information on mechanical performance and progress.

reTerminal, a Raspberry Pi 4 CM carrier board with a touchscreen and built-in sensors
In an industrial environment, HMIs play a key role. In the context of increasing digitization, HMIs have become irreplaceable as a control plane for industrial operations and equipment of various scales.
For example, factory operators can use HMIs to monitor, manage, and control autonomous machines and production lines. On the other hand, HMIs have become an important part of the operability of the system. They can control field-deployed equipment that may not be physically reachable, such as in large-scale, remote IoT.
In order to create a shopping directory UI that can be run on a Raspberry Pi, you need to choose a suitable Python GUI (graphical user interface) framework tool. As an interactive programming language, Python is currently leading the trend (Top Computer Languages 2021: StatisticsTimes.com) and is relatively easy to use. Starting to write a GUI framework is not a difficult task.
Python has been the leading programming language among five countries: the United States, India, Germany, the United Kingdom, and France, which surpasses the second highest usage of Java. Python’s usage is more than double that of Java in Germany, the United Kingdom, and France.

The Tkinter logo
For this chapter’s project, a digital shopping directory deployed into reTerminal, we use Tkinter as the GUI framework.
Tkinter is a Python-binding package for the Tk GUI toolkit, built with the standards of the Python interface of the Tk GUI toolkit and the GUI toolkit of Python. Tkinter includes Python’s standard libraries for Linux, Microsoft Windows, and macOS X.
The tkinter package (the Tk interface) is the standard Python interface to the Tk GUI toolkit. Since Tkinter is built into the Python installation package, you can import the Tkinter library after installing Python. For the purposes of simplifying the interface development, we utilize PAGE, a GUI generator, to create the layout and populate it with different widgets. PAGE is a cross-platform drag-and-drop GUI generator. It allows users to easily build a Python GUI window containing a series of Tk and ttk widgets. PAGE is derived from Virtual Tcl, forked to generate Python modules to implement the desired GUI.
Implementation
- 1)
Basic Tkinter usage.
- 2)
Build an interface with the PAGE GUI generator.
- 3)
Deploy it into the Raspberry Pi
This section walks you through the development of a touchscreen-based application for the Raspberry Pi and the use of the Tkinter module in Python. The main purpose of this project is to demonstrate how to build user interfaces using Python and Tkinter. The main advantage of using Tkinter is its simplicity and ease of use. At the end of this project, you will have built a simple directory system that can be used on a touchscreen for the Raspberry Pi.
Basic Tkinter Usage
You can find the following code in the Chapter_4/exercise_1 folder.

Sample Tkinter app execution result
You can now use the mouse or a touchscreen to click the button and close the window.
Build an Interface with the PAGE GUI Generator
Use the steps in the following sections to build the interface using the PAGE GUI generator .
Install PAGE GUI Generator
It’s better to install the PAGE GUI generator and set up the preliminary design on your PC. Next are the instructions for installing and using PAGE on Ubuntu 20.04 Desktop.
Download page-6.2.tgz from https://sourceforge.net/projects/page/files/page/.

PAGE files extracted to the Chapter_4/page folder
This will put the whole distribution in the subdirectory called page.
From the File menu, choose New to start new project-building interfaces. Save this to the exercise_2 folder in Chapter_4 under the name directory.tcl.
Create the UI with Tkinter Widgets in PAGE
Next, you are going to create an instance of tk.Label, insert the shopping mall map image into that label, create several buttons to pin at different locations, and finally add the corresponding message box to shops using another instance of tk.Label.
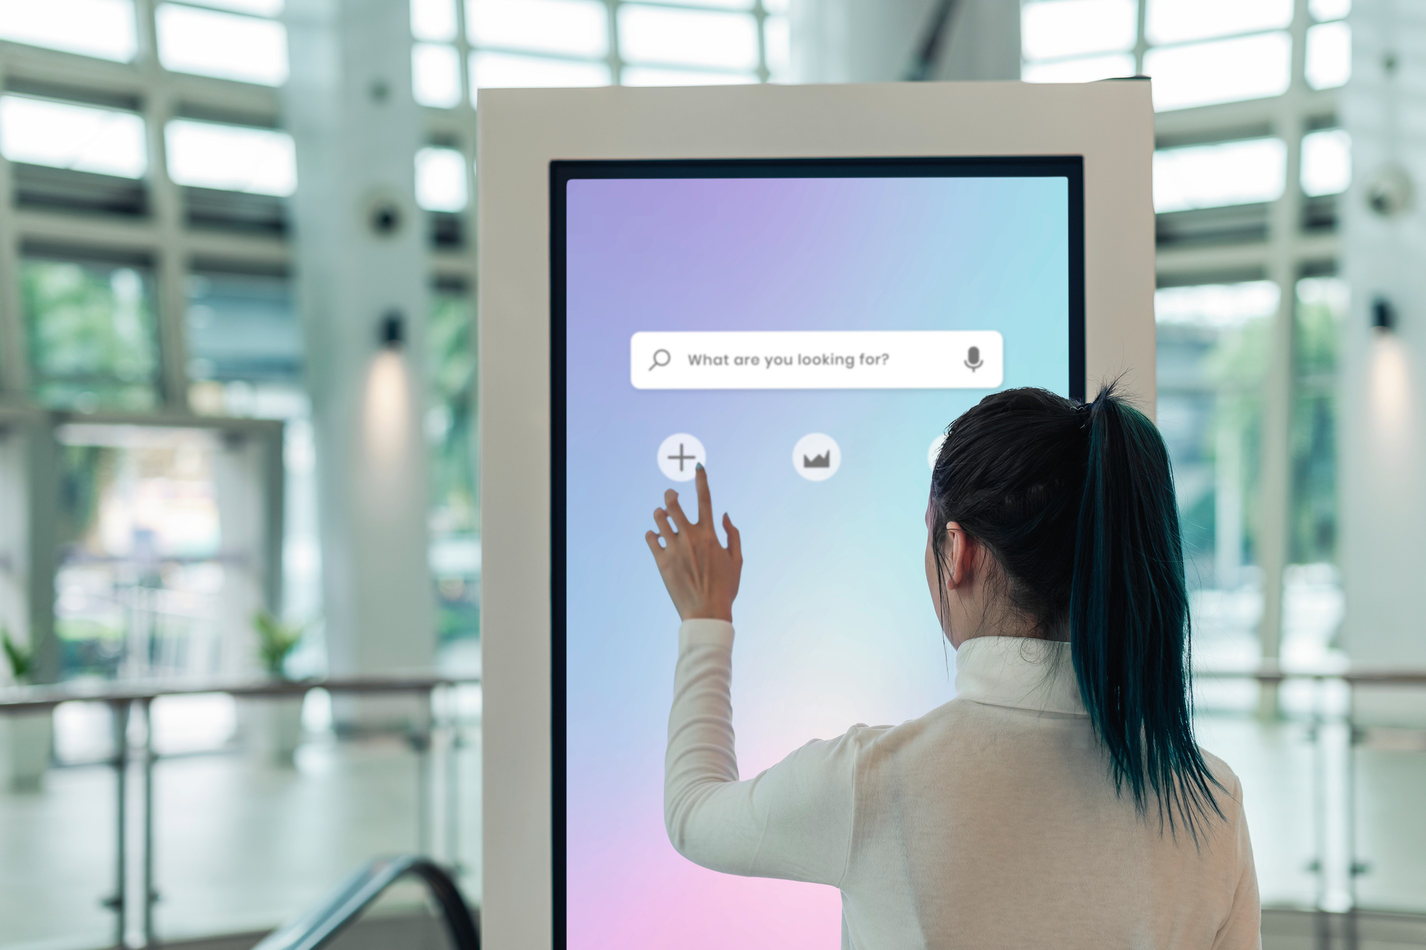
The first thing you should do is change the name of the main window. You can do that by editing the Alias and Title entries in the Attribute Editor. Set Alias to Directory and Title to Directory. Additionally, set the width to 1280 and the height to 720, and make them non-resizable.
Main window and map label with an image of the mall map set

Button position and attributes
If you get the You cannot insert a widget inside a label! error message, it means you’re trying to insert the Button widget into the map label. Click the empty space in the window instead. After the button is placed in the window, move it to the desired position. Choose an icon for every button in the Attribute Editor by clicking the three dots icon next to the image field. Be sure to provide a meaningful alias for every button, such as sears_button.
Finally, place a shop description. To do that, create a new label and place it inside the Main window. Edit the alias to description_label. Don’t set the text yet, as you’ll do that later, when you write the program logic.
You need to create only one label for the shop description.
Write Program Logic in Python
While you have several buttons, you only need one label, since you can move the label and change its text programmatically, depending on which button was pressed.

Python 3 code export interface
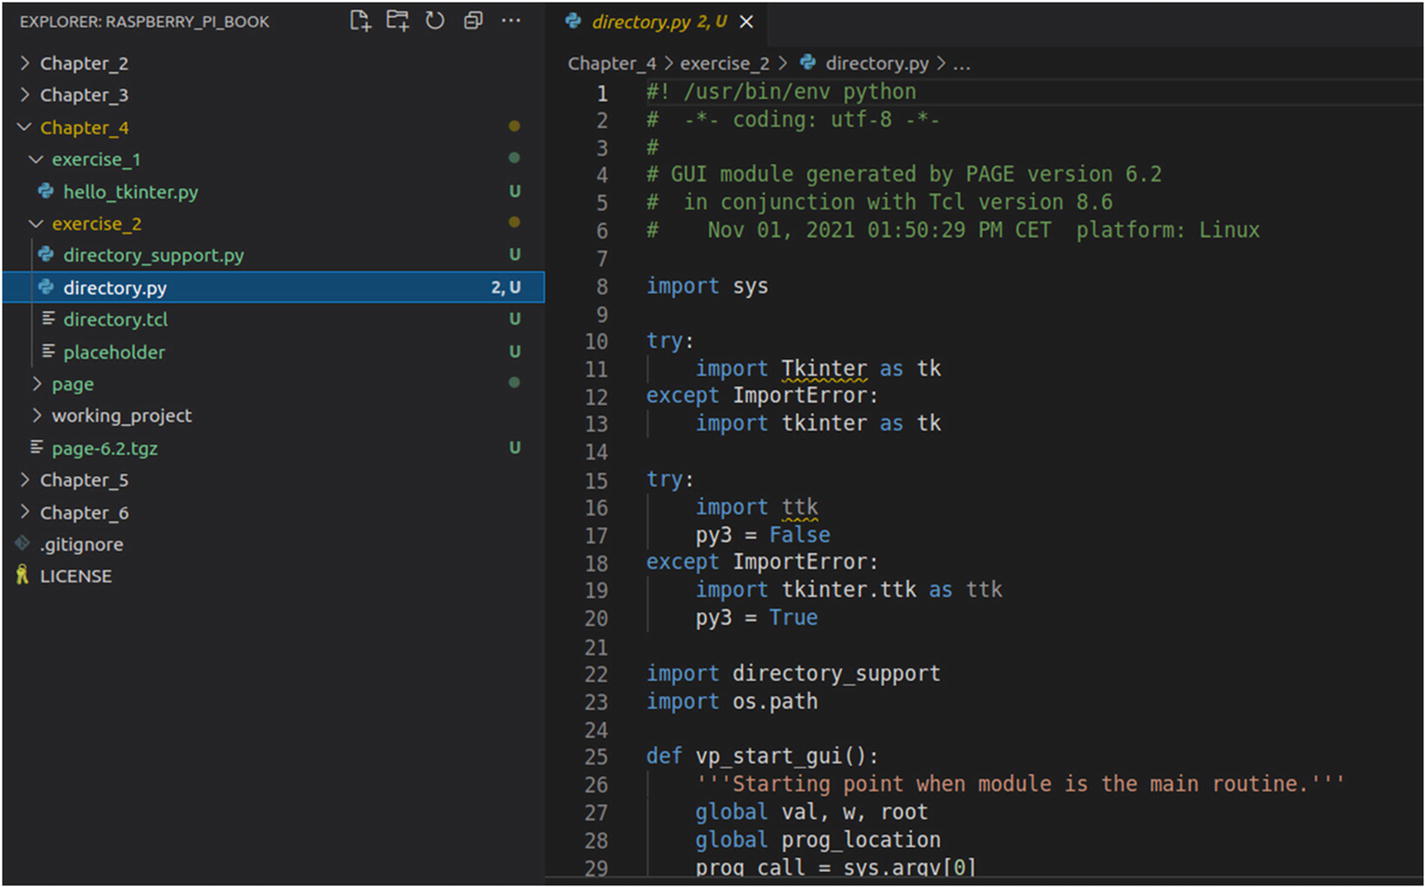
Project structure in VS Code

Added show_label (method ) and parameters for zara_button

Working project displayed on reTerminal
Pro Tips
What are some alternatives to the relatively simple interface offered by Tkinter? Other popular and much more flexible options for creating user interfaces with Python include PyQt and PySimpleGUI. They can be a bit more challenging to learn, but offer a lot of power and extensibility.

QT logo
PySide2 and Qt5 are based on the Qt for Python project. There is strong compatibility between the two frameworks, making it nearly 99.9 percent of the same API. PySide2 and Qt5 provide powerful and simple features for Python developers. There are also abundant documentation and examples you can find in the developer community for both beginners and experts to use as examples when developing applications. Qt for Python is popular, with extensive community support and more than 1 million software developers.
PySimpleGUI logo
Summary
In the chapter, you learned how to transform Raspberry Pi 4 into an interactive directory to help mall customers or other retail environments. The chapter discussed the development of a touchscreen-based application for the Raspberry Pi, together with the usage of the Tkinter module in Python.
The main purpose of this project is to demonstrate how to build user interfaces using Python and Tkinter. The main advantage of using Tkinter is its simplicity and ease of use. At the end of this project, you will have built a simple directory system that can be used on a touchscreen for the Raspberry Pi. It can be run, for example, on the Seeed Studio reTerminal, a carrier board for Raspberry Pi 4 CM. We used the PAGE GUI generator to generate a UI for the directory and then translated it into a Python 3 project.