
If you have worked on projects in a team environment, or if you need a place to keep your own code safe, then you’ll agree that using a source control solution is essential. It doesn’t matter if it’s a large enterprise solution or a small Pet project, Visual Studio makes it extremely easy for developers to use Git and GitHub.
Git is a tool that developers install locally on their machine. GitHub is an online service that stores code safely that has been pushed to it from computers using the Git tool.
In 2018, Microsoft acquired GitHub for $7.5 billion in Microsoft stock. This acquisition of GitHub brought about changes to their pricing tiers. Previously, developers could only create public repos on the free tier. In January 2019, however, GitHub announced that developers can now create unlimited private repositories on the free tier.
Create a GitHub account
Create and clone a repository
Commit changes to a repository
Create a branch from your code
Create and handle pull requests
These are all things that developers will do on a daily basis when working with Git and GitHub. While the process might change slightly if you use a different source control strategy, the concepts remain the same.
Create a GitHub Account

A screenshot depicts the signup page of GitHub. It includes entering your email, creating a password, and entering a username.
Sign up for GitHub
Enter a username (Figure 5-1), email address, and password. GitHub then checks your password to verify that it does not appear on a list of known compromised passwords. If all checks out, a confirmation code is sent to your email address. After verifying your email address, GitHub will take you through a short personalization process before finally offering you an option to sign up for the Team account or continuing with the free account.
Unlimited public and private repositories
Three collaborators for private repositories
Issues
Project tables and boards
Pages and wikis for public repos
GitHub Actions (2000 minutes/month) or free for public repos
Unlimited public and private repositories
Unlimited collaborators
Issues
Project tables and boards
Repository insights
Automatic code review assignment
GitHub Actions (3000 minutes/month) or free for public repos
GitHub Team on the other hand allows a team of developers to collaborate on projects, and GitHub bills for GitHub Team on a per-user basis.
For more info on all GitHub’s products, browse to the following URL: https://docs.github.com/en/get-started/learning-about-github/githubs-products.

A screenshot depicts the repositories page. It includes the following options: set status and edit profile.
Create a new repository
The next logical step is to create a repository for your new project. Let’s have a look at that in the next section.
Create and Clone a Repository

A screenshot depicts the options under the Git menu. Clone, create Git repository, local repositories, commit or stash, and settings.
Create Git Repository

A screenshot depicts a page for creating a Git repository. The options include initializing a local Git repository and creating a new GitHub repository.
Create a Git repository
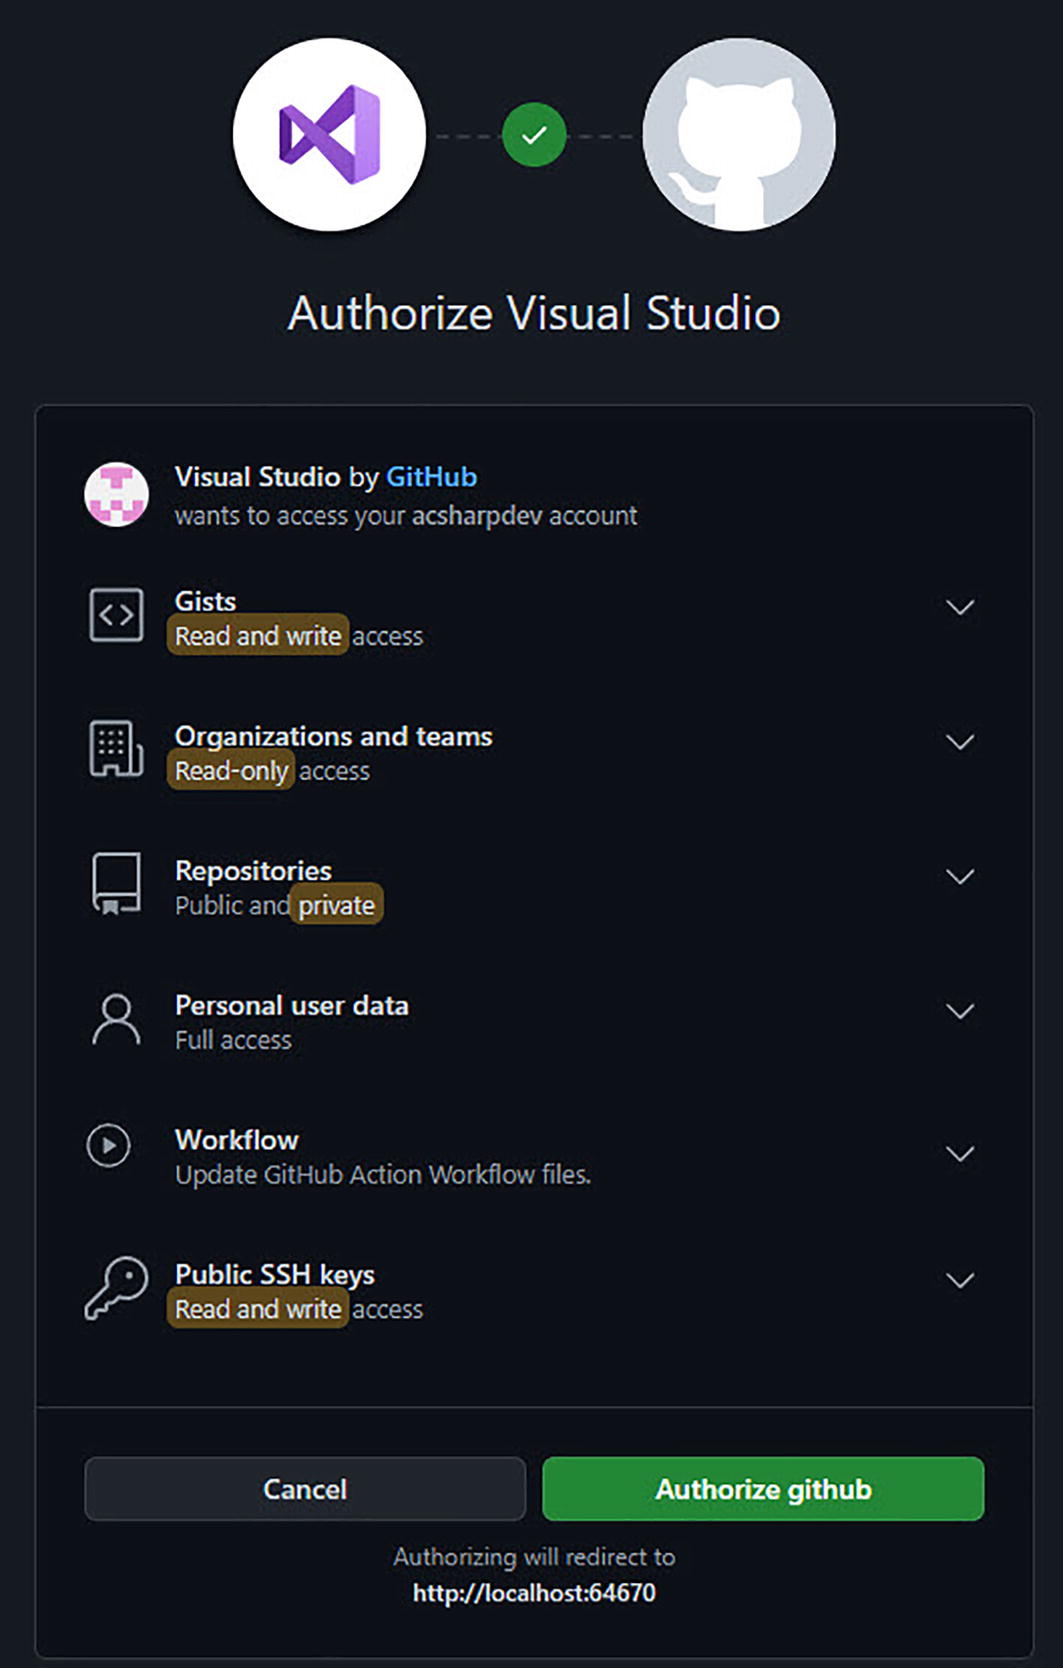
A screenshot depicts a page for authorizing visual studio. The options are visual studio by GitHub, gists, organizations and teams, repositories, personal user data, workflow, and public S S H keys.
Authorize Visual Studio in GitHub

A screenshot depicts a page for creating a Git repository. It includes the options for initializing a local Git repository, creating a new GitHub repository, and pushing your code to GitHub.
Create and push your code
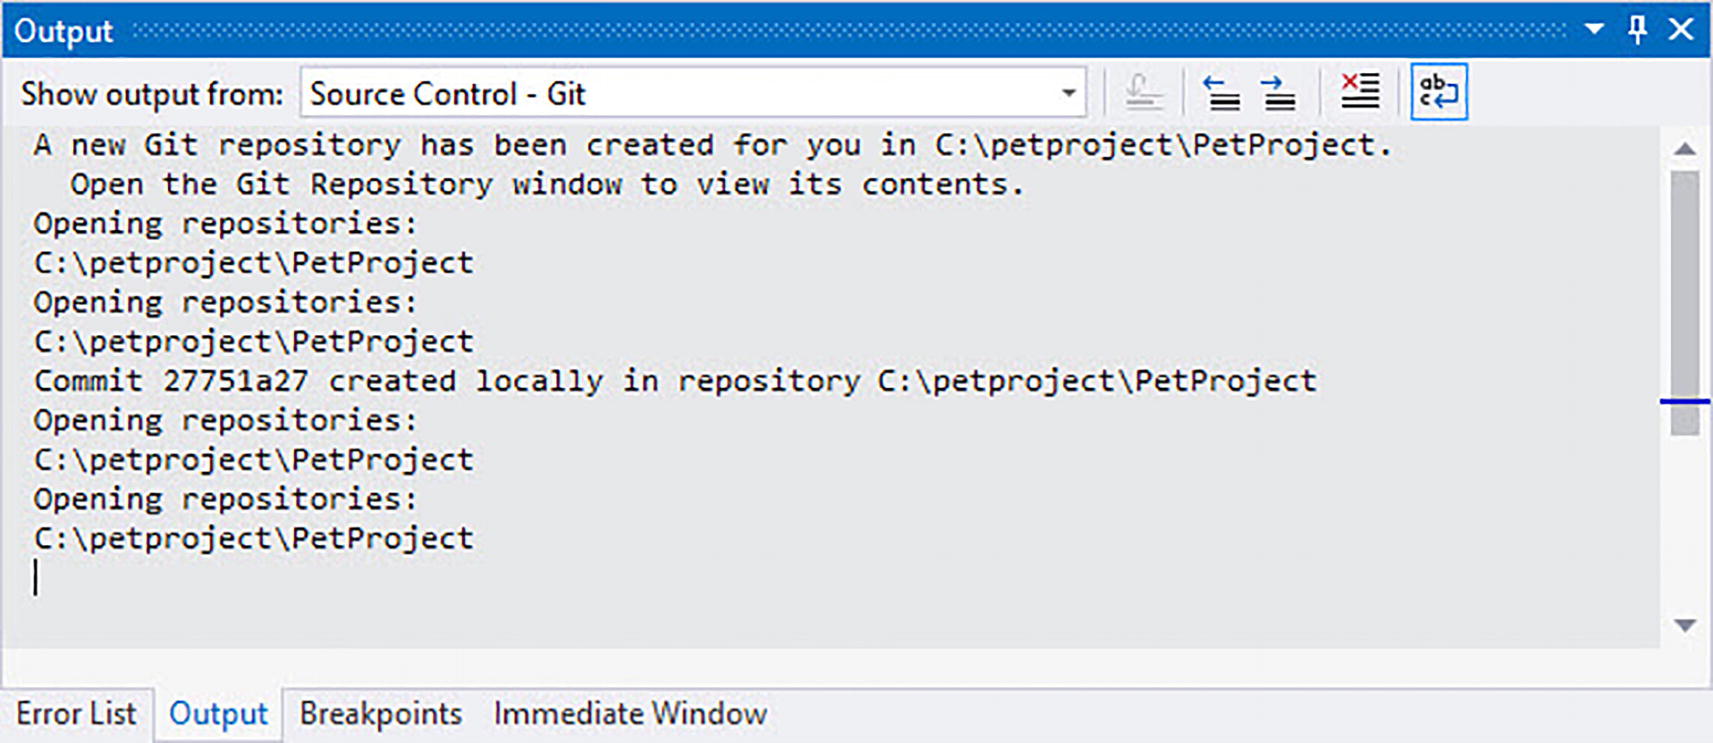
A screenshot depicts the output window. It states that a new Git repository has been created and its location.
New Git repository created
It is important to remember that this project is now under source control using Git. Remember that we mentioned earlier that Git is the source control plumbing, the tool that developers install locally on their machines.
If you never want a backup of your code in the cloud, or never want to collaborate with other developers, you can just use Git. This is, however, a quite unlikely scenario, especially now that GitHub allows you free private repositories.

A screenshot depicts the GitHub account created. It includes set status and edit profile options and the options to choose language, type, and sort.
The created repository on GitHub
There you will see the Private PetProject repo you just pushed from Visual Studio.
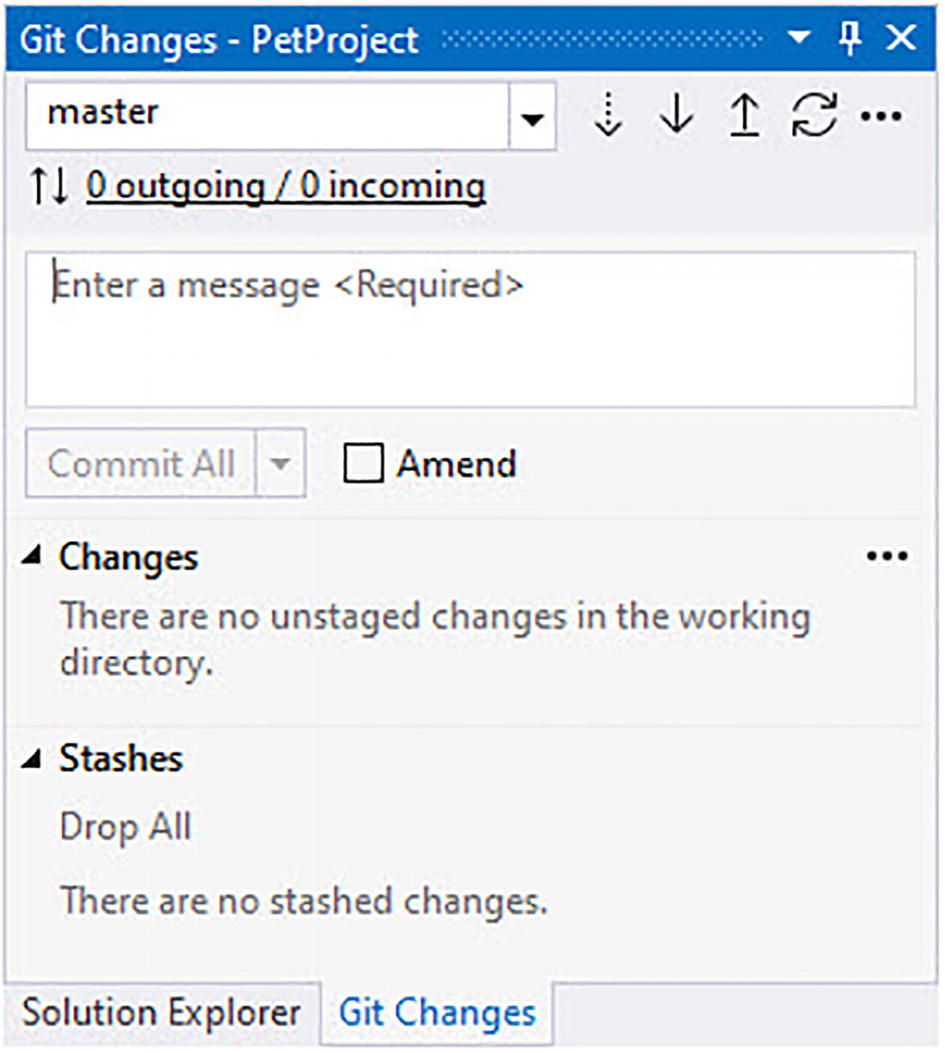
A screenshot depicts the page for Git changes. It includes 0 outgoing, 0 incoming, changes, stashes, and the tabs for solution explorer and Git changes.
The Git Changes
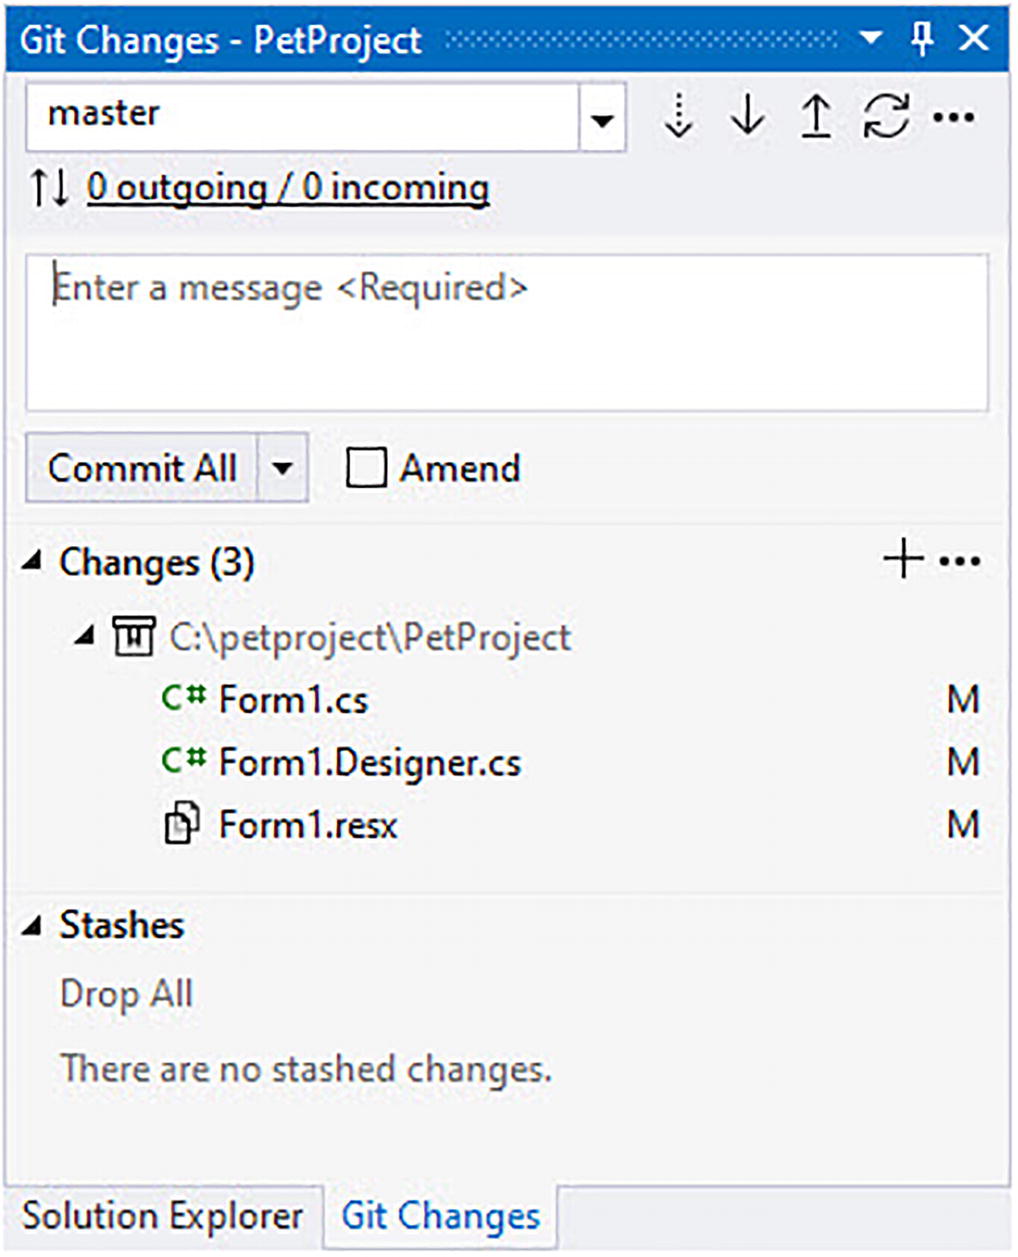
A screenshot depicts the page for Git changes. It includes 0 outgoing, 0 incoming, 3 changes, no stashes, and the tabs for solution explorer and Git changes.
Git Changes showing changes files
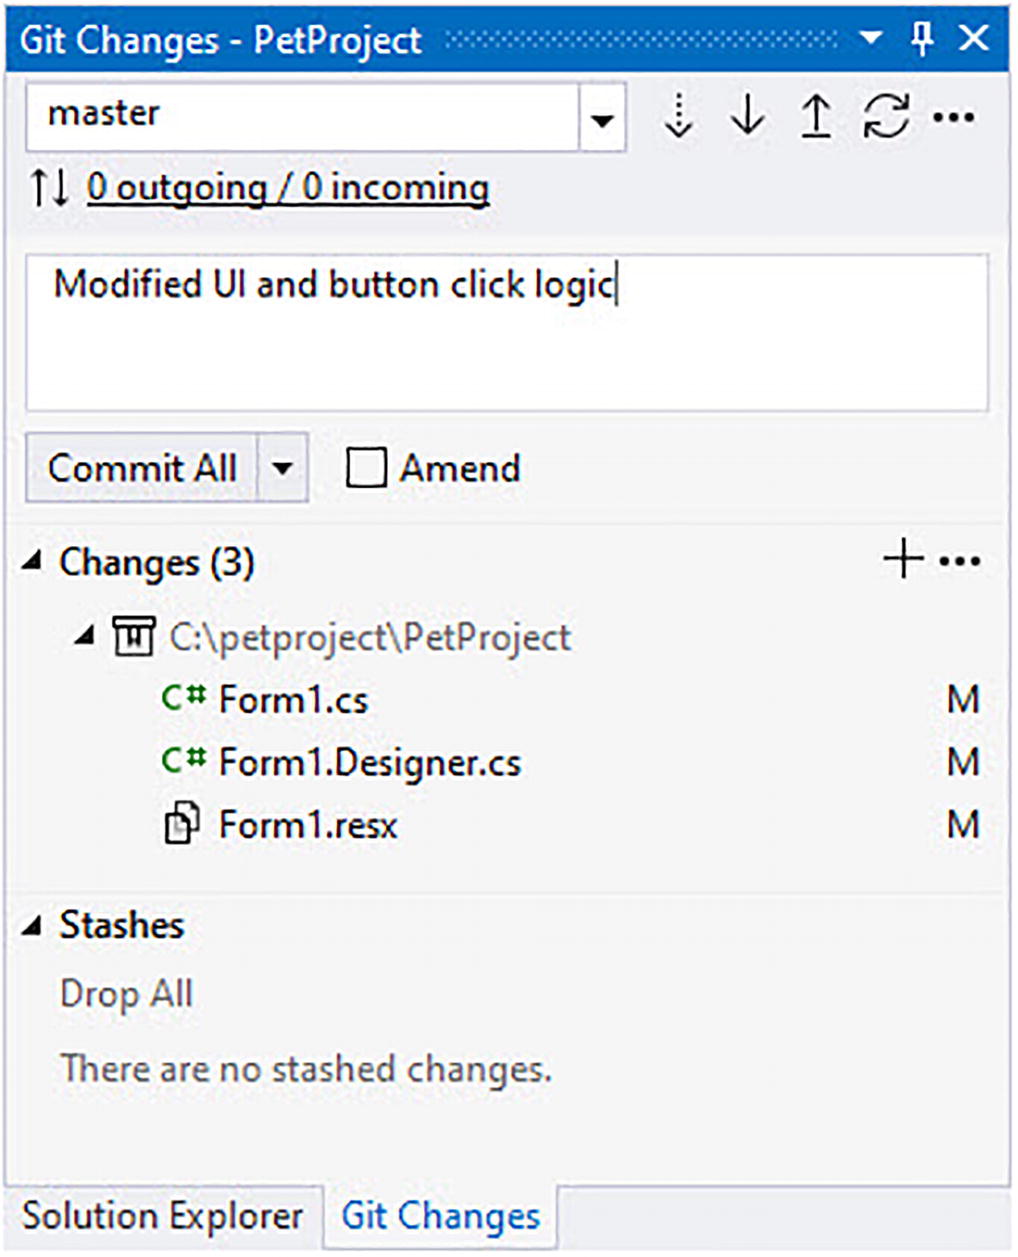
A screenshot depicts the page for Git changes. The text in the message box reads modified U I and button click logic.
Entering a commit message
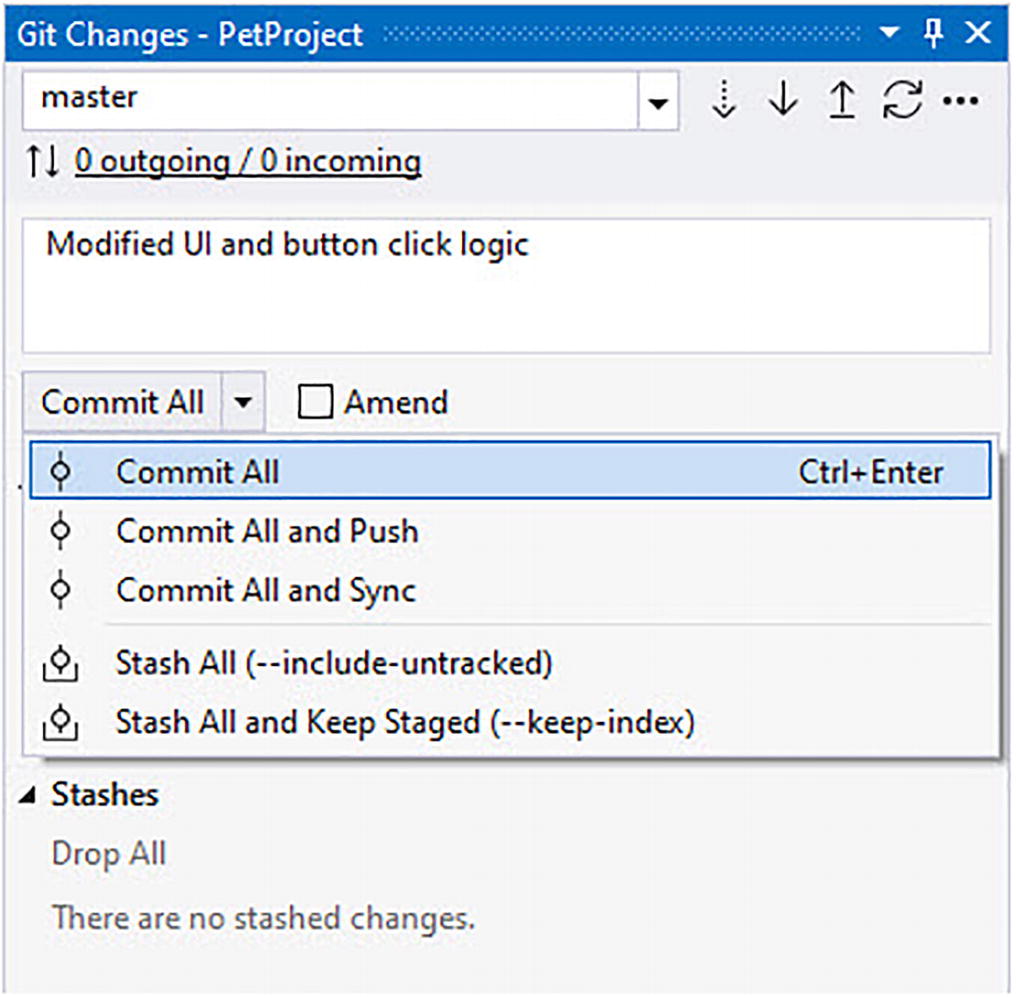
A screenshot depicts the page for Git changes. It illustrates the options under commit all. Commit all, commit all and push, commit all and sync, stash all, and stash all and keep staged.
Commit options
We are just going to commit the changes without pushing to the remote repo.
Remember, the Commit All will create the changes locally. Nothing will be created on the remote GitHub repo yet.

A screenshot depicts the page for Git changes. It indicates commit c 3371328 created locally, 1 outgoing, 0 incoming, no changes, and no stashes.
Commit the changes locally
You might want to commit locally while working on code, and you are not quite ready to push the changes to the remote. This is a nice workflow to follow. Make some changes, commit locally with a specific commit message, make some more changes, commit again with another commit message, and so on.
Each commit message and ID will also be visible on GitHub along with the files that have changed.
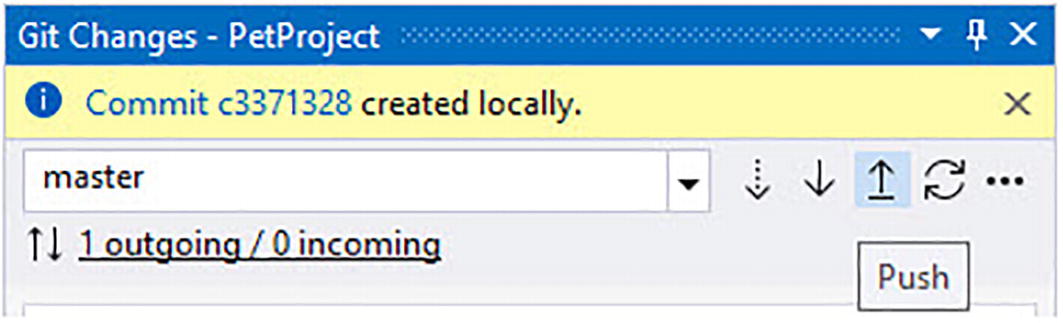
A screenshot depicts the page for Git changes. It indicates commit c 3371328 created locally, 1 outgoing, 0 incoming, and a push tab.
Push changes to the remote repo

A screenshot depicts the page for Git changes. The text reads successfully pushed to origin or master, create a pull request.
Successful push to the remote repo
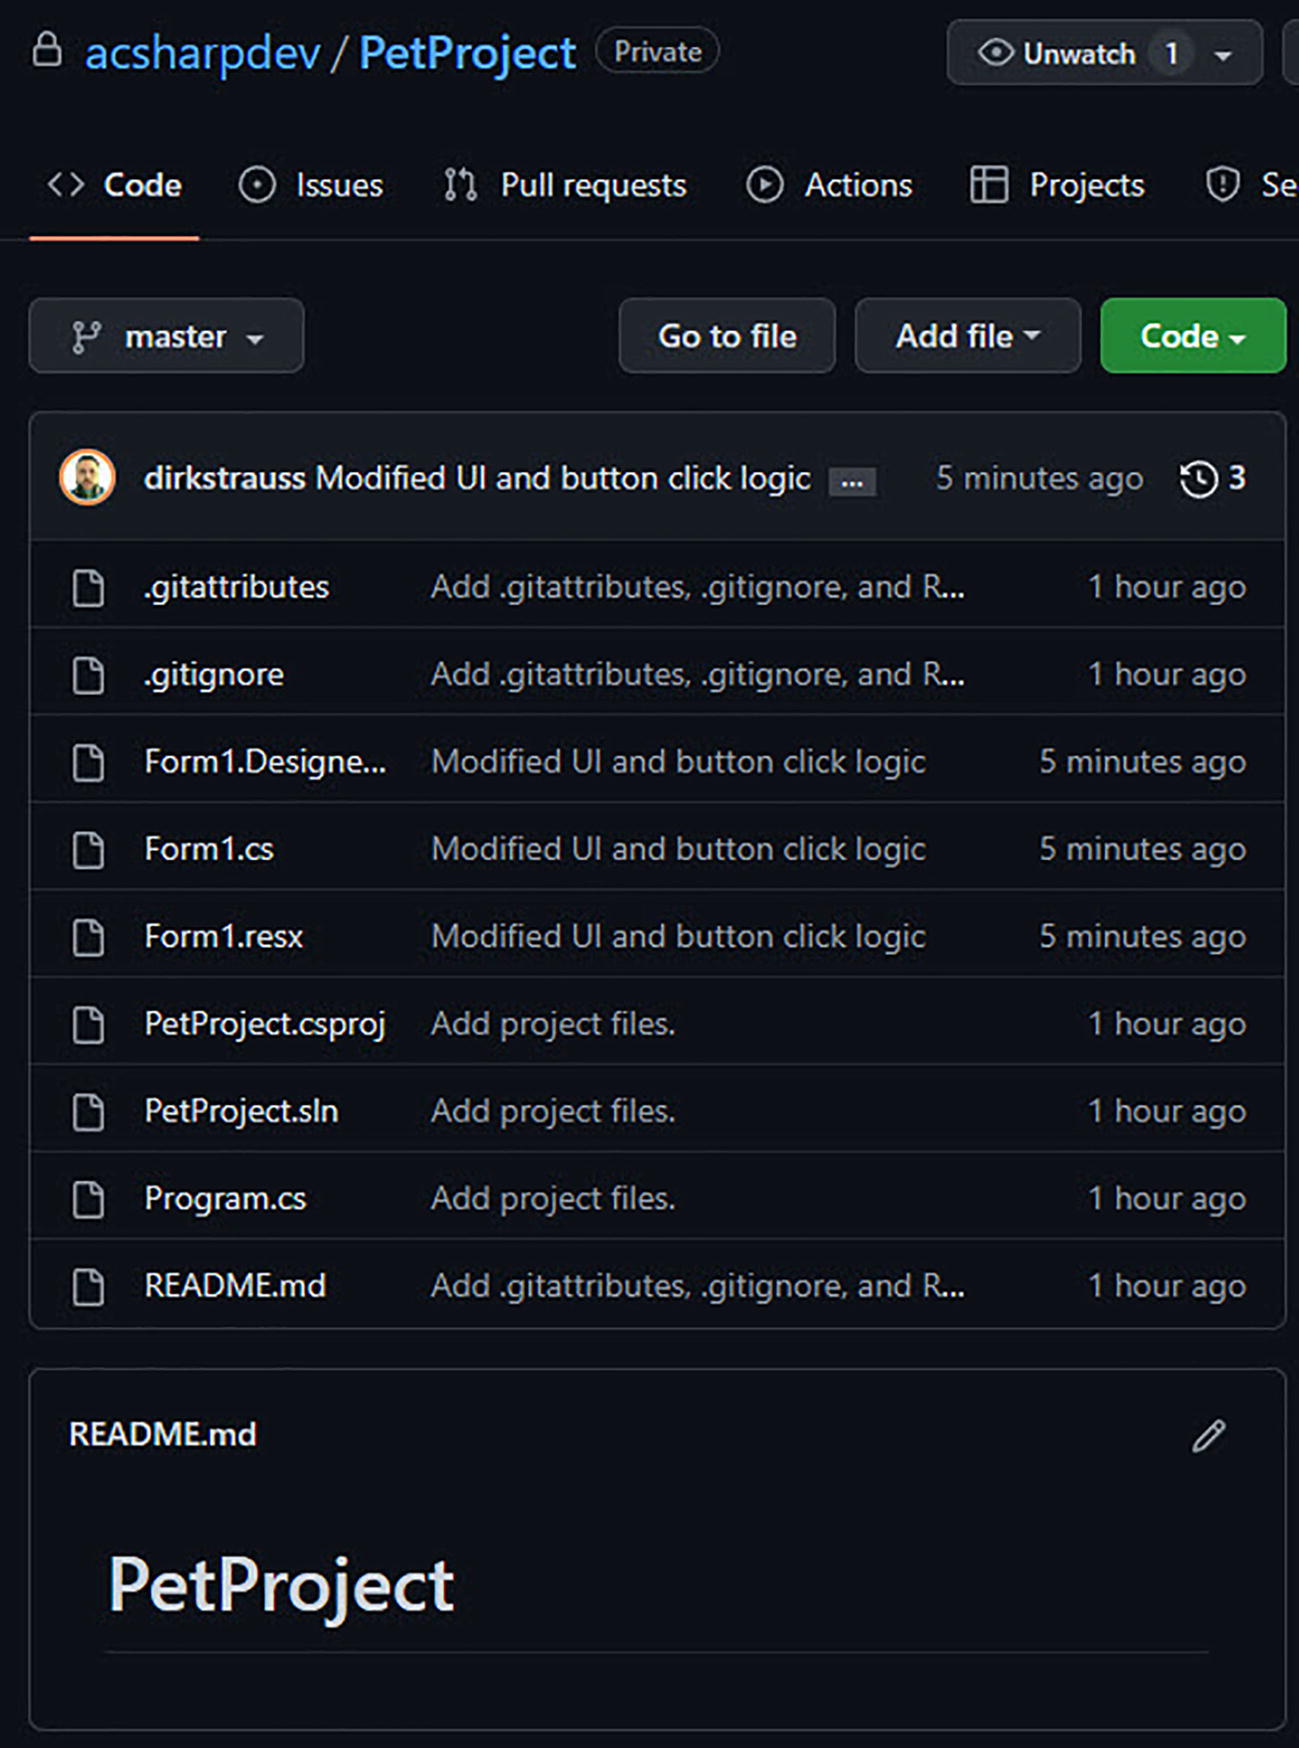
A screenshot depicts the pushed codes under dirkstrauss modified U I and button click logic.
The pushed changes in GitHub

A screenshot depicts a page for solution explorer. It includes the dependencies, form 1, and a R E A D M E file under the solution Pet Project.
Changed files you want to undo
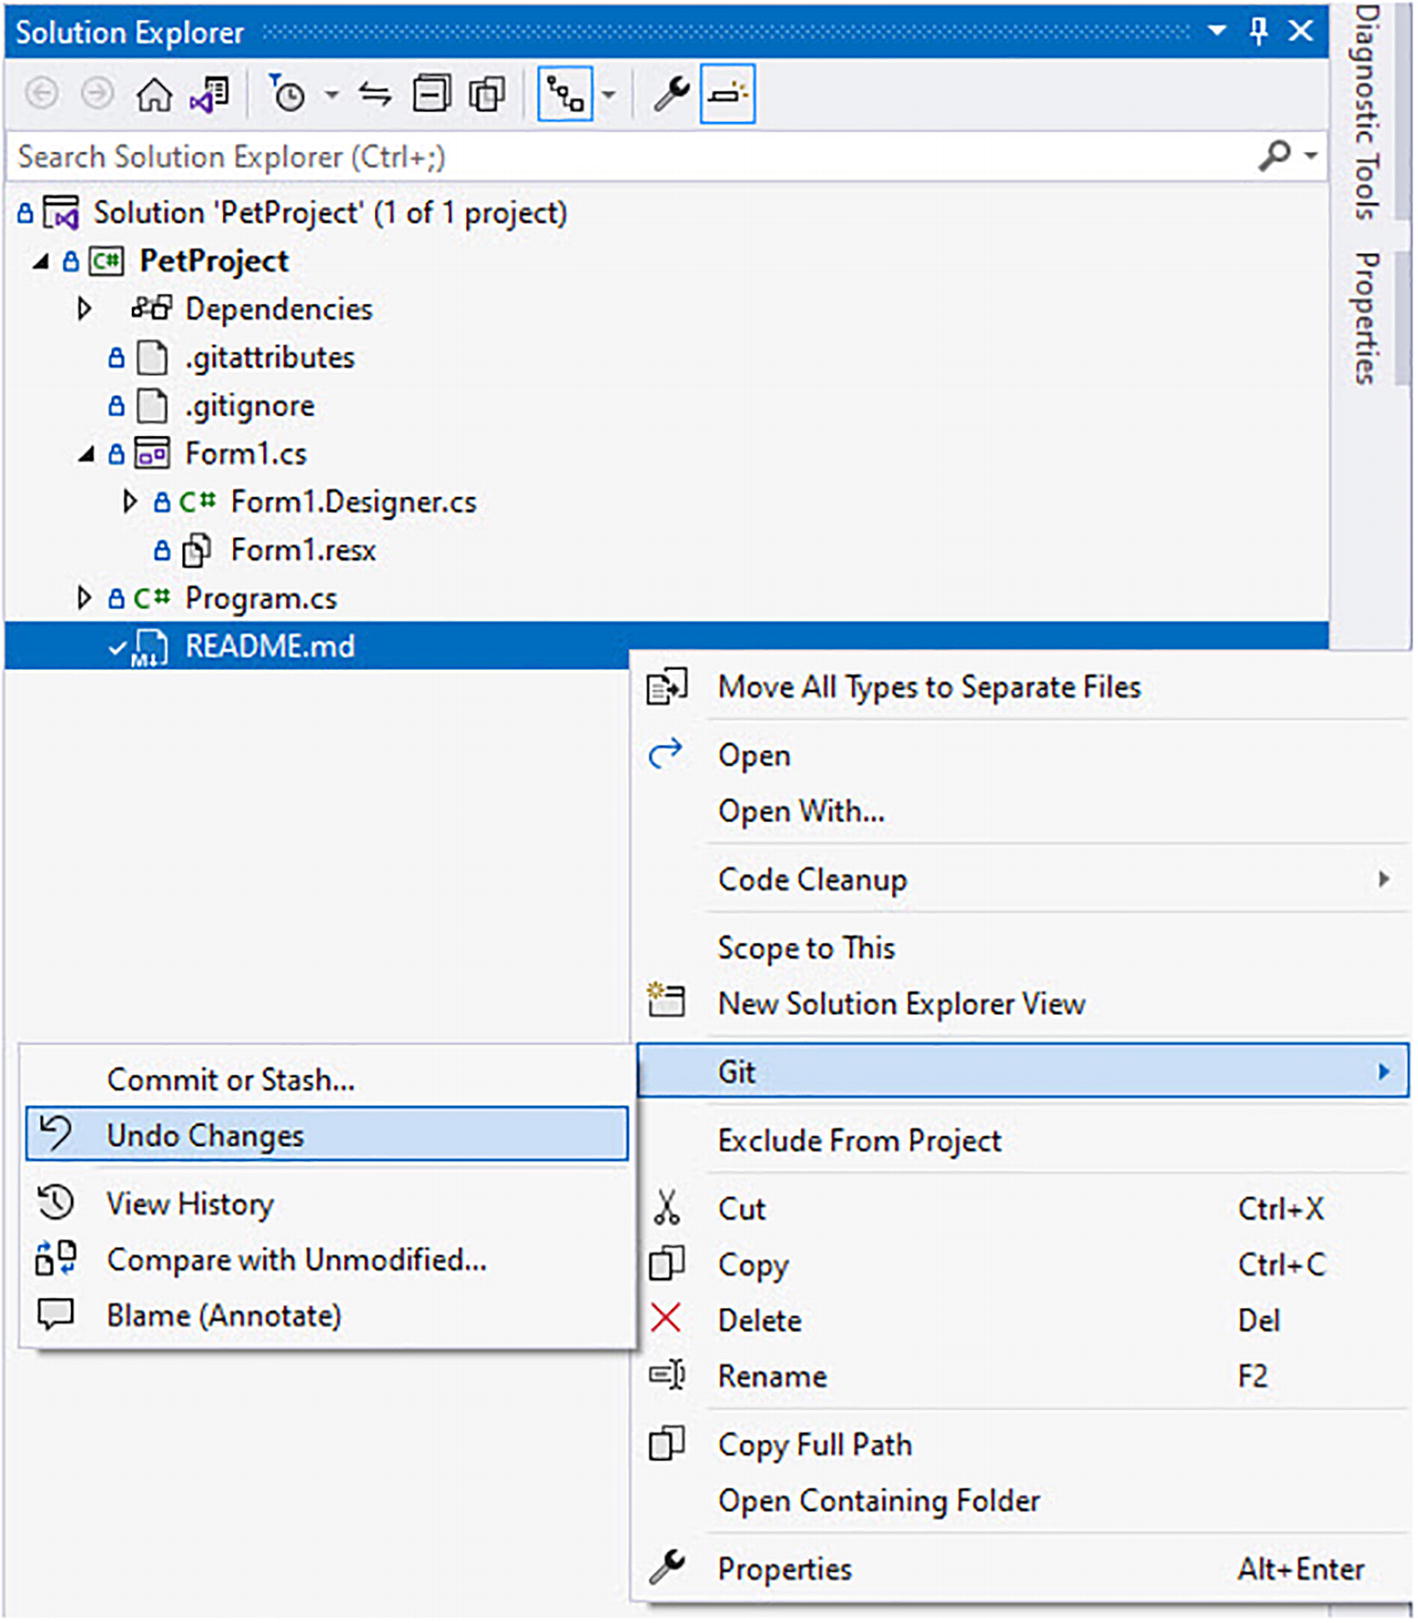
A screenshot depicts a page for solution explorer with the options under Git. It highlights the undo changes option under the Git option.
The Undo Changes option
This is nice, especially when you have made some debug-specific changes to a config file that you do not want to commit to source control.
Cloning a Repository

A screenshot depicts the collaborators for private repository and direct access.
Add collaborators

A screenshot depicts a GitHub invitation from acsharpdev to collaborate on the acsharpdev or Pet Project repository.
Invitation to collaborate

A screenshot depicts the options under get started. Clone a repository, open a project or solution, open a local folder, create a new project, and continue without code.
Clone or check out code

A screenshot depicts the options under clone a repository. Enter a Git repository U R L with repository location and path and browse a repository. An arrow indicates the GitHub.
Clone from GitHub
From this screen, you can enter the repository location to get the code from, but because I am a collaborator on this GitHub project, I can simply click the GitHub option (Figure 5-22).
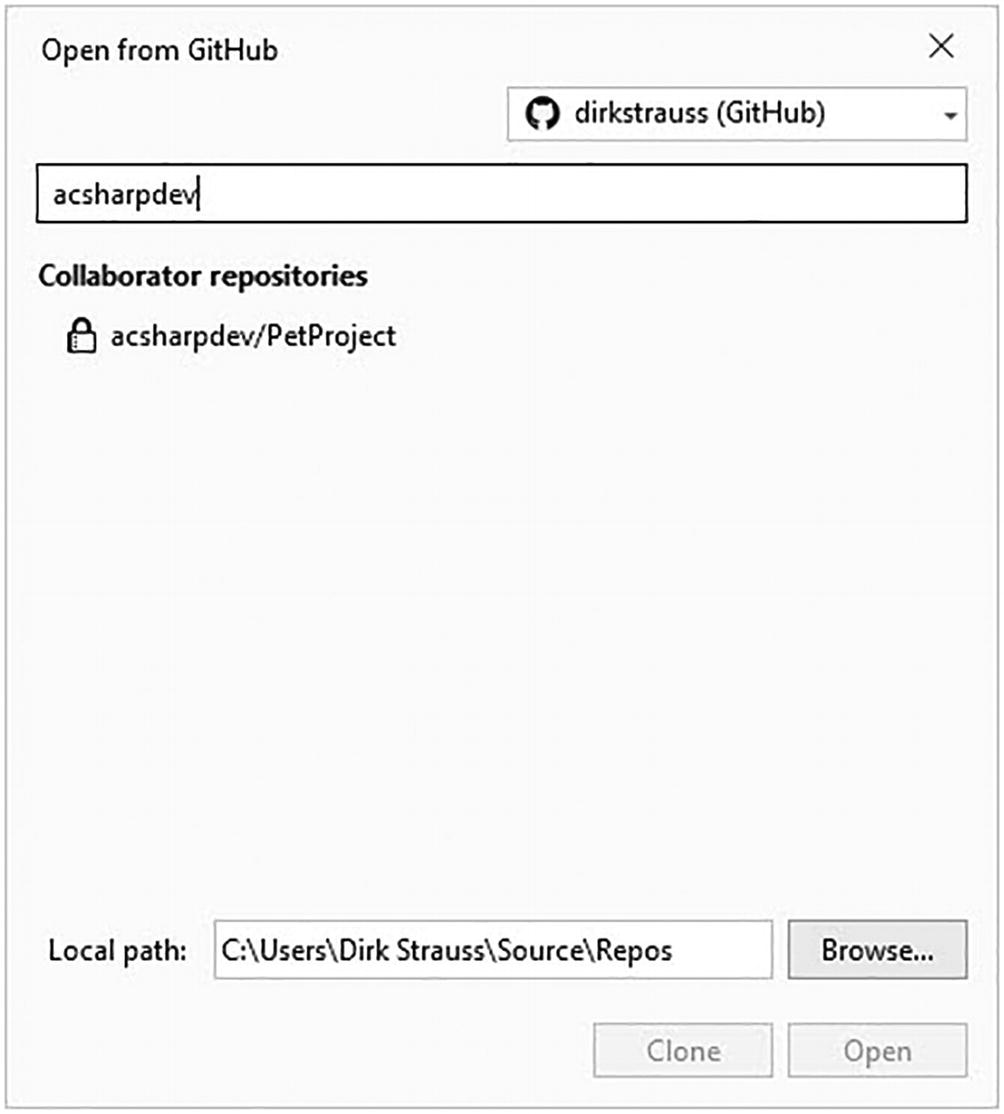
A screenshot depicts the open from the GitHub screen. It includes the collaborator repositories.
Open from GitHub

A screenshot depicts the home page of team explorer. It includes Git changes, Git repository, project, and settings.
The Team Explorer window
I now have cloned the repository to my local machine, and I can now collaborate with @acsharpdev on his project and share my changes with him easily.
Create a Branch from Your Code

A screenshot highlights the master icon under the solution explorer.
Working in the master branch

A screenshot depicts the following options. Filter branches, new branch, locals, remotes, and master.
Branches view

A screenshot depicts the options for creating a new bench. It indicates the branch name, based-on, checkout branch, and create and cancel tabs.
Create a new branch

A screenshot depicts the following options. Filter branches, new branch, locals, remotes, and master and super cool feature under locals.
Feature branch created

A screenshot indicates the super cool feature option under the solution explorer.
Feature branch checked out

A screenshot depicts the solution explorer window. It includes Pet Project, dependencies, cool feature class, form 1, program, and a R E A D M E file.
New feature code added

A screenshot depicts the get changes window for the Pet Project. The text box reads, the new feature, please write better commit messages.
Changes to feature branch

A screenshot depicts the get changes window for the Pet Project. It highlights the commit all and push option under the commit all icon.
Commit All and Push
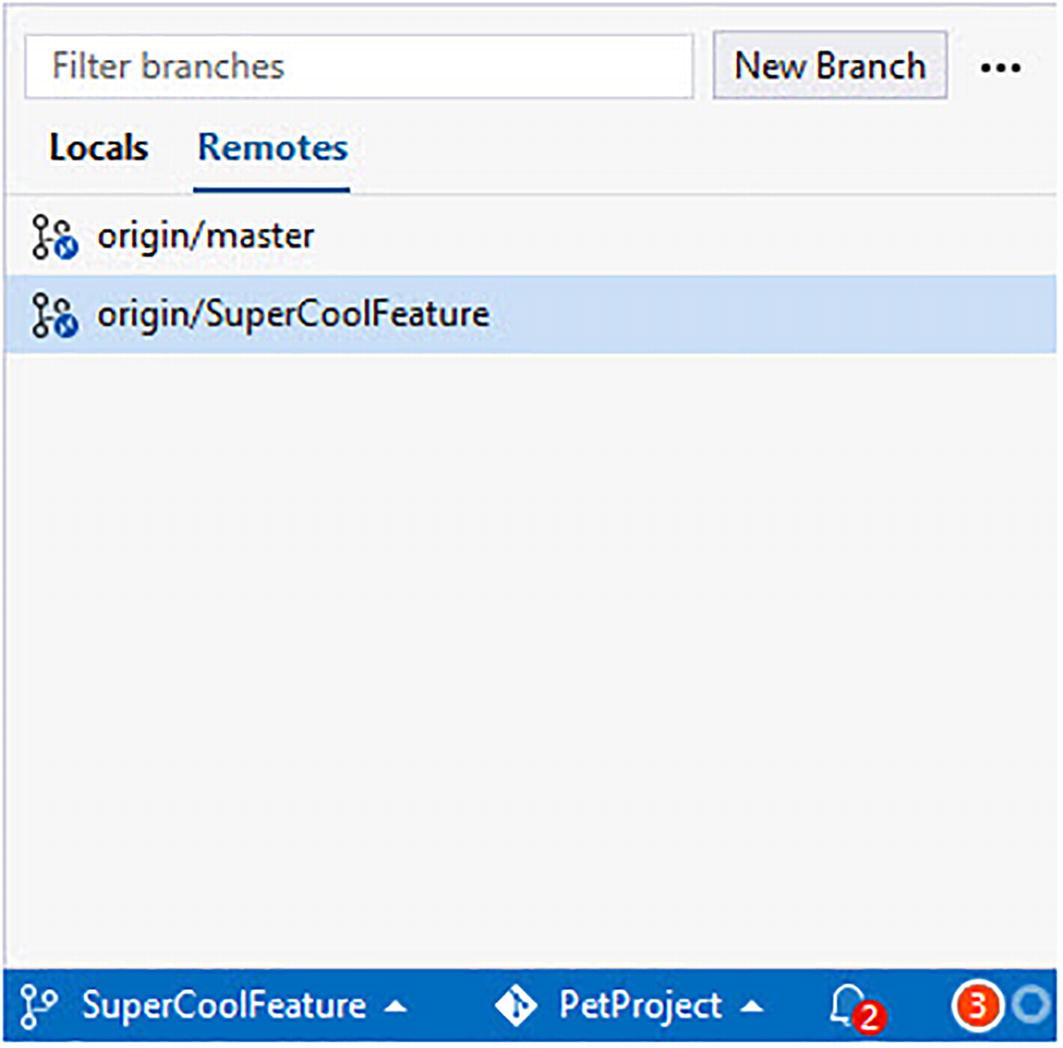
A screenshot includes the following. Filter branches, new branch, locals, remotes, and origin or master and origin or super cool feature under remotes.
Branch pushed to the server
The code is now safely on the GitHub repo. How do I get my changes into the master branch? For this, we will be creating a pull request.
Creating and Handling Pull Requests
The term pull request might sound strange to some folks that aren’t used to working with a source control system. The “pull” means to request that your code be pulled into the main working branch of the source code. Some developers also refer to a pull request as a merge request.
In Visual Studio, we can easily create a pull request. By doing this, we are telling the team that our code is ready to be peer-reviewed and, if it’s good, merged into the main master branch.
You will remember that in the previous section, we created a branch and added all our new features to the branch. Then we committed those changes to Git (locally) before pushing them up to GitHub.
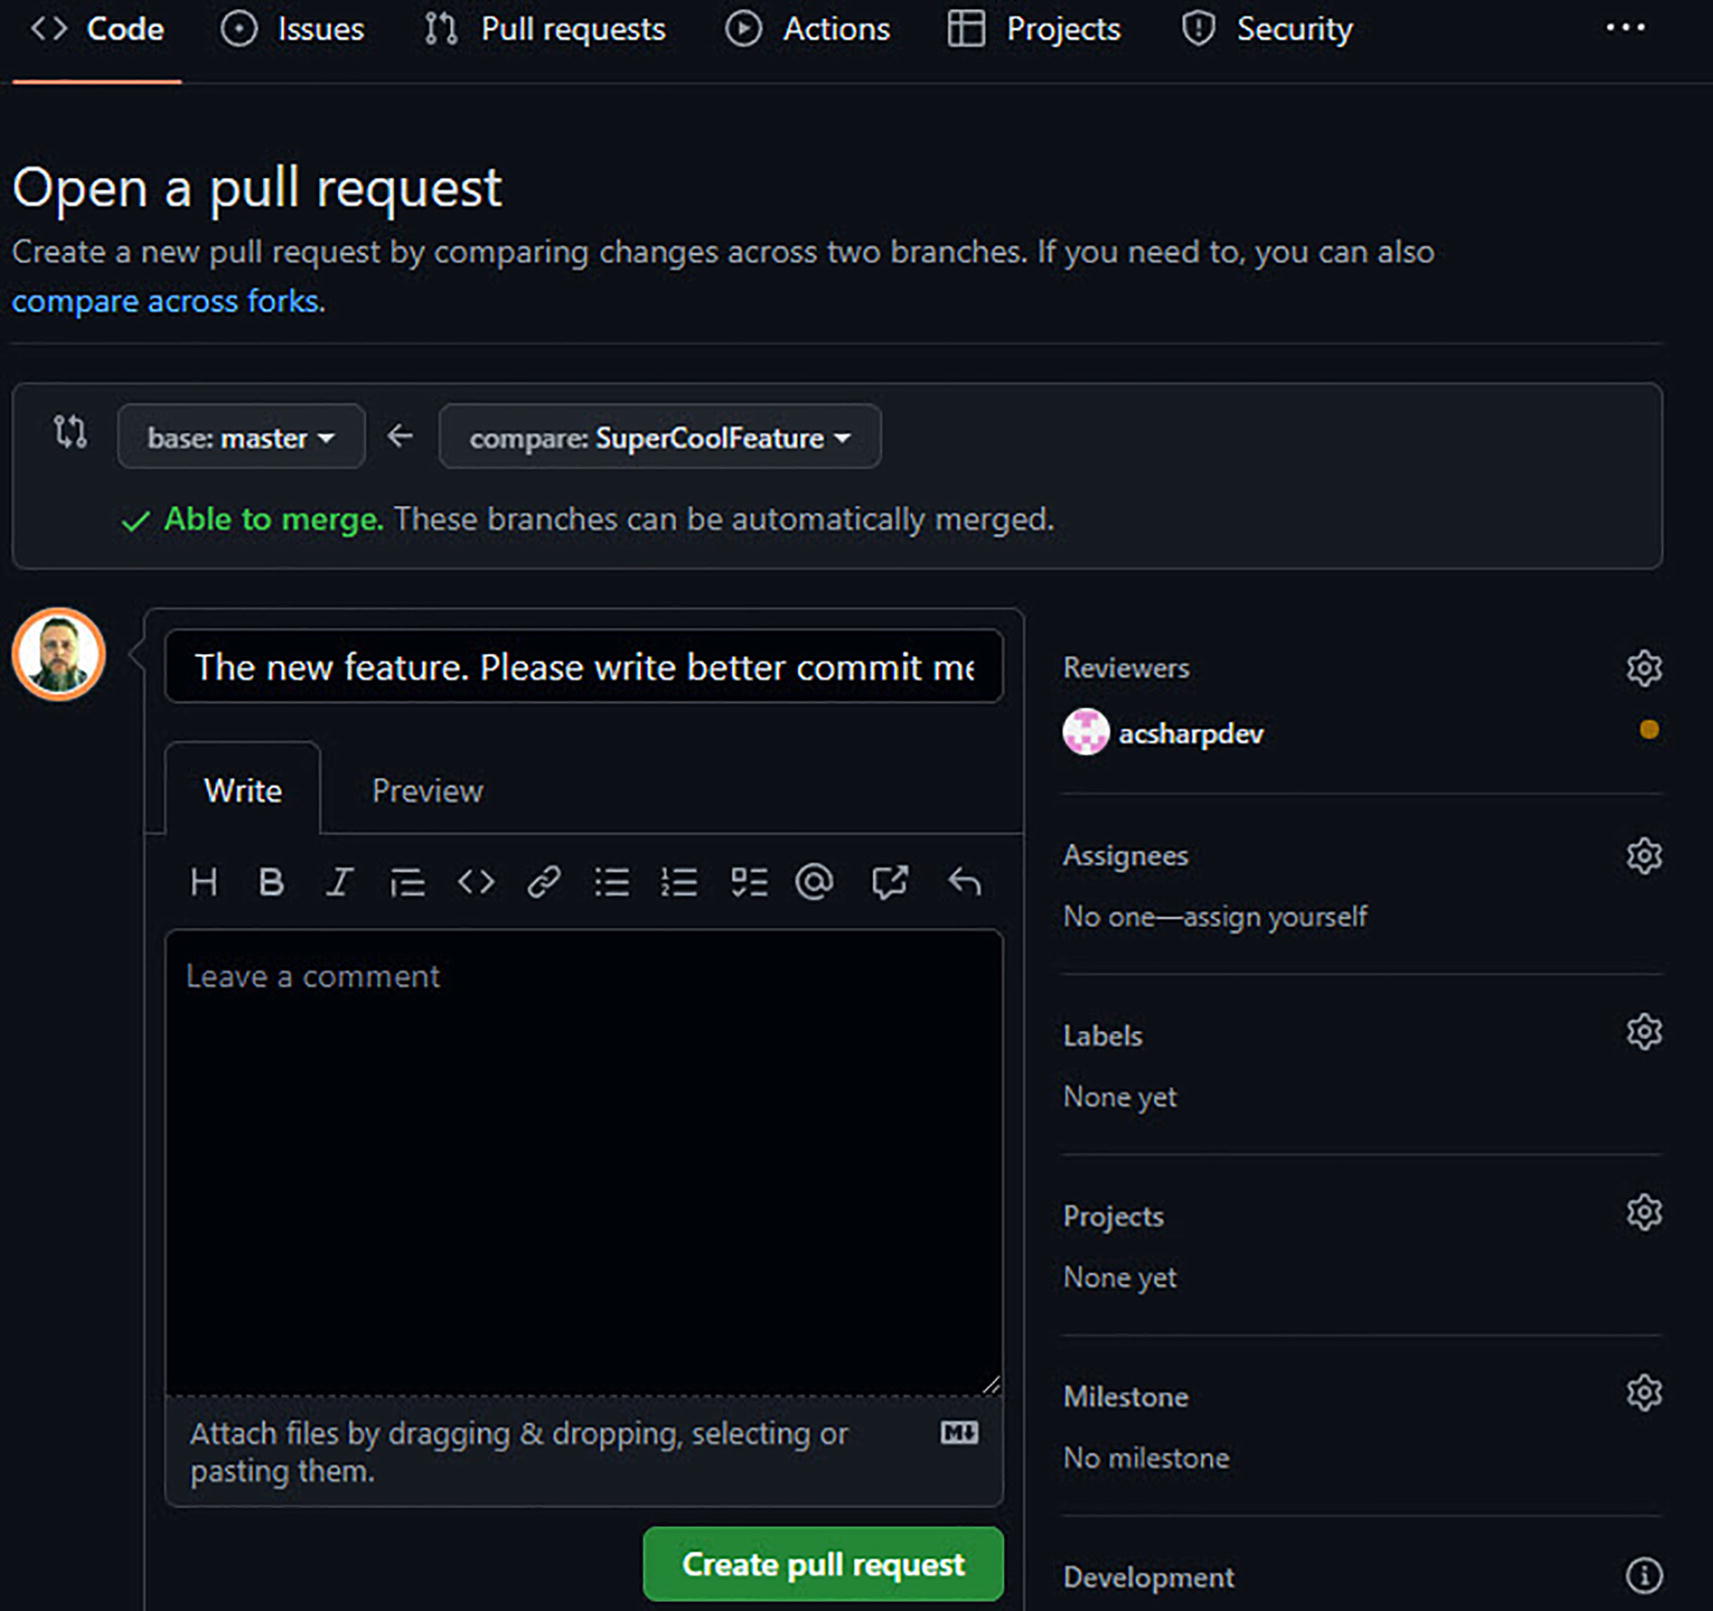
A screenshot depicts a page for opening a pull request. It includes the reviewers, assignees, labels, projects, milestone, development, and a create pull request tab.
Create a pull request

A screenshot depicts the pull request details. The comment box reads I have added the required super cool feature class under the write option.
Pull request details
When you have added all the required details, you click the Create pull request button. This pull request will now go to the acsharpdev user where he can review my code, add comments, and hopefully approve my changes.

A screenshot depicts the options under pull requests. It includes labels, milestones, filters, 1 open, and 0 closed.
Pull request created

A screenshot depicts a new pull request notification. The text under review requests reads, the new feature, please write better commit messages.
New pull request notification
On the other side of the continent, the acsharpdev user has just finished working on some code and sees my pull request on GitHub under the Review requests tab (Figure 5-37).

A screenshot includes the review requested with 1 pending reviewer, the requirement of approval from specific reviewers before merging, and a merge pull request tab.
View pull request details

A screenshot depicts the cool feature class under the files changed tab. The text includes that dirkstrauss wants to 1 commit into master from supercool feature.
View differences
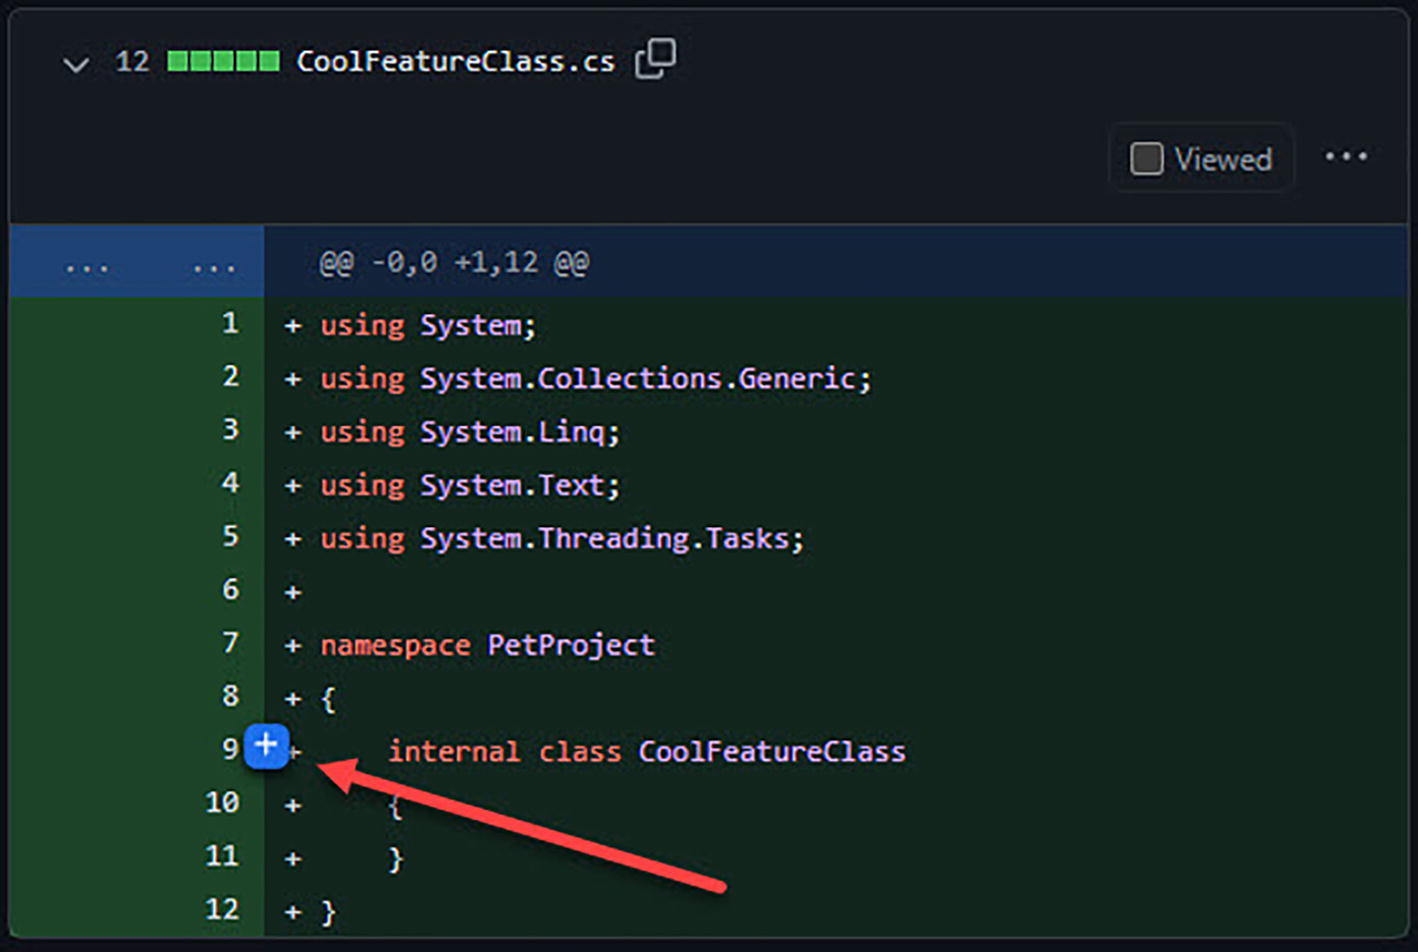
A screenshot indicates a plus sign in the ninth line of the code for the cool feature class with an arrow mark.
Review code in pull request

A screenshot depicts the code for the cool feature class. It includes a text under the write option and highlights the start a review tab.
Adding comments to pull requests

A screenshot depicts the lines from 6 to 9 of the code for the cool feature class. It includes a comment and the space to type a reply.
View pull request comments

A screenshot depicts a comment and a reply. The reply reads I will make sure to add better class names in future.
View review comments
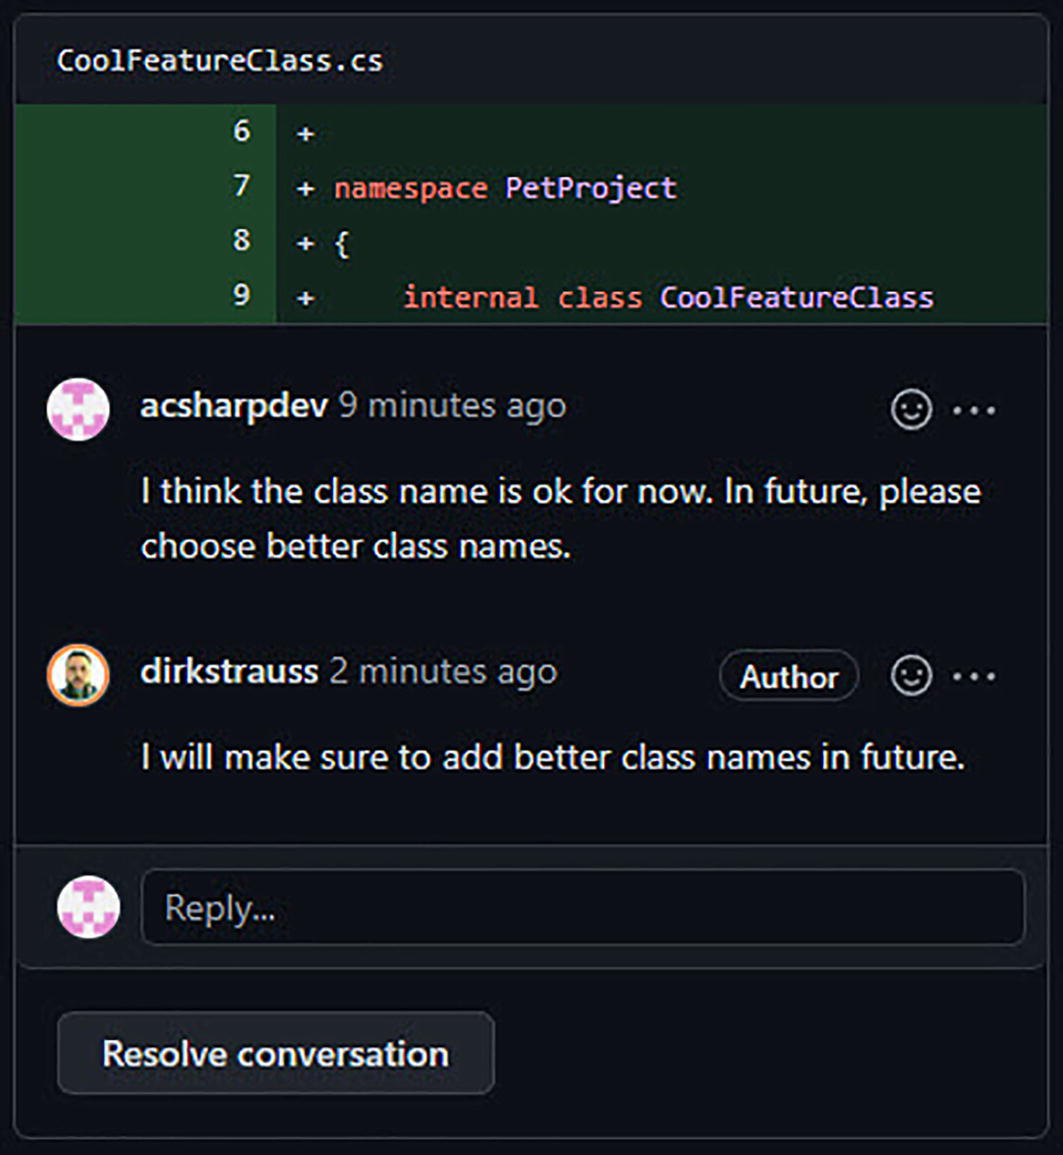
A screenshot depicts a comment, a reply by the author, and a resolve conversation tab.
Approving a pull request

A screenshot depicts three conditions and a merge pull request tab.
Merge pull request on GitHub
Create a merge commit
Squash and merge
Rebase and merge
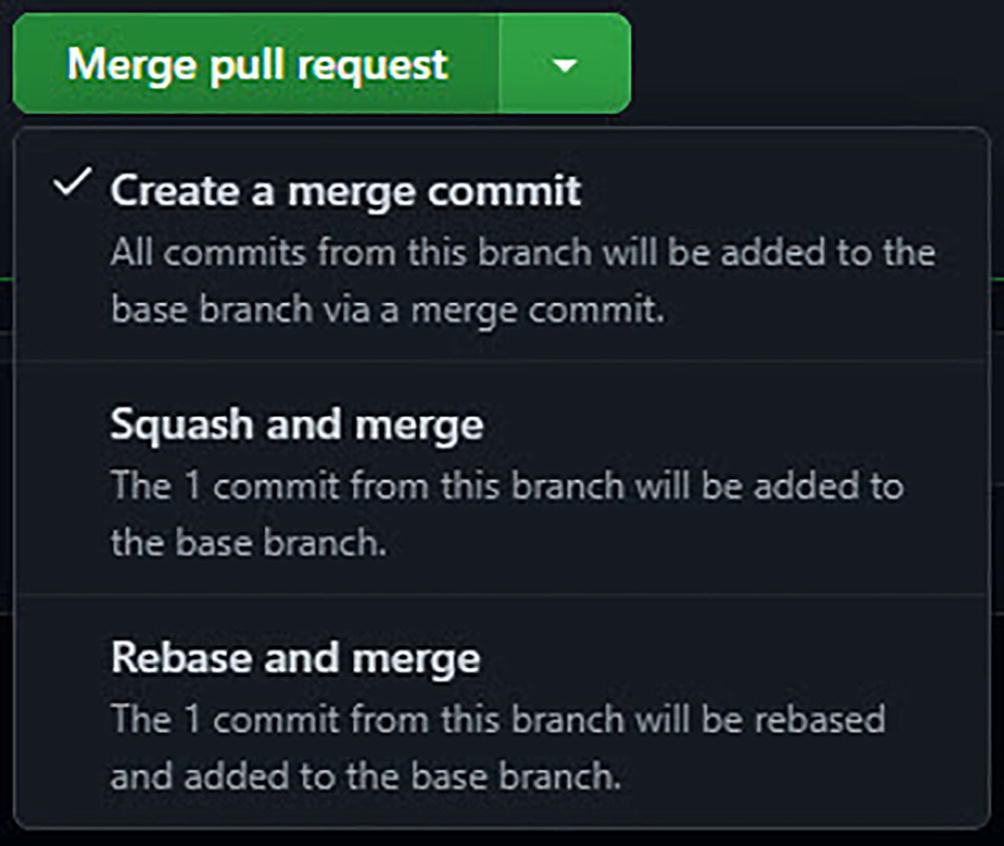
A screenshot depicts the options to create a merge commit, squash and merge, and rebase and merge under the merge pull request tab.
Merge pull request

A screenshot includes the text, pull request successfully merged and closed, and a delete branch tab.
Pull request merged into the master branch
I can now switch to my master branch and pull the changes to get the new feature into my local master branch. Switch to your master branch by clicking the branch name in the bottom-right toolbar of Visual Studio and selecting master from there.

A screenshot depicts the Git changes window with 2 arrow marks to view incoming and fetch. It includes 2 incomings and a merge pull request.
View incoming commits
Notice that the branch displayed under Branches is the master branch. This is because we switched to our local master branch in Git. The new feature was merged with the remote master branch on GitHub by the acsharpdev user a few minutes ago. I need to pull those changes into my local master branch to get it up to date. To do this, I click the Pull arrow next to the Fetch arrow in the Git Changes tab.
Fetch only downloads the changes from the remote repository (GitHub) but does not integrate the code into your local branch. Fetch just really shows you what changes there are that need to be merged into your local branch.
Pull is used to update your local branch with the latest changes on the remote repository. This merge might potentially result in merge conflicts that you need to resolve before continuing.

A screenshot depicts the solution explorer window and highlights the cool feature class.
Local master branch merged
At this point, because the changes have been merged into the master branch, and my local master branch has been updated, I can safely delete the feature branch I created earlier.
Using pull requests allows developers to have a lot more control over the code that gets merged into the main working branch of the project. Using branches allows me to make changes to the code in an isolated manner without risking the stability of the master branch.
Working with Stashes
Sometimes, you might be working on some changes, and you continue to make a whole range of changes without noticing that you are working on the wrong branch.

A screenshot includes the options for filter branches, new branch, locals, and remotes. Locals contain master and new features.
Working in the master branch
Switching to the Git Changes tab, I notice that I have made all my changes on the master branch (Figure 5-51) instead of on the correct NewFeatures branch.

A screenshot depicts the Git changes window. An arrow mark indicates the master below the Gitchanges tab.
Changes in the incorrect branch
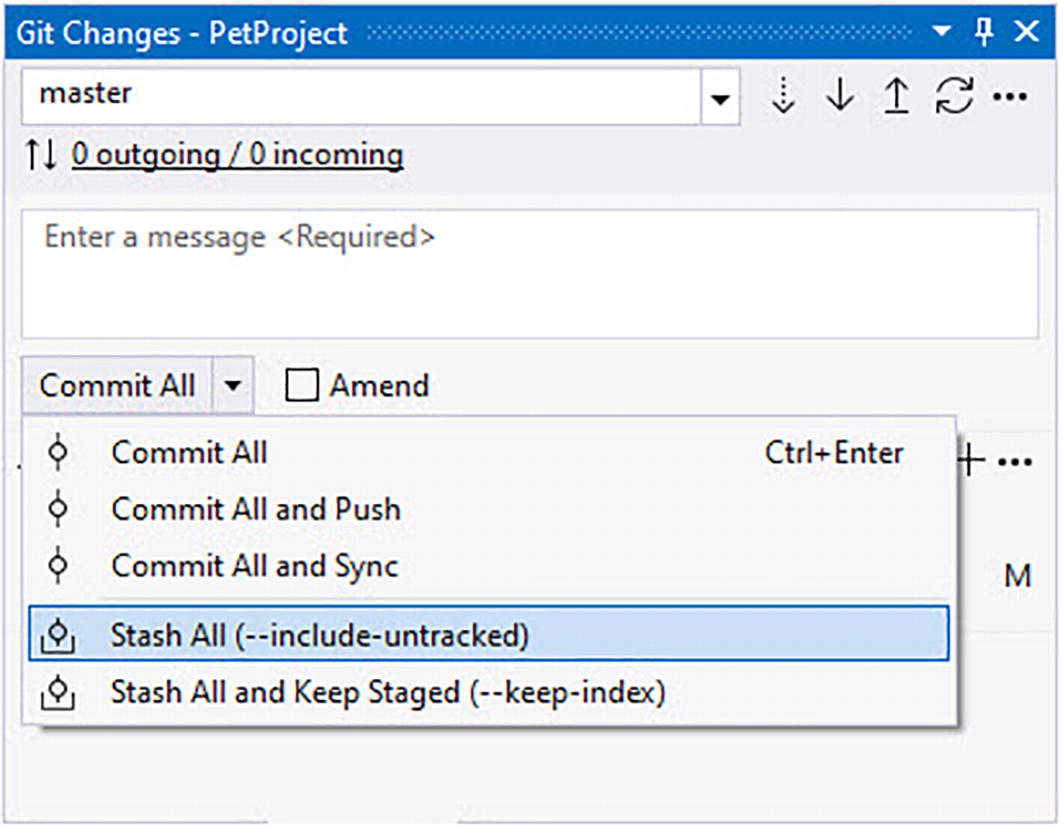
A screenshot depicts the Git changes window. It highlights the stash-all option under the commit-all icon.
Stash the changes on master

A screenshot depicts the Git changes window with no unstaged changes and one stash.
Changes stashed
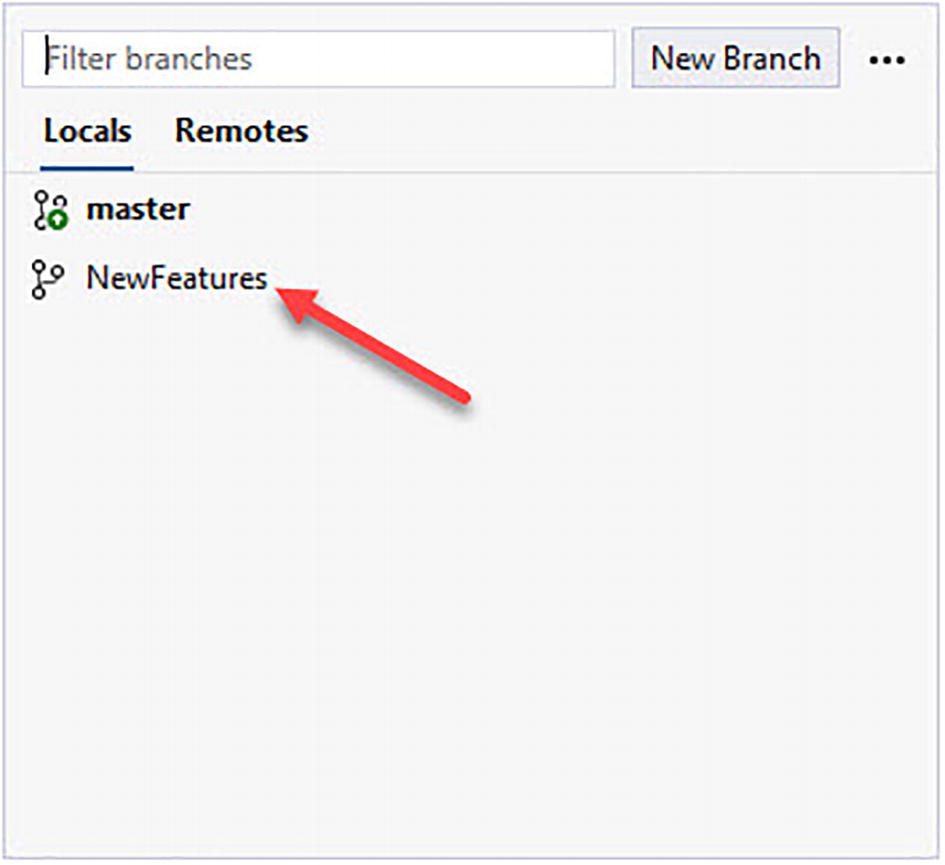
A screenshot includes an arrow mark to indicate the new features under locals.
Change to correct branch
Apply – Apply the changes to the branch and keep the stash.
Pop – Apply the changes to the branch and drop the stash.
Drop – This will delete the stash without applying anything.

A screenshot depicts the Git Changes window. It includes the options to view changes, apply, pop, and drop the stash.
Apply, pop, or drop the stash
Stashing allows me to pause the changes I was working with and carry on with something else for a while. Another great example of using stashes is when I am working on a branch, and I need to make a bug fix. I can stash my changes which will revert the code in my branch. Then I can make the bug fix and push that up to the remote repo before popping my stash back to my branch. Stashing allows developers to be very flexible when working with code changes.
Multi-repo Support

A screenshot highlights the multi-repo support with 3 options; expand description, more info, and give feedback.
Enable Preview Features

A screenshot depicts 2 Acme Web Api Demos updated for 18 seconds and 1 minute, respectively.
Multiple GitHub repos
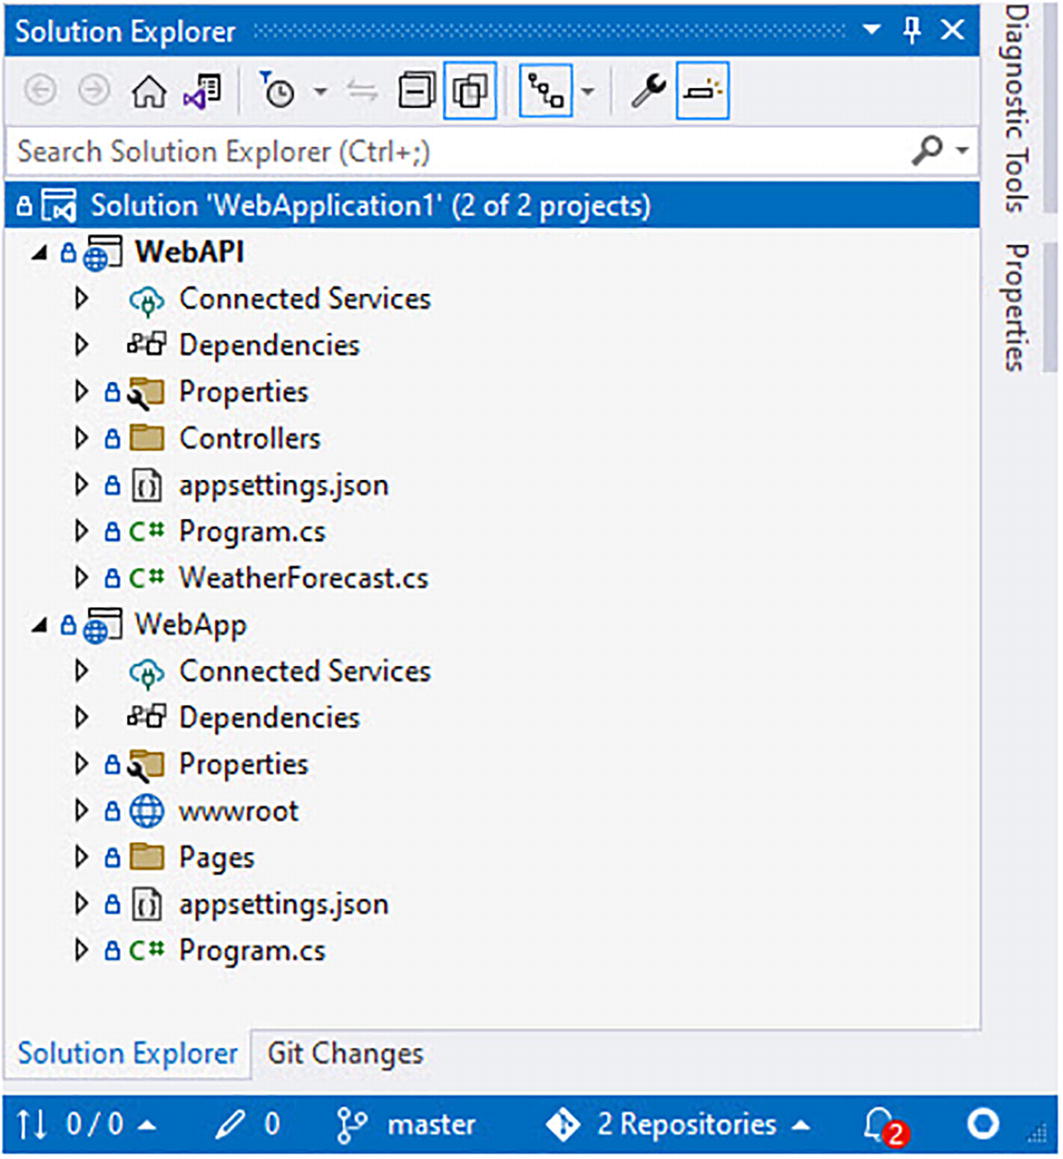
A screenshot depicts the solution explorer window. It includes 2 projects under solution web application 1 and the options under web A P I and web app.
Multi-repos open in Visual Studio

A screenshot depicts the Git Changes window with 2 repositories. It includes the text, modified program file, and 2 changes.
Changes in both repositories

A screenshot depicts the Git Changes window with 2 repositories. It includes the text, successfully created the following commits, 6 c a 1770 a, 489773 c e.
Changes committed locally

A screenshot depicts the Git Changes window with 2 repositories. It includes the names of repositories under all repositories and no unstaged changes.
Select the repo to push
Having the ability to work with multiple repositories in Visual Studio is convenient because I no longer need to open a separate instance of Visual Studio to work on a different repository.
Compare Branches

A screenshot depicts the options to filter branches, locals, remotes, and a new branch tab. It includes master and new features under locals.
View the branches to compare
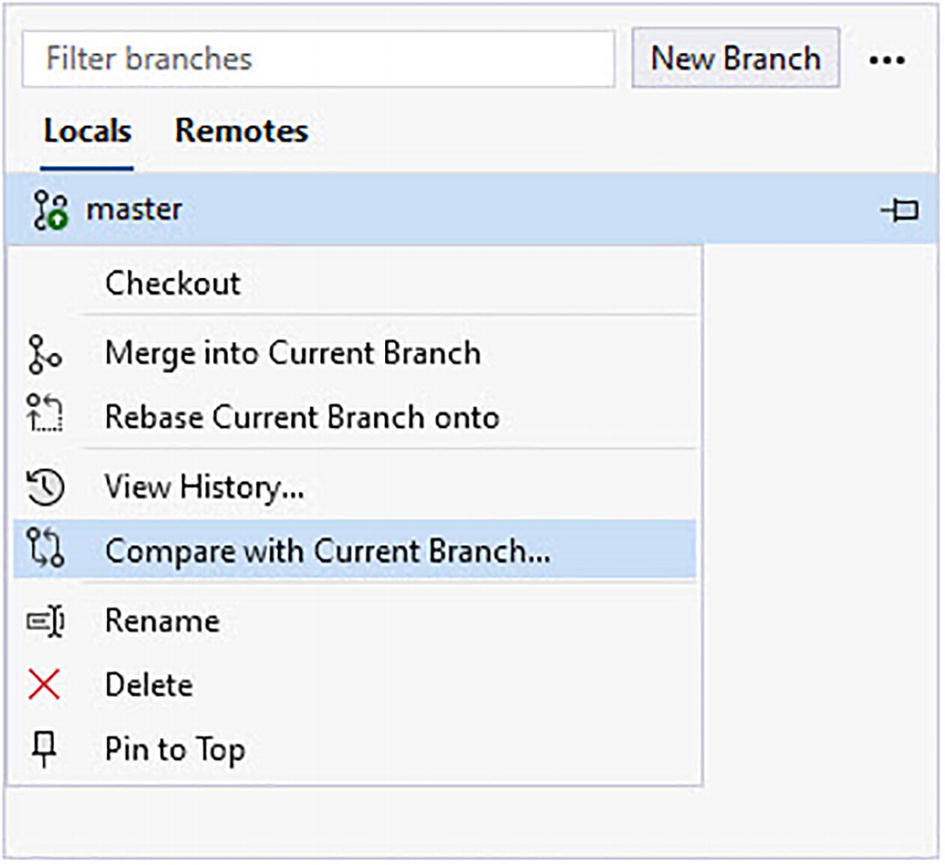
A screenshot highlights the compare with current branch option under the master menu in the locals.
Compare to master branch

A screenshot depicts a comparison between the 2 branches. It includes the codes with 13 and 18 lines, respectively.
The branch diff

A screenshot highlights the inline mode option under comparing branches.
Changing the preferred diff layout
I can also use the diff configuration options gear in the top-right corner to switch to an inline diff view as seen in Figure 5-65.
Check Out Commit

A screenshot highlights the Git repository option in the view menu.
View the Git Repository
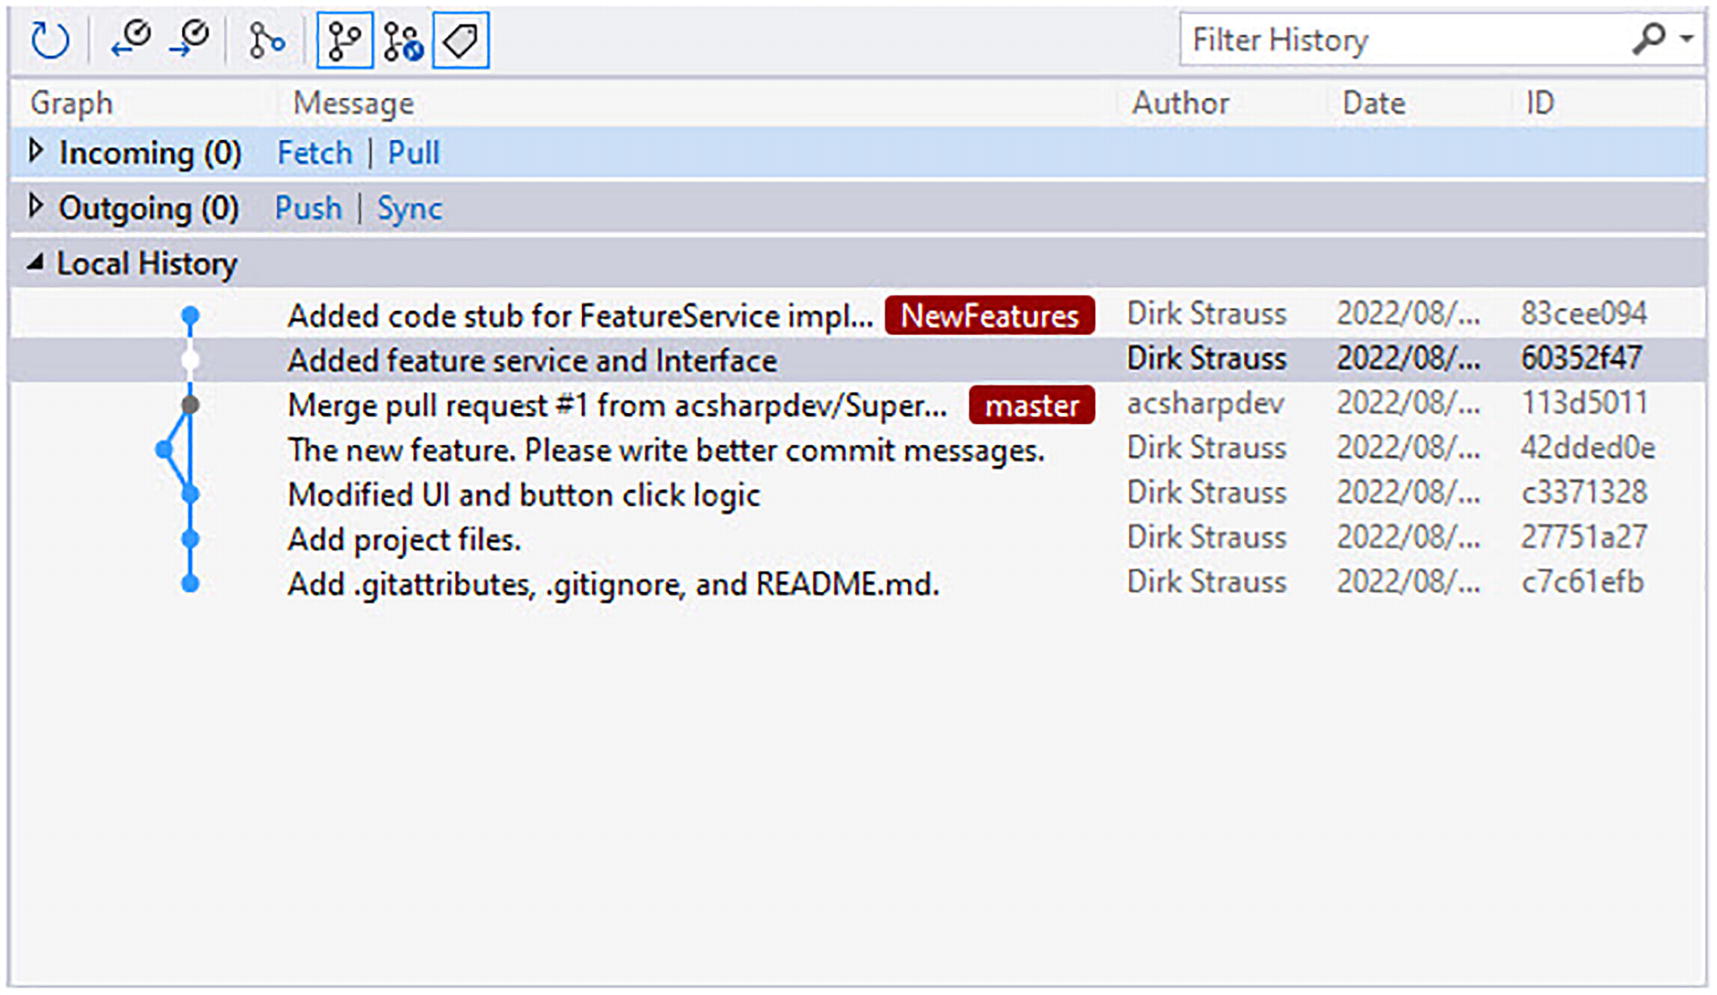
A screenshot depicts the list of files in the local history.
The Git Repository window
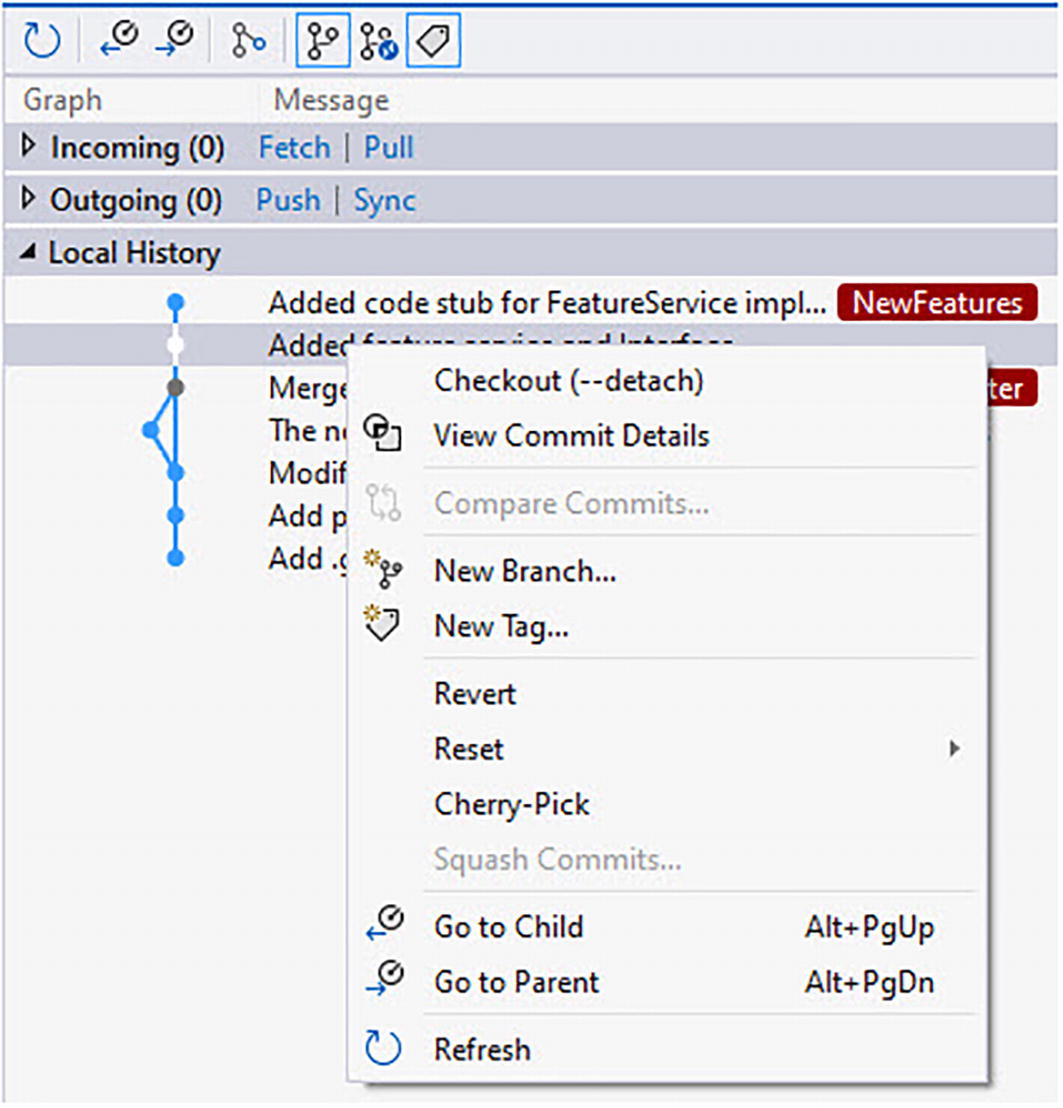
A screenshot depicts a list of options. It includes checkout detach, view commit details, new branch, new tag, revert, reset, cherry-pick, and refresh.
Check out a commit
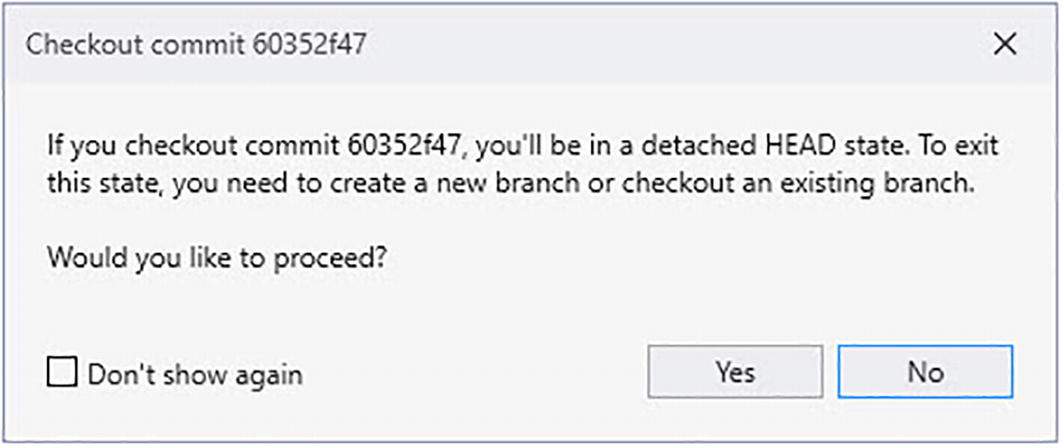
A screenshot depicts a box with a confirmation question to checkout 60352f47. It includes a checkbox don't show again along with yes and no options.
The checkout commit confirmation

A screenshot depicts the visual studio status bar indicating a notification for detached.
The Visual Studio status bar
You can now run your tests and modify code as required. You can even commit your code if required. To get back to your branch, simply select it from the branch selector in the Visual Studio status bar.
Line Staging

A screenshot highlights the enable line staging support option and the O K tab.
Enable line-staging support

A screenshot depicts the Git Changes window with one change.
Git Changes showing changed files

A screenshot depicts lines 7 to 22 of the code under feature service and highlights the stage line option to stage the current line.
Staging a specific line of code
Line staging also supports side-by-side and inline diff modes. Being able to stage specific lines of code is a nice feature and allows developers to be quite flexible when committing code.
Summary
Microsoft has added a lot of new features and enhancements to Visual Studio 2022. We had a look at cloning repositories, creating branches, and handling pull requests. Multi-repo support is a fantastic new feature, and being able to compare commits, check out specific commits, and stage specific lines of code without leaving Visual Studio makes for a welcome productivity enhancement. I hope that you will continue exploring Visual Studio and embracing the rich set of features it provides.