
Chapter 7
Kombucha

Kombucha, a fermented tea with a pleasantly acidic and sometimes fizzy taste, has become popular in recent years among health enthusiasts. It first gained traction worldwide in the late 1990s, and it hails from teas originally served in Germany, Asia, and Russia. Some of the healthful effects associated with kombucha are longevity, immune support, and even weight loss.
A symbiotic culture of bacteria and yeasts, known as SCOBY, is the fermented goodness that rests atop a mug of kombucha. SCOBY is made with the tea leaves, sugar, and water, and the sugar feeds the SCOBY keeping the bacteria alive, multiplying and fermenting to make the culture. The unique flavor of SCOBY is described by some as pleasing yet vinegar-like or acidic. Sometimes the culture turns the tea a bit fizzy through the fermentation process. A small amount of alcohol is produced during the fermentation process and this alcohol along with lactic acid, acetic acid, and gluconic acid all fight the replication of bad bacteria in the culture.
Because the probiotic bacteria and yeast require the right environment to thrive, try making it at home to ensure the best possible result (providing you closely follow the guidelines for preparation). Fresh ingredients and proper storage are essential for the SCOBY to survive. Some studies show that commercially manufactured kombucha may lose some of its vitality due to improper storage and inconsistent manufacturing practices.
The SCOBY needs to stay clean and clear of mold, which can be a common side effect of poor preparation. Look for green, blue, or black coloring on your culture, which can signal mold growth. If you do spot mold, you will need to throw out the culture and sterilize your equipment before starting a new culture.

◁ Kombucha
YIELD: 14 CUPS (3.3 L)
One of the nicest ways to start your kombucha tea is to ask a friend to share their SCOBY. Try to find a local co-op or try an online message board for folks in your area who share your interest in this invigorating tea. You may end up buying your own kit to start SCOBY but considering sharing yours with others. (See the Resources, for my recommendation.)
EQUIPMENT YOU’LL NEED:
Medium pot
1 glass gallon (3.8 L) jar
Cheesecloth or cotton fabric square
Rubber band or string
Instant-read thermometer
Reusable cotton tea bag, if you use loose tea
Straws
Long-handled wooden or metal mixing spoon
INGREDIENTS:
14 cups (3.3 L) water, divided
3 bags black, green, or oolong tea, or 3 tablespoons (approximately 8 g) caffeinated loose-leaf tea
1 cup (200 g) sugar
1 kombucha SCOBY
1 cup (235 ml) kombucha (This will come with your SCOBY.)
In a small pot, bring 4 cups (950 ml) of the water to a boil, remove from the heat, and steep the tea bags (or loose tea in a reusable cotton tea bag) for 5 to 6 minutes.
Remove the tea bag(s) and add the sugar, stirring to dissolve.
Add the remaining 10 cups (2.4 L) of water to the glass jar and then add the hot tea.
Your tea should be at approximately room temperature—no higher than 88°F (31°C) or you may kill your kombucha SCOBY. Use a thermometer to be sure of the temperature.
Gently add the kombucha SCOBY and kombucha and stir. Cover the jar with cheesecloth and secure with a rubber band or string.
Allow the kombucha to ferment undisturbed at room temperature (ideally 76°F, or 24°C) for 1 week.
After 7 days, you should see a new, cream-colored layer growing on the surface of your kombucha, which is a new baby SCOBY. While trying not to disturb it too much, dip a straw a few inches (about 7.5 cm) into your kombucha, cover the top of the straw with your finger, and pull out a sip to taste.
Taste your brewing kombucha once a day until your ideal kombucha flavor is reached. If it’s still sweet, allow it to ferment longer. Most often my kombucha is done between 10 and 14 days, depending on the ambient room temperature.
When your kombucha is finished, with clean hands, remove your SCOBY, along with 1 cup (235 ml) of basic kombucha. Keep them together in a clean glass jar; this will be the starter for your next batch. It can be kept in the refrigerator, in an airtight jar or container, for several months until you are ready to brew again. After several batches, you will be able to separate the thickened baby SCOBY to share with a friend, along with 1 cup (235 ml) of basic kombucha so your friend can brew a batch too!
NOTES: Testing strips for pH can be used to verify that your kombucha is finished, which is when it’s within the ideal range of 2.5 to 3.5. Although pH testing isn’t strictly necessary, it can offer peace of mind to new brewers. See the Resources).
When cleaning your kombucha jar and bottles, do not use antibacterial soaps, as any residue will prevent fermentation. Regular soap and hot water are sufficient.
Keep in mind that the sugar isn’t for you; it’s food for the bacteria. It needs sugar to grow and create beneficial probiotics, acids, vitamins, and antioxidants. With an average 10- to 14-day brewing time, the culture processes most of the sugar, leaving you with a healthy, delicious, and low-sugar beverage.
If you do not wish to do a second ferment (see here), simply place your finished kombucha in a sealed jug or jar in the refrigerator. Or, keep at room temperature and pour into a glass over ice when you are in the mood for a drink. It may not be as fizzy as bottled kombucha, but it will have all the same great nutrition and flavor.
Kombucha Soda
YIELD: 3 CUPS (700 ML)
The second fermentation is what makes kombucha into a soda. After you have brewed your kombucha, seal up the brewed tea and allow the magic to happen. The fizziness is created during the time that the tea is sealed. The flavor combinations are endless, so feel free to experiment.
3/4 cup (170 g) chopped fresh fruit or all-natural, no-additive fruit juice (175 ml) of choice
3 cups (700 ml) (See Kombucha)
To a glass bottle with a tight-fitting lid (see the Resources, for my recommendation), add the fruit or juice. Whatever the size of your bottle or however many bottles you’re preparing, I recommend a 1:4 ratio of fruit or juice to kombucha (e.g., for every 1 cup [235 ml] kombucha, add 1/4 cup [60 ml] fruit or juice).
Pour the kombucha into the bottle, leaving 1 inch (2.5 cm) of space at the top. Seal the bottle tightly and store in a warm, dark place, such as a kitchen cabinet, for 2 to 4 days.
After 2 to 4 days, move the bottle to the refrigerator. Once chilled, pop the top and enjoy your very own home-brewed kombucha soda!
NOTES: If you wish, you may strain out the fruit or small cultures that might have formed during the second ferment before drinking.
If you are reusing store-bought kombucha bottles or Mason jars, I recommend placing a piece of parchment paper beneath the lid to help make a tighter seal. Do note that it will likely not produce as fizzy a kombucha as bottling with swing tops, which make an airtight seal.
Carrot Chickpea Salad with Tahini Kombucha Dressing
YIELD: 4 SERVINGS
FOR THE TAHINI KOMBUCHA DRESSING:
2 tablespoons (30 g) tahini
2 tablespoons (28 ml) (See Kombucha)
1/4 cup (60 ml) extra-virgin olive oil
Sea salt and ground black pepper, to taste
FOR THE SALAD:
8 medium carrots, peeled and sliced on a spiral slicer or grated into long strips
1/2 cup (75 g) crumbled feta cheese
1/2 cup (8 g) fresh cilantro leaves
1/2 cup (120 g) canned cooked chickpeas
1/4 cup (35 g) golden raisins
This salad can be thrown together in just a few minutes. Kombucha adds some flavor to the tahini dressing. The fresh carrots provide crunch, the chickpeas add a creamy texture, and the raisins add a touch of sweetness.
MAKE THE TAHINI KOMBUCHA DRESSING: In a small bowl, whisk together the tahini and Kombucha. While whisking, slowly drizzle in the olive oil until all of the oil is incorporated. Season with salt and pepper.
MAKE THE SALAD: Divide the carrots among 4 salad plates or bowls. Top with the cheese, cilantro, chickpeas, and raisins. Serve drizzled with the Tahini Dressing.
NOTE: If you like, substitute sunflower seed butter for the tahini.

◁ Lemon Rosemary White Bean Dip
YIELD: 2 CUPS (475 ML)
Snacks can be healthful! This standard white bean dip is improved with the added flavor of lemon and rosemary, and a probiotic addition from Kombucha. It is best served with crunchy fresh vegetables or even as a spread on a sandwich.
1 can (15 ounces, or 425 g) cannellini beans, drained and rinsed
2 tablespoons (28 ml) (See Kombucha)
Juice of 1/2 of a lemon
1 tablespoon (15 ml) olive oil
1 small clove of garlic
1/2 teaspoon sea salt
1/4 teaspoon ground black pepper
2 pinches of fresh rosemary needles, plus more for garnish
Place the cannellini beans, Kombucha, lemon juice, olive oil, garlic, salt, pepper, and rosemary in a food processor. Pulse until creamy, about 2 to 3 minutes. Top with more fresh rosemary, if desired.

◁ Beet, Grapefruit, and Chèvre Salad with Kombucha Balsamic Vinaigrette
YIELD: 4 SMALL SERVINGS
Think outside the box with this beet and grapefruit salad, which is hearty, earthy, and tangy, with a touch of light creaminess from the chèvre. You’ll be sure to impress your friends at the next dinner party.
2 medium golden beets
2 medium red beets
FOR THE VINAIGRETTE:
1 tablespoon (15 ml) (See Kombucha)
1 tablespoon (15 ml) balsamic vinegar
1 teaspoon Dijon mustard
1 teaspoon raw honey
Pinch each of sea salt and ground black pepper
3 tablespoons (45 ml) extra-virgin olive oil
FOR THE SALAD:
4 cups (220 g) baby salad greens
2 grapefruits, peeled and segmented
4 ounces (115 g) chèvre (goat cheese), crumbled
1/3 cup (41 g) pistachios, chopped
2 tablespoons (8 g) chopped fresh dill
Preheat the oven to 425°F (220°C, or gas mark 7).
Place the golden beets and the red beets in separate foil pouches and set on a rimmed baking pan. Roast for 40 minutes or until tender. Remove from the oven and let stand until cool enough to handle. Peel the beets by rubbing them with your hands under running water. Cut the beets into 1/4-inch (6 mm) slices.
MAKE THE KOMBUCHA BALSAMIC VINAIGRETTE: In a blender, combine the Kombucha, vinegar, mustard, honey, and a pinch of salt and pepper. While the blender is running on low, slowly drizzle in the oil until all the oil is incorporated. Set aside until ready to use.
MAKE THE SALAD: Divide the salad greens among 4 salad plates. Arrange the beets and grapefruit segments on top of the greens and then top with the chèvre, pistachios, and dill.
Drizzle with the Kombucha Balsamic Vinaigrette and serve immediately.

◁ Chicken Satay with Cilantro and Almond Butter Sauce
YIELD: 4 SERVINGS
Nothing says fun like food on a stick! This chicken is tender and honey baked. Serve with a side of your favorite grilled vegetables, (zucchini and eggplant pair nicely) and Fermented Ginger Orange Carrots. Your family will never guess it’s so healthy!
FOR THE SAUCE:
1/2 of a bunch fresh cilantro
1 inch (2.5 cm) piece of fresh ginger, peeled and coarsely chopped
1 clove of garlic
1/4 cup (65 g) almond butter
2 tablespoons (28 ml) (See Kombucha)
2 tablespoons (28 ml) coconut aminos
Juice of 1 lime
1 teaspoon raw honey
Sea salt, to taste
FOR THE SKEWERS:
1 pound (455 g) boneless, skinless chicken breasts or thighs, cut into 1-inch (2.5 cm) cubes
2 tablespoons (28 g) butter or ghee, melted
Sea salt and ground black pepper, to taste
2 tablespoons (40 g) raw honey
Soak four 10-inch (25.5 cm) wooden skewers in water for 10 minutes (to prevent burning). Preheat the oven to 450°F (230°C, or gas mark 8).
MAKE THE SAUCE: In a food processor, combine the cilantro, ginger, garlic, almond butter, Kombucha, coconut aminos, lime juice, and honey, and process until smooth and creamy. Season with salt.
MAKE THE SKEWERS: Put the chicken pieces in a bowl or shallow dish. Pour one-third of the sauce over the chicken and toss to coat thoroughly. (Reserve the rest of the Cilantro and Almond Butter Sauce for serving.) Place the soaked skewers through the chicken pieces and arrange in baking dish.
Drizzle the chicken skewers with the melted butter and season lightly with salt and pepper.
Bake for 10 to 15 minutes until the chicken starts to brown and is cooked almost all the way through.
Remove from the oven and turn the skewers, coating them with any juices in the pan. Drizzle the honey over each skewer. Put back in the oven and bake for 8 to 10 minutes more until the chicken is cooked all the way through. Watch carefully so that it doesn’t burn.
Serve immediately with the reserved Cilantro and Almond Butter Sauce.

◁ Roasted Vegetables and Quinoa with Creamy Walnut Dressing
YIELD: 4 SMALL OR 2 LARGE SERVINGS
Most of us would benefit from eating more vegetables, and the easiest way to get more veggies into our diets is with salads. But forget the boring salad routine. Roasted vegetables, quinoa, and a creamy, nutty dressing take this salad to another level that’ll leave you satisfied and guilt-free.
FOR THE ROASTED VEGETABLES:
1/2 cup (87 g) quinoa
6 small carrots, peeled and halved lengthwise
2 portobello mushroom caps, cut into 1/2 inch (1.3 cm) thick strips
2 yellow bell peppers, quartered and seeded
1 medium red onion, sliced into 1/2-inch-thick (1.2 cm) rings
1 tablespoon (14 g) coconut oil, melted
Sea salt and ground black pepper, to taste
FOR THE CREAMY WALNUT DRESSING:
1/2 cup (50 g) walnuts
1/4 cup (60 ml) extra-virgin olive oil
2 tablespoons (28 ml) (See Kombucha)
Juice of 1/2 of a lemon
1 tablespoon (20 g) raw honey
1 teaspoon Dijon mustard
8 cups (440 g) spring mix salad greens
1/4 cup (30 g) sweetened dried cranberries
Preheat the oven to 400°F (200°C, or gas mark 6). Prepare the quinoa on the stovetop according to the package directions.
MAKE THE ROASTED VEGETABLES: Divide the carrots, mushrooms, bell peppers, and onion between 2 rimmed baking sheets. Lightly drizzle with the coconut oil and sprinkle with salt and pepper. Roast for 12 to 15 minutes until the vegetables are tender and lightly browned.
MAKE THE CREAMY WALNUT DRESSING: In a food processor, process the walnuts, oil, Kombucha, lemon juice, honey, and mustard until smooth and creamy. Season with salt and pepper.
To serve, divide the salad greens among the plates. Divide the quinoa, roasted vegetables, and dried cranberries over the greens. Serve drizzled with the Creamy Walnut Dressing.
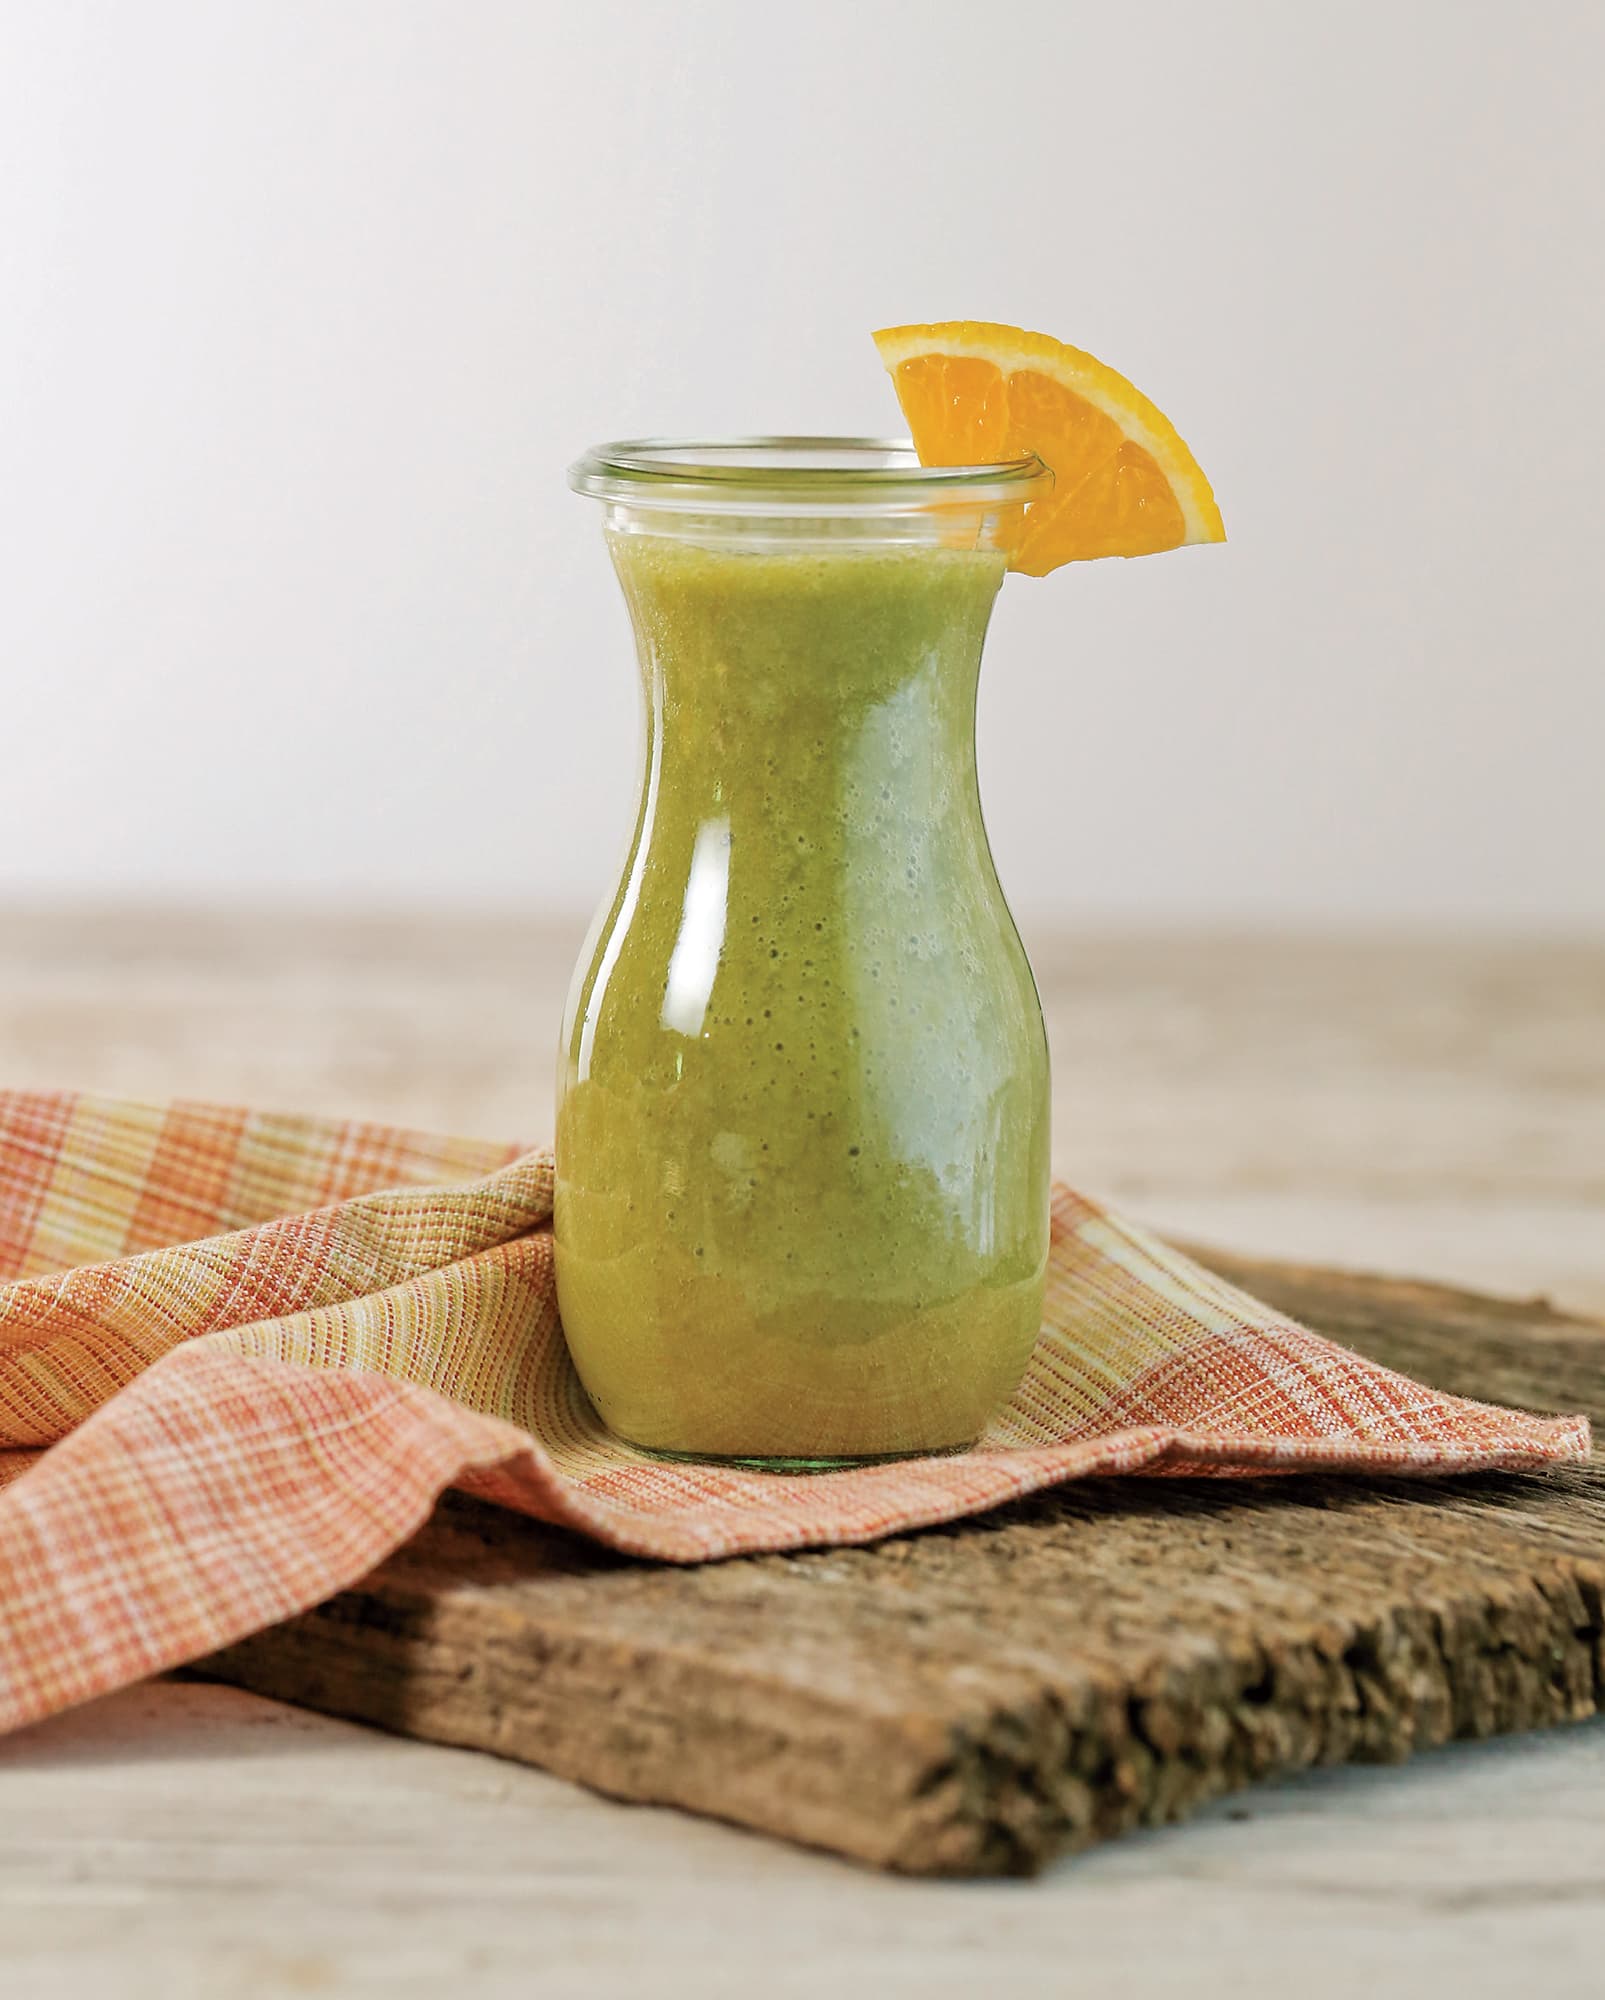
◁ Citrus Ginger Kale Smoothie
YIELD: 1 SERVING
Everyone is talking about green smoothies and maybe you’ve wanted to see what all the fuss is about. Here’s your chance! Can something green and healthy taste that good? Don’t take my word for it, try it, and you be the judge.
2 cups (134 g) fresh kale, stemmed
1 banana, frozen
1 navel orange, peeled and seeded
1 inch (2.5 cm) piece of fresh ginger, peeled
1 cup (235 ml) (See Kombucha Soda)
Orange slice, for garnish (optional)
Place the kale, banana, orange, and ginger in a blender and blend until smooth, stopping to scrape down the sides of the pitcher as needed.
Add the Kombucha and blend again until smooth. Serve with a slice of orange for garnish, if desired.
NOTE: Add plain or vanilla protein powder as desired. I suggest collagen peptides. (See the Resources.)
Spiced Apple Cranberry Kombucha Sangria
YIELD: 3 QUARTS (2.8 L)
First used in Portugal and Spain, sangria is now a popular party drink everywhere. It adds festive flair to every celebration. In some cultures, sangria symbolizes passion and vitality, and with one sip of this recipe, you’ll see why. Make this sangria the day before to let the flavors mesh.
2 oranges, sliced into thick rounds
6 whole cloves
1 bottle (750 ml) of white wine
3 apples, cut into thin wedges
2 cinnamon sticks
1 cup (100 g) fresh or frozen cranberries
1 cup (235 ml) apple cider
1/2 cup (120 ml) unsweetened cranberry juice
1/4 cup (60 ml) brandy
1/4 cup (85 g) raw honey
4 cups (950 ml) (See Kombucha Soda)
Stud the orange slices with the cloves by sticking the oranges with a toothpick to create a hole and then stuffing the point of a clove into it. Keep a few clove-studded orange slices aside for garnish. (Don’t be tempted to use more cloves, or the flavor might overwhelm the sangria.)
Add the oranges, white wine, apples, cinnamon sticks, cranberries, apple cider, cranberry juice, brandy, and honey to a large pitcher or punch bowl. Give it all a good stir until the honey is dissolved. Allow it to sit for several hours or overnight in the refrigerator to let the flavors come together.
To serve, pour into glasses, taking some of the fruit for each glass. Top each glass with a generous splash of Kombucha soda and give it a stir. Garnish with a clove-studded orange slice.
NOTE: For a nonalcoholic version, omit the wine and brandy and use additional apple cider.
Strawberry Lemonade Kombucha Ice Pops
YIELD: 10 POPS
11/2 cups (220 g) fresh strawberries, stemmed and chopped
1 cup (235 ml) freshly squeezed lemon juice (Use Meyer lemons, if you can get them.)
1 cup (235 ml) (See Kombucha)
1/2 cup (170 g) raw honey
Loaded with tons of fresh strawberries and a probiotic bunch from Kombucha, this kid-friendly ice pop recipe creates the perfect treat for a hot summer afternoon.
In a blender, place the strawberries, lemon juice, Kombucha, and honey and blend well.
Pour the mixture into ice pop molds and freeze for 4 to 6 hours until frozen solid.
NOTE: If the pops don’t easily release from the molds, dip them in warm water for a few seconds. For the ice pop molds that I recommend, see the Resources.