
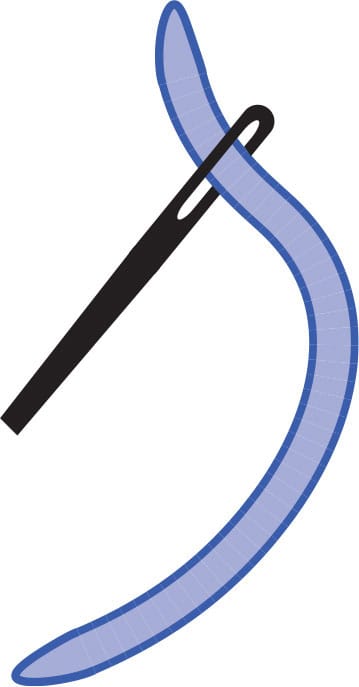
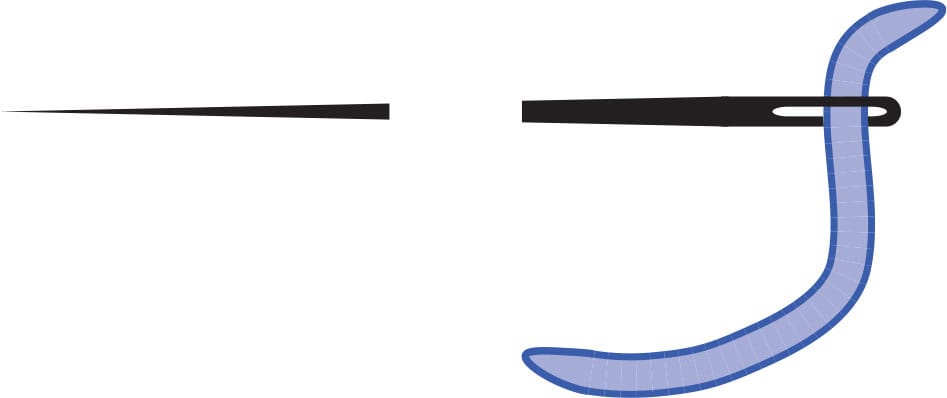
GETTING STARTED
All you need to get started is a needle, thread, fabric, pair of scissors, and an idea. The correct equipment enhances the embroidery experience and makes stitching much easier. Use the information in this section as a reference for choosing the correct equipment and supplies. You will refer to the information time and time again.
stitching equipment and supplies
Embroidery requires a very low investment in equipment and supplies, yet there are many options to consider. Many tools, fabrics, threads, and yarns can be used for more than one type of embroidery, and those items are introduced here.
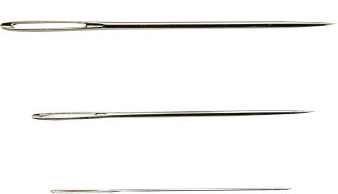
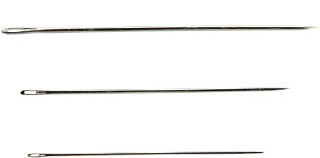
NEEDLES
Needles are the most important tool required to create a beautiful piece of embroidered needlework. The type and size of needle you choose depends on the fabric or canvas and the type of thread or wool to be used for the stitching.
A needle needs to fit your hand and feel comfortable when stitching. Choose a needle with an eye large enough for the thread or wool to move freely through but not larger than needed.
When you stitch, the threads of the fabric move, allowing the needle to slide through the weave. Once the needle passes through, those threads move back into place. But when you work with a needle that is too large, it leaves a hole in the fabric or enlarges the canvas hole.
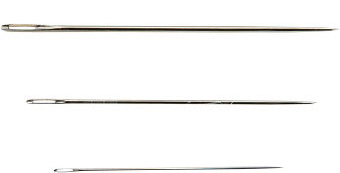
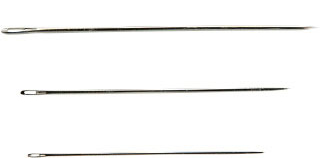
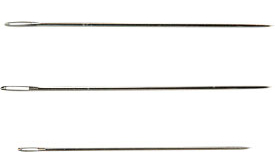
Chenille Needles
Chenille needles are thick with large eyes and sharp points. Sizes range from 18 (largest) to 28 (smallest). Used for creative embroidery and crewel; the larger sizes are used for wool and crewel threads, size 3 and 5 pearl cotton, metallic braids, and silk ribbon. The smaller sizes are used for embroidery floss, over-dyed thread, combination threads (wool and silk), smaller sizes of metallic braids, and size 12 and 8 pearl cotton. Size 28 can be used for beading. This needle can be used on any fabric that has a plain-weave.
Crewel Needles
Crewel needles are thin with long eyes and sharp points. Sizes range from 1 (largest) to 10 (smallest). The larger sizes are used for wool and larger metallic braids. The smaller sizes are used for strands of cotton, silks, rayon thread, and smaller metallic braids. This needle can be used on any plain-weave fabric. Size 7 or 8 can be used for beading after the stitches are in place.
Embroidery Needles
Embroidery needles have long medium eyes and sharp points. Sizes range from 1 (largest) to 10 (smallest). They are used for creative embroidery and crewel, with stranded threads, silks, rayon, metallic thread, and braid. This needle can be used on any plain-weave fabric or for general hand sewing.
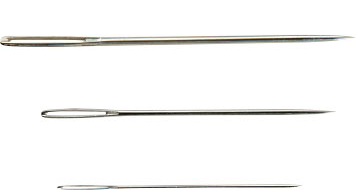
Milliners
Milliners are long and thin with very small eyes and sharp points. Sizes range from 1 (largest) to 10 (smallest). This needle is the same diameter down the length of the needle. Use a milliner to work a bullion knot that has a smooth even appearance. This needle can be used on any plain-weave fabric. It also works well for attaching beads with beading thread if a longer beading needle is not required.
These needles are excellent for finishing seams by hand or securing appliqués. The thin needle allows you to take small running stitches and to hide a slip stitch between the folds of fabric.
Sharps
Sharp needles are thin and short with small eyes and sharp points. Sizes range from 1 (largest) to 12 (smallest). These needles are excellent for finishing seams by hand or securing an appliqué. The thin needle allows you to take small running stitches and to hide a slip stitch between the folds of fabric.
Tapestry Needles
Tapestry needles are thick with large eyes and blunt points. They are slightly shorter than chenille needles and range in size from 18 (largest) to 28 (smallest). They are mainly used for cross-stitch and needlepoint and are perfect for working the whipped or laced portion of a crewel or creative embroidery stitch to prevent splitting the stitched thread. The larger sizes are used for wool, cotton thread, and crewel threads. The smaller sizes are used for embroidery floss, over-dyed, silk, and so on. Size 28 can be used for beading. This needle can be used on any even-weave fabric.
Chenille needles: Sizes 18, 22, and 26
Crewel needles: Sizes 1, 5, and 10
Embroidery needles: Sizes 5, 7, and 10
Milliners: Sizes 3, 7, and 10
Sharps: Sizes 6, 7, and 10
Tapestry needles: Sizes 18, 22, and 28
CUTTING TOOLS
Scissors or shears should be chosen for the task at hand. There are several types suitable for embroidery. To keep scissors or shears sharp, use them only for what they were designated. When scissors are not in use, they should be put away for safety. Keep scissors covered with a sheath or place them in the case they came in to protect the sharp point.
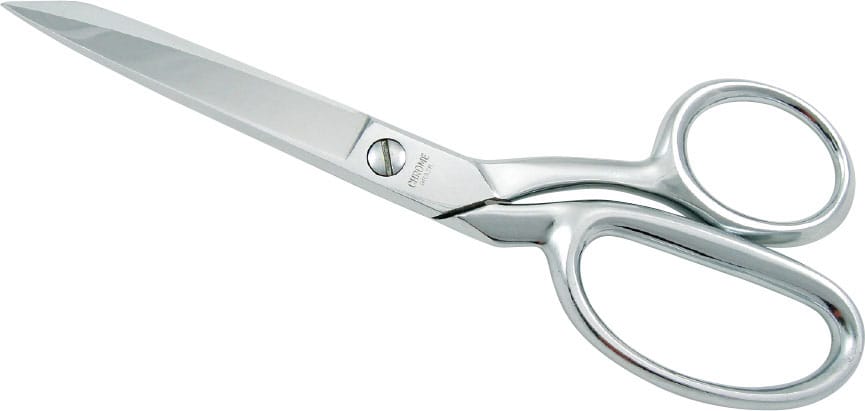
Embroidery Scissors
Embroidery scissors are small and sharp and have a tapered point with a 1" (2.5 cm) blade cut. There are many different kinds available in a wide range of prices. These scissors are used to cut lengths of cotton, silk, or wool threads. When cutting thread lengths, it is recommended that you cut close to the base of the blade.
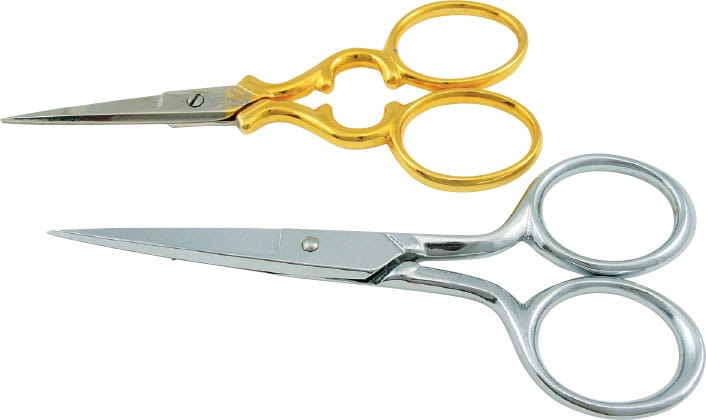
Embroidery scissors
Fabric Shears
Fabric shears are large and sharp and have a straight 8" (20.3 cm) blade. They are used for cutting all types of fabric.
Fabric shears
Paper Scissors or Shears
Paper scissors or shears are available in many sizes. Cut tissue paper and tape with these.
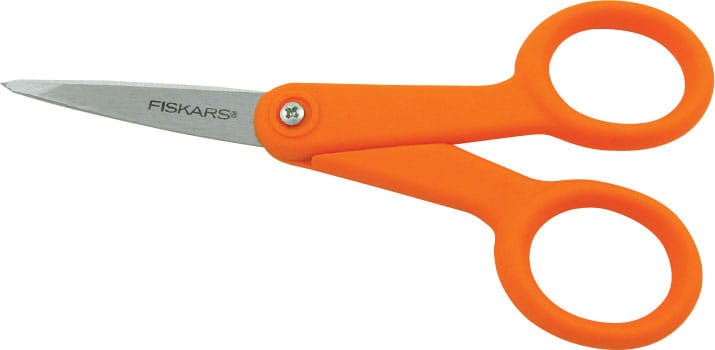
Paper scissors or shears
Cutting Board, Wide Ruler, and Rotary Cutter
This equipment is often thought of more for quilting than embroidery. Although they are not necessary for this type of stitching, these tools ensure clean, accurate cuts on all types of fabric. If you have a clean cut on the edge of your fabric, you have a well-finished project.

Cutting board, wide ruler, and rotary cutter
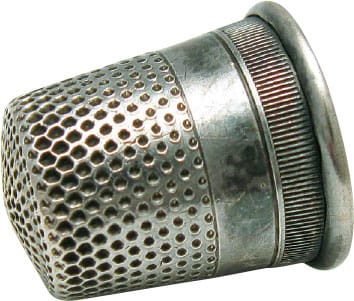
HOOPS OR FRAMES
Creative embroidery, cross-stitch, and crewel are usually worked in a hoop or frame, though some stitchers prefer not to use them. Hoops and frames hold the work taut, making stitching easier and stitches more uniform. The size and type of hoop or frame will depend on the project and your preference. The following information will help you decide which type will work best for you.
When using a hoop, 2" to 3" (5.1 to 7.6 cm) of excess fabric should extend beyond the hoop or frame, before the fabric has been secured. This will help to keep the fabric taut once the hoop or frame has been tightened. When working on premade clothing, it is not always possible to have this much extra fabric. In such cases, you may find it easier to work the project without a hoop or frame.
If the hoop allows the fabric to slip during stitching, readjust the fabric as needed. When working on particularly delicate fabric, try wrapping the hoop with muslin fabric strips to lessen the stress on the fabric. Cut 1/2" (1.3 cm) strips of fabric to wrap around each of the hoop circles. Secure the end of the wrapped fabric with a small tack stitch.
Always remove the needlework from the hoop, clamp, or snap frame when not stitching. If they are left in place for longer than the stitching time, a permanent mark may develop on the fabric and thread. Or, frame up a larger piece of fabric than called for to keep the project area away from the frame or loop edges. This allows you to keep the fabric in the frame until the project is completed.
Wooden and Plastic Hoops
Wooden hoops have a screw tension. Plastic hoops come with a screw or spring tension. Both types of hoops have two round circles, one smaller than the other. To use a screw-tension hoop, separate the two circles and place the fabric over the smaller circle so it lies smoothly. Place the larger top circle over the fabric, pressing it into place. Gently screw the tension device to hold the work securely in place between the circles. The fabric needs to be taut across the bottom circle.
If using a hoop with a spring tension, be sure the fabric is smooth over the smaller circle before carefully placing the larger hoop on top. The spring-load tension will adjust automatically.
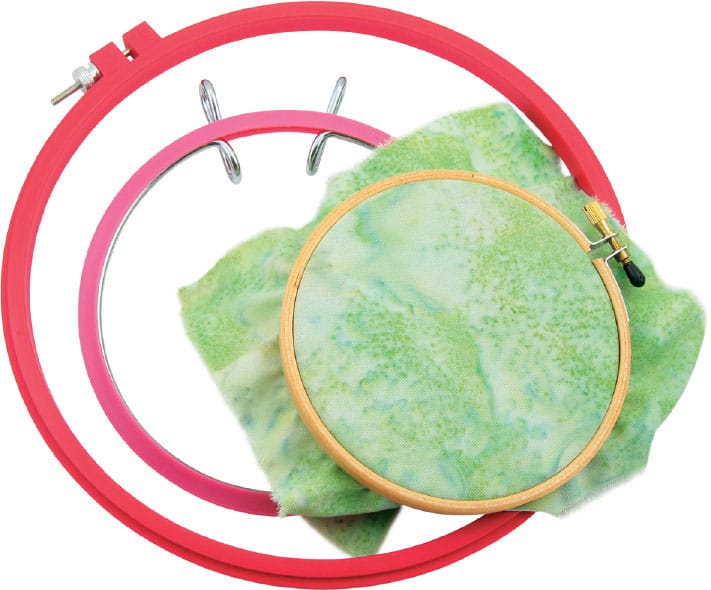
Wooden and plastic hoops
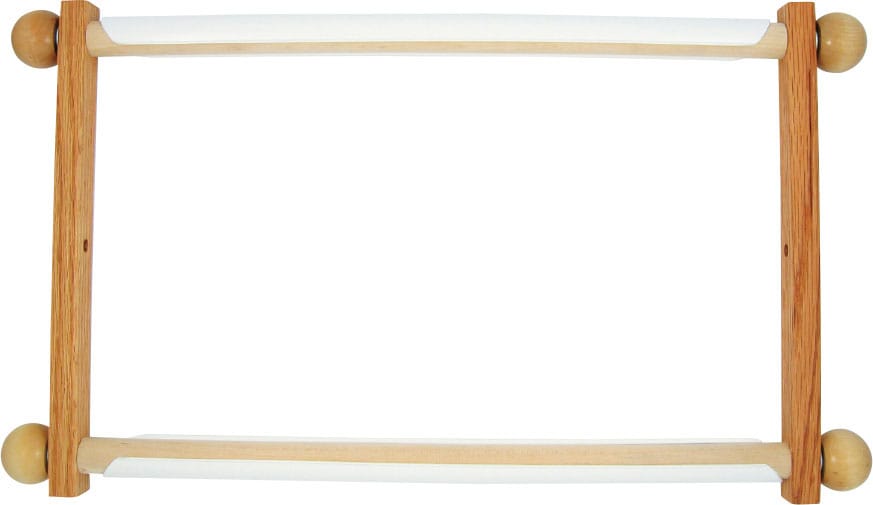
Scroll Frame (with a split)
Slots in the dowel rods of this frame hold the fabric securely. You can adjust the tension so the fabric is taut for stitching. When you need to reposition the work, simply loosen the screws and roll to the desired area.
This type of frame makes it easy to quickly frame up and start the project without needing to tack or baste the work to the frame. It can be used for cross-stitch, crewel, and creative embroidery.
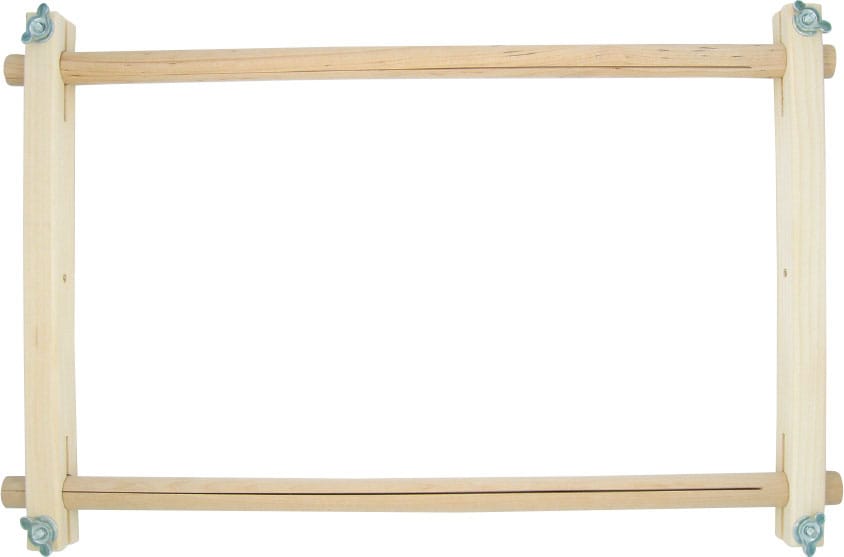
Scroll frame
Ratchet Frame
This is a lightweight frame that works similarly to the wooden scroll frame. This system allows the fabric to scroll back and forth effortlessly on the two-way ratchets. The fabric is held at the correct tension between the two split rails without leaving marks on the fabric. Small or large projects can be worked on it without having to baste the fabric to the frame. The lightness of the frame makes it perfect for stitching and for traveling. It can be used when working cross-stitch, crewel, and creative embroidery.
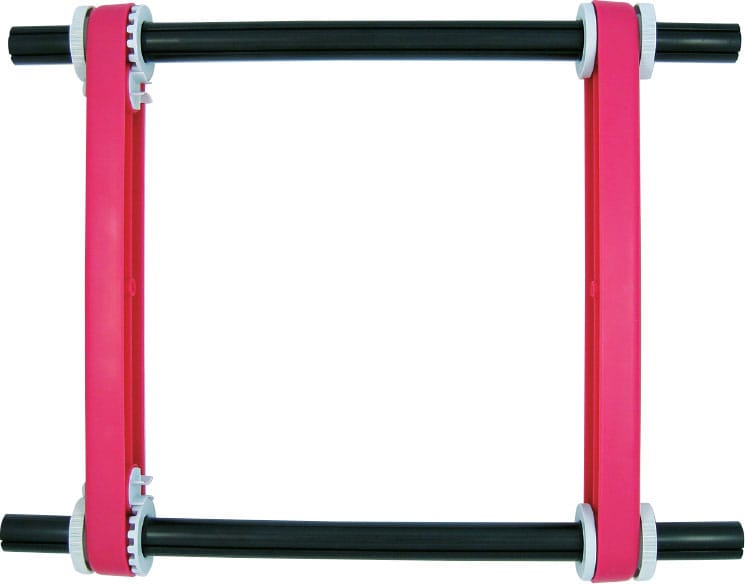
Ratchet frame
Handi-Clamp
This frame functions like the scroll frame, but it has two plastic clamps to hold the fabric in place. It does not require thumb tacks or staples and there is no basting. Simply lay the fabric over the dowel rod and snap the half-circular fastener in place on one end. Repeat for the other end. Use the knobs to roll up and tighten the fabric, making it taut in the frame. The company does recommend placing a piece of quilt batting (4" [10.2 cm] wide by the length of the scroll bar) between the frame and fabric to avoid marking the fabric with the frame bar. This frame is easy to use and is suitable for cross-stitch, crewel, and creative embroidery.
Handi-Clamp
Q-Snap Frame
The Q-Snap is square. Place the fabric over the square and snap the half-circular fasteners in place on each side of the frame. Once the fasteners are in place, rotate them slightly away from you to tighten the fabric so it is taut in the frame. This frame works well for traveling.
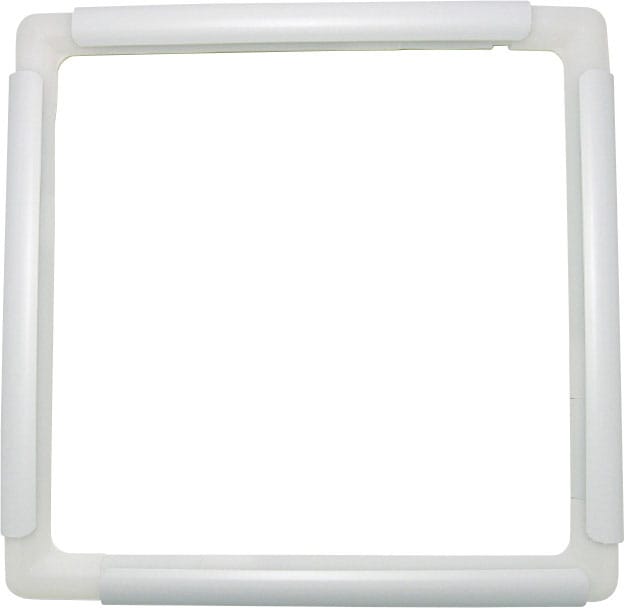
Q-Snap frame
SUPPLIES
Beeswax
Available in needlework shops, beeswax is used to strengthen threads and reduce knotting or kinking. At times, you’ll need a certain color of thread for beading. If you strengthen them with beeswax, you can use embroidery floss, hand-dyed single strand cotton, or sewing thread. Simply run the thread across the beeswax several times.
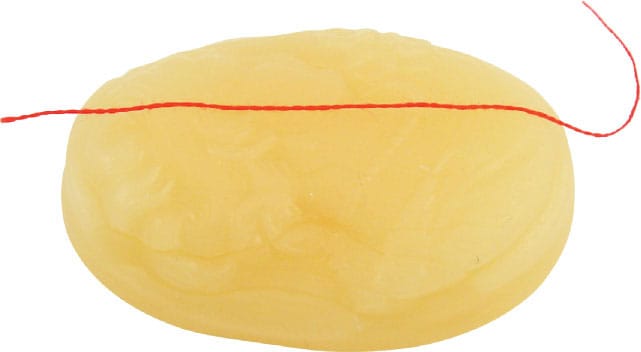
Beeswax
Iron and Ironing Board
It is important to remove all wrinkles from fabric before stitching. If fabric has been folded for long, lightly spray with water mixed with a teaspoon of white vinegar before light pressing. Batik fabric should be washed before spraying with vinegar water.
Press Cloth
This type of cloth is needed when fusing stabilizers to the wrong side of fabric. It is also handy when pressing a dark colored or synthetic fabric to avoid creating a shine on the fabric.
Light Source
Good lighting is important when stitching. Ideally, the light should come from over your shoulder. The best types of lighting are natural window light, daylight bulbs, and daylight fluorescent lamps.
Magnification
Several types of magnification work well. These include lighted floor stands, table lights with magnifiers, magnifiers that hang on a cord around the neck, and magnifiers that fit on your head allowing your glasses to remain in place.
My favorite is the magnifier that fits on your head. You can adjust it low enough to see the needlework while still being able to see above the top edge of the magnification. This allows you to watch TV or observe other people in the room.
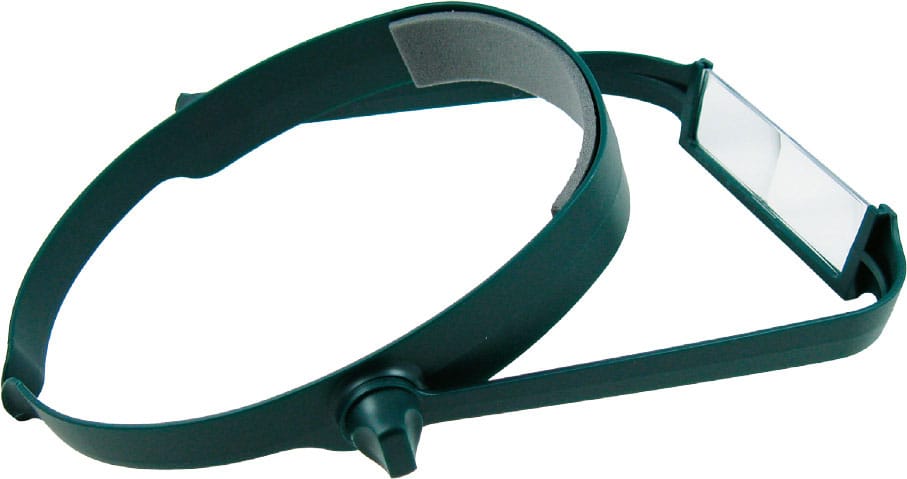
Magnification
Needle Threader
The needle and thread you choose will determine the kind of needle threader needed.
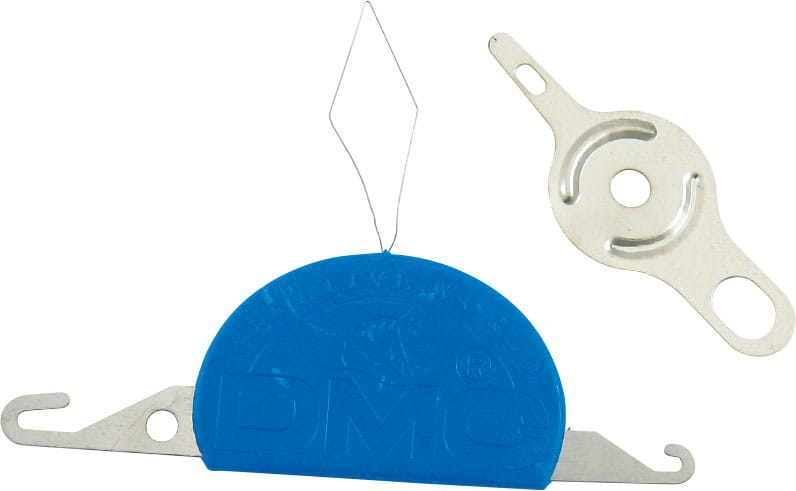
Needle threader
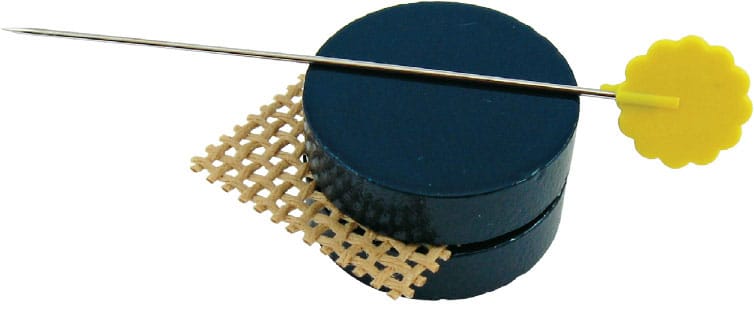
Quilter’s Tape
This is a tape with a light adhesive that will not leave a residue on fabric. Use it to hold tissue paper on the right side of the fabric until basting it in place. Mark the tape every 1/4" or 1/2" (0.6 or 1.3 cm) to help keep your border stitches evenly spaced. Remove the tape when you’re done stitching for the day—do not leave tape on the fabric for more than a few hours. Read all product instructions before using.
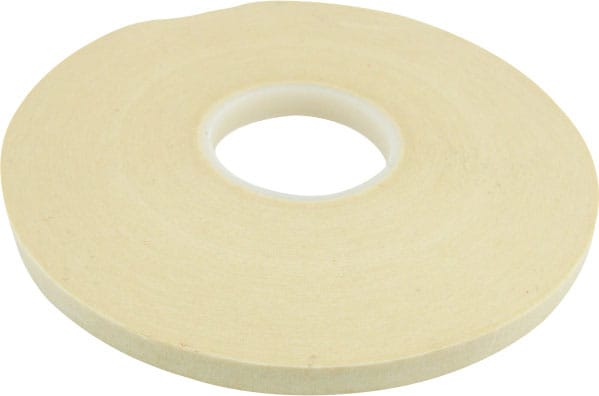
Quilter’s tape
Ruler and Measuring Tape
Keep a measuring tape handy to locate the center of your fabric before placing your design. A small ruler is handy for measuring the length of a stitch or for accurately placing patterns.
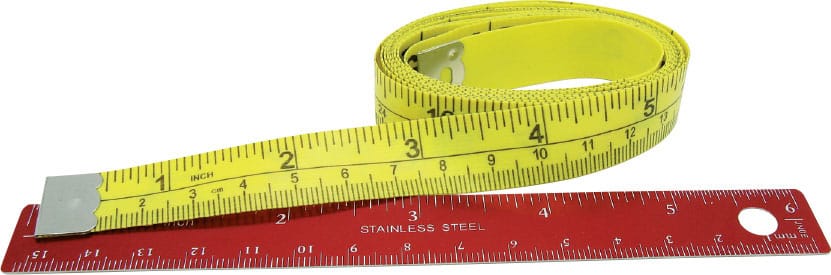
Ruler and measuring tape
Laying Tool or Stiletto
Either of these tools can be used to lay a metal thread or stranded thread so it does not twist as it enters the canvas. When these tools are not in use, secure the stiletto tip or place the laying tool in its case. Store this tool out of the reach of children.

Laying tool or stiletto
Straight Pins and Pin Cushion
Use straight pins to hold fabrics together or to mark a starting point on canvas or stitchery. Straight pins can be used to straighten out a knot in your thread. If you have a kink in a creative embroidery thread that doesn’t want to lie smoothly against the fabric, just use the pin as a laying tool.
Thimbles
Using a thimble is entirely optional. When used, it is normally worn on the middle finger to help push the needle through heavier fabrics. You may find the feel of a thimble awkward at first. It will take time to learn to stitch using one, but it prevents pricking a finger.
Thimbles
Magnets
Placing a magnet on each side of your fabric creates the perfect spot to place your needle while stitching.
Magnets
Tweezers
These little jewels are a must in every needlework basket. They help to remove threads that have been clipped, extract bits of tissue paper that are stuck under a stitch, and pick up a needle that is buried deep in the carpet.
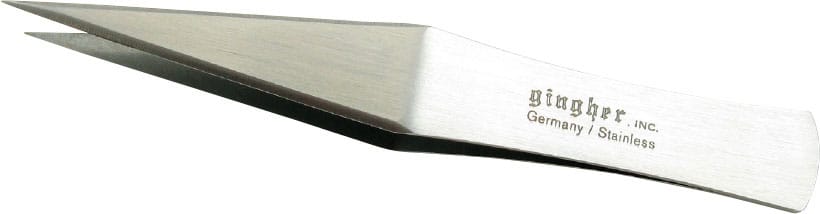
Tweezers
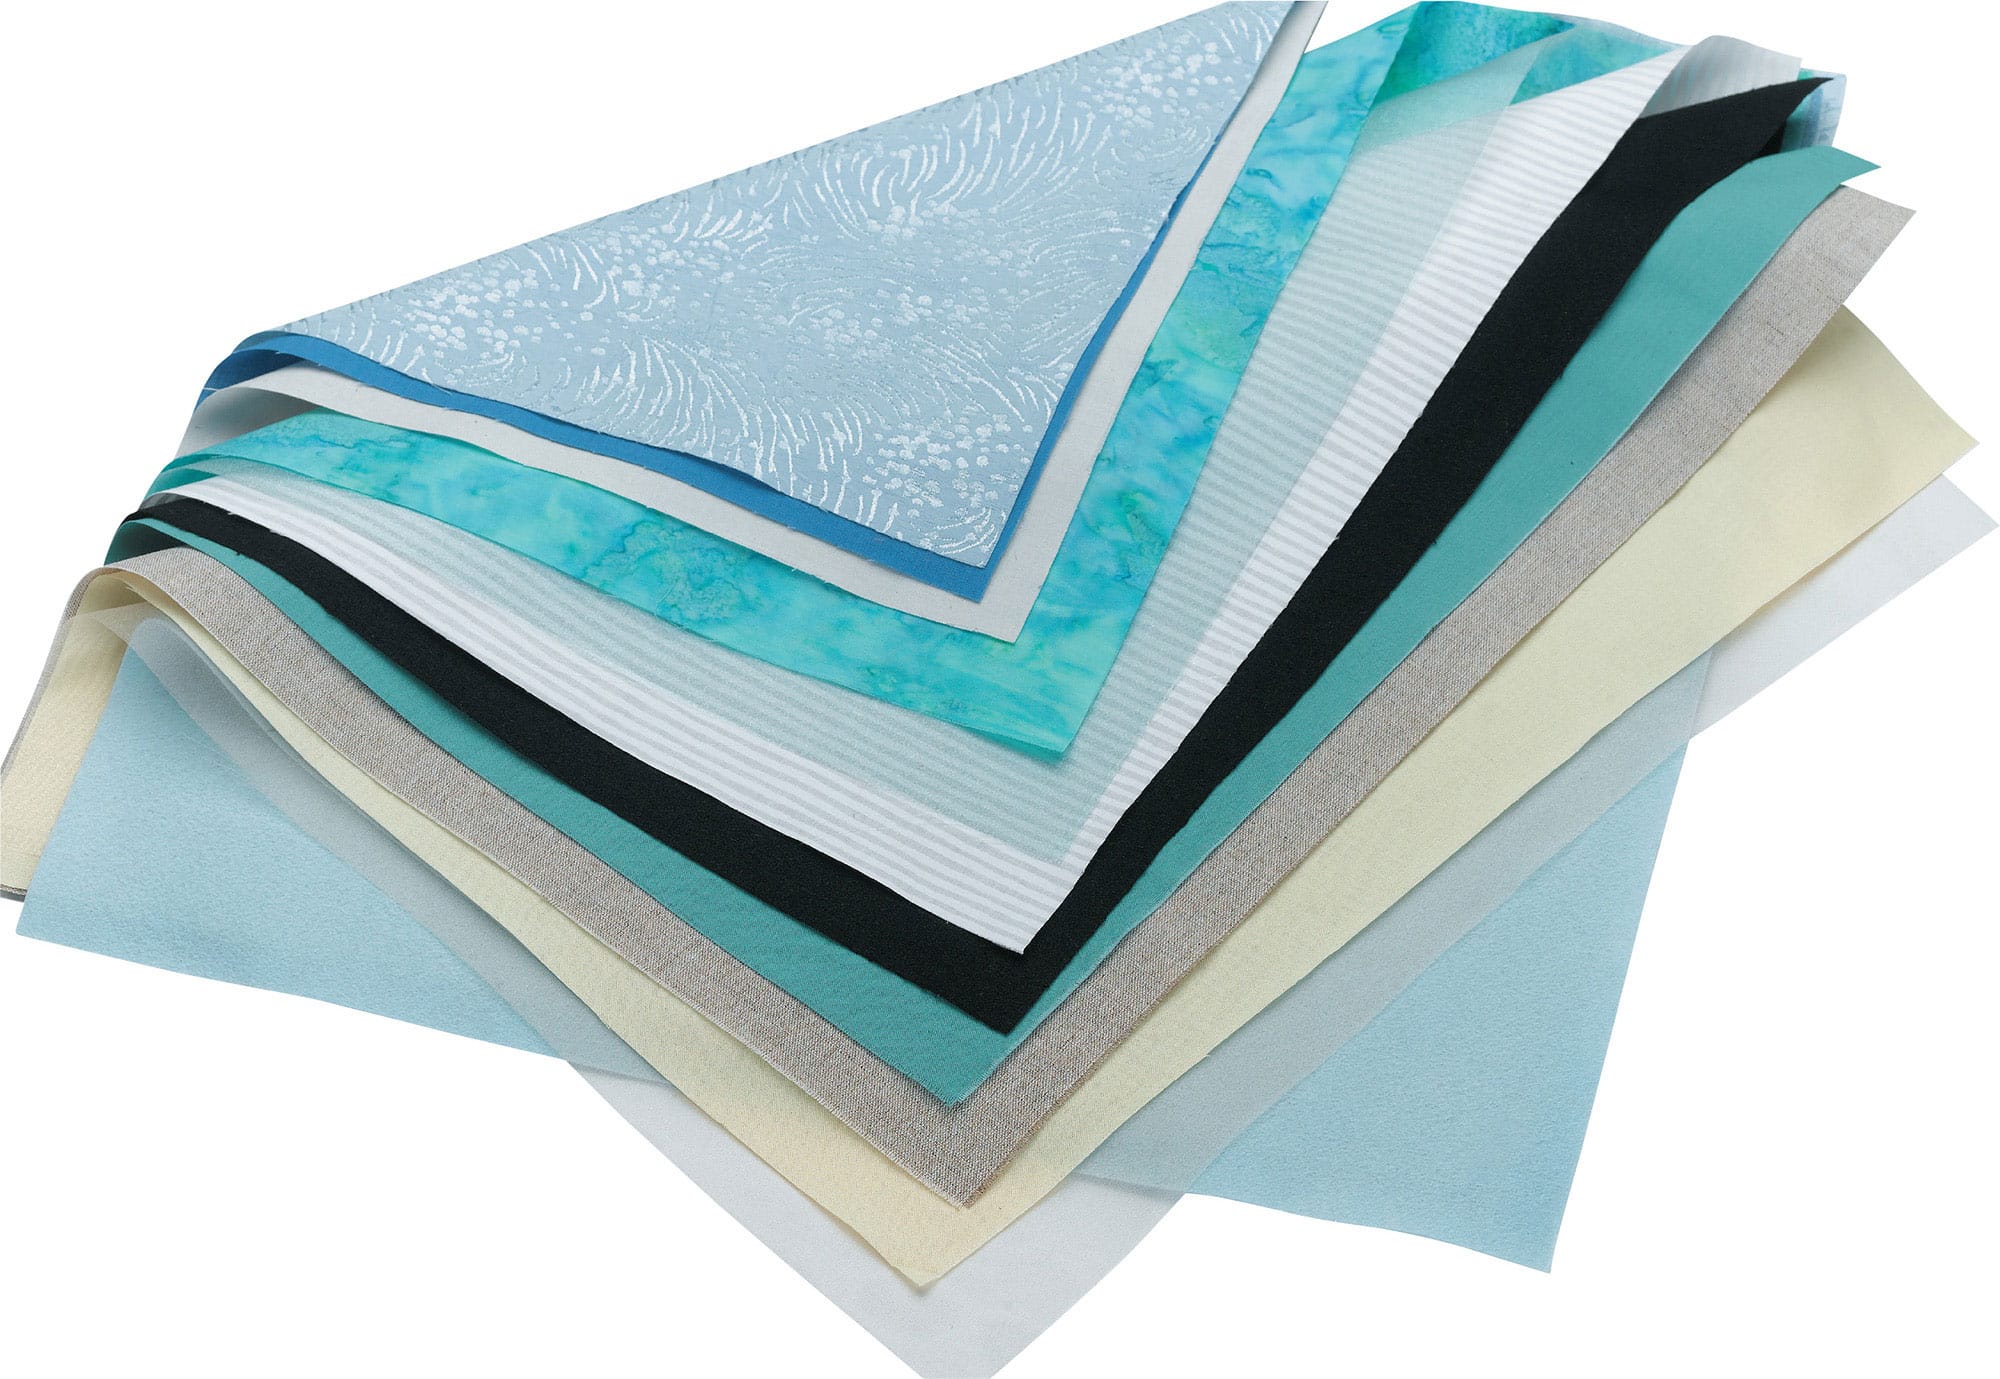
fabrics
When planning your project, choose a fabric suited to the pattern and finished design. Use a fabric that will showcase your thread colors when the project is finished.
There is a wide range of fabrics, clothing, kitchen items, and even paper that can be embroidered. Fabric that has give, or stretches, does not work well. The thread does not stretch, causing the fabric to pucker. Use a stabilizer like medium-weight Pellon, or two layers of fabric if cotton is being used. A lightweight flannel also works well.
Crewel work is usually done with heavy thread, and heavyweight fabrics work well. Linen fabric can also be used.
There is an endless range of cross-stitch fabric and premade items available for cross-stitch. High-count linens worked over several threads result in a beautiful finished project. Waste canvas is available to attach to regular fabric or clothing items.
FABRIC PREPARATION
Before using washable fabric, wash, dry, and iron fabric following the manufacturer’s instructions. If you do not prewash the fabric, it may shrink when it is washed later, distorting the stitches.
If your finished project will not be washed, it is not necessary to prewash the fabric. Washing removes sizings, which are used in some fabrics to give the fabric a crisp look that enhances the finished project.
When using a loosely woven fabric, overcast (zigzag) the edges. Some stitchers prefer to always overcast or serge the edges or run a quick basting hem along the edges.
If you find a fabric you like that isn’t included here, ask for a small sample of it to work a few stitches on. Then answer the following questions to determine if the fabric is suitable for the stitching technique. Did the needle slide easily in and out of the fabric? Did the fabric lay flat after the stitches were in place? Do you like the effect of the stitches and thread with the fabric?
COTTONS (PLAIN-WEAVE)
Cotton fabrics are available in an array of beautiful, lush solid colors. The batiks make a wonderful background for embroidery. They come in a wide range of colors, including multicolored.
White-on-white and cream-on-cream prints or stripes (patterns on the fabric are of like color) give just a hint of texture to the background for embroidering. In the quilting world, this type of fabric is used for the quilt pattern background. I love stitching on this type of white fabric. The threads bring the color to the project.
Muslin—unbleached or bleached white—is a lightweight fabric. It comes in 100 percent cotton or a 50/50 blend. The 100 percent cotton is a good choice for embroidery. Available in different thread counts (a higher thread count works best), it is a nice surface for kitchen towels, aprons, and pillows. Muslin also works well with transfer paper, window tracing, or iron-on pencil.
Good for: creative embroidery
QUILTING COTTON
Cotton works well for crewel projects. This fabric comes in wonderful colors. Kona cotton is a little thicker than other brands on the market, making it a favorite. Do use a stabilizer with cotton.
Good for: crewel
SHEER
This transparent fabric is slippery and can be a little difficult to work with. Layer two pieces together to create a little more weight to the fabric. You can choose a darker tone of the same color, or use a contrasting color under the sheer. Adding a piece of stabilizer under the solid fabric would give the two pieces of fabric even more stability. This fabric is beautiful when used by itself or in combination with a piece of solid colored fabric. It is well worth the effort once the project is complete.
Good for: creative embroidery
SILK NOIL
This natural silk has a nubby texture that enhances your stitchery. Wonderful for purses or picture frames, the fabric comes in a wide range of colors. Black or off-white colors are wonderful backgrounds for colorful stitchery.
Good for: creative embroidery
SHANTUNG
This shiny fabric has crosswise ribs and slubs, giving character and texture to the fabric. It works especially well for home décor projects. Shantung has a fine texture and is woven from cultivated silk. There is also a synthetic fabric that looks like shantung. It is hard to tell the difference between the two. The synthetic is a slightly lighter fabric. Both types work but need to be stabilized.
Good for: creative embroidery and crewel
FELT
Felt comes in wool blends, bamboo, and 100 percent wool. The wool blends and bamboo are widely available, and the 100 percent wool can be found in specialty shops or online. Felt is easy to use and does not ravel. Projects can quickly be finished by using one of the edging stitches.
Good for: creative embroidery and crewel
LINEN
Linen fabric found in fabric stores comes in several colors along with a natural color that is sold in the home décor area. The natural color is thinner than linen found in needlework shops. It can be used with a stabilizer. Even-weave linens from needlework shops can be used for crewel. The higher count linens work best for this technique. Loosely woven linens (gaps between threads) do not work well. The stitches will slide under the threads. The higher the fabric count, the easier it is to work the stitches. Glasgow linen is a slightly heavier linen. It works well with wool or blends.
Good for: creative embroidery, crewel, and cross-stitch
UPHOLSTERY OR DRAPERY WEIGHT
There are stunning fabrics to be found in the home décor area of large fabric stores. I recently found a herringbone weave for upholstery that I am looking forward to using. Patterned, striped, textured, and silky fabrics work well for this technique. The type of fabric you choose to use will depend on the design and threads being used.
Good for: crewel
DUPIONI
This interesting silk has a tight weave with irregular crosswise slubbed yarns that form ribs across the fabric. It is a light- to medium-weight fabric with a rough texture and dull sheen. It comes in natural or bleached white as well as bright dyed colors. This is a favorite choice for many crewel stitchers. The natural colored silk is beautiful when stitched using wool, silk, and cotton threads. The textures of the fabric and threads give the design an added elegance.
Good for: crewel
CORDUROY
This fabric comes with a wide wale and fine wale. The wale gives the fabric a ribbed look that can add interest to the stitching. Choose the size wale that fits with the design you are stitching. A smaller detailed design would work better on a fine wale. For the wide wale, Persian yarn and pearl cottons work well. This is a seasonal fabric that is usually found in fabric stores in the fall.
Good for: crewel
HAND OVER-DYED WOOL
This fabric comes in stunning over-dyed colors with the shades of color flowing over the wool fabric. Wool fabric with wool thread mixed with silks and single-strand cotton give an interesting textured look to any design. Wool does not ravel and can be finished with edging stitches.
Good for: crewel
OVER-DYED FABRIC
Aida, linen, metallic, and specialty-weave fabrics all come in over-dyed varieties. There is a large range of counts and colors in these fabrics. Aida comes in 11 to 20 count. Linen comes in 28 to 40 count and the Specialty-Weave 10 count Tula. More colors and types of over-dyed fabric are becoming available all the time, as cross-stitchers love working on them.
Good for: cross-stitch
AIDA AND AIDA BLENDS
Aida is available in count sizes from 8 to 18. It comes in 100 percent cotton and cotton blends. The 100 percent cotton is a stiff fabric, making it easier to stitch. After stitching, Aida fabric can be washed and pressed and it becomes much softer. The most popular size is 14 count, which is currently available in over five dozen colors. The color wheel is represented well with all the available colors.
There are different kinds of Aida—the metallic collection, country, homespun, and vintage to name a few. These are made from 100 percent cotton or cotton blended with rayon, polyester, or linen.
Good for: cross-stitch
SPECIALTY WEAVE FABRICS
These blended fabrics are manufactured using a combination of two of the following types of threads: cotton, rayon, linen, and metallic. The count ranges from 7 to 28. Two higher count fabrics that are easy to work on are Tula (rayon and cotton) in 10 count and Klostern (rayon and cotton) in 7 count. Jute (100 percent Jute) in 12 count is wonderful for country-style projects. Cross-stitch metallic fabric has flecks of gold or silver sprinkled over the cloth. These flecks of gold and silver add interest to certain types of designs.
Good for: cross-stitch
threads
When choosing thread for a project, consider what the project will be used for. Choose a thread that can be washed if the project will require it. Most thread today can be washed by hand, while others need to be dry-cleaned.
When purchasing over-dyed, hand-dyed, and variegated threads, buy the full quantity the project requires at the same time, and be sure that all of the threads are from the same dye lot; threads from a different dye lot may vary slightly in color. Even silks and stranded cotton could have a slight difference in color, although the difference is not usually noticeable on a project. These threads do not list a dye lot on the package. A very slight difference would only be detectable if stitching a large background with one color. If you are working such a project and find you are running short on thread, stop stitching and purchase the new thread. Then alternate cut strands from each of the skeins of thread to blend the new color with the previous color.
PEARL COTTON (COTON PERLÉ)
This cotton thread is slightly twisted and is used as a single strand. It has a beautiful sheen with many colors to choose from along with several sizes. Sizes used for creative embroidery are 5, 8, and 12. Size 12 is used for very fine work, and 5 can be used as a laid thread for couching. Sizes 12, 8, and 5 can be used for cross-stitch on Aida and linen. When working with pearl cotton, the section of thread that is in the eye of the needle loses its sheen and becomes dull. Avoid using this section for working stitches.
Good for: creative embroidery, cross-stitch
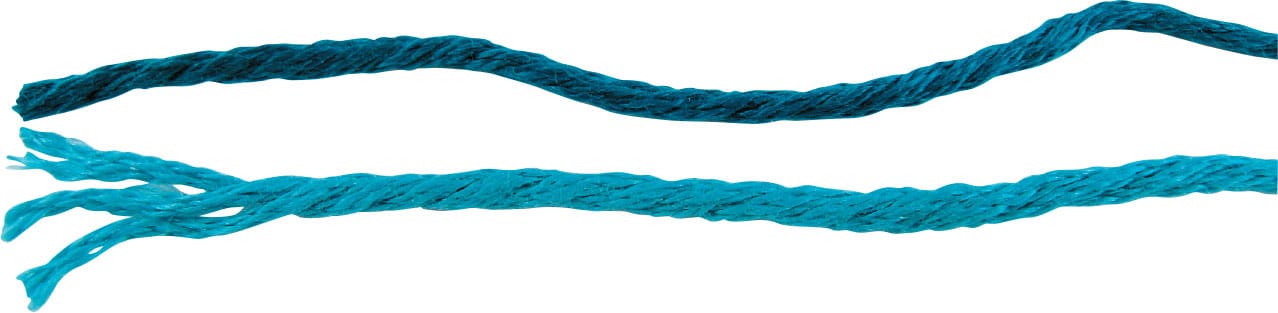
SIX-STRAND EMBROIDERY FLOSS
Made with 100 percent cotton, this six-strand embroidery floss thread is available in solid and variegated colors. There is a large range of solid colors to choose from and many of these colors come in a range of shaded tones. Cotton threads are very versatile and easy to use. You will need to watch your tension when stitching with cotton, as there is no stretch or give to the thread.
Good for: creative embroidery, crewel, cross-stitch
LINEN
There are several 100 percent linen threads available. These textured threads come in six strand and a single strand. The strands vary in width along the strand. It is easy to work with, although the strands have a slightly coarse texture. There is a wide range of colors. Dye lots vary, so it’s best to purchase the amount needed.
Good for: creative embroidery, cross-stitch
SATIN AND RAYON
These six-strand threads have a very silky, shiny sheen. They work best for flat, straight stitches or satin stitches but can also be used in place of stranded cotton with careful manipulation. Although they are slippery to work with, these threads are well worth the effort when the end result is viewed. These threads are manmade but contain some natural fiber so they do not fall into the synthetic thread range.
Good for: creative embroidery
SYNTHETIC THREAD
These polyester threads are beautiful when stitched. Varieties include tubular threads that have a nice shiny appearance and work well for flat laid stitches to be couched down. There is also a single-strand thread that has a slight twist in the thread with a metallic fleck embedded along the thread. This thread works well for projects where just a little bit of sparkle is desired.
Good for: creative embroidery
COTTON HAND-DYED AND OVER-DYED
These threads come in a skein in six-strand embroidery floss and a single-strand thread. They are a joy to work with and are especially appropriate when filling an area. Once a pattern is worked with these threads, there can never be another exactly like it. The dyes create lovely shades of color along the thread. Use the thread as it comes from the skein. Knot the end of the thread that was previously cut before cutting a new length. By using the previous cut to begin stitching, you will match the color range of the thread you just ended.
Good for: creative embroidery, crewel, cross-stitch

Pearl cotton (Coton Perlé)

Six-strand embroidery floss

Linen

Satin and Rayon

Synthetic thread

Cotton hand-dyed and over-dyed
SILK
Silk comes in hand-dyed and solid colors, and is easy to stitch with. It is available on a spool in a six- or twelve-stranded thread, a single-thread card or skein, and in half skeins. It has a soft sheen, adding beauty to a design.
Silk also comes with metallic flecks scattered along the thread to give just a touch of bling to the stitches. This silk has a look of its own and is a very soft thread. The added metallic is a thread that is woven into the twisted strands. To see how it looks stitched, check out the fedora hat band project shown here.
Good for: creative embroidery, crewel, cross-stitch
BRAID (METALLIC)
This metallic braid comes on a spool in many sizes. The very fine size 4 braid, fine size 8 braid, and tapestry size 12 braid work best for creative embroidery and crewel. The larger size 12 braid is great for using as a thread to couch over or for straight stitches where a touch of metallic is desired. For cross-stitch, size 4, 8, and 12 also work best for even-weave fabric. This braid should have a little space in the corner it comes up and goes down in. Using a braid that is too large for the thread count will take away from the beauty of the braid. It should lie flat against the fabric. This twisted braid is a dream to stitch with and a great way to add a little sparkle to your project. It is very flexible, which makes it ideal for working curved lines, and it can be used for any type of stitch.
Good for: creative embroidery, crewel, cross-stitch
STRANDED METALLIC
Stranded metallic can be used as a single strand or in combination with floss. If you would like a little sparkle but not the full effect of metallic, you can use one strand of floss and one strand of metallic. It is a bit slippery, so watch your tension.
Good for: creative embroidery, crewel
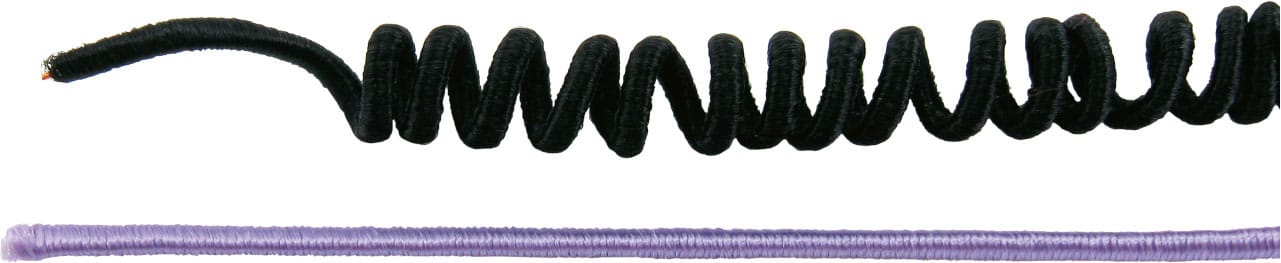
MEMORY THREAD
This thread—which is really a flexible copper wire wrapped with a soft fiber—adds a dimensional appearance to a design. It works well on fabric or paper. Memory thread is wonderful for decorative stitches and embellishing. You can use it as a laid stitch to be couched.
When using as a laid stitch, place a couching stitch over the ends to hold the wrapped fiber on the wire in place. Memory thread can be used for basket handles, flower stems, butterfly wings, and coiled for flower centers. When working antennae on the butterfly you can use memory thread. If you want a coil, simply wrap the thread around a large needle. The bendable thread will allow you to secure one end of the length and leave the other end so it is slightly elevated above the fabric.
Good for: creative embroidery, cross-stitch
CREWEL WOOL
This 100 percent wool yarn is single-strand soft wool. It is two strands twisted together to create one strand of wool and should not be separated. To work most crewel stitches, you will need to join several strands of this wool. The number of strands used depends on how thick a stitch you want for the area you are filling. This wool comes in a wide range of colors.
Good for: crewel
 TIP When stitching with wool or wool-blend yarns, leave a little more space between stitches than when working with a finer thread. You want the thread, or wool, to lie flat and smooth against the fabric.
Silk

Braid (Metallic)

Stranded metallic
Memory thread

Crewel wool
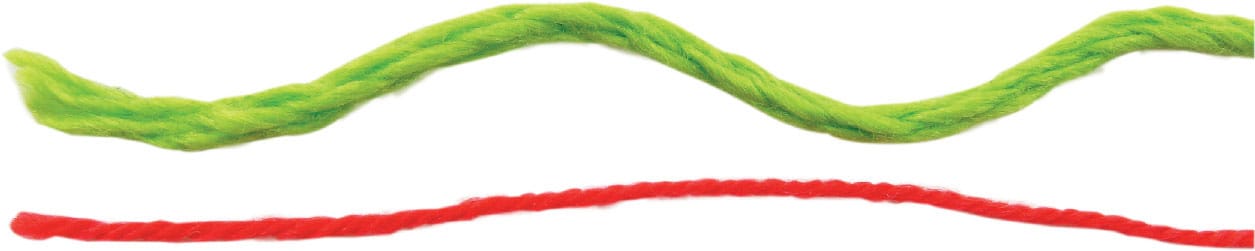
PERSIAN YARN
This 100 percent virgin wool yarn is a three-ply yarn. You will need to separate the strands before stitching. It can be purchased in hanks, skeins, or by the pound. Some needlework shops also sell it by the three-ply strand. It comes in 230 shaded colors. Stitching with this yarn creates a slightly fuzzy appearance, adding an interesting texture to the stitched area.
Good for: crewel

Persian yarn
WOOL BLENDS
These blends come in single strand or three ply in fiber blends of wool/acrylic and wool/silk. The single-strand wool/silk blend is very easy to work with and seems to glide in and out of the fabric effortlessly.
Good for: crewel
Wool blends
HAND OVER-DYED STRANDED COTTON
This is a six-strand cotton that can be used for couching, lacing stitches, French knots, and feather stitches. This thread has a soft blending of color that runs along the thread. It can add a touch of shading when working shapes or filling in areas.
Good for: crewel

Hand over-dyed stranded cotton
TWISTED HAND-DYED COTTON
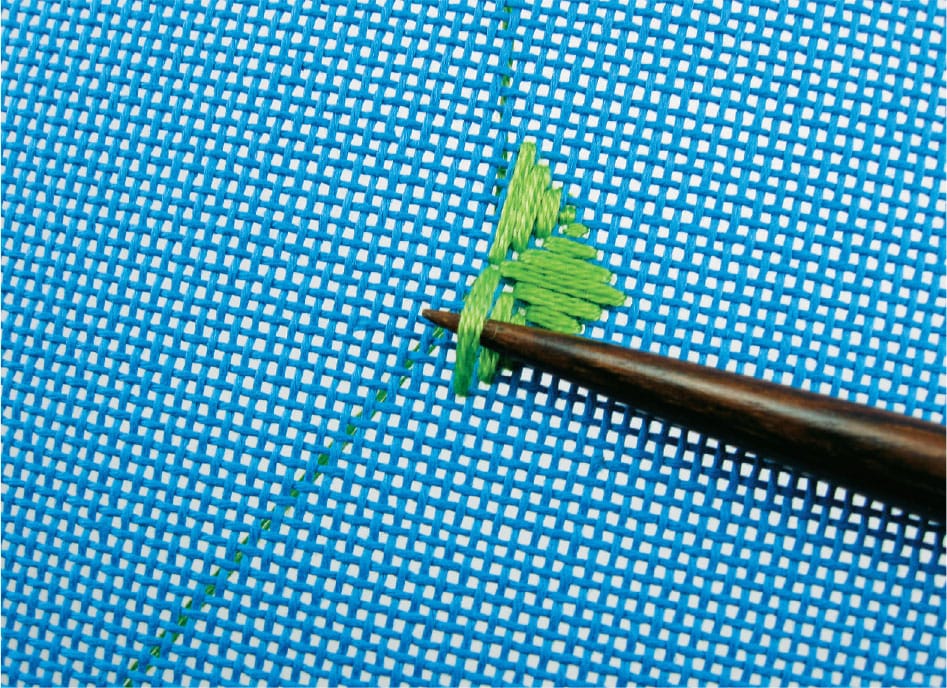
This three-ply pima cotton thread comes in beautiful variegated hand-dyed colors. The variegated colors of this twisted thread give your stitches beautiful color flowing across the fabric. One strand can be used for crewel work, and the three-ply strand (do not separate) can be used as a laid thread to couch over. You’ll need to separate the plies of thread (shown here) before using for cross-stitch. One ply can be used on 11–20 count depending on your choice of fabric. For some linen fabric, two-ply thread may be necessary. Dye lots vary so it’s best to purchase the amount needed.
Good for: crewel, cross-stitch

Twisted hand-dyed cotton
SPECIALTY THREAD
This single-strand polyester with metallic flecks along the thread comes in many colors. It is easy to work with and can be used on fabric that is not as tightly woven. It works well on linen and silks.
Good for: crewel

Specialty thread
charts, diagrams, and patterns
DESIGN CHARTS
Cross-stitch is worked from a chart and is referred to as counted work. Creative embroidery and crewel are normally considered free-form techniques. If worked using a chart and even-weave fabric, they then become counted work. The creative embroidery and crewel techniques are shown in a free-form style in this book, which allows more freedom when working the stitches.
CROSS-STITCH CHARTS
Cross-stitch charts are shown on a square grid. Each stitch is represented by a square on the chart. The color key and chart have corresponding symbols that indicate the color, type of thread, and amount of thread needed for each stitch. Information is given if the cross-stitch is worked over one or two threads on even-weave fabric. Some patterns give sizes of the design when worked on more than one type of fabric and fabric count. Others indicate the fabric size needed for that project. When counting cross-stitch, count each square on the pattern for correct placement on the fabric. For more information refer to the Cross-Stitch chapter (shown here).
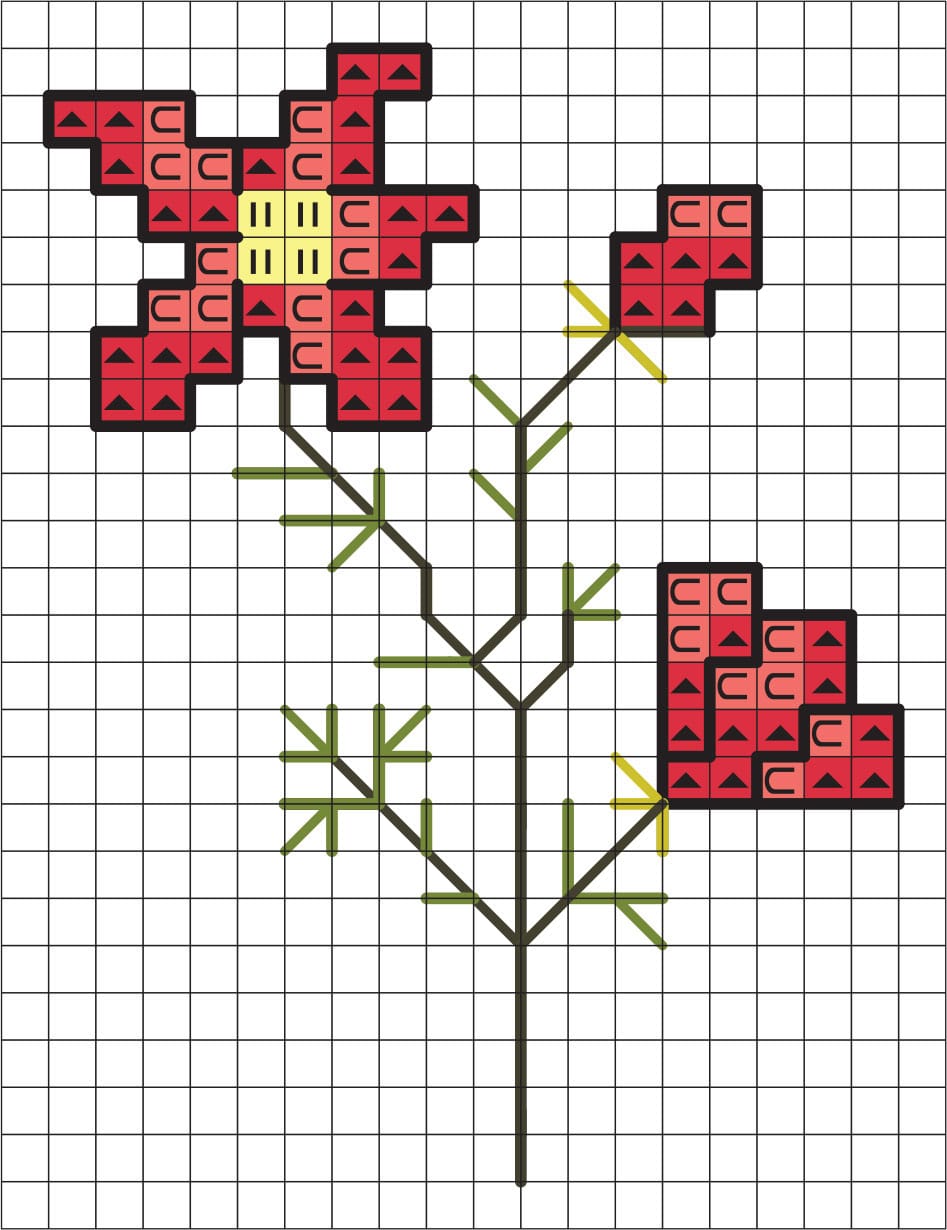
Cross-stitch chart
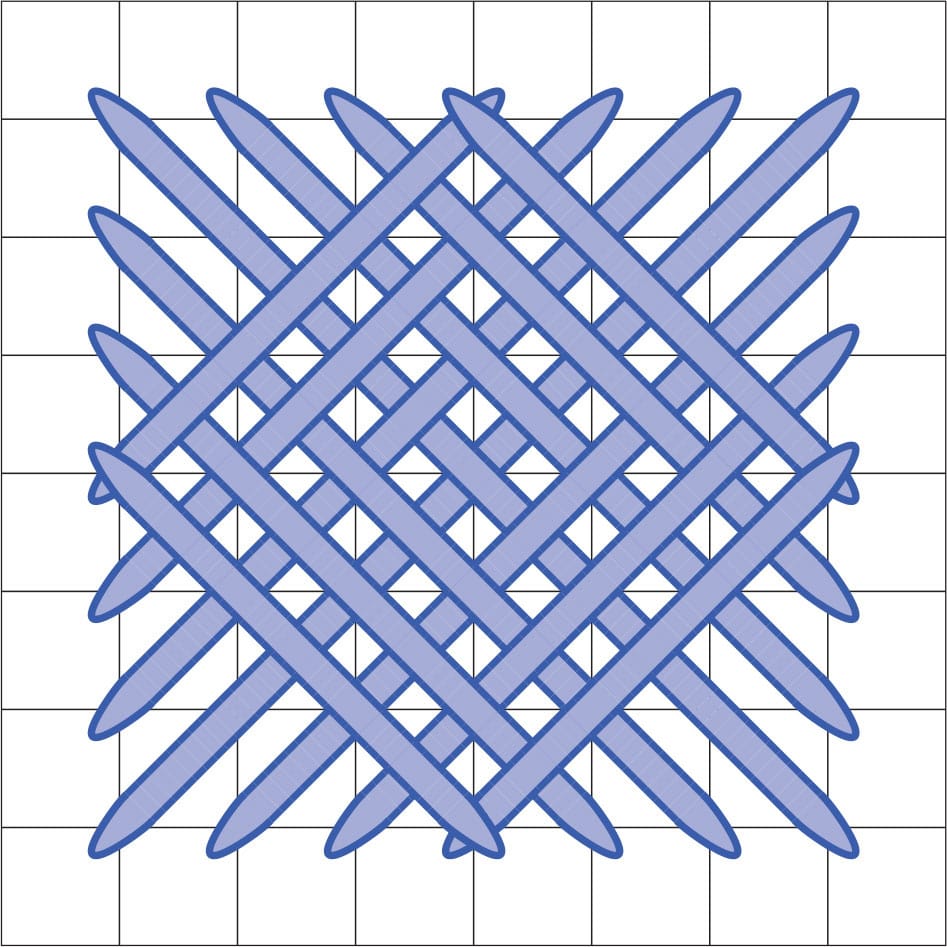
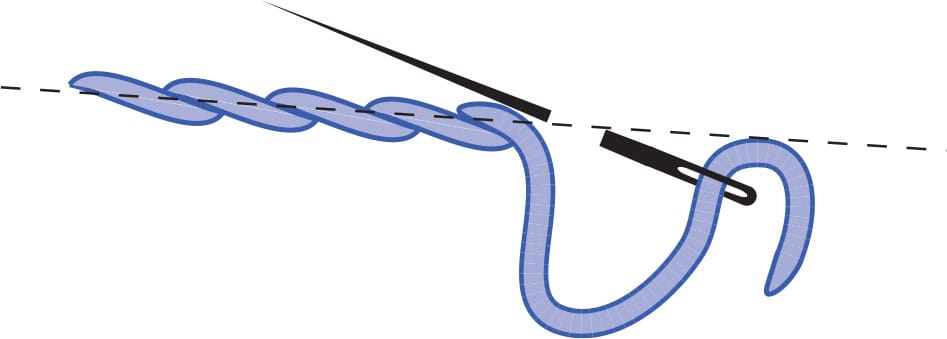
STITCH DIAGRAMS
Cross-stitch and needlepoint have diagrams that show a grid line with arrows and/or numbers to indicate where to place the stitch. Creative embroidery and crewel have diagrams that show how the stitch is worked without a grid. These diagrams have arrows and numbers, but the stitch length is up to the stitcher.
DESIGN PATTERNS
Patterns for creative embroidery and crewel come in the form of line drawings, pattern books, kits, and stamped pattern packs. For the line drawings and pattern books, you’ll need to transfer the pattern onto the fabric to be used. This information is discussed under Transferring Patterns (shown here). Stamped patterns are purchased in pattern packs and come in a wide range of themes. The stamped design is ironed directly to the fabric. Follow the manufacturer’s instructions to transfer the pattern onto the fabric.
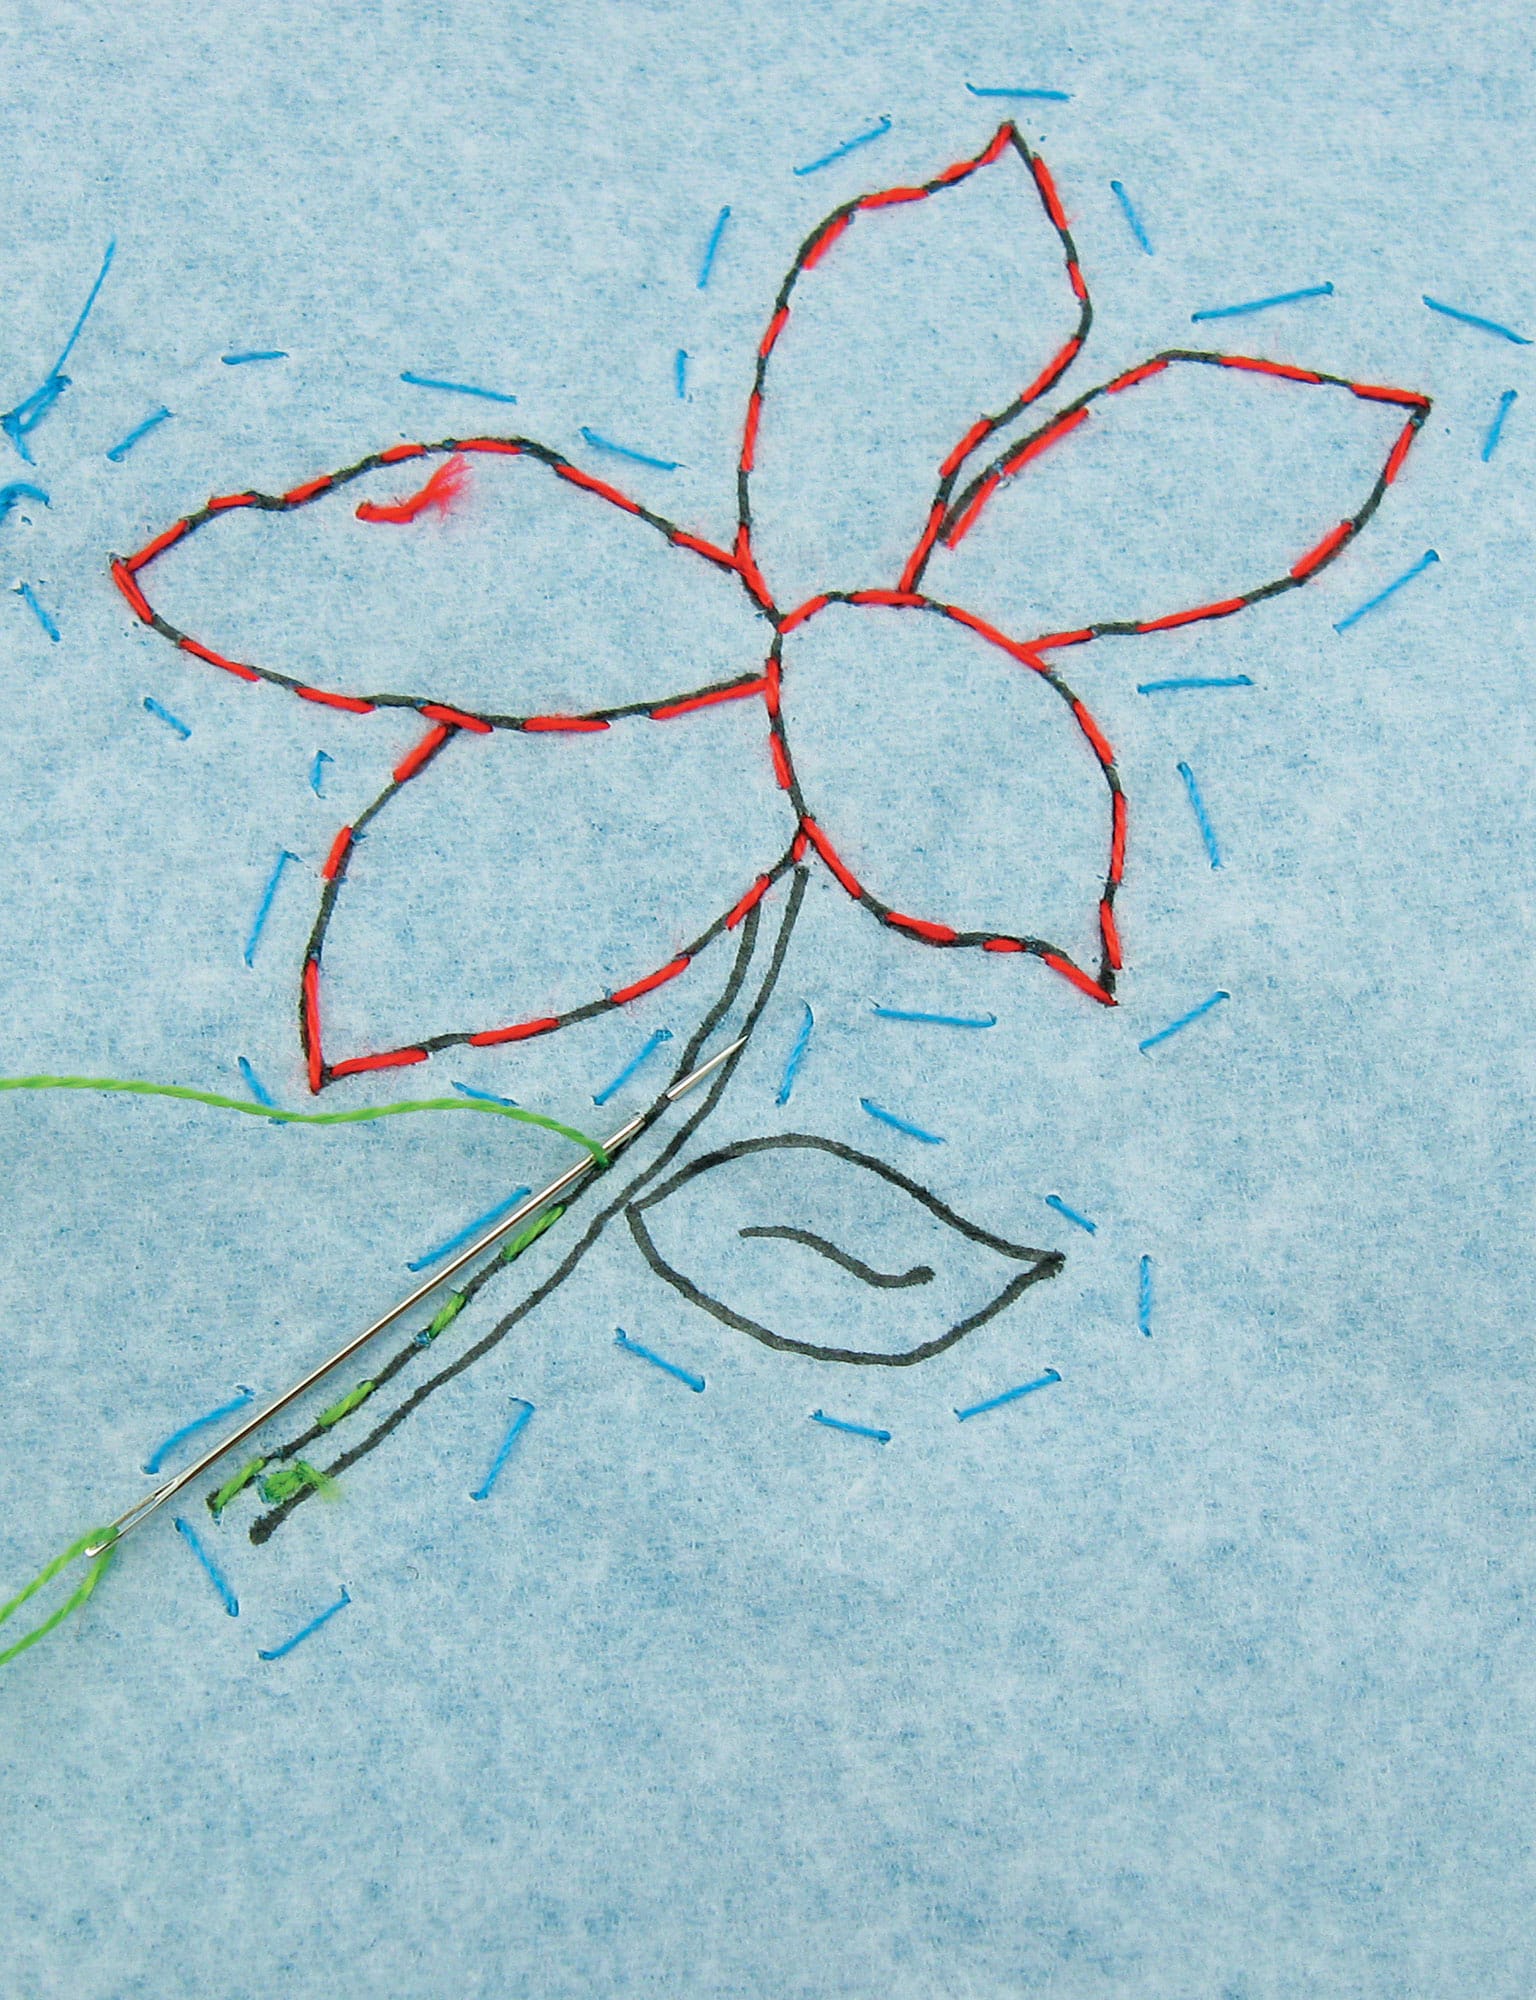
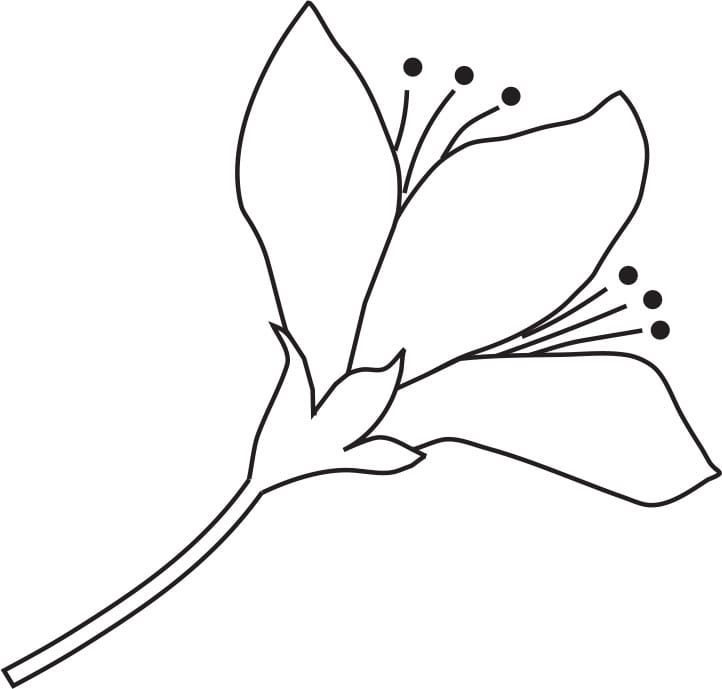
Hand drawings are really patterns that you can transfer using any of the methods discussed in this section. Create a keepsake for your child by turning one of their drawings into a finished piece of needlework.
Line drawing
Needlepoint stitch
Embroidery diagram
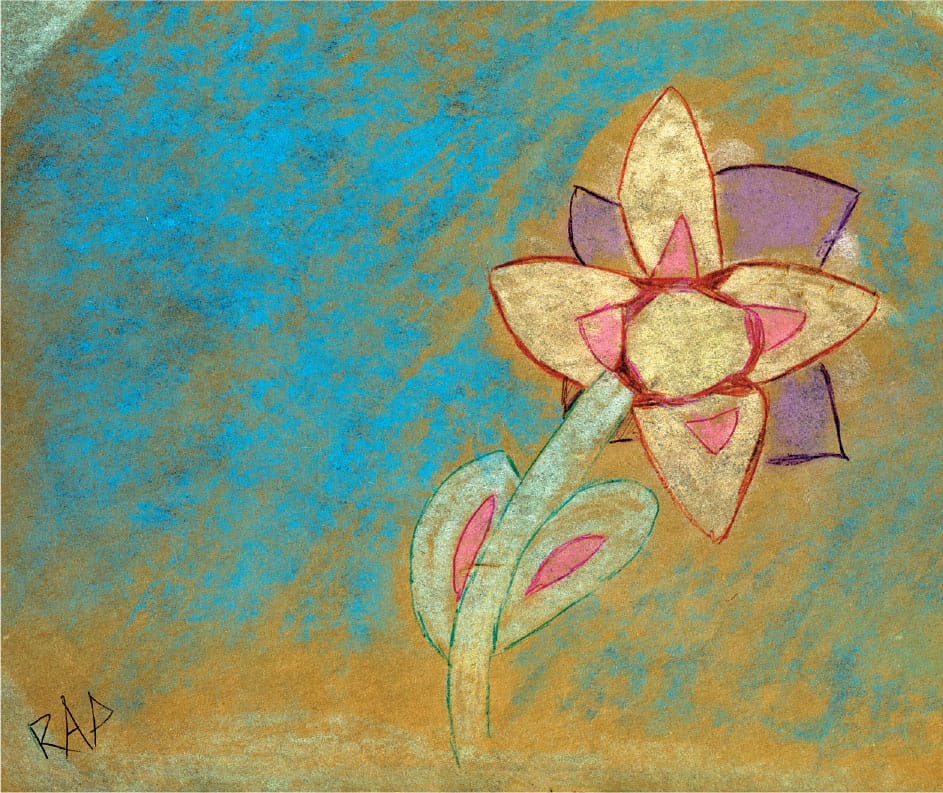
Drawing by Rileigh Pack, age 11
transferring patterns and stabilizing fabric
Once you have the design and fabric, you will need to decide how to transfer the design to the fabric and how to stabilize the fabric, if necessary. The subjects of design transfer and stabilizers are closely related.
There are several ways to transfer an original design or pattern to your fabric. The fabric and stabilizer used often determines which transfer method to use. With a little experimentation, you will soon decide the type of transfer method and supplies you prefer. I use the basting method with tissue paper or the non-fusible stabilizer more than any other method. I like the transfer results of the basting.
TRACING
Tracing is a key technique when transferring designs. There are many considerations when selecting an appropriate marker or pencil for use when tracing.
Permanent or Waterproof Pens
Use these pens to trace the pattern onto the stabilizer or tissue paper. Once the pattern is traced, it’s best to let the ink dry for a few minutes before placing it next to the fabric and basting the design. These two types of pens should not rub off on the thread or ribbon when the stitches pass through the traced area.
Here are some examples of pens: Pigma Micron black fine pen, which is a micro pigment ink waterproof pen purchased in art stores, and Sharpie permanent black fine pen available in drug stores, discount stores, and so on. Be sure the Sharpie says that it is permanent. Do not use either of these types of pen directly on fabric because the lines will not come out when the fabric is washed.
Pencils
A mechanical, #4 hard, or marking pencil can be used to trace the pattern onto the stabilizer or tissue paper. If using white or very light colored threads, ribbons, or silk, the pencil lead could leave a slight discoloration on the threads or fabric surface. Most pencil lines marked directly on fabric will come out when washed, but there is always the chance they will remain visible.
Vanishing or Water-erasable Marking Pens
These widely available pens can be used to draw a pattern directly onto the fabric. They work especially well for children, who can draw their own pattern and then execute the stitches of their choice. If using the water-erasable pen, be sure to wash the project after the stitching is completed to remove the marked lines. The vanishing pen lines should indeed simply vanish. Follow the product directions carefully. Also, try to keep fabric marked with these pens out of the direct sun, as heat could set the marks permanently.

Vanishing or water-erasable Marking Pens
Tracing on Fabric Method
Use a sunny window or light box to trace directly onto the fabric. Place the fabric over the pattern, centering the pattern in the correct position. Pin the pattern to the fabric. Recheck placement by holding the fabric up to the sunny window or placing it on the light box. When you are satisfied with the placement, tape the fabric to the light box or window, using 1/4" (6 mm) quilter’s tape. Trace the pattern using an appropriate marker or pencil. This is a quick and easy way to transfer the pattern.
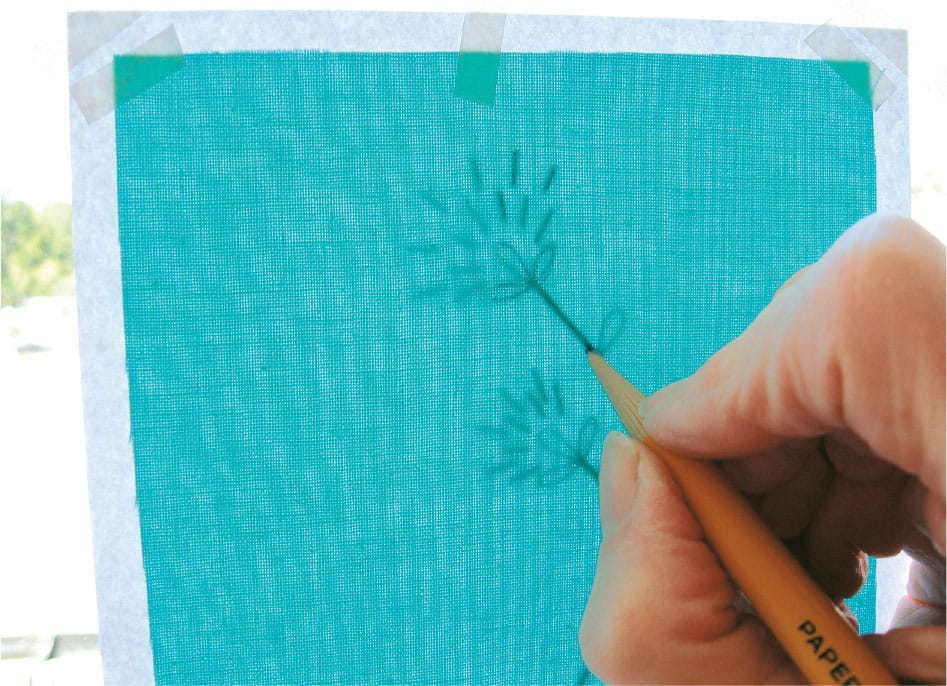
Tracing on fabric
Tracing Using Transfer Paper and Stylus Method
This method uses colored tracing or transfer papers to trace the pattern directly onto the fabric. The papers are available in several colors, and the color should not smear or come off on the thread. If the pattern has writing on the back, trace the pattern onto tracing paper or tissue paper before transferring it to fabric or stabilizer. Simply place the traced pattern in correct position over the fabric. Slip the transfer paper under the design, carbon against the fabric. Use the stylus as you would a pencil, bearing down on the stylus with a little pressure. Trace over the pattern, transferring it to the fabric.
These are some of the transfer papers available: DMC wax-free tracing paper that is less powdery than others on the market. It will wash out. Clover’s tracing paper does not smear, and it will wash out, but it does transfer a stronger color to the fabric. This paper comes in brighter colors. Loew Cornell transfer paper is greaseless, wax-free, erasable, and smudge-proof. It’s best to test the product on a scrap of fabric to be sure you like the results before using it on your project fabric. Always read the product instructions.
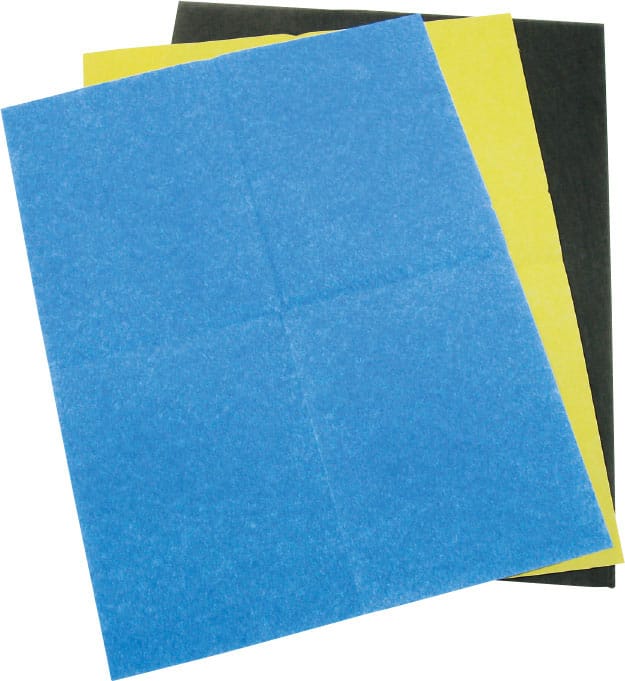
Transfer paper
IRONING METHOD
Heat Transfer Pencil
Heat transfer pencils, available in craft and fabric stores, allow you to transfer patterns directly to the fabric. The lines are permanent, so they should only be used if the needlework will cover the lines entirely. This method transfers the mirror image of the pattern, so trace the pattern onto tissue paper first using plain pen or pencil, then flip the paper over and trace the lines with the heat transfer pencil. Center the pattern facedown on the right side of the fabric, and pin in place. Transfer the pattern to the fabric with a heated iron, following the pencil manufacturer’s directions.

Heat transfer pencil
BASTING METHOD
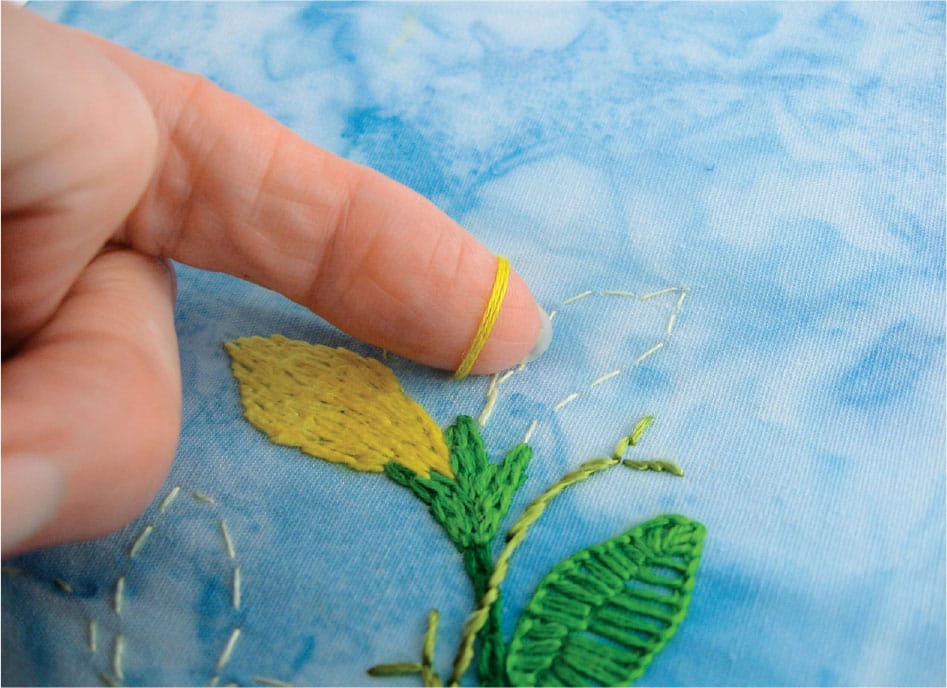
With this method, the pattern is transferred to stabilizer or tissue paper before basting it onto the fabric. The basted stitches remain on the fabric until you stitch over them or remove them. They will not disappear, require washing, or discolor the fabric or threads. This method gives you the truest transfer. Although it does require a few more minutes to baste the pattern onto the fabric, the results are well worth it, especially when transferring larger patterns.
To baste the pattern in place, use either sewing thread or one strand of embroidery floss that matches the colors of threads to be used to complete the pattern. For ease in removing basting thread, do not knot ends. Instead, take two small backstitches to begin and end the basting thread. When the stitching of the project is completed, remove any basting threads that show. As you stitch the project, you will cover most, if not all, of the basting stitches, saving you the extra time it would take to remove them.
Basting Using Tissue Paper
This method works well for all types of projects, especially for small designs on clothing. Use a low-temperature iron to press out any wrinkles in the paper. Trace the pattern onto the tissue paper using a fine-tip black permanent pen or pencil. Then center the traced pattern faceup on the right side of the fabric, and pin in place. Baste the pattern onto the fabric, stitching through the tissue paper and fabric. When the entire pattern has been basted, run the tip of the needle along the basting lines to score the tissue paper; then carefully tear the paper away. Use tweezers to remove any little pieces of tissue paper that remain.
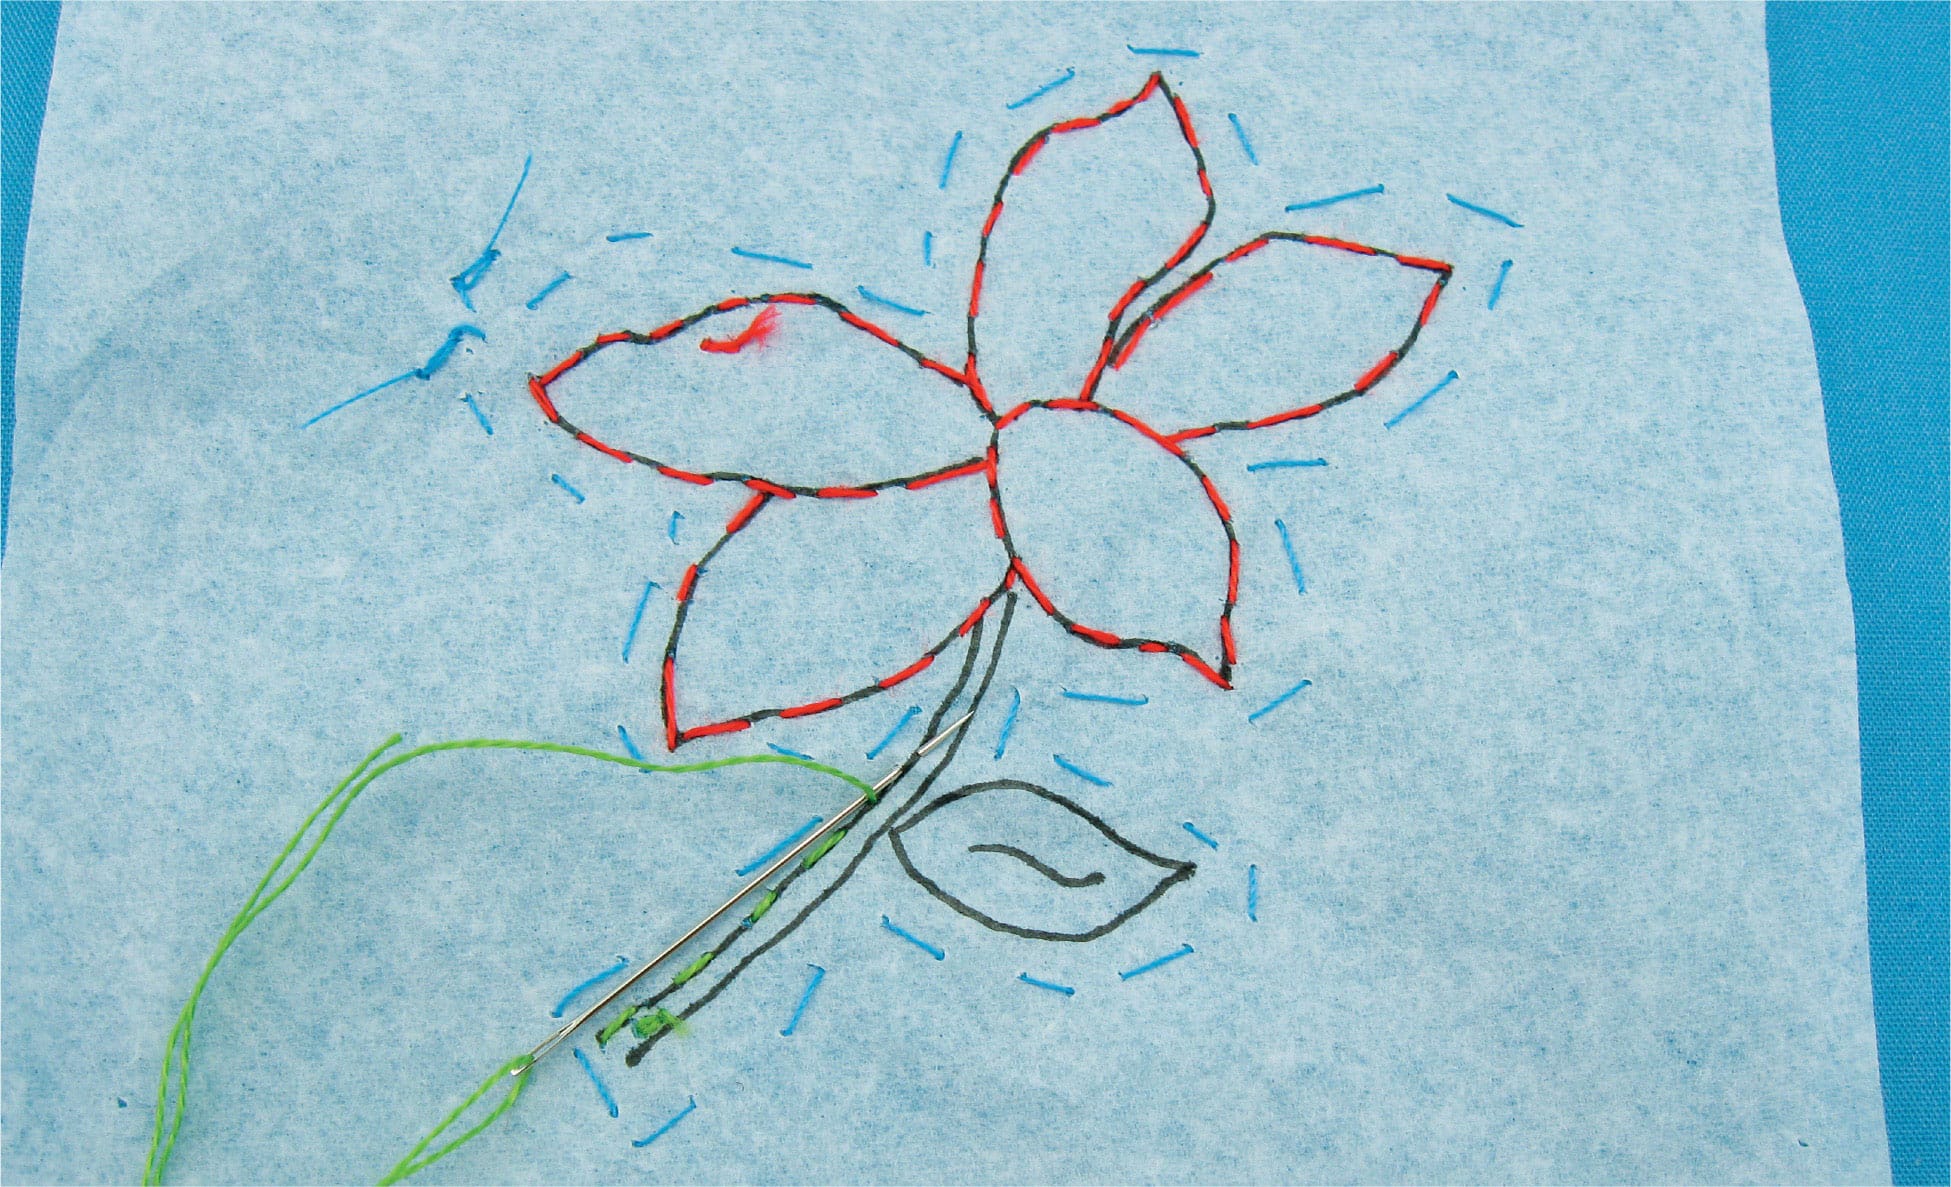
Basting through tissue paper on right side
Basting Using Fusible Stabilizer
This method works well for medium-weight fabrics like corduroy, twill, and home décor items. Be sure your fabric choice can withstand the temperature required for fusing. Pellon’s featherweight fusible stabilizer is a good choice. Using an appropriate marker or pencil, trace the pattern onto the stabilizer. Then center the traced pattern facedown on the wrong side of the fabric, and pin in place. The pattern can easily be seen through the stabilizer. Fuse the stabilizer to the fabric, following the manufacturer’s instructions, and allow to cool. Working from the wrong side, baste the pattern onto the right side, stitching thorough the stabilizer and fabric so the pattern shows clearly on the right side.
Basting through stabilizer on wrong side
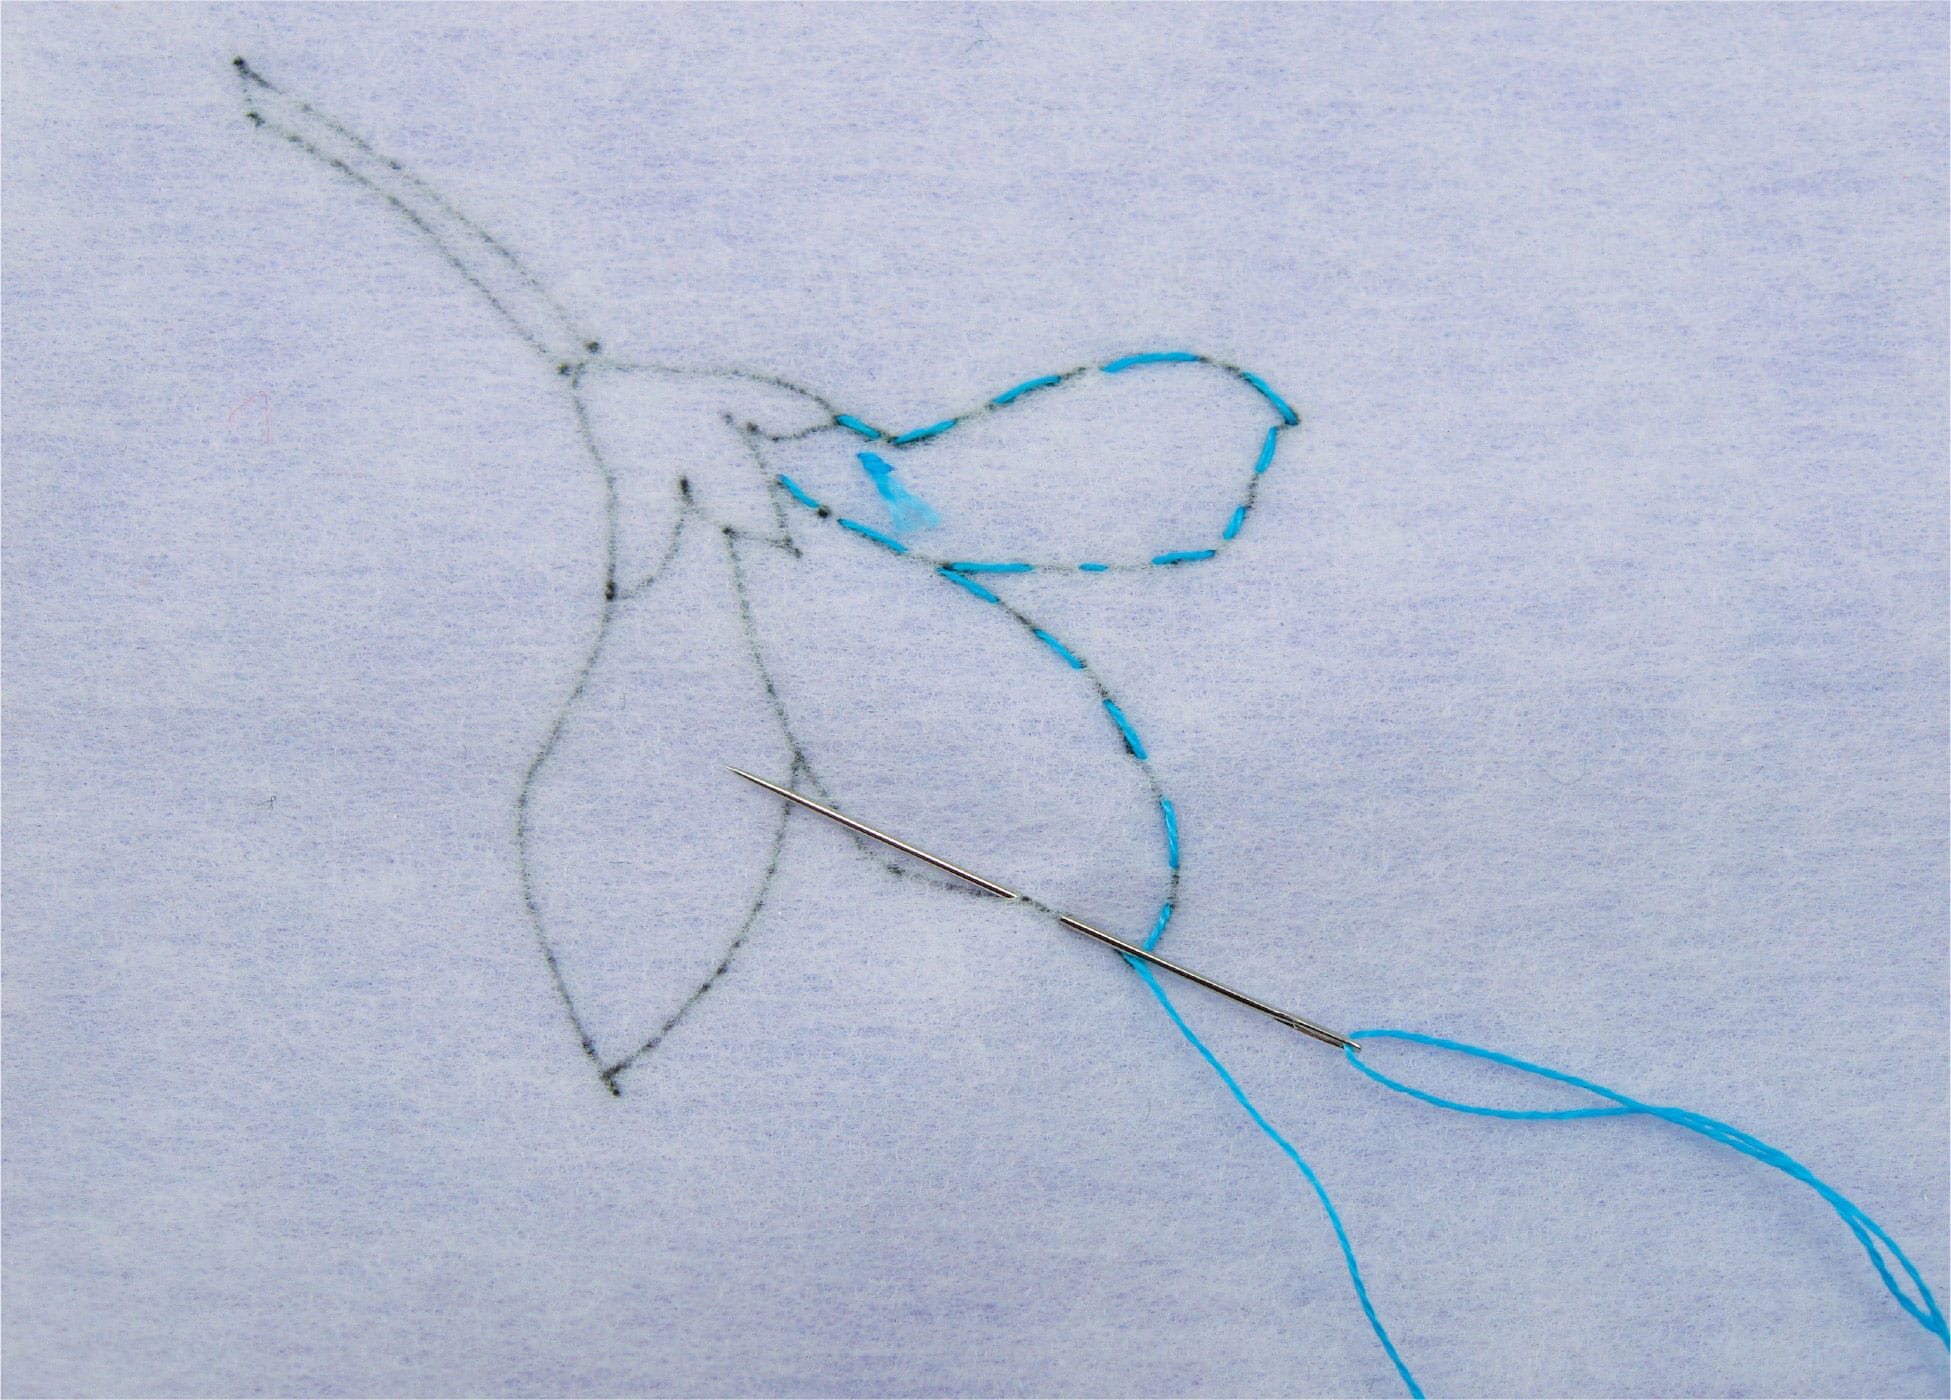
Basting Using Non-Fusible Stabilizer
This method works well for light- to medium-weight opaque home décor and clothing items. Pellon #30 non-fusible stabilizer is easy to use and gives the finished work a little body. Using an appropriate marker or pencil, trace the pattern onto the stabilizer. Then center the traced pattern facedown on the wrong side of the fabric, and pin in place. The pattern can easily be seen through the stabilizer. Working from the wrong side, baste the pattern onto the right side, stitching thorough the stabilizer and fabric so the pattern shows clearly on the right side. For clothing, trim away excess stabilizer after the needlework is finished.
OTHER STABILIZERS
The following stabilizers are opaque, making it necessary to use one of the transferring methods that transfer to the front of the fabric. Suggestions include: Basting Using Tissue Paper, Heat Transfer Pencil, and Tracing Using Transfer Paper and Stylus.
Fusible Fleece (Pellon)
Fusible fleece works well to stabilize lighter-weight fabric. It does require that you transfer the pattern using one of the transfer methods discussed in this chapter.
The fleece gives body to the fabric while adding padding between the fabric and the back of the work. It helps to keep the fabric from wrinkling. The downside of the product is that it can leave small bits of batting on the front of the fabric if stitches need to be removed. This product works well with creative embroidery and crewel.
stitching basics
FABRIC PREPARATION
Before using washable fabric for creative embroidery, crewel, and cross-stitch, wash, dry, and iron fabric following the manufacturer’s instructions. If you do not prewash the fabric, it may shrink when it is washed later, distorting the stitches.
If your finished project will not be washed, it is not necessary to prewash the fabric. Washing removes sizings, which are used in some fabrics to give the fabric a crisp look that enhances the finished project.
When using a loosely woven fabric, overcast (zigzag) the edges. Some stitchers prefer to always overcast or serge the edges or run a quick basting hem along the edges.
THREAD DETAILS
For easy stitching, thread should be cut in 14" to 16" (35.6 to 40.6 cm) lengths for stitching. Metallic thread and braids should be cut in 12" to 14" (30.5 to 35.6 cm) lengths. Some types of thread and most yarn (even strand cotton) become fuzzy if the length is longer than 16" (40.6 cm).
The nature of thread is to become twisted as you stitch. To counter this, form a habit of twisting your needle clockwise one turn after every few stitches to keep the thread straight. You can also let the needle and thread dangle downward from the fabric to allow the thread to untwist.
Some thread manufacturers indicate how many strands to use for the different sizes of even-weave fabric. There are so many threads on the market, it is impossible to list them all and give the number of strands to use for each fabric count. You will need to determine if the thread is covering the canvas, plain-weave, or even-weave fabric. Some stitchers prefer a heavy thread look to their needlework while others like a lighter look. See which look you like best.
Stranded Thread
All threads that are stranded should be separated and then plied back together unless otherwise noted in a pattern. This gives you better coverage when stitching. Hold the cut length between your thumb and index finger, leaving a small amount of thread exposed above the fingers. Separate one strand from the rest and pull that thread straight up. Continue until the number of strands needed have been separated. Use the number of strands called for by putting the plies back together.
Braids (Metallic)
Stitching braids come on spools. When you cut a length, it likes to slightly curl. To smooth out the thread, simply run your fingernail down the cut length.
STITCHING INFORMATION
Stab Stitch/Sewing Stitch
If you chose to use a hoop or frame, you will need to use the stab stitch method to stitch your project. This simply means you place one stitch at a time. You bring the needle up from the wrong side and go down into the fabric or canvas from the right side to work the stitch.
If not using a hoop, you can use the sewing method. Simply slide the needle in and out of the fabric using shallow stitches.
Thread Tension
Thread tension is a concern for every stitcher. Try to keep the tension consistent on all your stitches. Hold your fabric or canvas so you have a side view (front and back) of the stitches. Are any stitches of the same type, and with the same thread, higher or lower than the rest? If they are uneven, the tension is not consistent. Do your stitches appear the same? Do they appear to be pulling the fabric so it is wrinkling around the stitches or the canvas threads so they buckle? Does the stitching surface still lie flat? Are the stitches too loose? If you can run your needle under the thread and pull the stitch away from the fabric or canvas, it is too loose and you will need to pull your stitches a little tighter. Are the stitches too tight? Is it difficult to run your thread under your stitches on the back when ending your thread? This would indicate the tension is too tight. If this happens, loosen your tension just a little. Your stitches should be somewhere between too tight and too loose. Perfect tension requires patience and practice. One thing that helps is to learn to look at your needlework on the front and on the back every few stitches. If you make this a habit, you will be able to recognize when you are pulling the thread too tightly or leaving it too loose. The tension of a stitch is important in the finished piece. You can be an advanced stitcher or a beginning stitcher and not have a quality piece if the tension isn’t correct.
Stab stitch
Sewing stitch
Laying the Thread
Although it is optional when stitching, laying thread with a laying tool creates a smoother look. Using a laying tool can be as simple as guiding the thread with your finger as it goes down into the fabric or canvas. You can also use a darning needle, stiletto, or a laying tool sold in needlework shops. Keeping the thread straight and smooth gives the stitch a nicer appearance. Stranded threads should lie next to each other without twisting over themselves.
To lay threads, bring the thread to the front side of the work. Place the laying tool under the thread. Take the thread to where it goes down into the fabric or canvas. Use the tool to gently work the thread in one direction as it goes into the hole of the canvas or the even-weave fabric. In order for the thread lie correctly, it must be smooth as it goes down into fabric or canvas and comes up out of the fabric or canvas.
Your finger as a laying tool
Using a laying tool
Beginning and Ending Threads
SMALL KNOT
Creative embroidery and crewel can all be started using a small knot.
Thread the needle and bring the tip end of the thread length up along the side of the needle so the end of the thread is toward your body and the point of the needle is straight up in the air. Hold the thread firmly next to the needle between your thumb and forefinger with your stitching hand grasping the middle of the needle. With the other hand, wrap the loose thread at the tip of your thumb around the end of the needle two or three times. (The number of wraps determines the size of the knot). Catch the end of the wrapped thread between your thumb and needle, and adjust the loose length of thread so it hangs downward along the needle. Hold the thread gently but firmly and pull the needle straight up with your stitching hand. The wrapped thread will slide down along the length of thread to form a small even knot at the tip end. Clip the tail of the thread near the knot. Hold the knot between your thumb and forefinger, and pull on the knot to be sure it is secure.
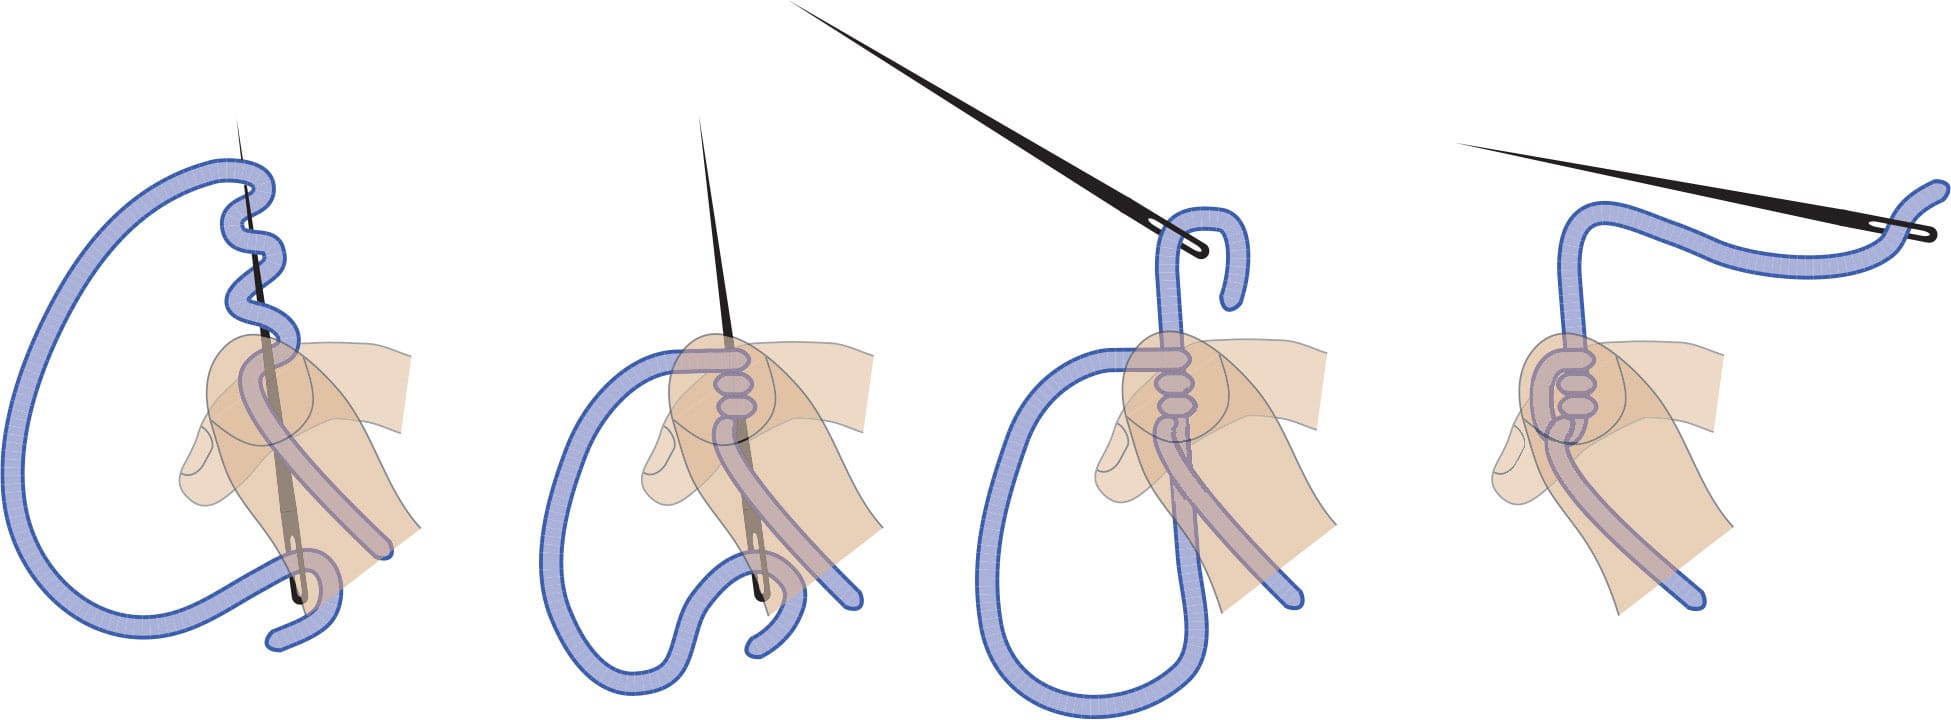
Small knot
EASY KNOT
Thread the needle. Moisten the end of your index finger. Wrap the end of the thread around the index finger. Roll the thread between your index finger and thumb until twisted together, and slide the loop to the tip of your index finger. Grip the top of the loop between your index finger and thumb, and pull it down to the end of the thread to form the knot.
WASTE KNOT
This type of knot can be used for any technique that uses plain- or even-weave fabric. Use a waste knot in areas where your stitches will cover the fabric. Put the needle down through the front side of your fabric in the area you will travel over. The knot should be 1" to 1 1/2" (2.5 to 3.8 cm) away from the starting point. Bring the needle up from the back at your starting point and begin stitching, working over the thread toward the knot. When you reach the knot, clip it off and continue stitching.
Once the knot is clipped, it may be necessary, on the back, to clip the thread closer to the last stitch placed. This will keep the fuzzy end of the thread from pulling to the front with the next stitch placed.

Waste knot
AWAY WASTE KNOT
Cross-stitch can be started with an away waste knot.
Tie a knot in the end of your thread and move 2" or 3" (5.1 or 7.6 cm) away from the stitching area. Put the needle down through the front of the fabric. Come up from the back of the fabric with your needle at the starting point and begin stitching. When you have finished stitching, clip the waste knot on the front of the fabric, and weave the thread under the stitching on the back to secure. This knot is the same as a waste knot, only it is placed further away from the working area.
Once you have an area stitched, this method can be used for any of the techniques. Simply weave the new thread length into the previously stitched work for about an inch (2.5 cm) to secure. Then begin stitching, being careful for the first couple of stitches so you don’t pull the thread tail out. If this project is one that will be washed many times, use a different method to begin so the thread is more secure.
WEAVING UNDER TO END
Use this method to end thread for crewel, creative embroidery, and cross-stitch. If the project isn’t going to be washed or have heavy use, you can simply weave the thread under several previously placed stitches on the back of the fabric. If the project is going to be washed, use a loop knot before clipping the thread.
ENDING SLIPPERY THREADS
To secure metallic, metallic braids, satin, and cotton pearl thread, run the thread under several stitches on the back of the fabric or canvas, and then take two backstitches over the thread of previously worked stitches. Be careful not to disrupt the stitches on the front.
LOOP KNOT
For a more secure ending, use a loop knot to end the thread. On the back of the fabric, weave the thread under several previously placed stitches. Then take the needle and thread around the stitch, slipping the needle through the looped end of the thread. Pull thread to secure the knot.
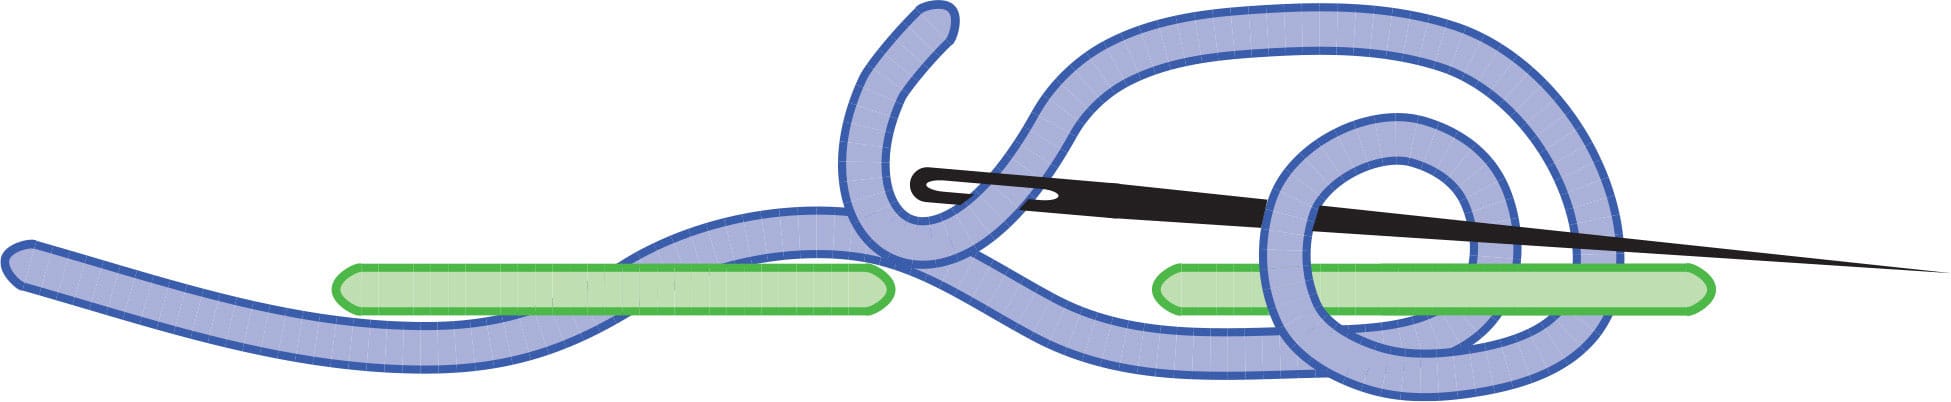
Loop knot
Removing Stitches
All stitchers at some point decide to rip out thread. This is simply part of the life of a stitcher. You may decide you do not like a type or color of thread. Or you feel you can do nicer stitching on the project. Whatever your reason, when you rip, use a blunt needle to help pull the stitch out of the fabric. As you pull the stitches out, clip the thread to shorten it if it is long; this will make it easier to pull out. It is never a good idea to use scissors to cut out thread, as you run the risk of cutting the fabric in addition to the thread. Use a new piece of thread to stitch the ripped area.