
Themes are much more than just layout with their respective HTML, CSS, and JavaScript. Without content, we would not have much to display. In Drupal 8, a lot of content has been moved into blocks that are then assigned to various regions.
Think of blocks as small sections of content. These blocks can contain a menu, a search form, a listing of content, plain HTML, and more. Drupal 8 uses this content within the Block layout system that makes up a good part of a website.
If you are familiar with blocks in Drupal 7, you will be happily surprised to find that blocks have matured and are now fieldable, similar to content types. This new implementation of blocks also allows the same block to be reused and displayed using different view modes. As we explore the Block layout, we will learn how to place blocks, configure them, and create custom blocks.
Begin by navigating to /admin/structure/block or by clicking on Structure and then Block layout from the Admin menu. The Block layout page provides an interface in order to manage block content and place them into regions, as shown in the following image:
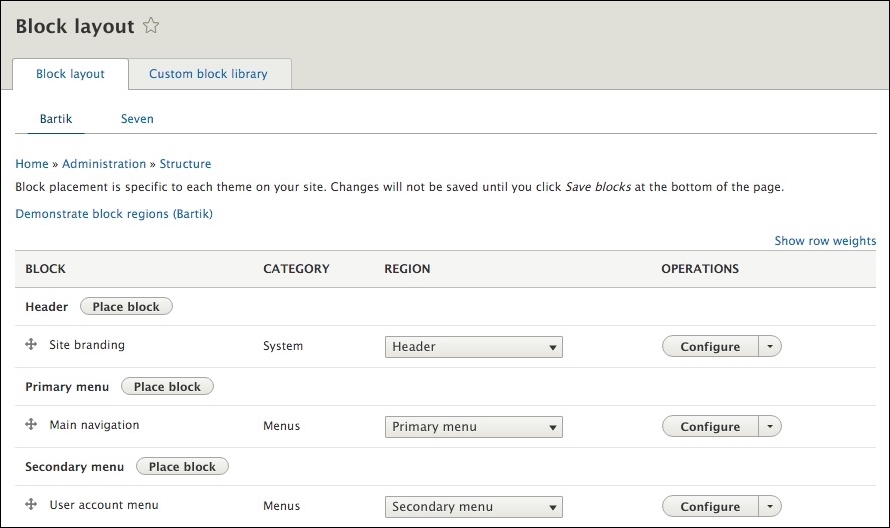
A block can be thought of as a chunk of content as small as a single line of HTML markup or as complicated as a listing of content types. Blocks can be categorized based on their functionality with the most common types of blocks categorized:
- Core: Blocks contained within the core installation consisting of items such as page title, primary admin actions, and tabs.
- System: Blocks that provide system functionality consisting of breadcrumbs, main-page content, messages, site branding, and a few others.
- Forms: Blocks that contain embedded forms such as the search form and user login.
- Menus: Blocks that contain menus and menu items, such as Administration, Footer, Main navigation, and Tools.
- Lists (Views): Blocks consisting of Views generated for block content. Generally, these types of blocks will be created during configuration or site building.
- Custom: Blocks are created from the Custom block library consisting of fieldable blocks with one or more display modes.
If blocks consist of content, regions are the containers that hold blocks and make up a themes layout.
Drupal 8 provides the following regions:
- Header
- Primary menu
- Secondary menu
- Highlighted
- Help
- Content
- Sidebar first
- Sidebar second
- Footer
- Breadcrumb
Also, each theme can define its own regions. An example of this is the Bartik theme, which implements additional regions for the footer. We will look at how to add custom regions later in Chapter 3, Dissecting a Theme.
To view defined regions within a theme, we can click on the Demonstrate block regions link located on the Block layout page. Clicking on this link will take us to the homepage with the regions highlighted, as shown in the following image:
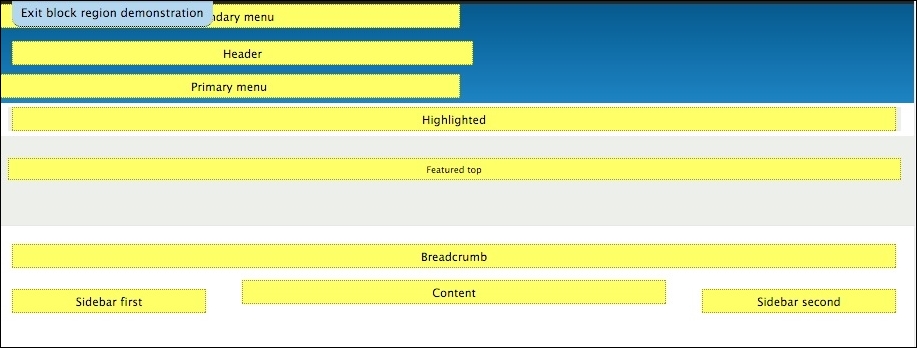
To return to the Block layout page, we click on the Exit block region demonstration link located at the top of the page.
If we scroll down the Block layout page and locate the Sidebar second region, we can see that it is currently empty. Empty regions will not output anything until we have placed a block within it. To place a block, we can follow these steps:
- Click on the Place block button next to the Sidebar second region.
- Locate the Powered by Drupal block and click on the Place block button.
- Leave the default settings within the Configure block dialog.
- Click on the Save block button.
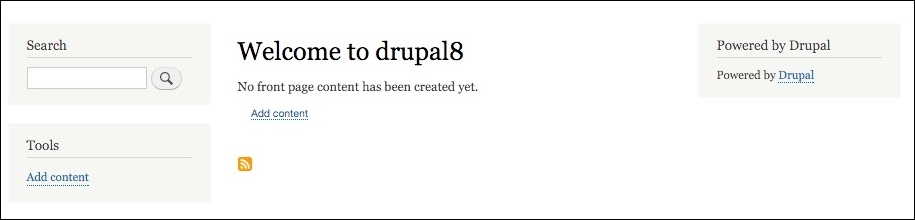
- We now have a new Powered by Drupal block placed within the Sidebar second region, as shown in the following image:

Let's verify that the Powered by Drupal block is displaying properly by navigating to our homepage. Since the Sidebar second region now contains a block, we will see the content appear in the right-hand column of the page, as shown in the following image:
So far, we have placed a block successfully within a region, but we can also configure a block based on the type of block it is.
Although we can navigate back and forth between the specific page a block is located on and the Block layout screen, it is much easier to use the context menu provided by the block. If we hover over a block, we will see a Configure block link as, shown in the following image:
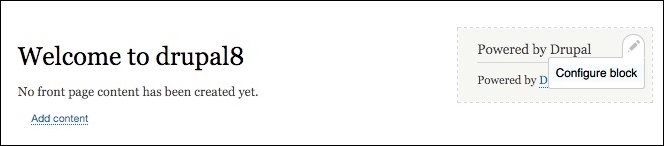
Clicking on this link takes us directly to the Configure block screen for the block, as shown in the following image:
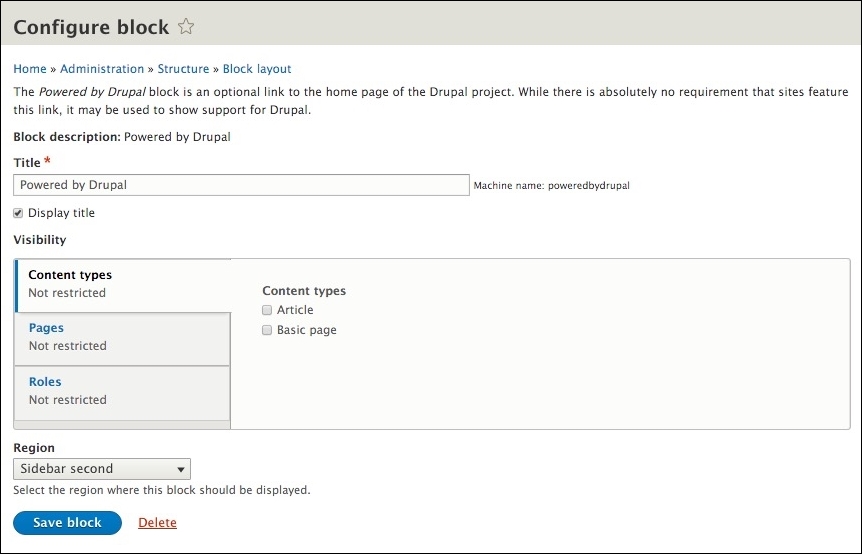
All blocks contain three common areas of configuration: Title, Visibility, and Region. Keep in mind that additional configuration options may be available based on the type of block. We will only be covering the basic configuration options.
Block content, whether system generated or custom, can have its display title changed or even suppressed. In the case of our Powered by Drupal block, we can change the title by simply inputting a different value in the Title field:
- Locate the Title field.
- Change the value to
Powered by Drupal 8. - Click on the Save block button.
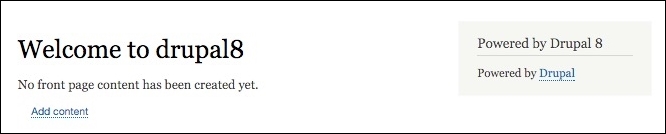
- We return to the homepage, and we can see that our block title has changed, as shown in the following image:
Let's try suppressing the block title all together by clicking on the Configure block context link and following these steps:
- Uncheck the Display title checkbox.
- Click on the Save block button.
We should now only see the content of our block being displayed as the title is gone.
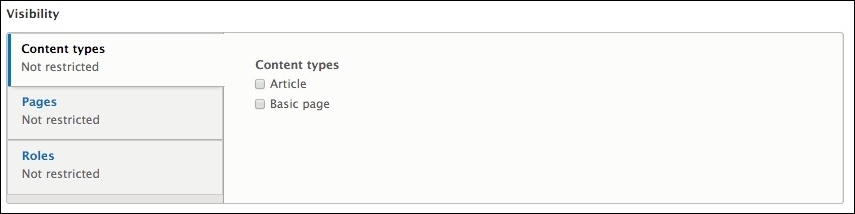
Sometimes, we may want to control the visibility of a particular block of content based on various contexts. If we navigate back to the Configure block screen and scroll down to the Visibility section, we will see three different contexts to restrict visibility based on Content types, Pages, and Roles.
Content types' visibility allows us to determine whether a block is displayed based on the content type of the node or page that the block is placed on. For example, if we have a block listing of recent articles that we only want to display in the sidebar on an Article Detail node, we could specify Article for the Content types restriction. This restriction would ensure that the same block did not accidentally show on a Basic page node.
Page restriction allows us to whitelist or blacklist blocks of content based on the path to a specific page or set of pages. The path to the page needs to be entered one line at a time and can utilize a wildcard "*" character to specify all children pages. Once we have entered the path, we can choose to negate the condition by either selecting Show for the listed pages or Hide for the listed pages.
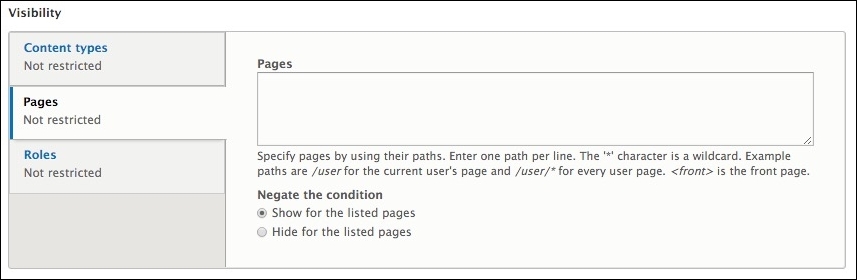
Page restriction visibility is probably the most common visibility setting used for blocks. Especially with Drupal 8 introducing the ability to reuse blocks, being able to control what page a block displays on is important to make sure that a block is not duplicated.
The last way to restrict block content is by role. A role is defined by the site administrator and generally consists of an administrator, editor, contributor, an authenticated user, and an anonymous user. Visibility to block content can be restricted by selecting the specific role, as shown in the following image:
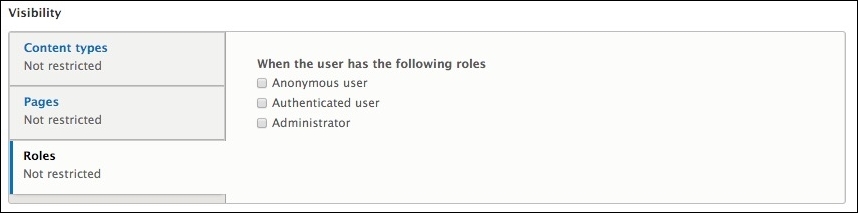
Role-specific visibility can be useful to display admin-only content or membership content to authenticated users without the anonymous user seeing it.
So far, we have worked with system-generated blocks. However, with the introduction of fieldable blocks in Drupal 8, we now have the ability to create custom blocks. Custom blocks are quite powerful and will be used to display content in ways not possible previously without a contributed module.
We can create a custom block by navigating back to the Block layout admin located at /admin/structure/block and following these steps:
- Locate the Sidebar second region.
- Click on the Place block button.
- Click on the Add custom block button.
We are now presented with the Add custom block screen that will allow us to create a default custom block that includes a Block description and a Body field, as shown in the following image:
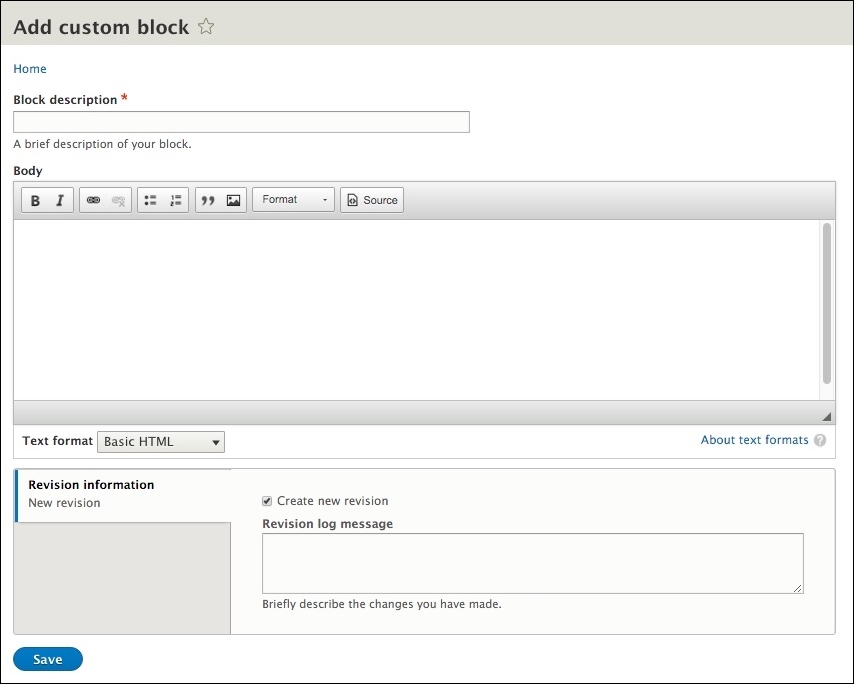
We can continue filling out our custom block by entering the following values:
- Block description: Our custom block
- Body: This is some basic content
Click on the Save button to proceed to the Configure block screen as follows:
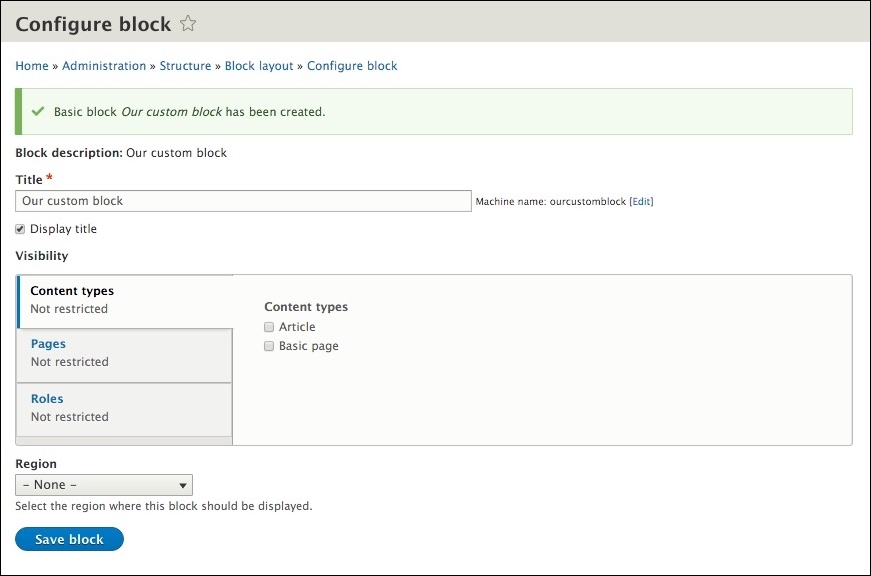
We can complete the creation of our custom block by leaving the defaults and clicking on the Save block button.
We have now created our first custom block, and if we scroll to the bottom of the Block layout admin, we will see our block displayed in the Disabled section, as shown in the following image:

At this point, we can place our custom block within any region by using another method of placing blocks, the Region dropdown. The Region dropdown is visible within each region and allows a block to quickly move another region by selecting the specified region from the dropdown.
Let's move our custom block into the Sidebar second region by following these steps:
- Select Sidebar second from the Region dropdown.
- Click on the Save blocks button to save our changes.
If we navigate to the homepage, we will see our new custom block displayed in the right sidebar directly under our other block.