
Previously, we looked at creating both a starter theme and a subtheme and, while each has its own benefit, we will often want to have the flexibility to develop on the fly. This means that we do not have to worry about managing a set of files already developed. This may sound contradictory to everything we have heard earlier, but taking an agile approach to theming allows for designers to create rich designs outside the boundaries of Drupal. With the introduction of Twig templates, we pretty much broke the mold on having to architect the layout of Drupal in a specific way. So, gone are the days of telling a designer that we can't implement their ideas.
As we create our custom theme, we will have the freedom to use whatever frontend tools are in the wild combined with the ability to implement both CSS and JS Frameworks using libraries, templates, and custom CSS/JS.
By now, setting up a theme should be second nature. We practiced this numerous times in Chapter 4, Getting Started – Creating Themes. But, in case we need a refresher, we can refer to that chapter for any outstanding questions.
We can begin by navigating to the themes folder and create a new folder named octo. This new folder will contain all of the files we will be using to develop our theme:
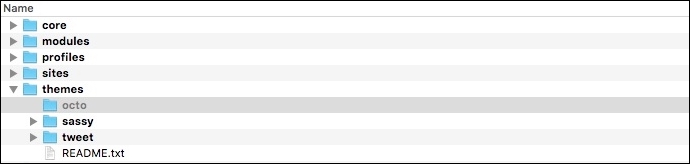
Next, we will create five additional subfolders within our main themes folder that will contain our CSS, Images, JavaScript, Twig templates, and any third-party vendor libraries such as Twitter Bootstrap. To ensure that we are all able to follow along without any naming conflicts, please make sure to name the five subfolders as follows:

We will be referencing these subfolders throughout the development of our theme with each folder containing the following files:
Go ahead and copy screenshot.png from the Chapter05/start/themes/octo folder and place it within the themes/octo folder. Drupal will use this screenshot within the Appearance page to help visually identify our theme.
Any new theme must contain an *.info.yml file to define metadata, style sheets, libraries, and regions so that Drupal 8 recognizes that there is a new theme available to be installed. Let's begin by opening up our favorite text editor and creating a new file named octo.info.yml.
Our new configuration file will contain the following required metadata to start with:
name: Octo
type: theme
description: 'A responsive Drupal 8 theme.'
core: 8.x
base theme: false
Make sure to save our changes and clear Drupal's cache. This will ensure that the theme registry picks up our changes.
Navigate to /admin/appearance
and locate our new theme on the Appearance page. If we look within the Uninstalled themes section, we will see the Octo theme available to install, as shown in the following screenshot:

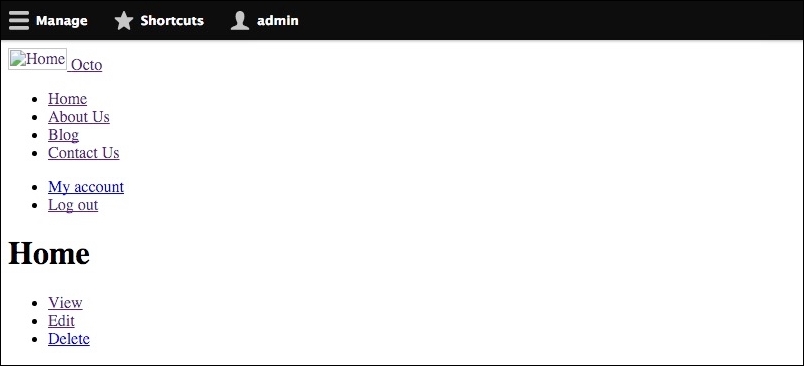
To install our theme, click on the Install and set as default link. With our new theme now installed, we can browse the homepage by clicking on the Back to site link in the admin menu. We will see that the original Bartik theme styling has been replaced with the non-styled look of our Octo theme, as shown in the following screenshot:
Currently, our theme is using the default Drupal 8 regions as we have not specified any within our configuration file. This would be fine if the content in our Mockup worked nicely with those regions, but as we discovered earlier, there are definitely some regions outside of the default that will need to be defined.
For example, Drupal 8 provides only a single Footer region, and we will clearly need more than one region in our footer to accomplish the three blocks of content, as well as the two additional blocks of content that fall below our footer.
Let's edit our octo.info.yml file and define the specific regions we will need to place blocks of content needed by our homepage and interior pages. Begin by adding a new block of metadata to define regions with the following:
regions:
  header_top: 'Header Top'
  header: 'Header'
  primary_menu: 'Primary menu'
  secondary_menu: 'Secondary menu'
  page_top: 'Page top'
  page_bottom: 'Page bottom'
  highlighted: Highlighted
  headline: 'Headline'
  breadcrumb: Breadcrumb
  before_content: 'Before Content'
  content: Content
  sidebar_first: 'Sidebar first'
  sidebar_second: 'Sidebar second'
  after_content: 'After Content'
  footer_first: 'Footer first'
  footer_second: 'Footer second'
  footer_third: 'Footer third'
  footer_bottom_left: 'Footer Bottom Left'
  footer_bottom_right: 'Footer Bottom Right'
Make sure to save any changes to our octo.info.yml file and then clear Drupal's cache. Finally, we will want to confirm that our newly defined regions are available to be used by navigating to /admin/structure/block and looking at the Block layout page to verify that our regions are now available, as shown in the following image:

So far, we are progressing very nicely with adding our required metadata and regions that our theme will need, sort of a wash, rinse, and repeat pattern; with options like adding configuration information, clearing cache, and verifying changes being available. How about taking a look at adding some assets that we will need before we start tackling different page sections of our site?
Drupal 8 definitely manages assets in a different way than we were used to in Drupal 7. With the introduction of Yaml configuration and asset libraries, we now have a separation of how CSS and JavaScript is referenced and used. Of course, we should be experts by now, but to recap, the process contains two steps.
- First, we need to create a
*.libraries.ymlfile, which will allow us to organize our theme's CSS, JavaScript, and dependencies. - Second, we will need to add the library reference to our theme's configuration file.
We will be using the Twitter Bootstrap library again with our theme. To ensure that we all use the same version of Bootstrap, we have provided a copy within the exercise files.
Begin by copying the Bootstrap folder contained in the Chapter05/start/themes/octo/vendor folder and place it within the themes/octo/vendor folder.
With Bootstrap accessible by our theme, we can create a new file named octo.libraries.yml and save it within the root of our theme. Next, we will want to add the following metadata to our octo.libraries.yml file:
bootstrap:
  version: 3.3.6
  css:
    theme:
      vendor/bootstrap/css/bootstrap.min.css: {}
      vendor/bootstrap/css/bootstrap-theme.min.css: {}
  js:
    vendor/bootstrap/js/bootstrap.min.js: {}
  dependencies:
    - core/jquery
The metadata we added basically starts with a variable name for how we want to access the library from our configuration file such as octo/bootstrap. Next, we need to make sure that we reference the version of the library we are adding followed by the path to the CSS, JS, and any dependencies. When dealing with YAML files, it is important to make sure that you have the proper indentations or else we may experience errors.
Now that we have our octo.libraries.yml file in place and have added a reference to Bootstrap, we need to open up our octo.info.yml file and add a pointer to our library in order for Drupal to recognize any assets that need to be loaded into our theme.
Open up the octo.info.yml file, and add the following prior to our regions section:
libraries:
  - octo/bootstrap
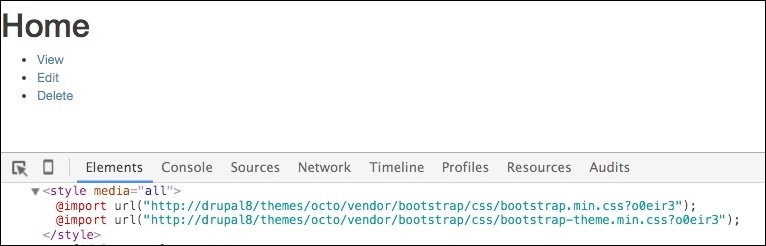
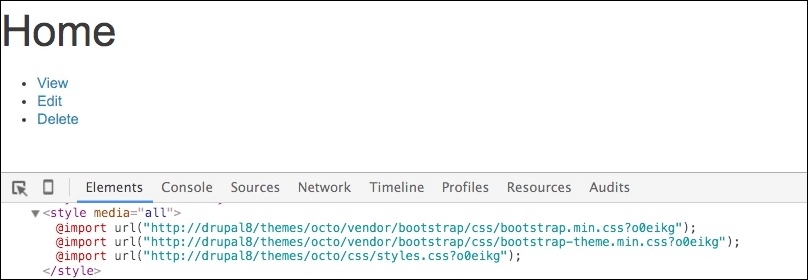
Make sure to save our changes and then clear Drupal's cache. If everything was successful, we should be able to navigate back to our homepage and note the Bootstrap CSS affecting out page elements. We can also confirm this by inspecting the page with Google Chrome and see in fact that Bootstrap is being loaded properly, as shown in the following screenshot:
Now that we have a sense of how libraries are added to our theme, we will need to add additional assets including our images, CSS, and JavaScript files that we will be using to create our theme throughout the remaining lessons.
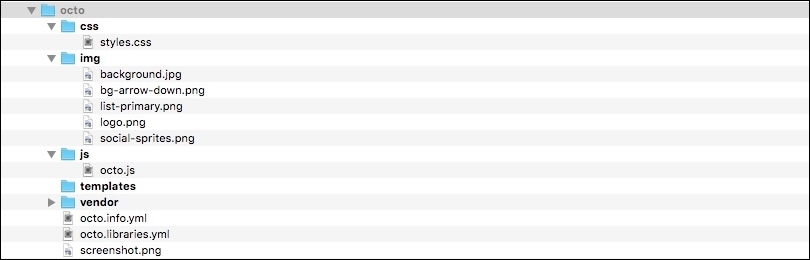
Begin by opening the Chapter05/start/themes/octo folder and copying the contents of the css, img and js folders and placing them into their respective folders inside the themes/octo folder, as shown in the following screenshot:
With our base assets in place, we will need to open back up our octo.libraries.yml file within our editor and add a global library entry that points to our new files.
Open up octo.libraries.yml and add the following entry directly below the bootstrap entry:
base:
  version: VERSION
  css:
    theme:
      css/styles.css: {}
  js:
    js/octo.js: {}
  dependencies:
    - core/jquery
It's important to remember that the formatting and order of these entries is crucial in making sure that we don't experience any Drupal errors, so feel free to look at the completed octo.libraries.yml file located in the Chapter05/end/themes/octo folder as a reference. Just to clarify, we want to make sure that Twitter Bootstrap loads first, then our base styling and scripts.
Once we have completed adding the new entry, make sure to save the file, then open up octo.info.yml, and add the following reference to our base library so that it reads as follows:
libraries:
  - octo/bootstrap
  - octo/base
Save the file and don't forget to clear Drupal's cache, this will ensure that our changes take effect. Now if we browse back to our homepage and inspect the markup, we will see that the new references have been added to our page and our styling has changed again:
We will be adding additional assets to our octo.libraries.yml file as we address each page of our site that needs additional functionality, so it is important to be comfortable with this process.
One last thing we need to make sure that we take care of before finishing this chapter is considering how Drupal handles default files. That is, files that we upload such as a logo, an image field on a content type, or any inline images that we would place directly in the content of our page.
Since we are using database snapshots to save time on having to recreate content, we want to make sure that any images that the database may be referencing are available to us and we don't encounter broken image paths.
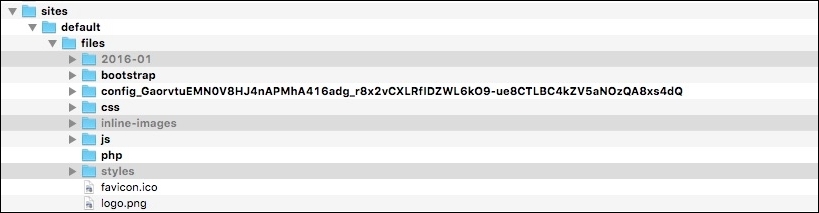
We can take care of this by copying the contents of our files folder located within the Chatper05/start/sites/default/files folder and placing them into the sites/default/files folder of our Drupal 8 instance. If prompted to replace or overwrite files, go ahead and say yes to ensure that we have all the files needed.
Once we are done, our sites/default/files folder should contain subfolders with images organized based on the upload date, inline images, and styles for image derivatives, as shown in the following screenshot:
We have now completed adding all the assets and initial libraries that our new custom theme will need—a great start to strengthen our theming skills.