
The next area of our About Us page we will need to create is the display of our Team members listing. We will be taking an existing Drupal content type named Team and using Views to display the four team members.
In order for us to implement the Team members section, we will need to complete a series of steps as follows:
- First, we will review the structural markup for our team members section in preparation for creating a new Drupal View.
- Next, we will look at various methods to theme View content as we complete our Team Members display.
- Finally, we will assign our custom View block to a new region and limit the page visibility to our About Us page.
The Views module provides multiple ways of creating block displays, whether we are simply outputting the fields of a content type as an unordered list or relying on rendering a specific content type directly. In any case, it is best to start off by breaking down how the Team Members block is structured within our mockup and then creating our view based on those needs.
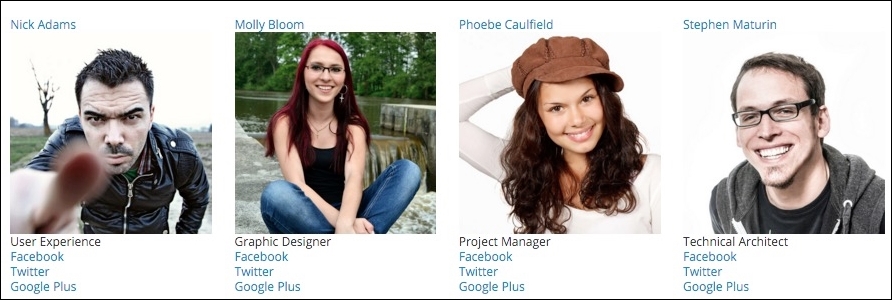
Let's start by reviewing the visual display and then break down the structural markup. Navigate to the exercise files and open up the about-us.html file found in the Mockup folder as shown here:

Visually, we can determine that our view will require the following content:
However, if we inspect the markup of an individual Team member, we will get a better idea of what fields a team member will need to display.
Markup
<div class="col-md-3 col-sm-6 views-row">

    <div class="img-round img-grayscale-hover">
      <a href="#" class="img-link">
        <span class="img-border">
          <img src="img/team-one.jpg" width="250" height="250" alt="Stephen Maturin">
        </span>
      </a>
    </div>

    <h6><span>Stephen Maturin</span></h6>

    <p>Technical Architect</p>

    <a class="button--icon" href="https://www.facebook.com/
    PacktPub"><i class="fa fa-facebook"></i></a>

    <a class="button--icon" href="https://twitter.com/
    packtpub"><i class="fa fa-twitter"></i></a>

    <a class="button--icon" href="https://plus.google.com/
    +packtpublishing/posts"><i class="fa fa-google-plus"></i></a>

</div>
Based on the markup mentioned earlier, each team member content type will need to display the following fields:
- Team Photo
- Title
- Position
- Social icons
Now that we have identified both our visual and structural markup and fields, we can begin creating our new Team Member view.
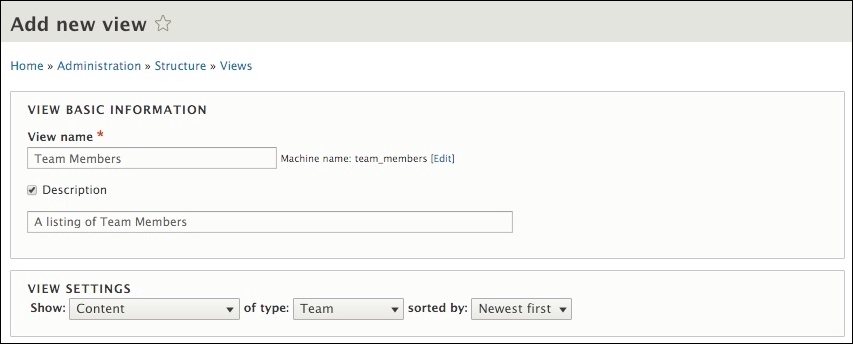
To get started, we will need to navigate to /admin/structure/views and click on the Add new view button. From the Views Admin screen, we will add the following information:
- VIEW BASIC INFORMATION:
- View name:
Team Members - Check the Description box
- Description:
A listing of Team Members
- View name:
- VIEW SETTINGS: Show: Content of type: Team sorted by: Newest first
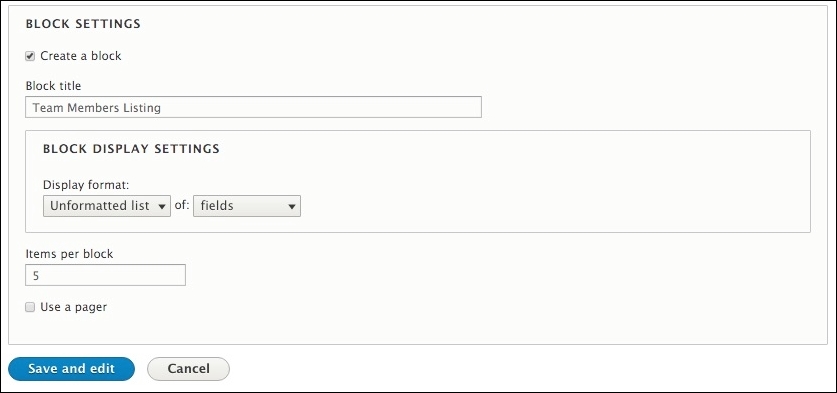
- BLOCK SETTINGS:
- Check the Create a block checkbox.
- Block title:
Team Members Listing
- BLOCK DISPLAY SETTINGS:
Now that our Team Member view has been created, we will need to add additional fields and adjust the format settings before we can use our new block. With the view still open we will need to add the following fields:
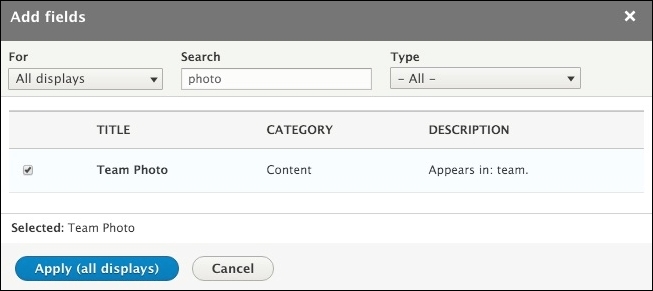
- Click on the Add button next to the FIELDS section.
- Enter the term
photoin the Search field to filter our choices. - Click on the Team Photo checkbox.
- Click on the Apply (all displays) button.
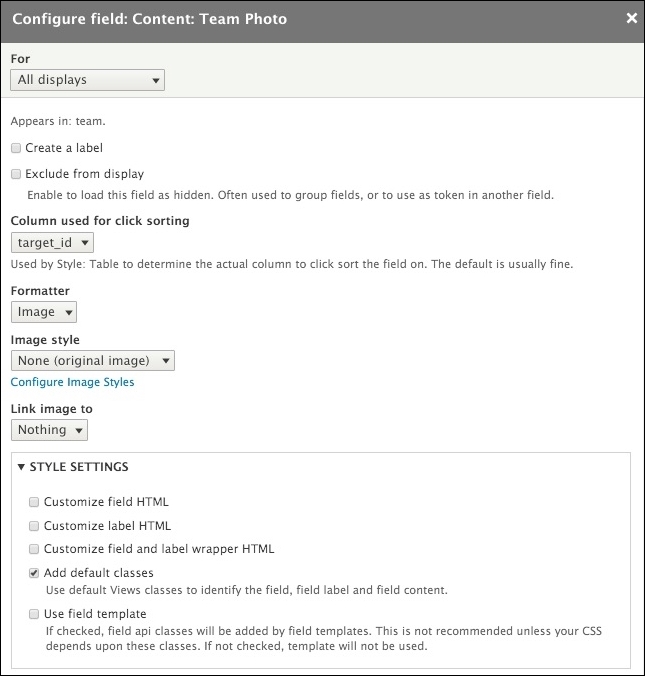
Next, we will need to configure the Team Photo field.
- Click on the STYLE SETTINGS section link.
- Uncheck the Add default classes checkbox.
- Click on the Apply (all displays) button.
With our Team Photo field added, we will need to repeat the steps mentioned earlier to add the remaining fields.
Job Position
- Click on the Add button next to the FIELDS section.
- Enter the term
Job Positionin the Search field to filter our choices. - Click on the Job Position checkbox.
- Click on the Apply (all displays) button.
- Click on the STYLE SETTINGS section link.
- Uncheck the Add default classes checkbox.
- Click the Apply (all displays) button.
Facebook link
- Click on the Add button next to the FIELDS section.
- Enter the term
Facebook linkin the Search field to filter our choices. - Click on the Facebook link checkbox.
- Click on the Apply (all displays) button.
- Click on the STYLE SETTINGS section link.
- Uncheck the Add default classes checkbox.
- Click on the Apply (all displays) button.
Twitter link
- Click on the Add button next to the FIELDS section.
- Enter the term
Twitter linkin the Search field to filter our choices. - Click on the Twitter link checkbox.
- Click on the Apply (all displays) button.
- Click on the STYLE SETTINGS section link.
- Uncheck the Add default classes checkbox.
- Click on the Apply (all displays) button.
Google Plus link
- Click on the Add button next to the FIELDS section.
- Enter the term
Google Plus linkin the Search field to filter our choices. - Click on the Google Plus link checkbox.
- Click on the Apply (all displays) button.
- Click on the STYLE SETTINGS section link.
- Uncheck the Add default classes checkbox.
- Click on the Apply (all displays) button.
With all of our fields now added to our view, we can click on the Save button to make sure that we don't lose any of our work. Our fields should now look like the following image:

We will be modifying our view quite frequently as we begin theming it, but in the meantime, let's assign our new block to the After Content region we created earlier. This will give us a better idea of what it currently looks like before proceeding.
Any time we create a new block display using views, we can easily assign it to any region from the Block layout page. Begin by navigating to /admin/structure/block and follow these nine steps:
- Locate the After Content region.
- Click on the Place block button.
- Locate the Team Members block.
- Click on the Place block button.
- Uncheck the Display title checkbox.
- Select the Pages tab under Visibility.
- Enter the path
/aboutinto the Page text field. - Make sure that the Show for the listed pages checkbox is selected.
- Click on the Save block button.
With our Team Members block assigned to the After Content region, we can now navigate back to the About Us page and preview the display:

We clearly have to do something to match our Team Members block to our mockup. If we compare the mockup to our About Us page, we can see that it doesn't yet match. We can address this, starting with adding some CSS directly to our View.
The first noticeable thing is that our four team members are stacked on the page vertically versus displaying nicely in four columns across the page. In order to resolve this, we need to simply add the Twitter Bootstrap column classes to our view's rows. We can achieve this by navigating to /admin/structure/views/view/team_members and following these four steps:
- Click on the Settings link next to Unformatted list within the FORMAT section.
- From the Block: Style options dialog, select the Row class text field and enter a value of col-md-3 col-sm-6.
- Click on the Apply button.
- Click on the Save button.
Navigate back to the About Us page, and our Team Members block should be displaying in their proper columns, as shown in the following image:
If we inspect the Team Members block, we can see that our view rows are now outputting the CSS class we added:

So far so good, but we still need to clean up how the Team Members block and fields are being output. Fortunately, we can add CSS classes to our overall view as well as rewrite the fields output to better match our mockup.
So far we have been working with the basic settings of a View. We can actually achieve more complex settings, such as contextual filters, relationships, and other miscellaneous settings within the Views UI. In the case of our Team Members view, we need to globally add a single CSS class name. While you may think we would need to create a Twig template to achieve this, we can actually add a CSS class from the admin by navigating to /admin/structure/views/view/team_members and following these steps:
- Click on the ADVANCED field set to expand the options within it.
- Locate the OTHER section.
- Click on the None link next to CSS class:.
- Enter a value of team into the CSS class name(s) text field.
- Click on the Apply (all displays) button.
- Click on the Save button.
If we navigate back to the About Us page and inspect the Team Members block, we will see that our view now has the new class added to it.

Another feature widely used when theming Views is the ability to rewrite field content. Every field we add to a view can be rewritten to easily modify the markup, and with Twig now part of Drupal 8 we can use this syntax to achieve the markup that our view needs.
One important item to remember when using this technique is that by default Drupal will provide field wrapper elements to each field. This unfortunately adds additional and unneeded div elements around every field. We will want to turn this setting off by navigating to /admin/structure/views/view/team_members and completing the following:
- Locate the FORMAT section.
- Click on the Settings link next to Show: Fields.
- Uncheck the Provide default field wrapper elements checkbox.
- Click on the Apply button.
Now that we have turned off the default field wrapper elements, we can proceed to rewriting each field starting with Team Photo.
Content: Team Photo
- Click on the Content: Team Photo link under the FIELDS section.
- Choose the Team (250x250) image style from the Image style dropdown.
- Expand the REWRITE RESULTS section.
- Check the Override the output of this field with custom text checkbox.
- Expand the REPLACEMENT PATTERNS section to view the replacement patterns we can use to rewrite our markup.
- Enter the following markup in the Text field:
<div class="img-round img-grayscale-hover"> <a href="#" class="img-link"> <span class="img-border"> {{ field_team_photo }} </span> </a> </div> - Click on the Apply (all displays) button to complete the field rewrite.
- Click on the Save button to save our view.
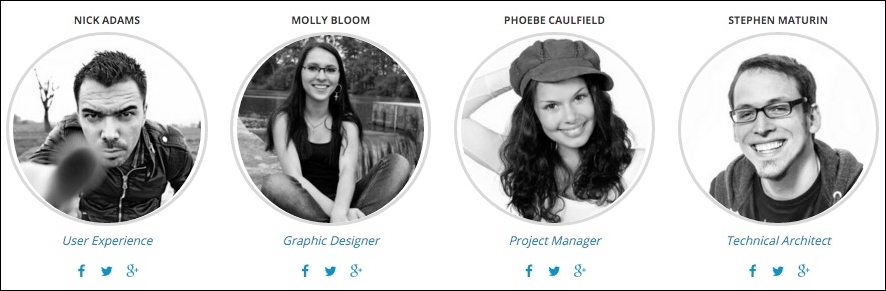
To validate that our field has been rewritten, navigate back to the About Us page and our Team Members' photographs should now be displaying, as shown in the following image:

If we inspect the markup of the page, we can see how simple rewriting the field output of views can be. Let's finish rewriting our fields by navigating to /admin/structure/views/view/team_members and following these remaining steps.
Content: Title field
- Click on the Content: Title link under the FIELDS section.
- Uncheck the Link to the Content checkbox.
- Expand the REWRITE RESULTS section.
- Check the Override the output of this field with custom text checkbox.
- Expand the REPLACEMENT PATTERNS section to view the replacement patterns we can use to rewrite our markup.
- Enter the following markup in the Text field:
<h6><span>{{ title }}</span></h6> - Click on the Apply (all displays) button.
- Click on the Save button to save our view.
Content: Job Position field
- Click on the Content: Job Position link under the FIELDS section.
- Expand the REWRITE RESULTS section.
- Check the Override the output of this field with custom text checkbox.
- Expand the REPLACEMENT PATTERNS section to view the replacement patterns we can use to rewrite our markup.
- Enter the following markup in the Text field:
<p>{{ field_job_position }}</p> - Click on the Apply (all displays) button.
- Click on the Save button to save our view.
Content: Facebook link field
- Click on the Content: Facebook link link under the FIELDS section.
- Expand the REWRITE RESULTS section.
- Check the Override the output of this field with custom text checkbox.
- Expand the REPLACEMENT PATTERNS section to view the replacement patterns we can use to rewrite our markup.
- Enter the following markup in the Text field:
<a class="button--icon" href="{{ field_facebook_link__uri }}"><i class="fa fa-facebook"></i></a> - Click on the Apply (all displays) button to complete the field rewrite.
- Click on the Save button to save our view.
Content: Twitter link field
- Click on the Content: Twitter link link under the FIELDS section.
- Expand the REWRITE RESULTS section.
- Check the Override the output of this field with custom text checkbox.
- Expand the REPLACEMENT PATTERNS section to view the replacement patterns we can use to rewrite our markup.
- Enter the following markup in the Text field:
<a class="button--icon" href="{{ field_twitter_link__uri }}"><i class="fa fa-twitter"></i></a> - Click on the Apply (all displays) button.
- Click on the Save button to save our view.
Content: Google Plus link field
- Click on the Content: Google Plus link link under the FIELDS section.
- Expand the REWRITE RESULTS section.
- Check the Override the output of this field with custom text checkbox.
- Expand the REPLACEMENT PATTERNS section to view the replacement patterns we can use to rewrite our markup.
- Enter the following markup in the Text field:
<a class="button--icon" href="{{ field_google_plus_link__uri }}"><i class="fa fa-google-plus"></i></a> - Click on the Apply (all displays) button.
- Click on the Save button to save our view.
With the remaining fields rewritten using the proper Twig replacement patterns, we can navigate back to our About Us page and review the results, as shown in the following image:
Our Team Members block is coming together nicely. We do have one field that is out of order and that is our team members' names. Currently, they are appearing above our images, and we need to fix that by rearranging our View's fields.
When we work with Views, we will often need to modify the fields that we have added, including rearranging them so that they display properly to match our design. We can easily accomplish this using the Views UI by navigating to /admin/structure/views/view/team_members and following these steps:
- Click on the dropdown button next to the FIELDS section.
- Choose Rearrange from the list.
- Drag the Content: Title field below the Content: Team Photo field using the drag icons.
- Click on the Apply (all displays) button.
- Click on the Save button to save our view.
Now that we have our fields rearranged properly, we still need to add the header and subheader so that they appear above our block. Because we need the headings to be part of our view block, we can take a look at using the View header to add the markup and content required to match our mockup.
Our best option to add this markup is to use the View header, which can be done by navigating to /admin/structure/views/view/team_members and following these steps:
- Click on the Add button within the HEADER section of our views BLOCK SETTINGS.
- Choose Text area from the Add header window, this will allow us to provide markup text for the area.
- Click on the Apply (all displays) button.
- Choose Full HTML from the Text format dropdown.
- Enter the following markup in the Content field:
<div class="view-header">
  <h2 class="block-title">Meet our awesome team</h2>
  <hr>
  <p class="block-subtitle">We bring you an awesomeness of
  design, creative skills, thoughts, and ideas.</p>
</div>
- Click on the Apply button.
- Click on the Save button to save our view.
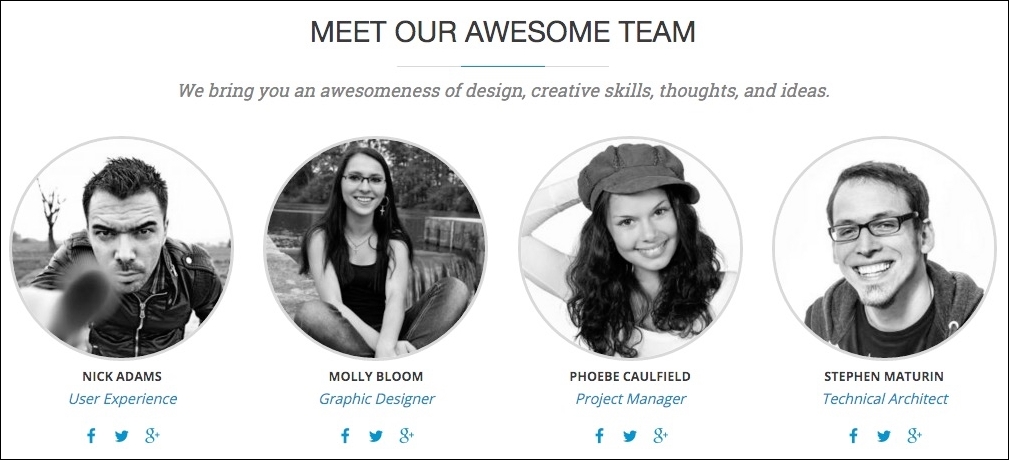
If we view our About Us page, we see that our header and tagline are now being displayed. We are almost finished with this section.
The only visual element still missing is the gray background that helps separate our Team Members block from the rest of our content. Also, if we were to resize the page and check for any responsive qualities, we would note that something is just not quite right. In fact, upon further investigation, our After Content region does not include the container class that enables Twitter Bootstrap to apply its media queries properly.
Adding markup to any regions requires us to either create or modify an existing Twig template. As we have seen before, all we need to do is inspect our page markup to determine where the template resides and what file name suggestion we should use:

Begin by following these steps:
- Navigate to
core/modules/system/templatesand copy theregion.html.twigtemplate to ourthemes/octo/templatesfolder. - Rename
region.html.twigtoregion--after-content.html.twig. - Replace the content with the following markup:
{% set classes = ['region','region-' ~ region|clean_class,] %} {% if content %} <div{{ attributes.addClass(classes) }}> <div class="container"> {{ content }} </div> </div> {% endif %} - Save
region--after-content.html.twig.
Make sure you clear Drupal's cache and then refresh the browser. If we preview the About Us page, we will now see our completed Team Members section. By using Twig to create a template for our After Content region, we enabled the markup to be responsive with the container class as well as using the classes variable to display the name of the region for our global styling to take effect.
In order for us to complete the interior page structure, we need to add back our global footer. Let's take a look at doing that now.