
Our blog listing is a shortened representation of our Blog detail page, with just enough information to tease our users into reading more. To help us identify what fields we will need to display for our blog listing, we should review each individual post on our mockup. We can visually identify that we will need to display the following fields:
- Image
- Post date
- Title
- Teaser
- Author
- Tags (taxonomy)
- Comments
While all of these fields make up our post content type, there are also additional fields such as Thumbnail and Full content that are not being displayed. So how would we go about presenting the same data to users differently, based on the layout? We could hide fields using CSS, or add PHP conditions, but there is a much easier method for creating different display modes.
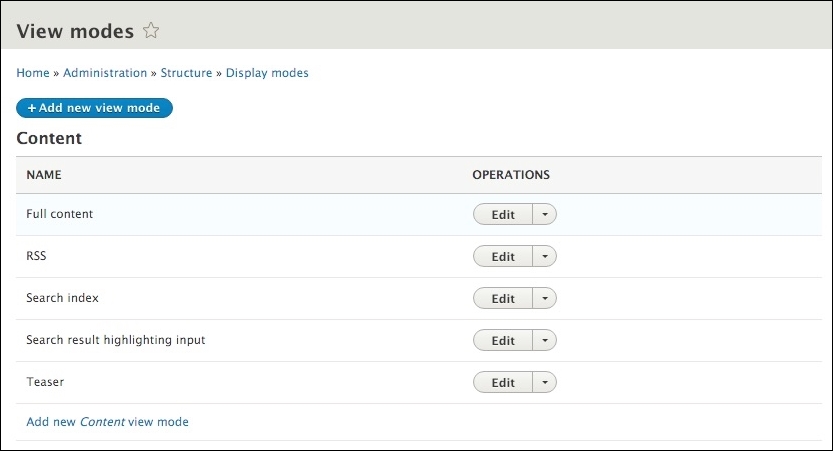
One feature of Drupal 8 that provides us with the flexibility to present content differently based on specific requirements is display modes. By default, Drupal provides each content type or node with a handful of displays for enabling fields based on a default view or teaser view. We can see a listing of all the current display modes associated with content by navigating to /admin/structure/display-modes/view, as shown in the following image:
However, we are not limited to just these displays. We can create different displays for both Node forms and Node views. In fact, let's create a new view mode for our blog listing by following these steps:
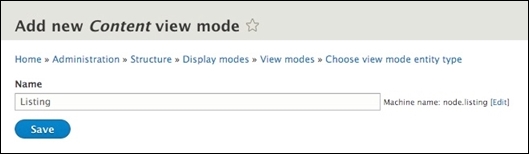
- Click on the Add new Content view mode link.
- Enter the value
Listingin the Name text field. - Click on the Save button.
Now that we have created our new View mode, we can use it with any content type that we choose. In the case of our post content type, we will utilize it to manage what fields will be displayed when using the listing display.
The ability to manage a content types display has actually been around since Drupal 6. Once known as build modes, we can now utilize our new display by navigating to /admin/structure/types/manage/post/display and enabling the custom display settings as shown:
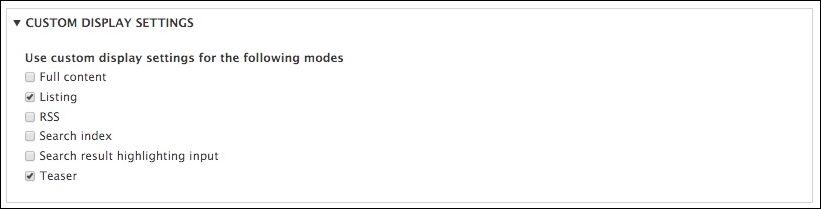
- Click on the CUSTOM DISPLAY SETTINGS fieldset to expand it.
- Check the Listing checkbox under Use custom display settings for the following modes.
- Click on the Save button.
Our new listing display should now be available to select along the top of our Manage display screen. Selecting Listing will display a new view mode that we can use to specify which fields will be enabled.
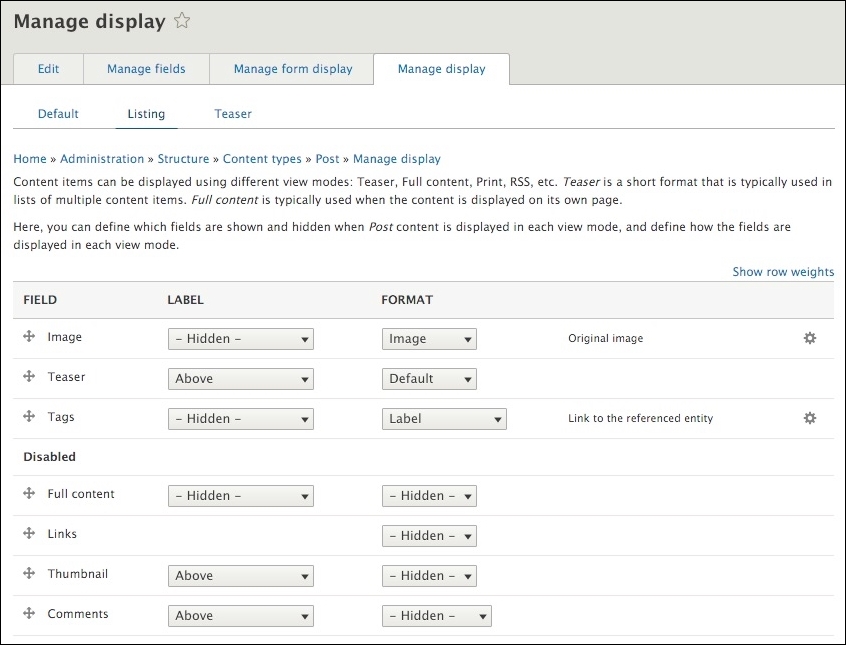
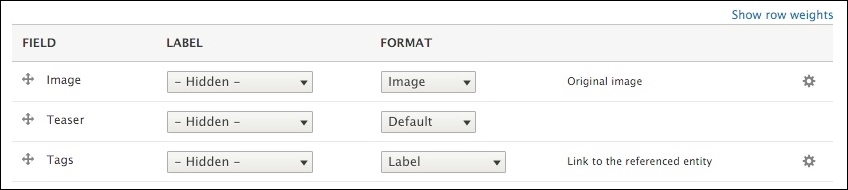
Fields can be dragged, dropped, and rearranged by simply clicking on the drag icon next to each field name. Any fields located under the Disabled section will not be displayed when the Listing view mode is used. For our blog listing page, we only want to display the Image, Teaser, and Tags fields. Go ahead and drag these into place, as shown in the following image:
Once we have rearranged the fields as needed, we can click on the Save button to lock in our changes.
Managing the display of fields is not just about selecting which fields are enabled or disabled. We also have the ability to specify how the label of each field will be presented, as well as how each field will be formatted.
The label for each field can have one of four states. The label can display above or inline with the field, as well as be hidden or visually hidden. Visually hiding a label does not prevent the label itself from being available for screen readers, and is great for accessibility requirements.
For our three fields, we will want them to all be hidden from our display, so we can follow these steps to hide each field:
- Click on the LABEL dropdown next to the Image field and choose Hidden.
- Click on the LABEL dropdown next to the Teaser field and choose Hidden.
- Click on the LABEL dropdown next to the Tags field and choose Hidden.
- Click on the Save button.
Each field can also be formatted so that it is displayed differently, based on the formatting options. This allows us to have finer control over how text is displayed, how content is referenced, and what size an image is displayed at. Based on the formatting options, there may be additional settings that can be applied.
For example, if we click on the gear icon to the right of our image field, we will be presented with options to select various image styles and even enable the image to link to the node itself:
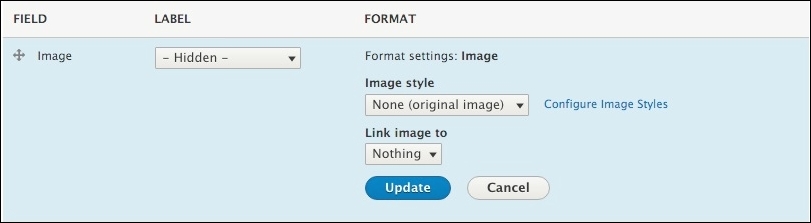
Currently, our fields do not require formatting, but it is important to know where to manage this functionality when the need arises.