
In this section, we will learn how to develop a touch-driven application that runs on mobile devices using Qt Quick.
- First of all, create a new Qt Quick application project.
- In Qt Creator, right-click on
qml.qrcand select Open in Editor. Then, click Add | Add Files and addtux.pngto the project:
- Next, open up
MainForm.ui.qml. Drag an image widget from the Library window to the canvas. Then, set the source of the image totux.pngand set itsfillmodetoPreserveAspectFit. After that, set itswidthto200and itsheightto220. - Make sure both the mouse area widget and the image widget are exported as alias properties of the root item by clicking on the small icon besides their respective widget name.
- After that, switch over to the Script Editor by clicking on the Edit button on the side bar located at the left side of the editor. We need to change the mouse area widget to a multi-point touch area widget, like so:
MultiPointTouchArea { id: touchArea anchors.fill: parent touchPoints: [ TouchPoint { id: point1 }, TouchPoint { id: point2 } ] } - We also set the
Imagewidget to be automatically placed at the center of the window by default:Image { id: tux x: (window.width / 2) - (tux.width / 2) y: (window.height / 2) - (tux.height / 2) width: 200 height: 220 fillMode: Image.PreserveAspectFit source: "tux.png" }The final UI should look something like this:

- Once you're done with that, let's open up
main.qml. First, clear everything within theMainFormobject exceptanchors.fill: parent, like so:import QtQuick 2.5 import QtQuick.Window 2.2 Window { visible: true MainForm { anchors.fill: parent } } - After that, declare several variables within the
MainFormobject that will be used to rescale the image widget. If you want to know more about thepropertykeyword used in the following code, check out the There's more… section at the end of this example:property int prevPointX: 0 property int prevPointY: 0 property int curPointX: 0 property int curPointY: 0 property int prevDistX: 0 property int prevDistY: 0 property int curDistX: 0 property int curDistY: 0 property int tuxWidth: tux.width property int tuxHeight: tux.height
- Next, we will define what will happen when our finger touches the multi-point area widget. In this case, we will save the positions of the first and second touch points if more than one finger touches the multi-point touch area. We also save the width and height of the image widget so that later on we can use these variables to calculate the scale of the image when the fingers start to move:
touchArea.onPressed:
{
  if (touchArea.touchPoints[1].pressed)
  {
    if (touchArea.touchPoints[1].x < touchArea.touchPoints[0].x)
      prevDistX = touchArea.touchPoints[1].x - touchArea.touchPoints[0].x
    else
      prevDistX = touchArea.touchPoints[0].x - touchArea.touchPoints[1].x

    if (touchArea.touchPoints[1].y < touchArea.touchPoints[0].y)
      prevDistY = touchArea.touchPoints[1].y - touchArea.touchPoints[0].y
    else
      prevDistY = touchArea.touchPoints[0].y - touchArea.touchPoints[1].y

    tuxWidth = tux.width
    tuxHeight = tux.height
  }
}
The following image shows the example of touch points being registered when two fingers are touching the screen, within the touchArea boundary.
touchArea.touchPoints[0]is the first registered touch point andtouchArea.touchPoints[1]is the second. We then calculate the X and Y distance between the two touch points and save them asprevDistXandprevDistY:
- After that, we will define what will happen when our fingers move while remaining in contact with the screen and still within the boundary of the touch area. At this point, we will calculate the scale of the image by using the variables we saved in the previous step. At the same time, if we detect that only a single touch is found, then we will move the image instead of altering its scale:
touchArea.onUpdated:{
  if (!touchArea.touchPoints[1].pressed)
  {
    tux.x += touchArea.touchPoints[0].x - touchArea.touchPoints[0].previousX
    tux.y += touchArea.touchPoints[0].y - touchArea.touchPoints[0].previousY
  }
  else
  {
    if (touchArea.touchPoints[1].x < touchArea.touchPoints[0].x)
    curDistX = touchArea.touchPoints[1].x - touchArea.touchPoints[0].x
    else
      curDistX = touchArea.touchPoints[0].x - touchArea.touchPoints[1].x

    if (touchArea.touchPoints[1].y < touchArea.touchPoints[0].y)
      curDistY = touchArea.touchPoints[1].y - touchArea.touchPoints[0].y
    else
      curDistY = touchArea.touchPoints[0].y - touchArea.touchPoints[1].y

      tux.width = tuxWidth + prevDistX - curDistX
      tux.height = tuxHeight + prevDistY - curDistY
  }
}
The following image shows the example of moving touch points -
touchArea.touchPoints[0]moved from point A to point B whiletouchArea.touchPoints[1]moved from point C to point D. We can then determine how many units have the touch points moved by looking at the differences between the previous X, Y variables with the current ones:
- You can now build and export the program to your mobile device. You will not be able to test this program on a platform that does not support multi-touch. Once the program is running on the mobile device (or desktop/laptop that supports multi-touch), try two things: put only one finger on the screen and move it around, and put two fingers on the screen and move them in opposite directions. What you should see is that the penguin will be moved to another place if you use only one finger, and it will be scaled up or down if you use two fingers:

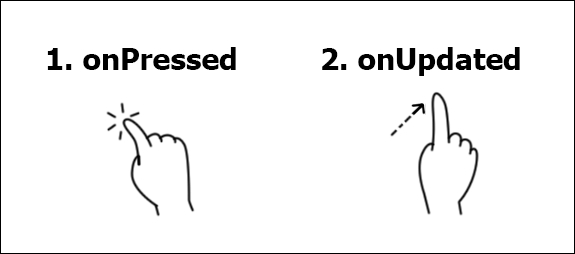
When a finger touches the screen of the device, the multi-point touch area widget triggers the onPressed event and registers the position of each of the touch points in an internal array. We can get this data by telling Qt which touch point you want to get access to. The first touch will bear the index number of 0, the second touch will be 1, and so on. We will then save this data into variables so that we can retrieve it later to calculate the scaling of the penguin image.
When one or more fingers remain in contact with the screen while moving, a multi-point touch area will trigger the onUpdate event. We will then check how many touches there are—if only one touch is found, we will just move the penguin image based on how much our finger has moved. If there is more than one touch, we will compare the distance between the two touches and compare this with the previous variables we have saved, to determine how much we should rescale the image.
We must also check whether the first touch is on the left side of the second touch or the right side. This way we can prevent the image from being scaled in the inverse direction of the finger movement and producing an inaccurate result.
As for the movement of the penguin, we will just get the difference between the current touch position and the previous one, add that to the coordinate of the penguin, and it's done. A single touch event is usually a lot simpler and more straightforward than a multi-touch event.
In Qt Quick, all its components have built-in properties such as width, height, color, and so on that are attached to the components by default. However, Qt Quick also allows you to create your own custom properties and attach them to the components you declared in your QML script. A custom property of an object type may be defined in an object declaration in a QML document by adding the property keyword before the type keyword, for example:
property int myValue;
You can also bind the custom property to a value by using a colon (:) before the value, like so:
property int myValue: 100;
To learn more about the property types supported by Qt Quick, check out this link: http://doc.qt.io/qt-5/qtqml-typesystem-basictypes.html