
BDD/ATDD is gaining much popularity in agile software development, and Cucumber-JVM is a mainstream tool used to implement this practice in Java. Cucumber-JVM is the Java port of the Cucumber framework, widely used in Ruby.
Cucumber-JVM allows developers, QA, and non-technical or business participants to write features and scenarios in a plain text file using Gherkin language. This is done with minimal restrictions about grammar in a typical Given, When, and Then structure.
This feature file is then supported by a step definition file, which implements automated steps to execute the scenarios written in the feature file. Apart from testing APIs with Cucumber-JVM, we can also test UI level tests by combining Selenium WebDriver.
In this recipe, we will use Cucumber-JVM, Maven, and Selenium WebDriver to implement tests for the fund transfer feature of an online banking application.
- Create a new Maven project named FundTransfer in Eclipse.
- Add the following dependencies to
POM.XML:<project xmlns="http://maven.apache.org/POM/4.0.0" xmlns:xsi="http://www.w3.org/2001/XMLSchema-instance" xsi:schemaLocation="http://maven.apache.org/POM/4.0.0 http://maven.apache.org/xsd/maven-4.0.0.xsd"> <modelVersion>4.0.0</modelVersion> <groupId>FundTransfer</groupId> <artifactId>FundTransfer</artifactId> <version>0.0.1-SNAPSHOT</version> <dependencies> <dependency> <groupId>info.cukes</groupId> <artifactId>cucumber-java</artifactId> <version>1.2.4</version> <scope>test</scope> </dependency> <dependency> <groupId>info.cukes</groupId> <artifactId>cucumber-junit</artifactId> <version>1.2.4</version> <scope>test</scope> </dependency> <dependency> <groupId>junit</groupId> <artifactId>junit</artifactId> <version>4.12</version> <scope>test</scope> </dependency> <dependency> <groupId>org.seleniumhq.selenium</groupId> <artifactId>selenium-java</artifactId> <version>2.47.1</version> </dependency> </dependencies> </project>
Perform the following steps to create BDD/ATDD tests with Cucumber-JVM:
- Select the FundTransfer project in Package Explorer in Eclipse. Select and right-click on src/test/resources in Package Explorer. Select New | Package from the menu to add a new package, as shown in the following screenshot:

- Enter
fundtransfer.testin the Name: textbox and click on the Finish button. - Add a new file to this package. Name this file
fundtransfer.feature, as shown in the following screenshot: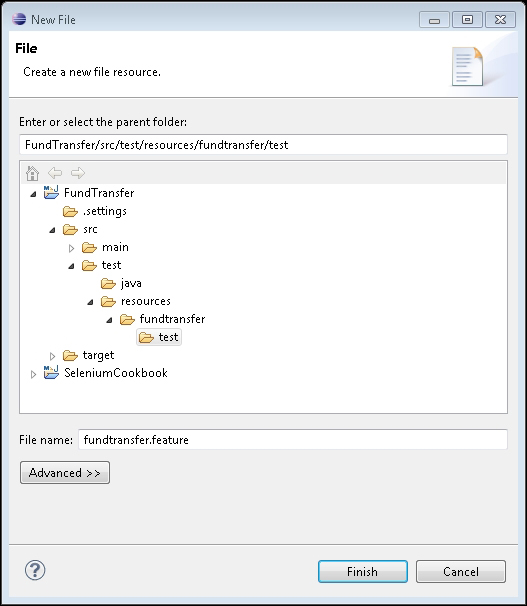
- Add the
FundTransferfeature and scenarios to this file:Feature: Customer Transfer's Fund As a customer, I want to transfer funds so that I can send money to my friends and family Scenario: Valid Payee Given the user is on Fund Transfer Page When he enters "Jim" as payee name And he enters "100" as amount And he submits request for Fund Transfer Then ensure the fund transfer is complete with "$100 transferred successfully to Jim!!" message Scenario Outline: Invalid conditions Given the user is on Fund Transfer Page When he enters "<payee>" as payee name And he enters "<amount>" as amount And he submits request for Fund Transfer Then ensure a transaction failure "<message>" is displayed Examples: | payee | amount | message | | Unmesh | 100 | Transfer failed!! 'Unmesh' is not registered in your List of Payees | | Tim | 100000 | Transfer failed!! account cannot be overdrawn | - Select and right-click on src/test/java in Package Explorer. Select New | Package from the menu to add a new package, as shown in the following screenshot:

- Create a class named
FundTransferStepDefsin the newly created package. Add the following code to this class:package fundtransfer.test; import org.openqa.selenium.WebDriver; import org.openqa.selenium.chrome.ChromeDriver; import org.openqa.selenium.WebElement; import org.openqa.selenium.By; import cucumber.api.java.*; import cucumber.api.java.en.*; import static org.junit.Assert.assertEquals; public class FundTransferStepDefs { protected WebDriver driver; @Before public void setUp() { driver = new ChromeDriver(); } @Given("the user is on Fund Transfer Page") public void theUserIsOnFundTransferPage() { driver.get("http://cookbook.seleniumacademy.com/fundTransfer.html"); } @When("he enters "([^"]*)" as payee name") public void heEntersPayeeName(String payeeName) { driver.findElement(By.id("payee")).sendKeys(payeeName); } @And("he enters "([^"]*)" as amount") public void heEntersAmount(String amount) { driver.findElement(By.id("amount")).sendKeys(amount); } @And("he submits request for Fund Transfer") public void heSubmitsRequestForFundTransfer() { driver.findElement(By.id("transfer")).click(); } @Then("ensure the fund transfer is complete with "([^"]*)" message") public void ensureTheFundTransferIsComplete(String msg) { WebElement message = driver.findElement(By.id("message")); assertEquals(message.getText(), msg); } @Then("^ensure a transaction failure "([^"]*)" is displayed$") public void ensureATransactionFailureMessage(String msg) { WebElement message = driver.findElement(By.id("message")); assertEquals(message.getText(), msg); } @After public void tearDown() { driver.close(); } } - Create a support class
RunCukesTest, which will define the Cucumber-JVM configurations:package fundtransfer.test; import cucumber.api.CucumberOptions; import cucumber.api.junit.Cucumber; import org.junit.runner.RunWith; @RunWith(Cucumber.class) @CucumberOptions(plugin = {"pretty", "html:target/report/report.html", "json:target/report/cucu_json_report.json", "junit:target/report/cucumber_junit_report.xml"}) public class RunCukesTest { } - To run the tests in Maven life cycle, select the FundTransfer project in Package Explorer. Right-click on the project name and select Run As | Maven test. Maven will execute all the tests from the project.
- At the end of the test, an HTML report will be generated, as shown in the following screenshot. To view this report, open
index.htmlin thetarget eportfolder:
Creating tests in Cucumber-JVM involves three major steps: writing a feature file, implementing automated steps using the step definition file, and creating support code as needed.
To write features, Cucumber-JVM uses the Gherkin syntax. The feature file describes the feature and then the scenarios to test the feature:
Feature: Customer Transfer's Fund
       As a customer,
       I want to transfer funds
       so that I can send money to my friends and family
You can write as many scenarios as needed to test the feature in the feature file. The scenario section contains the name and steps to execute the defined scenario, along with test data required to execute that scenario using the application:
Scenario: Valid Payee
       Given the user is on Fund Transfer Page
       When he enters "Jim" as payee name
       And he enters "100" as amount
       And he Submits request for Fund Transfer
       Then ensure the fund transfer is complete with "$100 transferred successfully to Jim!!" message
Team members use these feature files and scenarios to build and validate the system. Frameworks like Cucumber provide an ability to automatically validate the features by allowing us to implement automated steps. For this we need to create the step definition file that maps the steps from the feature file to the automation code. Step definition files implement a method for steps using special annotations. For example, in the following code, the @When annotation is used to map the step "When he enters "Jim" as payee name" from the feature file in the step definition file. When this step is to be executed by the framework, the heEntersPayeeName() method will be called by passing the data extracted using regular expressions from the step:
@When("he enters "([^"]*)" as payee name")
public void heEntersPayeeName(String payeeName) {
  driver.findElement(By.id("payee")).sendKeys(payeeName);
}
In this method, the WebDriver code is written to locate the payee name textbox and enter the name value using the sendKeys() method.
The step definition file acts like a template for all the steps from the feature file, while scenarios can use a mix and match of the steps based on the test conditions.
A helper class RunCukesTest is defined to provide Cucumber-JVM configurations, such as how to run the features and steps with JUnit, report format, and location, shown as follows:
@RunWith(Cucumber.class)
@CucumberOptions(plugin = {"pretty", "html:target/report/report.html","json:target/report/cucu_json_report.json","junit:target/report/cucumber_junit_report.xml"})
public class RunCukesTest {
}In this example, step definition methods are calling Selenium WebDriver methods directly. However, a layer of abstraction can be created using the Page object where a separate class is defined with the definition of all the elements from FundTransferPage:
import org.openqa.selenium.WebDriver;
import org.openqa.selenium.WebElement;
import org.openqa.selenium.support.CacheLookup;
import org.openqa.selenium.support.FindBy;
import org.openqa.selenium.support.PageFactory;

public class FundTransferPage {

  @FindBy(id = "payee")
  @CacheLookup
  public WebElement payeeField;

  @FindBy(id = "amount")
  public WebElement amountField;

  @FindBy(id = "transfer")
  public WebElement transferButton;

  @FindBy(id = "message")
  public WebElement messageLabel;

  public FundTransferPage(WebDriver driver)
  {
    if(!"Online Fund Transfers".equals(driver.getTitle()))
      throw new IllegalStateException("This is not Fund Transfer Page");
    PageFactory.initElements(driver, this);
  }
}