In the preceding sections, we discussed various model classes. Now, we will look at how to present the data to the users using the QTableView widget. The data source for the QTableView is provided by any of the model classes. The table view is the most used view format as this represents a virtual representation of 2D SQL table structure. We will look at the code first, then discuss its functionality:
import sys
from PySide.QtGui import *
from PySide.QtCore import *
from PySide.QtSql import *
def initializeModel(model):
model.setTable("employee")
model.setEditStrategy(QSqlTableModel.OnManualSubmit)
model.select()
model.setHeaderData(0, Qt.Horizontal, "ID")
model.setHeaderData(1, Qt.Horizontal, "First Name")
model.setHeaderData(2, Qt.Horizontal, "Last Name")
model.setHeaderData(3, Qt.Horizontal, "Age")
model.setHeaderData(4, Qt.Horizontal, "Gender")
model.setHeaderData(5, Qt.Horizontal, "Income")
def createView(title, model):
view = QTableView()
view.setModel(model)
view.setWindowTitle(title)
return view
def createConnection():
db = QSqlDatabase.addDatabase('QSQLITE')
db.setDatabaseName('sample.db')
ok = db.open()
if not ok:
return False
myQuery = QSqlQuery()
myQuery.exec_("""CREATE TABLE employee (id INTEGER PRIMARY KEY
AUTOINCREMENT UNIQUE NOT NULL, first_name CHAR(20) NOT NULL,
last_name CHAR(20), age INT, sex CHAR(1), income FLOAT)""")
myQuery.exec_("""INSERT INTO employee (first_name, last_name, age, sex, income)
VALUES ('Alice', 'A', 30, 'F', 5000.00)""")
myQuery.exec_("""INSERT INTO employee (first_name, last_name, age, sex, income)
VALUES ('Bob', 'B', 31, 'M', 5100.00)""")
myQuery.exec_("""INSERT INTO employee (first_name, last_name, age, sex, income)
VALUES ('Caesar', 'C', 32, 'F', 5200.00)""")
myQuery.exec_("""INSERT INTO employee (first_name, last_name, age, sex, income)
VALUES ('Danny', 'D', 34, 'M', 5300.00)""")
myQuery.exec_("""INSERT INTO employee (first_name, last_name, age, sex, income)
VALUES ('Eziekel', 'E', 35, 'F', 5400.00)""")
return True
if __name__ =='__main__':
try:
myApp = QApplication(sys.argv)
if not createConnection():
print("Error Connecting to Database")
sys.exit(1)
model = QSqlTableModel()
initializeModel(model)
view1 = createView("Table Model - Example1", model)
view2 = createView("Table Model - Example2", model)
view1.setGeometry(100, 100, 500, 220)
view2.setGeometry(100, 100, 500, 220)
view1.show()
view2.move(view1.x() + view1.width() + 20, view1.y())
view2.show()
myApp.exec_()
sys.exit(0)
except NameError:
print("Name Error:", sys.exc_info()[1])
except SystemExit:
print("Closing Window...")
except Exception:
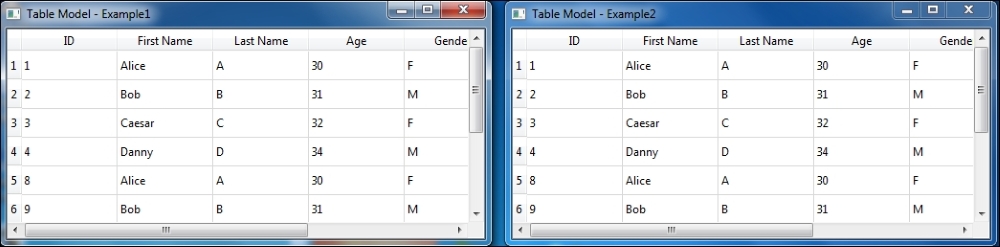
print(sys.exc_info()[1])At first, we create and establish a database connection and execute the sample data in the createConnection() function. As discussed, a SQLite connection is created using the Qt's SQLite driver, QSQLITE. We set the database name in the next line. If the file exists, the database connection uses it or else creates a new file using the same name. We check the success of the connection and return false if it is not so. The sample queries are executed one by one in order, and a true value is returned indicating that the connection was successful and the data is populated. In the initializeModel() function, we define the properties of the model and set the display format by specifying its column headers. The createView() function creates a view, and returns it to the caller function. On execution, we will get two table views, as shown in the following screenshot.
On execution, we will get two table views, as shown in the following screenshot: