The main part of any GUI program is to create windows and define functionalities around it. We will start exploring the ways to create windows and customize it in this chapter, and we will move on to create a real-life windows application in the next chapter.
The widget is the center of the user interface. It receives the user inputs from the mouse, keyboard, and other events of the window system, and paints a representation of itself on the screen. Every widget is rectangular, and sorted in a Z-order. Z-order is an ordering of displayed overlapping windows. The window with a higher Z-order will appear on top of windows with lower Z-orders. A widget is clipped by its parent and by the widgets in front of it. A widget that does not have a parent is called a window and is always independent. Usually, windows have a frame and a title bar at the least, but it is possible to create them without these by setting some windows flags. This chapter explains how to create simple windows using QWidget and also how to create some widely used widgets. The code snippets that are explained from this chapter onward will be based on Object-Oriented Design principles.
The QWidget is the base class for all the user interface classes. A widget can be a top-level widget or a child widget contained in a top-level or parent widget. Now, let's create a top-level window using QWidget. The constructor of the QWidget class takes two optional parameters, parent and flags. The parent parameter can be a QWidget object and the flags parameter can be a combination of PySide.QtCore.Qt.WindowFlags, as follows:
# Import required modules
import sys, time
from PySide.QtGui import *
from PySide.QtCore import *

# Our main window class
class SampleWindow(QWidget):
    # Constructor function
    def __init__(self):
        super(SampleWindow,self).__init__()

        self.initGUI()


    def initGUI(self):
        self.setWindowTitle("Sample Window")
        self.setGeometry(300, 300, 200, 150)
        self.setMinimumHeight(100)
        self.setMinimumWidth(250)
        self.setMaximumHeight(200)
        self.setMaximumWidth(800)
        self.show()
        print("Sample Window show in the GUI
")

if __name__ == '__main__':
    # Exception Handling
    try:
        myApp = QApplication(sys.argv)
        myWindow = SampleWindow()
        QCoreApplication.processEvents()
        time.sleep(3)
        myWindow.resize(300, 300)
        myWindow.setWindowTitle("Sample Window Resized")
        myWindow.repaint()
        myApp.exec_()
        sys.exit(0)
    except NameError:
        print("Name Error:", sys.exc_info()[1])
    except SystemExit:
        print("Closing Window...")
    except Exception:
        print (sys.exc_info()[1])
In this sample program, we create a window, set its minimum and maximum size, and repaint the window with different dimensions after a short period. If you look at the code closely, you will realize that the code follows the exception handling mechanism and object-oriented principles that were explained earlier.
The main idea in the earlier program is to introduce you to creating classes and objects, and work around them because programming in PySide indirectly implies programming using OO principles. PySide libraries follow the OO principles, and so do we. Our sample window is instantiated with the class that we declared for this purpose. The SampleWindow class is inherited from the PySide.QtGui.QWidget class. So, all the properties of QWidget can also be applied to our SampleWindow class. The __init__ function is called the constructor that has to be shown when an object is instantiated while instantiating the object. In Python, object-oriented super function can be used to access inherited methods that have been overridden in a class. In sample code, we have to call the QtWidget initialization and hence, the super(SampleWindow,self).__init__() line. As the best practice, we have created function initGUI initialization in our sample window using the methods that are inherited from the QWidget class. The functions, setMinimumHeight, setMinimumWidth, set the window to minimum size and cannot be shrunk further. Similarly, the window cannot be extended beyond the maximum size specified by the functions, setMaximumHeight and setMaximumWidth, and we paint the window on the screen by calling the show function on the SampleWindow object.
Our main function is encapsulated in a try, catch block to deal with any unexpected exceptions that may occur. As explained in the previous chapter, every PySide application must create a main application object:
- We will start with creating an object for the
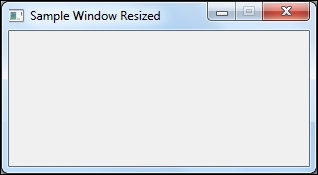
QApplicationclass. Then, we create an object for our custom definedSampleWindowclass. At this point, the__init__function is called and all the properties that are defined for our sample window are set, and the window is displayed. - The lines that follow are just an example to show us that we can repaint the window with different dimensions at any point during the execution of the program. So, we hold on (sleep) for three seconds, resize the window, and repaint it on the screen.
- Now, execute the code and have some fun. The event loop will be explained in Chapter ?. As of now, we should know that without
coreApplication.processEvents(), we will not see the initial window with the title "Sample Window" and only see "Sample Window Resized". Go ahead and try to take a look at it yourself. - On executing the program, you will be shown a window, as shown in the following image. This window will get resized after three seconds.
You may not initially see a window when executing this program on an XWindow-based system, such as Linux, because the main application loop has not been called yet. So, none of the objects have really been constructed and buffered out to the underlying XWindow system.
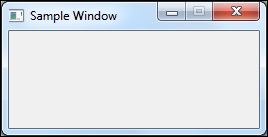
The following figure is the screenshot of the final output that you will see: