
Even though Symfony and Zend Framework have been the big players for quite a long time, during this last couple of years, a third framework came into play that has grown in popularity so much that nowadays it is the favorite framework among developers. Simplicity, elegant code, and high speed of development are the trump cards of this "framework for artisans". In this section, you will have a glance at what Laravel can do, taking the first steps to create a very simple application.
Laravel comes with a set of command-line tools that will make your life easier. Because of this, it is recommended to install it globally instead of per project—that is, to have Laravel as another program in your environment. You can still do this with Composer by running the following command:
$ composer global require "laravel/installer"
This command should download the Laravel installer to ~/.composer/vendor. In order to be able to use the executable from the command line, you will need to run something similar to this:
$ sudo ln -s ~/.composer/vendor/bin/laravel /usr/bin/laravel
Now, you are able to use the laravel command. To ensure that everything went all right, just run the following:
$ laravel –version
If everything went OK, this should output the version installed.
Yes, we know. Every single tutorial starts by creating a blog. However, we are building web applications, and this is the easiest approach we can take that adds some value to you. Let's start then; execute the following command wherever you want to add your application:
$ laravel new php-blog
This command will output something similar to what Composer does, simply because it fetches dependencies using Composer. After a few seconds, the application will hopefully tell you that everything was installed successfully and that you are ready to go.
Laravel created a new php-blog directory with quite a lot of content. You should have something similar to the directory structure shown in the following screenshot:

Let's set up the database. The first thing you should do is update the .env file with the correct database credentials. Update the DB_DATABASE values with your own; here's an example:
DB_HOST=localhost
DB_DATABASE=php_blog
DB_USERNAME=root
DB_PASSWORD=
You will also need to create the php_blog database. Do it with just one command, as follows:
$ mysql -u root -e "CREATE SCHEMA php_blog"
With Laravel, you have a migrations system; that is, you keep all the database schema changes under database/migrations so that anyone else using your code can quickly set up their database. The first step is to run the following command, which will create a migrations file for the blogs table:
$ php artisan make:migration create_posts_table --create=posts
Open the generated file, which should be something similar to database/migrations/<date>_create_posts_table.php. The up method defines the table blogs with an autoincremental ID and timestamp field. We would like to add a title, the content of the post, and the user ID that created it. Replace the up method with the following:
public function up()
{
    Schema::create('posts', function (Blueprint $table) {
        $table->increments('id');
        $table->timestamps();
        $table->string('title');
        $table->text('content');
        $table->integer('user_id')->unsigned();
        $table->foreign('user_id')
            ->references('id')->on('users');
    });
}
Here, the title will be a string, whereas the content is a text. The difference is in the length of these fields, string being a simple VARCHAR and text a TEXT data type. For the user ID we defined INT UNSIGNED, which references the id field of the users table. Laravel already defined the users table when creating the project, so you do not have to worry about it. If you are interested in how it looks, check the database/migrations/2014_10_12_000000_create_users_table.php file. You will note that a user is composed by an ID, a name, the unique e-mail, and the password.
So far, we have just written the migration files. In order to apply them, you need to run the following command:
$ php artisan migrate
If everything went as expected, you should have a blogs table now similar to the following:

To finish with all the preparations, we need to create a model for our blogs table. This model will extend from IlluminateDatabaseEloquentModel, which is the ORM that Laravel uses. To generate this model automatically, run the following command:
$ php artisan make:model Post
The name of the model should be the same as that of the database table but in singular. After running this command, you can find the empty model in app/Post.php.
Let's add a quick endpoint just to understand how routes work and how to link controllers with templates. In order to avoid database access, let's build the add new post view, which will display a form that allows the user to add a new post with a title and text. Let's start by adding the route and controller. Open the app/Http/routes.php file and add the following:
Route::group(['middleware' => ['web']], function () {
    Route::get('/new', function () {
        return view('new');
    });
});
These three very simple lines say that for the /new endpoint, we want to reply with the new view. Later on, we will complicate things here in the controller, but for now, let's focus on the views.
Laravel uses Blade as the template engine instead of Twig, but the way they work is quite similar. They can also define layouts from where other templates can extend. The place for your layouts is in resources/views/layouts. Create an app.blade.php file with the following content inside this directory, as follows:
<!DOCTYPE html>
<html lang="en">
<head>
    <title>PHP Blog</title>
    <link rel="stylesheet" href="{{ URL::asset('css/layout.css') }}" type="text/css">
    @yield('css')
</head>
<body>
<div class="navbar">
    <ul>
        <li><a href="/new">New article</a></li>
        <li><a href="/">Articles</a></li>
    </ul>
</div>
<div class="content">
@yield('content')
</div>
</body>
</html>
This is just a normal layout with a title, some CSS, and an ul list of sections in the body, which will be used as the navigation bar. There are two important elements to note here other than the HTML code that should already sound familiar:
- To define a block, Blade uses the
@yieldannotation followed by the name of the block. In our layout, we defined two blocks:cssandcontent. - There is a feature that allows you to build URLs in templates. We want to include the CSS file in
public/css/layout.css, so we will useURL::assetto build this URL. It is also helpful to include JS files.
As you saw, we included a layout.css file. CSS and JS files are stored under the public directory. Create yours in public/css/layout.css with the following code:
.content {
    position: fixed;
    top: 50px;
    width: 100%
}
.navbar ul {
    position: fixed;
    top: 0;
    width: 100%;
    list-style-type: none;
    margin: 0;
    padding: 0;
    overflow: hidden;
    background-color: #333;
}
.navbar li {
    float: left;
    border-right: 1px solid #bbb;
}
.navbar li:last-child {
    border-right: none;
}
.navbar li a {
    display: block;
    color: white;
    text-align: center;
    padding: 14px 16px;
    text-decoration: none;
}
.navbar li a:hover {
    background-color: #111;
}
Now, we can focus on our view. Templates are stored in resources/views, and, as with layouts, they need the .blade.php file extension. Create your view in resources/views/new.blade.php with the following content:
@extends('layouts.app')

@section('css')
    <link rel="stylesheet" href="{{ URL::asset('css/new.css') }}" type="text/css">
@endsection

@section('content')
    <h2>Add new post</h2>
    <form method="post" action="/new">
        <div class="component">
            <label for="title">Title</label>
            <input type="text" name="title"/>
        </div>
        <div class="component">
            <label>Text</label>
            <textarea rows="20" name="content"></textarea>
        </div>
        <div class="component">
            <button type="submit">Save</button>
        </div>
    </form>
@endsection
The syntax is quite intuitive. This template extends from the layouts' one and defines two sections or blocks: css and content. The CSS file included follows the same format as the previous one. You can create it in public/css/new.css with content similar to the following:
label {
    display: block;
}
input {
    width: 80%;
}
button {
    font-size: 30px;
    float: right;
    margin-right: 20%;
}
textarea {
    width: 80%;
}
.component {
    padding: 10px;
}
The rest of the template just defines the POST form pointing to the same URL with title and text fields. Everything is ready to test it in your browser! Try accessing http://localhost:8080/new or the port number of your choice. You should see something similar to the following screenshot:

As explained before, user authentication and authorization is one of the features that most frameworks contain. Laravel makes our lives very easy by providing the user model and the registration and authentication controllers. It is quite easy to make use of them: you just need to add the routes pointing to the already existing controllers and add the views. Let's begin.
There are five routes that you need to consider here. There are two that belong to the registration step, one to get the form and another one for the form to submit the information provided by the user. The other three are related to the authentication part: one to get the form, one to post the form, and one for the logout. All five of them are included in the AuthAuthController class. Add to your routes.php file the following routes:
// Registration routes...
Route::get('auth/register', 'AuthAuthController@getRegister');
Route::post('auth/register', 'AuthAuthController@postRegister');

// Authentication routes...
Route::get('/login', 'AuthAuthController@getLogin');
Route::post('login', 'AuthAuthController@postLogin');
Route::get('logout', 'AuthAuthController@getLogout');
Note how we defined these routes. As opposed to the one that we created previously, the second argument of these is a string with the concatenation of the controller's class name and method. This is a better way to create routes because it separates the logic to a different class that can later be reused and/or unit tested.
If you are interested, you can browse the code for this controller. You will find a complex design, where the functions the routes will invoke are actually part of two traits that the AuthController class uses: RegistersUsers and AuthenticatesUsers. Checking these methods will enable you to understand what goes on behind the scenes.
Each get route expects a view to render. For the user's registration, we need to create a template in resources/views/auth/register.blade.php, and for the login view, we need a template in resources/views/auth/login.blade.php. As soon as we send the correct POST parameters to the correct URL, we can add any content that we think necessary.
Let's start with the registration form; this form needs four POST parameters: name, e-mail, password, and password confirmation, and as the route says, we need to submit it to /auth/register. The template could look similar to the following:
@extends('layouts.app')

@section('css')
    <link rel="stylesheet" href="{{ URL::asset('css/register.css') }}" type="text/css">
@endsection

@section('content')
    <h2>Account registration</h2>

    <form method="post" action="/auth/register">
        {{ csrf_field() }}
        <div class="component">
            <label for="name">Name</label>
            <input type="text" name="name"
                   value="{{ old('name') }}" />
        </div>
        <div class="component">
            <label>Email</label>
            <input type="email" name="email"
                   value="{{ old('email') }}"/>
        </div>
        <div class="component">
            <label>Password</label>
            <input type="password" name="password" />
        </div>
        <div class="component">
            <label>Password confirmation</label>
            <input type="password" name="password_confirmation" />
        </div>
        <div class="component">
            <button type="submit">Create</button>
        </div>
    </form>
@endsection
This template is quite similar to the form for new posts: it extends the layout, adds a CSS file, and populates the content section with a form. The new addition here is the use of the old function that retrieves the value submitted on the previous request in case that the form was not valid and we showed it back to the user.
Before we try it, we need to add a register.css file with the styles for this form. A simple one could be as follows:
div.content {
    text-align: center;
}
label {
    display: block;
}
input {
    width: 250px;
}
button {
    font-size: 20px;
}
.component {
    padding: 10px;
}
Finally, we should edit the layout in order to add a link on the menu pointing to the registration and login pages. This is as simple as adding the following li elements at the end of the ul tag:
<li class="right"><a href="/auth/register">Sign up</a></li>
<li class="right"><a href="/login">Sign in</a></li>
Add also the style for the right class at the end of layout.css:
div.alert {
    color: red;
}
To make things even more useful, we could add the information for what went wrong when submitting the form. Laravel flashes the errors into the session, and they can be accessed via the errors template variable. As this is common to all forms and not only to the registration one, we could add it to the app.blade.php layout, as follows:
<div class="content">
    @if (count($errors) > 0)
        <div class="alert">
            <strong>Whoops! Something went wrong!</strong>
            @foreach ($errors->all() as $error)
                <p>{{ $error }}</p>
            @endforeach
        </div>
    @endif
@yield('content')
In this piece of code, we will use Blade's @if conditional and @foreach loop. The syntax is the same as PHP; the only difference is the @ prefix.
Now, we are ready to go. Launch your application and click on the registration link on the right-hand side of the menu. Attempt to submit the form, but leave some fields blank so that we can note how the errors are displayed. The result should be something similar to this:

One thing that we should customize is where the user will be redirected once the registration is successful. In this case, we can redirect them to the login page. In order to achieve this, you need to change the value of the $redirectTo property of AuthController. So far, we only have the new post page, but later, you could add any path that you want via the following:
protected $redirectPath= '/new;
The user's login has a few more changes other than the registration. We not only need to add the login view, we should also modify the menu in the layout in order to acknowledge the authenticated user, remove the register link, and add a logout one. The template, as mentioned earlier, has to be saved in resources/views/auth/login.blade.php. The form needs an e-mail and password and optionally a checkbox for the remember me functionality. An example could be the following:
@extends('layouts.app')

@section('css')
    <link rel="stylesheet" href="{{ URL::asset('css/register.css') }}" type="text/css">
@endsection

@section('content')
    <h2>Login</h2>

    <form method="POST" action="/login">
        {!! csrf_field() !!}
        <div class="component">
            <label>Email</label>
            <input type="email" name="email"
                   value="{{ old('email') }}">
        </div>
        <div class="component">
            <label>Password</label>
            <input type="password" name="password">
        </div>
        <div class="component">
            <input class="checkbox" type="checkbox" name="remember">
            Remember Me
        </div>
        <div class="component">
            <button type="submit">Login</button>
        </div>
    </form>
@endsection
The layout has to be changed slightly. Where we displayed the links to register and log in users, now we need to check whether there is a user already authenticated; if so, we should rather show a logout link. You can get the authenticated user through the Auth::user() method even from the view. If the result is not empty, it means that the user was authenticated successfully. Change the two links using the following code:
<ul>
    <li><a href="/new">New article</a></li>
    <li><a href="/">Articles</a></li>
    @if (Auth::user() !== null)
        <li class="right">
            <a href="/logout">Logout</a>
        </li>
    @else
        <li class="right">
            <a href="/auth/register">Sign up</a>
        </li>
        <li class="right">
            <a href="/login">Sign in</a>
        </li>
    @endif
</ul>This last part of the user management session is probably the most important one. One of the main goals when authenticating users is to authorize them to certain content—that is, to allow them to visit certain pages that unauthenticated users cannot. In Laravel, you can define which routes are protected in this way by just adding the auth middleware. Update the new post route with the following code:
Route::get('/new', ['middleware' => 'auth', function () {
    return view('new');
}]);
Everything is ready! Try to access the new post page after logging out; you will be redirected automatically to the login page. Can you feel how powerful a framework can be?
As we mentioned before, Laravel comes with an ORM, Eloquent ORM, which makes dealing with models a very easy task. In our simple database, we defined one table for posts, and we already had another one for users. Posts contain the ID of the user that owns it—that is, user_id. It is good practice to use the singular of the name of the table followed by _id so that Eloquent will know where to look. This was all we did regarding the foreign key.
We should also mention this relationship on the model side. Depending on the type of the relationship (one to one, one to many, or many to many), the code will be slightly different. In our case, we have a one-to-many relationship because one user can have many posts. To say so in Laravel, we need to update both the Post and the User models. The User model needs to specify that it has many posts, so you need to add a posts method with the following content:
public function posts() {
    return $this->hasMany('AppPost');
}
This method says that the model for users has many posts. The other change that needs to be made in Post is similar: we need to add a user method that defines the relationship. The method should be similar to this one:
public function user() {
    return $this->belongsTo('AppUser');
}
It looks like very little, but this is the whole configuration that we need. In the next section, you will see how easy it is to save and query using these two models.
Even though the title of this section mentions complex controllers, you will note that we can create complete and powerful controllers with very little code. Let's start by adding the code that will manage the creation of posts. This controller needs to be linked to the following route:
Route::post('/new', 'PostPostController@createPost');As you can imagine, now, we need to create the PostPostController class with the createPost method in it. Controllers should be stored in app/Http/Controllers, and if they can be organized in folders, it would be even better. Save the following class in app/Http/Controllers/Post/PostController.php:
<?php

namespace AppHttpControllersPost;

use AppHttpControllersController;
use IlluminateHttpRequest;
use IlluminateSupportFacadesAuth;
use IlluminateSupportFacadesValidator;
use AppPost;

class PostController extends Controller {

    public function createPost(Request $request) {

    }
}
So far, the only two things we can note from this class are:
- Controllers extend from the
AppHttpControllersControllerclass, which contains some general helpers for all the controllers. - Methods of controllers can get the
IlluminateHttpRequestargument as the user's request. This object will contain elements such as the posted parameters, cookies, and so on. This is very similar to the one we created in our own application.
The first thing we need to do in this kind of controller is check whether the parameters posted are correct. For this, we will use the following code:
public function createPost(Request $request) {
    $validator = Validator::make($request->all(), [
        'title' => 'required|max:255',
        'content' => 'required|min:20',
    ]);

    if ($validator->fails()) {
        return redirect()->back()
            ->withInput()
            ->withErrors($validator);
    }
}
The first thing we did is create a validator. For this, we used the Validator::make function and sent two arguments: the first one contains all the parameters from the request, and the second one is an array with the expected fields and their constraints. Note that we expect two required fields: title and content. Here, the first one can be up to 255 characters long, and the second one needs to be at least 20 characters long.
Once the validator object is created, we can check whether the data posted by the user matches the requirements with the fails method. If it returns true—that is, the validation fails—we will redirect the user back to the previous page with redirect()->back(). To perform this invocation, we will add two more method calls: withInput will send the submitted values so that we can display them again, and withErrors will send the errors the same way AuthController did.
At this point, it would be helpful to the user if we show the previously submitted title and text in case the post is not valid. For this, use the already known old method in the view:
{{--...--}}
<input type="text" name="title"
value="{{ old('title') }}"/>
</div>
<div class="component">
<label>Text</label>
<textarea rows="20" name="content">
{{ old('content') }}
</textarea>
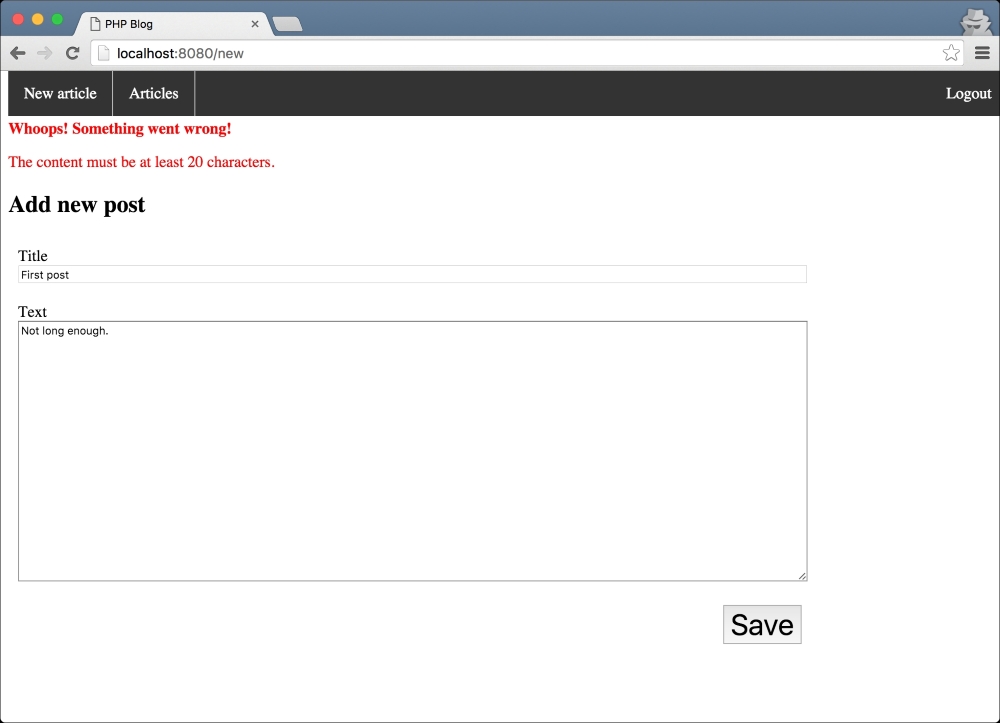
{{--...--}}At this point, we can already test how the controller behaves when the post does not match the required validations. If you miss any of the parameters or they do not have correct lengths, you will get an error page similar to the following one:
Let's now add the logic to save the post in case it is valid. If you remember the interaction with the models from our previous application, you will be gladly surprised at how easy it is to work with them here. Take a look at the following:
public function createPost(Request $request) {
    $validator = Validator::make($request->all(), [
        'title' => 'required|max:255',
        'content' => 'required|min:20',
    ]);

    if ($validator->fails()) {
        return redirect()->back()
            ->withInput()
            ->withErrors($validator);
    }

    $post = new Post();
    $post->title = $request->title;
    $post->content = $request->content;

    Auth::user()->posts()->save($post);

    return redirect('/new');
}
The first thing we will do is create a post object setting the title and content from the request values. Then, given the result of Auth::user(), which gives us the instance of the currently authenticated user model, we will save the post that we just created through posts()->save($post). If we wanted to save the post without the information of the user, we could use $post->save(). Really, that is all.
Let's quickly add another endpoint to retrieve the list of posts for a given user so that we can take a look at how Eloquent ORM allows us to fetch data easily. Add the following route:
Route::get('/', ['middleware' => 'auth', function () {
    $posts = Auth::user()
        ->posts()
        ->orderBy('created_at')
        ->get();
    return view('posts', ['posts' => $posts]);
}]);
The way we retrieve data is very similar to how we save it. We need the instance of a model—in this case, the authenticated user—and we will add a concatenation of method invocations that will internally generate the query to execute. In this case, we will ask for the posts ordered by the creation date. In order to send information to the view, we need to pass a second argument, which will be an array of parameter names and values.
Add the following template as resources/views/posts.blade.php, which will display the list of posts for the authenticated user as a table. Note how we will use the $post object, which is an instance of the model, in the following code:
@extends('layouts.app')

@section('css')
    <link rel="stylesheet" href="{{ URL::asset('css/posts.css') }}" type="text/css">
@endsection

@section('content')
    <h2>Your posts</h2>

    <table>
    @foreach ($posts as $post)
        <tr>
            <td>{{ $post->title }}</td>
            <td>{{ $post->created_at }}</td>
            <td>{{ str_limit($post->content, 100) }}</td>
        </tr>
    @endforeach
    </table>
@endsection
The lists of posts are finally displayed. The result should be something similar to the following screenshot:

In a very short time, we created an application that allows you to register, log in, and create and list posts from scratch. We will end this section by talking about how to test your Laravel application with PHPUnit.
It is extremely easy to write tests in Laravel as it has a very nice integration with PHPUnit. There is already a phpunit.xml file, a customized TestCase class, customized assertions, and plenty of helpers in order to test with the database. It also allows you to test routes, emulating the HTTP request instead of testing the controllers. We will visit all these features while testing the creation of new posts.
First of all, we need to remove tests/ExampleTest.php because it tested the home page, and as we modified it, it will fail. Do not worry; this is an example test that helps developers to start testing, and making it fail is not a problem at all.
Now, we need to create our new test. To do this, we can either add the file manually or use the command line and run the following command:
$ php artisan make:test NewPostTest
This command creates the tests/NewPostTest.php file, which extends from TestCase. If you open it, you will note that there is already a dummy test, which you can also remove. Either way, you can run PHPUnit to make sure everything passes. You can do it in the same way we did previously, as follows:
$ ./vendor/bin/phpunit
The first test we can add is one where we try to add a new post but the data passed by the POST parameters is not valid. In this case, we should expect that the response contains errors and old data, so the user can edit it instead of rewriting everything again. Add the following test to the NewPostTest class:
<?php

class NewPostTest extends TestCase
{
    public function testWrongParams() {
        $user = factory(AppUser::class)
            ->make(['email' => '[email protected]']);

        $this->be($user);

        $this->call(
            'POST',
            '/new',
            ['title' => 'the title', 'content' => 'ojhkjhg']
        );

        $this->assertSessionHasErrors('content');
        $this->assertHasOldInput();
    }
}
The first thing we can note in the test is the creation of a user instance using a factory. You can pass an array with any parameter that you want to set to the make invocation; otherwise, defaults will be used. After we get the user instance, we will send it to the be method to let Laravel know that we want that user to be the authorized one for this test.
Once we set the grounds for the test, we will use the call helper that will emulate a real HTTP request. To this method, we have to send the HTTP method (in this case, POST), the route to request, and optionally the parameters. Note that the call method returns the response object in case you need it.
We will send a title and the content, but this second one is not long enough, so we will expect some errors. Laravel comes with several customized assertions, especially when testing these kinds of responses. In this case, we could use two of them: assertSessionHasErrors, which checks whether there are any flash errors in the session (in particular, the ones for the content parameter), and assertHasOldInput, which checks whether the response contains old data in order to show it back to the user.
The second test that we would like to add is the case where the user posts valid data so that we can save the post in the database. This test is trickier as we need to interact with the database, which is usually a not a very pleasant experience. However, Laravel gives us enough tools to help us in this task. The first and most important is to let PHPUnit know that we want to use database transactions for each test. Then, we need to persist the authenticated user in the database as the post has a foreign key pointing to it. Finally, we should assert that the post is saved in the database correctly. Add the following code to the NewPostTest class:
use DatabaseTransactions;

//...

public function testNewPost() {
    $postParams = [
        'title' => 'the title',
        'content' => 'In a place far far away.'
    ];

    $user = factory(AppUser::class)
        ->make(['email' => '[email protected]']);
    $user->save();

    $this->be($user);

    $this->call('POST', '/new', $postParams);

    $this->assertRedirectedTo('http://localhost/new');
    $this->seeInDatabase('posts', $postParams);
}
The DatabaseTransactions trait will make the test to start a transaction at the beginning and then roll it back once the test is done, so we will not leave the database with data from tests. Saving the authenticated user in the database is also an easy task as the result of the factory is an instance of the user's model, and we can just invoke the save method on it.
The assertRedirectedTo assertion will make sure that the response contains the valid headers that redirect the user to the specified URL. More interestingly, seeInDatabase will verify that there is an entity in the posts table, which is the first argument, with the data provided in the array, which is the second argument.
There are quite a lot of assertions, but as you can note, they are extremely useful, reducing what could be a long test to a very few lines. We recommend you to visit the official documentation for the full list.