Most applications demand an intense development effort in order to provide a better interaction with its users. Bringing simplicity and usability is a huge challenge, and as our world is changing at the speed of the light, we must rely on a technology that really allows us to achieve this mission with the least amount of code and pain possible.
In terms of data handling, AngularJS offers a complete set of technologies that are capable of accomplishing any challenge related to presenting, transforming, synchronizing, and validating data on the user's interface. All this comes with a very simple syntax that can radically shorten the learning curve.
In this Lesson, we will talk about data handling using AngularJS. The following topics will be covered in this Lesson:
- Expressions
- Filters
- Form validation
An expression is a simple piece of code that will be evaluated by the framework and can be written between double curly brackets, for example, {{car.plate}}. This way of writing expressions is known as interpolation and allows you to easily interact with anything from the scope.
The following code is an example that we have already seen before. Here, we are using it to retrieve the value of the car's plate, color, and entrance, and this is done inside the ngRepeat directive:
index.html

<table>
  <thead>
    <tr>
      <th></th>
      <th>Plate</th>
      <th>Color</th>
      <th>Entrance</th>
    </tr>
  </thead>
  <tbody>
    <tr
      ng-class="{selected: car.selected}"
      ng-repeat="car in cars"
 >
   <td>
        <input
          type="checkbox"
          ng-model="car.selected"
        />
      </td>
      <td>{{car.plate}}</td>
      <td>{{car.color}}</td>
      <td>{{car.entrance}}</td>
    </tr>
  </tbody>
</table>
In our example, for each iteration of the ngRepeat directive, a new child scope is created, which defines the boundaries of the expression.
Besides exhibiting the available objects in the scope, the expressions also give us the ability to perform some calculations such as {{2+2}}. However, if you put aside the similarities with JavaScript's eval() function, which is also used to evaluate expressions, AngularJS doesn't use the directive explicitly.
The expressions also forgive the undefined and null values, without displaying any error; instead, it doesn't show anything.
Sometimes, it might be necessary to transform the value of a given expression in order to exhibit it properly, however, without changing the underlying data. In the next section on filters, we will learn how expressions are well suited for this purpose.
Filters associated with other technologies, like directives and expressions, are responsible for the extraordinary expressiveness of the framework. They allow us to easily manipulate and transform any value, that is, not only just the ones combined with expressions inside a template, but also the ones injected in other components such as controllers and services.
Filters are really useful when we need to format dates and currency according to our current locale, or even when we need to support the filtering feature of a grid component. They are the perfect solution to easily perform any data manipulation.
To make filters interact with the expression, we just need to put them inside double curly brackets:
{{expression | filter}}Also, the filters can be combined, thus creating a chain where the output of filter1 is the input of filter2, which is similar to the pipeline that exists in the shell of Unix-based operating systems:
{{expression | filter1 | filter2}}The framework already brings with it a set of ready-to-use filters that can be quite useful in your daily development. Now, let's have a look at the different types of AngularJS filters.
The currency filter is used to format a number based on a currency. The basic usage of this filter is without any parameter:
{{ 10 | currency}}The result of the evaluation will be the number $10.00, formatted and prefixed with the dollar sign. We can also apply a specific locale symbol, shown as follows:
{{ 10 | currency:'R$'}}Now, the output will be R$10.00, which is the same as the previous output but prefixed with a different symbol. Although it seems right to apply just the currency symbol, and in this case the Brazilian Real (R$), this doesn't change the usage of the specific decimals and group separators.
In order to achieve the correct output, in this case R$10,00 instead of R$10.00, we need to configure the Brazilian (PT-BR) locale available inside the AngularJS distribution package. In this package, we might find locales for most countries, and we just need to import these locales to our application in the following manner:
<script src="js/lib/angular-locale_pt-br.js"></script>
After importing the locale, we will not have to use the currency symbol anymore because it's already wrapped inside.
Besides the currency, the locale also defines the configuration of many other variables, such as the days of the week and months, which is very useful when combined with the next filter used to format dates.
The date filter is one of the most useful filters of the framework. Generally, a date value comes from the database or any other source in a raw and generic format. Because of this, such filters are essential to any kind of application.
Basically, we can use this filter by declaring it inside any expression. In the following example, we have used the filter on a date variable attached to the scope:
{{ car.entrance | date }}The output will be Dec 10, 2013. However, there are numerous combinations we can make with the optional format mask:
{{ car.entrance | date:'MMMM dd/MM/yyyy HH:mm:ss' }}When you use this format, the output changes to December 10/12/2013 21:42:10.
Have you ever tried to filter a list of data? This filter performs exactly this task, acting over an array and applying any filtering criteria.
Now, let's include a field in our car parking application to search any parked cars and use this filter to do the job:
index.html
<input
  type="text"
  ng-model="criteria"
  placeholder="What are you looking for?"
/>
<table>
  <thead>
    <tr>
      <th></th>
      <th>Plate</th>
      <th>Color</th>
      <th>Entrance</th>
    </tr>
  </thead>
  <tbody>
    <tr
      ng-class="{selected: car.selected}"
      ng-repeat="car in cars | filter:criteria"
 >
   <td>
        <input
          type="checkbox"
          ng-model="car.selected"
        />
      </td>
      <td>{{car.plate}}</td>
      <td>{{car.color}}</td>
      <td>{{car.entrance | date:'dd/MM/yyyy hh:mm'}}</td>
    </tr>
  </tbody>
</table>
The result is really impressive. With an input field and filter declaration, we did the job.
Sometimes, generally for debugging purposes, it might be necessary to display the contents of an object in the JSON format. JSON, also known as JavaScript Object Notation, is a lightweight data interchange format.
In the next example, we will apply the filter to a car object:
{{ car | json }}The expected result if we use it based inside the car's list of our application is as follows:
{
  "plate": "6MBV006",
  "color": "Blue",
  "entrance": "2013-12-09T23:46:15.186Z"
}Sometimes, we need to display text, or even a list of elements, and it might be necessary to limit its size. This filter does exactly that and can be applied to a string or an array.
The following code is an example where there is a limit to the expression:
{{ expression | limitTo:10 }}The lowercase filter displays the content of the expression in lowercase:
{{ expression | lowercase }}The number filter is used to format a string as a number. Similar to the currency and date filters, the locale can be applied to present the number using the conventions of each location.
Also, you can use a fraction-size parameter to support the rounding up of the number:
{{ 10 | number:2 }}The output will be 10.00 because we used the fraction-size configuration. In this case, we can also take advantage of the locale configuration to change the fraction separator.
With the orderBy filter, we can order any array based on a predicate expression. This expression is used to determine the order of the elements and works in three different ways:
- String: This is the property name. Also, there is an option to prefix
+or–to indicate the order direction. At the end of the day,+plateor-plateare predicate expressions that will sort the array in an ascending or descending order. - Array: Based on the same concept of String's predicate expression, more than one property can be added inside the array. Therefore, if two elements are considered equivalent by the first predicate, the next one can be used, and so on.
- Function: This function receives each element of the array as a parameter and returns a number that will be used to compare the elements against each other.
In the following code, the orderBy filter is applied to an expression with the predicate and reverse parameters:
{{ expression | orderBy:predicate:reverse }}Let's change our example again. Now, it's time to apply the orderBy filter using the plate, color, or entrance properties:
index.html

<input
  type="text"
  ng-model="criteria"
  placeholder="What are you looking for?"
/>
<table>
  <thead>
    <tr>
      <th></th>
      <th>
        <a href=""ng-click="field = 'plate'; order=!order">
          Plate
        </a>
      </th>
      <th>
        <a href=""ng-click="field = 'color'; order=!order">
          Color
        </a>
      </th>
      <th>
        <a href=""ng-click="field = 'entrance'; order=!order">
          Entrance
        </a>
      </th>
    </tr>
  </thead>
  <tbody>
    <tr
      ng-class="{selected: car.selected}"
      ng-repeat="car in cars | filter:criteria | orderBy:field:order"
 >
   <td>
        <input
          type="checkbox"
          ng-model="car.selected"
        />
      </td>
      <td>{{car.plate}}</td>
      <td>{{car.color}}</td>
      <td>{{car.entrance | date:'dd/MM/yyyy hh:mm'}}</td>
    </tr>
  </tbody>
</table>
Now, we can order the car's list just by clicking on the header's link. Each click will reorder the list in the ascending or descending order based on the reverse parameter.
We can also use filters in other components such as controllers and services. They can be used by just injecting $filter inside the desired components. The first argument of the filter function is the value, followed by the other required arguments.
Let's change our application by moving the date filter, which we used to display the date and hour separated in the view, to our controller:
controllers.js
parking.controller("parkingCtrl", function ($scope, $filter) {
  $scope.appTitle = $filter("uppercase")("[Packt] Parking");
});
This approach is often used when we need to transform the data before it reaches the view, sometimes even using it to the algorithms logic.
AngularJS already comes with a bunch of useful and interesting built-in filters, but even then, we'll certainly need to create our own filters in order to fulfill specific requirements.
To create a new filter, you just need to register it to the application's module, returning the filter function. This function takes the inputted value as the first parameter and other additional arguments if necessary.
Now, our application has a new requirement that can be developed through the creation of a customized filter.
This requirement involves formatting the car's plate by introducing a separator after the third character. To achieve this, we are going to create a filter called plate. It will receive a plate and will return it after formatting it, after following the rules:
filters.js

parking.filter("plate", function() {
  return function(input) {
    var firstPart = input.substring(0,3);
    var secondPart = input.substring(3);
    return firstPart + " - " + secondPart;
  };
});
With this filter, the 6MBV006 plate is displayed as 6MB - V006.
Now, let's introduce a new parameter to give the users a chance to change the plate's separator:
filters.js

parking.filter("plate", function() {
  return function(input, separator) {
    var firstPart = input.substring(0,3);
    var secondPart = input.substring(3);
    return firstPart + separator + secondPart;
  };
});Almost every application has forms. It allows the users to type data that will be sent and processed at the backend. AngularJS provides a complete infrastructure to easily create forms with the validation support.
The form will always be synchronized to its model with the two-way data binding mechanism, through the ngModel directive; therefore, the code is not required to fulfill this purpose.
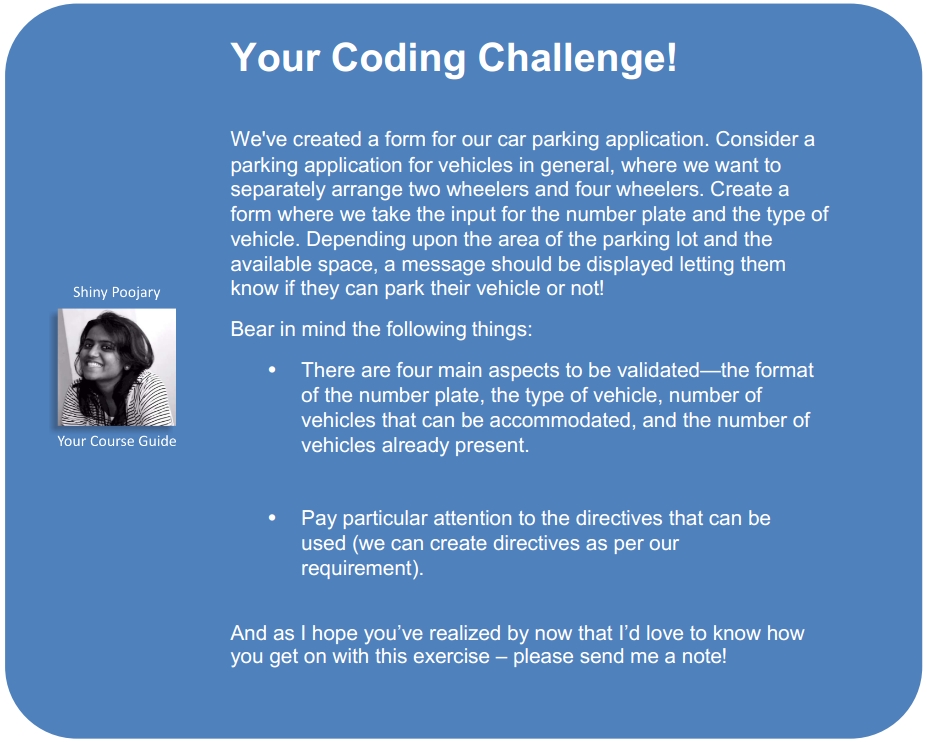
Now, it's time to create our first form in the car parking application. Until now, we have been using the plate of the car in any format in order to allow parking. From now on, the driver must mention the details of the plate following some rules. This way, it's easier to keep everything under control inside the parking lot.
The HTML language has an element called form that surrounds the fields in order to pass them to the server. It also creates a boundary, isolating the form as a single and unique context.
With AngularJS, we will do almost the same thing. First, we need to surround our fields with the form element and also give a name to it. Without the name, it won't be possible to refer to it in the future. Also, it's important to assign a name to each field.
In the following code, we have added the form to our parking application:
index.html

<form name="carForm">
  <input
    type="text"
    name="plateField"
    ng-model="car.plate"
    placeholder="What's the plate?"
  />
</form>
For the form, avoid using the name that has already been used inside the ngModel directive; otherwise, we will not be able to perform the validation properly. It would be nice to use some suffix for both the form and the field names as that would help to make things clearer, thus avoiding mistakes.
The validation process is quite simple and relies on some directives to do the job. The first one that we need to understand is the ngRequired directive. It could be attached to any field of the form in order to intimate the validation process that the field is actually required:
<input
  type="text"
  name="plateField"
  ng-model="car.plate"
  placeholder="What's the plate?"
  ng-required="true"
/>
In addition to this, we could be a little more specific by using the ngMinlength and ngMaxlength directives. It is really useful to fulfill some kinds of requirements such as defining a minimum or maximum limit to each field.
In the following code, we are going to add a basic validation to our parking application. From now on, the field plate will be a required parameter and will also have minimum and maximum limits:
<input
  type="text"
  name="plateField"
  ng-model="car.plate"
  placeholder="What's the plate?"
  ng-required="true"
  ng-minlength="6"
  ng-maxlength="10"
/>
To finish, we can add a regular expression to validate the format of the plate. This can be done through the ngPattern directive:
<input
  type="text"
  name="plateField"
  ng-model="car.plate"
  placeholder="What's the plate?"
  ng-required="true"
  ng-minlength="6"
  ng-maxlength="10"
  ng-pattern="/[A-Z]{3}[0-9]{3,7}/"
/>
The result can be evaluated through the implicit object $valid. It will be defined based on the directives of each field. If any of these violate the directives definition, the result will be false. Also, the $invalid object can be used, considering its usefulness, depending on the purpose:
<button
  ng-click="park(car)"
  ng-disabled="carForm.$invalid"
>
  Park
</button>
If the plate is not valid, the following alert should be displayed:
<alert
  ng-show="carForm.plateField.$invalid"
  topic="Something went wrong!"
>
  The plate is invalid!
</alert>
However, there is a problem with this approach. The alert is displayed even if we type nothing and this might confuse the user. To prevent such situations, there are two properties that we need to understand, which are covered in the next section.

Sometimes, it would be useful to know whether the field was never touched in order to trigger (or not) some validation processes. This can be done by the means of two objects with very suggestive names: $pristine and $dirty.
Pristine means purity, and here, it denotes that the field wasn't touched by anyone. After it's been touched for the first time, it becomes dirty. So, the value of $pristine always starts with true and becomes false after any value is typed. Even if the field is empty again, the value remains false. The behavior of the $dirty object is just the opposite. It is by default false and becomes true after the first value is typed:
<alert
  ng-show="carForm.plateField.$dirty && carForm.plateField.$invalid"
  topic="Something went wrong!"
>
  The plate is invalid!
</alert>In the end, the one that remains is the $error object. It accumulates the detailed list of everything that happens with the form and can be used to discover which field must be proofread in order to put the form in a valid situation.
Let's use it to help our users understand what's exactly going wrong with the form:
<alert
  ng-show="carForm.plateField.$dirty && carForm.plateField.$invalid"
  topic="Something went wrong!"
>
  <span ng-show="carForm.plateField.$error.required">
    You must inform the plate of the car!
  </span>
  <span ng-show="carForm.plateField.$error.minlength">
    The plate must have at least 6 characters!
  </span>
  <span ng-show="carForm.plateField.$error.maxlength">
    The plate must have at most 10 characters!
  </span>
  <span ng-show="carForm.plateField.$error.pattern">
    The plate must start with non-digits, followed by 4 to 7 numbers!
  </span>
</alert>


