
Once you find and fix compatibility issues, the next step is to select a migration tool or method and perform the actual migration. There are different methods available for various scenarios. The selection largely depends on downtime, database size, and network speed/quality.
Here's a comparison of various migration methods to help you correctly choose a migration method:
|
Migration Method |
Description |
Downtime |
Database Size |
|---|---|---|---|
|
SQL Server Management Studio – Deploy Database to Azure SQL Database |
Wizard-based GUI to export on-premises database to
|
Yes (depends on database size) |
Small to Medium databases |
|
Sqlpackage.exe |
Command-line utility to export on-premises databases to
|
Yes (Depends on database size) |
Small to Medium databases |
|
Manual (Dacpac and BCP) |
Use
|
Yes (Depends on database size) |
Large to Very Large databases (improved performance from parallel bcp in) |
|
SQL Azure Migration Wizard |
Free Codeplex wizard-based GUI utility. It scripts out schema in a T-SQL file and then uses bcp, as mentioned in the previous method. |
Yes (Depends on database size) |
Large to Very Large |
|
Data Migration Assistant |
Wizard-based GUI standalone migration software. Uses T-SQL script to migrate schema and bcp to migrate data. Allows you to choose which objects and table to migrate. Detects and lists out compatibility issues as well. |
Yes (Depends on database size) |
Large to Very Large databases |
|
Transactional Replication |
Azure SQL Database as a subscriber to on-premises SQL Server Database publisher. Higher complexity, cost, and resources. Supports SQL Server 2012+ as the publisher and Azure SQL Database as the subscriber. |
Short |
Large to Very Large databases |
Let us consider our example of ToyStore Ltd. from the previous chapter. Mike has performed all the necessary steps that he had to complete before he could migrate the SQL Server database to Azure. Now, all he has to do is perform the migration using the tool of his choice. He selects SQL Server Management Studio. In this section, we’ll see how to use SQL Server Management Studio for migrating a database to Azure.
- Open SQL Server Management Studio. Press F8 to open Object Explorer. Connect to your SQL instance.
- In the object explorer, right-click toystore database | Tasks | and select Deploy Database to Microsoft Azure SQL Database:

- In the Deploy Database wizard, click Next to continue:

- In the Connect to Server dialogue box, provide your Azure SQL Server Name, administrator login name, and password. Click Connect to connect to the Azure SQL Server:

- In the Deployment Settings window:
- Under New database name, provide the name of the Azure SQL Database to which you wish to migrate as an on-premises database.
- The Azure SQL Database edition and the Service Objective are automatically detected by the SSMS.
- Under Other settings, under the Temporary file name, SSMS displays the path of the exported
bacpacfile. You can change it if you wish to or you can leave it as default. Click Next to continue:
- In the Verify Specified Settings window, review the Source and Target settings, and then click Finish to start the migration process:

SSMS checks for compatibility issues, and the migration process terminates because of compatibility issues. Click on Error besides the exporting database option to view the error's details:


- In the Error Details windows, observe that the migration was terminated because of unsupported objects found in the
bacpacpackage. Click OK to close the Error Details window. The next step is to fix the errors. - Open
C:codeChapter02FixCompatibilityIssues.sqlin SQL Server Management studio. The script fixes the compatibility issues by commenting/correcting out the unsupported code within the stored procedures:USE [toystore] GO ALTER proc [dbo].[BackUpDatabase] As -- Backup command isn't supported on Azure SQL Database --backup database toystore to disk = 'C: orystore.bak' --with init, stats=10 GO ALTER proc [dbo].[EmailProc] As -- Database mail isn't supported on Azure SQL Database --EXEC msdb.dbo.sp_send_dbmail -- @profile_name = 'toystore Administrator', -- @recipients = '[email protected]', -- @body = 'The stored procedure finished successfully.', -- @subject = 'Automated Success Message' ; select * from city
- Press F5 to execute the script. Repeat steps 1-10 to successfully migrate the database:

- To verify the migration, connect to Azure SQL Database using SSMS and run the following query:
SELECT TOP (1000) [OrderID]
      ,[CustomerID]
      ,[SalespersonPersonID]
      ,[PickedByPersonID]
      ,[ContactPersonID]
      ,[BackorderOrderID]
      ,[OrderDate]
      ,[ExpectedDeliveryDate]
      ,[CustomerPurchaseOrderNumber]
      ,[IsUndersupplyBackordered]
      ,[Comments]
      ,[DeliveryInstructions]
      ,[InternalComments]
      ,[PickingCompletedWhen]
      ,[LastEditedBy]
      ,[LastEditedWhen]
  FROM [toystore].[Sales].[Orders]
Congratulations! You have successfully migrated your SQL Server database to an Azure SQL Database.
This section describes how to migrate a SQL Server database, such as the
toystore database, to an Azure SQL Database using the Data Migration Assistant.
- Open Microsoft Data Migration Assistant on your computer. From the left ribbon, Click on the + sign, as shown in the following screenshot:

- In the resultant window, you will need to select these fields:
- Under the Projecttype, select Assessment.
- Under the Projectname, type
toystore. - Under the Source servertype, select SQL Server.
- Under the Target servertype, select Azure SQL Server.
- And click Create to create a new assessment project:

- In the resulting Select report type window, select the Check database compatibility and Check feature parity checkbox. Click Next to continue:

- In the Connect to a server window:

- In Add Sources, select
toystoreand click Add to continue. - Click Start Assessment to find the compatibility issues.
- DMA will apply the compatibility rules to find and list out the compatibility issues. It tells you the features which aren't supported under the SQL Server feature parity Options:

As per the DMA, you have one instance of Cross-database reference and Service Broker which aren't supported in Azure SQL Database.
- Under Options, select the Compatibility issues radio button:

DMA lists out the stored procedure which failed the compatibility test.
To fix the errors, open
C:codeChapter02FixCompatibilityIssues.sqlin SQL Server Management Studio and execute it against thetoystoredatabase. - In the upper-right corner, click Restart Assessment:

DMA will re-assess and notify you that there are no compatibility issues:

- To migrate the database, from the left-hand navigation bar, click the + sign.
- In the resulting window:
- Under the Project type, select Migration.
- Under the Project name, type
toystoremigration. - Under the Source server type, select SQL Server.
- Under the Target server type, select Azure SQL Server.
- Under the Migration scope, select Schema and Data.
- Click Create to create a new assessment project:

- In theConnect to server window:
- Under the Server name, provide the SQL Server name.
- Under the Authentication type, select Windows Authentication.
- Click Connect to continue:

- Select
toystorefrom the list of available databases and click Next:
- In the Connect to target server window:
- Under the Server name, provide the Azure SQL Server name.
- Under the Authentication type, select SQL Server Authentication.
- Under the Username, provide the Azure SQL Server admin user.
- Under the Password, provide the password.
- Clear the Encrypted connection checkbox.
- Click Connect to continue:

- In the resulting window, select the toystore database, and then click Next to continue:
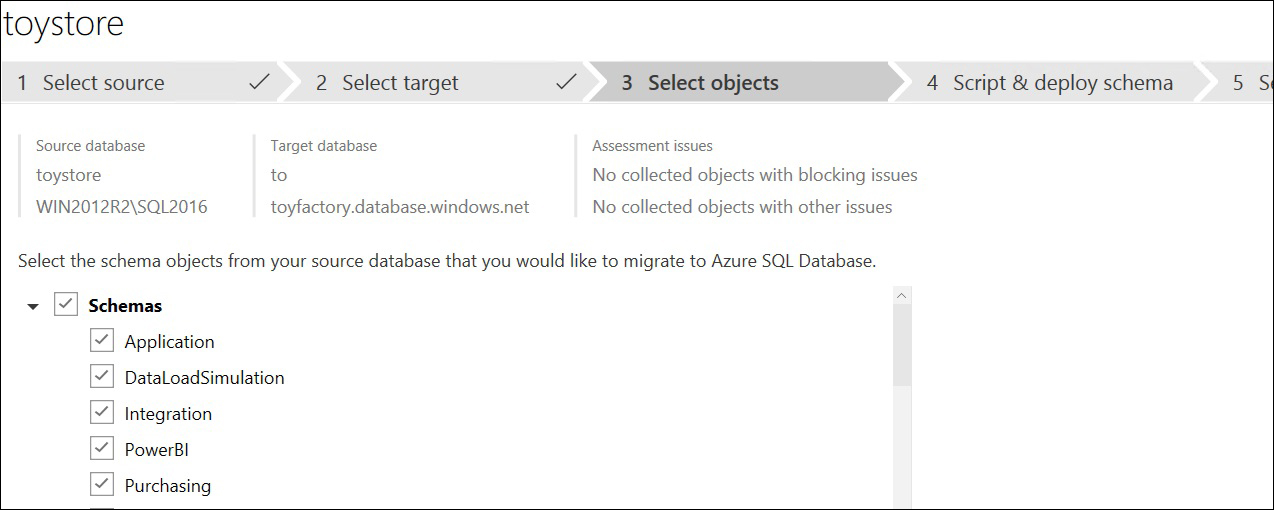
- In the resulting Select objects window, you can select which objects to move to Azure SQL Database. Select all and click Generate SQL Scripts at the bottom of the window to continue:
- DMA will generate a T-SQL script to deploy the database schema. If you wish to save the T-SQL script, you can do so by clicking on the Save option under the Generated script section:

- In the Script and Deploy schema window, click the Deploy schema button to deploy the schema to the Azure server. DMA will execute the T-SQL script against the Azure SQL Database to create the selected database objects:

- Once schema migration is successful, click Migrate data.
- In the resulting Selected tables window, you can choose which table data to migrate. Leave it as default, for example, select all tables, and then click Start data migration:

This migrates data from the selected tables in parallel and therefore can be used for large to very large databases:

In this section, we will make use of the toy manufacturing company introduced in an earlier chapter as an example to understand how to migrate an SQL Server database to an Azure SQL Database using Transactional Replication.
- Open SQL Server Management Studio (SSMS). Press F7 to open Object Explorer. In the Object Explorer, click Connect to connect to your SQL Server.
- In the Object Explorer, right-click on the Replication node and click New Publication:

- In the New Publication Wizard welcome screen, click Next to continue.
- In the Publication Database window, select
toystoreas the database to be published. Click Next to continue:
- In the New Publication Wizard, select Transactional publication. There are only two publication types allowed with Azure SQL Database as a subscriber – Snapshot publication and Transactional publication.
Click Next to continue:

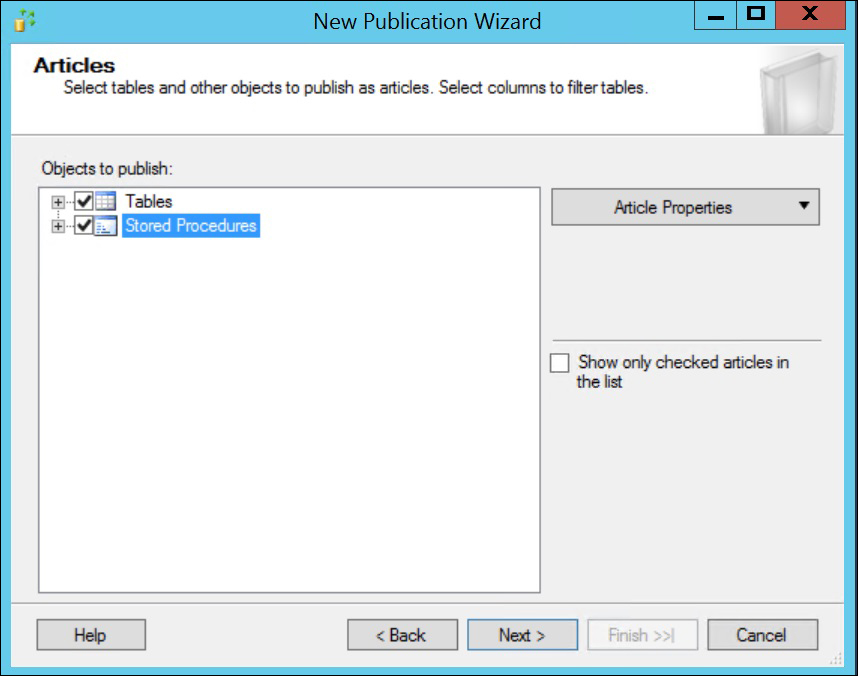
- In the Articles page, select all the objects to publish. Click Next to continue. If required, you can filter out objects which you don't want to migrate to an Azure SQL Database here:
- The Article Issues page alerts you that you should migrate all tables that are referenced by views, stored procedures, functions, and triggers. As we are migrating all tables, we don't have anything to do here. Click Next to continue:

- Filter Table Rows lets you filter unwanted rows that you don't want to publish. As you are publishing all rows, leave it as default and click Next to continue:

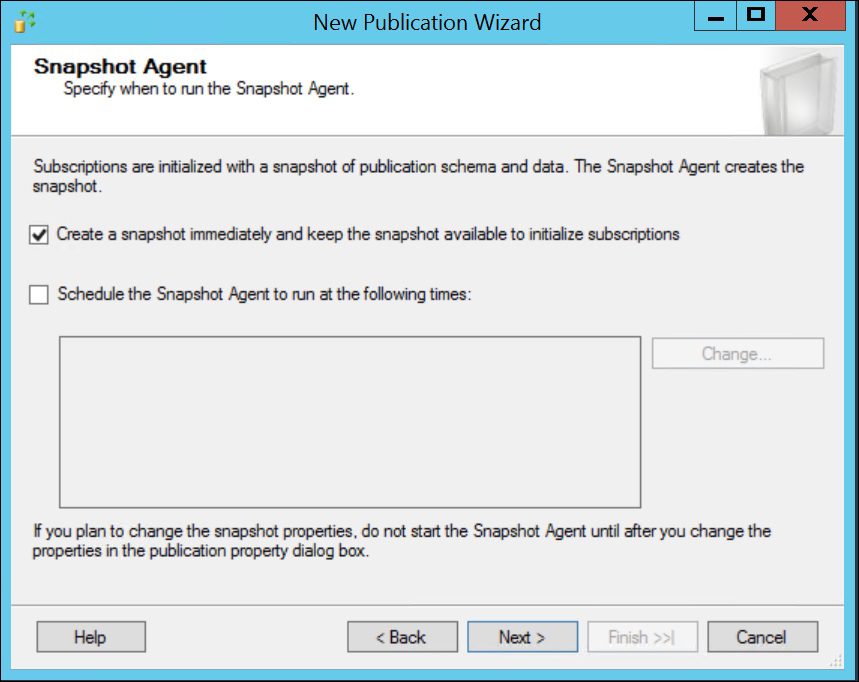
- In the Snapshot Agent page, select the Create a snapshot immediately and keep the snapshot available to initialize subscriptions options. You can also schedule the Snapshot Agent to run at specific times:
- In the Agent Security page, select the Security Settings button:

- In the Snapshot Agent Security page, specify the account for the snapshot agent to run on. You can either give the domain account that has permission to access the SQL Server Instance and the database or you can choose it to run under the SQL Server Agent service account, which isn't the recommended option.
Under the Connect to the publisher section, select By impersonating the process account. The process account must have read and write access on the publisher database:

- Click OK to continue. You'll be taken back to the Agent Security page.
Check the Use the security settings from the Snapshot Agent, under the Log Reader Agent text box. The Log Reader Agent will run under the same account as the Snapshot agent. You can choose different security settings for the Log Reader agent if you wish to:

Click Finish to continue.
- In the Complete the Wizard page, under Publication name, provide a name for your publication. You can review the objects which are being published in this window.
Click Finish to create the publication:

- The New Publication Wizard will now create the publication. Add the selected articles to the publication and it will start the snapshot agent:

Click + to complete the New Publication Wizard.
In the Object Explorer, expand the Replication node, and then expand Local Publications; observe that the publication toystorepub is added to the publication list:

- The next step is to create a subscription for the Azure SQL Database. Open Object Explorer, expand the Replication node, and right-click on the Local Subscription option. Select New Subscriptions to continue. Azure SQL Database only supports push subscriptions:

- In the New Subscription Wizard, select Next to continue:

- In the Publication page, select the publication for which you wish to create the subscription. The
toystorepubpublication is listed out under thetoystoredatabase. If it's the only publication, it'll be selected by default. Click Next to continue:
- In the Distribution Agent Location page, select Run all agents at the Distributor, which in our case is the push subscription. Pull subscription isn't allowed with Azure SQL Database as a subscriber.
Click Next to continue:

- In the Subscribers page, click the Add Subscriber button at the bottom of the window and select Add SQL Server Subscriber:

In the Connect to Server dialog box, provide the Azure SQL Server name and SQL Authentication login credentials to connect to the Azure SQL Server. Click Connect to continue:

The Subscribers page will now list the Azure SQL Server under the Subscriber column and
toystoredatabase under the Subscription Database column. Select the Azure SQL Server if it's not already selected and click Next to continue. - In the Distribution Agent Security window, Click (Option menu) to set security option:

The distribution agent can run under the context of the domain account or SQL Server Agent Service account (not recommended) for the agent. Provide a domain account that has appropriate access to the Distribution Server, which in our case is the same as the Publication Server.
Under the Connect to the Distributor section, select the default option (by impersonating the process account). You can also use a SQL Server login if you wish to.
Under the Connect to the Subscriber section, provide the Azure SQL Server, SQL Server login, and password.
Click OK to go back to the Distribution Agent Security page. It'll now show the selected security options:

Click Next to continue.
- In the Synchronization Schedule page, under the Agent Schedule section, select Run Continuously and click Next to continue:

- In the Initialize Subscriptions page, under the Initialize When option, select Immediately, and then click Next to continue:

- In the Wizard Actions window, select Create the subscription(s) option and click Next to continue:

- In Complete the Wizard window, review the subscriptions settings and click Finish to create the subscription.
The wizard will create the subscription and will initiate the snapshot agent to apply the initial snapshot on the subscriber.
Once the initial snapshot is applied, all of the transactions on the publisher will be sent to the subscriber.
Click close to end the wizard.
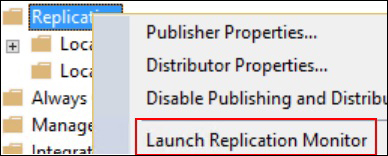
- To verify the replication, in the Object Explorer, right-click the Replication node and select Launch Replication Monitor:
In the replication monitor, expand the My Publishers node, then expand the SQL Server Instance name node. The
toystorepubpublication will be listed there. Select thetoystorepubpublication to check the synchronization health:
It may take time to generate and apply the initial snapshot depending on the database's size.
To further verify that the objects are migrated to Azure SQL Database, switch to SSMS and open Object Explorer if it's not already open.
Connect to your Azure SQL Database and expand the
Tablesnode. Observe that all of the tables are listed under theTablesnode: