
Database backups are one of the most important things a database administrator has to perform. A good database backup strategy can help recover from system outages, unwanted deletes or updates, database corruption issues, and other related issues.
This chapter teaches you how to back up an Azure SQL Database. You'll learn about automated and manual backups, explore automated backup features, and perform the manual backup of an Azure SQL Database.
By the end of this chapter, you will be able to:
- Perform manual and automatic backups
- Export an Azure SQL Database using the Azure portal
- Export an Azure SQL Database using PowerShell
Microsoft provides automated backups for Azure SQL Databases.
Automatic backup consists of full, differential, and log backups. The first automatic full backup is performed immediately after the database is provisioned. The differential is scheduled to occur every hour, and transaction log backups are scheduled for every 5-10 minutes. The full backup is scheduled for once a week:

Figure 3.1: Automatic Backups
Microsoft gives you free backup storage which is double the size of your maximum provisioned database storage. For example, if you have a standard Azure SQL Database of size 100 GB, you get 200 GB of free backup storage. You can control the free backup storage size by limiting the retention period of the backups.
The backup retention period varies as per the different service tiers. The retention period for the basic service tier is seven days, and for the Standard and Premium tiers it's 35 days. You can extend the retention period through the Long Term Retention feature, which stores the backup in the Azure Backup Service Vault for as long as 10 years.
A Recovery Service vault is a storage service used to store backups of various Azure services such as VMs, Azure SQL databases, and even on-premises database backups.
Consider the
toystore SQL Database created in
Chapter 2
Database to an Azure SQL Database. Mike has now been tasked with securing and backing up the data at ToyStore Ltd. In this section, we’ll learn how to create a Recovery Service Vault and then configure long-term backup retention for the Azure SQL Database using this Recovery Service Vault.
- Log in to the Azure portal, https://portal.azure.com, with your Azure credentials. Select More Services from the bottom of the left-hand navigation pane:
- In the Main Services pane, type
recoveryin the search box. From the search results, select Recovery Service vaults:
- In the Recovery Services vaults pane, click Add to create a new Recovery Services vaults:

- In the new pane:
- Under the Name label, enter the recovery service vault name.
- Under the Subscription drop-down list, select your Azure subscription, if not already selected.
- Under the Resource group, provide a resource group. The resource group for the recovery service vault should be the same as that of the Azure SQL Server hosting the database, for which the long-term retention is being implemented.
- Under the Location, select the location which is the same as that of the selected resource group location.
- Click Create to provision the recovery service vault:

- From the left-hand navigation, select AllResources. From the All resources pane, select the
toyfactory sqlserver. Thetoystoredatabase is hosted in thetoyfactory sqlserver. You can also select thetoyfactoryserver from the portal dashboard.From the toyfactory SQL server pane, under the Settings section, select Long-term backup retentions, as shown in the following screenshot:

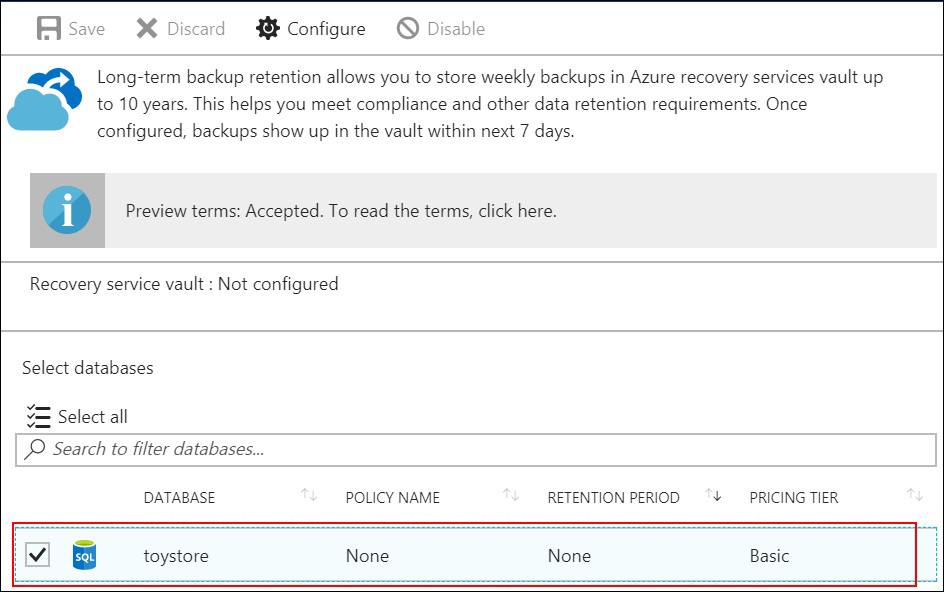
- In the resultant pane:
- Accept the preview terms to proceed, since long-term backup retention is in preview.
- Select the
toystoredatabase under the Select databases section and select Configure from the top menu:
- In the Configure pane, select the Recovery service vault option. All ineligible service vaults will be unavailable for selection. The eligibility criteria is that you can only select a vault in the same resource group and location as the Azure SQL Database:

- Select the
toystorebackupvaultrecovery service vault created in the preceding steps.
- Select the
- You'll go brought back to the Configure window:
- Select or create a new retention policy.
- Specify the policy name as
oneyearretentionpolicy. You can give a policy name of your choice. - Specify the retention period, which is for how many years you want to store
toystoredatabase backups. - Click create to configure long-term backup retention:

- You'll be back to the long-term retention pane. Select Save from the top menu to apply the retention policy:

- In the confirmation popup, click OK to continue:

- Wait for the retention policy to be applied. Once it is configured, the long-term retention pane will be updated with the details:

- The full backups will be automatically copied to the vault every week and will be retained for a year.