
Now that we've implemented and tested our server application in our local development environment, we are ready to deploy it to the cloud. We need to have a Google account and be registered in the GCP to be able to continue. It is enough to have a free subscription to GCP to perform the following steps and try our server application in the Google Compute Engine:
- Log into your Google account and go to GCP: https://console.cloud.google.com.
- On the main page, open the Go to Compute Engine link or use the Navigation Menu and select the Compute Engine link.
- On the Compute Engine page, select the VM Instances option.
- Click the Create instance link at the top of the page and create a VM instance with the following characteristics:
Name: classify-server
Zone: choose appropriate to you, us-central1-a
Generation: first
Machine-type: n1-standard-1
CPU platform: automatic
Boot disk: New 10 GB standard persistent disk
Image: Debian GNU/Linux 9 (stretch)
Identity and API access: Compute Engine default service account
Access scopes: Allow default access
Firewall: Allow HTTP traffic
We can also add a GPU to our VM instance configuration. Be aware that a GPU can significantly raise the cost of the service, so think carefully about whether using a GPU is right for you. Usually, for machine learning inference tasks, having multi-core CPUs is more than enough. In other cases, if we plan to use GCP to train machine learning algorithms, its powerful GPUs can significantly reduce training time.
- On the VM instances page, select the VM instance that we created. Start it by clicking the Start button at the top of the page.
- To be able to work with GCP effectively, we need to install the GCP SDK. The SDK can help us share files from our local system to the remote VM instance machine without a browser. Before installing the GCP SDK, please make sure that your system has Python 2 installed with a release number of Python 2.7.9 or higher. The GCP SDK can be downloaded from https://cloud.google.com/sdk/docs/. The SDK is an archive file. We can extract the contents of the file into any location on our filesystem. Then, we can run the gcloud application from the [bin] folder with the init parameter to initialize the SDK. This should look similar to ./google-cloud-sdk/bin/gcloud init. This utility should ask us to log into our Google account to continue. The following snippet shows the possible command-line session:
Would you like to log in (Y/n)?  y
Your browser has been opened to visit:
https://accounts.google.com/o/oauth2/auth?...
After authorization, we can select the project for the current work session. The GCP initialized the project when we initially created the VM instance, so if we take a look at the top of the Compute Engine page, we should see a tab called My First Project. The following snippet shows the possible command-line session:
Pick cloud project to use:
[1] hardy-aleph-253219
[2] Create a new project
Please enter numeric choice or text value (must exactly match list item):  1
Now, we can select default choices for the other questions to finish the GCP SDK's initialization.
- We can use the GCP SDK to copy the server application's source code to the running instance. To copy a folder from our local machine to the remote one, we can use the following command:
gcloud compute scp --recurse [LOCAL_PATH] [INSTANCE_NAME]:~/[DEST_PATH]
Here, LOCAL_PATH is the path to some folder on our local machine, INSTANCE_NAME is the name of the target VM instance, and DEST_PATH is the name of the folder in the home directory of our user on the remote machine. We should verify that we're using the same username on the local machine and the remote machine because the gcloud utility always places files in the home directory with the username that's being used on the local machine.
- On the VM instances page, we have to identify the VM instance that we started previously and where we copied the source files. Then, we should find the column named Connect, select SSH, and choose the Open in browser window option. This action opens a new browser window with an interactive command-line session connected to your remote machine. We can also use the GCP SDK to configure the SSH session with standard utilities.
- In the command-line window, we can use the following commands to configure the development environment that's required for us to build our server application on the remote machine:
sudo apt-get install git
sudo apt-get install cmake
sudo apt-get install g++
sudo apt-get install libopencv-dev
sudo apt-get install libprotobuf-dev
sudo apt-get install unzip
sudo apt-get install python-pip
sudo apt-get install libopenblas-dev
sudo apt-get install pybind11-dev
pip install pyyaml
pip install typing
- Now that we've configured the development environment, we can continue working with the source code and build the required third-party libraries. We have two such dependencies: the cpp-httplib library and the PyTorch framework. The cpp-httplib library is a single-file header-only library, so it is enough to clone it to our source code tree. The following snippet shows the commands you'll need to use to do this:
cd ~/[DEST_PATH]/server
git clone https://github.com/yhirose/cpp-httplib third-party/httplib
- There are two ways to get the PyTorch framework's dependency. If your environment has a GPU with CUDA support, you can download the pre-compiled binaries from the official site. The following snippet shows how to do this:
cd third-party
wget --no-check-certificate https://download.pytorch.org/libtorch/cu100/libtorch-shared-with-deps-1.2.0.zip
unzip libtorch-shared-with-deps-1.2.0.zip
cd ..
- The second way is to build PyTorch from certain sources. This is the only option you have if your environment doesn't have a GPU because the official binaries require working CUDA support. However, if your goal is to perform inference only, you won't need this because, in many cases, a modern CPU can fully satisfy your needs. Also, when you build PyTorch from sources, you can include the FBGEMM library in your build. It is a low-precision, high-performance matrix-matrix multiplication and convolution library for server-side inference that was developed by Facebook engineers. Now, you can use FBGEMM as a backend of the Caffe2 and PyTorch quantized operators for
x86
machines by using the USE_FBGEMM CMake option during a build. The following snippet shows how to clone, build, and install the PyTorch C++ library from sources:
cd third-party
git clone https://github.com/pytorch/pytorch.git
cd pytorch/
git checkout v1.2.0
git submodule update --init --recursive
mkdir build
cd build
cmake .. -DCMAKE_INSTALL_PREFIX=~/dev/server/third-party/libtorch -DUSE_CUDA=OFF -DUSE_CUDNN=OFF -DUSE_OPENMP=ON -DBUILD_TORCH=ON -DUSE_FBGEMM=ON -DBUILD_PYTHON=OFF
cmake --build . --target install -- -j8
Notice that we have to recursively initialize the PyTorch git submodules because many of them also contain many dependencies as submodules.
- Now that we've configured the development environment and gathered all the dependencies, we can build our server application on the removed VM. To do this, use the following commands:
cd ~/[DEST_PATH]/server
mkdir build
cd build
cmake .. -DCMAKE_PREFIX_PATH=~/dev/server/third-party/libtorch
cmake --build . --target all
- To run the server application, we need two more files: the model snapshot file and the synset file, which contains class descriptions. We can copy them from the local development environment to the remote machine with the following commands while using the GCP SDK:
gcloud compute scp [LOCAL_PATH]/model.pt [INSTANCE_NAME]:~/[DEST_PATH]/model
gcloud compute scp [LOCAL_PATH]/synset.txt [INSTANCE_NAME]:~/[DEST_PATH]/model
If you only need to copy a couple of files, you can use a web-based SSH connection window. There is a menu for copying files from the local machine.
- Before we can start our application, we need to configure the GCP Firewall to allow incoming connections to the server program we want to launch. On the GCP Console page, go to the Navigation Menu and open the VPC network link. On the VPC network page, open the Firewall rules link. Then, on the Firewall rules page, click the Create a firewall rule button to create a new firewall rule. We can find this button at the top of the page. For a new firewall rule, we have to enter the following information:
Name: classify-server
Target tags: http-server
Actions on match: allow
Source IP ranges: 0.0.0.0/0
Protocol and ports: tcp:8080
Then, we need to click on the Create button to finish the rule creation process.
- We also need to remember the IP addresses that have been assigned to the VM instance we are using. There are two IP addresses: one that's internal and one that's external. We can find them on the VM Instance page when we're looking at a particular VM instance record. The internal IP address is statically assigned, and we can even see it for stopped instances. The external IP address is dynamically assigned when you start the instance.
- To start our server application, we can use the following command:
cd ~/[DEST_PATH]/server/build
./classify-server ~/[DEST_PATH]/model/model.pt ~/[DEST_PATH]/model/synset.txt ~/[DEST_PATH]/client/ [internal ip] 8080
[internal ip] is the IP address we examined in step 16. The number 8080 means that the application has been configured to listen for incoming messages on port 8080. We also have to carefully check the paths to the model snapshot file, the synset file, and the path to the directory where we placed our static client files.
- To make our HTML client work, we have to update the upload.js file. At the beginning of the file, there's a definition for the url string. It will be in the following form:
const url = 'http://localhost:8080/imgclassify';
Change the localhost address to the external IP address that we examined in step 16. By doing this, we can access our service by using the following URL in any browser:
http://[external ip]:8080
The client's page should look as follows:

You would see the following response message if you submit the Newfoundland dog image:
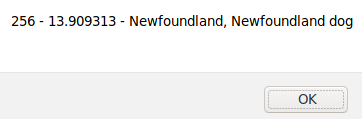
This page shows that our model assigned a value of 13.909313 to the 256 class, which is Newfoundland dog. This score was the highest among our classes.