
Chapter 6: Implementing and Managing Hybrid Identities
The previous chapter focused primarily on guest user accounts. We discussed how these guest users would be able to access and collaborate on resources with member users and how we would manage these users. In this chapter, we will bring together on-premises identities and allow them to create a seamless single identity with our Azure Active Directory (Azure AD) tenant. After completing this chapter, you will understand how to configure, manage, and troubleshoot connections between on-premises and cloud identity and access management (IAM) solutions.
In this chapter, we're going to cover the following main topics:
- Implementing and managing Azure AD Connect
- Implementing and managing seamless single sign-on (SSO)
- Implementing and managing Azure AD Connect Health
- Troubleshooting sync errors
Technical requirements
In this chapter, we will continue to explore configuring a tenant for use with Microsoft 365 and Azure. There will be exercises that will require access to Azure AD. If you have not yet created trial licenses for Microsoft 365, please follow the directions provided in Chapter 1, Preparing for your Microsoft Exam.
Implementing and managing Azure AD Connect
In order to be able to configure hybrid identities and synchronization in Azure AD and on-premises environments, you will need to have the Global Administrator or Hybrid Identity Administrator role within the Azure AD tenant and the Domain Enterprise Administrator role within the on-premises Windows AD tenant. We will explain more about the differences between these two directory services in this section.
Before we discuss the implementation of hybrid identities, it is important to understand what a hybrid identity is and why it is necessary. The following sections will provide this information.
Hybrid identity
The term hybrid identity is meant to signify that a company has users that use on-premises resources, and users that use cloud-native resources. Within this hybrid identity infrastructure, there is going to be an on-premises Windows AD domain controller that is used to manage the on-premises users, and Azure AD, which manages the cloud-native users, both members and guests. This infrastructure coincides with companies that use a hybrid cloud. Many companies have this Windows AD domain controller in place today. The next section will provide some understanding of what this means before we discuss how we can connect it to our Azure AD.
Azure AD
To review, Azure AD is Microsoft's cloud-based IAM solution. The role of Azure AD is to manage cloud identities for Microsoft and Azure resources, as well as other third-party cloud applications that utilize open source identity protocols, such as Security Assertion Markup Language (SAML) or Web Services Federation (WS-Federation). For users to access these cloud applications and services, they require their identity to be configured and recognized within the Azure AD tenant.
Many companies do not utilize only cloud-native applications and services, therefore they rely on an on-premises Windows AD to manage access to these applications. The next section will explain Windows AD and its role in a hybrid identity infrastructure.
Windows AD
Windows AD is the software that we are referencing. Within an on-premises infrastructure, we also refer to the role of domain controller and the overall solution of AD Domain Services (AD DS). AD DS is the legacy IAM solution for companies with on-premises infrastructure. The focus of the exam is not to have a deep-dive into Windows AD and AD DS, but it is important to understand how it compares to Azure AD as it pertains to users and groups. If you would like to understand more about AD DS, you can read more at this link: https://docs.microsoft.com/en-us/windows-server/identity/ad-ds/get-started/virtual-dc/active-directory-domain-services-overview.
There are similarities and differences between AD DS and Azure AD. They both manage identities and access by assigning roles and authorizing access to users and groups; however, AD DS does this through an object-based structure. Within this object structure, there can be multiple organizational units (OUs) to which these objects belong. This creates a more hierarchical structure than the flat structure of Azure AD, but this difference creates challenges when wanting users and groups to access on-premises and cloud resources utilizing the same username and password. Additionally, creating duplicate entries in both AD DS and Azure AD will cause an issue with the management of users and groups.
To address this problem, Microsoft has Azure AD Connect as a solution to bring together AD DS and Azure AD. The next section will discuss how this works.
Azure AD Connect
Since a company that is adopting the use of cloud resources has, in most cases, this on-premises identity infrastructure in place, we need to have a way to synchronize these identities to our cloud-based Azure AD. Azure AD Connect is a software solution that is installed within the on-premises infrastructure and configured to synchronize users and groups to Azure AD. Azure AD Connect simplifies the management of these users and groups by providing ways that an identity and access administrator can manage users in one interface and have the changes update in near real time.
Since there are structural differences in how AD DS and Azure AD are built, Azure AD Connect provides a conduit to create a consistent user and administrator experience with IAM.
There are some prerequisites and aspects that are out of scope within Azure AD Connect that you should understand. The installation prerequisites can be found at this link: https://docs.microsoft.com/en-us/azure/active-directory/hybrid/how-to-connect-install-prerequisites. When planning to implement Azure AD Connect, the following information should be understood and planned accordingly:
- Azure AD Connect synchronizes users and groups, not devices or applications. There are ways to co-manage devices and support on-premises application access within Azure AD—this will be covered in later chapters.
- Azure AD Connect synchronizes a single AD DS forest per Azure AD tenant. If there are multiple forests, then multiple tenants will be required in Azure AD.
There are additional considerations in planning for AD DS and Azure AD synchronization with Azure AD Connect, but these will be covered within the use cases for each synchronization type.
There are three options when configuring Azure AD Connect for synchronization, outlined as follows:
- Password hash synchronization (PHS)
- Pass-through authentication (PTA)
- AD Federation Services (AD FS) synchronization
Before we move into how to configure Azure AD Connect, let's take a closer look at each of these synchronization types and how they are used.
PHS
PHS is the easiest option to configure and is the default option that is within the Express setup. PHS maintains both the on-premises and cloud identities of users. This takes place through providing on-premises user identities to Azure AD, along with an encrypted hash of their passwords. This allows users to sign in to on-premises and cloud applications with the same authentication credentials.
PHS is a good option when a company has a single on-premises domain and is moving quickly to a cloud-native infrastructure. PHS is not for companies with complex authentication and password requirements within on-premises AD.
As previously stated, PHS maintains authentication credentials on-premises and in Azure AD. Therefore, PHS can have users authenticate to cloud applications through Azure AD while passing authentication responsibilities of on-premises applications to on-premises AD. The benefit here is that if a connection fails in Azure AD Connect between the on-premises AD DS and Azure AD, users are still able to authenticate to their cloud applications and remain partially productive. The following diagram provides a visual representation of how this workflow is handled. Additional information can be found at https://docs.microsoft.com/en-us/azure/active-directory/hybrid/whatis-phs:
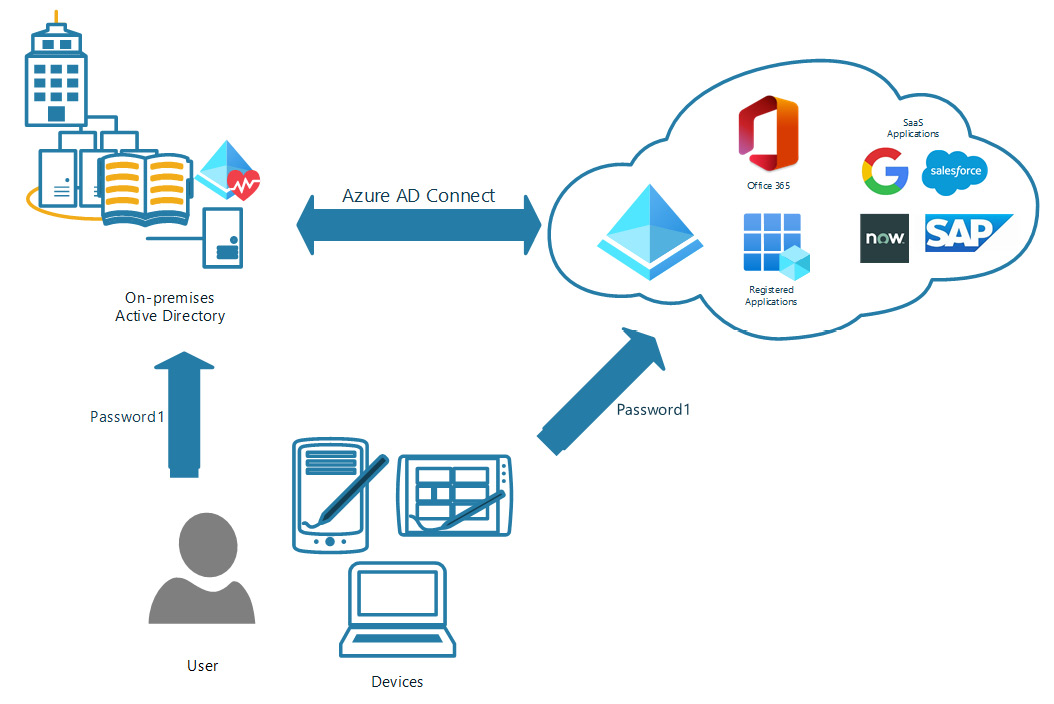
Figure 6.1 – PHS diagram
As the preceding diagram shows, a user can go to either Azure AD or on-premises AD to authenticate. Therefore, if the Azure AD Connect connection is down, users still have access to their cloud resources. This allows them to continue to work until the synchronization connection is restored. Now, let's look at PTA.
PTA
The next hybrid identity synchronization option that we will discuss is PTA. Unlike PHS, which allows user identities to be authenticated in either the on-premises AD or Azure AD, PTA requires all users to authenticate to the on-premises AD.
In this configuration, if the Azure AD Connect connection between Azure AD and the on-premises AD were to become disconnected, no users would be able to authenticate to on-premises or cloud resources. Therefore, it is important to actively monitor this connection and build resiliency in the architecture. The following diagram shows how PTA functions and how you can architect resiliency with redundancy in PTA agents and a backup domain controller:
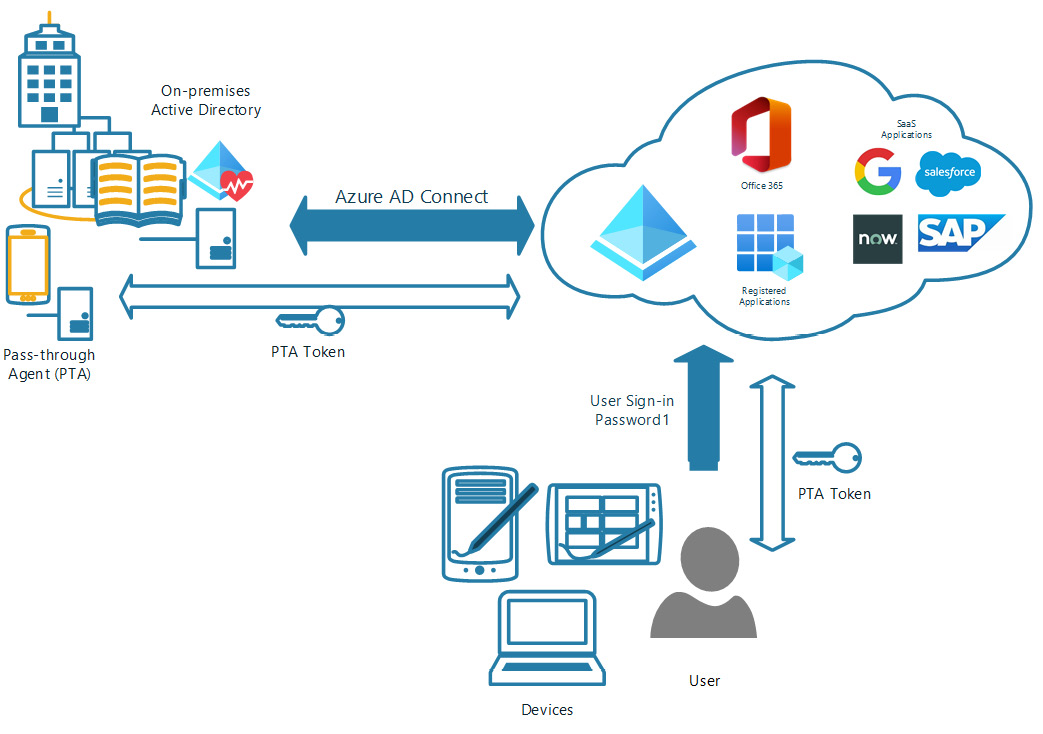
Figure 6.2 – PTA diagram
There are some good reasons to utilize PTA. If a company requires authentication parameters and limits that only allow users to access resources during certain times, these rules can only be configured currently on an AD domain controller. With PTA, you can utilize modern authentication features with Azure AD, such as multi-factor authentication (MFA) and self-service password reset (SSPR). However, for SSPR, you will need to enable the Password writeback feature within Azure AD Connect. Additional information on PTA can be found at this link: https://docs.microsoft.com/en-us/azure/active-directory/hybrid/how-to-connect-pta.
AD FS synchronization
AD FS synchronization is the most complex of the three Azure AD Connect synchronization types. Unlike PHS and PTA, which can be installed directly on the on-premises domain controller in many cases, AD FS requires additional infrastructure in place to support the authentication process. Here is a diagram that shows the complexity of the infrastructure and the necessary components:
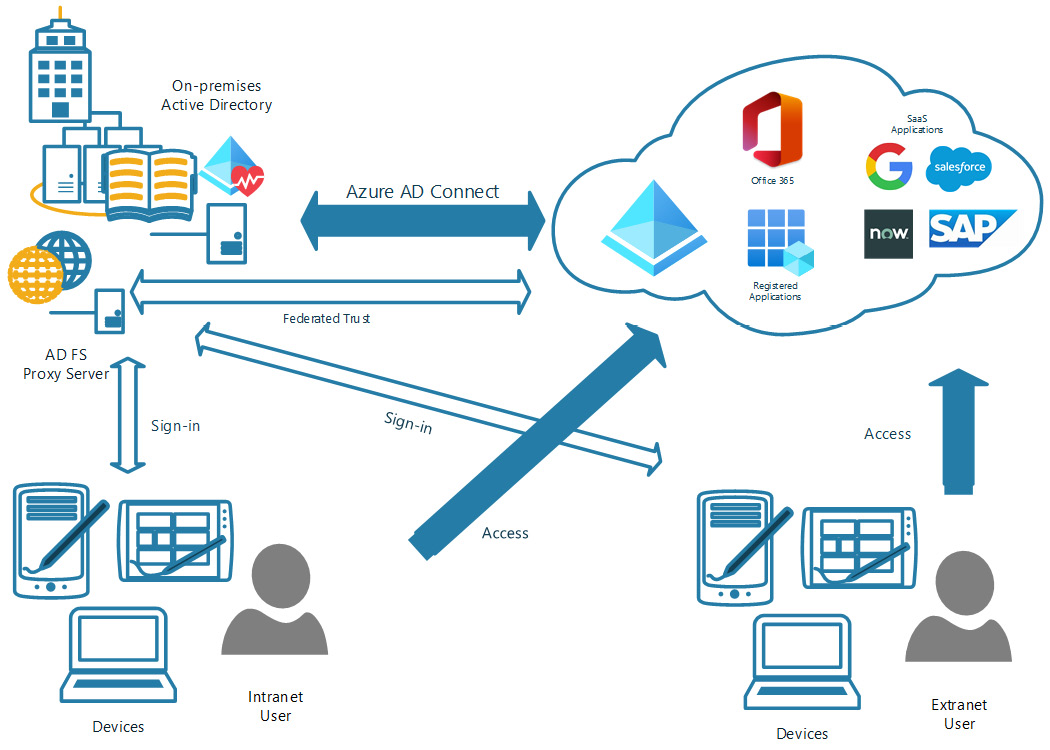
Figure 6.3 – AD FS synchronization diagram
AD FS synchronization is utilized in complex AD infrastructures where there are multiple domains, and third-party MFA solutions or smart cards are utilized. For additional information on the configuration of AD FS synchronization, you can use this link: https://docs.microsoft.com/en-us/azure/active-directory/hybrid/how-to-connect-fed-management.
PHS and PTA are the more widely discussed of the three Azure AD Connect options. It is important to understand when each should be used within a hybrid identity architecture, as discussed in each of the corresponding sections.
Now, let's go through the initial steps of installing Azure AD Connect and connecting to Azure AD.
Configuring Azure AD Connect
The first steps are to download and install Azure AD Connect in the on-premises infrastructure. This can be done on the on-premises AD domain controller server or on another member server that is joined to the domain. For our example, we will use the on-premises domain controller server to install Azure AD Connect. Follow these next steps:
- If you are not already logged in to the AD domain controller, access it through Remote Desktop Protocol (RDP) with domain administrator credentials. This is important because, as stated previously, you need to have this level of administrator privileges to configure Azure AD Connect. Once logged in, you should see a screen like this:
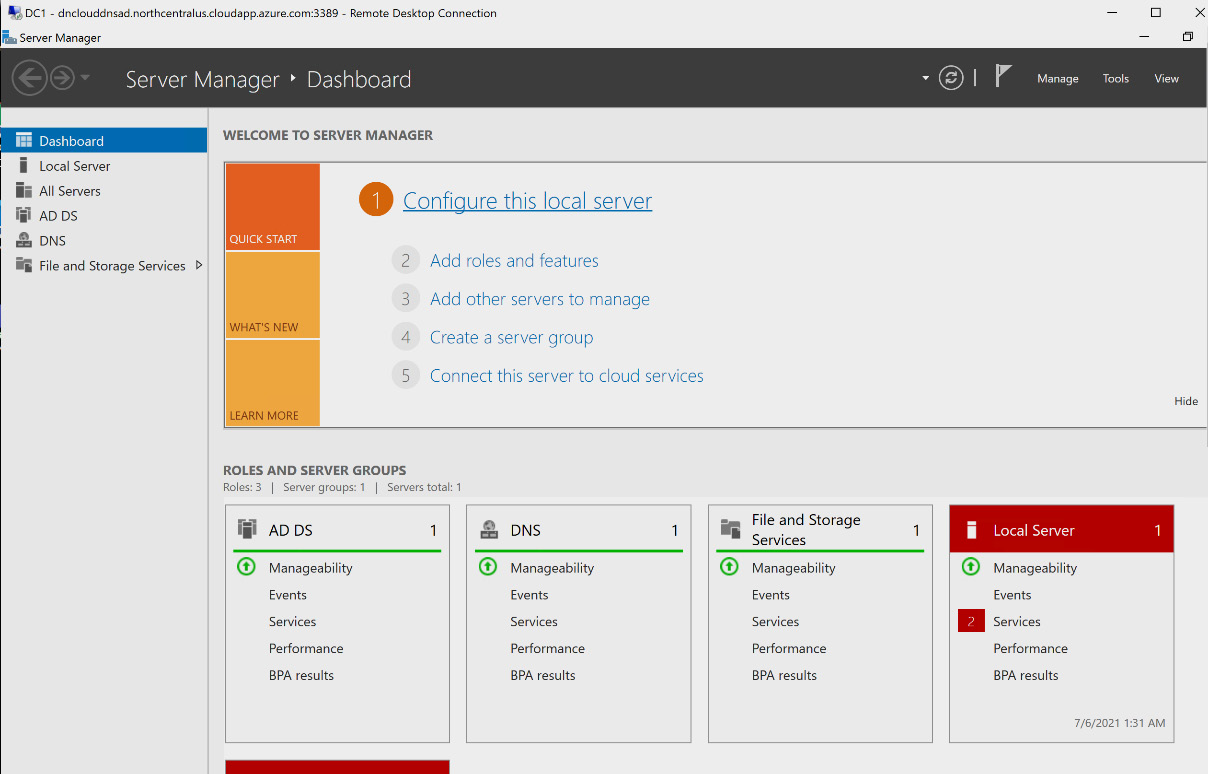
Figure 6.4 – RDP login to the AD domain controller
- From the AD domain controller, use the web browser to navigate and log in to Azure AD at https://portal.azure.com. Once logged in, you should see a screen like this:
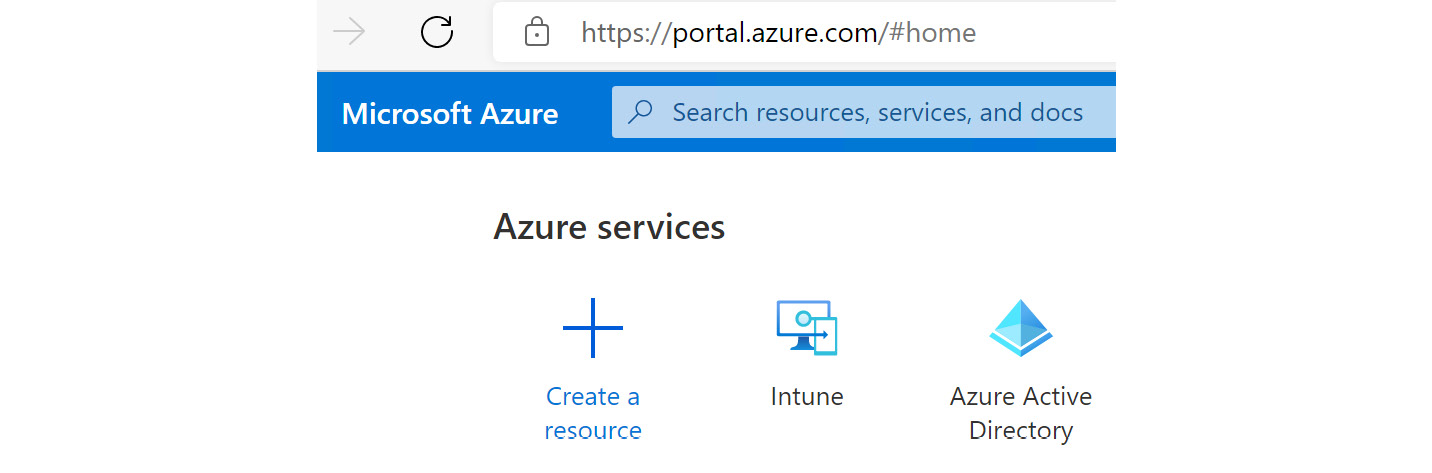
Figure 6.5 – Azure AD in Azure portal
- In the Azure Active Directory blade, navigate to Azure AD Connect on the menu under Manage, as illustrated in the following screenshot:
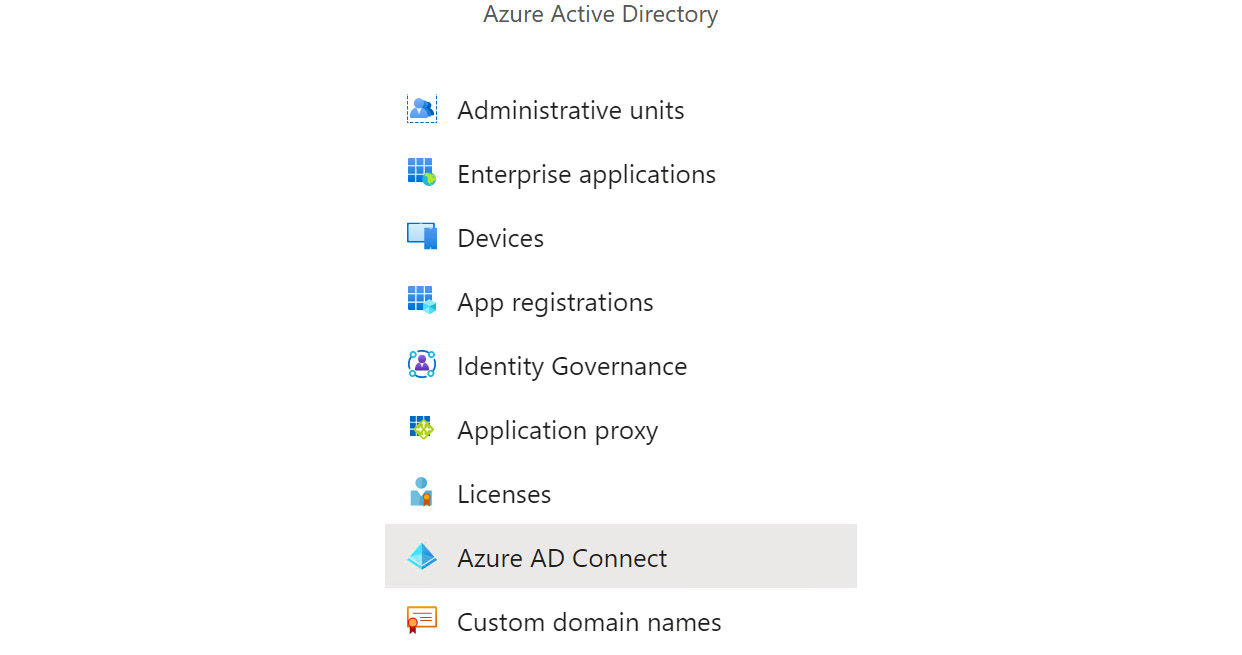
Figure 6.6 – Azure AD Connect on Azure AD menu
- Within the Azure AD Connect blade, find Download Azure AD Connect under PROVISION FROM ACTIVE DIRECTORY, as illustrated in the following screenshot:
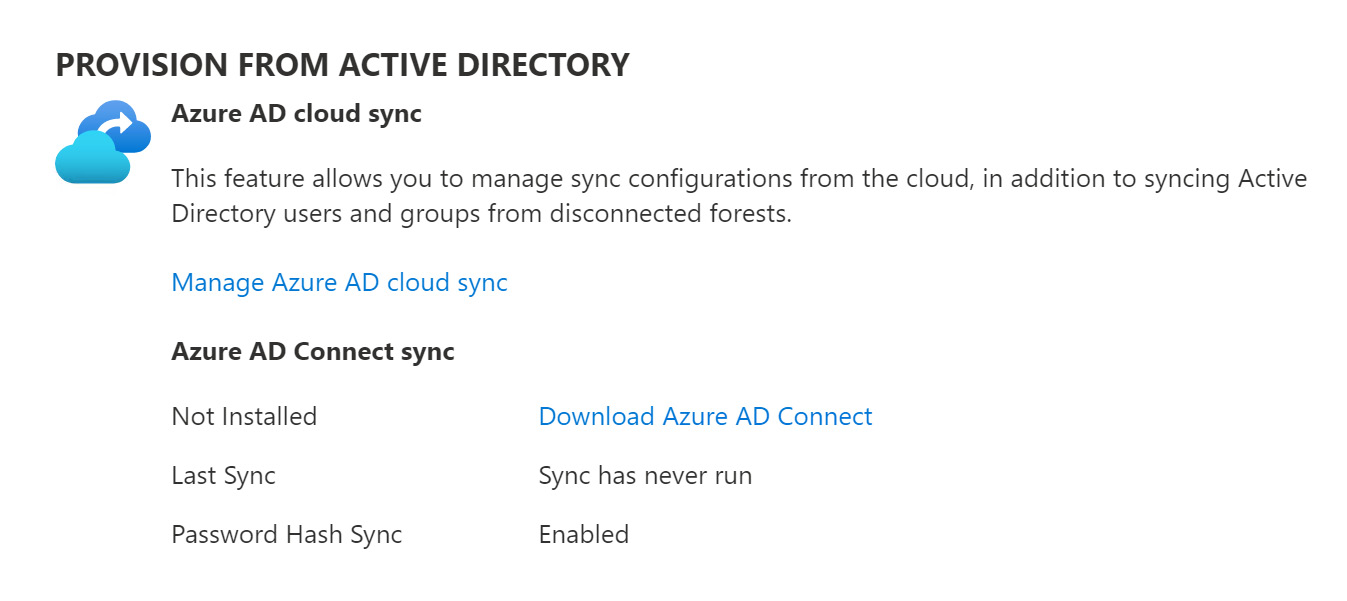
Figure 6.7 – Download Azure AD Connect link
- The Microsoft Azure Active Directory Connect download page will open. Select Download to download Azure AD Connect, as illustrated in the following screenshot:
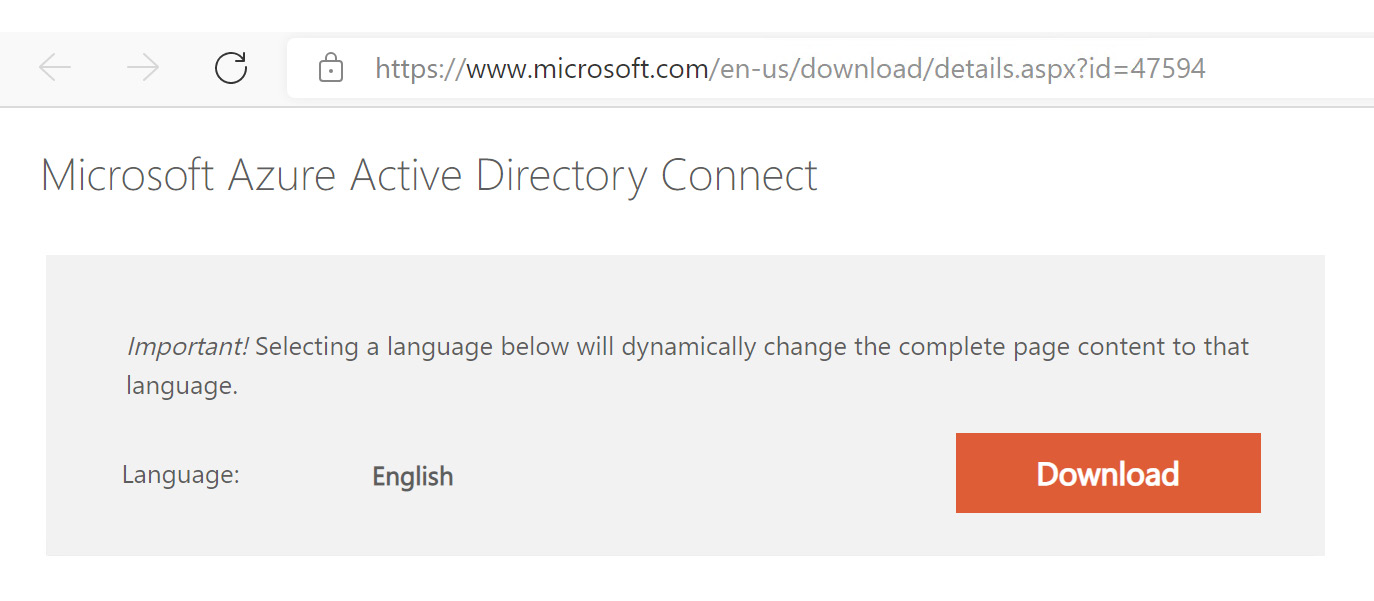
Figure 6.8 – Azure AD Connect at Microsoft download page
- After the download completes, navigate to the Downloads folder and install the application, as illustrated in the following screenshot:
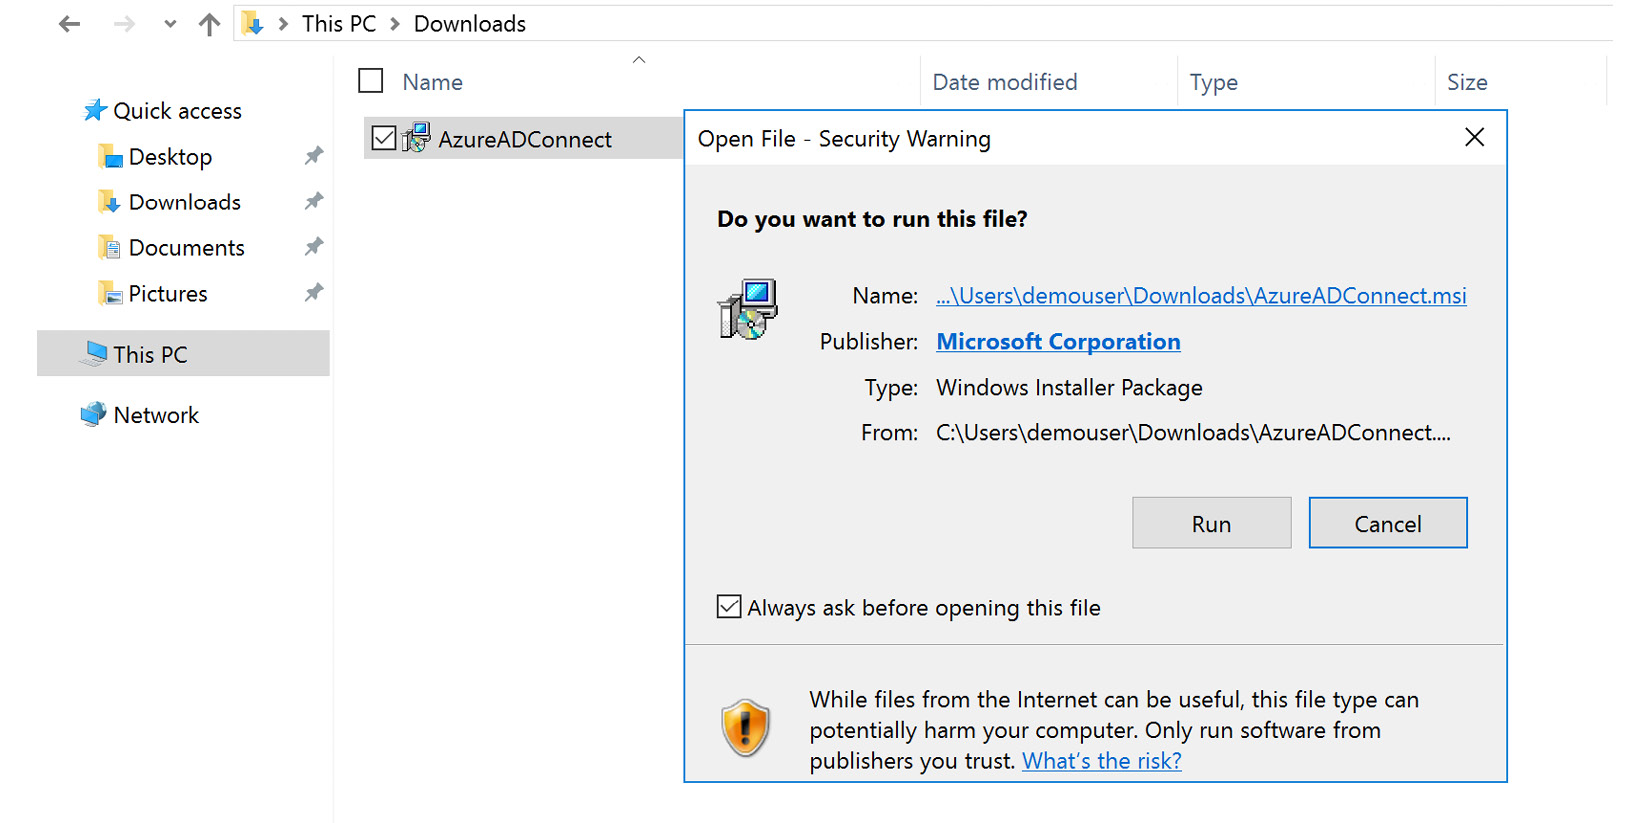
Figure 6.9 – Installation of Azure AD Connect
- When the installation is complete, you will begin the configuration wizard for Azure AD Connect. Agree to the licensing terms and click Continue, as illustrated in the following screenshot. Additional configuration steps will be covered in the following sections based on the synchronization that your company will use:

Figure 6.10 – Azure AD Connect configuration wizard
The next sections will discuss the use cases for each and how to configure them with Azure AD and AD DS.
Now that we understand how PHS handles authentication and where we would use it, the next action is to go through the steps to configure it. Let's do this now, as follows:
- In the previous section, we went through the process to get Azure AD Connect installed on the on-premises AD domain controller. We will pick up from step 7 with the configuration of PHS. After accepting the licensing terms and selecting Continue, you will be taken to the express settings, as shown in the following screenshot. To configure PHS, simply select Use express settings:
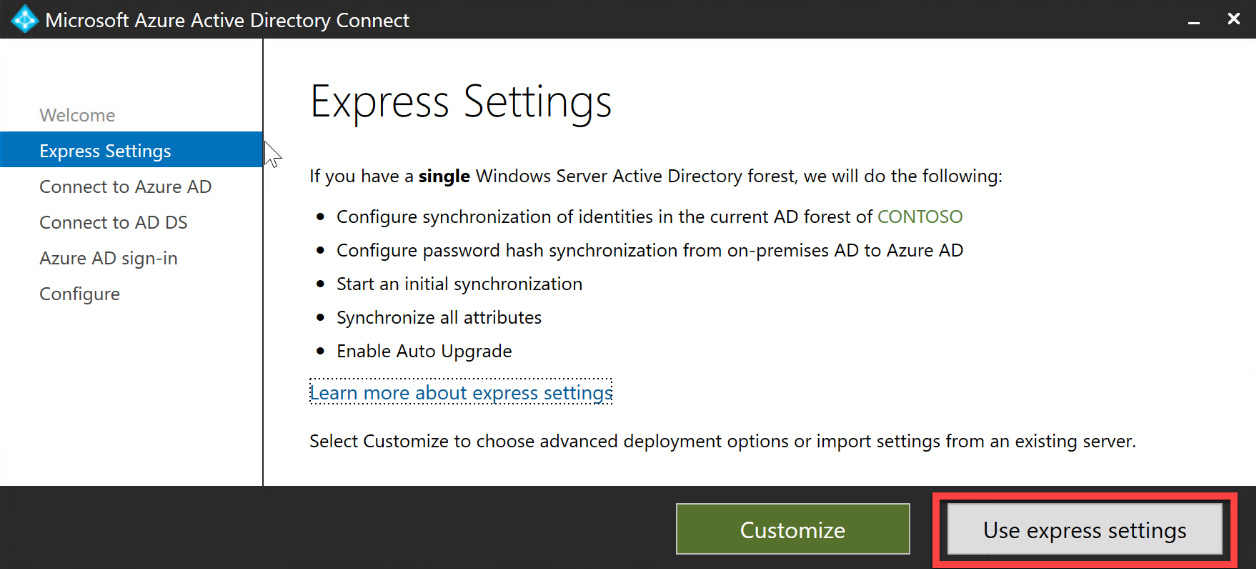
Figure 6.11 – Express settings wizard
- Next, you will be prompted to enter the global administrator or hybrid identity administrator credentials for the Azure AD account, as illustrated in the following screenshot:

Figure 6.12 – Entering Azure AD global administrator or hybrid identity administrator credentials
- After the Azure AD credentials have been verified, you will be prompted to enter the domain enterprise administrator credentials for the on-premises AD DS, as illustrated in the following screenshot:
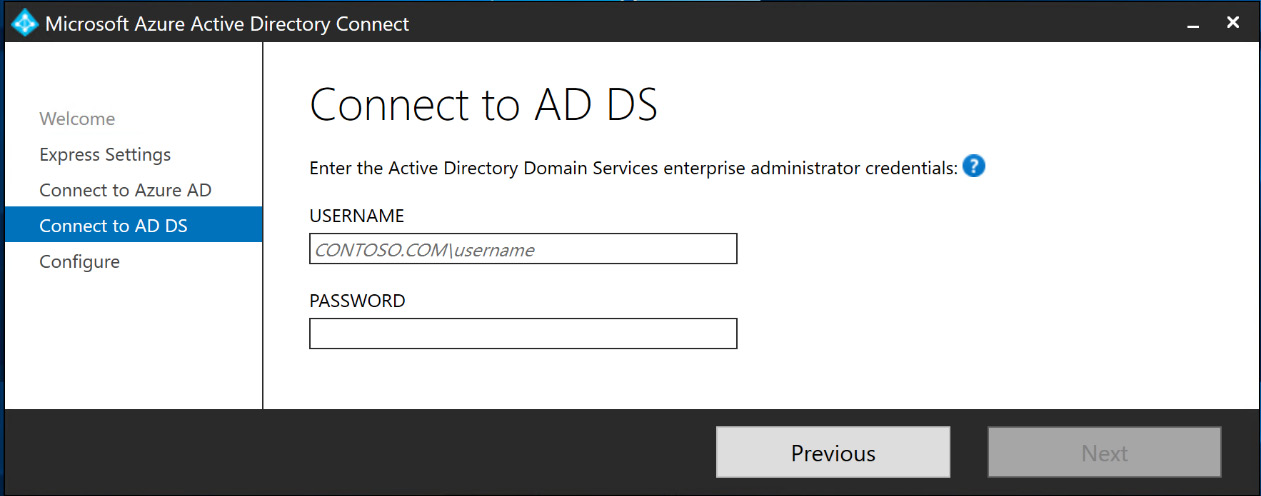
Figure 6.13 – Entering AD DS enterprise administrator credentials
- The next step verifies that the on-premises domain is an active domain registered in Azure AD. If it is not, you have an option to select to continue without matching the User Principal Name (UPN) suffixes, as shown in the following screenshot:
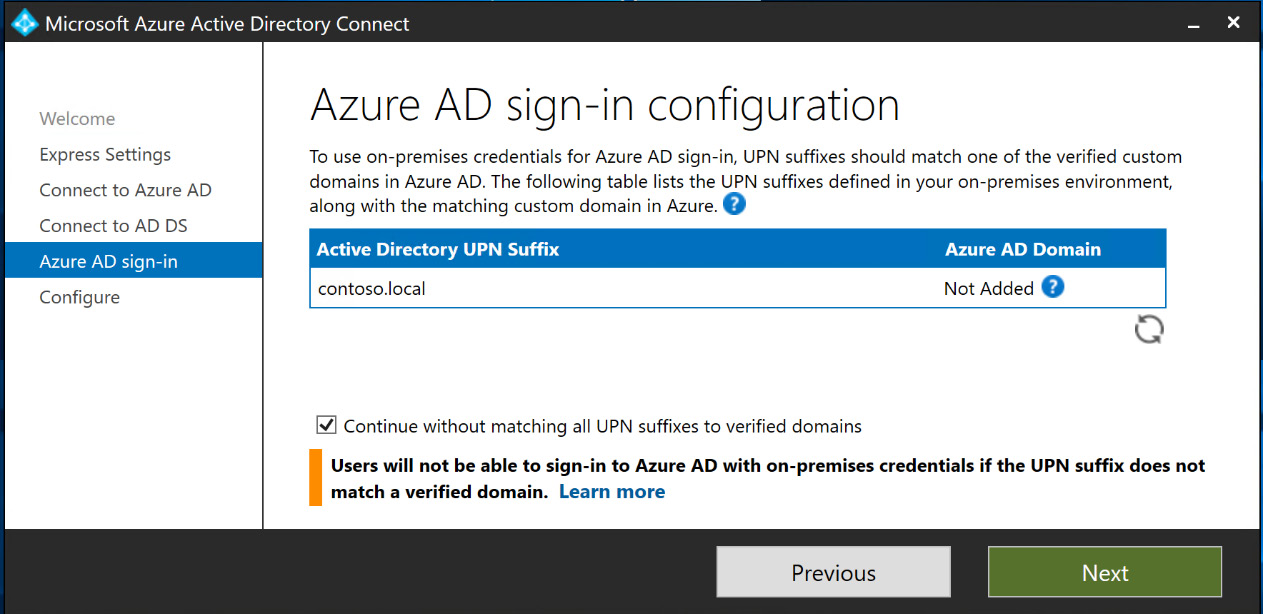
Figure 6.14 – AD UPN suffix and Azure AD domain
- Selecting Next will verify the configuration and provide a summary of the settings for Azure AD Connect. You have an option to start synchronizing users immediately after the configuration is complete. Select Install to complete the Azure AD Connect installation, as illustrated in the following screenshot:
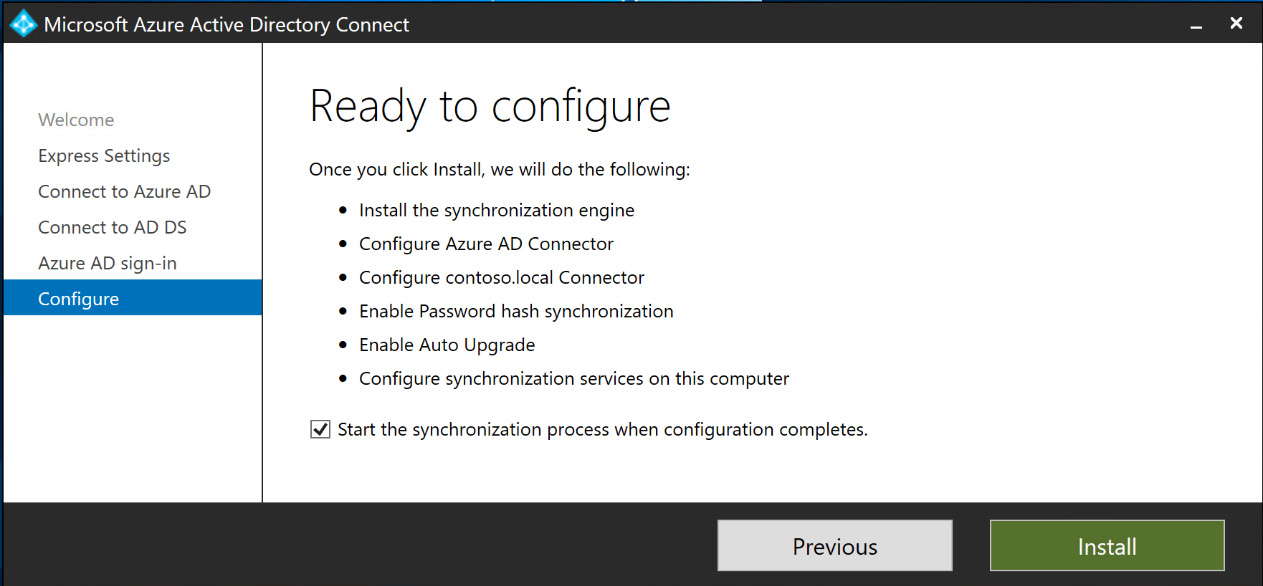
Figure 6.15 – Ready to configure and install Azure AD Connect
After the installation completes, Azure AD Connect will be configured to synchronize users from on-premises AD to Azure AD, utilizing PHS. This configuration for Azure AD Connect is the least complex of the three options. The next sections will provide information about PTA and AD FS synchronization.
Configuring PTA
We will now go through the steps to configure PTA within Azure AD Connect, as follows:
- Follow Figure 6.4 through Figure 6.10 to get started. After accepting the licensing agreement, instead of selecting Use express settings as we did for PHS, you will select Customize, as shown in the following screenshot:

Figure 6.16 – Customize settings wizard
- In the next section of the wizard, there are some options to use existing setup options. If this is a new installation, no additional boxes need to be checked; just select Install, as illustrated in the following screenshot:
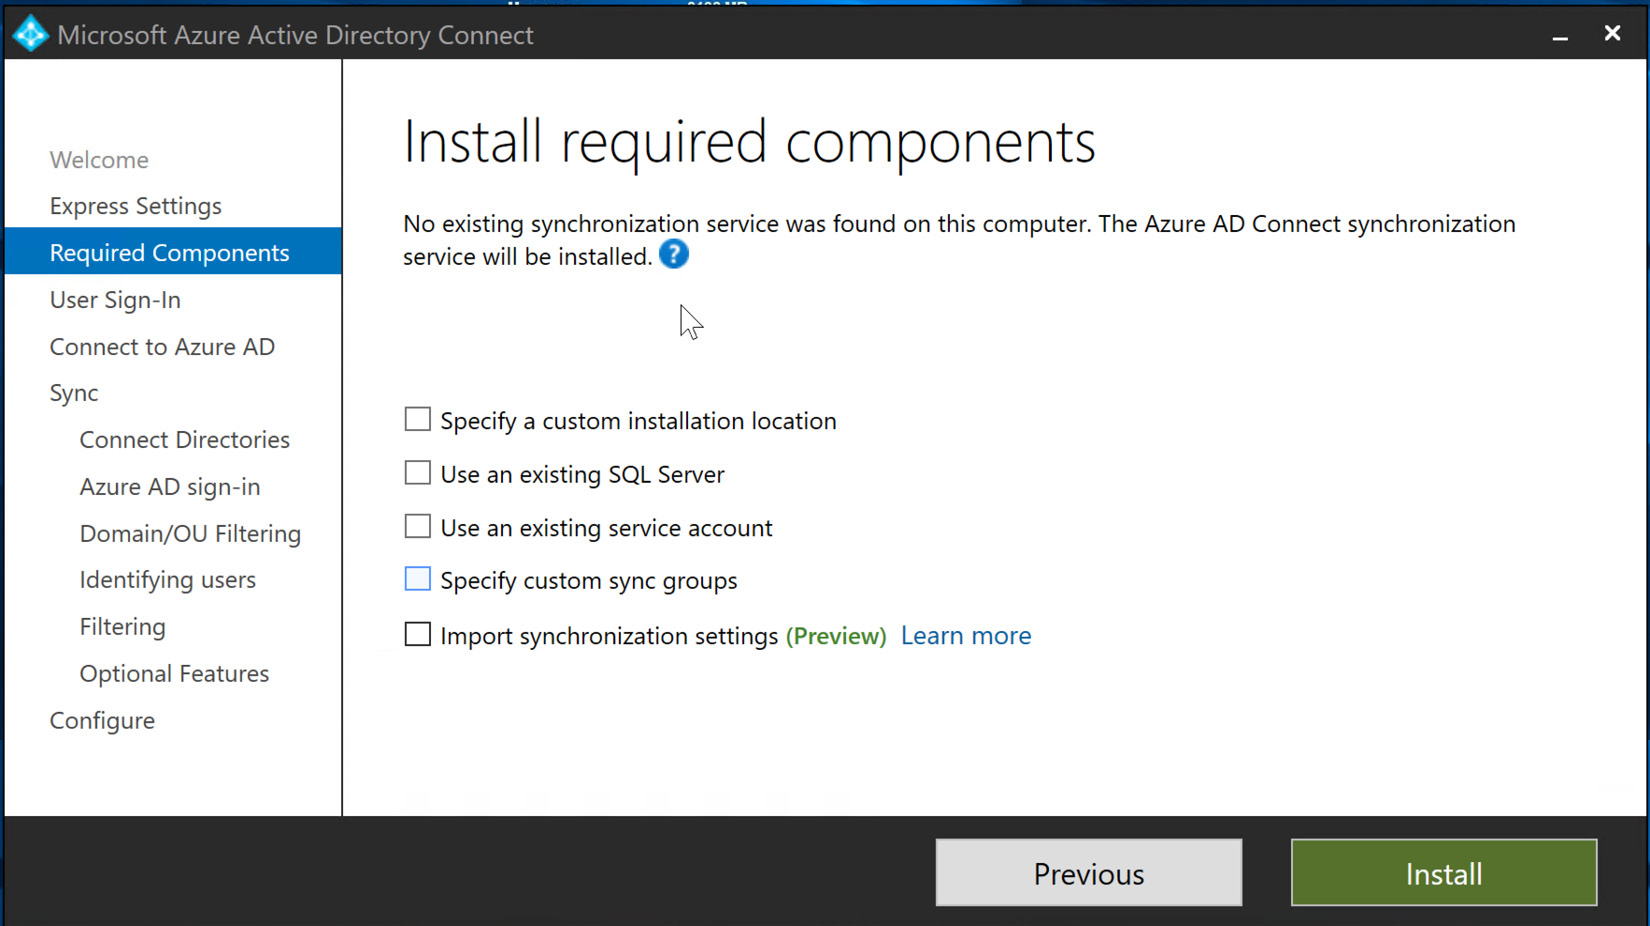
Figure 6.17 – Installation of Azure AD Connect Structured Query Language (SQL) and synchronization services
- This will begin the local SQL Server express and synchronization installation.
- When the database and synchronization components complete installation, you can then customize the synchronization options. Pass-through authentication will be chosen for this exercise; then, select Next. The following screenshot shows this selection. Later in this chapter, we will discuss the implementation of SSO within hybrid identities. The following screenshot also shows that there is a checkbox to enable this during this step, but it can also be configured later:
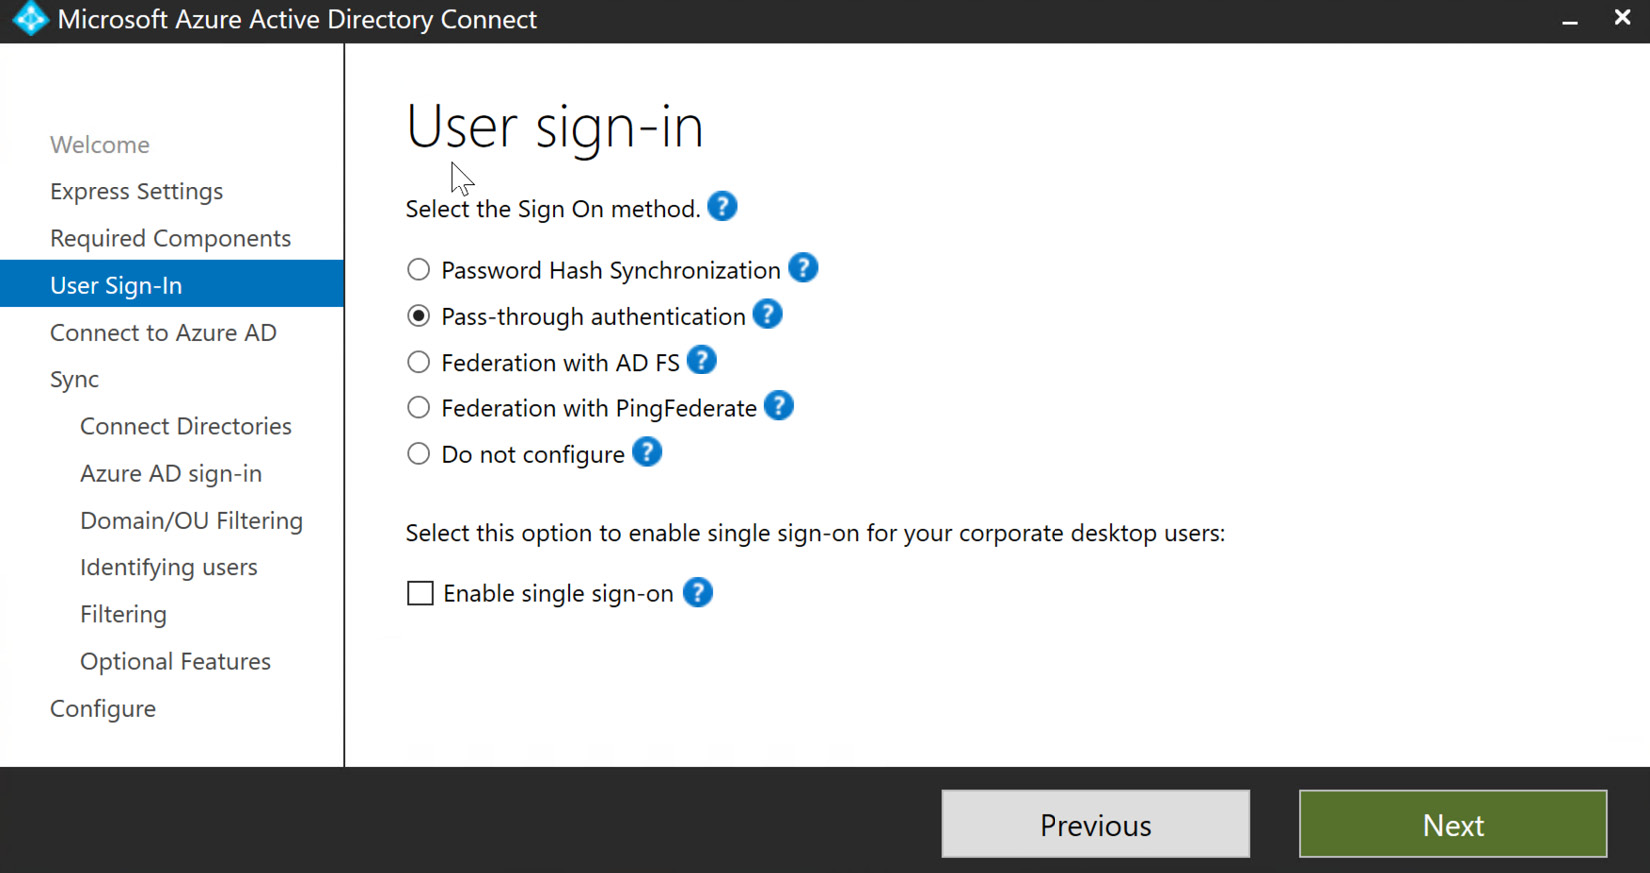
Figure 6.18 – Selecting synchronization option
Note
All of the synchronization types are available in this blade, including PHS. These steps would only be used with PHS if certain OUs were going to be synchronized with Azure AD.
- Next, you will enter the global administrator credentials to Connect to Azure AD and select Next, as illustrated in the following screenshot:
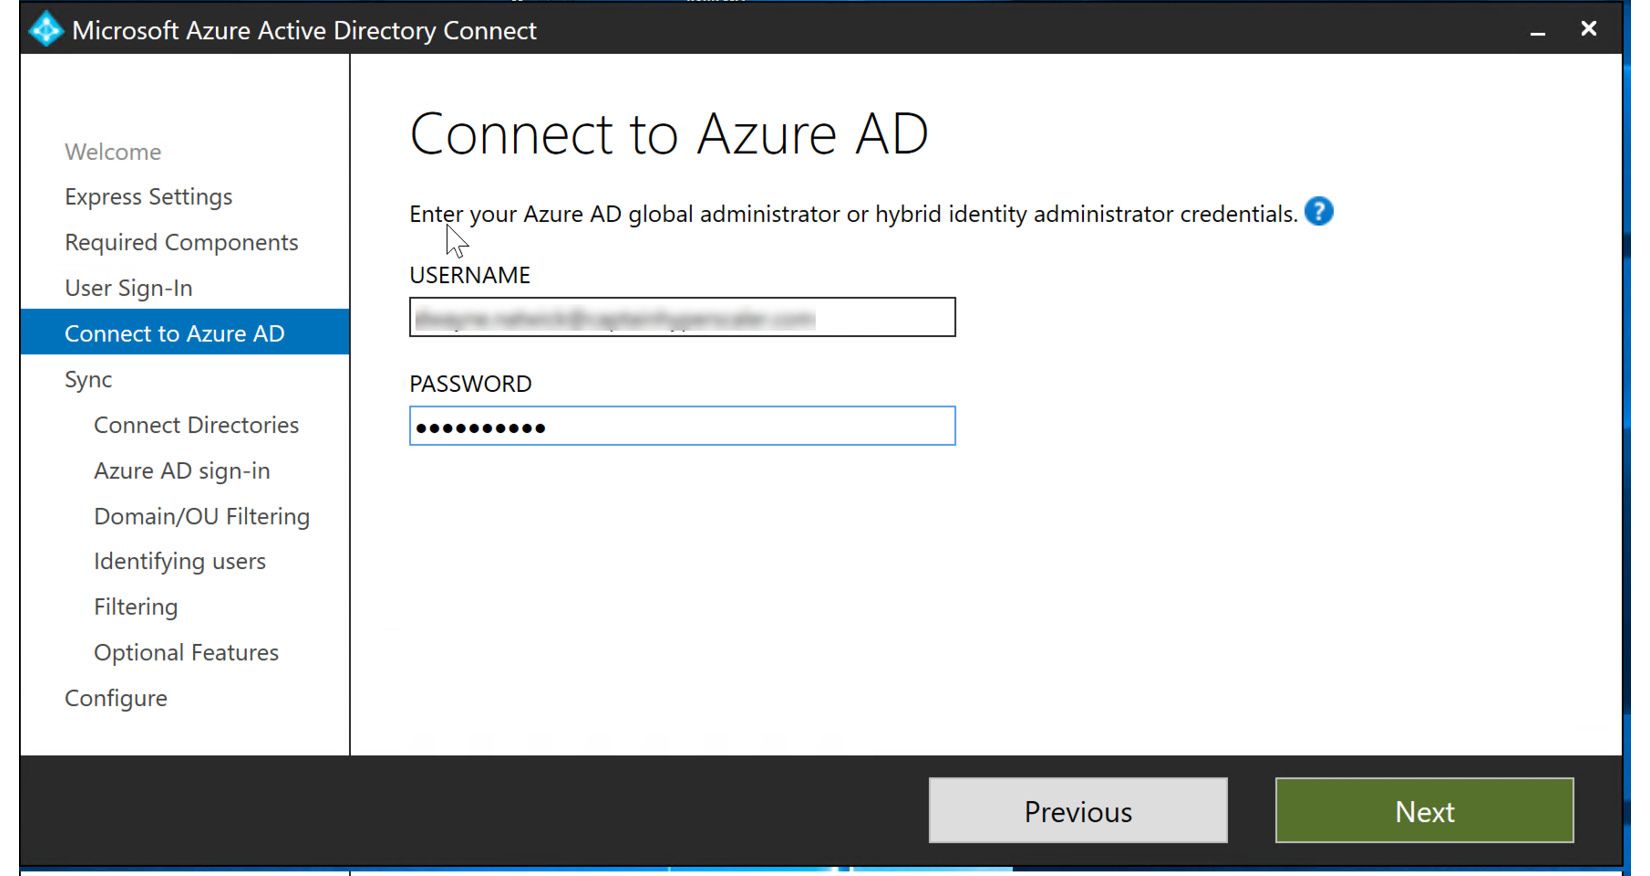
Figure 6.19 – Entering Azure AD global administrator credentials
- In the next step, locate the AD forest that you will be synchronizing with Azure AD Connect and select Add Directory, as illustrated in the following screenshot:
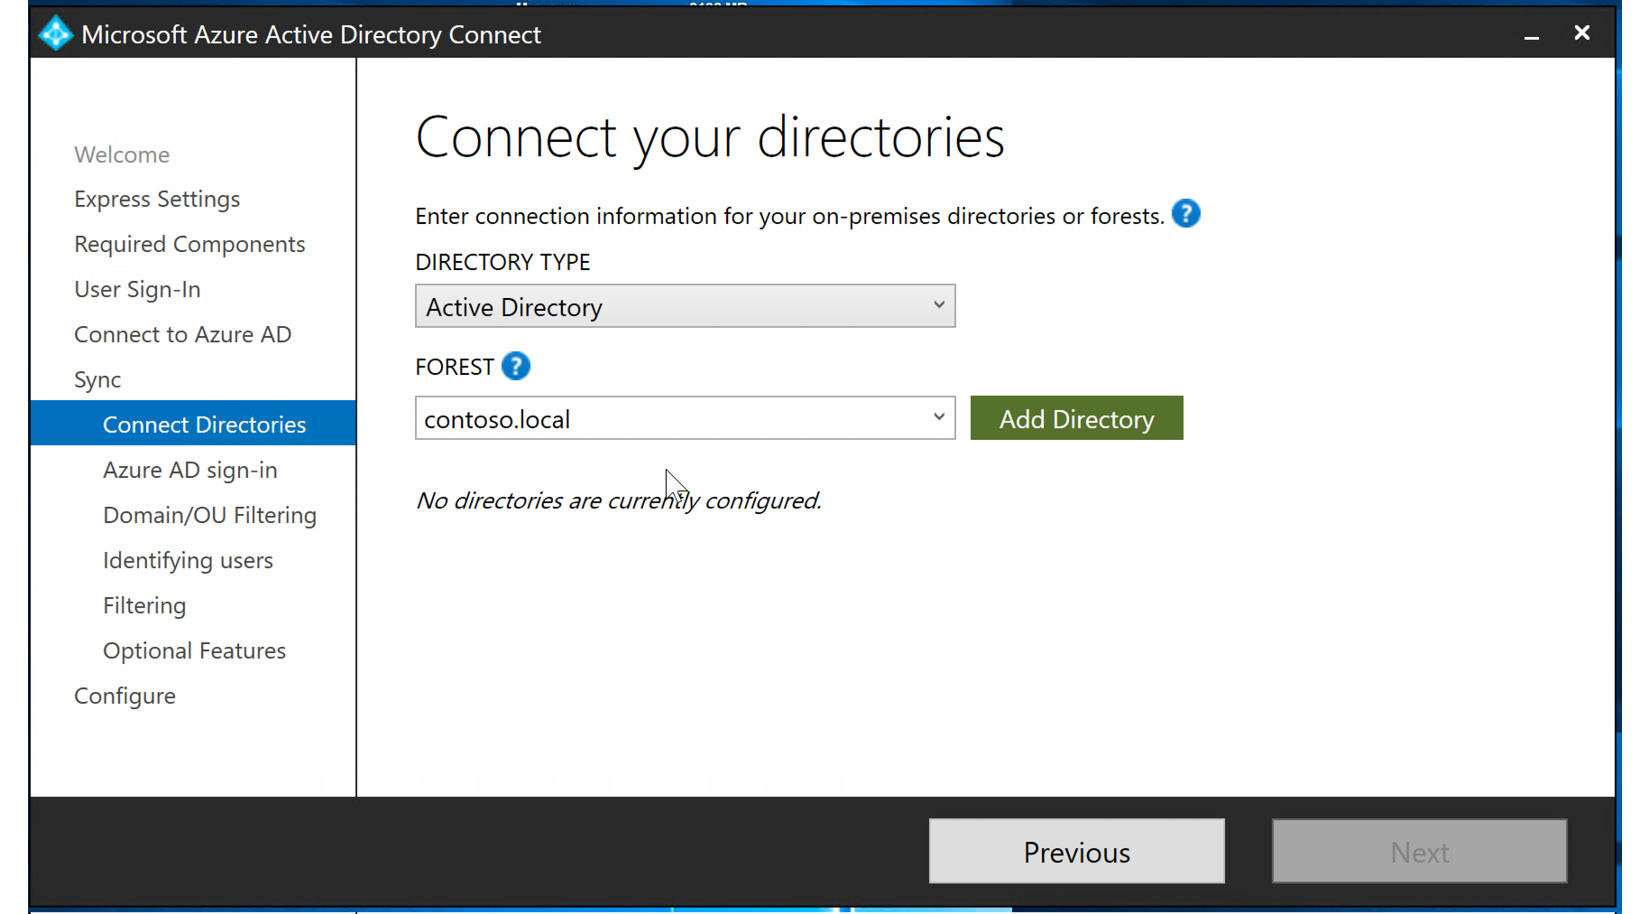
Figure 6.20 – Adding directory forest to synchronize
- The tile will open to create a new AD account, or you can use an existing AD account. This is not the enterprise domain administrator account. If this is a new Azure AD Connect installation, select Create new AD account for the AD forest synchronization and select OK, as illustrated in the following screenshot:
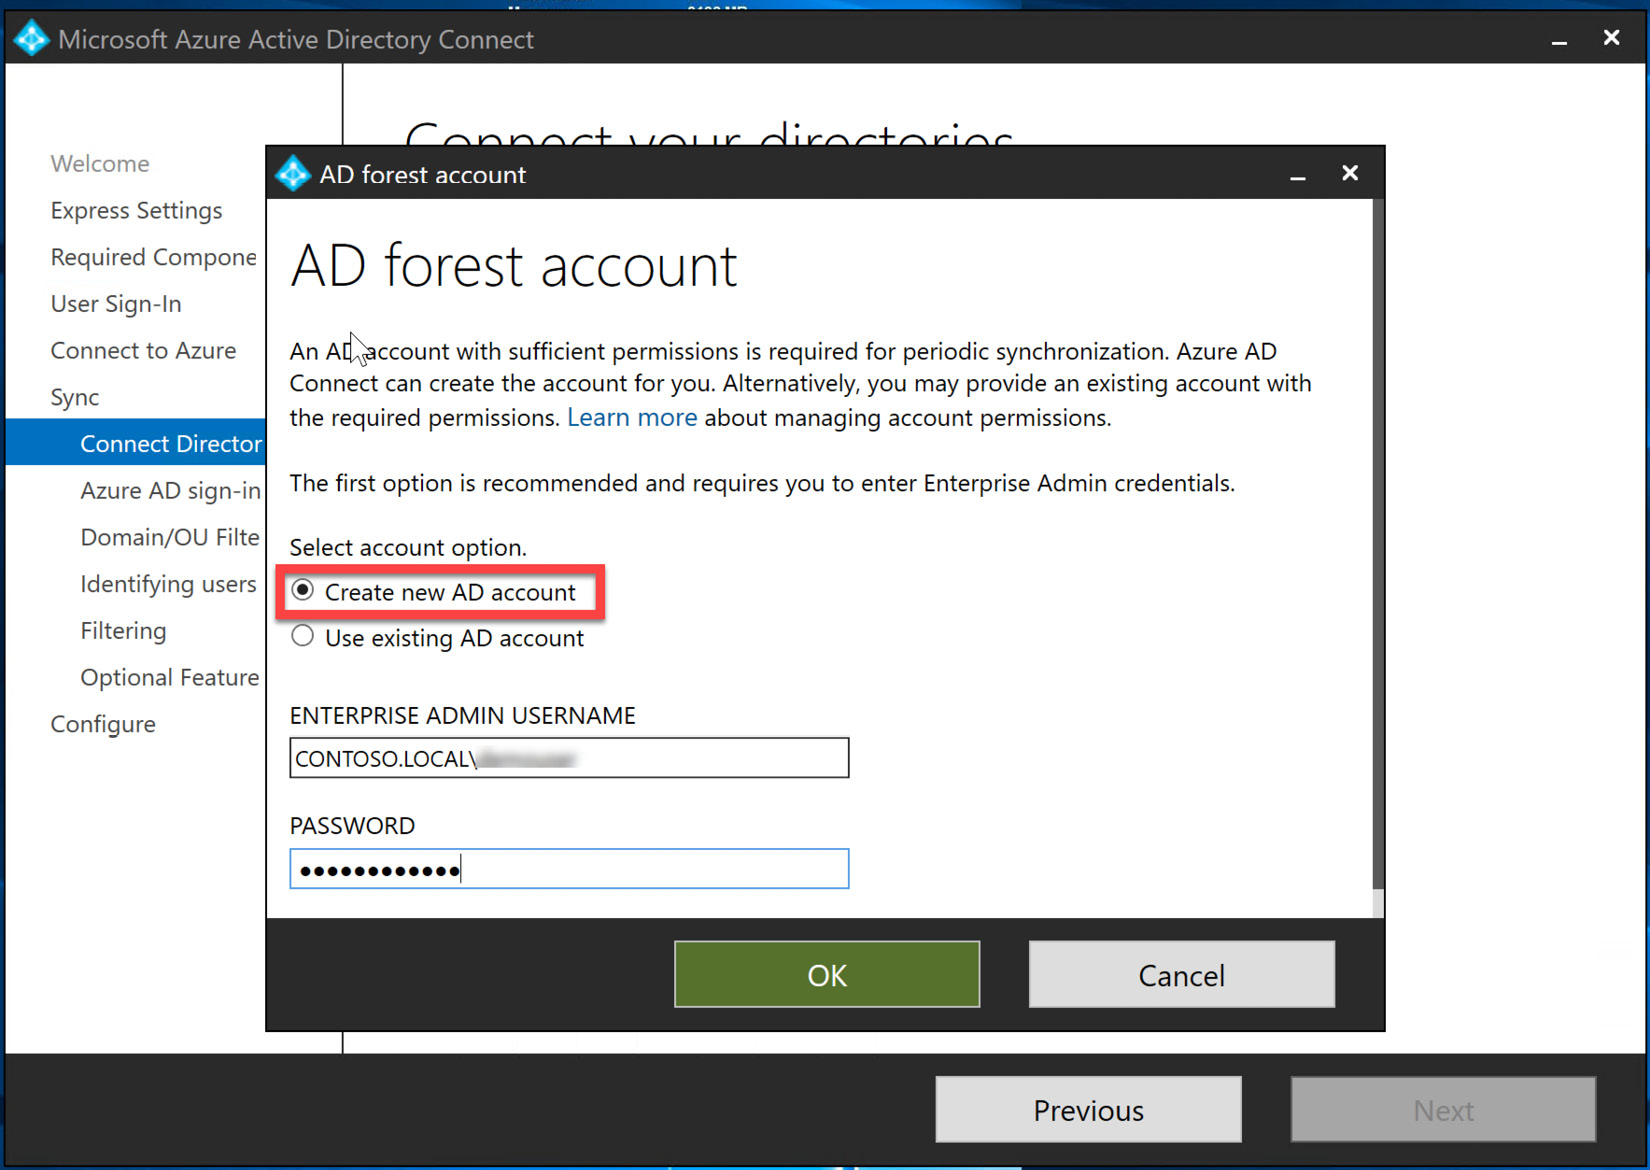
Figure 6.21 – Creating a new AD account for synchronization
- The directory is now configured, and you can select Next to continue the configuration, as illustrated in the following screenshot:
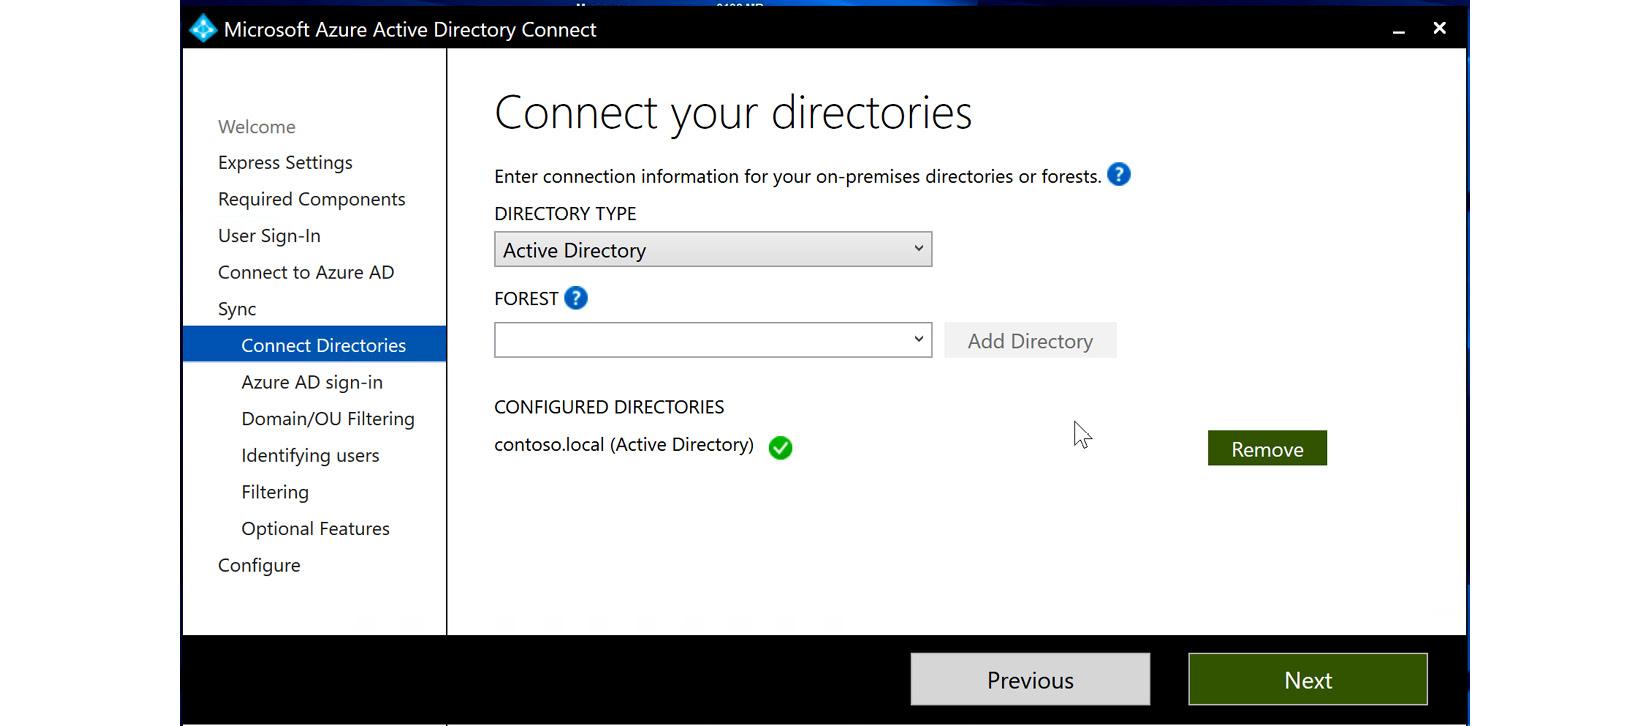
Figure 6.22 – Configured directories are complete
- The connection between Azure AD and the AD domain is initiated and checked. Azure AD Connect is now signed in to both Azure AD and the on-premises AD, and they are almost ready to synchronize. The following screenshot shows the configuration—this should be similar to yours. Since authentication is handled within the on-premises AD domain controller, the domain selected does not need to be a publicly verified domain. You can select the box to continue without matching and then select Next, as illustrated here:
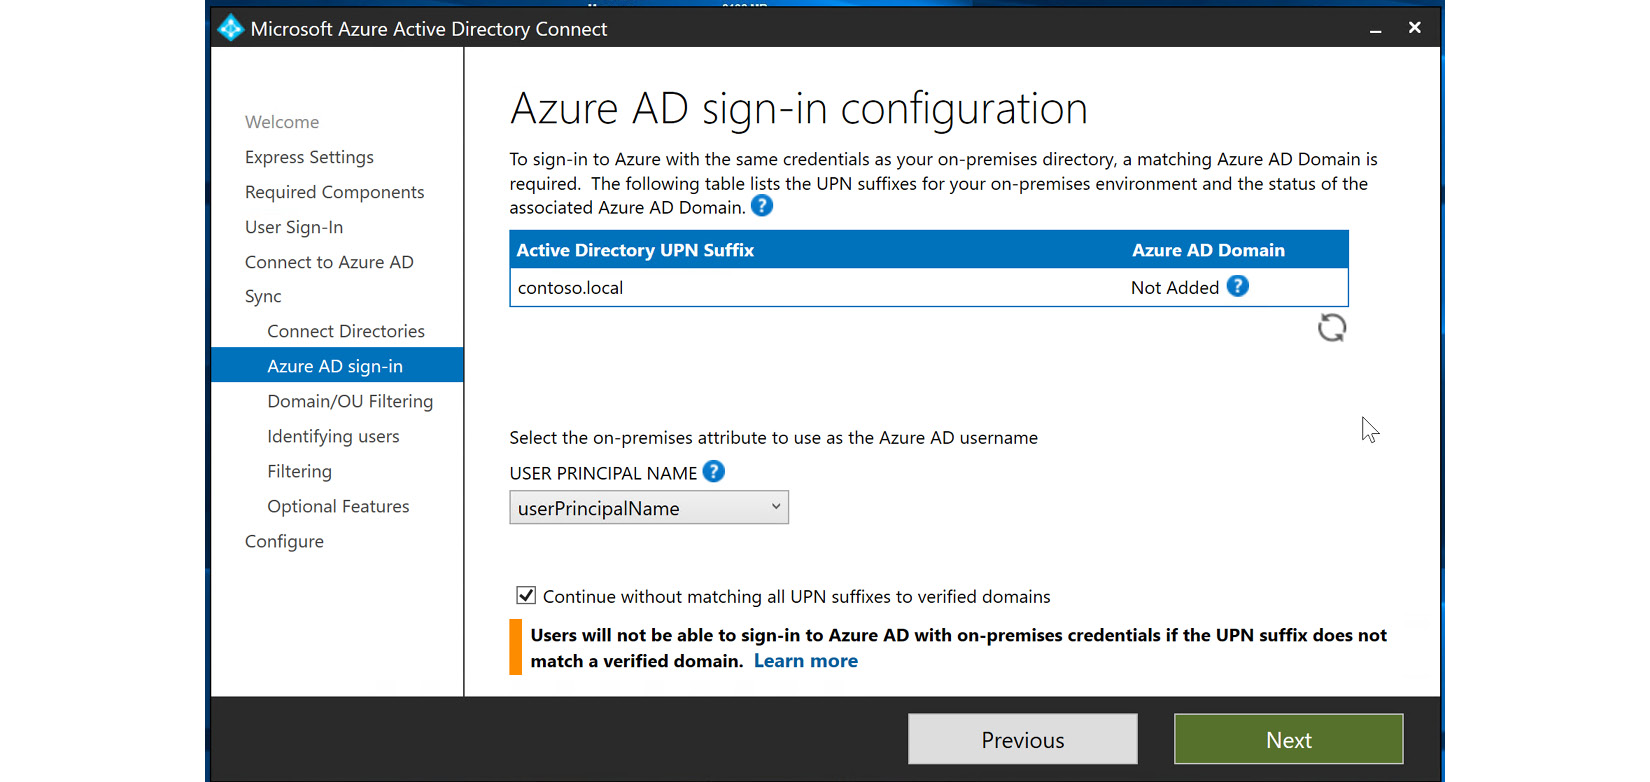
Figure 6.23 – Azure AD sign-in configuration
- The next few blades allow for the customizing of selected domains, object units, or users to be synchronized. The first blade is the Domain/OU Filtering blade. If you select Sync selected domains and OUs, you can select and deselect the checklist options for a more targeted synchronization. This is shown in the following screenshot:
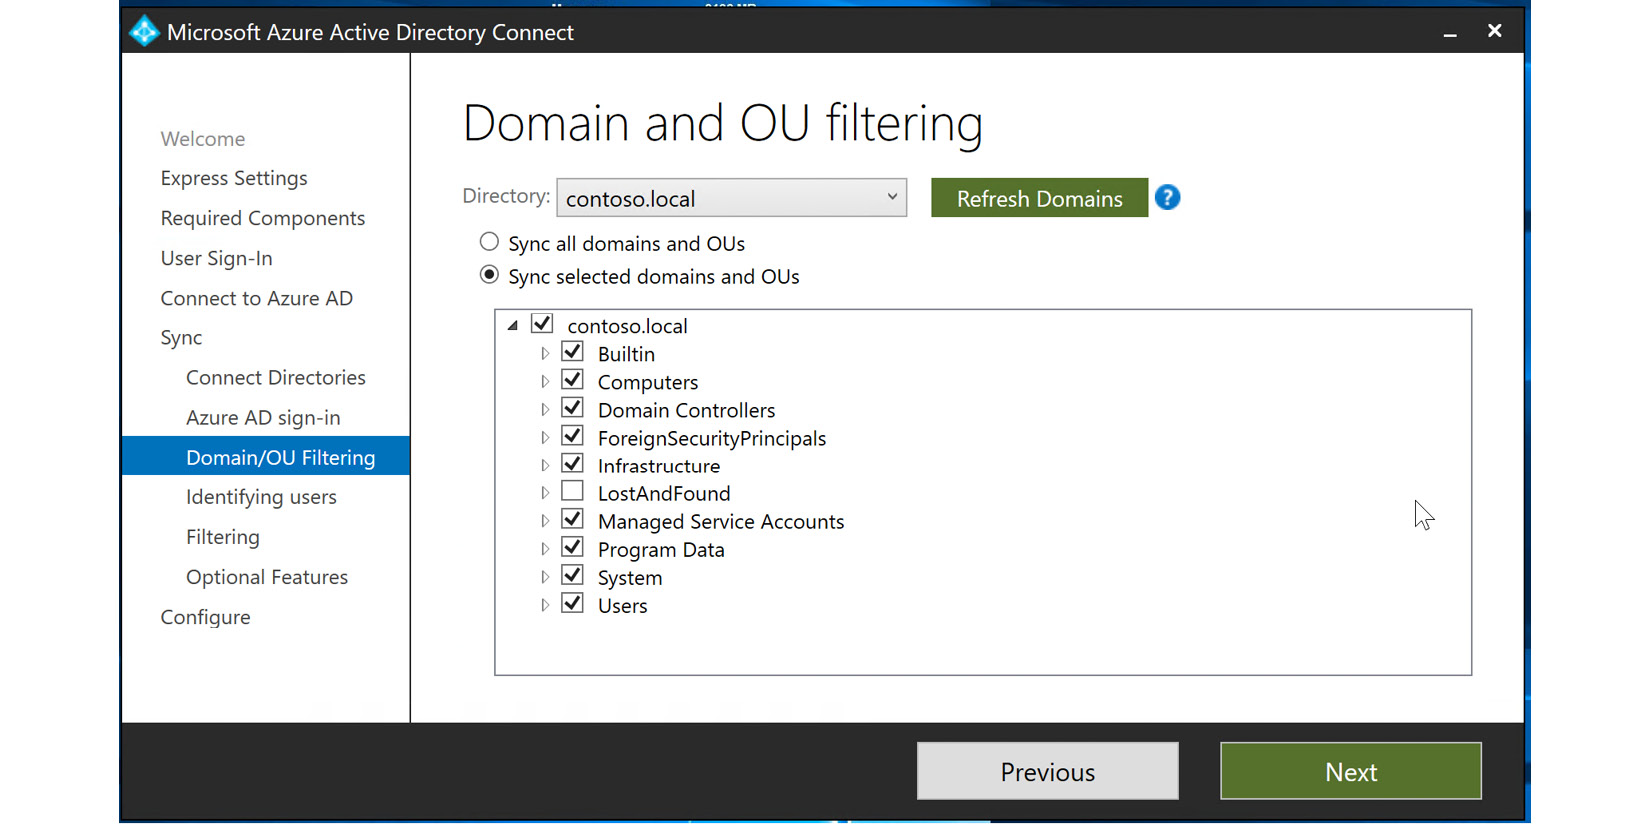
Figure 6.24 – Syncing selected domains and OUs
- For our example, we are going to select all domains and OUs, as shown in the following screenshot, and then select Next:
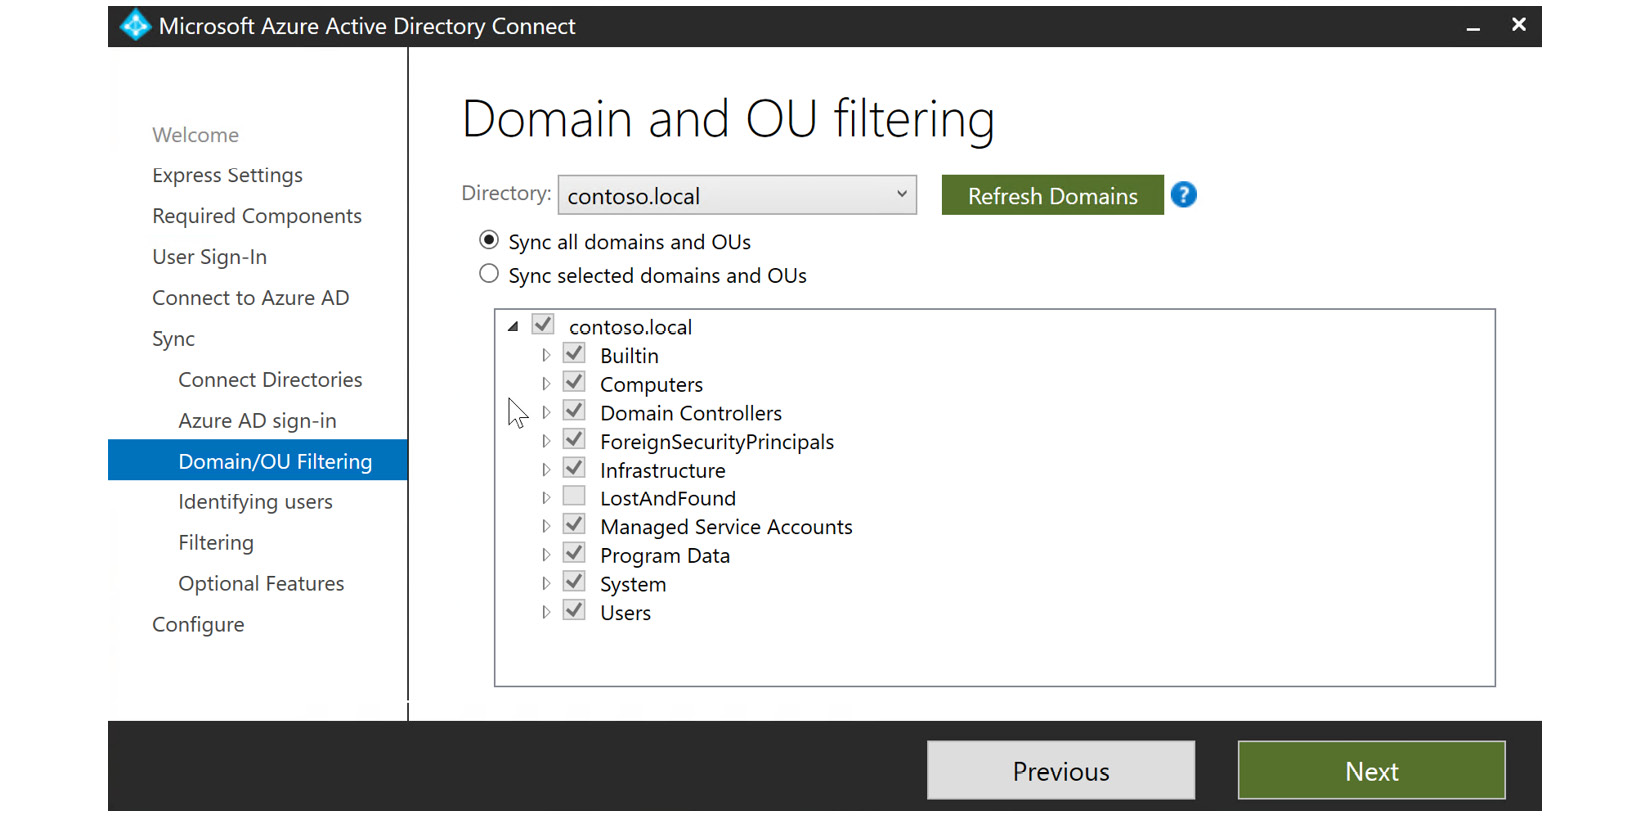
Figure 6.25 – Syncing all domains and OUs
- The next blade allows us to identify users to synchronize. In this example, we are going to leave this as All and select Next. One point to note in the following screenshot is that Azure is selected as the source anchor. You can select different attributes within the on-premises AD domain to be a source anchor, if necessary. The source anchor is a unique attribute for the user and it cannot be changed once it is chosen:
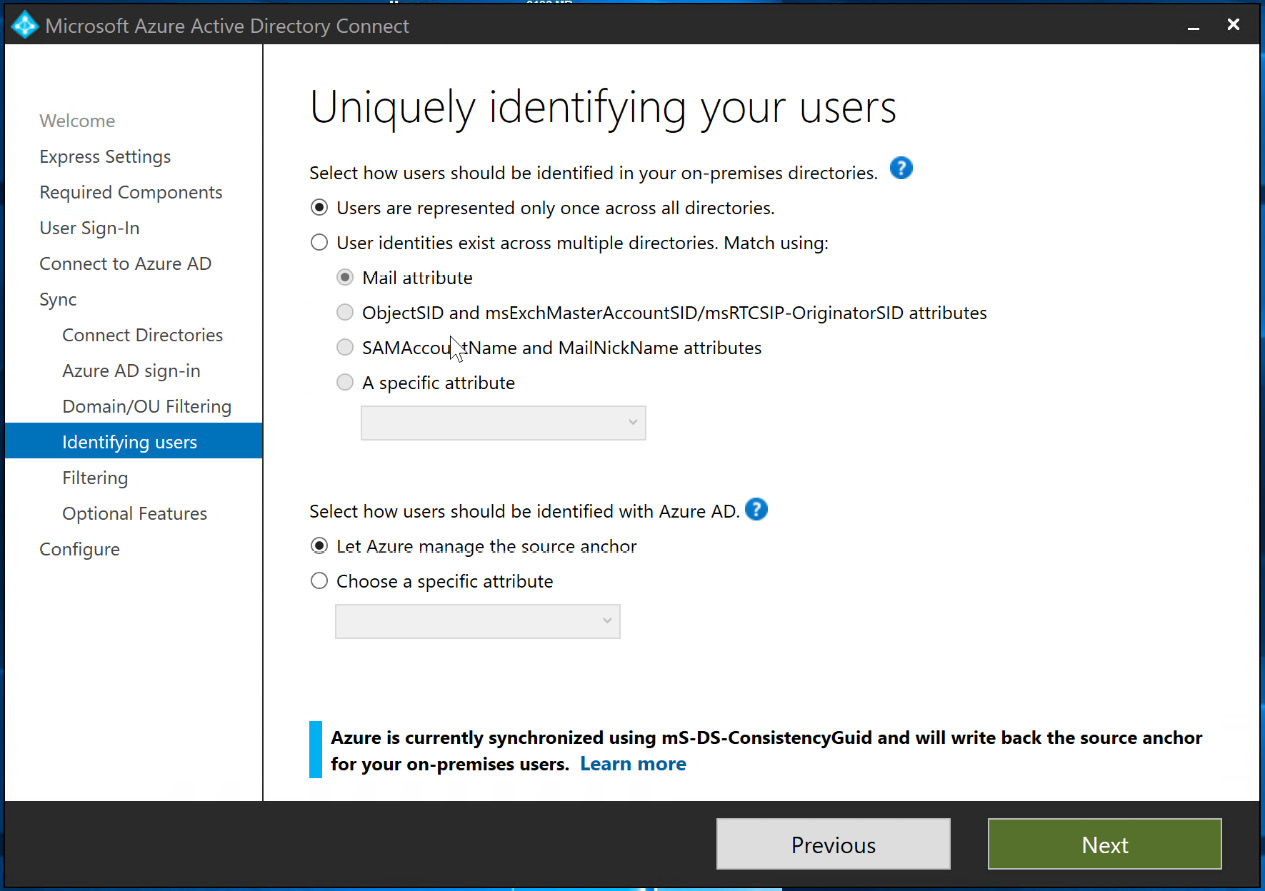
Figure 6.26 – Uniquely identifying your users
- In the Filtering blade, you can select certain users and devices to be synchronized. In the following example, we will select Synchronize all users and devices and select Next:
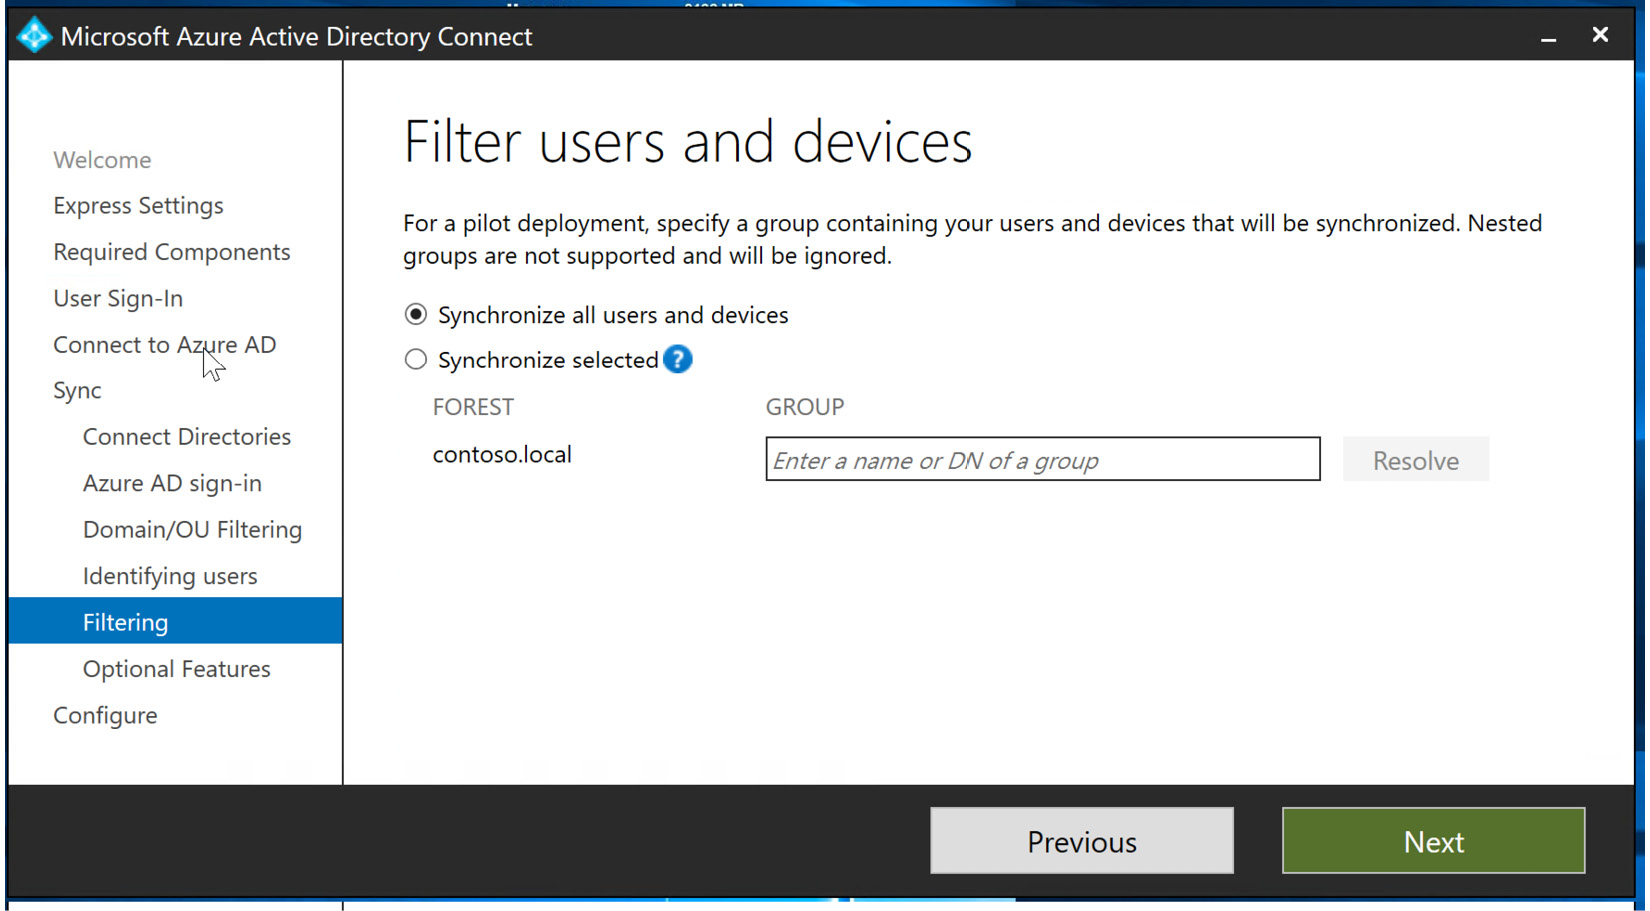
Figure 6.27 – Filtering users and devices
- The final blade in the customization settings is Optional Features. Some of the selections here are grayed out during the initial setup, but you do have an option to include Password hash synchronization, Directory extension attribute sync, Azure AD app and attribute filtering, and Password writeback. Password writeback is required to allow SSPR to be used within Azure AD. These options can be included by going back into Azure AD Connect after installation, so for this exercise, you will leave them unchecked and select Next, as illustrated in the following screenshot:
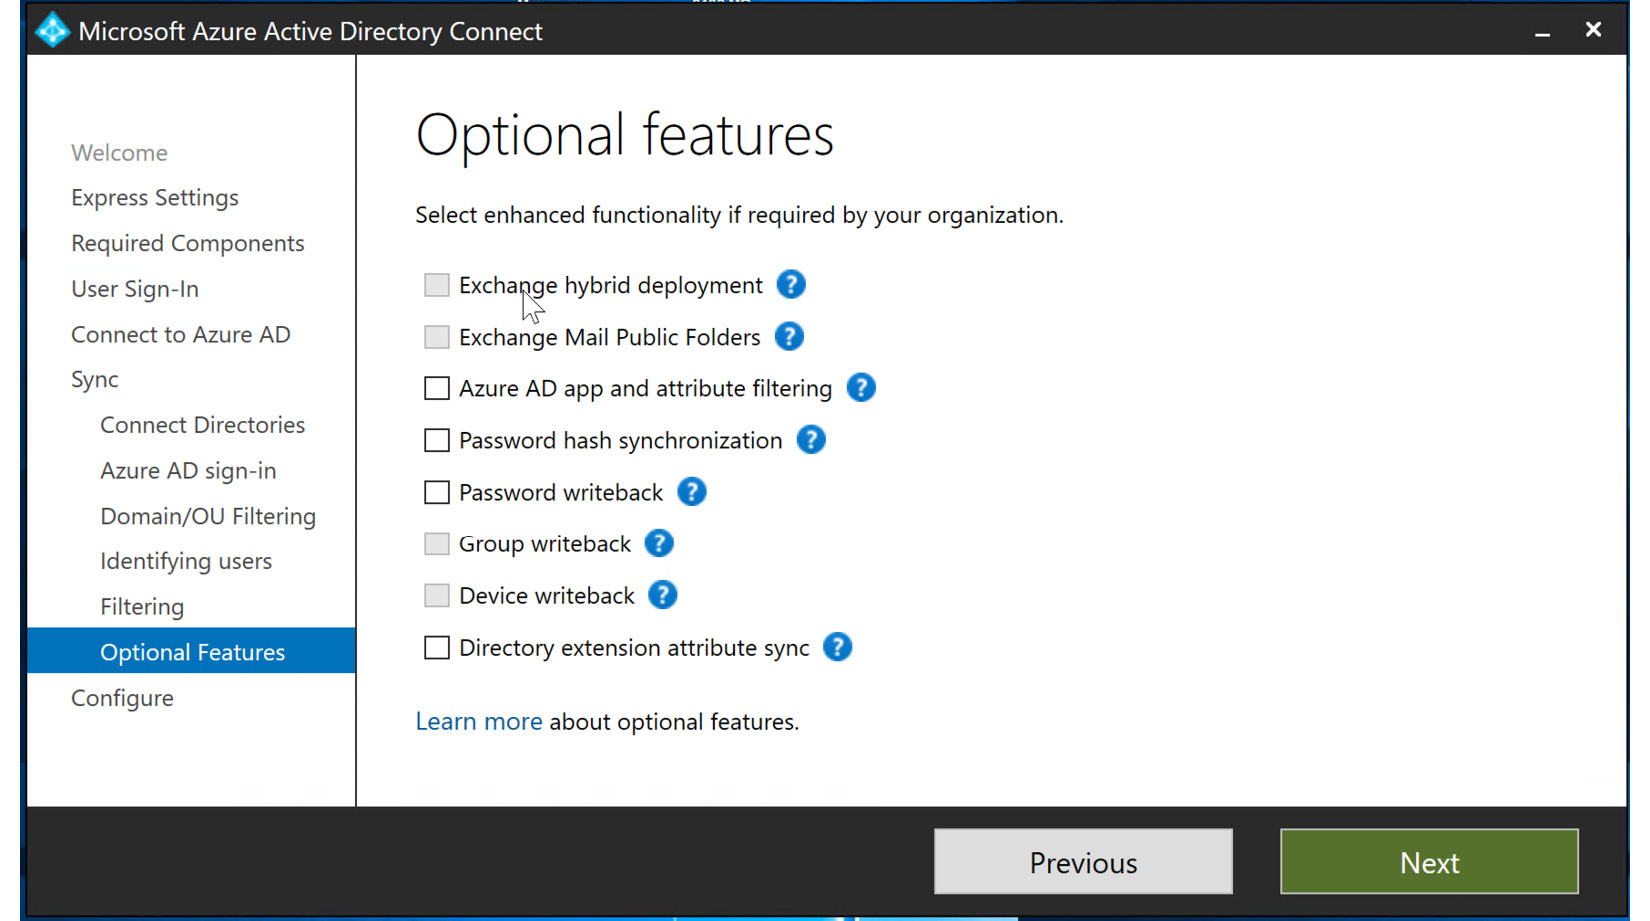
Figure 6.28 – Optional Features configuration
- The final blade shows the configuration settings that you have completed through this exercise. Select Install to complete the installation of Azure AD Connect with PTA, as illustrated in the following screenshot:
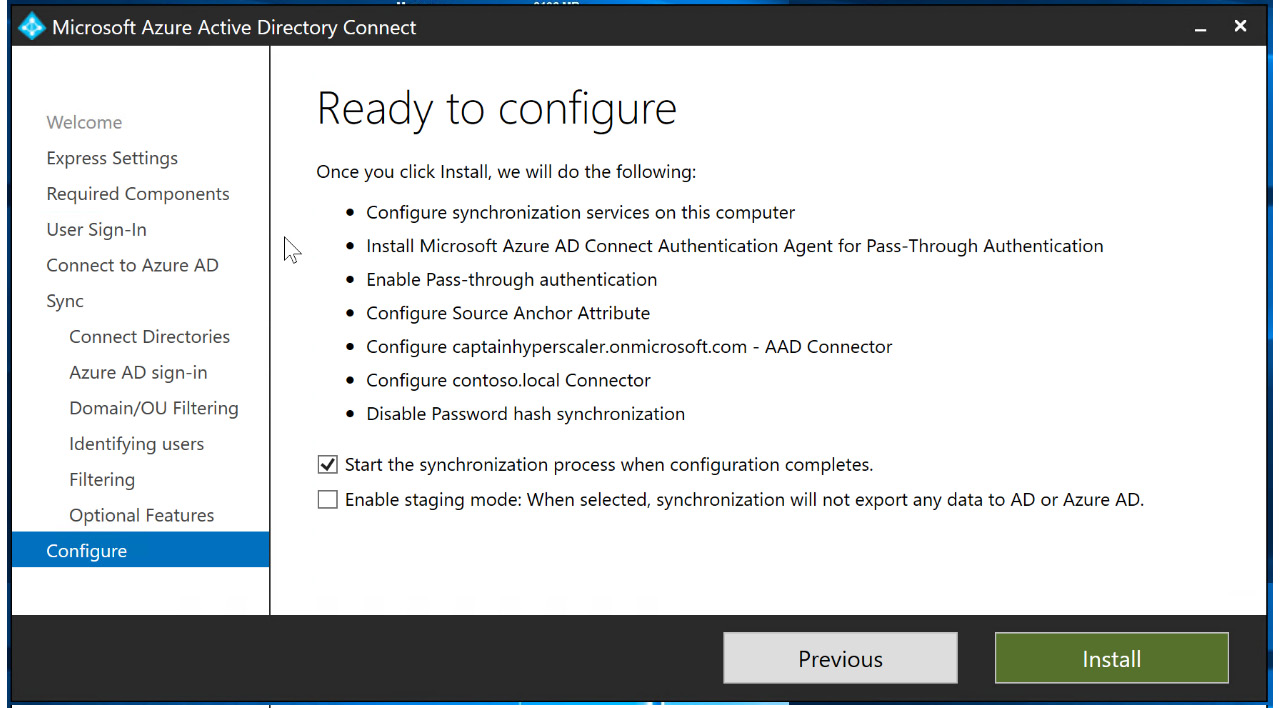
Figure 6.29 – Final configuration review and installation
- This will complete the installation of Azure AD Connect with PTA. One of the components that are installed on the AD domain controller server is a PTA agent. In order to have a resilient architecture, it is recommended that at least two of these PTA agents are installed on member servers in the on-premises infrastructure.
The third and final synchronization type within hybrid identity infrastructures is AD FS. The customization of Azure AD Connect would be initiated within the customized fields within the Azure AD Connect wizard. However, AD FS requires additional federated proxy servers, as shown in Figure 6.3 earlier in this chapter.
The next section will discuss how to implement and manage SSO within a hybrid identity infrastructure.
Implementing and managing seamless SSO
Seamless SSO provides users with a consistent sign-on experience, whether they are accessing cloud applications or on-premises applications. Within a hybrid identity through Azure AD Connect, this is configured based on the synchronization settings. PHS provides this experience when the users are synchronized since the passwords from on-premises environment are synchronized as a hash to Azure AD. PTA requires Password writeback to be enabled in the Optional Features blade. For additional security, Password hash synchronization can also be enabled with PTA. Once these configurations are in place, users can authenticate to their applications on-premises and within Azure AD with the same username and password.
In addition, many third-party cloud applications are registered and available within the Azure AD application marketplace. These applications can also be configured to use Azure AD credentials for SSO. The more applications your company uses that can be configured for Azure AD authentication, the better the experience for users. Chapter 10, Planning and Implementing Enterprise Apps for Single Sign-On (SSO), will cover the registration of applications within Azure AD in detail.
The next section will discuss Azure AD Connect Health and how it can be used to monitor the hybrid identity connection created with Azure AD Connect.
Implementing and managing Azure AD Connect Health
Azure AD Connect Health is used as a monitoring and management tool for Azure AD Connect. Azure AD Connect Health provides a heartbeat from the on-premises installation of Azure AD Connect to Azure AD. The information that is reported in Azure AD Connect Health includes successful and unsuccessful synchronizations and can also alert you as the identity and access administrator of a lost connection between Azure AD Connect and Azure AD. Azure AD Connect Health is not installed by default when installing Azure AD Connect, so you will need to install this application. The following steps will take you through the process and will show you where to access Azure AD Connect Health:
- Log in to the Azure AD portal and navigate to Azure AD Connect under Manage in Azure AD. Scroll down to see HEALTH AND ANALYTICS. Select the Azure AD Connect Health link in blue, as shown in the following screenshot:
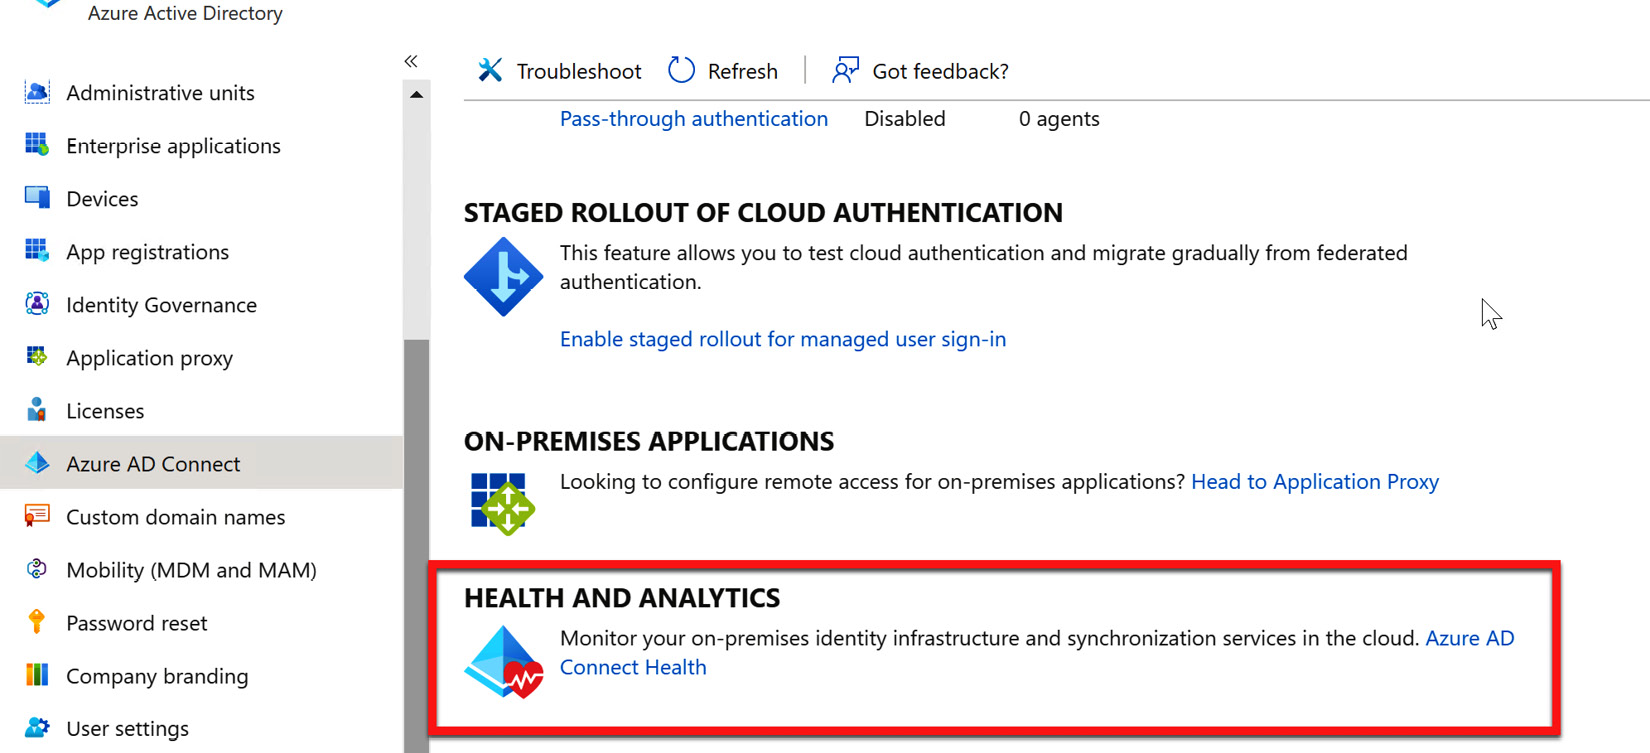
Figure 6.30 – Azure AD Connect Health link
- The Azure Active Directory Connect Health blade will open to the Quick start section. If you have used PHS or PTA, you will choose Download Azure AD Connect Health Agent for AD DS, as shown in the following screenshot. Note that there is a separate download for AD FS infrastructures:
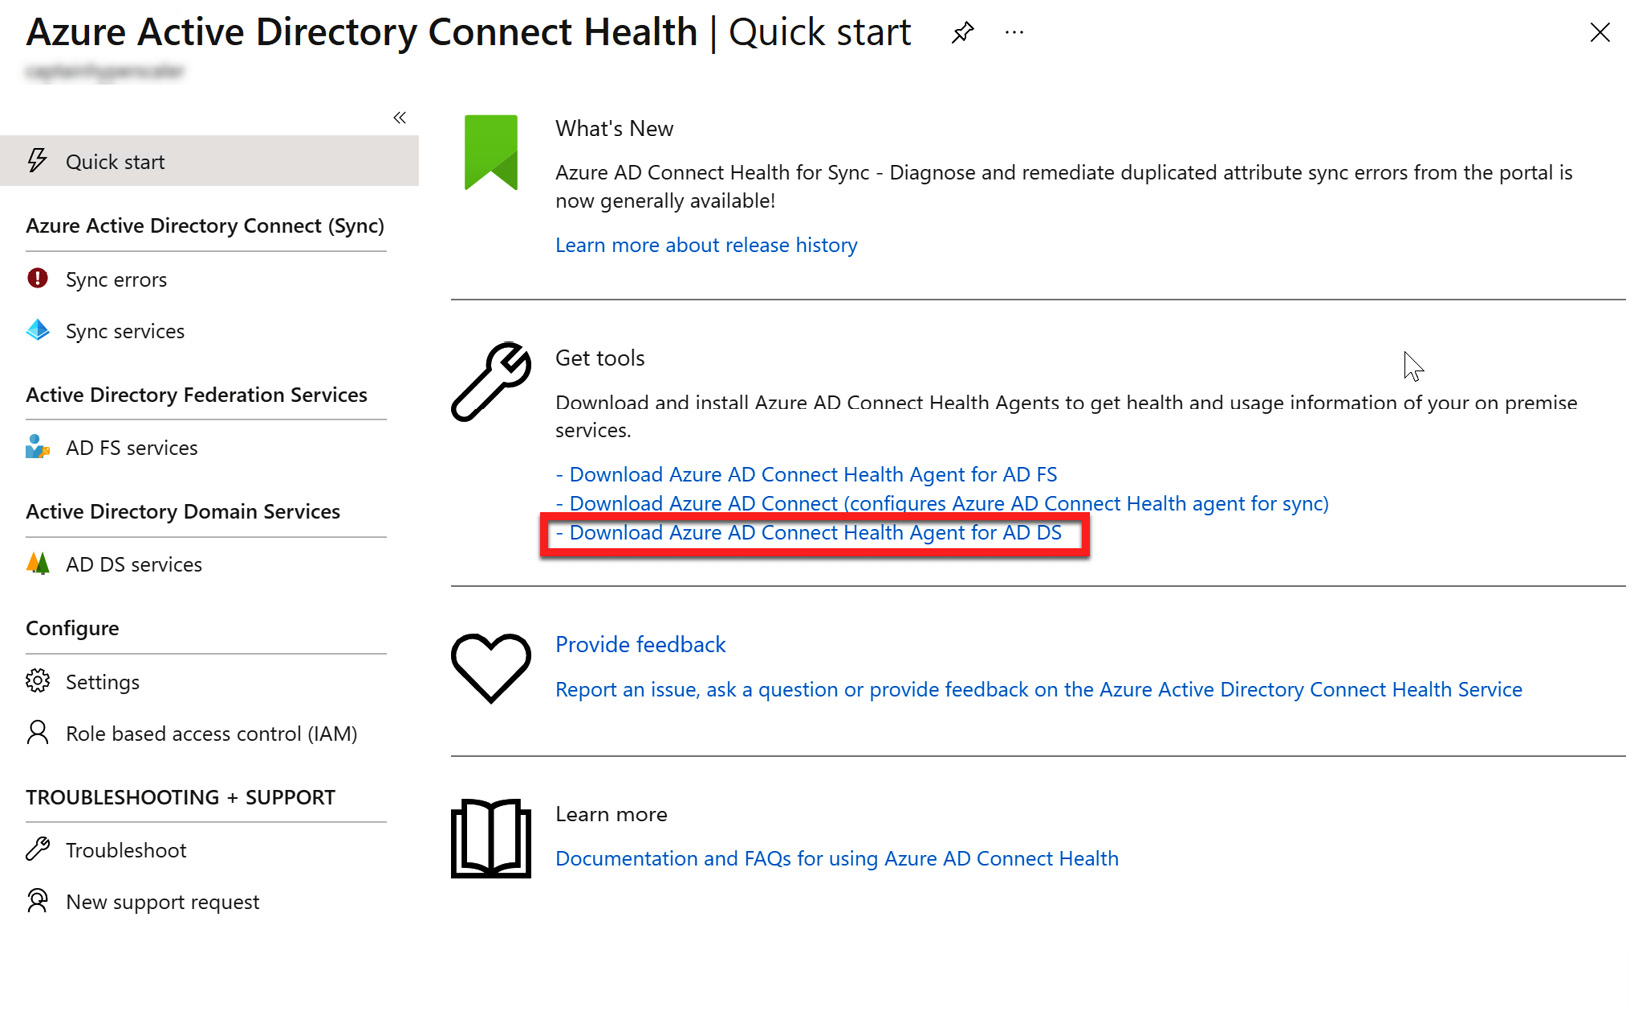
Figure 6.31 – Azure AD Connect Health Agent download
- After the file downloads, navigate to the folder and select the file to install the agent, as illustrated in the following screenshot:
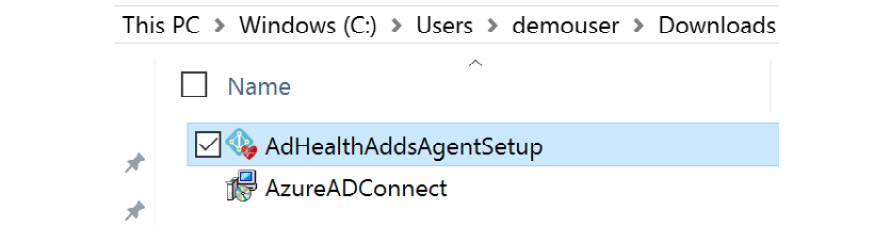
Figure 6.32 – Azure AD Connect Health Agent install file
- When the installation runs, you will be prompted for some prerequisites. Select Next and the agent will install. The installation will prompt a configuration that will run a PowerShell script and ask you to log in to the Azure AD account with the global administrator credentials. Within the PowerShell window, you will be provided with notification of a successful agent installation, as illustrated in the following screenshot:
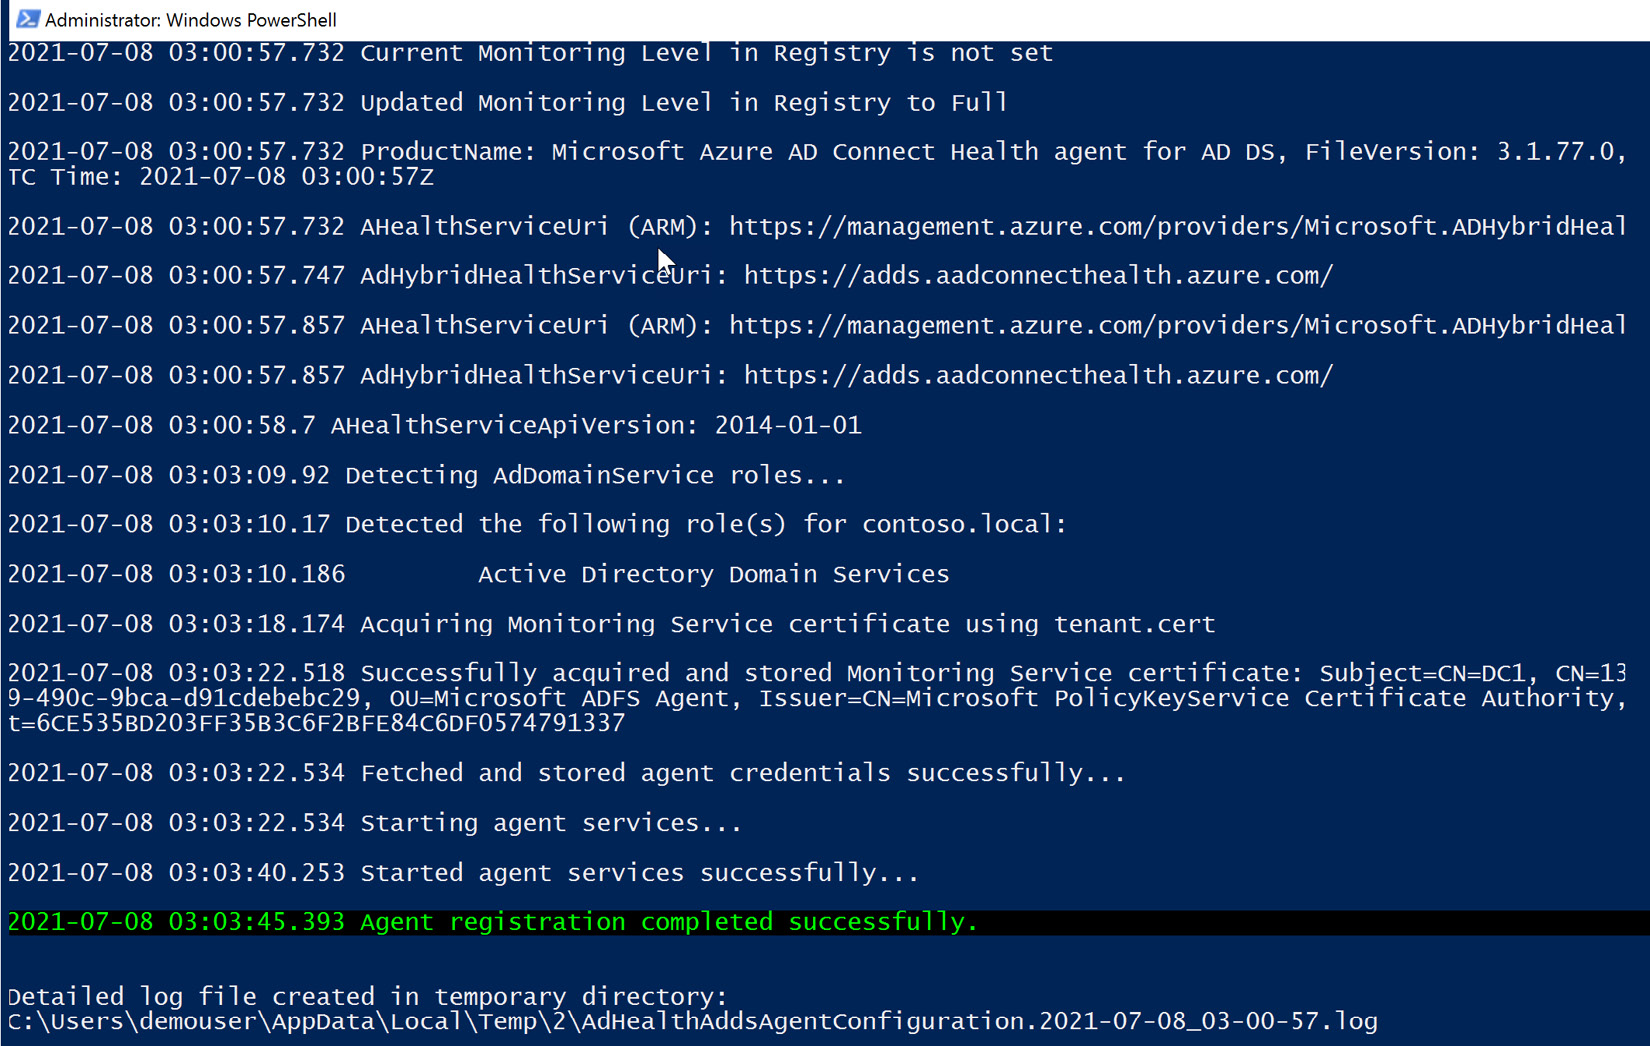
Figure 6.33 – Azure AD Connect Health Agent installation complete and registered
- After the agent has been installed and registered, you can view the status of the sync services in Azure Active Directory Connect Health, as shown in the following screenshot:
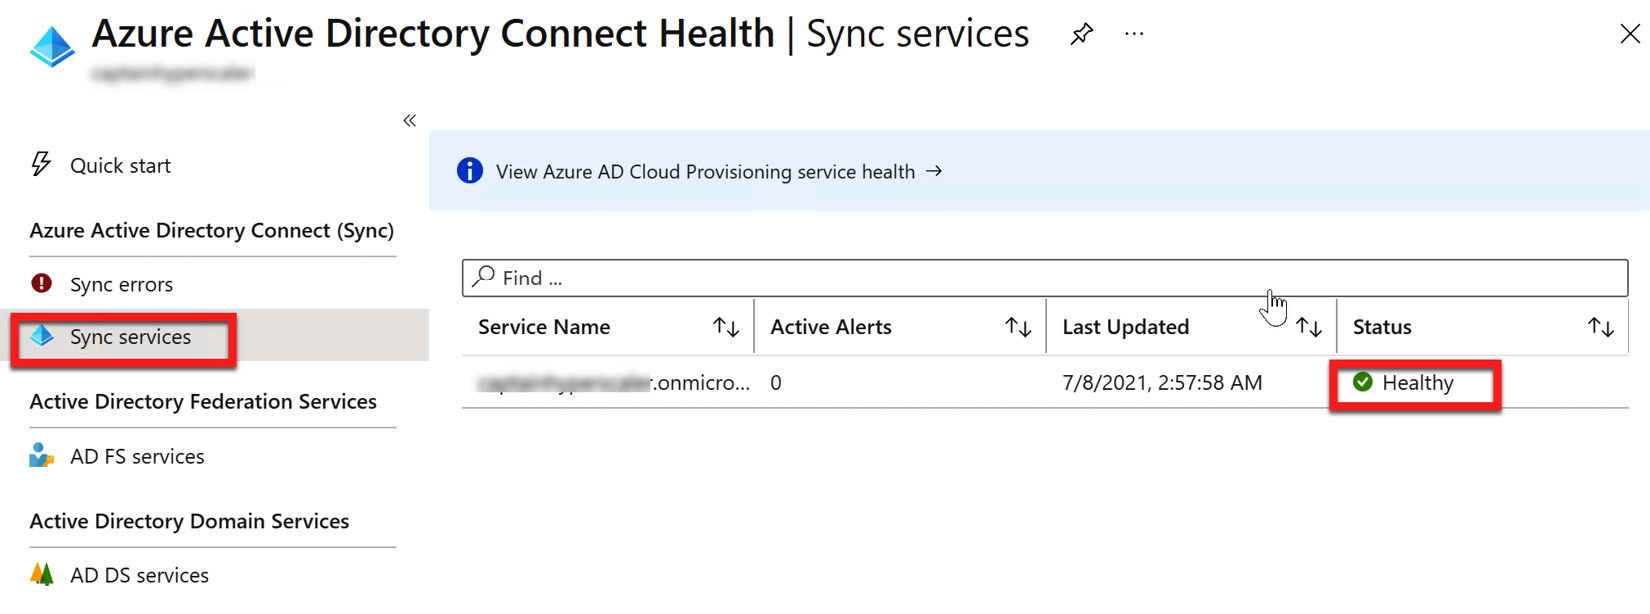
Figure 6.34 – Azure AD Connect Health Agent sync services' status
- You can also see the status of the on-premises AD DS services, as shown in the following screenshot:
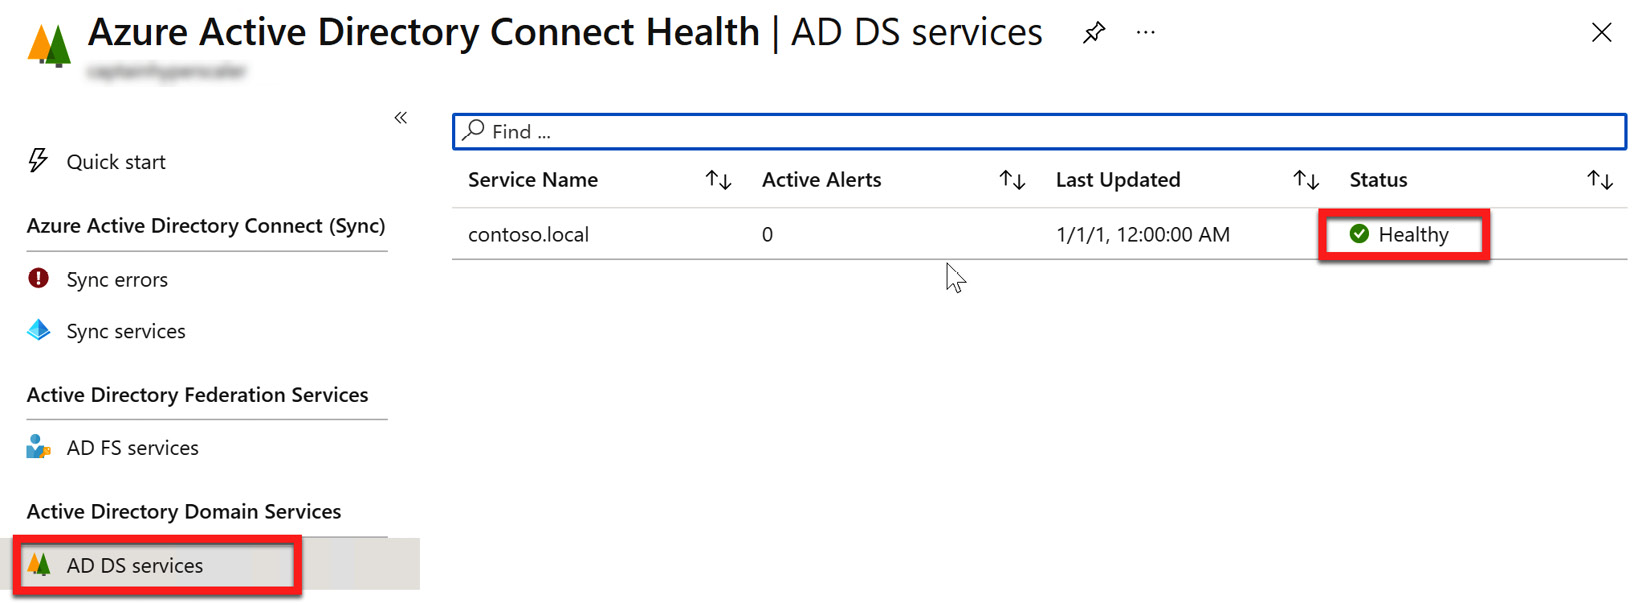
Figure 6.35 – Azure AD Connect Health Agent AD DS services' status
Azure AD Connect Health is now connected and registered within Azure AD. You can now view the health status of the services and determine if any synchronization errors are taking place with the Azure AD Connect services configured in the infrastructure. The final section of this chapter will discuss how to find and troubleshoot errors with Azure AD Connect Health.
Troubleshooting sync errors
The final part of the implementation and management of a hybrid identity infrastructure is how to identify and troubleshoot errors. Azure AD Connect Health provides the platform and heartbeat that is used by Azure AD Connect to verify that the connection and synchronization between the on-premises AD and Azure AD are completing successfully. However, connections are lost and errors happen within every network infrastructure. Azure AD Connect Health can help provide information to troubleshoot and diagnose these synchronization errors.
In the previous section, Figure 6.34 and Figure 6.35 showed how to view the health of the sync services and AD DS. Above the sync services' health on the menu is where you can view sync service errors. Further down the menu, you will find the Troubleshoot section, as shown in the following screenshot:
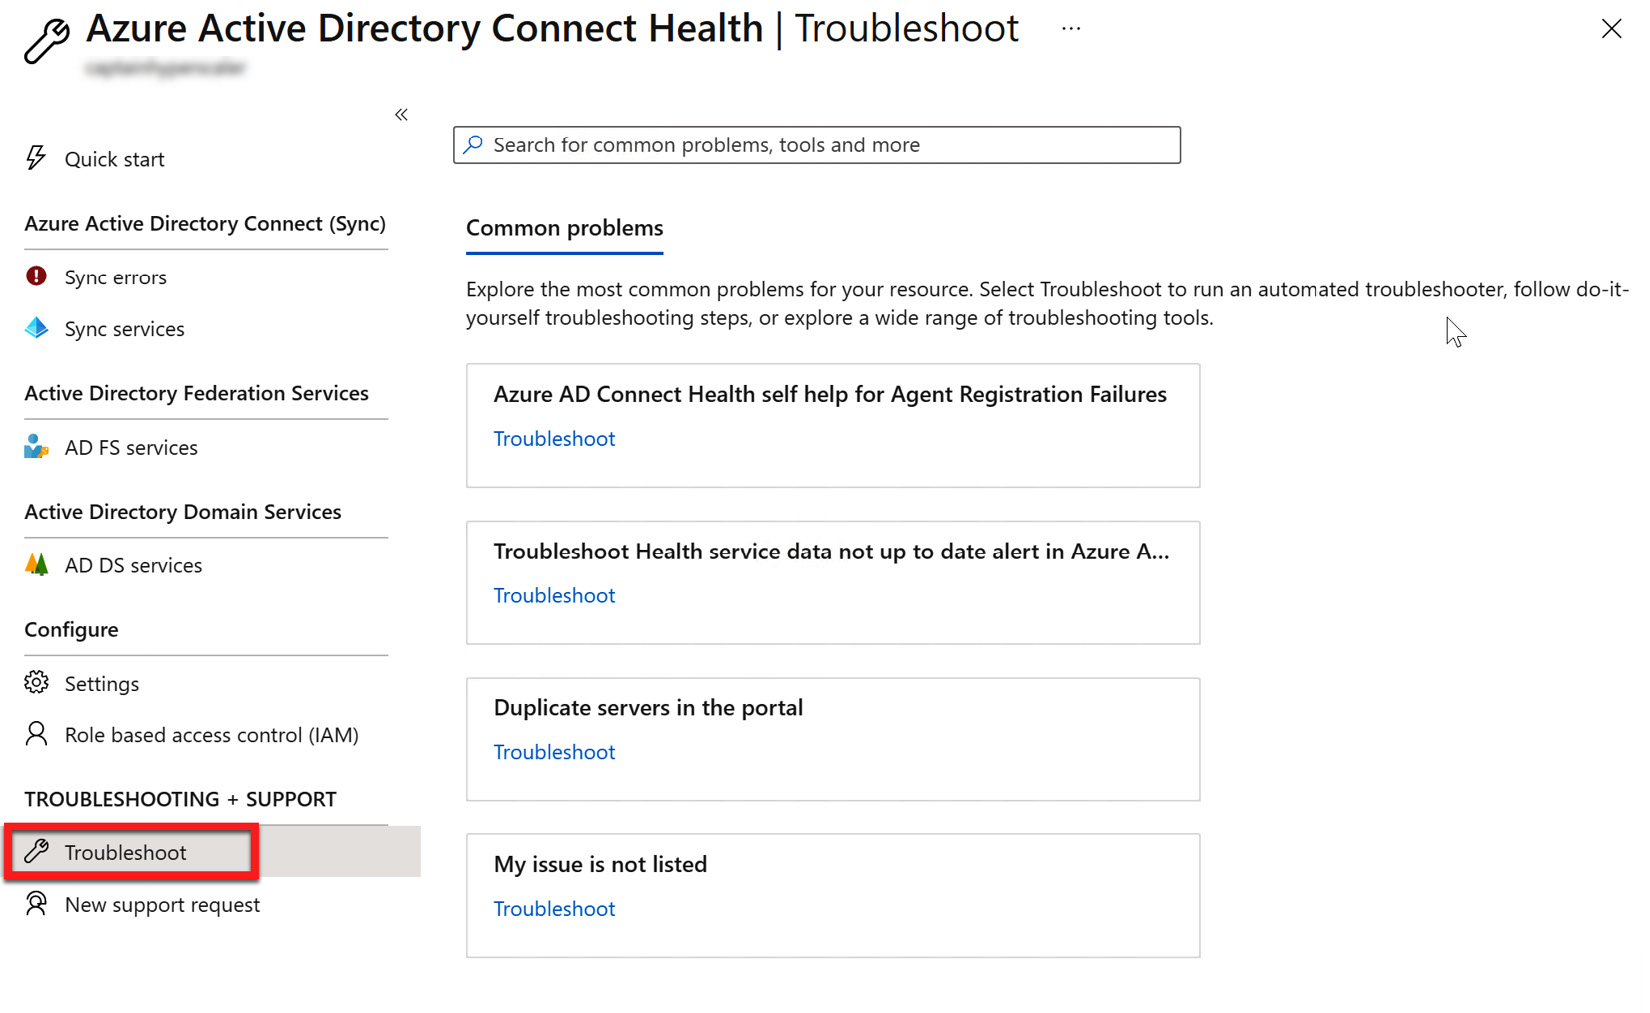
Figure 6.36 – Troubleshooting common problems
Within the TROUBLESHOOTING + SUPPORT menu, the Troubleshoot blade provides some common problems that might arise and documentation on how to correct the issue. If this documentation does not help, you can use the New support request blade to open a support ticket with Microsoft.
Synchronization status can also be viewed on the Azure AD Connect installed on-premises server, which is the AD domain controller, as installed during the chapter exercise, by going to Synchronization Services Manager. This is shown in the following screenshot:
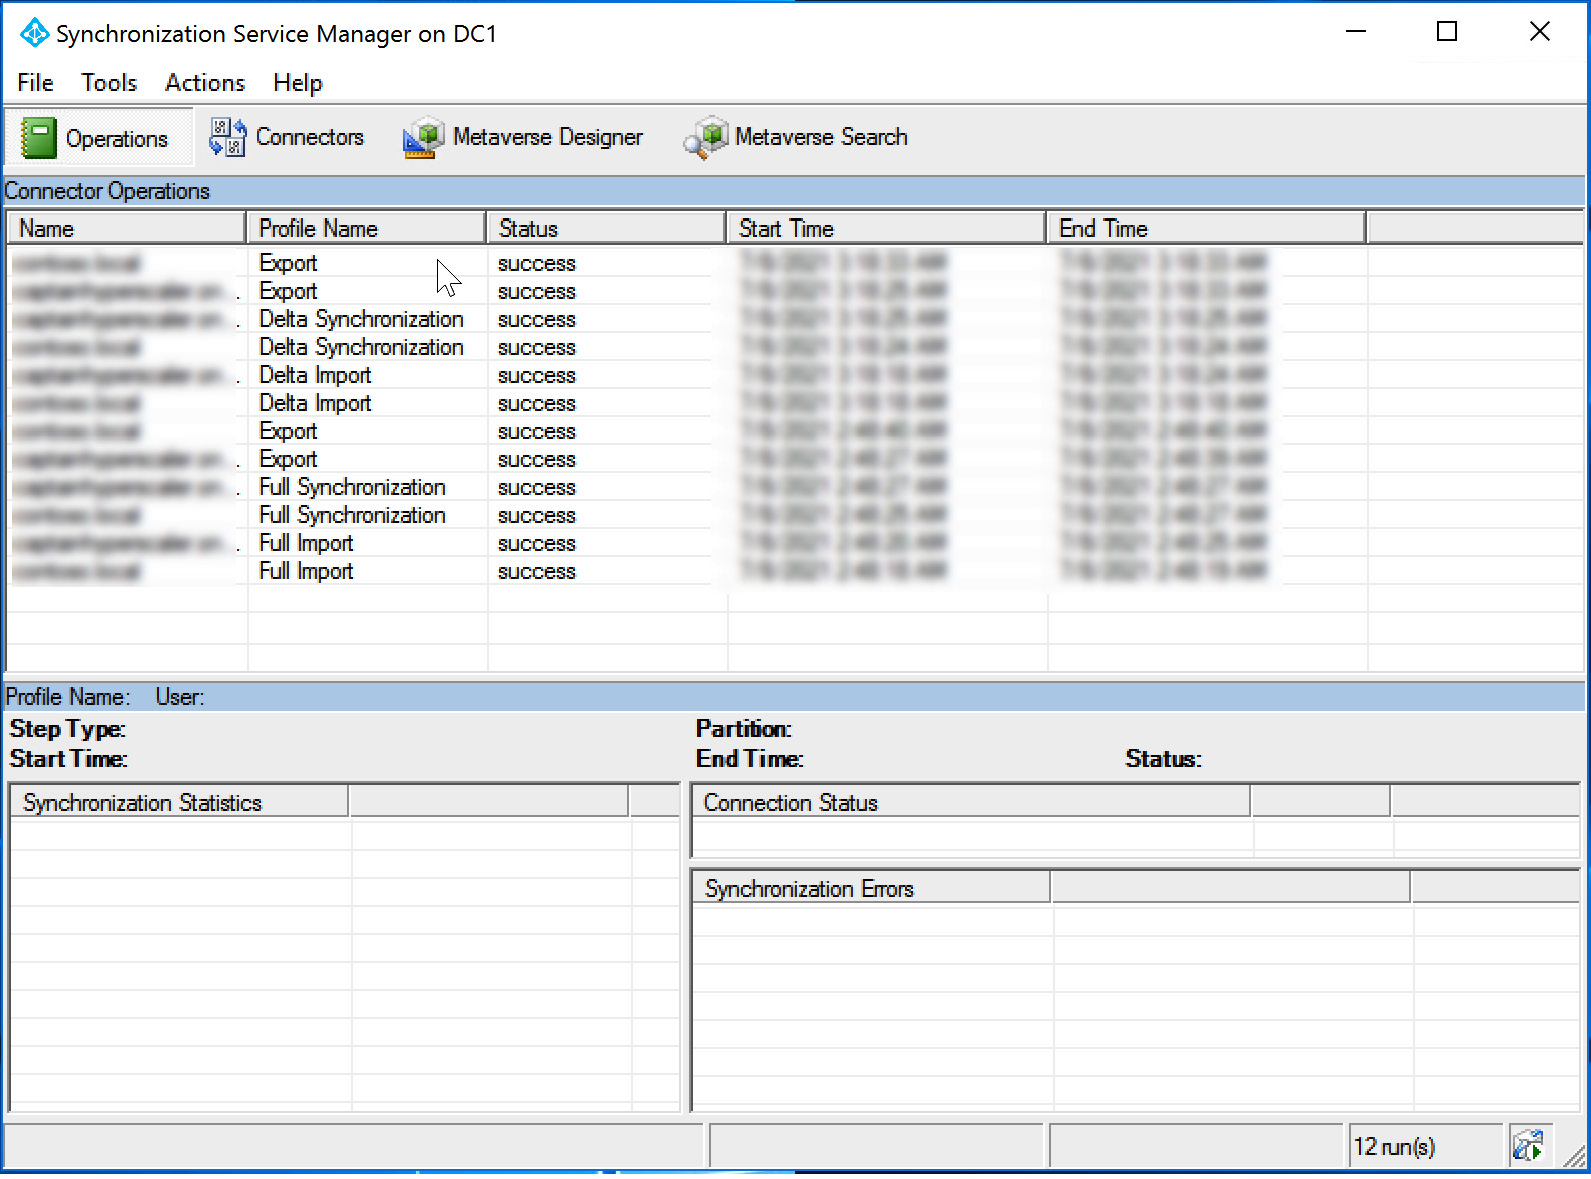
Figure 6.37 – Synchronization Service Manager
This section has shown you how to view and find steps to troubleshoot synchronization issues with Azure AD Connect.
Summary
In this chapter, we described how to configure, manage, and monitor hybrid identities utilizing Azure AD and on-premises AD DS. This included how to configure Azure AD Connect synchronization types, set up SSO, install Azure AD Connect Health, and monitor and troubleshoot synchronization status. The next chapter will discuss securing identities with MFA and providing SSPR for users and groups.