
5
Test Automation for Web
Test automation for modern web applications poses tough questions for quality engineers regularly, and there has been significant progress in terms of the tools and support in recent years. The test automation market is ripe with tools to aid engineers in setting up and executing efficient test scripts. Some notable tools include Protractor, Cypress, and WebdriverIO. The development of these tools with all their innovative capabilities is strong evidence of the evolution in the quality engineering space, primarily to address modern web automation demands. In this chapter, let us dive deep into automating a web application using Cypress and learn the nitty-gritty aspects of the tool.
Here are the main topics we will be looking at in this chapter:
- Why Cypress?
- Installing and setting up Cypress
- Creating your first test in Cypress
- Employing selectors and assertions
- Intercepting API calls
- Additional configurations
- Considerations for web automation
Technical requirements
In this chapter, we will continue using Node.js (version 16.14.2), which we installed in Chapter 4, Getting Started with the Basics. We will also be using node package manager (npm) to install Cypress version 11.2.0. All the code examples illustrated in this chapter can be found under the ch5 folder at https://github.com/PacktPublishing/B19046_Test-Automation-Engineering-Handbook/tree/main/src/ch5.
Why Cypress?
Cypress is a next-generation frontend test automation tool built for automating both legacy and modern web applications. It also comes loaded with additional power to perform in-depth component testing, mocking and stubbing API calls, and more. Our focus in this chapter will remain on exploring its end-to-end (E2E) testing abilities. Cypress has grown versatile in the space of web test automation as it comes packed with many handy tools that might need additional manual integration efforts when using some of the other tools in the market. Rather than limiting itself as a browser automation tool, Cypress comes as a comprehensive E2E testing framework to validate both backend and frontend logic. It has a similar configuration for every frontend framework, thereby making the setup easy and portable. It also has tremendous performance gains when compared with the test runtimes of other commonly used E2E test frameworks.
Several continuous integration (CI) services such as CircleCI, GitHub Actions, and more have specific modules that offer seamless integration with Cypress. Cypress also supports SDKs to scale the test execution across platforms on the cloud. There are also options to extend the behavior of Cypress using innumerable plugins, available at https://docs.cypress.io/plugins/index. Cypress thus brings enormous simplicity for its users in testing modern web applications, and in doing so, boosts their productivity.
To start learning Cypress, you should be aware of advanced software testing concepts. It is absolutely vital to possess reasonable experience working with JavaScript. It is recommended to go through the Introduction to JavaScript section from Chapter 4 of this book to understand the basics. It would also help to have a good understanding of object-oriented programming (OOP) to assist with creating a robust test automation framework using Cypress. Knowing all that Cypress has to offer and more, it is a wonderful time to dive into the installation and setup of Cypress.
Installing and setting up Cypress
Let us now run through a detailed step-by-step installation and setup process for Cypress:
- In Chapter 4, we installed Node.js, which is a runtime environment for JavaScript. Node.js installation comes with a default and extremely useful package manager called npm. Figure 5.1 shows how to check the version of npm installed on your machine:
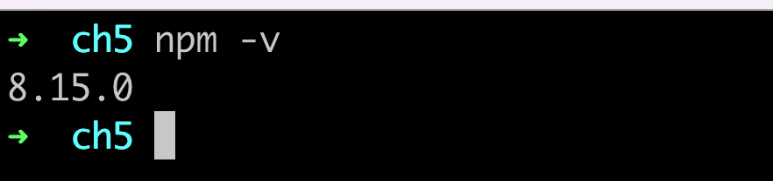
Figure 5.1 – Checking the installed npm version
- Let us next create an empty project to install Cypress and further explore its features. Run npm init –y in an empty folder (preferably named app) in your local directory to create a package.json file. Figure 5.2 shows the corresponding output with the contents of the file:
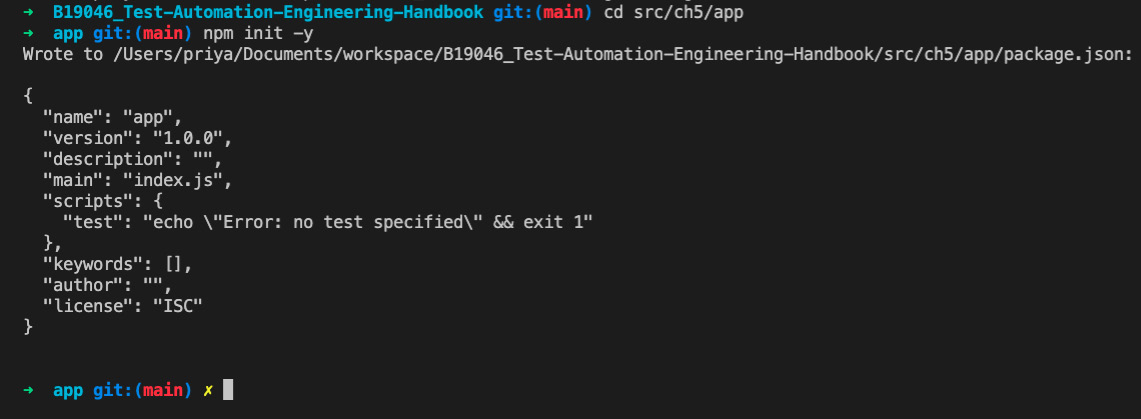
Figure 5.2 – npm init
Note
npm init <initializer> is used to set up new or existing packages. If <initializer> is omitted, it will create a package.json file with fields based on the existing dependencies in the project. The –y flag is used to skip the questionnaire.
package.json is the primary configuration file for npm and can be found in the root directory of the project. It helps to run your application and handle all the dependencies.
- Execute npm install cypress in the root of our src/ch5/app project. This creates a node_modules folder, which contains a chain of dependencies required by the package being installed (Cypress). Figure 5.3 shows the output of this step, with package.json showing Cypress installed. It is generally considered good practice to save the testing libraries in the devDependencies section of the package.json file using the npm install cypress --save-dev command:
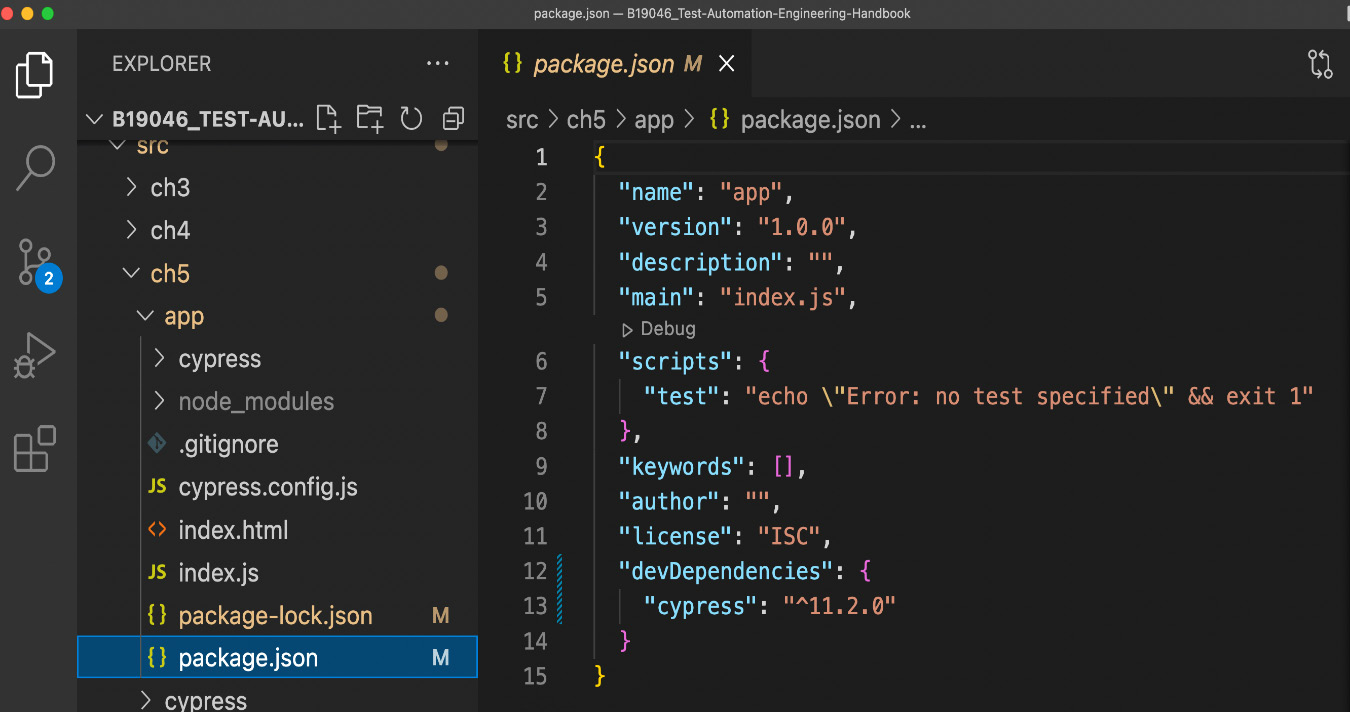
Figure 5.3 – npm install cypress
- Create an index.html file in the root, as shown in Figure 5.4, to serve as the primary loading page for our application. Also, create an empty index.js file:

Figure 5.4 – Creating an index.html file
- Execute npx cypress open to open Cypress. This command opens the executable file from the node_modules/bin directory. Figure 5.5 illustrates the output where the in-built browser is opened:
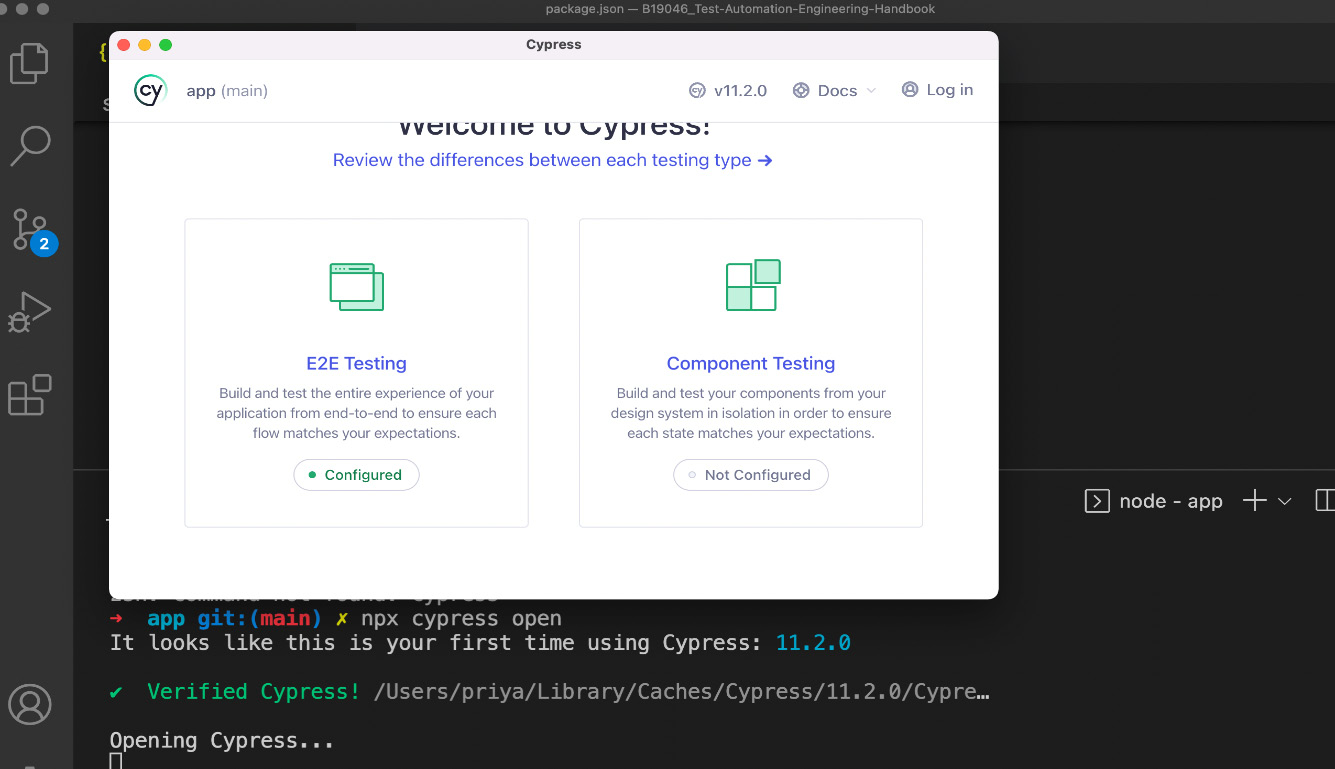
Figure 5.5 – npx cypress open command
- Now, click on the E2E Testing option, which adds some configuration files to the repository, and hit Continue in the next modal, as shown in Figure 5.6:

Figure 5.6 – Cypress config modal
- In the next modal, select the preferred browser for E2E testing. I have selected Chrome in this case, as shown in Figure 5.7, and it opens the browser in a new window:
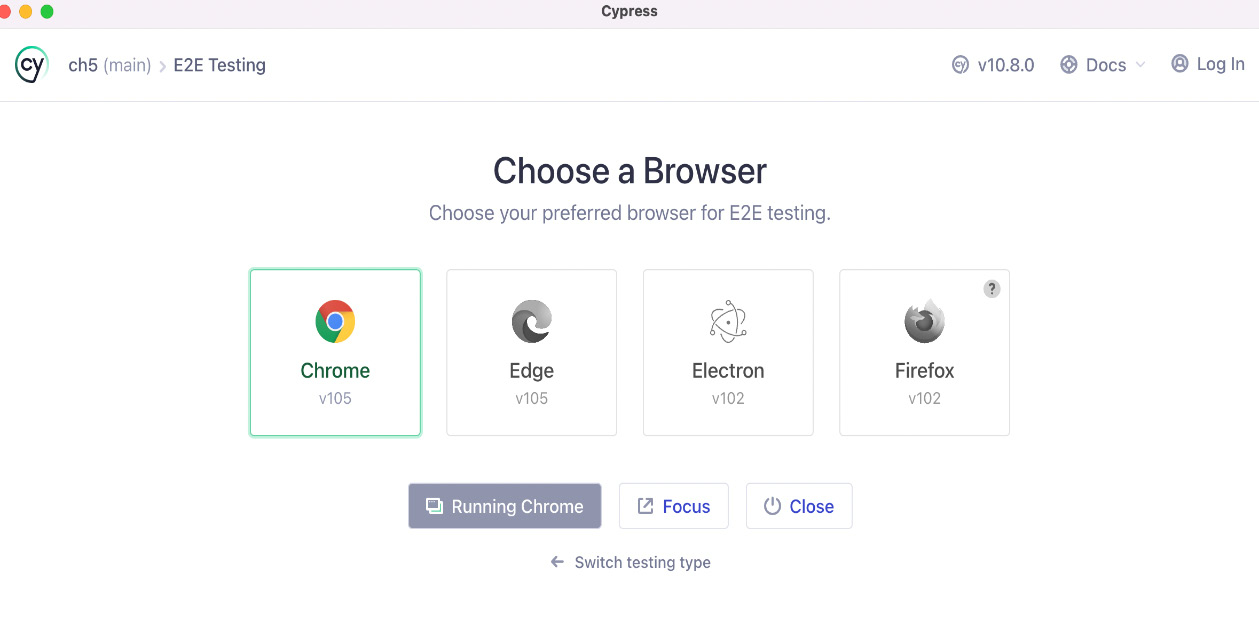
Figure 5.7 – Choosing a preferred browser
This completes the installation of Cypress and gets it ready to a point where we can start writing our own tests. In the next section, let us start working on our first test and review some additional configurations.
Creating your first test in Cypress
A test in Cypress is commonly referred to as a spec, which stands for specification. We will be referring to them as specs for the remainder of this chapter. Let us begin by understanding how to write arrow functions and callback functions in JavaScript.
Creating arrow functions in JavaScript
Arrow functions are extremely handy, and they clean things up quite a bit. They were introduced in the ECMAScript 6 (ES6) version. The code snippet in Figure 5.8 shows a simple function to add two numbers. It takes two parameters and returns the sum. Let us turn this into an arrow function:
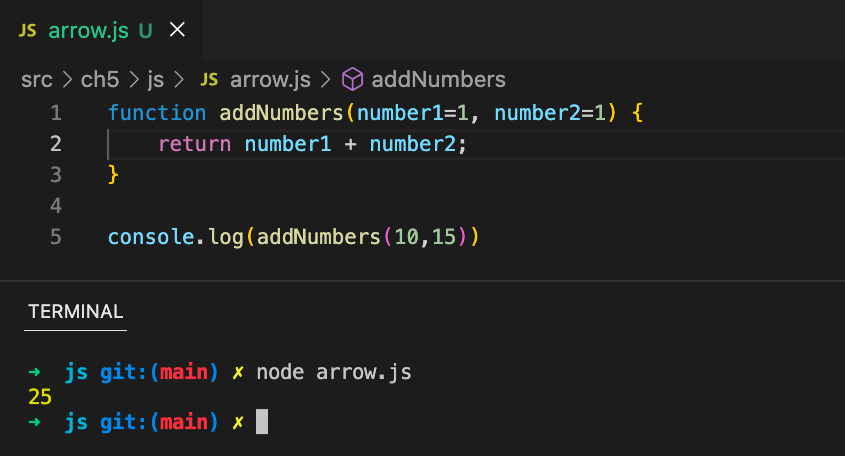
Figure 5.8 – Function to add two numbers
Instead of using the function keyword, we name it like a variable and use an equals sign to assign it to the body of the function. After the parameters, we use a symbol called fat arrow (=>). In the case of one-liner functions, we can further simplify them by removing the curly braces surrounding the function body. We could also remove the return keyword, and it still returns the computed value. If we have only one parameter, we could lose the parentheses around the parameters as well. It would look like this: const addNumbers = number1 => number1 + 5. An example is shown in Figure 5.9. This works very neatly in the case of array iterations. Let’s say we have an array of movies, and we would like to iterate over them and print the names of all the movies. This can be neatly done in a single line by using movies.forEach(movie) => console.log(movie, name) arrow functions:
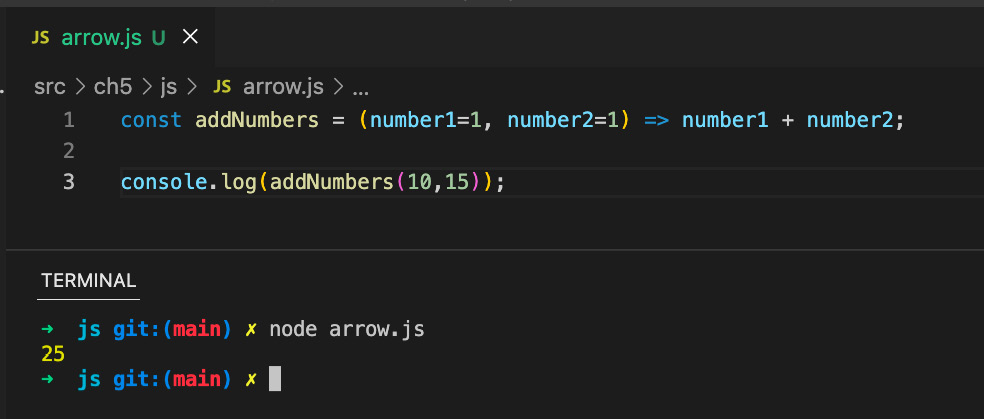
Figure 5.9 – Arrow function with two parameters
Let us next learn about callback functions in JavaScript.
Creating callback functions in JavaScript
In JavaScript, since functions are set up as objects. we can pass and call other functions within a function. A function that is passed as a parameter to another function is called a callback function.
Let us use the setTimeout() function to understand callback functions. The setTimeout() function calls a method after a specified wait in milliseconds. For example, setTimeout(() => console.log('hello!'), 5000) would print the message after a wait of 5 seconds. Let us now create an arrow function to accept and print a message to the console, as shown in Figure 5.10. Let us call this function printMessage(), with a delay of 5 seconds by passing it as a parameter to the setTimeout() function, making it a callback function:
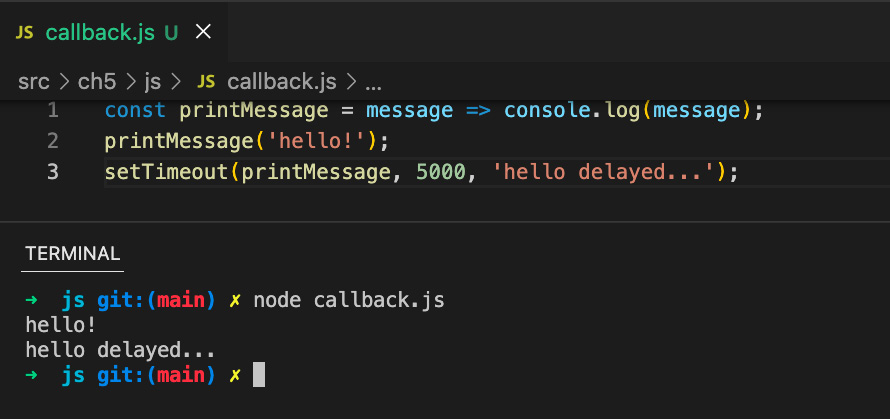
Figure 5.10 – Callback functions
We could also pass in the whole body of the arrow function instead of the name, as shown in Figure 5.11. These are called anonymous functions since they do not have a name and are declared at runtime:
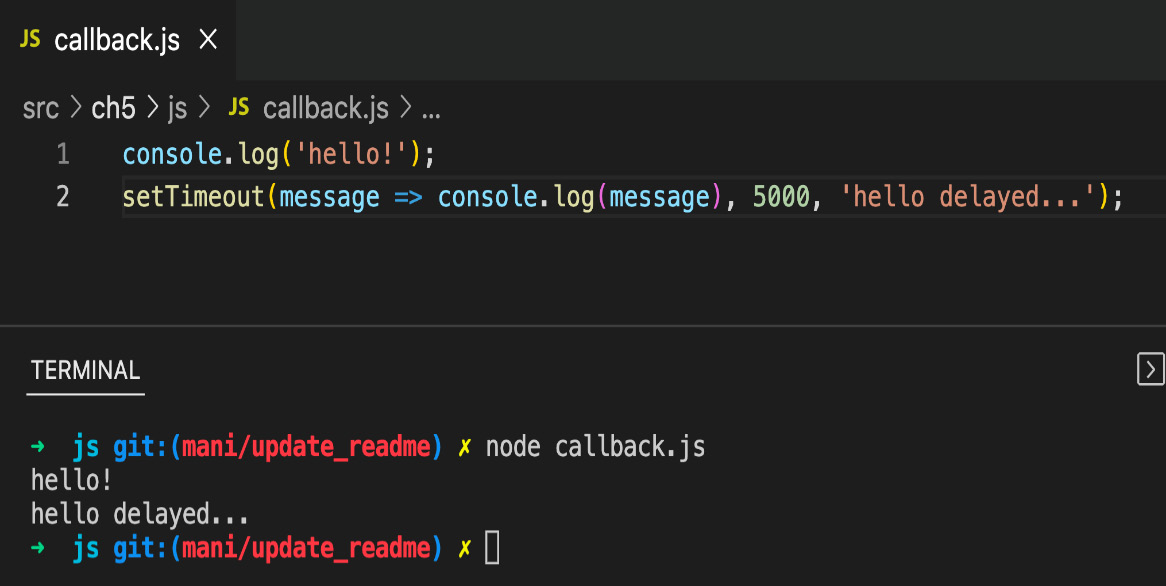
Figure 5.11 – Anonymous callback functions
A key advantage of using callback functions is that it enables the timing of function calls and assists in writing and testing asynchronous JavaScript code. There are many instances in the modern web application where there is a need to make external API calls and resume the current task rather than wait for the external call to complete. Callback functions come in handy here to unblock the execution of the main block of code. It is important to use callbacks only when there is a need to bind your function call to something potentially blocking, to facilitate asynchronous code execution.
With this additional knowledge about functions in JavaScript, let us now commence writing our first spec.
Writing our first spec
It is a good practice to organize all tests under a single folder in your repository. If there are more tests, then they can be categorized under a parent test folder. Create a folder named e2e under src/ch5/app/cypress. Now, create a test file, as shown in Figure 5.12:
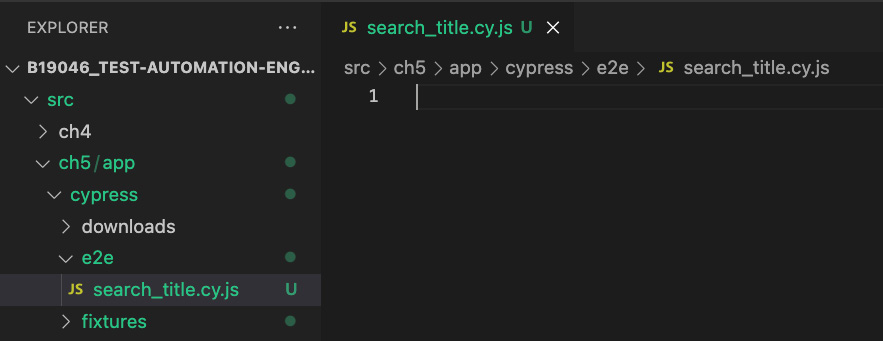
Figure 5.12 – Creating a test file
Our first test searches for the string quality in the search box on the home page of https://www.packtpub.com/. Then, it verifies the search result page by looking for the Filter Results string. Copy and paste the code from the https://github.com/PacktPublishing/B19046_Test-Automation-Engineering-Handbook/blob/main/src/ch5/app/cypress/e2e/search_title.cy.js GitHub link into the test file.
Let us now examine the structure of a Cypress spec.
Becoming familiar with the spec structure
Every test framework requires its tests to be written in a specific language and format. Cypress is no different, and as we already know, it uses JavaScript. Cypress comes packed with its own set of functions under the global cy object. It also utilizes the describe-it-expect format using bundled libraries from Mocha and Chai frameworks. Additionally, an assertions framework using expect with command chaining is also supported to complete granular validations. The describe block captures the high-level purpose of the spec, and the it block adds specific implementation details of the test. Note that both the describe and it blocks accept callback functions as their second parameter, and they are defined as arrow functions. This is a common syntax, and you will see this more often in modern JavaScript code. Please be wary of braces, semicolons, and parentheses. It is recommended to use an extension such as Prettier to assist with the formatting as it could get messy pretty quickly.
We have started with a comment that describes what is being achieved in this spec. Cypress internally uses the TypeScript compiler, and the reference tag is used to equip autocompletion with only Cypress definitions. The beforeEach block, as the name suggests, runs before every it block. It usually contains the prerequisite steps to execute the individual it blocks. Here, we use the visit command to access the Packt Publishing website within the beforeEach block. Then, the it block drills down to which action is performed in the spec. If we end up adding more it blocks to this spec, the visit command would be executed before the beginning of each it block. This is a simple spec but it captures the necessary structure of a spec written in Cypress.
Next, let us examine how to execute our first spec.
Executing our first spec
Cypress comes packed with a powerful visual runner tool to assist in test execution. This can be used when users have a need to inspect tests visually during runtime. Another option is to execute tests via the CLI for quicker results and minimal test execution logs. In this section, we will survey both ways to execute tests in Cypress.
Using the command line
Using the command line to execute tests is always a quick and easy option. It usually helps when you are not interested in looking at the frontend aspects of the test execution. The npx cypress run -s cypress/e2e/search_title.cy.js command can be used to execute an individual spec in Cypress. The –s flag stands for spec, followed by the name of the file. Without the –s flag, the npx cypress run command would execute all the specs found in the current project. Figures 5.13 and 5.14 illustrate the output of the command-line execution of our first spec. Figure 5.13 shows the output of the CLI, with a listing of actions performed on the UI:
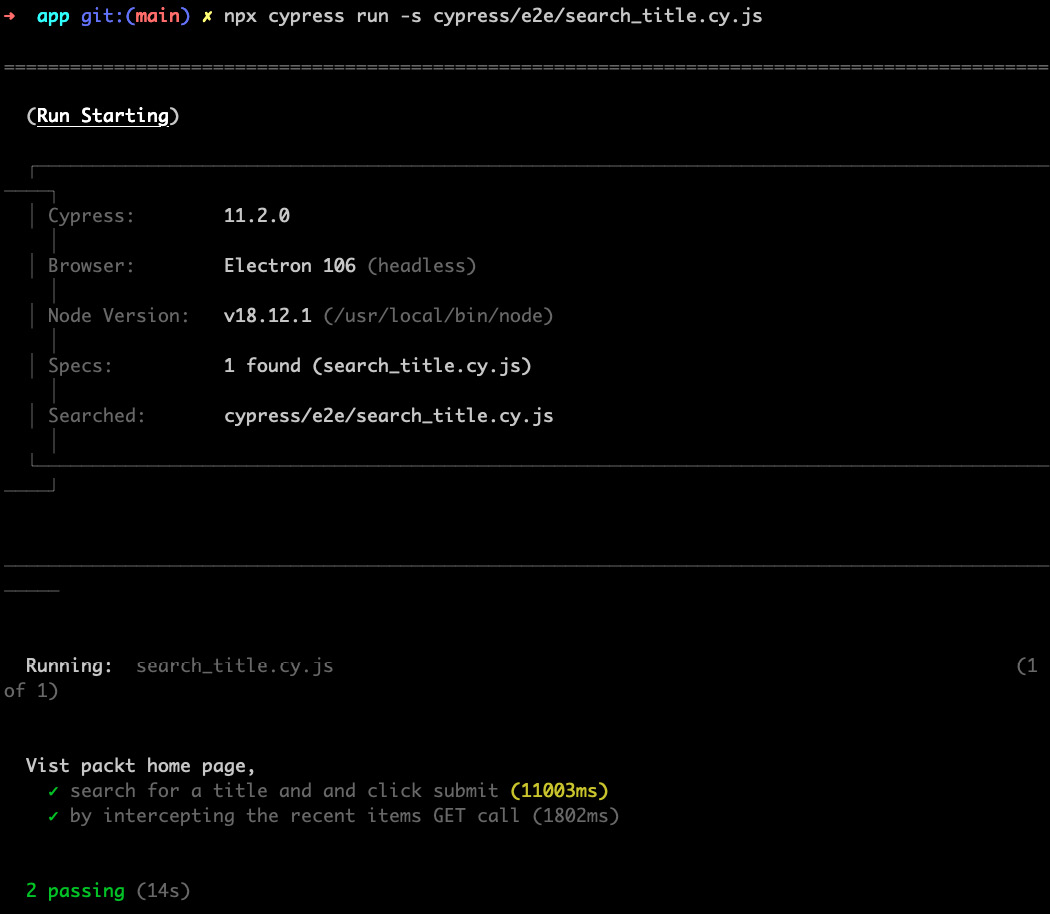
Figure 5.13 – CLI test execution
Figure 5.14 shows a summary of the tests executed, with a breakdown of the results:
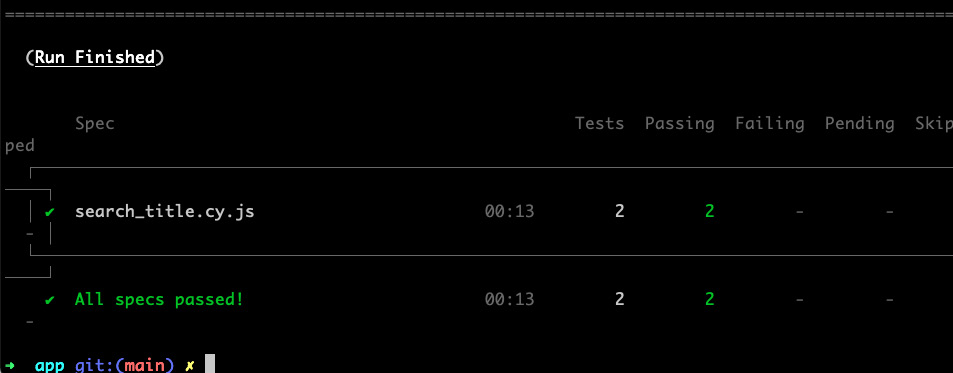
Figure 5.14 – CLI test execution (continued)
Next, let us next explore the visual test runner for executing our spec.
Using the visual test runner
Cypress comes with an extremely insightful and detailed test runner and provides quite a bit of debugging data for tests being executed. To utilize this mode, we can start with the npx cypress open command, which opens up a series of modals. The first modal requires the selection of the type of test, as previously shown in Figure 5.5. The second modal, as seen earlier in Figure 5.7, provides an option to select a browser against which the test can be run. The third modal lists all specs in the project and shows some additional metadata about the specs and their recent runs:
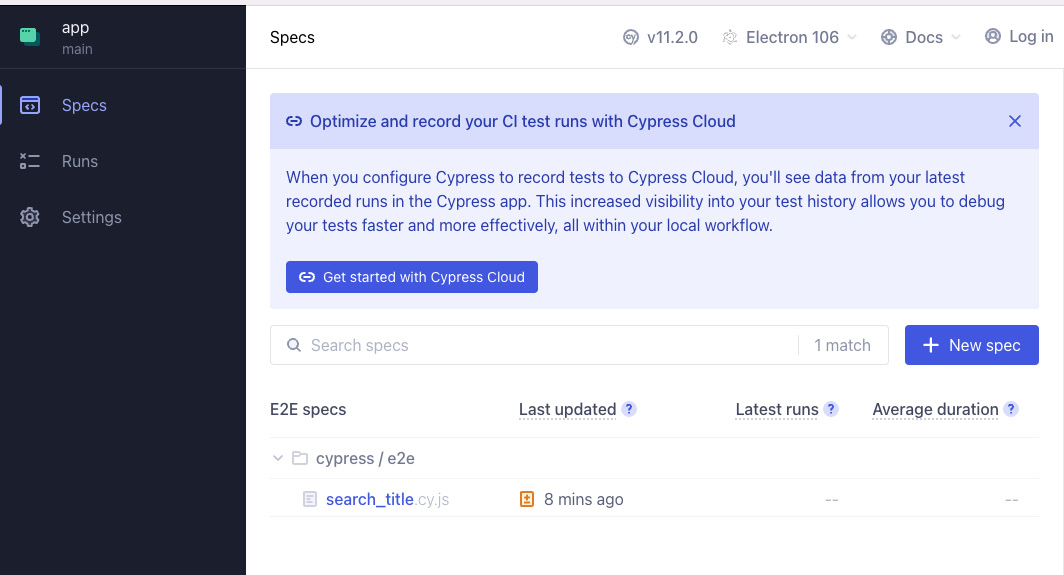
Figure 5.15 – Test selection modal
Test execution begins when the user clicks on the test, as shown in Figure 5.15. This opens a new browser that shows the actual steps being executed. The left pane shows the various frontend and backend calls being made while executing this test. Figure 5.16 shows a view of the test execution. Cypress offers a live-reloading feature out of the box using the cypress-watch-and-reload package. Whenever there is a change in the code, the test is rerun automatically and the view, as shown in Figure 5.16, reloads live:
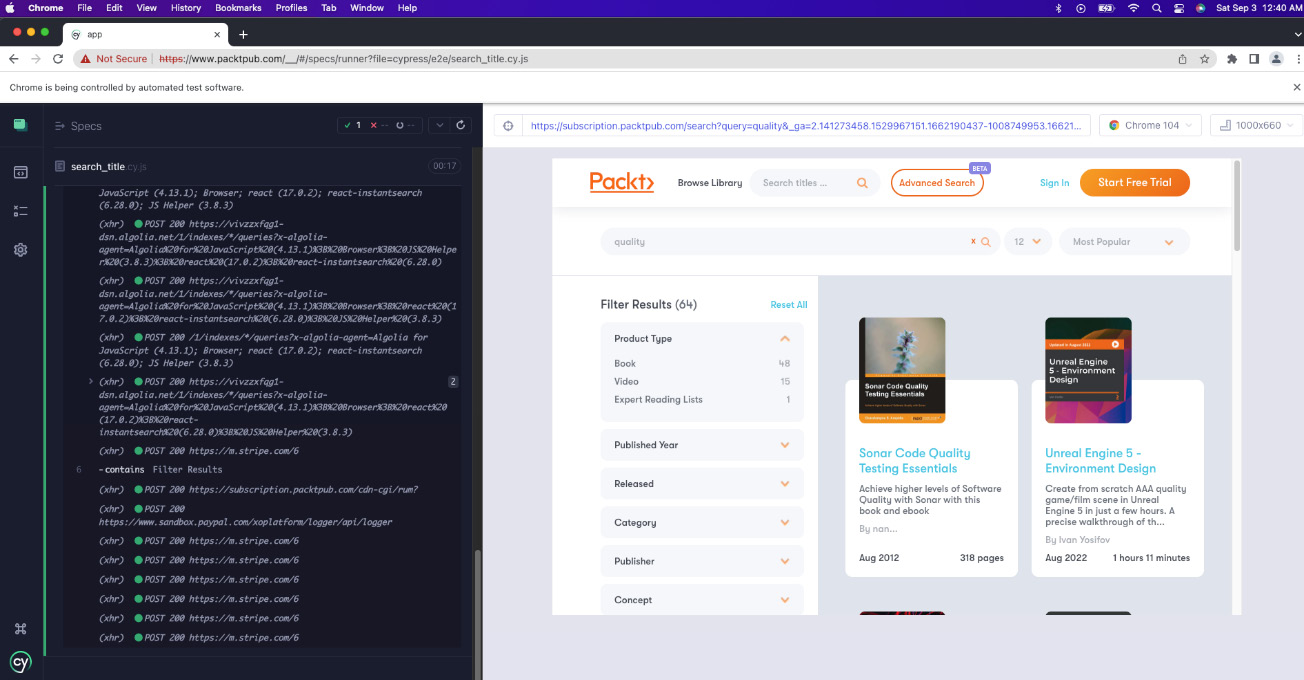
Figure 5.16 – Visual test runner
This view also allows users to view the stack trace of errors and provides options to navigate between test runs and settings. The browser on the right pane can be used like any other browser window to inspect and debug using the developer tools. Users are strongly encouraged to further explore the features that this test runner has to offer.
In the next section, let us gain a deeper understanding of using selectors in Cypress.
Employing selectors and assertions
Selectors are identifiers for elements in the Document Object Model (DOM). We have various ways to identify elements, such as using their class, name, type, and so on. Every test framework has its own custom commands to make the code clear and concise. Cypress provides users with an efficient interface to look for selectors and comes with standard support for all selectors. Let us continue using our first spec to dig deeper into utilizing selectors.
Working with selectors
cy.get is the primary function to search for elements in the DOM. In our search_title.cy.js test file, we have used .input-text, which identifies the element with the input-text class name and sets a value in it. We have also used [aria-label="Search"] to look for the Search button. This is an example of an attribute search. We are essentially finding an element with the value of the aria-label Search attribute and clicking on it. id and data are other reliable attributes for identifying elements in the DOM. It is important to remember to use square brackets when employing attributes in selectors. This raises the question of what kind of selector to use in each case. The answer would be to employ the simplest one that uniquely identifies the required element on the DOM.
Cypress assists users here by providing a selector playground feature that automatically populates the selector. Let us rerun our first spec using a visual test runner and reach the execution page, as shown in Figure 5.16. Now, refer to Figure 5.17 and click the circular toggle icon This opens the selector playground where the user can type the selector or use the arrow icon for Cypress to automatically populate it. Now, the user can use the browser to click on the required UI element and get the unique selector right away. The user can also play around with other options and validate their correctness by plugging them into the textbox:
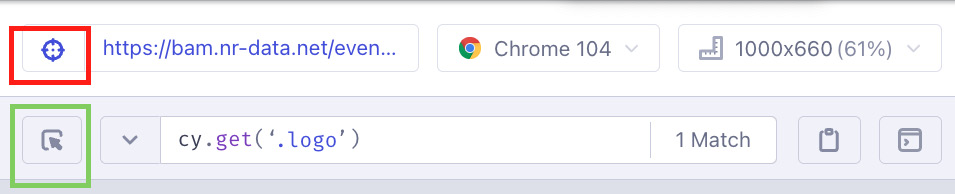
Figure 5.17 – Selecting a playground
To write efficient automation scripts, it is vital to know which selectors are reliable and perform better in a given situation. Imagine a test automation project with 5,000 test cases and all of them find a link using the worst-performing selector, which has a lag of 50 milliseconds relative to the best-performing selector. That would make the test suite slower by 250,000 milliseconds for every run. This would impact feedback times immensely when considering hundreds of CI pipeline runs over a few days.
XPath selectors identify the target element by navigating through the structure of the HTML document, while CSS selectors use a string to identify them. Direct CSS selectors using an element’s ID or class usually perform better than XPath selectors. Using an ID selector is often the most reliable way of selecting an HTML element. It helps to analyze the elements to understand whether they are dynamic and which selectors would be supported across different browsers, and based on that, decide on a selector strategy. It usually takes a bit of troubleshooting to arrive at an efficient pattern of selectors working for a specific application and a team.
Let us now learn about the available assertion options.
Asserting on selectors
Assertions give us a way to perform validations on various UI elements. They are usually chained to the command with selectors and work together to identify an element and verify it. should is the primary function utilized on assertions, and it works with a myriad of arguments.
Let us update our first spec to add some assertions. We have earlier used the contains function in our spec to assert a partial string in the search results page. Figure 5.18 shows the assertions in action. Next, we add an assertion on the Reset button to validate that it is disabled. In the following line, we get the navigation bar element by the id attribute and chain it with an assertion that validates the class name:

Figure 5.18 – Assertions for the navbar and Reset button
Let us add another assertion before entering the search string to validate it is empty using the have.value parameter. Figure 5.19 demonstrates this assertion:
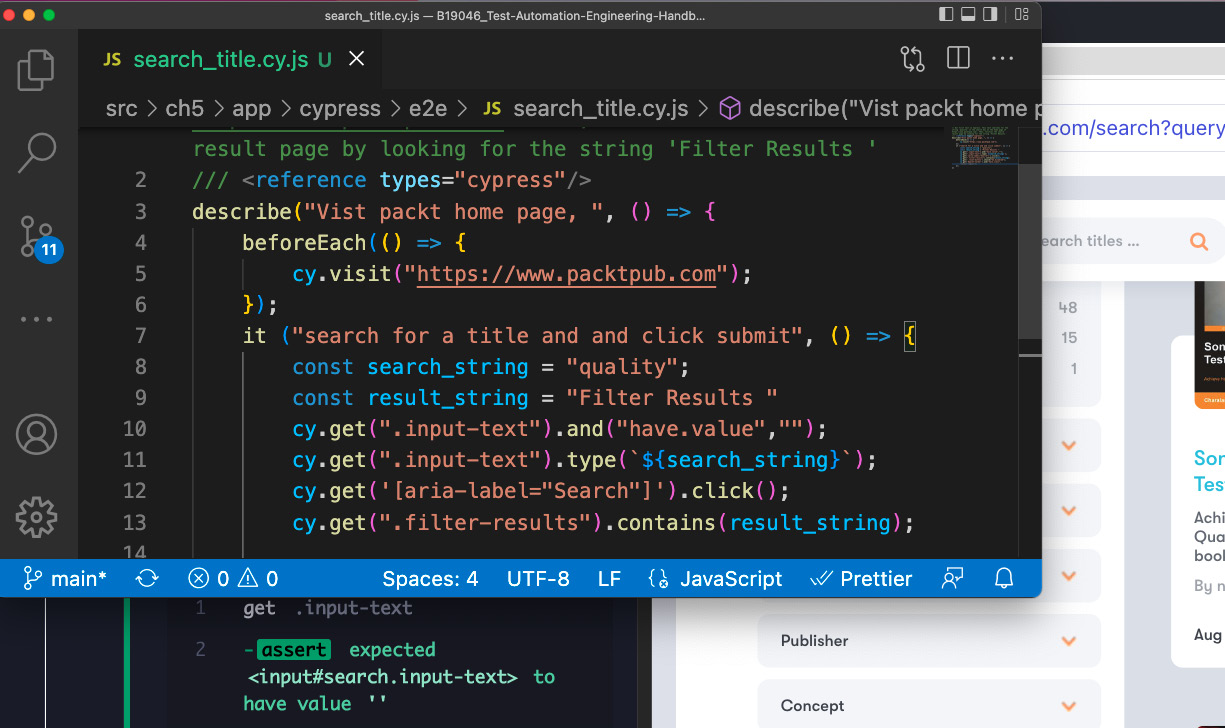
Figure 5.19 – Asserting empty value in a textbox
Cypress comes with very good documentation (https://docs.cypress.io/api/table-of-contents) and users are encouraged to use it as a reference to be aware of the various available options. So far, we’ve worked on identifying and asserting UI elements. In the next section, let us work with API calls in Cypress.
Intercepting API calls
Cypress lets users work with underlying API requests and stub responses where necessary. Let us analyze the API calls when loading the Packt Publishing home page and try to stub one of the responses. cy.intercept() is the command used to work with API calls, and it offers a wide variety of parameters. For this example, we will be using the routeMatcher and staticResponse arguments. We add a second it block to intercept the underlying API call and specify the type of HTTP call, URL, and a predefined response as parameters, as shown in Figure 5.20:

Figure 5.20 – cy.intercept call
The value of the static response parameter can be obtained using the Network tab of the developer tools to get the actual response for the API call. This is illustrated in Figure 5.21. By passing this in as the staticResponse parameter, the GET call on this URL will always return the stubbed response instead of the original:
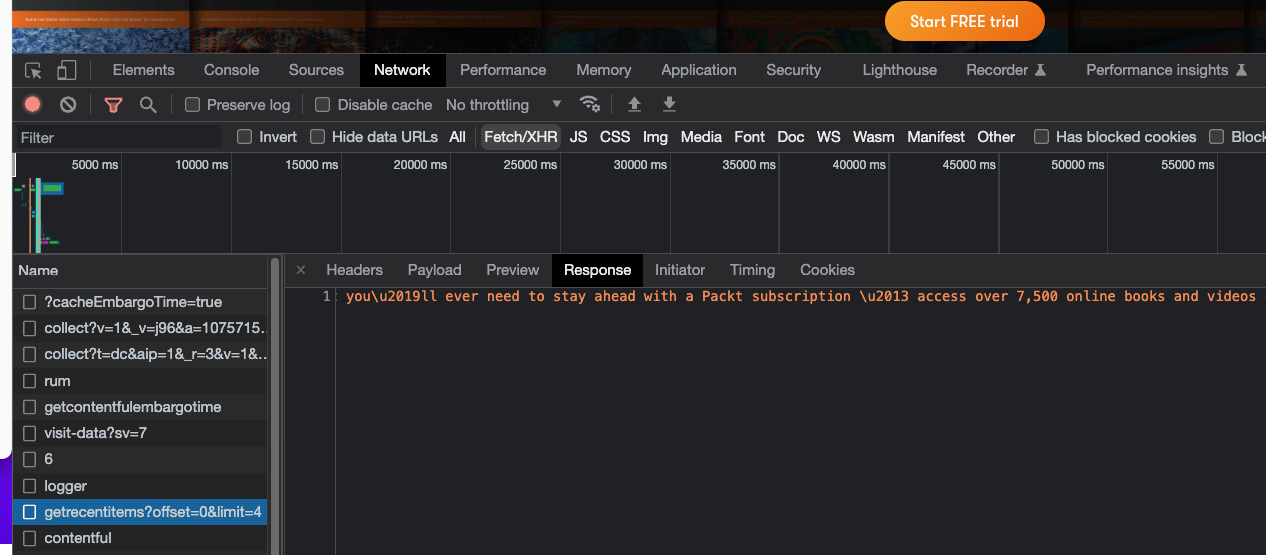
Figure 5.21 – API payload for stubbing
Figure 5.22 demonstrates the result of the intercept command in action:
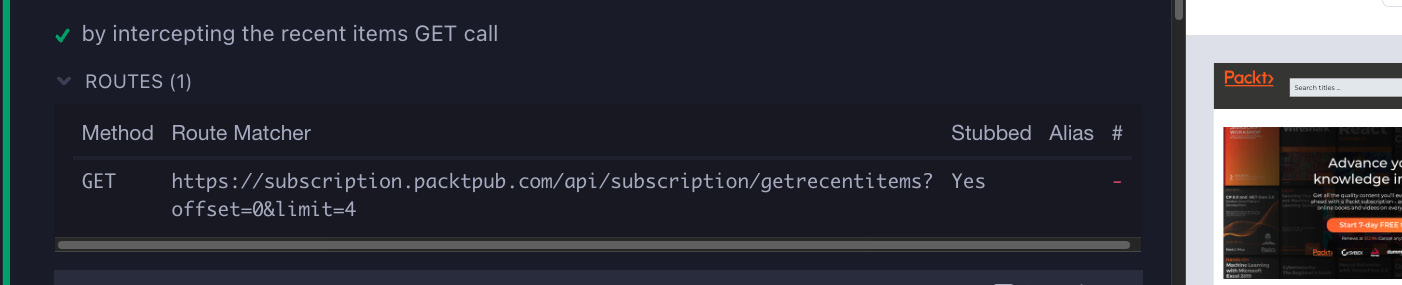
Figure 5.22 – Intercept results
This empowers the user to test the underlying API calls for different payloads and validate the application behavior in each case. This also saves resources in cases where some of these are expensive API calls. This is just one way to handle API calls with Cypress, and there are a variety of options available to explore. In the next section, let us quickly review some additional configurations that might be helpful with setup and validation.
Additional configurations
Let us review a few additional configurations in this section to build stable and efficient specs:
- The first configuration is a Git feature and not specific to Cypress. Adding a .gitignore file is a general necessity for all projects. Add it to the src/ch5/app root folder to ignore files we don’t want Git to track on our local directory. As shown in Figure 5.23, let’s add a node_modules folder so that we don’t have to check in and keep track of all dependencies:
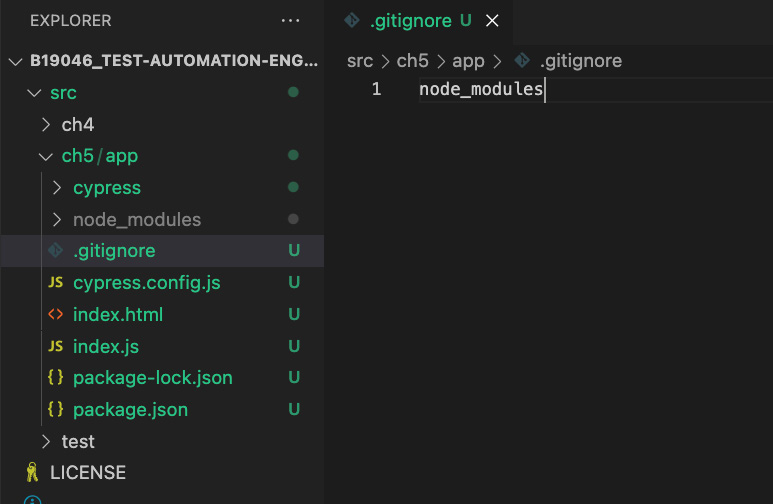
Figure 5.23 – .gitignore file
- Cypress comes with a default timeout of 4 seconds (4,000 milliseconds), and the get method accepts a second parameter to set a custom timeout. For example, in our spec, we can add extra wait after searching for the string and waiting for the Reset button to appear with cy.get('.reset-button', {timeout:10000}).should("be.disabled"). This line waits for 10 seconds for the Reset button to appear and then runs the assertion.
- Cypress provides a delay feature when performing actions on the DOM. For example, when typing an entry in the textbox, it has a default delay of 10 milliseconds for each key press. In our spec, this delay can be customized as cy.get(".input-text").type(`${search_string}`, { delay:500 }) to fit the need of the application. In this case, there will be a half-second delay before typing the next character in the textbox.
We have secured a solid understanding of the major features of Cypress and are well set to explore its capabilities further. Before we close this chapter, let us review some valuable considerations for web automation.
Considerations for web automation
Modern web application testing and automation come with their own set of challenges in terms of complexity. With all the great features packed within Cypress, it has its own limitations as well.
Limitations of Cypress
So far, we have reviewed in detail what Cypress can do, but it would be wise to also call out the things Cypress cannot do as of today. When considering test automation at an organizational scale, it is critical to gather clarity on how the tool fits in. Let us now list a few items that Cypress does not support as of today:
- It currently cannot drive two browsers in concurrency.
- It doesn’t provide support for multi-tabs in the browser.
- It only supports JavaScript for test cases.
- It currently does not support Safari or IE.
- It has limited support for iFrames (an element that loads another HTML element within a web page).
- The larger the test suite, the slower its execution in Cypress due to its underlying protocol, which enables a debugger in Chromium-based browsers. It is, however, ideal for small-to-medium-sized test suites.
- Cypress contains a lot of syntactic ambiguity that can make it difficult to scale it across an organization.
Let us now take up some considerations for web automation in general.
Web automation considerations
So, it is imperative to thoroughly review your team’s test automation requirements and take into consideration every detail. Let us look at some chief items to be mindful of:
- Always focus on validating the core business logic and the scenarios that surround it. Moving past the basic functionality and building a stable automated regression suite for your web application gives tremendous ROI in the long term.
- In the era of digitization, the usability of the web application takes a focal role, and it is compulsory to validate the look and feel of the web application across multiple browsers on multiple platforms.
- It is essential to perform due diligence regarding continued support from the community or the vendors before deciding on a tool or strategy for web application automation.
- We can’t stress enough the critical role Agile methodologies play in modern software projects. So, it is vital for the web application tool to integrate seamlessly with CI services and perform efficiently in union.
- The data and privacy aspects of test data should be taken into account since modern web applications tend to tap the power of cloud services continually. Further attention has to be paid when handling personally identifiable information (PII).
- To gain additional stability with test scripts, avoid cluttering them with brittle selectors. Exercise caution when choosing a selector and have a long-term view of how the screen might change.
- Distinguish between synchronous and asynchronous calls within your web application and employ test methods appropriately to suit the purpose.
- Make efforts to organize tests consistently for readability and performance reasons. Explore the tool’s capabilities or additional plugins to standardize test scripts.
This brings us to the end of a detailed introductory walk-through of Cypress and its features. There is more to explore and learn, as with any other tool. Cypress offers great promise for web application automation and provides innovative solutions to some of the problems that have haunted the test engineering community in modern web application testing. The Cypress team actively releases a lot of new features on a regular basis, and it is the right time to further explore its advanced abilities. Let us summarize what we have learned in this chapter in the next section.
Summary
Let us quickly recap what we have learned in this chapter. We went through a step-by-step installation and setup process for Cypress. We commenced the next section by understanding arrow and callback functions in JavaScript. Then, we continued on to write our first spec and ventured out to comprehend its structure and execution capabilities. We worked on using selectors and assertions within our spec to identify and validate DOM elements. Then, we learned how to intercept API calls in Cypress. We familiarized ourselves with some additional Cypress configurations before taking on web automation considerations.
In the next chapter, we will confront another crucial quality engineering topic: mobile test automation. We will be using Appium 2.0 to formulate test scripts for Android and iOS platforms.
Questions
- What are some advantages of using Cypress?
- What is the purpose of the package.json file in the code repository?
- Why are callback functions used in JavaScript?
- What is the purpose of a beforeEach block in a Cypress spec?
- How do you select a DOM element using the id attribute?
- What is the Cypress command used to intercept API calls?