1. TypeScript Fundamentals
Activity 1.01: Creating a Library for Working with Strings
Solution:
Here are the steps that will help you create all the functions listed in the activity problem statement.
toTitleCase
The toTitleCase function will process a string and capitalize the first letter of each word, but will make all the other letters lowercase.
Test cases for this function are as follows:
"war AND peace" => "War And Peace"
"Catcher in the Rye" => "Catcher In The Rye"
"tO kILL A mOCKINGBIRD" => "To Kill A MockingBird"
Here are the steps to help you write this function:
- This function will take a single parameter that is a string and return a string as well:
function toTitleCase (input:string) : string {
- First off, we will split the input into an array of strings using the split string method. We'll split on every space character:
// split the string into an array on every occurrence of
// the space character const words = input.split(" ");
- Next, we will define a new array that will hold each word as we transform it into title case, and use a for..of loop to loop through the array of words:
const titleWords = []; // loop through each word for (const word of words) {
- For each word we will extract the first character and the rest of the characters using the slice string method. We will transform the initial to uppercase, and the rest of the characters to lowercase. Next, we'll join them back together to form a complete word and push the result to the holding array:
// take the first character using `slice` and convert it to uppercase const initial = word.slice(0, 1).toLocaleUpperCase(); // take the rest of the character using `slice` and convert them to lowercase const rest = word.slice(1).toLocaleLowerCase(); // join the initial and the rest and add them to the resulting array titleWords.push(`${initial}${rest}`);
- At last, we will join all the processed words together, with a separating space, and we have our result:
// join all the processed words const result = titleWords.join(" "); return result;}
- Next, we can test whether the function gives the expected results for the given test inputs:
console.log(`toTitleCase("war AND peace"):`);console.log(toTitleCase("war AND peace")); console.log(`toTitleCase("Catcher in the Rye"):`);console.log(toTitleCase("Catcher in the Rye"));console.log(`toTitleCase("tO kILL A mOCKINGBIRD"):`);console.log(toTitleCase("tO kILL A mOCKINGBIRD"));
- We should receive the results:
toTitleCase("war AND peace"):War And Peace toTitleCase("Catcher in the Rye"):Catcher In The Rye toTitleCase("tO kILL A mOCKINGBIRD"):To Kill A Mockingbird
countWords
Here are the steps to help you write this function:
- The countWords function will count the number of separate words within a string. Words are delimited by spaces, dashes (-), or underscores (_). Test cases for this function are as follows:
"War and Peace" => 3
"catcher-in-the-rye" => 4
"for_whom the-bell-tolls" => 5
- Create the countWords function using the following code:
function countWords (input: string): number {
- Split the words using a regex that will match any occurrence of a space, underscore, or dash character:
const words = input.split(/[ _-]/);
- Return the length of the array that is the result of the split:
return words.length;
}
- Test the function and console out the results:
console.log(`countWords("War and Peace"):`);
console.log(countWords("War and Peace"));
console.log(`countWords("catcher-in-the-rye"):`);
console.log(countWords("catcher-in-the-rye"));
console.log(`countWords("for_whom the-bell-tolls"):`);
console.log(countWords("for_whom the-bell-tolls"));
toWords
The toWords function will return all the words that are within a string. Words are delimited by spaces, dashes (-), or underscores (_).
Test cases for this function are as follows:
"War and Peace" => [War, and, peace]
"catcher-in-the-rye" => [catcher, in, the, rye]
"for_whom the-bell-tolls" => [for, whom, the, bell, tolls]
This function is very similar to the previous one we developed. The significant difference is that we need to return not only the number of words but also the actual words themselves. So, instead of a number, this function will return an array of strings:
- Here is the code to create this function:
function toWords (input: string): string[] {
- Once more, we will need to split the input into an array of strings using the split string method, using the [ _-] regular expression. Split the words using a regular expression that will match any occurrence of a space, underscore, or dash character:
const words = input.split(/[ _-]/);
- Once we have the words, we can just return them:
// return the words that were split return words;}
- Next, we can test whether the function gives the expected results for the given test inputs:
console.log(`toWords("War and Peace"):`);console.log(toWords("War and Peace")); console.log(`toWords("catcher-in-the-rye"):`);console.log(toWords("catcher-in-the-rye"));console.log(`toWords("for_whom the-bell-tolls"):`);console.log(toWords("for_whom the-bell-tolls"));
- We should receive the results:
toWords("War and Peace"):[ 'War', 'and', 'Peace' ]toWords("catcher-in-the-rye"):[ 'catcher', 'in', 'the', 'rye' ]toWords("for_whom the-bell-tolls"):[ 'for', 'whom', 'the', 'bell', 'tolls' ]
repeat
repeat will take a string and a number and return that same string repeated that number of times.
Test cases for this function are as follows:
„War", 3 => „WarWarWar"
„rye", 1 => „rye"
„bell", 0 => „"
Here are the steps to help you write this function:
- This function will take two parameters, one that is a string and a second one that is a number, and return a string as well:
function repeat (input: string, times: number): string {
There are many ways to implement this function, and we'll illustrate one approach. We can create an array with the required number of elements, and then use the array's fill method to fill it with the value of the string. In that way, we will have an array of times elements, and each element will have the input value:
// create a new array that with length of `times` // and set each element to the value of the `input` string const instances = new Array(times).fill(input);
- Next, we just need to join all the instances, using an empty string as the delimiter. That way, we're making sure that no spaces or commas are inserted between the strings:
// join the elements of the array together const result = instances.join(""); return result;}
- Next, we can test whether the function gives the expected results for the given test inputs:
console.log(`repeat("War", 3 ):`);console.log(repeat("War", 3 )); console.log(`repeat("rye", 1):`);console.log(repeat("rye", 1));console.log(`repeat("bell", 0):`);console.log(repeat("bell", 0));
- We should receive the following results:
repeat("War", 3 ):WarWarWar repeat("rye", 1):rye repeat("bell", 0):
isAlpha
isAlpha returns true if the string only has alpha characters (that is, letters). Test cases for this function are as follows:
"War and Peace" => false
"Atonement" => true
"1Q84" => false
Here are the steps to help you write this function:
- This function will take a single parameter that is a string and return a Boolean:
function isAlpha (input: string): boolean {
- For this function to work, we need to check whether each character is a lower- or uppercase letter. One of the best ways to determine that is to use a regular expression that checks it. In particular, the character group [a-z] will check for a single character and if we use the star quantifier (*), we can tell the regular expression to check for all the characters. We can add the i modifier to the regular expression to make the match case-insensitive, so we don't need to worry about letter casing:
// regex that will match any string that only has upper and //lowercase letters const alphaRegex = /^[a-z]*$/i
- Next, we need to actually test our input. Since we only need to know whether the string matches, we can use the test method of the regular expression and return its result:
// test our input using the regex const result = alphaRegex.test(input); return result;}
- Next, we can test whether the function gives the expected results for the given test inputs:
console.log(`isAlpha("War and Peace"):`);console.log(isAlpha("War and Peace")); console.log(`isAlpha("Atonement"):`);console.log(isAlpha("Atonement"));console.log(`isAlpha("1Q84"):`);console.log(isAlpha("1Q84"));
- We should receive the results:
isAlpha("War and Peace"):false isAlpha("Atonement"):true isAlpha("1Q84"):false
isBlank
isBlank returns true if the string is blank, that is, it consists only of whitespace characters.
Test cases for this function are as follows:
"War and Peace" => false
" " => true
"" => true
Here are the steps to help you write this function:
- This function will take a single parameter that is a string and return a Boolean:
function isBlank (input: string): boolean {
- For this function to work, we need to check whether each character in the string is a whitespace character. We can use a regular expression to determine that, or we can use some kind of looping construct that will iterate through the string. One approach would be to test whether the first character is a space, and if it is, slice it off:
// test if the first character of our input is an empty space while (input[0] === " ") {// successively slice off the first character of the input input = input.slice(1); }
- This loop will execute until it reaches a non-whitespace character. If it does not encounter one, it will only stop when there is no first element of the string, that is, when the string is the empty string. If that's the case, our original input only contained whitespace, and we can return true. Otherwise, we should return false:
// the loop will stop on the first character that is not a //space.// if we're left with an empty string, we only have spaces in // the input const result = input === ""; return result;
- Next, we can test whether the function gives the expected results for the given test inputs:
console.log(`isBlank("War and Peace"):`);console.log(isBlank("War and Peace")); console.log(`isBlank(" "):`);console.log(isBlank(" "));console.log(`isBlank(""):`);console.log(isBlank(""));
- We should receive the following results:
isBlank("War and Peace"):false isBlank(" "):true isBlank(""):true
Note that there are multiple ways to implement all the preceding functions. The code shown is just one way to implement them, and these implementations are mostly for illustrative purposes. For example, a proper string utility library will need to have much more robust and extensive test suites.
2. Declaration Files
Activity 2.01: Building a Heat Map Declaration File
Solution:
In this activity, we'll be building a TypeScript application named heat map log system that will track the baseball pitch data and ensure the integrity of the data. Perform the following steps to implement this activity:
- Visit the following GitHub repository at https://packt.link/dqDPk and download the activity project containing the specs and configuration elements.
- Open the Visual Studio Code editor and then open the terminal.
- Change to the activity-starter directory in the terminal or command prompt by writing the following command:
cd activity-starter
- Run the following command to install the dependencies:
npm install
You will now see the following files in the activity-starter directory:

Figure 2.19: Starter project files
- Open the HeatMapTypes.d.ts declaration file in the types/ directory, define a module called HeatMapTypes, and export the interface named Pitcher. Define three attributes for the Pitcher module: batterHotZones, pitcherHotZones, and coordinateMap. The data structures should be the same for all three attributes, Array<Array<number>>, but coordinateMap should be optional. Write the following code to accomplish this:
declare module "HeatMapTypes" {
export interface Pitcher {
batterHotZones: Array<Array<number>>;
pitcherHotZones: Array<Array<number>>;
coordinateMap?: Array<any>;
}
}
The preceding code in the editor looks like this:

Figure 2.20: Creating a pitcher interface
- Open heat_map_data.ts and import the declaration files. Create and export a let variable called data and assign it to the Pitcher type. You will need to import the lodash library, which was installed when you initially ran npm install. Write the following code to do this:
/// <reference path="./types/HeatMapTypes.d.ts"/>
import hmt = require('HeatMapTypes');
import _ = require('lodash');
export let data: hmt.Pitcher;
- Add values to the data variable that adhere to the declaration rules. Assign nested arrays as values to both the batterHotZones and pitcherHotZones attributes. Add the following code to do this:
data = {
batterHotZones: [[12.2, -3], [10.2, -5], [3, 2]],
pitcherHotZones: [[3, 2], [-12.2, 3], [-10.2, 5]],
};
- Create a new function named findMatch() that takes in both the batterHotZones and pitcherHotZones arrays and utilize the lodash function, intersectionWith(), to return the identical nested array. Finally, store the value of the findMatch() function in the coordinateMap attribute that was defined in the declaration file. Write the following code to do this:
export const findMatch = (batterHotZones, pitcherHotZones) => {
return _.intersectionWith(batterHotZones, pitcherHotZones, _.isEqual);
};
data.coordinateMap = findMatch(data.batterHotZones, data.pitcherHotZones);
console.log(data.coordinateMap);
- Now, in the terminal, type the following commands to generate the JavaScript code and run it:
tsc heat_map_data.ts
node heat_map_data.js
Once we run the preceding commands, the following output is displayed in the terminal:
[[3,2]]
In the preceding output, the common values from both the attributes are fetched and then printed. In this case, the common values are [3, 2].
- Now, change the values of both the attributes. Write the following code:
data = {
batterHotZones: [[12.2, -3], [10.2, -5], [3, 2]],
pitcherHotZones: [[3, 2], [-12.2, 3], [10.2, -5]],
};
- Now, in the terminal, type the following commands to generate the JavaScript code and run it:
tsc heat_map_data.ts
node heat_map_data.js
Once we run the preceding commands, the following output is displayed in the terminal:
[[10.2, -5], [3, 2]]
In the preceding output, the common values are [10.2, -5] and [3, 2]. Finally, we built a heat map log system that will track the baseball pitch data and ensure the integrity of the data.
3. Functions
Activity 3.01: Building a Flight Booking System with Functions
Solution:
- Start with the stubs provided in code samples. We have three files: index.ts, bookings.ts, and flights.ts. The index.ts file is a bit abstract and will just represent some of the transactions we push into our system. bookings.ts handles the user-facing activities of managing a booking, and flights.ts is the back office of filling up flights and making sure that everybody has a seat.
- The index.ts file won't change unless you feel like changing it and adding some new scenarios. Let's run it without adding any code:
npx ts-node index.ts Not implemented!
So we have work to do. Several functions are not yet implemented. Let's start by looking at flights.ts. There is a partial implementation there as we have an interface called Flights that describes the attributes of a flight, a list of available flights implementing that interface, and even a method to fetch the flights, called getDestinations. We need to implement logic to check to see whether the number of seats we want to book are still available, logic that can hold seats while we confirm a reservation, and logic that converts those seats held into reserved seats once our payment has been processed.
- To check availability, we should see whether the number of seats we're requesting exceeds the number of remaining seats while holding any held seats in reserve. We can express this as seatsRequested <= seatsRemaining - seatsHeld, which is a Boolean expression that can be returned by the function. This can be written as an arrow function in the flights.ts file:
export const checkAvailability = (
flight: Flight,
seatsRequested: number
): boolean => seatsRequested <= flight.seatsRemaining - flight.seatsHeld;
- The holdSeats function should confirm that the requested seats are available and hold them if they are. If there aren't enough seats remaining, we need to throw an error and interrupt the flow:
export const holdSeats = (flight: Flight, seatsRequested: number): Flight => {
if (flight.seatsRemaining - flight.seatsHeld < seatsRequested) {
throw new Error('Not enough seats remaining!');
}
flight.seatsHeld += seatsRequested;
return flight;
};
- To round out flights.ts, we have reserveSeats. This function operates similarly to holdSeats, but it confirms that the seats we wish to reserve have been held, and then converts them into reserved seats by increasing the seatsHeld property and reducing the seatsRemaining property by the same amount:
export const reserveSeats = (
flight: Flight,
seatsRequested: number
): Flight => {
if (flight.seatsHeld < seatsRequested) {
throw new Error('Seats were not held!');
}
flight.seatsHeld -= seatsRequested;
flight.seatsRemaining -= seatsRequested;
return flight;
};
That should do it for flights.ts. However, our program still won't run until we implement bookings.ts.
- First of all, we're going to use a factory pattern for creating bookings. That means we'll have a function that returns a function to create bookings. We'll employ currying to create a closure so that we can initialize the createBooking function with bookingNumber in order to give each booking a unique identifier. The factory could look like this:
const bookingsFactory = (bookingNumber: number) => (
flight: Flight,
seatsHeld: number
): Booking => ({
bookingNumber: bookingNumber++,
flight,
paid: false,
seatsHeld,
seatsReserved: 0,
});
Our factory takes bookingNumber as an argument to initialize this value and then increments the number each time it creates a new booking. We assign some default values to the booking to confirm to the Booking interface already provided in the module.
- To call the factory and get a createBooking function with bookingNumber already curried into it, we can simply write the following:
const createBooking = bookingsFactory(1);
- We have yet to write functions to start the booking process, handle the payment, and complete the booking, thereby reserving the seats on a flight. To begin the booking, we need to check availability on the flight we've chosen based on the number of seats we're requesting. If that is successful, we can create the booking and hold the seats. Otherwise, we can raise an error to alert the user to the fact that the booking cannot be completed:
export const startBooking = (
flight: Flight,
seatsRequested: number
): Booking => {
if (checkAvailability(flight, seatsRequested)) {
holdSeats(flight, seatsRequested);
return createBooking(flight, seatsRequested);
}
throw new Error('Booking not available!');
};
- In order to check flight availability and hold seats, we need to import these functions from flights.ts. This has already been done at the top of the bookings.ts module. The export keyword is used throughout these modules to make functions available to other modules. Some functions lack the export keyword, and so can only be invoked from within the module, effectively making them private.
- We'll cheat a little with our processPayment function since we aren't implementing a payment system. We will just mark the booking as paid and return it:
export const processPayment = (booking: Booking): Booking => {
booking.paid = true;
return booking;
};
- To complete the booking, we call reserveSeats in the flights module and then update our counts:
export const completeBooking = (booking: Booking): Booking => {
reserveSeats(booking.flight, booking.seatsHeld);
booking.seatsReserved = booking.seatsHeld;
booking.seatsHeld = 0;
return booking;
};
- With all the functions implemented, we can invoke our program again and see the output:
npx ts-node index.ts
Booked to Lagos {
bookingNumber: 1,
flight: {
destination: 'Lagos',
flightNumber: 1,
seatsHeld: 0,
seatsRemaining: 29,
time: '5:30'
},
paid: true,
seatsHeld: 0,
seatsReserved: 1
}
//...
Istanbul flight {
destination: 'Istanbul',
flightNumber: 7,
seatsHeld: 0,
seatsRemaining: 0,
time: '14:30'
}
Booking not available!
Activity 3.02: Writing Unit Tests
Solution:
- In the describe block, fetch the destinations for this scenario and then cache the first one as flight. Now, we can write a simple test to test that the correct number of destinations were returned:
test('get destinations', () => {
expect(destinations).toHaveLength(7);
});
We could test each of the individual destinations and their properties as well.
- Check the availability of several of the destinations. We can introduce all sorts of scenarios. Here are a few:
test('checking availability', () => {
const destinations = getDestinations();
expect(checkAvailability(destinations[0], 3)).toBeTruthy();
expect(checkAvailability(destinations[1], 5)).toBeFalsy();
expect(checkAvailability(destinations[2], 300)).toBeFalsy();
expect(checkAvailability(destinations[3], 3)).toBeTruthy();
});
The first destination has at least three seats available. The second does not have five available, and so on.
- Try holding some seats in the next test. We should test both success and failure scenarios:
test('hold seats', () => {
expect.assertions(3);
flight = holdSeats(flight, 3);
expect(flight.seatsHeld).toBe(3);
flight = holdSeats(flight, 13);
expect(flight.seatsHeld).toBe(16);
try {
holdSeats(flight, 15);
} catch (e) {
expect(e.message).toBe('Not enough seats remaining!');
}
});
Note that in order to ensure that the catch block was reached, we're expecting three assertions in this test. Without that, the test would still turn green even if, for some reason, the last call to holdSeats didn't throw an error.
- Finish up the flights test with a unit test to reserve seats:
test('reserve seats', () => {
expect.assertions(3);
flight = reserveSeats(flight, 3);
expect(flight.seatsRemaining).toBe(27);
flight = reserveSeats(flight, 13);
expect(flight.seatsRemaining).toBe(14);
try {
reserveSeats(flight, 1);
} catch (e) {
expect(e.message).toBe('Seats were not held!');
}
});
This test runs through a few scenarios, including another error condition. In some cases, it might be appropriate to put error conditions in separate tests. A good rule of thumb for this is that each of your tests should be easy to comprehend and maintain. If any module or function gets to be too big, just break it up.
- Now, write some tests for bookings using the same principles:
describe('bookings tests', () => {
test('create a booking', () => {
const booking = startBooking(destinations[0], 3);
expect(booking).toEqual({
bookingNumber: 1,
flight: destinations[0],
paid: false,
seatsHeld: 3,
seatsReserved: 0,
});
});
test('pay for a booking', () => {
let booking = startBooking(destinations[0], 3);
booking = processPayment(booking);
expect(booking.paid).toBe(true);
});
test('complete a booking', () => {
let booking = startBooking(destinations[0], 3);
booking = processPayment(booking);
booking = completeBooking(booking);
expect(booking.paid).toBe(true);
expect(booking.seatsReserved).toBe(3);
});
});
- Let's now try running the tests and see how things look:
npm test
> jest --coverage --testRegex="^((?!-solution).)*\.test\.tsx?$"
PASS ./bookings.test.ts
PASS ./flights.test.ts
-------------|---------|----------|---------|---------|-------------------
File | % Stmts | % Branch | % Funcs | % Lines | Uncovered Line #s
-------------|---------|----------|---------|---------|-------------------
All files | 97.14 | 83.33 | 100 | 96.97 |
bookings.ts | 94.74 | 50 | 100 | 94.44 | 34
flights.ts | 100 | 100 | 100 | 100 |
-------------|---------|----------|---------|---------|-------------------
Test Suites: 2 passed, 2 total
Tests: 7 passed, 7 total
Snapshots: 0 total
Time: 1.782 s
Ran all test suites.
The tests passed! But we haven't hit 100% line coverage yet. We can actually open up the coverage report, which will be inside the coverage/lcov-report directory in the root of our project. The coverage tool (Istanbul) that comes bundled with Jest will produce an HTML report that we can open in any browser. This will show us the exact piece of code that hasn't been covered:
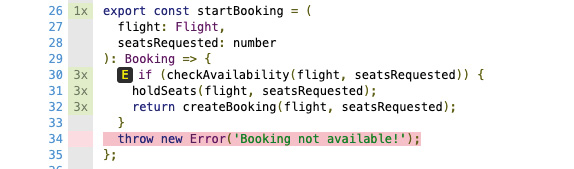
Figure 3.2: HTML report produced by the tool
- We've missed one error scenario. Let's add that as a new describe block to avoid further complicating the tests we've already written:
describe('error scenarios', () => {
test('booking must have availability', () => {
expect.assertions(1);
try {
startBooking(destinations[6], 8);
} catch (e) {
expect(e.message).toBe('Booking not available!');
}
});
});
There's no particular need to have a new describe block, but in this case, it might make the code a bit cleaner. Use describe and test blocks for readability and maintenance.
- Let's now run the tests again:
npm test
> jest --coverage --testRegex="^((?!-solution).)*\.test\.tsx?$" PASS ./bookings-solution.test.ts
PASS ./flights-solution.test.ts
-------------|---------|----------|---------|---------|-------------------
File | % Stmts | % Branch | % Funcs | % Lines | Uncovered Line #s
-------------|---------|----------|---------|---------|-------------------
All files | 100 | 100 | 100 | 100 |
bookings.ts | 100 | 100 | 100 | 100 |
flights.ts | 100 | 100 | 100 | 100 |
-------------|---------|----------|---------|---------|-------------------
Test Suites: 2 passed, 2 total
Tests: 8 passed, 8 total
Snapshots: 0 total
Time: 0.694 s, estimated 1 s
Ran all test suites.
We've hit our goal of 100% line coverage!
4. Classes and Objects
Activity 4.01: Creating a User Model Using Classes, Objects, and Interfaces
Solution:
In this activity, we'll be building a user authentication system that will pass login data to a backend API to register and sign users into our baseball scorecard application. Perform the following steps to implement this activity:
- Visit the following GitHub repository and download the activity project containing the specs and configuration elements: https://packt.link/oaWbW.
The activity-solution directory contains the completed solution code, and the activity-starter directory provides the basic start code to work with.
- Open the Visual Studio Code editor and then open the terminal. Change into the activity-starter directory in the terminal or command prompt and run the following command to install the dependencies:
npm install
You will now see the following files in the activity-starter directory:

Figure 4.10: Activity project files
- Open the auth.ts file inside the activity-starter folder and create an interface named ILogin containing two string attributes, namely, email and password. Write the following code to accomplish this:
interface ILogin{
email: string;
password:string;
}
- Create a Login class that takes in an object that contains the string attributes of email and password. Also, pass the ILogin interface as a parameter to the constructor function inside the Login class:
export class Login{
email: string;
password: string;
constructor(args: ILogin){
this.email = args.email;
this.password = args.password;
}
}
- Create an interface named IAuth containing two attributes, user and source. Here, the user attribute will be of the Login type, and the source attribute will be of the string type. Write the following code to implement this:
interface IAuth{
user: Login;
source: string;
}
- Create an Auth class that takes in an object containing the attributes of user and source. Also, create a constructor function that will take the IAuth interface as a parameter. Write the following code to accomplish this:
export default class Auth{
user: Login;
source: string;
constructor(args: IAuth){
this.user = args.user;
this.source = args.source;
}
}
- Next, we'll add a validUser() method to the Auth class, which returns a string stating that the user is authenticated if email is equal to [email protected], and if password is equal to secret123. If either of those values doesn't match, the function will return a string stating that the user is not authenticated. Write the following code to define this function:
validUser(): string{
const { email, password } = this.user;
if(email === "[email protected]" && password === "secret123"){
return `Validating user…User is authenticated: true`;
} else {
return `Validating user…User is authenticated: false`;
}
}
- Create two objects of the Login class, namely, goodUser and badUser. For the goodUser object, set the email value to [email protected] and password to secret123. For the badUser object, set the email value to [email protected] and password to whoops. Write the following code to accomplish this:
const goodUser = new Login({
email: "[email protected]",
password: "secret123"
});
const badUser = new Login({
email: "[email protected]",
password: "whoops"
});
- Create two objects of the Auth class, namely, authAttemptFromGoodUser and authAttemptFromBadUser. For the first object, assign the goodUser object of the Login class to the user attribute and Google to the source attribute. For the second object, assign the badUser object of the Login class to the user attribute and Google to the source attribute. Once both objects are created, call the validUser() function of the Auth class and print the results in the terminal. Write the following code to accomplish this:
const authAttemptFromGoodUser = new Auth({
user: goodUser,
source: "Google"
});
console.log(authAttemptFromGoodUser.validUser());
const authAttemptFromBadUser = new Auth({
user: badUser,
source: "Google"
});
console.log(authAttemptFromBadUser.validUser());
- Now, in the terminal, type the following commands to generate the JavaScript code and run it:
tsc auth.ts
node auth.js
Once we run the preceding commands, the following output is displayed in the terminal:
Validating user…User is authenticated: true
Validating user…User is authenticated: false
In the preceding output, the validUser() function returns a true value when the correct details of user and password are passed. When incorrect details are passed, the function returns a false value.
5. Interfaces and Inheritance
Activity 5.01: Building a User Management Component Using Interfaces
Solution:
- Create a user object interface with the following properties: email : string, loginAt : number, and token : string. Make loginAt and token optional:
interface UserObj {
email: string
loginAt?: number
token?: string
}
- Build a class interface with a global property user and use the interface created in Step 1 to apply user object rules. You need to define a getUser method that returns the user object. Use the interface to ensure that the return object is a user object. Finally, define a login method that takes a user object and password(type string) as arguments. Use the user object interface as the user argument type:
interface UserClass {
user: UserObj
getUser(): UserObj
login(user: UserObj, password: string):UserObj
}
- Declare a class called UserClass that implements the class interface from Step 2. Your login method should assign the local function's user argument to the global user property and return the global user. The getUser method should return the global user:
class User implements UserClass {
user:UserObj
getUser(): UserObj {
return this.user
}
login(user: UserObj, password: string): UserObj {
// set props user object
return this.user = user
}
}
- Create an instance of your class, as declared in Step 2:
const newUserClass:UserClass = new User()
- Create a user object instance:
const newUser: UserObj = {
email: "[email protected]",
loginAt: new Date().getTime(),
token: "123456"
}
- Console out our methods to ensure that they are working as expected:
console.log(
newUserClass.login(newUser, "password123")
)
console.log(
newUserClass.getUser()
)
The expected output is as follows:
{ email: '[email protected]', loginAt: 1614068072515, token: '123456' }
{ email: '[email protected]', loginAt: 1614068072515, token: '123456' }
This user management class is a central location where you can isolate all your application's user-related functions and rules. The rules you have crafted by using interfaces to implement your code will ensure that your code is better supported, easier to work with, and bug-free.
Activity 5.02: Creating a Prototype Web Application for a Vehicle Showroom Using Inheritance
Solution:
- Create a parent class that will hold all common methods and properties for a base vehicle, define a constructor method that allows you to initialize the base properties of this class, and add a method that returns your properties as an object. If necessary, add an access modifier to properties and class methods you want to control access to:
class Motor {
private name: string
wheels: number
bodyType: string
constructor(name: string, wheels: number, bodyType: string) {
this.name = name
this.wheels = wheels
this.bodyType = bodyType
}
protected getName(): string {
return this.name
}
buildMotor() {
return {
wheels: this.wheels,
bodyType: this.bodyType,
name: this.name
}
}
}
- Derive two child classes from your parent class that are types of vehicles, for example, Car and Truck. Override your constructor to add some unique properties to your child classes based on the type of vehicles:
class Car extends Motor {
rideHeight: number
constructor(name: string, wheels: number, bodyType: string, rideHeight: number) {
super(name, wheels, bodyType)
this.rideHeight = rideHeight
}
_buildMotor() {
return {
...super.buildMotor,
rideHeight: this.rideHeight
}
}
}
class Truck extends Motor {
offRoad: boolean
constructor(name: string, wheels: number, bodyType: string, offRoad: boolean) {
super(name, wheels, bodyType)
this.offRoad = offRoad
}
_buildMotor() {
return {
wheels: this.wheels,
bodyType: this.bodyType,
offRoad: this.offRoad
}
}
}
- Derive a class from one of the child classes created in Step 3, for example, Suv, which will have some of the things a truck might have, so it would be logical to extend Truck:
class Suv extends Truck {
roofRack: boolean
thirdRow: boolean
constructor(name: string, wheels: number, bodyType: string,
offRoad: boolean, roofRack: boolean, thirdRow: boolean) {
super(name, wheels, bodyType, offRoad)
this.roofRack = roofRack;
this.thirdRow = thirdRow
}
}
- Instantiate your child class:
const car: Car = new Car('blueBird', 4, 'sedan', 14)
const truck: Truck = new Truck('blueBird', 4, 'sedan', true)
const suv: Suv = new Suv('xtrail', 4, 'box', true, true, true)
- Console out our child class instance:
console.log(car)
console.log(truck)
console.log(suv)
You will obtain the following output:
Car { name: 'blueBird', wheels: 4, bodyType: 'sedan', rideHeight: 14 }
Truck { name: 'blueBird', wheels: 4, bodyType: 'sedan', offRoad: true }
Suv {
name: 'xtrail',
wheels: 4,
bodyType: 'box',
offRoad: true,
roofRack: true,
thirdRow: true
}
In this activity, you created the bare minimum classes that we require for the web application. We have shown how we can build complexity, reuse, and extend application code with inheritance in TypeScript.
6. Advanced Types
Activity 6.01: Intersection Type
Solution:
- Create a Motor type, which will house some common properties you may reuse on their own or in combination with other types to describe a vehicle object. You can use the following properties as a starting point: color, doors, wheels, and fourWheelDrive:
type Motor = {
color: string;
doors: number;
wheels: number;
fourWheelDrive: boolean;
}
- Create a Truck type with properties common to a truck, for example, doubleCab and winch:
type Truck = {
doubleCab: boolean;
winch: boolean;
}
- Intersect the two types to create a PickUpTruck type:
type PickUpTruck = Motor & Truck;
- Build a TruckBuilder function that returns our PickUpTruck type and also takes PickUpTruck as an argument:
function TruckBuilder (truck: PickUpTruck): PickUpTruck {
return truck
}
const pickUpTruck: PickUpTruck = {
color: 'red',
doors: 4,
doubleCab: true,
wheels: 4,
fourWheelDrive: true,
winch: true
}
- Console out the function return:
console.log (
TruckBuilder(pickUpTruck)
)
You should see the following output once you run the file:
{
color: 'red',
doors: 4,
doubleCab: true,
wheels: 4,
fourWheelDrive: true,
winch: true
}
Activity 6.02: Union Type
Solution:
- Build a LandPack and an AirPack type. Make sure to have a literal to identify the package type:
type LandPack = {
height: number,
weight: number,
type: "land",
label?: string };
type AirPack = {
height: number,
weight: number,
type : "air",
label?: string };
- Construct a union type, ComboPack, which can be LandPack or AirPack:
type ComboPack = LandPack | AirPack
- Make a Shipping class to process your packages. Make sure to use your literal to identify your package types and modify your package with the correct label for its type:
class Shipping {
Process(pack: ComboPack) {
// check package type
if(pack.type === "land") {
return this.ToLand(pack);
} else {
return this.ToAir(pack);
}
}
ToAir(pack: AirPack): AirPack {
pack.label = "air cargo"
return pack;
}
ToLand(pack: LandPack): LandPack {
pack.label = "land cargo"
return pack;
}
}
- Create two package objects of the AirPack and LandPack types. Then, instantiate your Shipping class, process your new objects, and console out the modified objects:
const airPack: AirPack = {
height: 5,
weight: 10,
type: "air",
};
const landPack: LandPack = {
height: 5,
weight: 10,
type: "land",
};
const shipping = new Shipping;
console.log(
shipping.Process(airPack)
);
console.log(
shipping.Process(landPack)
);
Once you run the file, you will obtain the following output:
{ height: 5, weight: 10, type: 'air', label: 'air cargo' }
{ height: 5, weight: 10, type: 'land', label: 'land cargo' }
Activity 6.03: Index Type
Solution:
- Build your PackageStatus index type using an interface with a status property of the string type and a value of the Boolean type:
interface PackageStatus {
[status: string]: boolean;}
- Create a Package type that includes a property of the PackageStatus type and some common properties of a typical package:
type Package = {
packageStatus: PackageStatus,
barcode: number,
weight: number
}
- Make a class to process your Package type, which takes the Package type on initialization, has a method to return your packageStatus property, and a method that updates and returns the packageStatus property:
class PackageProcess {
pack: Package
constructor(pack: Package) {
this.pack = pack;
}
Status () {
return this.pack.packageStatus;
}
UpdateStatus(status: string, state: boolean) {
this.pack.packageStatus[status] = state;
return this.Status();}
}
- Create a Package object called pack:
const pack: Package = {
packageStatus: {"shipped": false, "packed": true, "delivered": true},
barcode: 123456,
weight: 28
};
- Instantiate your PackageProcess class with your new pack object:
const processPack = new PackageProcess(pack)
- Console out your pack status:
console.log(processPack.Status());
- Update your pack status and console out your new pack status:
console.log(
processPack.UpdateStatus("shipped", true)
);
Once you run the file, you should obtain the following output:
{ shipped: false, packed: true, delivered: true }
{ shipped: true, packed: true, delivered: true }
The first line in the preceding output displays the original pack status, whereas the second line displays the updated pack status.
7. Decorator
Activity 7.01: Creating Decorators for Call Counting
Solution:
- Create a class called Person with the public properties firstName, lastName, and birthday.
- Add a constructor that initializes the properties via the constructor parameters:
class Person {
constructor (public firstName: string,
public lastName: string,
public birthDate: Date) {
}
}
- Add a private field called _title and expose it via a getter and setter as a property called title:
private _title: string;
public get title() {
return this._title;
}
public set title(value: string) {
this._title = value;
}
- Add a method called getFullName that will return the full name of person:
public getFullName() {
return `${this.firstName} ${this.lastName}`;
}
- Add a method called getAge that will return the current age of the person (by subtracting the birthday from the current year):
public getAge() {
// only sometimes accurate
const now = new Date();
return now.getFullYear() – this.birthDate.getFullYear();
}
- Create a global object called count and initialize it to the empty object:
const count = {};
- Create a constructor wrapping decorator factory called CountClass that will take a string parameter called counterName:
type Constructable = { new (...args: any[]): {} };
function CountClass(counterName: string) {
return function <T extends Constructable>(constructor: T) {
// wrapping code here
}
}
- Inside the wrapping code, increase the count object's property defined in the counterName parameter by 1 and then set the prototype chain of the wrapped constructor:
const wrappedConstructor: any = function (...args: any[]) {
const result = new constructor(...args);
if (count[counterName]) {
count[counterName]+=1;
} else {
count[counterName]=1;
}
return result;
};
wrappedConstructor.prototype = constructor.prototype;
return wrappedConstructor;
- Create a method wrapping decorator factory called CountMethod that will take a string parameter called counterName:
function CountMethod(counterName: string) {
return function (target: any, propertyName: string,
descriptor: PropertyDescriptor) {
// method wrapping code here
}
}
- Add checks for whether the descriptor parameter has value, get, and set properties:
if (descriptor.value) {
// method decoration code
}
if (descriptor.get) {
// get property accessor decoration code
}
if (descriptor.set) {
// set property accessor decoration code
}
- In each respective branch, add code that wraps the method:
// method decoration code
const original = descriptor.value;
descriptor.value = function (...args: any[]) {
// counter management code here
return original.apply(this, args);
}
// get property accessor decoration code
const original = descriptor.get;
descriptor.get = function () {
// counter management code here
return original.apply(this, []);
}
// set property accessor decoration code
const original = descriptor.set;
descriptor.set = function (value: any) {
// counter management code here
return original.apply(this, [value]);
}
- Inside the wrapping code, increase the count object's property defined in the counterName parameter by 1:
// counter management code
if (count[counterName]) {
count[counterName]+=1;
} else {
count[counterName]=1;
}
- Decorate the class using the CountClass decorator, with a person parameter:
@CountClass('person')
class Person{
- Decorate getFullName, getAge, and the title property getter with the CountMethod decorator, with the person-full-name, person-age, and person-title parameters, respectively:
@CountMethod('person-full-name')
public getFullName() {
@CountMethod('person-age')
public getAge() {
@CountMethod('person-title')
public get title() {
- Write code outside the class that will instantiate three person objects:
const first = new Person("Brendan", "Eich", new Date(1961,6,4));
const second = new Person("Anders", "Hejlsberg ", new Date(1960,11,2));
const third = new Person("Alan", "Turing", new Date(1912,5,23));
- Write code that will call the getFullName and getAge methods on the objects:
const fname = first.getFullName();
const sname = second.getFullName();
const tname = third.getFullName();
const fage = first.getAge();
const sage = second.getAge();
const tage = third.getAge();
- Write code that will check whether the title property is empty and set it to something if it is:
if (!first.title) {
first.title = "Mr."
}
if (!second.title) {
second.title = "Mr."
}
if (!third.title) {
third.title = "Mr."
}
- Write code that will log the count object to the console:
console.log(count);
Once you run the file, you will obtain the following output on the console:
{
person: 3,
'person-full-name': 3,
'person-age': 3,
'person-title': 6
}
Activity 7.02: Using Decorators to Apply Cross-Cutting Concerns
Solution:
- Create the code for the BasketBallGame class:
interface Team {
score: number;
name: string;
}
class BasketBallGame {
private team1: Team;
private team2: Team;
constructor(teamName1: string, teamName2: string) {
this.team1 = { score: 0, name: teamName1 };
this.team2 = { score: 0, name: teamName2 };
}
getScore() {
return `${this.team1.score}:${this.team2.score}`;
}
updateScore(byPoints: number, updateTeam1: boolean) {
if (updateTeam1) {
this.team1.score += byPoints;
} else {
this.team2.score += byPoints;
}
}
}
- Create a class decorator factory called Authenticate that will take a permission parameter and return a class decorator with constructor wrapping. The class decorator should load the permissions metadata property (array of strings), then check if the passed parameter is an element of the array. If the passed parameter is not an element of the array, the class decorator should throw an error, and if present, it should continue with the class creation:
type Constructable = { new (...args: any[]): {} };
function Authenticate(permission: string) {
return function <T extends Constructable>(constructor: T) {
const wrappedConstructor: any = function (...args: any[]) {
if (Reflect.hasMetadata("permissions", wrappedConstructor)) {
const permissions = Reflect.getMetadata("permissions",
wrappedConstructor) as string[];
if (!permissions.includes(permission)) {
throw Error(`Permission ${permission} not present`);
}
}
const result = new constructor(...args);
return result;
};
wrappedConstructor.prototype = constructor.prototype;
return wrappedConstructor;
};
}
- Define a metadata property of the BasketballGame class called permissions with the value ["canUpdateScore"]:
Reflect.defineMetadata("permissions", ["canUpdateScore"], BasketBallGame);
- Apply the class decorator factory on the BasketballGame class with a parameter value of "canUpdateScore":
@Authenticate("canUpdateScore")
class BasketBallGame {
- Create a method decorator called MeasureDuration that will use method wrapping to start a timer before the method body is executed and stop it after it's done. You need to calculate the duration and push it to a metadata property called durations for the method:
function MeasureDuration() {
return function (target: any, propertyName: string,
descriptor: PropertyDescriptor) {
if (descriptor.value) {
const original = descriptor.value;
descriptor.value = function (...args: any[]) {
const start = Date.now();
const result = original.apply(this, args);
const end = Date.now();
const duration = end-start;
if (Reflect.hasMetadata("durations", target, propertyName)) {
const existing = Reflect.getMetadata("durations",
target, propertyName) as number[];
Reflect.defineMetadata("durations", existing.concat(duration),
target, propertyName);
} else {
Reflect.defineMetadata("durations", [duration],
target, propertyName)
}
return result;
}
}
}
}
- Apply the MeasureDuration method decorator on the updateScore method:
@MeasureDuration()
updateScore(byPoints: number, updateTeam1: boolean) {
- Create a method decorator factory called Audit that will take a message parameter and return a method decorator. The method decorator should use method wrapping to get the arguments and the return value of the method. After the successful execution of the original method, it should display the audit log to the console:
function Audit(message: string) {
return function (target: any, propertyName: string,
descriptor: PropertyDescriptor) {
if (descriptor.value) {
const original = descriptor.value;
descriptor.value = function (...args: any[]) {
const result = original.apply(this, args);
console.log(`[AUDIT] ${message} (${propertyName}) called with:`)
console.log("[AUDIT]", args);
console.log("[AUDIT] and returned result:")
console.log("[AUDIT]", result);
return result;
}
}
}
}
- Apply the Audit method decorator factory on the updateScore method, with a parameter value of Updated score:
@MeasureDuration()
@Audit("Updated score")
updateScore(byPoints: number, updateTeam1: boolean) {
- Create a parameter decorator called OneTwoThree that will add the decorated parameter in the one-two-three metadata property:
function OneTwoThree(target: any, propertyKey: string,
parameterIndex: number) {
if (Reflect.hasMetadata("one-two-three", target, propertyKey)) {
const existing = Reflect.getMetadata("one-two-three",
target, propertyKey) as number[];
Reflect.defineMetadata("one-two-three",
existing.concat(parameterIndex), target, propertyKey);
} else {
Reflect.defineMetadata("one-two-three",
[parameterIndex], target, propertyKey);
}
}
- Create a method decorator called Validate that will use method wrapping to load all values for the one-two-three metadata property, and for all marked parameters, check their value. If the value is 1, 2, or 3, you should continue the execution of the original method. If not, you should stop the execution with an error:
function Validate() {
return function (target: any, propertyKey:string,
descriptor: PropertyDescriptor) {
const original = descriptor.value;
descriptor.value = function (...args: any[]) {
// validate parameters
if (Reflect.hasMetadata("one-two-three",
target, propertyKey)) {
const markedParams = Reflect.getMetadata("one-two-three",
target, propertyKey) as number[];
for (const marked of markedParams) {
if (![1,2,3].includes(args[marked])) {
throw Error(`The parameter at position ${marked} can only be 1, 2 or 3`);
}
}
}
return original.apply(this, args);
}
}
}
- Apply the OneTwoThree decorator to the byPoints parameter of updateScore and apply the Validate decorator to the updateScore method.
@MeasureDuration()
@Audit("Updated score")
@Validate()
updateScore(@OneTwoThree byPoints: number, updateTeam1: boolean) {
- Create a game object and update its score a few times:
const game = new BasketBallGame("LA Lakers", "Boston Celtics");
game.updateScore(3, true);
game.updateScore(2, false);
game.updateScore(2, true);
game.updateScore(2, false);
game.updateScore(2, false);
game.updateScore(2, true);
game.updateScore(2, false);
When you run the file, the console should reflect the application of all decorators:
[AUDIT] Updated score (updateScore) called with arguments:
[AUDIT] [ 3, true ]
[AUDIT] and returned result:
[AUDIT] undefined
[AUDIT] Updated score (updateScore) called with arguments:
[AUDIT] [ 2, false ]
[AUDIT] and returned result:
[AUDIT] undefined
[AUDIT] Updated score (updateScore) called with arguments:
[AUDIT] [ 2, true ]
[AUDIT] and returned result:
[AUDIT] undefined
[AUDIT] Updated score (updateScore) called with arguments:
[AUDIT] [ 2, false ]
[AUDIT] and returned result:
[AUDIT] undefined
[AUDIT] Updated score (updateScore) called with arguments:
[AUDIT] [ 2, false ]
[AUDIT] and returned result:
[AUDIT] undefined
[AUDIT] Updated score (updateScore) called with arguments:
[AUDIT] [ 2, true ]
[AUDIT] and returned result:
[AUDIT] undefined
[AUDIT] Updated score (updateScore) called with arguments:
[AUDIT] [ 2, false ]
[AUDIT] and returned result:
[AUDIT] undefined
7:8
8. Dependency Injection in TypeScript
Activity 8.01: DI-Based Calculator
Solution:
In this activity, we will build a basic calculator that utilizes DI to evaluate mathematical expressions, as well as logging its output to either the console or a file:
- To start things off, define the basic building block of our calculator – an operator. This is defined via an interface, which actual implementations can rely on:
export interface Operator {
readonly symbol: string;
evaluate(a: number, b: number): number;
}
You need to create this file in the src/interfaces folder and save it as operator.interface.ts.
- Next, implement the first operator – the addition operator. This will be a class that implements the Operator interface:
import { Operator } from '../interfaces/operator.interface';
export class AddOperator implements Operator {
readonly symbol = '+';
public evaluate(a: number, b: number) {
return a + b;
}
}
The preceding code needs to be written in a file called add.operator.ts in srcoperators.
- Make this operator available for injection by InversifyJS by adding the @injectable decorator to the class:
import { injectable } from 'inversify';
import { Operator } from '../interfaces/operator.interface';
@injectable()
export class AddOperator implements Operator {
readonly symbol = '+';
public evaluate(a: number, b: number) {
return a + b;
}
}
- Next, since interfaces don't exist at runtime, we need to create some runtime representation of our abstraction for AddOperator. This is usually done using symbols, and will be used by InversifyJS at runtime to understand what needs to be injected. We'll define it under a TYPES constant, which we'll be able to add other symbols for later:
export const TYPES = {
AddOperator: Symbol.for('AddOperator'),
};
This code needs to be written in a new file saved in the src ypes folder. We have named this file index.ts.
- Now, build a first draft for our calculator, which will use AddOperator, via DI:
import { injectable, inject } from 'inversify';
import { TYPES } from '../types';
import { AddOperator } from '../operators/add.operator';
@injectable()
export class Calculator {
constructor(@inject(TYPES.AddOperator) private addOperator: AddOperator) {}
evaluate(expression: string) {
const expressionParts = expression.match(/[d.]+|D+/g);
if (expressionParts === null) return null;
// for now, we're only going to support basic expressions: X+Y
const [operandA, operator, operandB] = expressionParts;
if (operator !== this.addOperator.symbol) {
throw new Error(`Unsupported operator. Expected ${this.addOperator.symbol}, received: ${operator}.`);
}
const result = this.addOperator.evaluate(Number(operandA), Number(operandB));
return result;
}
}
Here, we implement a Calculator class that has a single method – evaluate, which takes in an expression as a string, and returns the result for that expression. This code needs to be written in a new file called index.ts, saved in the src/calculator folder.
Note
The current implementation only supports expressions in the form of X+Y (where X and Y can be any numbers). We'll fix that later in the activity.
Calculator gets AddOperator in DI, and in order to evaluate the expression, it first runs through a regular expression to split it by numbers, and then it destructures the result array. Lastly, it uses the evaluate method of AddOperator to perform the final expression evaluation.
This means that the calculator's responsibility is only to destructure the expression into its individual parts, and then pass it off to AddOperator to handle the math evaluation logic. This demonstrates how using DI helps to retain the single responsibility principle of SOLID.
- Configure the IoC container (in the src/ioc.config.ts file) so that Calculator can receive AddOperator when it asks for TYPES.AddOperator:
import { Container } from 'inversify';
import { Calculator } from './calculator/index';
import { Operator } from './interfaces/operator.interface';
import { AddOperator } from './operators/add.operator';
import { TYPES } from './types';
export const container = new Container();
container.bind<Operator>(TYPES.AddOperator).to(AddOperator);
container.bind(Calculator).toSelf();
- Finally, our main file (src/main.ts), which will kick things off when we run the application, is as follows:
import 'reflect-metadata';
import { Calculator } from './calculator/index';
import { container } from './ioc.config';
const calculator = container.get(Calculator);
try {
const result = calculator.evaluate('13+5');
console.log('result is', result);
} catch (err) {
console.error(err);
}
This is just using our previously defined IoC container and asking it for a Calculator instance. This is how we ask for instances of symbols explicitly in InversifyJS in an imperative API, which we need here, since we want to kick things off. Since InversifyJS is the one creating Calculator, it also looks at its constructor and sees that we've asked for a TYPES.AddOperator, which it then looks up in the IoC container again to resolve and gives that to the calculator's constructor.
Once you run this file, you should obtain the following output:
result is 18
Note that you can either run the code by executing npm start in the activity-starter folder or by executing npx ts-node main.ts in the src folder.
Note
If the AddOperator class were also to require dependencies using @inject, the same process described above would be repeated again to get them, and so on recursively until all dependencies have been resolved.
- Next, we can implement the other operators, similar to how we did with AddOperator – just replace the symbol with the relevant one (-, *, /) and the evaluate method's implementation with the relevant math operation:
- Here is the code for SubtractOperator (subtract.operator.ts):
// operators/subtract.operator.ts
import { injectable } from 'inversify';
import { Operator } from '../interfaces/operator.interface';
@injectable()
export class SubtractOperator implements Operator {
readonly symbol = '-';
public evaluate(a: number, b: number) {
return a - b;
}
}
- Here is the code for MultiplyOperator (multiply.operator.ts):
// operators/multiply.operator.ts
import { injectable } from 'inversify';
import { Operator } from '../interfaces/operator.interface';
@injectable()
export class MultiplyOperator implements Operator {
readonly symbol = '*';
public evaluate(a: number, b: number) {
return a * b;
}
}
- Here is the code for DivideOperator (divide.operator.ts):
// operators/divide.operator.ts
import { injectable } from 'inversify';
import { Operator } from '../interfaces/operator.interface';
@injectable()
export class DivideOperator implements Operator {
readonly symbol = '/';
public evaluate(a: number, b: number) {
return a / b;
}
}
Now, instead of creating an injection token for each Operator, injecting each one into Calculator, and then acting on each, we can create a more generic implementation of Calculator with the help of the @multiInject decorator. This decorator allows an injection token to be specified and an array of all implementations registered for that token to be obtained. This way, Calculator is not even coupled to an abstraction for any specific operator and only gets a dynamic list of operators, which can have any implementation as long as it conforms to the Operator interface.
- Update the types/index.ts file with the following code:
export const TYPES = {
Operator: Symbol.for('Operator'),
};
This replaces our AddOperator symbol from earlier with a more generic one.
- Update the calculator app code (src/calculator/index.ts):
import { injectable, multiInject } from 'inversify';
import { Operator } from '../interfaces/operator.interface';
import { tryParseNumberString, tryParseOperatorSymbol } from "../utils/math";
import { TYPES } from '../types';
@injectable()
export class Calculator {
constructor(@multiInject(TYPES.Operator) private operators: Operator[]) {}
evaluate(expression: string) {
// same as before…
}
}
Note that in further steps, you will need to modify the preceding code to include two functions, tryParseNumberString and tryParseOperatorSymbol. Both these functions are created in the math.ts file placed in the src/utils folder.
- Update the ioc.config.ts file:
import { Container } from 'inversify';
import { Calculator } from './calculator';
import { Operator } from './interfaces/operator.interface';
import { AddOperator } from './operators/add.operator';
import { DivideOperator } from './operators/divide.operator';
import { MultiplyOperator } from './operators/multiply.operator';
import { SubtractOperator } from './operators/subtract.operator';
import { TYPES } from './types';
export const container = new Container();
container.bind<Operator>(TYPES.Operator).to(AddOperator);
container.bind<Operator>(TYPES.Operator).to(SubtractOperator);
container.bind<Operator>(TYPES.Operator).to(MultiplyOperator);
container.bind<Operator>(TYPES.Operator).to(DivideOperator);
container.bind(Calculator).toSelf();
- Next, fix the naïve evaluate method of Calculator to be more generic, too. First, instead of relying on a specific token, map all expression parts and parse them:
evaluate(expression: string) {
// ...
const parsedExpressionParts = expressionParts.map(part => {
const numberParseResult = tryParseNumberString(part);
if (numberParseResult.isNumberString) return numberParseResult.number;
const operatorParseResult = tryParseOperatorSymbol(part, this.operators);
if (operatorParseResult.isOperatorSymbol) return operatorParseResult.operator;
throw new Error(`Unexpected part: ${part}`);
});
}
This will give us back an array of numbers and operators.
Note
Try to implement tryParseNumberString and tryParseOperatorSymbol yourself. However, you can refer to utils/math.ts to help you complete this step.
- Then, reduce this array to get our final result:
evaluate(expression: string) {
// ...
const { result } = parsedExpressionParts.reduce<{ result: number; queuedOperator: Operator | null }>((acc, part) => {
if (typeof part === 'number') {
// this is the first number we've encountered, just set the result to that.
if (acc.queuedOperator === null) {
return { ...acc, result: part };
}
// there's a queued operator – evaluate the previous result with this and
// clear the queued one.
return {
queuedOperator: null,
result: acc.queuedOperator.evaluate(acc.result, part),
};
}
// this is an operator – queue it for later execution
return {
...acc,
queuedOperator: part,
};
}, { result: 0, queuedOperator: null });
return result;
}
- Simplify the code in the ioc.config.ts file even further by leveraging barrels. Create operator/index.ts with the following code:
// operators/index.ts
export * from './add.operator';
export * from './divide.operator';
export * from './multiply.operator';
export * from './subtract.operator';
- Update the ioc.config.ts file:
// ioc.config.ts
import { Container } from 'inversify';
import { Calculator } from './calculator';
import { Operator } from './interfaces/operator.interface';
import * as Operators from './operators';
import { TYPES } from './types';
export const container = new Container();
Object.values(Operators).forEach(Operator => {
container.bind<Operator>(TYPES.Operator).to(Operator);
});
container.bind(Calculator).toSelf();
This means we now import an Operators object from the barrel file, which includes everything that's exposed there. We take the values of that barrel object and bind each one to TYPES.Operator, generically.
This means that adding another Operator object only requires us to create a new class that implements the Operator interface and add it to our operators/index.ts file. The rest of the code should work without any changes.
- Our main.ts file is changed to a slightly more complicated expression:
import 'reflect-metadata';
import { Calculator } from './calculator';
import { container } from './ioc.config';
const calculator = container.get(Calculator);
try {
const result = calculator.evaluate('13*10+20');
console.log('result is', result);
} catch (err) {
console.error(err);
}
When you run the main.ts file (using npx ts-node main.ts), you should obtain the following output:
result is 150
Bonus:
- As a bonus, let's say that we want some reporting on the operations performed in the calculator. We can add logging pretty easily without too many changes. We'll create two reporting implementations, one to the console and another to a filesystem:
Note
The filesystem implementation will only work in a Node.js environment, since it will use some modules only available to it.
- Define the Logger interface:
export interface Logger {
log(message: string, ...args: any[]): void;
warn(message: string, ...args: any[]): void;
error(message: string, ...args: any[]): void;
}
This will serve as the public API that the consumers wanting a logger can use, and that our implementations will need to adhere to.
- Create the console-based implementation of Logger first:
import { injectable } from 'inversify';
import { Logger } from '../interfaces/logger.interface';
@injectable()
export class ConsoleLogger implements Logger {
log(message: string, ...args: any[]) {
console.log('[LOG]', message, ...args);
}
warn(message: string, ...args: any[]) {
console.warn('[WARN]', message, ...args);
}
error(message: string, ...args: any[]) {
console.error('[ERROR]', message, ...args);
}
}
This is a simple wrapper class around the console object that's built into browser engines and Node.js. It adheres to our Logger interface, and so allows consumers to depend on it. For the example, we've also added the type of the message to the beginning of the actual output.
- Next, create an injection token for it, and register it in our container. The updated code for the types/index.ts file is as follows:
// types/index.ts
export const TYPES = {
Operator: Symbol.for('Operator'),
Logger: Symbol.for('Logger'),
};
The updated code for the src/ioc.config.ts file is as follows:
// ioc.config.ts
import { Container } from 'inversify';
import { Calculator } from './calculator';
import { Logger } from './interfaces/logger.interface';
import { Operator } from './interfaces/operator.interface';
import { ConsoleLogger } from './logger/console.logger';
import * as Operators from './operators';
import { TYPES } from './types';
export const container = new Container();
Object.values(Operators).forEach(Operator => {
container.bind<Operator>(TYPES.Operator).to(Operator);
});
container.bind(Calculator).toSelf();
container.bind<Logger>(TYPES.Logger).to(ConsoleLogger);
- Finally, use the logger in our Calculator class:
import { injectable, multiInject, inject, optional } from 'inversify';
import { Operator } from '../interfaces/operator.interface';
import { TYPES } from '../types';
import { tryParseNumberString, tryParseOperatorSymbol } from '../utils/math';
import { Logger } from '../interfaces/logger.interface';
@injectable()
export class Calculator {
constructor(
@multiInject(TYPES.Operator) private operators: Operator[],
@inject(TYPES.Logger) @optional() private logger?: Logger
) {}
evaluate(expression: string) {
// ...
const { result } = parsedExpressionParts.reduce<{ result: number; queuedOperator: Operator | null }>( ... );
this.logger && this.logger.log(`Calculated result of expression: ${expression} to be: ${result}`);
return result;
}
}
Notice that we use the @optional decorator to indicate to InversifyJS that Calculator doesn't require a Logger to operate, but if it has one it can inject, Calculator can use it. This is also why it's marked as an optional argument in the constructor, and why we need to check whether it exists before calling the log method.
The output to the console when running it should be as follows:
[LOG] Calculated result of expression:13*10+20 is 150
Now, let's say we want to replace our console-based logger with a file-based one, which will persist across runs so that we can track the calculator's evaluation history.
- Create a FileLogger class that implements Logger:
import fs from 'fs';
import { injectable } from 'inversify';
import { Logger } from '../interfaces/logger.interface';
@injectable()
export class FileLogger implements Logger {
private readonly loggerPath: string = '/tmp/calculator.log';
log(message: string, ...args: any[]) {
this.logInternal('LOG', message, args);
}
warn(message: string, ...args: any[]) {
this.logInternal('WARN', message, args);
}
error(message: string, ...args: any[]) {
this.logInternal('ERROR', message, args);
}
private logInternal(level: string, message: string, ...args: any[]) {
fs.appendFileSync(this.loggerPath, this.logLineFormatter(level, message, args));
}
private logLineFormatter(level: string, message: string, ...args: any[]) {
return `[${level}]: ${message}${args} `;
}
}
- And finally, all we need to do in order to replace our console-based logger with a file-based one is a single-line change in our IoC container configuration.
For console-based logging, use this command:
container.bind<Logger>(TYPES.Logger).to(ConsoleLogger);
For file-based logging, use this command:
container.bind<Logger>(TYPES.Logger).to(FileLogger);
Make sure to import this logger correctly in the ioc.config.ts file.
The final output to the file is as follows:

Figure 8.8: Final output of the file-based logger in activity-starter/src//tmp/calculator.log, after changing the app to use it
9. Generics and Conditional Types
Activity 9.01: Creating a DeepPartial<T> Type
Solution:
Let's build this type up, step by step:
- First, let's create a PartialPrimitive type:
type PartialPrimitive = string | number | boolean | symbol | bigint | Function | Date;
- Then, let's start by defining a basic DeepPartial<T> type:
type DeepPartial<T> = T extends PartialPrimitive ? T : Partial<T>;
Next, we need to handle more complex structures – such as arrays, sets, and maps. These require using the infer keyword, and in addition to that, require some more "manual wiring" for each of these types.
- Let's start with adding handling for the Array type:
type DeepPartial<T> =
T extends PartialPrimitive
? T
: T extends Array<infer U>
? Array<DeepPartial<U>>
: Partial<T>;
This would've worked, but due to current limitations in TypeScript at the time of writing, this doesn't compile, since DeepPartial<T> circularly references itself:

Figure 9.17: Current TypeScript version limitation not allowing generic types to reference themselves
To work around this, we'll create a helper type, DeepPartialArray<T>, and use it:
interface DeepPartialArray<T> extends Array<DeepPartial<T>> {}
type DeepPartial<T> =
T extends PartialPrimitive
? T
: T extends Array<infer U>
? DeepPartialArray<U>
: Partial<T>;
This works around the problem and compiles fine.
- Next, to support a Set, a similar approach to what we did in the previous step is needed, so we'll create an interface to serve as a "middle-man" for building the entire generic type:
interface DeepPartialArray<T> extends Array<DeepPartial<T>> {}
interface DeepPartialSet<T> extends Set<DeepPartial<T>> {}
type DeepPartial<T> = T extends PartialPrimitive
? T
: T extends Array<infer U>
? DeepPartialArray<U>
: T extends Set<infer U>
? DeepPartialSet<U>
: Partial<T>;
- Similarly to arrays and sets, maps also need the approach wherein we need create an interface to serve as a "middle-man" for building the entire generic type:
interface DeepPartialArray<T> extends Array<DeepPartial<T>> {}
interface DeepPartialSet<T> extends Set<DeepPartial<T>> {}
interface DeepPartialMap<K, V> extends Map<DeepPartial<K>, DeepPartial<V>> {}
type DeepPartial<T> = T extends PartialPrimitive
? T
: T extends Array<infer U>
? DeepPartialArray<U>
: T extends Map<infer K, infer V>
? DeepPartialMap<K, V>
: T extends Set<infer U>
? DeepPartialSet<U>
: Partial<T>;
Note
This workaround is no longer needed as of TypeScript 3.7.
- Lastly, let's make our DeepPartial<T> type support objects too:
type DeepPartial<T> = T extends PartialPrimitive
? T
: T extends Array<infer U>
? DeepPartialArray<U>
: T extends Map<infer K, infer V>
? DeepPartialMap<K, V>
: T extends Set<infer U>
? DeepPartialSet<U>
: T extends {}
? { [K in keyof T]?: DeepPartial<T[K]> }
: Partial<T>;
This completes the DeepPartial<T> implementation.
A great use case for the DeepPartial<T> type is in a server-side PATCH method handler, which updates a given resource with new data. In PATCH requests, all fields are usually optional:
import express from 'express';
const app = express();
app.patch('/users/:userId', async (req, res) => {
const userId = req.params.userId;
const userUpdateData: DeepPartial<User> = req.body;
const user = await User.getById(userId);
await user.update(userUpdateData);
await user.save();
res.status(200).end(user);
});
Notice that we use DeepPartial<User> to correctly type the body of the request, before passing it in the update method:
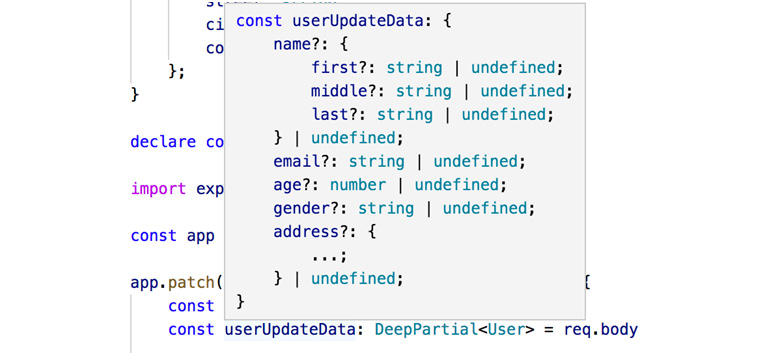
Figure 9.18: The correctly typed request body
As can be seen in the preceding figure, due to the usage of DeepPartial<T>, the request's body is typed correctly, such that all fields are optional, including nested ones.
10. Event Loop and Asynchronous Behavior
Activity 10.01: Movie Browser Using XHR and Callbacks
Solution:
- In the script.ts file, locate the search function and verify that it takes a single string parameter and that its body is empty.
- Construct a new XMLHttpRequest object:
const xhr = new XMLHttpRequest();
- Construct a new string for the search result URL using the getSearchUrl method:
const url = getSearchUrl(value);
- Call the open and send methods of the xhr object:
xhr.open('GET', url); xhr.send();
- Add an event handler for the xhr object's onload event. Take the response and parse it as a JSON object. Store the result in a variable of the SearchResultApi interface. This data will have the results of our search in a results field. If we get no results, this means that our search failed:
xhr.onload = function() { const data = JSON.parse(this.response) as SearchResultApi; }
- If the search returned no results, call the clearResults method:
if (data.results.length === 0) { clearResults(value); }
- If the search returned some results, just take the first one and store it in a variable, ignoring the other ones:
else { const resultMovie = data.results[0]; }
- Inside the onload handler, in the successful search branch, create a new XMLHttpRequest object:
const movieXhr = new XMLHttpRequest();
- Construct a new string for the search result URL using the getMovieUrl method:
const movieUrl = getMovieUrl(resultMovie.id);
- Call the open and send method of the constructed xhr object:
movieXhr.open('GET', movieUrl); movieXhr.send();
- Add an event handler for the xhr object's onload event. Take the response and parse it as a JSON object. Store the result in a variable of the MovieResultApi interface. This response will have the general data for our movie, specifically, everything except the people who were involved in the movie. We will need to have another call to the API to get the data about the people:
movieXhr.onload = function () { const movieData: MovieResultApi = JSON.parse(this.response);
- Inside the onload handler, create a new XMLHttpRequest object:
const peopleXhr = new XMLHttpRequest();
- Construct a new string for the search result URL using the getPeopleUrl method:
const peopleUrl = getPeopleUrl(resultMovie.id);
- Call the open and send method of the constructed xhr object:
peopleXhr.open('GET', peopleUrl); peopleXhr.send();
- Add an event handler for the xhr object's onload event. Take the response, and parse it as a JSON object. Store the result in a variable of the PeopleResultApi interface. This response will have data about the people who were involved in the movie:
const data = JSON.parse(this.response) as PeopleResultApi;
- Now we actually have all the data we need, so we can actually create our own object, inside the people onload handler, which is inside the movie onload handler, which is inside the search onload handler.
The people data has cast and crew properties. We'll only take the first six cast members, so first sort the cast property according to the order property of the cast members. Then slice off the first six cast members into a new array:
data.cast.sort((f, s) => f.order - s.order); const mainActors = data.cast.slice(0, 6);
- Transform the cast data (which is CastResultApi objects) into your own Character objects. We need to map the character field of CastResultApi to the name field of Character, the name field to the actor name, and the profile_path field to the image property:
const characters: Character[] = mainActors.map(actor => ({ name: actor.character, actor: actor.name, image: actor.profile_path }))
- From the crew property of the people data, we'll only need the director and the writer. Since there can be multiple directors and writers, we'll get the names of all directors and writers and concatenate them, respectively. For the directors, from the crew property, filter the people who have a department of Directing and a job of Director. For those objects, take the name property, and join it together with an & in between:
const directors = data.crew .filter(person => person.department === "Directing" && person.job === "Director") .map(person => person.name) const directedBy = directors.join(" & ");
- For the writers, from the crew property, filter the people who have a department of Writing and a job of Writer. For those objects, take the name property, and join it together with an & in between:
const writers = data.crew .filter(person => person.department === "Writing" && person.job === "Writer") .map(person => person.name); const writtenBy = writers.join(" & ");
- Create a new Movie object (using object literal syntax). Fill in all the properties of the Movie object using the data from the movie and people responses we've prepared so far:
const movie: Movie = { id: movieData.id, title: movieData.title, tagline: movieData.tagline, releaseDate: new Date(movieData.release_date), posterUrl: movieData.poster_path, backdropUrl: movieData.backdrop_path, overview: movieData.overview, runtime: movieData.runtime,
characters: characters, directedBy: directedBy, writenBy: writtenBy }
- Call the showResults function with the movie we constructed:
showResults(movie);
- In your parent directory (Activity01 in this case), install dependencies with npm i.
- Compile the program using tsc ./script.ts ./interfaces.ts ./display.ts.
- Verify that the compilation ended successfully.
- Open index.html using the browser of your choice.
You should see the following in your browser:

Figure 10.5: The final web page
Activity 10.02: Movie Browser Using fetch and Promises
Solution:
- In the script.ts file, locate the search function and verify that it takes a single string parameter and that its body is empty.
- Above the search function, create a helper function called getJsonData. This function will use the fetch API to get data from an endpoint and format it as JSON. It should take a single string called url as a parameter, and it should return a promise:
const getJsonData = (url: string):Promise<any> => {}
- In the body of the getJsonData function, add code that calls the fetch function with the url parameter, and then call the json method on the returned response:
const getJsonData = (url: string):Promise<any> => { return fetch(url) .then(response => response.json());}
- In the search method, construct a new string for the search result URL using the getSearchUrl method:
const searchUrl = getSearchUrl(value);
- Call the getJsonData function with searchUrl as a parameter:
return getJsonData(searchUrl)
- Add a then handler to the promise returned from getJsonData. The handler takes a single parameter of the type SearchResultApi:
return getJsonData(url) .then((data:SearchResultApi) => { }
- In the body of the handler, check whether we have any results and if we don't, throw an error. If we do have results, return the first item. Note that the handler returns an object with id and title properties, but the then method actually returns a promise of that data. This means that after the handler, we can chain other then calls:
.then((data:SearchResultApi) => { if (data.results.length === 0) { throw Error("Not found"); } return data.results[0]; })
- Add another then call to the previous handler. This handler will take a movieResult parameter that contains the id and title of the movie. Use the id property to call the getMovieUrl and getPeopleUrl methods to, respectively, get the correct URLs for the movie details and for the cast and crew:
}) .then(movieResult => { const movieUrl = getMovieUrl(movieResult.id); const peopleUrl = getPeopleUrl(movieResult.id); })
- After getting the URLs, call the getJsonData function with both of them, and assign the resulting values to variables. Note that the getJsonData(movieUrl) call will return a promise of MovieResultApi, and getJsonData(peopleUrl) will return a promise of PeopleResultApi. Assign those result values to variables called dataPromise and peoplePromise:
const movieUrl = getMovieUrl(movieResult.id); const peopleUrl = getPeopleUrl(movieResult.id); const dataPromise: Promise<MovieResultApi> = getJsonData(movieUrl); const peoplePromise: Promise<PeopleResultApi> = getJsonData(peopleUrl);
- Call the static Promise.all method with dataPromise and peoplePromise as parameters. This will create another promise based on those two values, and this promise will be resolved successfully if and only if both (that is, all) promises that are contained within resolve successfully. Its return value will be a promise of an array of results:
const resultPromise = Promise.all([dataPromise, peoplePromise]);
- Return the promise generated by the Promise.all call from the handler:
return resultPromise; })
- Add another then handler to the chain. This handler will take the array returned from Promise.all as a single parameter:
}) .then(dataResult => { });
- Deconstruct the parameter into two variables. The first element of the array should be the movieData variable of type MovieResultApi, and the second element of the array should be the peopleData variable of type PeopleResultApi:
const [movieData, peopleData] = dataResult // we can actually let TypeScripts type inference pick out the types
- The people data has cast and crew properties. We'll only take the first six cast members, so first sort the cast property according to the order property of the cast members. Then slice off the first six cast members into a new array:
peopleData.cast.sort((f, s) => f.order - s.order); const mainActors = peopleData.cast.slice(0, 6);
- Transform the cast data (which is CastResultApi objects) into our own Character objects. We need to map the character field of CastResultApi to the name field of Character, the name field to the actor name, and the profile_path field to the image property:
const characters :Character[] = mainActors.map(actor => ({ name: actor.character, actor: actor.name, image: actor.profile_path }))
- From the crew property of the people data, we'll only need the director and the writer. Since there can be multiple directors and writers, we'll get the names of all directors and writers and concatenate them, respectively. For the directors, from the crew property, filter the people who have a department of Directing and a job of Director. For those objects, take the name property, and join it together with an & in between:
const directors = peopleData.crew .filter(person => person.department === "Directing" && person.job === "Director") .map(person => person.name) const directedBy = directors.join(" & ");
- For the writers, from the crew property, filter the people who have a department of Writing and a job of Writer. For those objects, take the name property, and join it together with an & in between:
const writers = peopleData.crew .filter(person => person.department === "Writing" && person.job === "Writer") .map(person => person.name); const writtenBy = writers.join(" & ");
- Create a new Movie object (using object literal syntax). Fill in all the properties of the Movie object using the data from the movie and people responses we've prepared so far:
const movie: Movie = { id: movieData.id, title: movieData.title, tagline: movieData.tagline, releaseDate: new Date(movieData.release_date), posterUrl: movieData.poster_path, backdropUrl: movieData.backdrop_path, overview: movieData.overview, runtime: movieData.runtime, characters: characters, directedBy: directedBy, writenBy: writtenBy }
- Return the Movie object from the handler:
return movie; });
Note that we did not do any UI interactions in our code. We just received a string, did some promise calls, and returned a value. The UI work can now be done in UI-oriented code. In this case, that's in the click event handler of the search button. We should simply add a then handler to the search call that will call the showResults method, and a catch handler that will call the clearResults method:
search(movieTitle) .then(movie => showResults(movie)) .catch(_ => clearResults(value));
The output should be the same as the previous activity.
Activity 10.03: Movie Browser Using fetch and async/await
Solution:
- In the script.ts file, locate the search function and verify that it takes a single string parameter and that its body is empty. Note that this function is now marked with the async keyword, which allows us to use the await operator:
const getJsonData = (url: string):Promise<any> => {}
- In the body of the getJsonData function, add code that calls and awaits the fetch function with the url parameter, and then call calls the json method on the returned response:
const getJsonData = (url: string):Promise<any> => { const response = await fetch(url); return response.json();}
- In the search method, construct a new string for the search result URL using the getSearchUrl method:
const url = getSearchUrl(value);
- Call the getJsonData function with the searchUrl as a parameter, and await the result. Place the result in the SearchResultApi variable:
const data: SearchResultApi = await getJsonData(url);
- Check whether we have any results and if we don't, throw an error. If we do have results, set the first item of the result property in a variable called movieResult. This object will contain the id and title properties of the movie:
if (data.results.length === 0) { throw Error("Not found"); } const movieResult = data.results[0];
- Use the id property to call the getMovieUrl and getPeopleUrl methods to, respectively, get the correct URLs for the movie details and for the cast and crew:
const movieUrl = getMovieUrl(movieResult.id); const peopleUrl = getPeopleUrl(movieResult.id);
- After getting the URLs, call the getJsonData function with both and assign the resulting values to variables. Note that the getJsonData(movieUrl) call will return a promise of MovieResultApi, and getJsonData(peopleUrl) will return a promise of PeopleResultApi. Assign those result values to variables called dataPromise and peoplePromise:
const dataPromise: Promise<MovieResultApi> = getJsonData(movieUrl); const peoplePromise: Promise<PeopleResultApi> = getJsonData(peopleUrl);
- Call the static Promise.all method with dataPromise and peoplePromise as parameters. This will create another promise based on those two values, and this promise will be resolved successfully if and only if both (that is, all) promises that are contained within resolve successfully. Its return value will be a promise of an array of results. await this promise, and place its result in a variable of type array:
const dataArray = await Promise.all([dataPromise, peoplePromise]);
- Deconstruct that array into two variables. The first element of the array should be the movieData variable of type MovieResultApi, and the second element of the array should be the peopleData variable of type PeopleResultApi:
const [movieData, peopleData] = dataArray;
- The people data has cast and crew properties. We'll only take the first six cast members, so first sort the cast property according to the order property of the cast members. Then slice off the first six cast members into a new array:
peopleData.cast.sort((f, s) => f.order - s.order); const mainActors = peopleData.cast.slice(0, 6);
- Transform the cast data (which is CastResultApi objects) into our own Character objects. We need to map the character field of CastResultApi to the name field of Character, the name field to the actor name, and the profile_path field to the image property:
const characters :Character[] = mainActors.map(actor => ({ name: actor.character, actor: actor.name, image: actor.profile_path }))
- From the crew property of the people data, we'll only need the director and the writer. Since there can be multiple directors and writers, we'll get the names of all directors and writers, and concatenate them, respectively. For the directors, from the crew property, filter the people who have a department of Directing and a job of Director. For those objects, take the name property, and join it together with an & in between:
const directors = peopleData.crew .filter(person => person.department === "Directing" && person.job === "Director") .map(person => person.name) const directedBy = directors.join(" & ");
- For the writers, from the crew property, filter the people who have a department of Writing and a job of Writer. For those objects, take the name property, and join it together with an & in between:
const writers = peopleData.crew .filter(person => person.department === "Writing" && person.job === "Writer") .map(person => person.name); const writtenBy = writers.join(" & ");
- Create a new Movie object (using object literal syntax). Fill in all the properties of the Movie object using the data from the movie and people responses we've prepared so far:
const movie: Movie = { id: movieData.id, title: movieData.title, tagline: movieData.tagline, releaseDate: new Date(movieData.release_date), posterUrl: movieData.poster_path, backdropUrl: movieData.backdrop_path, overview: movieData.overview, runtime: movieData.runtime, characters: characters, directedBy: directedBy, writenBy: writtenBy }
- Return the Movie object from the function:
return movie;
- Note that we did not do any UI interactions in our code. We just received a string, did some promise calls, and returned a value. The UI work can now be done in UI-oriented code. In this case, that's in the click event handler of the search button. We should simply await the result of the search call and then call the showResults method with it. We can use a standard catch expression to handle any errors:
try { const movie = await search(movieTitle); showResults(movie); } catch { clearResults(movieTitle); }
The output should be the same as the previous activity.
11. Higher-Order Functions and Callbacks
Activity 11.01: Higher-Order Pipe Function
Solution:
In this activity, we'll build a higher-order pipe function that accepts functions as arguments, and composes them from left to right, returning a function that accepts the arguments of the first function, and returns the type of the last function. When the returned function is run, it iterates over the given functions, feeding the return value of each function to the next one:
- Let's start by defining a type definition for the supported functions to compose, a function that accepts one argument of type T and returns one of type R:
type UnaryFunction<T, R> = T extends void ? () => R : (arg: T) => R;
As mentioned, we'll only support functions accepting up to one argument, for simplicity.
Note that in order to deal with the special case of 0 arguments, we need to check whether T extends void and returns a parameterless function.
- Next, let's start by writing a simple implementation of the pipe function, one that supports only a single function, making it essentially an identity function:
function pipe<R>(fn: UnaryFunction<void, R>): UnaryFunction<void, R>;
function pipe<T, R = T>(fn: UnaryFunction<T, R>): UnaryFunction<T, R> {
return fn;
}
Note that we require two overloads for the function, one for the special case of no parameters, and another for a single-parameter function.
- Let's expand this to support two functions by adding another overload:
function pipe<R>(fn: UnaryFunction<void, R>): UnaryFunction<void, R>;
function pipe<T, R = T>(fn: UnaryFunction<T, R>): UnaryFunction<T, R>;
function pipe<T, A, R>(fn1: UnaryFunction<T, A>, fn2: UnaryFunction<A, R>): UnaryFunction<T, R>;
function pipe<T, A, R>(fn1: UnaryFunction<T, A>, fn2?: UnaryFunction<A, R>) {
// TODO: Support two functions
}
The previous implementation no longer works, since we need to support both a single function, as well as multiple functions, so we can no longer just return fn. We'll add a naïve implementation for now and expand it to a more generic solution in the next steps.
- The naïve implementation for supporting two functions is to simply check whether fn2 is undefined – if it is, we only have a single function at hand, and can simply return fn1. Otherwise, we need to return a function that composes fn1 and fn2 on the given argument:
function pipe<R>(fn: UnaryFunction<void, R>): UnaryFunction<void, R>;
function pipe<T, R = T>(fn: UnaryFunction<T, R>): UnaryFunction<T, R>;
function pipe<T, A, R>(fn1: UnaryFunction<T, A>, fn2: UnaryFunction<A, R>): UnaryFunction<T, R>;
function pipe<T, A, R>(fn1: UnaryFunction<T, A>, fn2?: UnaryFunction<A, R>) {
if (fn2 === undefined) {
return fn1;
}
return (arg: T) => {
return fn2(fn1(arg));
};
}
- We can persist with the preceding approach, but it is tedious, and supporting more functions means changing the implementation. Instead, we can make the actual implementation accept an array of functions and reduce them, starting with arg as the initial value, and running the current function, fn, on the accumulator (the previous result). Let's do that, while still only supporting up to two functions:
function pipe<R>(fn: UnaryFunction<void, R>): UnaryFunction<void, R>;
function pipe<T, R = T>(fn: UnaryFunction<T, R>): UnaryFunction<T, R>;
function pipe<T, A, R>(fn1: UnaryFunction<T, A>, fn2: UnaryFunction<A, R>): UnaryFunction<T, R>;
function pipe<T>(...fns: UnaryFunction<any, any>[]): UnaryFunction<any, any> {
return (arg: T) => {
return fns.reduce((prev, fn) => fn(prev), arg);
};
}
- Lastly, we can expand our support for more functions by only needing to change the function declaration by adding another overload with the correct type:
In the case of three functions:
function pipe<T, A, B, R>(
fn1: UnaryFunction<T, A>,
fn2: UnaryFunction<A, B>,
fn3: UnaryFunction<B, R>,
): UnaryFunction<T, R>;
In the case of four functions:
function pipe<T, A, B, C, R>(
fn1: UnaryFunction<T, A>,
fn2: UnaryFunction<A, B>,
fn3: UnaryFunction<B, C>,
fn4: UnaryFunction<C, R>,
): UnaryFunction<T, R>;
In the case of five functions:
function pipe<T, A, B, C, D, R>(
fn1: UnaryFunction<T, A>,
fn2: UnaryFunction<A, B>,
fn3: UnaryFunction<B, C>,
fn4: UnaryFunction<C, D>,
fn5: UnaryFunction<D, R>,
): UnaryFunction<T, R>;
In each overload, we have the first generic as T – this is the type of argument that the returned function will have, and R – the return type of the returned function. Between them we have A, B, C, and so on, as the interim return type/argument type of the second…second to last functions. For all the preceding steps, make sure to export the functions by adding export before the function keyword.
Finally, we can use our pipe function to compose any functions we want, while staying completely type-safe:
const composedFn = pipe(
(x: string) => x.toUpperCase(),
x => [x, x].join(','),
x => x.length,
x => x.toString(),
x => Number(x),
);
console.log('result is:', composedFn('hello'))
Running the this code should result in the following output:
result is: 11
12. Guide to Promises in TypeScript
Activity 12.01: Building a Promise App
Solution:
- We can get started the same way we started building our API from the sample from GitHub:
npm i
The only dependencies we're using here are http-server to power our web application and typescript to transpile our code. Now that our project is set up, let's quickly create an index.html file:
<html>
<head>
<title>The TypeScript Workshop - Activity 12.1</title>
<link href="styles.css" rel="stylesheet"></link>
</head>
<body>
<input type="text" placeholder="What promise will you make?" id="promise-input"> <button id="promise-save">save</button>
<div>
<table id="promise-table"></ul>
</div>
</body>
<script type="module" src="app.js"></script>
</html>
- And then a styles.css file:
body {
font-family: Arial, Helvetica, sans-serif;
font-size: 12px;
}
input {
width: 200;
}
table {
border: 1px solid;
}
td {
overflow: hidden;
white-space: nowrap;
text-overflow: ellipsis;
}
Now we will create an app.ts file and create a very rough client library that implements a fetch abstraction similar to what we created in Chapter 3, Functions. Because TypeScript doesn't run natively in a web browser, we will need to use tsc to transpile our TypeScript code into JavaScript. There are some advanced tools such as webpack and Parcel that can help with this, but those are out of scope for this chapter so we will keep this simple and just use a single app.ts file.
- We'll use our PromiseModel interface again in our web app and create a fetchClient function using currying:
interface PromiseModel {
id?: number;
desc: string;
}
const fetchClient = (url: string) => (resource: string) => (method: string) => (
body?: PromiseModel
) => {
return fetch(`${url}/${resource}`, {
body: body && JSON.stringify(body),
headers: { "Content-Type": "application/json" },
method,
});
};
- Building on the model of curried fetch functions, let's create some resources:
const api = fetchClient("http://localhost:3000");
const resource = api("promise");
const getAction = resource("get");
const postAction = resource("post");
- These functions handle invoking the resources and updating page elements:
const deleteItem = (id: number) => {
const resource = api(`promise/${id}`);
resource("delete")().then(loadItems);
};
const loadItems = () => {
getAction().then((res) => res.json().then(renderList));
};
const saveItem = () => {
const input = document.getElementById("promise-input") as HTMLInputElement;
if (input.value) {
postAction({ desc: input.value }).then(loadItems);
input.value = "";
}
};
- Finally, we'll do some ugly HTML manipulation to update the UI:
const renderList = (data: PromiseModel[]) => {
const table = document.getElementById("promise-table");
if (table) {
table.innerHTML = "";
let tr = document.createElement("tr");
["Promise", "Delete"].forEach((label) => {
const th = document.createElement("th");
th.innerText = label;
tr.appendChild(th);
});
table.appendChild(tr);
data.forEach((el) => {
table.appendChild(renderRow(el));
});
}
};
const renderRow = (el: PromiseModel) => {
const tr = document.createElement("tr");
const td1 = document.createElement("td");
td1.innerHTML = el.desc;
tr.appendChild(td1);
const td2 = document.createElement("td");
const deleteButton = document.createElement("button");
deleteButton.innerText = "delete";
deleteButton.onclick = () => deleteItem(el.id!);
td2.appendChild(deleteButton);
tr.appendChild(td2);
return tr;
};
document.getElementById("promise-save")?.addEventListener("click", saveItem);
loadItems();
- Altogether, the app.ts file looks like this:
interface PromiseModel {
id?: number;
desc: string;
}
const fetchClient = (url: string) => (resource: string) => (method: string) => (
body?: PromiseModel
) => {
return fetch(`${url}/${resource}`, {
body: body && JSON.stringify(body),
headers: { "Content-Type": "application/json" },
method,
});
};
const api = fetchClient("http://localhost:3000");
const resource = api("promise");
const getAction = resource("get");
const postAction = resource("post");
const deleteItem = (id: number) => {
const resource = api(`promise/${id}`);
resource("delete")().then(loadItems);
};
const loadItems = () => {
getAction().then((res) => res.json().then(renderList));
};
const saveItem = () => {
const input = document.getElementById("promise-input") as HTMLInputElement;
if (input.value) {
postAction({ desc: input.value }).then(loadItems);
input.value = "";
}
};
const renderList = (data: PromiseModel[]) => {
const table = document.getElementById("promise-table");
if (table) {
table.innerHTML = "";
let tr = document.createElement("tr");
["Promise", "Delete"].forEach((label) => {
const th = document.createElement("th");
th.innerText = label;
tr.appendChild(th);
});
table.appendChild(tr);
data.forEach((el) => {
table.appendChild(renderRow(el));
});
}
};
const renderRow = (el: PromiseModel) => {
const tr = document.createElement("tr");
const td1 = document.createElement("td");
td1.innerHTML = el.desc;
tr.appendChild(td1);
const td2 = document.createElement("td");
const deleteButton = document.createElement("button");
deleteButton.innerText = "delete";
deleteButton.onclick = () => deleteItem(el.id!);
td2.appendChild(deleteButton);
tr.appendChild(td2);
return tr;
};
document.getElementById("promise-save")?.addEventListener("click", saveItem);
loadItems();
It's not hard to see why view frameworks are popular; however, this should do the trick for putting together a full-stack application.
- Now let's compile and run our web application. In one Command Prompt window, enter the following:
npx tsc -w.
This will transpile the TypeScript code in watch mode so that it restarts when changes are made.
- Start the HTTP server in another window with npx http-server . -c-1 as we did in Exercise 12.03, Promise.allSettled.
Now navigate a web browser to http://localhost:8080/. You should see a form like the one that follows:
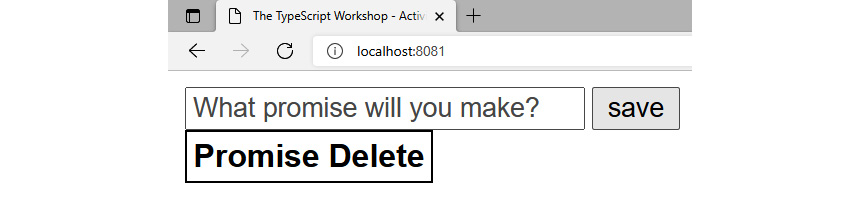
Figure 12.10: Initial load
Note
If you don't see "Promise Delete" then it could be that your API from Exercise 6, Implementing a RESTful API backed by sqlite isn't running. Return to that exercise and follow the steps there.
You can add and delete promises. Here are some examples:
- Add the promise Always lint my code and save it. You should see the following:
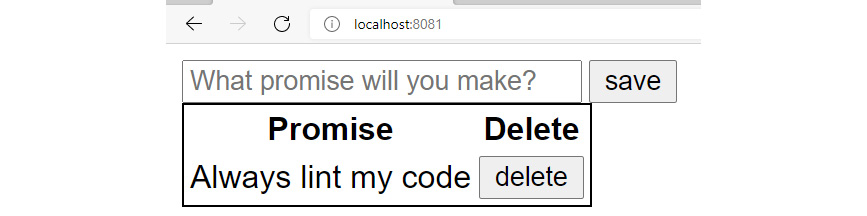
Figure 12.11: One promise made
- Add the promise Never block the event loop and save it:
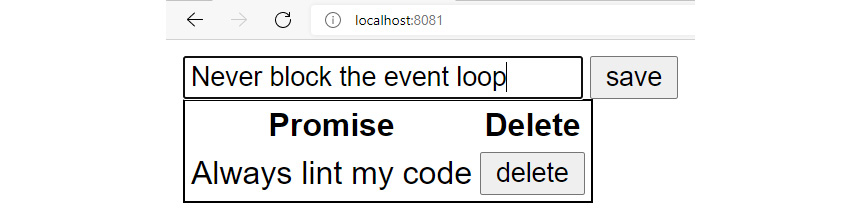
Figure 12.12: Text entered
You should see the following promise saved:
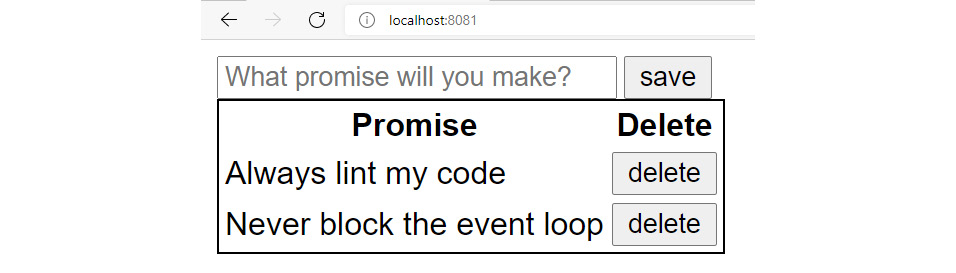
Figure 12.13: Text saved
Figure 12.14 and Figure 12.15 show some more examples:

Figure 12.14: Another promise saved
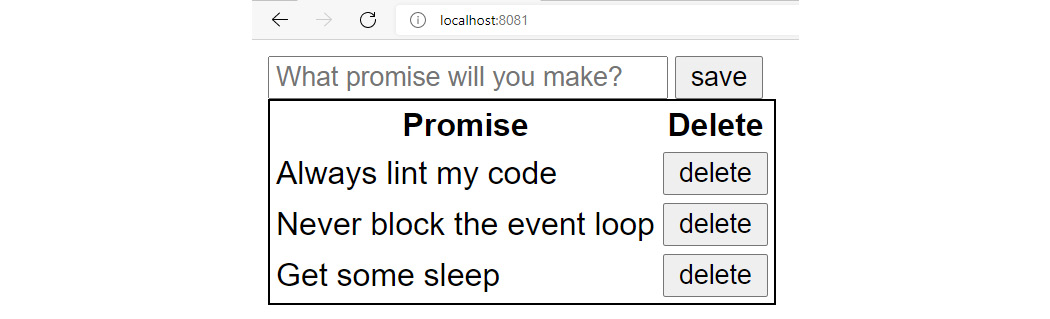
Figure 12.15: Another promise saved
Try to add to the application and make use of the API to get a single promise or update promises.
13. Async/Await in TypeScript
Activity 13.01: Refactoring Chained Promises to Use await
Solution:
Let's go over what needed to change in order to make this work:
- First of all, the await keyword can only be used inside an async function, so we must add that keyword to the function declaration:
const renderAll = async () => {
- Now we have to replace then with await. Let's look again at what the render function does. In our simple case, it just returns a promise that resolves to a string, but in the real world, it would render something in a web browser and then resolve to a string. Since we want to log out that string, we can actually resolve the promise inside a console.log statement. Even though console.log is a synchronous operation, putting await inside it will cause the function to print out the resolved promise value, exactly as we would hope.
The refactored program is six lines shorter and eliminates nesting:
export class El {
constructor(private name: string) {}
render = () => {
return new Promise((resolve) =>
setTimeout(
() => resolve(`${this.name} is resolved`),
Math.random() * 1000
)
);
};
}
const e1 = new El('header');
const e2 = new El('body');
const e3 = new El('footer');
const renderAll = async () => {
console.log(await e1.render());
console.log(await e2.render());
console.log(await e3.render());
};
renderAll();
- Run the file using npx ts-node refactor.ts. You should get the following output:
header is resolved
body is resolved
footer is resolved
14. TypeScript and React
Activity 14.01: The Blog
Solution:
- Create a new React application as outlined earlier in this chapter.
- Prepare a Firestore database with authentication on Firebase as outlined in Exercise 14.04, Getting Started with Firebase.
- Install the Firebase client with npm i firebase. Firebase includes typings so we won't need to install those separately.
- Create a directory called services under src and a file called firebase.ts there. The Firebase integration can be pretty basic:
import firebase from 'firebase';const config = { apiKey: 'abc123', authDomain: 'blog-xxx.firebaseapp.com', projectId: 'https://blog-xxx.firebaseio.com', storageBucket: 'blog-xxx.appspot.com', messagingSenderId: '999', appId: '1:123:web:123abc',};firebase.initializeApp(config);export const auth = firebase.auth();export const db = firebase.firestore();
- Make sure to use the values from the Firebase dashboard. This will expose Firebase's authentication and database capabilities to the rest of your application.
- Set up two providers under src/providers called StoriesProvider.ts and UserProvider.ts. Now, UserProvider.ts will be simpler, so let's do that one first. Like Exercise 14.03, React Context, we'll employ createContext and useState, but we'll also need useEffect:
import firebase from 'firebase';
import React, { createContext, ReactNode, useEffect, useState } from 'react';
import { auth } from '../services/firebase';
interface ContextProps {
children: ReactNode;
}
export const UserContext = createContext<Partial<firebase.User | undefined>>(
{}
);
export const UserProvider = (props: ContextProps) => {
const [user, setUser] = useState<firebase.User>();
useEffect(() => {
auth.onAuthStateChanged((userAuth) => {
setUser(userAuth ?? undefined);
});
});
return (
<UserContext.Provider value={user}>{props.children}</UserContext.Provider>
);
};
- StoriesProvider.ts is responsible for persisting stories (the blog links) and comments on the stories. To make this work, start by creating interfaces for comments and stories. Comments should belong to stories. Here's a sample of how that could be done:
export interface CommentModel { comment: string; timestamp: number; user: string;}export interface StoryModel { comments: CommentModel[]; id: string; link: string; title: string; user: string;}
With those interfaces created, we need to implement some methods in our provider, namely methods for adding comments and stories as well as a method that will fetch all the stories. To do that, we'll need to access a collection in our database. This can be done with a single line of code:
const storiesDB = db.collection('stories');
This code will create the collection if it doesn't exist. The storiesDB object we created has methods for fetching, adding, and updating documents from the collection. With those methods implemented, we add our stories data and the methods that handle the data to our provider value. This means that components that use StoriesContext will be able to call those methods or access that data.
Again, the solution to this somewhat complicated provider is available on GitHub.
- Raw document data is a bit difficult to work with, but Firebase has the concept of a converter that we can create, which will tell it how to map document fields to our TypeScript objects. Create and export a converter implementing the fromFirestore and toFirestore methods. Using those should eliminate some type errors and avoid us needing to use any.
- Install React Router (react-dom and react-router-dom). Set the default route to a home page. Then, create Add, Signin, and Signup pages. Put the pages under src/pages. Just put some text on them in a basic function component to verify routing is working as expected.
- Build out the Signup page first as it's hard to sign in without having signed up. Now we'll use Material-UI. Install @material-ui/core and @material-ui/icons and we can start building components.
- Our Signup page can be created using Container, TextField, and Button, which are all available components in Material-UI. How your page ultimately looks is up to you, but you will need two TextField components. One of those should have both a type and name of "email" and the other should have "password" for both of those props.
We'll track the state of both the email and password fields using useState and an onChange event.
When the button is clicked, we should call a method on the auth object we exported from our Firebase service earlier to create a new user using the given email address and password.
- Upon successfully signing in, let's send the user back to the home page with the useHistory React Hook.
- The Signin page will be a lot like the Signup page. It also needs to capture the user's email address and password and have a button to submit the form. This time we should call a method on auth to sign the user in via an email and password.
- Our Add page creates new posts to the blog. We'll capture the title of the post and a link. Add additional fields if you like. This will work similarly to the prior two pages, but now we will use StoriesContext instead of UserContext to expose the method to add stories.
- For the home page, we can just load up all the stories and display them as a Material-UI List. It's possible to just output the story object and wrap it in HTML tags to make it look presentable, but a better solution is to create a Story component that can better encapsulate the object. Add a Story component to src/components and use that for your story display.
- To manage comments, each story should have its own comments. It's a good idea to create this as a separate component that each story will contain. The Comments component can contain a list of each individual comments (another component!) as well as controls for grabbing that method to add comments from StoriesContext.
- At this point, everything is working quite well, but we should add some navigation elements so users don't have to key in the different routes. We can use the AppBar, Toolbar, Menu, MenuItem, and Button components from Material-UI to create some attractive navigation options. Navigation itself can be performed via the useHistory React Hook.