
How players interact with your project is probably one of the most important things that can be established as a part of your project. While player input is added for all projects, no matter what platform you are using, this is also one area that can make or break your mobile game.
If the controls that are implemented don't fit the game that you're making, or if the controls feel clunky, players will not play your game for long stretches of time. While many people consider Rockstar's Grand Theft Auto series of games to be great on console and PC, playing the game on a mobile device provides a larger barrier of entry, due to all of the buttons on the screen and replacing joysticks with virtual versions that don't have haptic feedback in the same manner as on other platforms.
Mobile and tablet games that tend to do well typically have controls that are simple, finding as many ways to streamline the gameplay as possible. Many popular games require a single input, such as Dong Nguyen's Flappy Bird and Ketchapp's Ballz.
There are many different ways for games to interact with a mobile device that are different than for traditional games, and we will explore a number of those in this chapter.
In this chapter, we will cover the different ways that inputs will work on mobile devices. We will start off with the input that is already built into our project using the mouse, and then move on to touch events, gestures, using the accelerometer, and accessing information via the Touch class.
This chapter will be split into a number of topics. It will contain a simple, step-by-step process from beginning to end. Here is the outline of our tasks:
- Using mouse input for mobile input
- Movement via touch
- Implementing a gesture
- Scaling the player using pinches
- Using the accelerometer
- Reacting to touch
Technical requirements
This book utilizes Unity 2020.1.0f1 and Unity Hub 2.3.1 but the steps should work with minimal changes in future versions of the editor. If you would like to download the exact version used in this book, and there is a new version out, you can visit Unity's download archive at https://unity3d.com/get-unity/download/archive. You can also find the system requirements for Unity at https://docs.unity3d.com/2020.1/Documentation/Manual/system-requirements.html in the Unity Editor system requirements section. You can find the code files present in this chapter on GitHub at https://github.com/PacktPublishing/Unity-2020-Mobile-Game-Development-Second-Edition/tree/master/Chapter%2003.
Using mouse input
Before we dive into mobile-only solutions, I do want to point out that it is possible to write inputs that work on both mobile and PC, namely using mouse controls. Mobile devices support using mouse clicks as taps on the screen, with the position of the tap/click being the location where the finger has been pressed. This form of input provides just the position where the touch happened and that it happened; it doesn't give you all of the features that the mobile-only options do. We will be discussing all of the features you get using mobile-specific input later on in this chapter, but I think it's important to note how to have click events on the desktop as well. I personally use the desktop often for ease of testing on both the PC and on my device, so I don't have to deploy to a mobile device to test every single change made in the project.
The following steps show how to use the desktop-based mouse click events for movement of the player:
- Inside Unity, open up your PlayerBehaviour script and add the following highlighted code to the Update function:
/// <summary>
/// FixedUpdate is called at a fixed framerate and is a prime place to put
/// Anything based on time.
/// </summary>
private void FixedUpdate()
{
    // Check if we're moving to the side
    var horizontalSpeed = Input.GetAxis("Horizontal") * dodgeSpeed;

    // If the mouse is held down (or the screen is pressed
       // on Mobile)
    if (Input.GetMouseButton(0))
    {
        // Converts to a 0 to 1 scale
        var worldPos =
        Camera.main.ScreenToViewportPoint(Input.mousePosition);
        float xMove = 0;

        // If we press the right side of the screen
        if (worldPos.x < 0.5f)
        {
            xMove = -1;
        }
        else
        {
            // Otherwise we're on the left
            xMove = 1;
        }

        // replace horizontalSpeed with our own value
        horizontalSpeed = xMove * dodgeSpeed;
    }

    rb.AddForce(horizontalSpeed, 0, rollSpeed);
}
We have added a number of things to the preceding script. First, we check whether the mouse button had been held down or not through the use of the Input.GetMouseButton function. The function will return true if the mouse is held down, and false if it is not. The function takes in a parameter, which is for what mouse button we'd like to check, providing 0 for the left button, 1 for the right, and 2 for the middle button. For mobile, however, only 0 will be picked up as a click.
To start off, we can get the position that the mouse is at using the Input.mousePosition property. However, this value is given to us in screen space. What is screen space? Well, let's first talk about how we traditionally deal with positions in Unity making use of world space.
When dealing with positions in Unity through the Inspector window, we have the point (0,0,0) in the middle of our world, which we call the origin, and then we refer to everything else based on an offset from there. We typically refer to this method of positioning as World Space. Assuming that we have our camera pointing toward the origin, World Space looks like this:

The lines are the x, y, and z axes of our world. If I were to move an object to the right or left, it would move along the x axis positively or negatively, respectively. When in school, you may have learned about using graphs and points, and world space works very much like that.
When using mouse input, Unity gives us this information in another space, Screen Space. In this space, the position is based on where the camera is and isn't involved with the actual game world. This space is also just in 2D, so there's only an x and y position with z always being stuck at 0:

In this case, the bottom left of the screen would be (0,0) and the top right would be (Screen.width, Screen.height). Screen.width and Screen.height are values in Unity that will give us the screen size of the screen window in pixels.
We could use these values as provided and then compare what side of the screen the player pressed, but, in my case, I think it'd be better to convert the position into an easier space to work with. One such space is the Viewport space, which goes from (0,0) to (1,1):

Instead of searching whether our x position is less than half of the screen width, I can instead just check whether it's less than 0.5, which is what we are doing here. If the value is less than 0.5, it's on the left side of the screen so we return -1; otherwise, it's on the right side, so we give 1.
Once we know that, we can then set the horizontal speed variable to move to the left or right based on our movement.
- Save the script and dive back into Unity and you will see the following:

As you can see in the preceding screenshot, we can now use either the mouse (Input.mousePosition) or our keyboard (Input.GetAxis) to move our player.
This form of input works well enough for what we're doing right now, but I'm assuming that you'll want to know how to use the mobile device's own way of moving, so we will go ahead and learn how to replicate the same functionality using touch instead.
Moving using touch controls
Unity's Input engine has a property called Input.touches, which is an array of Touch objects. The Touch struct contains information on the touch that occurred, having information such as the amount of pressure on the touch and how many times you tapped the screen. It also contains the position property, such as Input.mousePosition, that will tell you what position the tap occurred at, in pixels.
Let's look at the steps to use touch instead of mouse inputs:
- Adjust our preceding code to look something like the following:
//Check if Input has registered more than zero touches
if (Input.touchCount > 0)
{
   //Store the first touch detected.
   Touch touch = Input.touches[0];

   // Converts to a 0 to 1 scale
   var worldPos = Camera.main.ScreenToViewportPoint
                                          (touch.position);

   float xMove = 0;

   // If we press the right side of the screen
   if (worldPos.x < 0.5f)
   {
      xMove = -1;
   }
   else
   {
      // Otherwise we're on the left
      xMove = 1;
   }

   // replace horizontalSpeed with our own value
   horiztonalSpeed = xMove * dodgeSpeed;

}
Now, you may note that this code looks very similar to what we've written in the preceding section. With that in mind, instead of copying and pasting the appropriate code twice and making changes like a number of starting programmers would do, we can instead take the similarities and make a function. For the differences, we can use parameters to change the value instead.
- Keeping that in mind, let's add the following function to the PlayerBehaviour class:
/// <summary>
/// Will figure out where to move the player horizontally
/// </summary>
/// <param name="pixelPos">The position the player has
/// touched/clicked on</param>
/// <returns>The direction to move in the x axis</returns>
private float CalculateMovement(Vector3 pixelPos)
{
    // Converts to a 0 to 1 scale
    var worldPos = Camera.main.ScreenToViewportPoint(pixelPos);

    float xMove = 0;

    // If we press the right side of the screen
    if (worldPos.x < 0.5f)
    {
        xMove = -1;
    }
    else
    {
        // Otherwise we're on the left
        xMove = 1;
    }

    // replace horizontalSpeed with our own value
    return xMove * dodgeSpeed;
}
Now, instead of using Input.mousePosition or the touch position, we use a parameter for the function. Also, unlike previous functions we've written, this one will actually use a return value; in this case, it will give us a floating-point value. We will use this value in the Update to set horiztonalSpeed to a new value when this function is called. Now, we can call it appropriately.
- Now, update the Update function, as follows:
/// <summary>
/// FixedUpdate is called at a fixed framerate and is a prime place
  /// to put
/// Anything based on time.
/// </summary>
private void FixedUpdate()
{
    // Check if we're moving to the side
    var horizontalSpeed = Input.GetAxis("Horizontal") * dodgeSpeed;

    // Check if we are running either in the Unity editor or in a
    // standalone build.
    #if UNITY_STANDALONE || UNITY_WEBPLAYER || UNITY_EDITOR
        // Check if we're moving to the side
        horizontalSpeed = Input.GetAxis("Horizontal") * dodgeSpeed;

        // If the mouse is held down (or the screen is tapped
        // on Mobile)
        if (Input.GetMouseButton(0))
        {
            horizontalSpeed =
              CalculateMovement(Input.mousePosition);
        }

    // Check if we are running on a mobile device
    #elif UNITY_IOS || UNITY_ANDROID
        // Check if Input has registered more than zero touches
        if (Input.touchCount > 0)
        {
            // Store the first touch detected.
            Touch touch = Input.touches[0];
            horizontalSpeed = CalculateMovement(touch.position);
        }
    #endif

    rb.AddForce(horizontalSpeed, 0, rollSpeed);
}
In the preceding example, I am using a #if directive based on the platform selected. Unity will automatically create a #define depending on what has been selected as the platform we are deploying for. What this #if does, along with #elif and #endif, is allow us to include or exclude code from our project based on these symbols.
In Visual Studio, you may note that if you're building for iOS or Android, the code within the UNITY_IOS || UNITY_ANDROID section is grayed out, meaning that it won't be called currently because we are running the game in the Unity Editor. However, when we export the code to our platform, the appropriate code will be used.
This will allow us to specify the code for different versions of our project, which is vital when dealing with multi-platform development.
- Save the script and dive back into Unity.
Upon exporting your game to your Android device, you should note that the controls now work correctly using our newly created touch code. This allows us to have something that works on mobile as well as PC. Now, let's take a look at some of the mobile-specific ways that we can interpret input.
Implementing a gesture
Another type of input that you'll find in mobile games is that of a swipe, such as in Kiloo's Subway Surfers. This will allow us to use the general movement of the touch to dictate a direction for us to move in. This is usually used to have our players jump from one position to another or move quickly in a certain direction. So we'll go ahead and implement that using the following steps, instead of our previous movement system:
- In the PlayerBehaviour script, go ahead and add some new variables for us to work with:
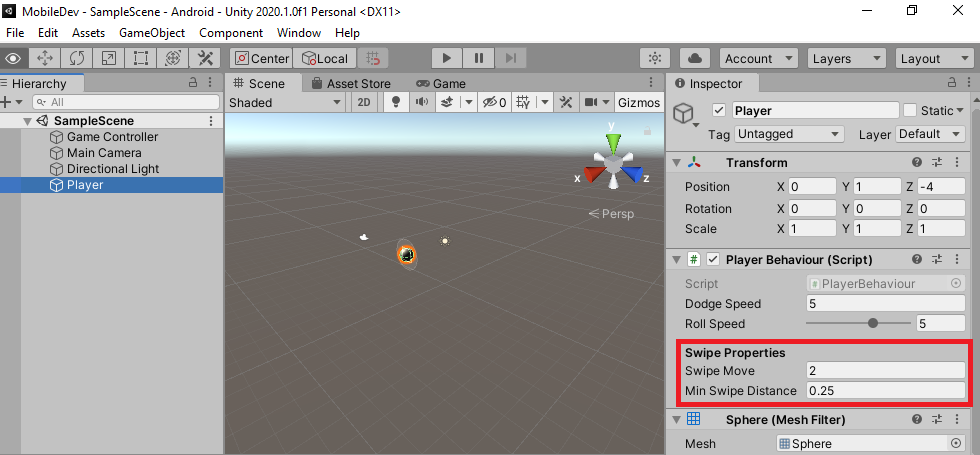
[Header("Swipe Properties")]
[Tooltip("How far will the player move upon swiping")]
public float swipeMove = 2f;


[Tooltip("How far must the player swipe before we will execute the action (in inches)")]
public float minSwipeDistance = 0.25f;

/// <summary>
/// Used to hold the value that converts minSwipeDistance to pixels
/// </summary>
private float minSwipeDistancePixels;

/// <summary>
/// Stores the starting position of mobile touch events
/// </summary>
private Vector2 touchStart;
In order to determine whether we are swiping, we will need to first check the start and the end of our movement. We will store the starting position in the touchStart property. We will also have the swipeMove property to set how far we will jump when the swipe happens. Lastly, we have the minSwipeDistance
variable, which will make sure that the player has moved on the x axis a little before actually making the jump – in this case, we want the user to move at least a quarter of an inch in order for the input to be counted as a swipe.
You'll also note that the Header attribute has been added to the top of the first variable. This will add a header to the Inspector tab, making it easier to break apart different sections of your script. If you were to save the script and dive into Unity, you should note that it has been added when you select the player:
Our next step will be to convert the MinSwipeDistance value from inches into the pixel equivalent, which can be used to see how far the user's swiping motion moves the player's character.
- Go back in the PlayerBehaviour script and update the Start function to add the following highlighted code:
       // Start is called before the first frame update
       private void Start()
       {
           // Get access to our Rigidbody component
           rb = GetComponent<Rigidbody>();

           minSwipeDistancePixels = minSwipeDistance * Screen.dpi;
        }
The Screen.dpi value stands for dots per inch and generally can be thought of as how many pixels are there per inch on the screen. By multiplying the value of minSwipeDistance with Screen.dpi, we know how long the movement in pixels needs to be to count as a swipe.
Now that we know the length of a swipe, we need to add the ability to trigger one. As we mentioned before, we have been using the FixedUpdate function for our player's movement. This is because Unity's physics engine is only updated once between each FixedUpdate, which is generally called less often than the Update function. We use the Input.GetAxis and Input.GetMouseButton functions, which return true every single frame that the button is held down and will continue to respond during FixedUpdate loops as well. This works great for events that happen over time, but FixedUpdate can miss the start and ending frames where input events happen, which is required for swipe events and certain actions like jumping in games. If you want something to happen the moment an input starts or finishes, you will likely want to utilize the Update function instead, and that is what we will be doing with our gesture.
- Now, back in the PlayerBehaviour script, add the following function to the project:
/// <summary>
/// Update is called once per frame
/// </summary>
private void Update()
{
    // Check if we are running on a mobile device
    #if UNITY_IOS || UNITY_ANDROID
        //Check if Input has registered more than zero touches
        if (Input.touchCount > 0)
        {
            //Store the first touch detected.
            Touch touch = Input.touches[0];

            SwipeTeleport(touch);
        }
    #endif
}
In the preceding code, we added a new behavior called SwipeTeleport that will only be called if the game is running on a mobile device. It hasn't been created yet, but this will take in the Touch event and use its properties to move the player if a swipe happens.
- We will then create a function to handle this new swiping behavior, as follows:
/// <summary>
/// Will teleport the player if swiped to the left or right
/// </summary>
/// <param name="touch">Current touch event</param>
private void SwipeTeleport(Touch touch)
{
    // Check if the touch just started
    if (touch.phase == TouchPhase.Began)
    {
        // If so, set touchStart
        touchStart = touch.position;
    }

    // If the touch has ended
    else if (touch.phase == TouchPhase.Ended)
    {
        // Get the position the touch ended at
        Vector2 touchEnd = touch.position;

        // Calculate the difference between the beginning and
        // end of the touch on the x axis.
        float x = touchEnd.x - touchStart.x;

        // If we are not moving far enough, don't do the teleport
        if (Mathf.Abs(x) < minSwipeDistancePixels)
        {
            return;
        }

        Vector3 moveDirection;

        // If moved negatively in the x axis, move left
        if (x < 0)
        {
            moveDirection = Vector3.left;
        }
        else
        {
            // Otherwise we're on the right
            moveDirection = Vector3.right;
        }

        RaycastHit hit;

        // Only move if we wouldn't hit something
        if (!rb.SweepTest(moveDirection, out hit, swipeMove))
        {
            // Move the player
            rb.MovePosition(rb.position + (moveDirection *
                            swipeMove));
        }
    }
}
In this function, instead of just using the current touch position, we instead store the starting position when the touch begins. When the player lifts their finger, we get the position as well. We then get the direction of that movement and then apply that movement to the ball, checking whether we'll collide with something before actually causing the movement.
- Save your script and dive back into Unity, exporting your project onto your mobile device.
Now, whenever we swipe to the left or right, the player will move accordingly. Let's learn about another action that we can use while playing the game in the next section.
Scaling the player using pinches
The concept of using touch events to modify things in the game can also be applied to other methods of touch interaction such as using finger pinches to zoom in and out. To see how to do this, let's make it so we can change the player's scale using two fingers to pinch or stretch out the view:
- Open up the PlayerBehaviour script and add the following properties:
[Header("Scaling Properties")]

[Tooltip("The minimum size (in Unity units) that the player should be")]
public float minScale = 0.5f;

[Tooltip("The maximum size (in Unity units) that the player should be")]
public float maxScale = 3.0f;

/// <summary>
/// The current scale of the player
/// </summary>
private float currentScale = 1;
- Next, add the following function:
/// <summary>
/// Will change the player's scale via pinching and stretching two
/// touch events
/// </summary>
private void ScalePlayer()
{
    // We must have two touches to check if we are scaling the
          object
    if (Input.touchCount != 2)
    {
        return;
    }
    else
    {
        //Store the touchs detected.
        Touch touch0 = Input.touches[0];
        Touch touch1 = Input.touches[1];

        // Find the position in the previous frame of each touch.
        Vector2 touch0Prev = touch0.position -
                                touch0.deltaPosition;
        Vector2 touch1Prev = touch1.position -
                                touch1.deltaPosition;

        // Find the the distance (or magnitude) between the touches
        // in each frame.
        float prevTouchDeltaMag = (touch0Prev -
                                    touch1Prev).magnitude;

        float touchDeltaMag = (touch0.position -
                                touch1.position).magnitude;

        // Find the difference in the distances between each frame.
        float deltaMagnitudeDiff = prevTouchDeltaMag -
                                     touchDeltaMag;

        // Keep the change consistent no matter what the framerate
             //is
        float newScale = currentScale - (deltaMagnitudeDiff
                                            * Time.deltaTime);

        // Ensure that it is valid
        newScale = Mathf.Clamp(newScale, minScale, maxScale);

        // Update the player's scale
        transform.localScale = Vector3.one * newScale;

        // Set our current scale for the next frame
        currentScale = newScale;

    }
}
Instead of using a single touch event, in this example, we are using two. Using both touches, we can see how they changed over the course of the previous frame (the delta). We then use that difference to modify the scale of the player. To ensure the ball will always have a valid value we use the Mathf.Clamp function to keep the values between what is set in minScale and maxScale.
- Next, we need to call the function by updating the Update function:
/// <summary>
/// Update is called once per frame
/// </summary>
private void Update()
{
    // Check if we are running on a mobile device
    #if UNITY_IOS || UNITY_ANDROID
        //Check if Input has registered more than zero touches
        if (Input.touchCount > 0)
        {
            //Store the first touch detected.
            Touch touch = Input.touches[0];

            SwipeTeleport(touch);

            ScalePlayer();
        }
    #endif
}
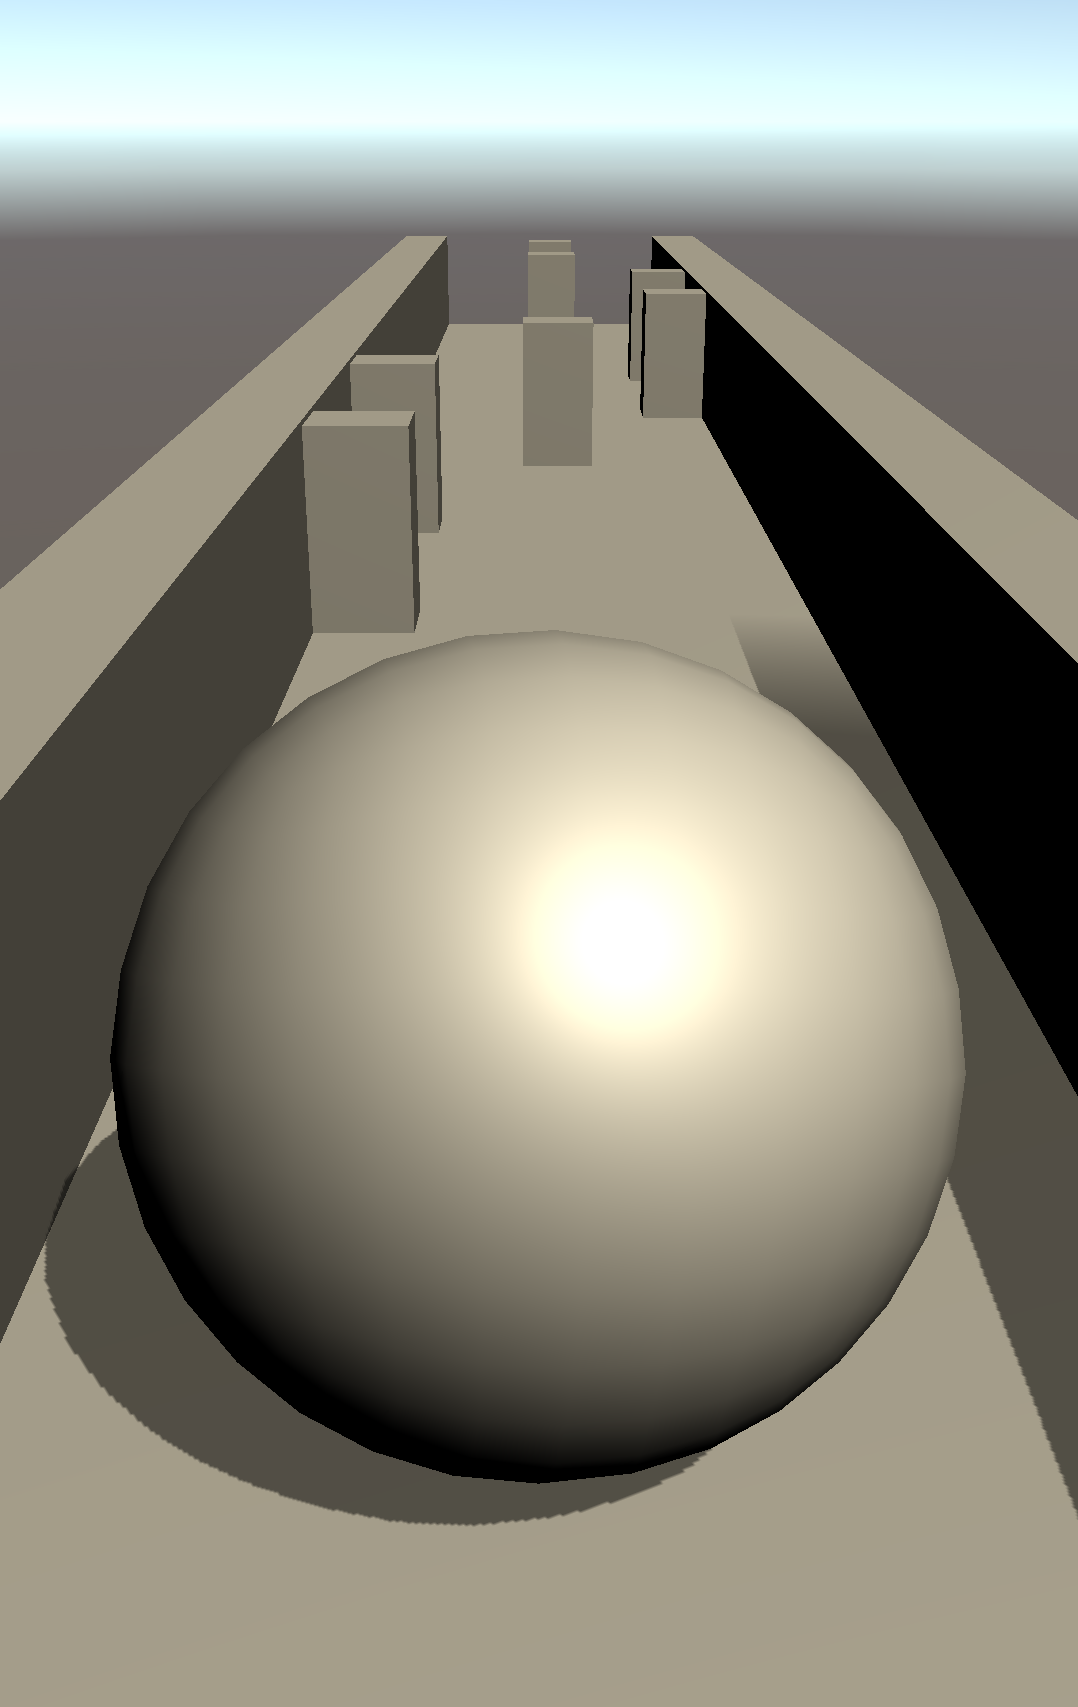
- Save your script and return to the Unity editor. Export your game and you should be able to see the player scaling in action – by pulling two fingers apart, you'll see the ball expand, and vice versa:
Hopefully, this demonstrates the power given by having the ability to use multi-touch and some of the advantages of utilizing touch events instead of just a single mouse click. Next, we will explore another type of input method that PCs don't have.
Using the accelerometer
Another type of input that mobile has, that PC doesn't, is the accelerometer. This allows you to move in game by tilting the physical position of the phone. The most popular example of this is likely the movement of the player in games such as Lima Sky's Doodle Jump and Gameloft's Asphalt series. To do something similar, we can retrieve the acceleration of our device using the Input.acceleration property and use it to move the player. Let's look at the steps to do just that:
- We may want to allow our designers to set whether they want to use this mode, or the ScreenTouch we used previously. With that in mind, let's create a new enum with the possible values to place in the PlayerBehaviour script above the Swipe Properties header:
[Tooltip("How fast the ball moves forwards automatically")]
[Range(0, 10)]
public float rollSpeed = 5;

public enum MobileHorizMovement
{
   Accelerometer,
   ScreenTouch
}

public MobileHorizMovement horizMovement =
    MobileHorizMovement.Accelerometer;

[Header("Swipe Properties")]
[Tooltip("How far will the player move upon swiping")]
public float swipeMove = 2f;
The preceding script utilizes an enum to define a custom type called MobileHorizMovement, which can be one of two values, Accelerometer and ScreenTouch. We then create a variable of this new type called horizMovement.
- Now, if you were to save the PlayerBehaviour script and dive back into the Inspector tab, you can see we can select one of these two options (Accelerometer or Screen Touch). By using this drop-down menu, the game designer of the project can easily select which of the two options we'd like to use, and then we can expand to even more if we'd like to in the future:

- Next, let's update the Update function with the following highlighted code:
// Check if we are running on a mobile device
#elif UNITY_IOS || UNITY_ANDROID

    if(horizMovement == MobileHorizMovement.Accelerometer)
    {
        // Move player based on direction of the accelerometer
        horizontalSpeed = Input.acceleration.x * dodgeSpeed;
    }

    //Check if Input has registered more than zero touches
    if (Input.touchCount > 0)
    {
        if (horizMovement == MobileHorizMovement.ScreenTouch)
        {
            //Store the first touch detected.
            Touch touch = Input.touches[0];
            horizontalSpeed = CalculateMovement(touch.position);
        }
    }
#endif
This will make use of the acceleration of our device, instead of the position of a touch on screen.
- Save your script and export the project.
With that, you'll note that we can now tilt our screen to the right or left and the player will move in the appropriate direction.
In Unity, acceleration is measured in g-force values, with 1 being 1g of force. If you hold the device upright (with the home button at the bottom) in front of you, the x axis is positive along the right, the y axis is positive upward, and the z axis is positive when pointing toward you.
It's great to know that our regular input is working, but you may want to check whether a game object in our scene has been touched so that the game can react to it. Let's do that next.
Detecting touch on game objects
To add something else for our player to do, as well as to demonstrate some additional input functionality, we'll make it so that if the player taps an obstacle, it will be destroyed. We will use the following steps to modify our existing code to add this new functionality and utilize the concept of raycasts:
- In the PlayerBehaviour script, add the following new function:
/// <summary>
/// Will determine if we are touching a game object and if so
/// call events for it
/// </summary>
/// <param name="touch">Our touch event</param>
private static void TouchObjects(Touch touch)
{
 // Convert the position into a ray
 Ray touchRay = Camera.main.ScreenPointToRay(touch.position);

 RaycastHit hit;

 // Create a LayerMask that will collide with all possible
    // channels
 int layerMask = ~0;

 // Are we touching an object with a collider?
 if (Physics.Raycast(touchRay, out hit, Mathf.Infinity,
             layerMask, QueryTriggerInteraction.Ignore))
  {
     // Call the PlayerTouch function if it exists on a
     // component attached to this object
     hit.transform.SendMessage("PlayerTouch",
             SendMessageOptions.DontRequireReceiver);
   }
}
Here, we use a different version to determine collisions: a raycast. The raycast is basically an invisible vector leading in a given direction, and we will use it to check whether it collides with any objects inside of our scenes. This is often used in games, such as first-person shooters, to determine whether the player has hit an enemy or not without spawning a projectile and moving it there.
The version of Physics.Raycast that we use here takes in five parameters:
- The first specifies what ray to use.
- The second is hit, which holds information about the collision that occurred if it happened.
- The third parameter specifies how far to check for a collision.
- The fourth is a layer mask, which is a way to only collide with certain objects. In our case, we want to collide with all colliders, so we use the bit-wise complement operator (~) to change a 0 into the number possible by flipping all the bits used to create the number.
- Lastly, we have an enumeration called QueryTriggerInteraction, which we say to Ignore. This means that the Tile End objects with the triggers we created in Chapter 1, Building Your Game, will not block our touch events, which would happen by default even if we couldn't see them.
For more information on raycasting, check out https://docs.unity3d.com/ScriptReference/Physics.Raycast.html.
If we do hit something, we call a function named SendMessage on the object that we collided with. This function will attempt to call a function with the same name as the first parameter if it exists on any component on the game object. The second parameter lets us know whether we should display an error if it doesn't exist.
- Now, in the Update function, let's actually call the aforementioned Touch
Objects function:
/// <summary>
/// Update is called once per frame
/// </summary>
private void Update()
{
  // Check if we are running on a mobile device
  #if UNITY_IOS || UNITY_ANDROID
  //Check if Input has registered more than zero touches
  if (Input.touchCount > 0)
  {
    //Store the first touch detected.
    Touch touch = Input.touches[0];

    SwipeTeleport(touch);

    TouchObjects(touch);
     ScalePlayer();
  }
 #endif
}
- Save the PlayerBehaviour script at this point.
- Finally, we call a PlayerTouch function if it exists. So, let's open up the ObstacleBehaviour script and add the following code:
public GameObject explosion;

/// <summary>
/// If the object is tapped, we spawn an explosion and
/// destroy this object
/// </summary>
private void PlayerTouch()
{
 if (explosion != null)
 {
    var particles = Instantiate(explosion, transform.position,
       Quaternion.identity);
    Destroy(particles, 1.0f);
 }

  Destroy(this.gameObject);
}
This function will basically destroy the game object it is attached to, and create an explosion that will also destroy itself after 1 second.
This is because when you tap the screen, every object that has an OnMouseDown method will do a raycast to check whether it was touched. When you have many objects on the screen, you'll note massive performance differences between one raycast and one hundred, and it's important to keep performance in mind when dealing with mobile development. For more information on this, check out http://answers.unity3d.com/questions/1064394/onmousedown-and-mobile.html.
- Save the scripts and dive back into Unity.
We haven't created an explosion particle effect yet. To create this effect, we will make use of a particle system. We'll be diving into particle systems at a much deeper level in Chapter 10, Making Our Game Juicy, but, for now, we can consider a particle system as a game object that is made as simply as possible so that we can spawn many of them on the screen at once without causing the game to slow down too much. This is mostly used for things such as smoke or fire, but, in this case, we will have our obstacle explode. Use the following steps to create an explosion particle effect:
- Create a particle system by going to GameObject | Effects | Particle System.
- Select the game object in the Hierarchy window and then open the Particle System component in the Inspector tab. In there, click on the Renderer section to expand it and change RenderMode to Mesh and Material to Default-Material by clicking on the circle next to the name and selecting it from the menu that pops up:

This will make the particles look like the obstacles that we've already created as a box with the default material.
- Next, under the top Particle System section, change the Gravity Modifier
property to 1. This makes it so the objects will fall over time, much like normal objects with rigid bodies do, but with less computation. - Then, under Start Speed, move to the right side and click on the downward-facing arrow, and from that menu, select Random Between Two Constants:

- This will change the single window to two, signifying the minimum and maximum values that can be used for this property. From there, set the two values to 0 and 8. This makes the objects spawned have starting speeds between 0 and 8.
- Then, change the Start Size to something between 0 and 0.25. This will ensure that we are creating a bunch of cubes that are smaller than the one we are planning to replace.
- Change Duration to 1 and uncheck the Looping option. This makes it so that the particle system will last only for 1 second, and unchecking looping means that the particle system will happen only once.
- Finally, change the Start Lifetime property to 1 so that we can ensure that all of the particles will be dead before the game object is destroyed.
- Under the Emission section, change Rate over Time to 0. Then, under Bursts, click on the + button and then set Count to 50:

This makes it so that 50 particles will be spawned right at the beginning of the particle system being created, much like an explosion.
- Then, check Size over Lifetime and click on the text next to the checkmark to show more details. From there, change the Size property by selecting a curve that decreases over time so that at the end they'll all be 0. This can be done by first selecting the curve itself and then going to the Particle System Curves section at the bottom of the Inspector window (If you do not see the contents shown in the following screenshot, you can click and drag the name upward to have it pop out. From there you can click on the option on the bottom left of the downward facing curve:

This will make the particles smaller over time, and they will destroy themselves only after they become invisible (a scale of 0).
- Finally, check the Collision property and open it, setting the Type property to World. This will cause the particles to hit the ground.
- Change the name of the particle system to Explosion. Then, make your object a prefab by dragging and dropping it from the Hierarchy tab into the Project tab in the Assets/Prefabs folder. Once the prefab is created, remove the original from the scene by selecting it and pressing the Delete key.
- Next, assign it to the Explosion property of the Obstacle Behaviour (Script) in the Obstacle prefab:

- Save your project and export it to your mobile device:

From now on, whenever we tap on the obstacles on our mobile device, they will be destroyed.
Summary
In this chapter, we have learned the main ways in which games are controlled when working on mobile devices. We also learned how we can use mouse inputs, touch events, gestures, and the accelerometer to allow players to interact with our game.
In the next chapter, we will explore the other main way that players interact with a game by diving into the world of user interfaces and creating menus that can be enjoyed no matter what device the user is playing the game on.