
In this chapter, we will cover:
- Setting up Apache Maven on Windows
- Setting up Apache Maven on Linux
- Setting up Apache Maven on Mac
- Verifying the Apache Maven installation
- Creating a new project
- Compiling and testing a project
- Understanding the Project Object Model
- Understanding the build lifecycle
- Understanding build profiles
Apache Maven originated as an attempt to simplify the build process for the now defunct Apache Jakarta Alexandria project. Its formative years were then spent in the Apache Turbine project where it eventually came to replace a brittle and fragile build system based on Apache ANT.
Given Maven’s tremendous potency and effectiveness in solving a majority of our day-to-day challenges, it has become hugely popular and is now widely used not only by developers but by other roles in a team including scrum masters, product owners, and project managers.
In recent years, Maven has clearly emerged as an important force-multiplier for Agile teams and organizations.
On its official website, http://maven.apache.org, Apache Maven’s objectives are listed as:
- Making the build process easy
- Providing a uniform build system
- Providing quality project information
- Providing guidelines for best practices in development
- Allowing transparent migration to new features
Whatever the reasons that made you choose Maven (be it build automation, dependency management, standardization, testability, lifecycle management, continuous integration, or any other industry best practice), the recipes in this book will get you up and running in the shortest time possible.
In the upcoming recipes, we will set up Maven on various platforms and host environments followed by selectively exploring the core concepts of the Project Object Model and the Maven build lifecycle.
We will look at installing and setting up Apache Maven on the Windows operating system. Maven is a command-line tool and needs to be integrated with the Windows environment variables. The process is quite simple and Java dependent.
There is a chance Apache Maven may have been pre-installed on your machine. Verify that Maven isn’t already installed before proceeding.
As mentioned, a prerequisite for working with Maven is the availability of the Java Development Kit. Make sure that the JDK is available before proceeding. This can be verified by running the following command line:
Java -version
It will give the following output:
java version "1.6.0_21"
Java(TM) SE Runtime Environment (build 1.6.0_21-b06)
Java HotSpot(TM) Client VM (build 17.0-b16, mixed mode, sharing)
If you do not have JDK installed, you can download it at http://www.oracle.com/technetwork/java/javase/downloads/index.html.
Got JDK? Next you need to get your hands on Maven. You can download it from:
http://maven.apache.org/download.html
After downloading Maven, extract the archive into any folder. For Windows, it is advised that the path doesn’t contain any white-space characters. I extracted Maven in the D drive.
D:apache-maven-3.0.2
To start using Maven, we need to configure Windows environment variables. The M2_HOME variable needs to be set and the PATH variable needs to be modified to include the Maven binaries folder.
You can set the environment variables by accessing the System settings in the Control Panel.
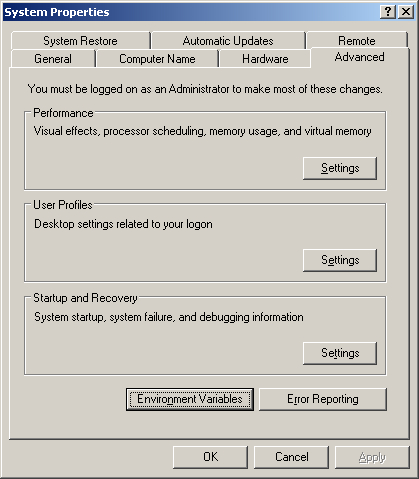
Select Environment Variables and then the New button to create a new environment variable.
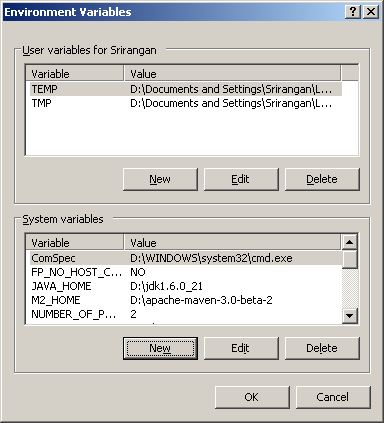
Create a new environment variable for M2_HOME pointing to the Maven base directory. For me, the value of M2_HOME will be D:apache-maven-3.0.2.
The PATH environment variable will already exist. Select it and click Edit to modify. It must be modified by appending the following text at the end:
;%M2_HOME%in
Apache Maven is now ready and available for use in the command line. It is also available for integration with IDEs and other development tools, but more on that in upcoming chapters.
- Setting up Apache Maven on Linux in this chapter
- Setting up Apache Maven on Mac in this chapter
- Verifying your Apache Maven installation in this chapter
- Working with Eclipse and Maven in Chapter 8, IDE Integration
- Working with NetBeans and Maven in Chapter 8, IDE Integration
- Working with IntelliJ and Maven in Chapter 8, IDE Integration