Appendix A. Installing ASP.NET AJAX
In this appendix, you’ll learn how to install ASP.NET AJAX and the additional packages available on the official website, such as the ASP.NET Futures, including the ASP.NET AJAX source code. We’ll also explain how to install the Ajax Control Toolkit and how to interact with the Toolkit homepage hosted at the CodePlex website. Because some of the examples presented in the book take advantage of the AdventureWorks database, the last section shows how to use this database in an ASP.NET website.
A.1. Downloading and installing ASP.NET AJAX
You can download the ASP.NET AJAX Extensions installer from the official website at http://ajax.asp.net. Figure A.1 shows the Downloads page of the official website. To reach it, click the Downloads button at the top of the page. From this page, you can download the latest release of ASP.NET AJAX as well as additional packages and resources such as the official documentation.
Figure A.1. You can download all the ASP.NET AJAX packages from the Downloads page of the official website.

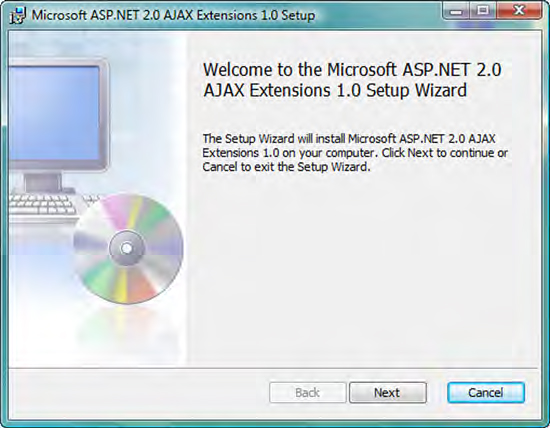
Once you’ve downloaded the ASP.NET AJAX Extensions installer, you can launch it by double-clicking the executable file. This starts the installation wizard, shown in figure A.2. The installer copies the necessary files to the default installation directory, which is the following:
C:Program FilesMicrosoft ASP.NETASP.NET 2.0 AJAX Extensionsv1.0.61025
Figure A.2. The ASP.NET AJAX Extensions installer
The installation folder has the same name as the current version number, which will vary for subsequent releases.
If you browse to the installation folder, you’ll find the following files:
- The Microsoft Ajax Library files, stored in the MicrosoftAjaxLibrary folder
- The System.Web.Extensions and System.Web.Extensions.Design assemblies, which contain the ASP.NET AJAX server framework
- A web.config file already configured for ASP.NET AJAX
The System.Web.Extensions assembly is automatically added to the Global Assembly Cache (GAC) by the installer. For this reason, there’s no need to reference it in a website’s bin folder. The Microsoft Ajax Library files are also embedded as web resources in the System.Web.Extensions assembly. To configure an ASP.NET AJAX-enabled website, the only thing you have to do is use the web.config file found in the installation directory. If you’re upgrading an existing website, you have to copy all the settings of the web.config file found in the installation directory to the web.config file of the website to upgrade.
To make it easier starting with ASP.NET AJAX, the installer configures also a Visual Studio template that sets up an ASP.NET AJAX-enabled website. To select the template, open Visual Studio 2005 and choose New Project from the File menu to open a window similar to the one shown in figure A.3.
Figure A.3. Templates installed by the ASP.NET AJAX installers

The ASP.NET AJAX-Enabled Website template creates the following files:
- A Default.aspx page with the ScriptManager control in it
- A web.config file already configured for ASP.NET AJAX
To take advantage of the Visual Studio Designer while developing for ASP.NET AJAX, you may want to add the ASP.NET AJAX controls to the Visual Studio Toolbox. The next section explains how to do it.
A.1.1. Adding the ASP.NET AJAX controls to the Toolbox
To add the ASP.NET AJAX controls to the Visual Studio Toolbox, proceed as follows:
1. Right-click (CTRL-Click on a Mac) the Toolbox, and choose Add New Tab. Name the new tab ASP.NET AJAX Extensions or give it whatever name you prefer.
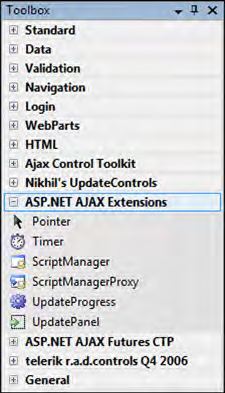
2. Right-click the new tab, and click Choose Items. A Browse dialog opens, where you can choose which assembly to add. Browse to the System.Web.Extensions.dll file, and double-click it. Now all the Toolkit controls are in the new tab in the Visual Studio Toolbox, as shown in figure A.4.
Figure A.4. The ASP.NET AJAX controls added to the Visual Studio Toolbox
The Downloads page of the official ASP.NET AJAX website contains additional packages available for download. The following sections will guide you through the installation process.
A.1.2. Installing the ASP.NET Futures CTP
The ASP.NET Futures CTP is a package containing additional features that are supposed to be included in the next releases of ASP.NET AJAX. These features aren’t supported by Microsoft and are provided as Community Technical Preview (CTP) code for evaluation purposes.
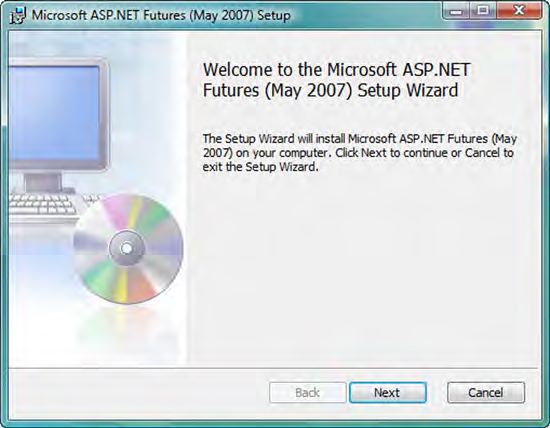
You can download the Futures CTP installer from the official ASP.NET AJAX website. When you run it, a wizard will guide you through the installation process, as shown in figure A.5. The installation directory contains the following:
- The Microsoft Ajax Library script files, stored in the ScriptLibrary folder
- The Microsoft.Web.Preview.dll assembly
- A web.config file already configured for ASP.NET AJAX CTP
Figure A.5. The ASP.NET AJAX CTP Installer.
To configure a new website for ASP.NET AJAX CTP, the only thing you have to do is use the web.config file found in the installation directory. If you’re upgrading an existing website, you have to copy all the settings of the web.config file found in the installation directory to the web.config file of the website to upgrade.
The installer also configures a Visual Studio template to create an ASP.NET AJAX CTP-enabled website. To select the template, open Visual Studio 2005, and choose New Project from the File menu.
The ASP.NET AJAX CTP-enabled Website template creates the following files:
- A Default.aspx page with the ScriptManager in it
- A web.config file already configured for the Futures CTP
- A bin folder that contains the Microsoft.Web.Preview.dll assembly
The script files embedded in the Microsoft.Web.Preview.dll assembly as web resources need to be explicitly referenced in the page using the ScriptManager control. Chapters 11 and 12 explain how to reference the Futures CTP files in an ASP.NET AJAX CTP-enabled page. Finally, you can add the ASP.NET Futures CTP controls to the Visual Studio Toolbox by following the same steps explained in section A.1.1. The only difference is that you have to select the Microsoft.Web.Preview assembly in the Browse dialog. The result is shown in figure A.6.
Figure A.6. The ASP.NET Futures CTP controls added to the Visual Studio Toolbox

A.1.3. Additional ASP.NET AJAX downloads
In addition to the main ASP.NET AJAX package and the ASP.NET Futures CTP, you can download the following files from the Downloads page of the official ASP.NET AJAX website:
- ASP.NET AJAX Extensions Source Code— The source code for ASP.NET AJAX, written in C#. The code can be modified and re-compiled to generate the System.Web.Extensions assembly. You can also use the source code to debug ASP.NET AJAX applications and step into the code.
- Microsoft AJAX Library— The JavaScript files needed to enable the Microsoft Ajax Library in a non-Windows system. For example, the package enables development with a PHP server.
- Sample Applications— A collection of samples written with the ASP.NET AJAX Extensions.
- Ajax Control Toolkit— A collection of Ajax-enabled controls provided as an open-source project hosted at CodePlex (http://www.codeplex.com).
The following section gives detailed instructions on how to install the Ajax Control Toolkit.
A.2. Installing the Ajax Control Toolkit
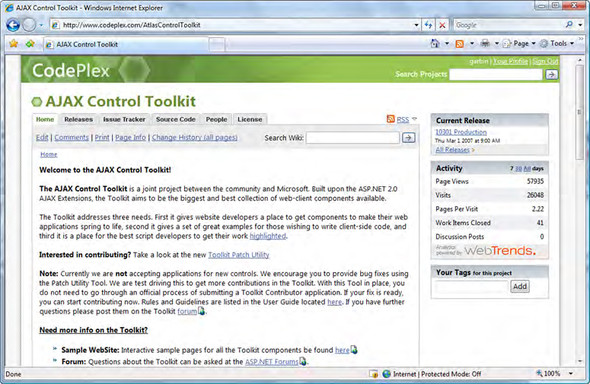
The Ajax Control Toolkit is hosted at CodePlex, which is Microsoft’s open-source project hosting website. The project homepage is at http://www.codeplex.com/AtlasControlToolkit; see figure A.7.
Figure A.7. The Ajax Control Toolkit homepage at CodePlex
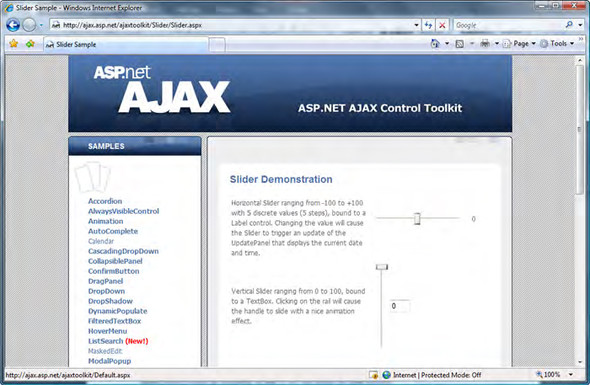
By clicking the Current Release tab in the homepage, you can choose whether to download the compiled binaries or the source code. In the first case, you get an archive that contains a sample website with demos of all the controls and a Visual Studio template to create a new Extender. If you want to use the Toolkit in your website, you only need to browse to the bin folder of the sample website and copy the AjaxControlToolkit.dll assembly into the bin folder of your website. Figure A.8 shows the Toolkit’s sample website, which you can browse online at http://ajax.asp.net/ajaxtoolkit/.
Figure A.8. The Ajax Control Toolkit’s sample website
If you download the source code, you gain the advantage of being able to study it or modify it to accommodate your needs. As usual, you must compile the source code to generate the AjaxControlToolkit.dll assembly to add to your website’s bin folder.
A.2.1. Adding the Toolkit controls to the Visual Studio Toolbox
To add the Toolkit controls to the Visual Studio Toolbox, follow these steps:
1. Right-click (CTRL-Click on a Mac) the Toolbox, and choose Add New Tab. Name the new tab Ajax Control Toolkit or give it whatever name you prefer.
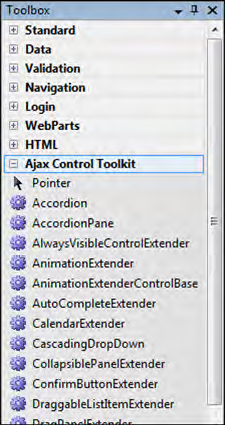
2. Right-click the new tab, and click Choose Items. A browse dialog opens, where you can choose which assembly to add. Browse to the installation directory, and double-click the AJAXExtensionsToolbox.dll file. Now all the Toolkit controls are in the new tab in the Visual Studio Toolbox, as shown in figure A.9.
Figure A.9. The Ajax Control Toolkit’s controls added to the Visual Studio Toolbox
A.2.2. Using the Ajax Control Toolkit controls
To use the controls contained in the AjaxControlToolkit.dll assembly, you need to register them in an ASP.NET page. Usually, you do this by adding a @Register directive at the top of the ASP.NET page in which you declare one or more Toolkit controls. This directive specifies which assembly and namespace contain the controls, as well as the tag prefix to use in declarative code. In the following example, the tag prefix has been set to ajaxToolkit, but you can choose the one you prefer:
<%@ Register Assembly="AjaxControlToolkit"
       Namespace="AjaxControlToolkit"
       TagPrefix="ajaxToolkit" %>
If you added the Toolkit controls to the Toolbox, you need to drag one onto the Visual Studio Designer to have the @Register directive automatically added to the web page. As an alternative, to avoid registering the AjaxControlToolkit assembly in every page, you can register it globally by adding the following code to your website’s web.config file, under the system.web element:
<pages>
  <controls>
    <add Assembly="AjaxControlToolkit"
          Namespace="AjaxControlToolkit"
          TagPrefix="ajaxToolkit" />
  </controls>
</pages>
Finally, when you’re dealing with the Toolkit controls programmatically, be sure to import the AjaxControlToolkit namespace:
using AjaxControlToolkit;
A.2.3. Interacting with CodePlex
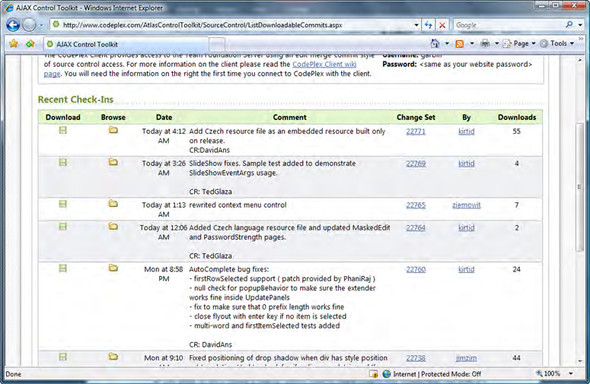
The CodePlex website offers a nice interface to deal with hosted projects. For example, from the Ajax Control Toolkit homepage, you can download the recent builds of the source code, which are created as soon as the source code is modified by one of the team members. Figure A.10 shows the page you can access from the Source Code tab in the project’s tab strip.
Figure A.10. You can download recent builds of the Ajax Control Toolkit from the CodePlex website.
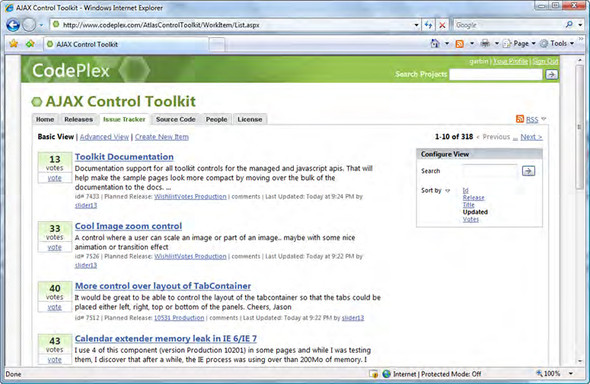
If you think you’ve found a bug or want to signal a feature that you wish would be included in one of the next releases, you can do that on the page accessible from the Issue Tracker tab, as shown in figure A.11. You can also vote for the issues you think should get high priority. The Toolkit team takes votes into consideration for determining the priority of bug fixes.
Figure A.11. CodePlex provides an issue tracker to signal and track bugs found in the Ajax Control Toolkit.
Finally, remember that the Ajax Control Toolkit is an open-source project open to contributions from the community. If you think you’ve developed a cool Ajax-enabled control, check the homepage for instructions on how to submit your creation and enter the project as a Toolkit contributor.
A.3. Installing the AdventureWorks database
Some of the examples in the book require access to the AdventureWorks database. Using the AdventureWorks database requires that SQL Server 2005 or SQL Server Express be installed on your machine.
The AdventureWorks database is provided free by Microsoft as an example corporate database to be used in development and testing scenarios. You can download the database from the following URL: http://www.microsoft.com/downloads/details.aspx?FamilyId=E719ECF7-9F46-4312-AF89-6AD8702E4E6E&displaylang=en.
Follow these steps to use the AdventureWorks database in an ASP.NET website:
1. Download and install the AdventureWorks database with the AdventureWorksDB.msi installer. This creates two files—AdventureWorks_Data.mdf and AdventureWorks_Log.ldf—in the installation directory.
2. In Visual Studio, select New Website from the File menu, then choose the ASP.NET Website template or the ASP.NET AJAX-Enabled Website template. Visual Studio sets up the new website for you and adds the App_Data folder.
3. Right-click (CTRL-Click on a Mac) the App_Data folder, and choose Add Existing Item. Then, browse to the AdventureWorks installation folder, and choose the Adventure- Works_Data.mdf file.
Finally, you need to add the connection string to the web.config file. Open the web.config file, and add a connectionStrings section under the configuration element:
<connectionStrings>
    <add name="AdventureWorks" connectionString="Data Source=.SQLEXPRESS;AttachDbFilename=|DataDirectory|AdventureWorks_Data.mdf;
Integrated Security=True;User Instance=True" />
</connectionStrings>
Now you’re ready to use the AdventureWorks database in a web application. Figure A.12 shows the AdventureWorks database added to a website’s App_Data website.
Figure A.12. The AdventureWorks database added to an ASP.NET website

To reference the connection string in declarative code, you can use the following substitution expression:
<%$ ConnectionStrings:AdventureWorks %>
You can also reference the connection string programmatically in the code-behind file. To do that, you need to import the System.Configuration namespace. The following code stores the connection string for the AdventureWorks database in the connString variable:
string connString =
 ConfigurationManager.ConnectionStrings["AdventureWorks"].ConnectionString;
