
Chapter 9. Securing a microservice
- Understanding why you need secure microservices
- Securing a microservice
- Consuming a secured microservice
- Interacting with secured microservices from a UI
In this chapter, you’ll expand on previous examples by adding various types of security to them. First you will learn about the different kinds of security that you might need to consider when designing and developing microservices.
9.1. The importance of securing your microservice
Securing your microservice is a critical task that needs to be thought out from the beginning of development. Not doing so early results in greater development time for integrating security later. Why? Not designing for security results in code that might need major refactoring to do so at a later date.
Though not taking security into account before development on a typical Enterprise Java application can easily add months to the development schedule, at least with microservices you usually have a lot less code to be refactored. Even so, isn’t it better to design for security up front and save time?
9.1.1. Why is security important?
As enterprise developers, we’re often called on to develop myriad applications, with the end user of the application varying between internal or external, and sometimes both. Figure 9.1 shows a microservice used by a small group of internal users.
Figure 9.1. Internal users

With these requirements, it’d be fair to determine that you can ignore security, right? Wrong!
Even when you’re developing a microservice for internal users only, can you guarantee that the security surrounding your microservice will hold? What happens if, or when, any security barriers preventing external network intrusions are breached?
Figure 9.2 shows how a malicious user, external to the network, would have uninhibited access to a microservice if network security is breached.
Figure 9.2. Malicious external user

Security is a feature that should never be taken for granted, no matter what precautions might be implemented. A common misconception is that security is infallible, which is certainly not the case.
Looking again at figure 9.2, if you don’t consider an internal network secure, you’re more inclined to add extra security within your own microservice to prevent unpermitted access to it. If every application or microservice that’s purely for internal purposes doesn’t include its own security precautions, you’ve made the security at the boundary of the external network a single point of failure.
That’s not even considering the case where you may have a malicious user within the internal network, as shown in figure 9.3! Though having an internal malicious user may not be common, this situation can’t be discounted. This situation can occur for many reasons: disgruntled employee or corporate espionage the most likely.
Few types of applications are developed that don’t need security. Those applications are mostly limited to serving read-only data that’s available to the general public already.
Figure 9.3. Malicious internal user

That’s a fairly narrow definition of an application for which you can ignore security. How many of these are your enterprise’s building every day? Probably none! Applications of this type that an enterprise has developed, or will, in its entire lifetime, would be extremely small in number. Static data that’s also publicly available doesn’t interest an enterprise.
What does all that mean? It means that no application or microservice can ignore security, at all, ever.
9.1.2. What problems does security need to solve?
Now that you know you need security, what kind of problems do you need to solve? That in itself could be the sole topic for a book! Because you’re not looking to re-create War and Peace for microservices, you’ll focus on the areas that would be of most interest.
Authentication and authorization are the two aspects of security that are the most relevant to microservices for us. Before you delve too deeply, you need to outline what each of these terms means.
Authentication is illustrated in figures 9.1, 9.2, and 9.3. It deals solely with whether a user has the right to access an application or microservice. It doesn’t matter where that application or microservice might be hosted, or even whether a user belongs to the enterprise or is external. Authentication is purely concerned with a user being able to access an application.
If a microservice doesn’t need to distinguish between users beyond whether or not they’re allowed, authentication is all that’s needed. But if users who’ve been authenticated require different levels of access to different parts of an application or microservice, you also need authorization.
Figure 9.4 provides an example of user roles that could be used for authorization of a microservice.
Figure 9.4. Multiple user roles for authorization

You see the roles of Admin, Manager, and User, all fairly typical roles that might be required. Whatever roles might be required for your microservice will vary, potentially from zero to many, depending on the requirements.
An enterprise may also have microservices, as shown in figure 9.5. In this case, you have a microservice administered by an internal user, with the role of Admin. But the User of the microservice is external to the enterprise.
Figure 9.5. Internal and external user roles

From the perspective of an entire application that may comprise many microservices, you usually need a mixture of authentication and authorization to satisfy security requirements. For an individual microservice within an application, you may need to concern yourself with only authentication of a user’s request and nothing more.
Whatever your microservice might require—whether it be authentication, authorization, or both—security needs to be considered during design to ensure that it isn’t a last-minute concern.
So how do you go about adding security into your microservices? You can certainly develop your own security solution, but that’s far from ideal in many situations. You’d have to spend time developing it, maintaining it, and so forth. Developing your own security solution not only results in a delayed start to developing what you want, your microservice, but also creates an additional maintenance burden for future developers.
What you want to do is take advantage of a solid project that’s developed and maintained by a large group of developers and that provides the security use cases you need to handle. Though you might have many possible options for such a project available, in this book we’ll choose Keycloak.
9.2. Working with Keycloak
Keycloak is an open source project providing identity and access management for modern applications and services. Adding authentication to applications and securing services can be achieved with a minimum of fuss.
9.2.1. Understanding Keycloak’s features
Keycloak provides many features. Here are four most relevant for microservice development:
- Single-sign on— Allows users to authenticate against Keycloak rather than each individual application or service. After users log in to Keycloak, they can access any application or service that’s authenticated through Keycloak.
- Social login— It’s super easy to enable social logins with Keycloak! Configure the social network within the admin console and go. No code or application changes are required.
- User federation— If your users are registered within LDAP or Active Directory, they can easily be federated with Keycloak. It’s also possible to develop your own provider to access your users, if they’re in different types of stores, such as a relational database.
- Standard protocols— Out of the box, Keycloak provides support for OpenID Connect, OAuth 2.0, and Security Assertion Markup Language (SAML).
Full details on Keycloak and all its features can be found on its website, www.keycloak.org.
9.2.2. Setting up Keycloak
The first thing you need to do is download the Keycloak server for your microservices and applications to integrate with. For our purposes, you have two ways of doing that. You could download a full WildFly distribution customized for Keycloak or download a Keycloak server built with Thorntail. To keep with the microservices way of doing things, choose the Thorntail version. The version you need for our examples is downloadable from http://mng.bz/s6r9.
After downloading, start this version on a separate port so it doesn’t interfere with your own microservices:
java -Dswarm.http.port=9090 -jar keycloak-2018.1.0-swarm.jar
When the server is started, in a browser navigate to http://localhost:9090/auth/. You’ll see a screen like the one in figure 9.6.
Figure 9.6. Setting up the Keycloak Admin user

Enter a username and password for an administrator account on the Keycloak server. Then click Create. Next, click the Administration Console link to see the login screen in figure 9.7.
Figure 9.7. Logging into the Keycloak administration console

Enter the credentials you provided when setting up the administrator account, and then click the Log In button.
Figure 9.8 shows the main screen of the Keycloak administration console. From here, all parts of Keycloak can be modified and adjusted to suit your needs. By default, you’re given a Master realm.
Figure 9.8. Keycloak administration console

Because the Master realm contains the admin user, it’s good practice to not use this realm for users who are authenticating with applications or microservices.
A Keycloak realm manages a set of users, along with their credentials, roles, and groups. Realms are isolated from each other and are responsible for managing only the users they’re associated with.
Realms provide a way to segregate groups of users for different purposes. You might have a realm for finance microservices and another realm for people management microservices. This separation ensures that users from each realm remain separate but are managed from a single Keycloak instance.
Depending on your needs, Keycloak is flexible enough to handle any situation that your application or microservice requires. A common requirement for typical application development, but still relevant for microservices, is the need to authenticate a user and use their credentials when calling services.
Figure 9.9 lays out the path a request would take to authenticate a user within a UI.
Figure 9.9. User authentication via a UI

The authentication steps are as follows:
- The user requests to log into the application UI.
- The UI redirects to Keycloak to perform the login. Keycloak returns tokens that can be used to issue authenticated requests.
- The user chooses to load a view requiring authentication.
- A bearer token provided by Keycloak is added to the HTTP headers of the request.
- The token is extracted from the request and passed to Keycloak for validation. If the token is valid, the secured microservice is able to process the request. If the token isn’t valid, an HTTP 401 status is returned to indicate that an unauthorized user made a request.
Definition
A bearer token is a security token with a special behavioral property. Any party in possession of the token can use it in any way that any other party in possession of the same token could. Using a bearer token doesn’t require the holder to prove possession of the cryptographic key.
A slight variation on the preceding process involves one microservice authenticating itself to issue requests against a secured microservice. Figure 9.10 illustrates this variation.
Figure 9.10. Microservice authentication

This process differs in that whatever calls the secured microservice doesn’t contain or receive an authentication token from a user:
- The request is received by a microservice that isn’t secured.
- The unsecured microservice authenticates itself against Keycloak.
- The bearer token is passed in the HTTP headers of the request to the secured microservice.
- The token is extracted from the request and passed to Keycloak for validation. If the token is valid, the secured microservice can process the request. If the token isn’t valid, an HTTP 401 status is returned to indicate that an unauthorized user made a request.
The remainder of this chapter presents examples for both of these scenarios. Let’s see how you can use Keycloak to secure some microservices.
9.3. Securing the Stripe microservice
In this section, you’ll look at how authentication works in the scenario in figure 9.10. Stripe and Payment microservices from chapter 8 will be implemented with security like figure 9.10. The Payment microservice will be based on the RESTEasy client version from that chapter. Let’s take a look at the previous scenario, this time with Stripe and Payment; see figure 9.11.
Figure 9.11. Microservice authentication with Stripe and Payment

9.3.1. Configuring Keycloak
With your Keycloak server running, the next step is defining a realm for your microservices to associate with.
After you’ve logged in to the administration console, hover over the Master realm name in the top-left corner to reveal the Add realm button, shown in figure 9.12.
Figure 9.12. Accessing the Add realm button in Keycloak

Click the Add Realm button to open the screen used to create a realm. Figure 9.13 shows this screen.
Figure 9.13. Creating a realm

Click the Select File option to locate cayambe-realm.json from the /chapter9/keycloak directory of the book’s code repository. Then click Open.
Figure 9.14 shows the realm you’ll create in Keycloak. To perform the import, you need to click Create so that the content of cayambe-realm.json will be imported and a Cayambe realm will exist.
Figure 9.14. Importing the Cayambe realm

With the Cayambe realm, you’re taking advantage of the Keycloak service accounts feature. This feature allows a client to authenticate itself with Keycloak, without any interaction from a user. This feature is super useful for administrative tasks that aren’t triggered by a user directly, such as scheduled jobs that still require authentication.
Now that your realm is created, let’s look at parts of the JSON you imported so you can see what Keycloak has set up.
Listing 9.1. cayambe-realm.json
  "realm": "cayambe",                                            1
  "enabled": true,                                               2
  ...
  "users": [
    {
      "username": "service-account-payment-service",             3
      "enabled": true,
      "serviceAccountClientId": "payment-authz-service",         4
      "realmRoles": [
        "stripe-service-access"                                  5
      ]
    }
  ],
  "roles": {
    "realm": [
      {
        "name": "stripe-service-access",                         6
        "description": "Stripe service access privileges"
      }
    ]
  },
  "clients": [
    {
      "clientId": "payment-authz-service",                       7
      "secret": "secret",                                        8
      "enabled": true,
      "standardFlowEnabled": false,
      "serviceAccountsEnabled": true                             9
    },
    {
      "clientId": "stripe-service",                              10
      "enabled": true,
      "bearerOnly": true                                         11
    }
  ]
- 1 Specifies the realm name to be cayambe
- 2 Ensures that your realm is enabled after being loaded
- 3 Unique username for your service account user.
- 4 Defines the clientId that will be authenticating with the service account
- 5 The roles that should be assigned to the service account user.
- 6 Defines the stripe-service-access realm role
- 7 Unique clientId for your Payment microservice.
- 8 Secret to be used for authenticating the service account user.
- 9 Enables the service account feature of Keycloak for the client
- 10 Client ID of the Stripe microservice that will be secured.
- 11 Identifies that the client only validates bearer tokens, but is unable to retrieve them
All the names and IDs you’ve defined here are unique within the realm you’ve created but have no meaning by themselves. They’re just text.
What’s important is that the client ID for a service in the realm matches the specification in the service configuration (which is covered in the next section). With that, your Keycloak server is ready to handle authentication for Stripe and Payment.
9.3.2. Securing the Stripe resource
The first step is to secure the Stripe microservice to ensure that you’re accessing Stripe APIs, without appropriate authentication. Once you know that you’re properly connecting to the service, you’ll add the necessary authentication.
If you take the code from chapter 8, you don’t need to modify StripeResource to add security. Pretty cool, right? You can add security to an existing RESTful endpoint without modifying its code! How does that work?
Right off the bat you need to let Maven know that you want to use Keycloak with your Thorntail microservice. For that, you need to add a dependency to your pom.xml:
    <dependency>
      <groupId>io.thorntail</groupId>
      <artifactId>keycloak</artifactId>
    </dependency>
The only other task is to define where Keycloak is, how it’s configured, and what needs protecting. Thankfully, you can do all that from within one file with Thorntail! You add a project-defaults.yml file into the src/main/resources directory of your Stripe microservice with the content shown in the following listing.
Listing 9.2. project-defaults.yml
swarm:
  keycloak:
    secure-deployments:
      chapter9-stripe.war:                                  1
        realm: cayambe                                      2
        bearer-only: true                                   3
        auth-server-url: http://192.168.1.13:9090/auth      4
        ssl-required: external
        resource: stripe-service                            5
        enable-cors: true
  deployment:
    chapter9-stripe.war:                                    6
      web:
        security-constraints:
          - url-pattern: /stripe/charge/*                   7
            roles: [ stripe-service-access ]                8
- 1 Section defining Keycloak configuration for chapter9-stripe.war deployment
- 2 Which realm your deployment uses for authentication—in this case, cayambe
- 3 Identify your microservice as bearer-only.
- 4 URL of the Keycloak server where the service realm is located. You don’t use localhost for when the service is deployed to Minishift.
- 5 Identify this resource as stripe-service, which corresponds to the Client ID in cayambe-realm.json.
- 6 Section defining deployment-specific configuration for chapter9-stripe.war. This is equivalent to what could be provided as part of web.xml.
- 7 Request that /stripe/charge URL patterns from this microservice are protected.
- 8 Only users with the role stripe-service-access can successfully execute a request on this microservice.
Now your Stripe microservice is secured from unauthenticated access! Let’s give it a try. Change to the /chapter9/serviceauth/stripe directory and run this:
mvn thorntail:run
Try opening a browser to http://localhost:8080/stripe/charge, and it will indicate Unauthorized. Connecting without a bearer token on the HTTP request from the browser results in your request being rejected, because you’re not properly authenticated.
To see a little more detail, you can use a browser plugin that shows the HTTP network call or use curl from a terminal.
Listing 9.3. Output from curl of Stripe
$ curl -v http://localhost:8080/stripe/charge

*   Trying ::1...
* TCP_NODELAY set
* Connected to localhost (::1) port 8080 (#0)
> GET /stripe/charge HTTP/1.1                                            1
> Host: localhost:8080
> User-Agent: curl/7.54.0
> Accept: */*
>
< HTTP/1.1 401 Unauthorized                                              2
< Expires: 0
< Connection: keep-alive
< WWW-Authenticate: Bearer realm="cayambe"
< Cache-Control: no-cache, no-store, must-revalidate
< Pragma: no-cache
< Content-Type: text/html;charset=UTF-8
< Content-Length: 71
< Date: Sun, 25 Feb 2018 03:22:53 GMT
<
* Connection #0 to host localhost left intact
<html><head><title>Error</title></head><body>Unauthorized</body></html>  3
Now it’s easier to see that you’re receiving a 401 HTTP response code, indicating you made an unauthorized attempt to access the URL. Now that Stripe is properly secured, how can another microservice access it without receiving user credentials?
You could also have deployed Stripe to Minishift as follows:
mvn clean fabric8:deploy -Popenshift
9.3.3. Authenticating in the Payment resource
The Payment microservice for this chapter is derived from the RESTEasy client in chapter 8. You need to make only a few minor modifications to have it authenticate itself against Keycloak.
To be able to authenticate Payment against Keycloak, you need to add a dependency to the Keycloak Authz Client:
<dependency>
  <groupId>org.keycloak</groupId>
  <artifactId>keycloak-authz-client</artifactId>
  <version>3.4.0.Final</version>
</dependency>
This dependency provides all the utility classes you need to authenticate with Keycloak. Now you need to define what Keycloak you’re interacting with, and which Payment microservice is within the Cayambe realm. For that, you need to create a keycloak.json file within the src/main/resources/directory.
Listing 9.4. keycloak.json for Payment service
{
  "realm": "cayambe",                                   1
  "auth-server-url": "http://192.168.1.13:9090/auth",   2
  "resource": "payment-authz-service",                  3
  "credentials": {
    "secret": "secret"                                  4
  }
}
- 1 The realm your deployment uses for authentication—in this case, cayambe.
- 2 URL of the Keycloak server where the cayambe realm is located.
- 3 Identify this resource as payment-authz-service, which corresponds to the Client ID in cayambe-realm.json.
- 4 The credential that needs to be passed to Keycloak to authenticate this client.
That’s all the configuration you need. Next add the code to authenticate with Keycloak. Because you’re now using Hystrix, you need to add the authentication handling into StripeCommand.
Listing 9.5. StripeCommand—getAuthzClient method
private AuthzClient getAuthzClient() {                                   1
    if (this.authzClient == null) {                                      2
        try {
            this.authzClient = AuthzClient.create();                     3
        } catch (Exception e) {
            throw new RuntimeException("Could not create authorization
client.", e);
        }
    }

    return this.authzClient;
}
client.", e);
}
}
return this.authzClient;
}
- 1 Add a helper method for retrieving the AuthzClient for Keycloak.
- 2 If you haven’t already created an AuthzClient, proceed.
- 3 Create the AuthzClient, which uses the information from keycloak.json to authenticate itself.
With AuthzClient at your disposal, you can now retrieve an access token that you can add to any request you make to Stripe. To do that, you must modify your run() method from StripeCommand by adding a request filter after you have a Resteasy-Client instance.
Listing 9.6. StripeCommand—run method
protected ChargeResponse run() throws Exception {
    ResteasyClient client = new ResteasyClientBuilder().build();

    client.register((ClientRequestFilter) clientRequestContext -> {        1
        List<Object> list = new ArrayList<>();
        list.add("Bearer " +
     getAuthzClient().obtainAccessToken().getToken());                     2
        clientRequestContext.getHeaders().put(HttpHeaders.AUTHORIZATION,
list);                                                                   3
    });

    ResteasyWebTarget target = client.target(serviceURI);

    StripeService stripeService = target.proxy(StripeService.class);
    return stripeService.charge(chargeRequest);
}
- 1 Register an anonymous ClientRequestFilter for modifying the HTTP request.
- 2 Use the AuthzClient to retrieve an access token from Keycloak, adding a prefix of Bearer to the token and adding it to a List.
- 3 Add the List you created to the AUTHORIZATION HTTP header of the request.
That’s all you need to do to pass a bearer token on any request you make to Stripe. Pretty simple, right?
9.3.4. Testing your secured microservice
Now that you have Stripe and Payment set up, it’s time to see all the services running and interacting with each other. If you don’t have the Keycloak server and Stripe already running, start them again, ensuring that you deploy Stripe into Minishift.
Then, you need to start Payment by changing to the /chapter9/serviceauth/ payment-service directory and running the following:
mvn clean fabric8:deploy -Popenshift
Open the OpenShift console to retrieve the URL of Payment. Then use the same tools you used in chapters 7 and 8 to execute an HTTP POST against the /sync and /async endpoints. If you try to access the Stripe microservice directly, you’ll still receive the HTTP response code 401 indicating you’re unauthorized.
To see the HTTP headers for Stripe when you’re calling it from Payment, you need to intercept the request or have some other way to output it. In this instance, you’ll modify Stripe to output HTTP request and response headers directly.
Let’s uncomment the following from project-defaults.yml in /chapter9/serviceauth/stripe:
  undertow:
    servers:
      default-server:
        hosts:
          default-host:
            filter-refs:
              request-dumper:
    filter-configuration:
      custom-filters:
        request-dumper:
          class-name: io.undertow.server.handlers.RequestDumpingHandler
          module: io.undertow.core
Restart Stripe and then issue another HTTP POST request on Payment. Within the OpenShift console, locate the Stripe service entry and click the three dots to the right of the pod status. From there, select View Logs, and you should see output logged for Stripe, such as the following:
----------------------------REQUEST---------------------------
               URI=/stripe/charge
 characterEncoding=null
     contentLength=63
       contentType=[application/json]
            header=Accept=application/json
            header=Connection=Keep-Alive
            header=Authorization=Bearer

       eyJhbGciOiJSUzI1NiIsInR5cCIgOiAiSldUIiwia2lkIiA6ICJCTTRFT3FlZXU1bGowaWZw
       cHR0aWtEejdnakhsNzBjd2hreGY4c05

       NWU1NIn0.eyJqdGkiOiJmNDIyNmJlYS1hNWE2LTQ0NDgtOTBiZS1kNmI4NGUwY2FlOWUiLCJ
       leHAiOjE1MTk1MzI0MTksIm5iZiI6MC

       wiaWF0IjoxNTE5NTMyMzU5LCJpc3MiOiJodHRwOi8vMTkyLjE2OC4xLjEzOjkwOTAvYXV0aC
       9yZWFsbXMvY2F5YW1iZSIsImF1ZCI6I

       nBheW1lbnQtYXV0aHotc2VydmljZSIsInN1YiI6IjljZjAyOTQ5LTgxMzctNGM1Ny04MTY4L
       TVhMzlhMDczMTRlMCIsInR5cCI6IkJl

       YXJlciIsImF6cCI6InBheW1lbnQtYXV0aHotc2VydmljZSIsImF1dGhfdGltZSI6MCwic2Vz
       c2lvbl9zdGF0ZSI6IjI5MGM3MTJiLTJ

       kMzItNGZjMi05YWJjLTIxOGFlNTk2MjQwMiIsImFjciI6IjEiLCJhbGxvd2VkLW9yaWdpbnM
       iOltdLCJyZWFsbV9hY2Nlc3MiOnsicm

       9sZXMiOlsic3RyaXBlLXNlcnZpY2UtYWNjZXNzIl19LCJyZXNvdXJjZV9hY2Nlc3MiOnt9LC
       JwcmVmZXJyZWRfdXNlcm5hbWUiOiJzZ
              XJ2aWNlLWFjY291bnQtcGF5bWVudC1zZXJ2aWNlIn0.fO-mOqigv661fSj-
       HNtVGixm_63QYw6Yl5Yo-
              BpDy7vLNQ5uLnWXLTovkiCnOfB8K1mNlAgWM-h5Nwc7IUCy7MJtMg-
              5L0ts0OOQRknIi42QrEN2kSTvQuTwJCtuhmQqfaV23rpn5SG7hf-
       5RVFnpgq3ElfEMW2fs7Ygnv-
              FlQ1Ls7Ns_uKZ7iH7kpwHl30xvXK_Lid9NXEyZI3e-

       7DcpFZPvALRt5_xBJOZk2ZfdITBVKxKc3g7r78ndmK1rnC8ar6t8Fplba2pUv_HYrMvthGp6
       XUwALr31qQcAmBS4Oua-
              qRJr2oa7SwSPfkYBsdR_BvPO1rM2R9h8VSYb_5z-A
              header=Content-Type=application/json
              header=Content-Length=63
              header=User-Agent=Apache-HttpClient/4.5.2 (Java/1.8.0_141)
              header=Host=chapter9-stripe:8080
              locale=[]
              method=POST
            protocol=HTTP/1.1
         queryString=
          remoteAddr=/172.17.0.5:47052
          remoteHost=172.17.0.5
              scheme=http
                host=chapter9-stripe:8080
          serverPort=8080
--------------------------RESPONSE--------------------------
     contentLength=56
       contentType=application/json
            header=Expires=0
            header=Connection=keep-alive
            header=Cache-Control=no-cache, no-store, must-revalidate
            header=Pragma=no-cache
            header=Content-Type=application/json
            header=Content-Length=56
            header=Date=Sun, 25 Feb 2018 04:19:24 GMT
            status=200
==============================================================
9.4. Capturing user authentication
To see how you can use user credentials to call a secured microservice, let’s secure the new Admin interface for Cayambe.
In this scenario, it’s been decided that a few users need the ability to delete categories from the system. That seems reasonable enough. But you don’t want everyone with access to be able to delete a category. That certainly wouldn’t be an ideal outcome!
To achieve this goal, you need a few code modifications:
- Secure the HTTP DELETE method on the JAX-RS resource.
- Integrate with Keycloak for logging a user into the UI.
- Add a Delete button to the UI for categories in the tree but enable it only when a user has the Admin role.
9.4.1. Configuring Keycloak
I didn’t show it when you set up the Cayambe realm earlier, but the realm is already set up with what you need for user authentication. Now let’s cover the details of the parts specifically about user authentication.
Listing 9.7. cayambe-realm.json
  "realm": "cayambe",                           1
  ...
  "users": [
    {
      "username": "ken",
      ...
      "realmRoles": [                           2
        "admin",
        "user",
        "offline_access"
      ],
      ...
    },
    {
      "username": "bob",
      ...
      "realmRoles": [                           3
        "user",
        "offline_access"
      ],
      ...
    }
  ],
  "roles": {
    "realm": [                                  4
      {
        "name": "user",
        "description": "User privileges"
      },
      {
        "name": "admin",
        "description": "Administrator privileges"
      }
    ]
  },
  "clients": [
    {
      "clientId": "cayambe-admin-ui",           5
      "enabled": true,
      "publicClient": true,                     6
      "baseUrl": "http://localhost:8080",       7
      "redirectUris": [
        "http://localhost:8080/*"
      ]
    },
    {
      "clientId": "cayambe-admin-service",      8
      "enabled": true,
      "bearerOnly": true
    }
  ]
- 1 Specifies the realm name to be cayambe
- 2 Creates a user named ken that has the realm roles of user and admin
- 3 Creates a user named bob that has the realm role of user
- 4 Defines the user and admin realm roles
- 5 Client ID for your UI
- 6 publicClient indicates that the client has the ability to log in users to Keycloak
- 7 Base URL of the application.
- 8 Client ID of the JAX-RS endpoints that the UI uses.
Now you’re ready to move on to the changes your application needs.
9.4.2. Securing category deletion
Taking code from the admin directory of chapter 6, you need to make only a few small modifications to secure it as you did with Stripe. Once again, you need to add the Maven dependency for Keycloak in Thorntail:
    <dependency>
      <groupId>io.thorntail</groupId>
      <artifactId>keycloak</artifactId>
    </dependency>
Next you configure the integration with Keycloak through project-defaults.yml.
Listing 9.8. project-defaults.yml
swarm:
  keycloak:
    secure-deployments:
      chapter9-admin.war:
        realm: cayambe                                     1
        auth-server-url: http://192.168.1.13:9090/auth     2
        ssl-required: external
        resource: cayambe-admin-service                    3
        bearer-only: true
  deployment:
    chapter9-admin.war:                                    4
      web:
        security-constraints:
          - url-pattern: /admin/category/*                 5
            methods: [ DELETE ]
            roles: [ admin ]
- 1 The realm your deployment uses for authentication—in this case, cayambe.
- 2 URL of the Keycloak server where the cayambe realm is located.
- 3 Identify this resource as cayambe-admin-service, which corresponds to the Client ID in cayambe-realm.json.
- 4 Section defining deployment-specific configuration for chapter9-admin.war. This is equivalent to what could be provided as part of web.xml.
- 5 Request that all URL patterns deeper than /admin/category from this microservice are protected, for the HTTP DELETE method. Only users with the role admin can execute a request with the URL and method defined.
That’s as far as you need to go to secure the deletion of categories over REST, but you’ll take this a step further to provide details about who is doing the deleting.
By adding the Keycloak dependency from Thorntail, you can retrieve details of the user making a request in the microservice. That’s nice for being able to audit who is doing what, though for our purposes you’re going to print out the information to the console.
Listing 9.9. CategoryResource
@DELETE
@Produces(MediaType.APPLICATION_JSON)
@Path("/category/{categoryId}")
@Transactional
public Response remove(
        @PathParam("categoryId") Integer categoryId,
        @Context SecurityContext context) throws Exception {               1

    String username = "";

    if (context.getUserPrincipal() instanceof KeycloakPrincipal) {         2
        KeycloakPrincipal<KeycloakSecurityContext> kp =
            (KeycloakPrincipal<KeycloakSecurityContext>)
     context.getUserPrincipal();                                           3

        username = kp.getKeycloakSecurityContext().getToken().getName();   4
    }

    try {
        Category entity = em.find(Category.class, categoryId);
        em.remove(entity);
        System.out.println(username + " is deleting category with id: " +
categoryId);                                                             5
    } catch (Exception e) {
        return Response
                .serverError()
                .entity(e.getMessage())
                .build();
    }

    return Response
            .noContent()
            .build();
}
- 1 Inject the JAX-RS SecurityContext as a method parameter. This gives you access to security information from the HTTP request.
- 2 Check if the User Principal is of type KeycloakPrincipal, which is what you expect.
- 3 Retrieve the User Principal into a KeycloakPrincipal.
- 4 From the token on the HTTP request, get the username of the user who initiated the request.
- 5 Print a simple audit message stating who is deleting which address.
9.4.3. Authenticating the user in a UI
Now that your RESTful endpoint is secure for category deletion, you can make the functionality available from the application UI. To see the changes you’ve made to the UI, look in the /chapter9/admin_ui/ui directory of the code for the chapter.
In this situation, you’ve chosen to include the JavaScript that Keycloak provides by adding an NPM dependency into package.json for keycloak-js. You could also download the appropriate JavaScript from the server directly, from http://localhost:9090/auth/js/keycloak.js.
As with your Java-based services, you need a keycloak.json file to configure our connection to the Keycloak server.
Listing 9.10. keycloak.json for Admin UI
{
  "realm": "cayambe",
  "auth-server-url": "http://192.168.1.13:9090/auth",
  "ssl-required": "external",
  "resource": "cayambe-admin-ui",
  "public-client": true
}
This code should now be quite familiar to you, because it covers the typical requirements for connecting to Keycloak. It defines cayambe-admin-ui as the resource you specified earlier as your Client ID, within the cayambe-realm.json file you imported into Keycloak.
With the keycloak.json file in place, you can initialize your connection to Keycloak.
Listing 9.11. keycloak-service.js
import Keycloak from 'keycloak-js';                  1

const keycloakAuth = Keycloak('/keycloak.json');     2
keycloakAuth.init({ onLoad: 'check-sso' })           3
  .success((authenticated) => {                      4
    // Handle successful initialization
  })
  .error(() => {
    // Handle failure to initialize
  });
- 1 Import the Keycloak object from the keycloak-js NPM module.
- 2 Create the Keycloak object and tell it where keycloak.json is for configuration.
- 3 Initialize Keycloak with check-sso, which checks only whether a user is currently logged in.
- 4 If you successfully connected to Keycloak, you’re passed an authenticated parameter to let you know whether a user is authenticated.
As part of the success() handling from listing 9.11, you want to set variables that you’ll need later. One of those is to retrieve the URL for logging into Keycloak, because you need to add the URL into the UI:
this.auth.loginUrl = this.auth.authz.createLoginUrl();
You can then pass that value into your ReactJS component for the header of the page, so that you can provide a link to log in:
<li className="dropdown"> <a className="dropdown-toggle nav-item-iconic"
this.props.login is set to the value of the Keycloak login URL, which you set on this.auth.loginUrl. You also want to add information into the header of the page about the current logged-in user, and provide a way for that user to log out as well. It’ll be an exercise for you to explore the JavaScript and see how that works.
The last piece is to provide a button in the UI to delete a category. CategoryListContainer, a ReactJS component, will set a Boolean value for the adminRole property to indicate whether the user has that role.
Then you just need HTML code to enable and disable a button based on this property:
<button disabled={!this.props.adminRole} className="btn btn-danger"
onClick={() => this.props.onDelete(category.id)}>Delete</button>
That’s most of the UI work done, except for passing the token you have for an authenticated user into any request that needs it. Let’s do that now.
You need to modify the ReactJS action you have for delete to set the token on a request, just as you did in the Payment microservice earlier. The process is similar in JavaScript.
Listing 9.12. Delete admin category
import axios from 'axios';                                  1
const ROOT_URL = 'http://localhost:8081';                   2

if (store.getState().securityState.authenticated) {         3
  store.getState().securityState.keycloak.getToken()        4
    .then(token => {
      axios.delete(`${ROOT_URL}/admin/category/${id}`, {    5
        headers: {
          'Authorization': 'Bearer ' + token                6
        }
      })
        .then(response => {
            // Handle success response
        })
        .catch(error => {
            // Handle errors
        });
    })
    .catch(error => {
      dispatch(notifyError("Error updating token", error));
    });
} else {
  dispatch(notifyError("User is not authenticated", ""));
}
- 1 Imports an NPM module to assist in HTTP calls
- 2 Defines the root URL of the RESTful endpoint for the address microservice
- 3 Checks whether there’s an authenticated user
- 4 Retrieves an authenticated token from keycloak-service.js
- 5 Defines the HTTP DELETE request you want to execute
- 6 Sets the token you received from keycloak.getToken() into an authorization header for the request
Did you forget how a UI and Keycloak interact? Let’s take another look in figure 9.15.
Figure 9.15. User authentication via UI

Anytime the UI calls delete on your RESTful endpoint, a token, if present, will be set on the request. For now, no other request from the UI will pass a token, but if there was a need to secure additional endpoints or to log information about the user making a request, then it could be added in a similar manner.
9.4.4. Testing that the new UI and service all work
It’s time to take the new UI for a spin. If Keycloak isn’t still running, start it with the command you used earlier in the chapter. Start the RESTful endpoints for your Admin service, change to /chapter9/admin_ui/admin, and run this:
mvn thorntail:run
Finally, you can run the UI! You want to simulate a production build, so you need a separate command to build and then start the UI:
mvn clean install
java -jar target/chapter9-ui-thorntail.jar
Now you can navigate to http://localhost:8080 and you’ll see the main page of the application, shown in figure 9.16.
Figure 9.16. Cayambe Admin screen
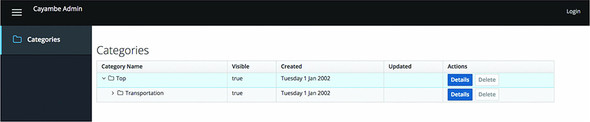
You can see your categories, as before, but now you also have a Login link in the top-right corner, and a disabled Delete button for each category.
Clicking Login, you’re redirected to Keycloak to authenticate yourself. Enter bob as the username and password for the password. You’re redirected back to your application and you’re now authenticated, as shown in figure 9.17.
Figure 9.17. Cayambe Admin when logged in with the User role

Although you’re authenticated, the Delete button is still disabled. Because Bob has only the User role, you’re not permitted to delete categories.
To see how to delete a category, let’s log out from Bob by clicking the user details in the top-right corner, and then select Logout from the options.
Now let’s log in as ken with the same password as before; see figure 9.18.
Figure 9.18. Cayambe Admin when logged in with the Admin role

The Delete button is now bright red, indicating it’s available for you to use. Clicking it deletes the category you choose, and you’ll see that category removed, as well as a message letting you know the category was successfully deleted.
I didn’t cover a lot of ReactJS code in this chapter, such as the code to check the token validity and to refresh it when it’s expiring. Please take a look at all the Java-Script code available for the application in the source code for the book.
Summary
- Securing your microservices is critical, regardless of whether they’re intended for internal users only. You can’t predict all the types of malicious users who may attempt to do harm through your microservices.
- Keycloak can accept bearer tokens, provide an authorization client, and provide easy configuration for securing your microservices.
- You can authenticate against Keycloak without a user, which is essential for microservice-to-microservice calls when the recipient is secured.
- You can integrate Keycloak into an application UI to provide authentication, and pass tokens to RESTful endpoints that are secured.