Chapter 1. Install, configure, and manage the mailbox role
The mailbox server role in Exchange 2013 hosts mailbox databases and other items, such as Client Access protocols, Transport service and Unified Messaging. All processing of a specific mailbox takes place on the Mailbox server hosting an active copy of the mailbox. Client connectivity is handled by the Client Access role, which can be co-located on the same server. But it only proxies the connections to Mailbox server components for further processing and rendering of the mailbox data being requested.
Important: Have you read page xvii?
It contains valuable information regarding the skills you need to pass the exam.
The Mailbox role is also expanded in Exchange 2013 to include Public Folders. Public Folders do not use dedicated public folder databases and are now stored in specially designed mailboxes store both public folder hierarchy and public folder content. This allows for public folders to take advantage of the existing high availability and storage technologies in use by mailbox databases.
With Exchange 2013, there is higher focus on service availability, easier management, and reduced costs. To achieve such goals, managed availability is introduced to provide internal monitoring. The internal monitoring of components is aimed at preventing failures, proactively restoring services, and initiating server failovers automatically or alerting administrators to take action. Automation, coupled with managed availability, is driven by the focus on measuring quality and the continuous availability of service to end users, instead of focusing on the uptime of individual components.
Simplification and automation have also been integrated in other database functions. When using JBOD configuration to achieve cost efficiency, disk failures in previous versions meant manual intervention to maintain healthy copies of mailbox databases. Automatic reseed functionality allows for automatic database reseeding on a spare disk on the same server. Failures affecting resiliency or redundancy, such as long I/O times or excessive memory consumption by replication processes, are addressed by automatically rebooting the server. While this might sound like a drastic measure, it doesn’t affect service availability because the assumption is that redundancy is provided using Database Availability Groups (DAGs) and other high availability features provided by Exchange 2013.
The network configuration of DAGs has also been simplified by automatically configuring DAG networks. DAGs can also distinguish between the Messaging Application Programming Interface (MAPI) and Replication networks, configuring them automatically. This greatly simplifies the setup, thus protecting against errors when configuring DAG networks manually.
Note: Manual vs. Automatic Configuration of DAG Networks
While Exchange 2013 functionality makes setup easier by configuring DAG networks automatically, in complex networks you might need to configure DAG networks manually. You might also need to troubleshoot DAG networks if errors are encountered and if replication or MAPI traffic is affected. It is important for you to pay attention to cmdlets and parameters that enable you to configure DAG networks manually.
Objectives in this chapter:
![]() Objective 1.1: Plan the mailbox role
Objective 1.1: Plan the mailbox role
![]() Objective 1.2: Configure and manage the mailbox role
Objective 1.2: Configure and manage the mailbox role
![]() Objective 1.3: Deploy and manage high availability solutions for the mailbox role
Objective 1.3: Deploy and manage high availability solutions for the mailbox role
![]() Objective 1.4: Monitor and troubleshoot the mailbox role
Objective 1.4: Monitor and troubleshoot the mailbox role
![]() Objective 1.5: Develop backup and recovery solutions for the mailbox role and public folders
Objective 1.5: Develop backup and recovery solutions for the mailbox role and public folders
![]() Objective 1.6: Create and configure mail-enabled objects
Objective 1.6: Create and configure mail-enabled objects
![]() Objective 1.7: Manage mail-enabled object permissions
Objective 1.7: Manage mail-enabled object permissions
Objective 1.1: Plan the mailbox role
Deploying the mailbox role requires the careful planning of mailbox role components. Despite advancements in storage technologies and improved I/O characteristics, it’s detrimental to deploy mailbox storage without considering storage characteristics, such as disk latency. Capacity planning is also just as important. With 16 terabytes as the supported maximum database size, it could be tempting to maximize database size with larger Serial ATA (SATA) disks. When considering such extremes, it’s important to consider other dependencies, such as time to reseed after a disk failure, time to restore from backups when multiple copies of the database are neither deployed nor available, the ability to meet recovery time objectives in case of an outage or a disaster, and so on.
This objective covers how to:
![]() Plan for storage requirements
Plan for storage requirements
![]() Plan mailbox role capacity and placement
Plan mailbox role capacity and placement
![]() Plan for virtualization
Plan for virtualization
![]() Design public folder placement strategy
Design public folder placement strategy
![]() Validate storage by running Jetstress
Validate storage by running Jetstress
Planning for storage requirements
Exchange 2013 supports multiple storage architectures and physical disk types. Each feature offers different performance characteristics and has its benefits. Direct attached storage, for example, has no dependency on an external data network used by Internet Small Computer System Interface (iSCSI) or a dedicated storage network used by Fibre-Channel storage. Similarly, Solid State Disk (SSD) drives offer fast data transfers at a cost of much smaller storage capacities per drive. In general, Exchange 2013 is designed to achieve efficiencies by reducing costs, and the goal is achieved by shifting balance in code, reducing I/O footprint, and optimizing reads and writes, so multiple databases can be placed on the same physical drive. Using bigger SATA drives allows for such efficiencies to materialize.
Anyone with a few years of experience deploying Microsoft Exchange environments can attest that no single solution meets customer requirements, since every customer is unique and so are their design requirements. The Microsoft guidance on Exchange 2013 storage design aims to address most common configurations by providing best practices guidance. For example, single copy databases may be best protected by using a redundant array of independent disks (RAID) configuration, while JBOD might provide best efficiencies when at least three copies of a database exist in a DAG.
 Exam Tip
It is important for you to be able to differentiate which configuration serves a proposed design the best. It is also important to understand the caveats spelled out in exam questions such as, “What is the supported configuration that is most cost effective?” Sometimes the requirements might seem to conflict, but paying close attention to details will help identify possible answers and rule out distractors.
When configuring disks, it is important for you to understand how to create a supported layout. When configuring disk sector size, you must pay attention to nuances such as a 512-byte sector that is supported on Exchange 2013, while 4 kilobyte sector disks aren’t supported on any version of Microsoft Exchange server.
Exam Tip
If a question in the exam has a possibility of producing a different answer based on a different version of Exchange server (that is, RTM vs SP1), exam questions will clearly spell out which version of Exchange Server is applicable for a given question.
The placement of database and related files is another important consideration for a Mailbox server. Best practices suggest that the operating system, and the pagefile should be a RAID-protected volume separate from any Exchange data logical unit numbers (LUNs). The placement of the database and log files is also an important consideration. If you’re deploying a stand-alone mailbox database and protecting it with traditional backup systems, whether to separate database and log files on their own separate volumes depends on the backup methodology in use. Placing database and log files on the same volume is supported. Best practices, however, suggest that database files and log files should be located on separate volumes backed by separate physical discs in stand-alone configurations. When multiple copies of a database are deployed in a DAG configuration, the requirement changes to a single database and a log per volume.
When determining the disk size, the size of the database being hosted becomes one of many factors to consider. You’ll find that the Exchange Role Requirements Calculator accounts for other items, such as impact of content index, which now equals roughly 20 percent of the size of the database file. An additional requirement for space is used by the master merge process. You can benefit from a reduction in space required for the master merge if you choose to place multiple databases per volume. No restriction exists on the placement of an active copy of a database or on the same volume as a replica of a different database.
While considering all of these factors for a database or a set of databases that are going to reside on a given disk, it not only becomes important to stay within supportability guidance, but you must also stay within the design requirements laid out for a given environment. Factors such as the time required to recover a database in case of a disaster, can affect your ability to benefit from large supported database sizes. The best practice guidance from Microsoft also differentiates between stand-alone database configurations and a database protected by multiple copies in a DAG. For example, the recommendation is not to exceed 200 gigabytes for a database if it’s in a stand-alone configuration. But if you plan to setup multiple copies for a database, best practices accommodates up to 2 terabytes for any given database.
Exam Tip
Pay attention to exam questions that differentiate between supported vs. best practices recommendations. Microsoft documents both scenarios clearly, and, for a given configuration, the difference between the supported configuration and best practices can be significant.
The transaction logs required to recover from a catastrophe also differ from one configuration to another. A stand-alone database configuration protected by traditional backups requires backups to protect transaction logs. Using circular logging doesn’t provide the capability to revert to a given point in time before data loss. In contrast, if multiple copies of a database are deployed in a DAG configuration, circular logging is the recommended best practice in the light of complementary functionality, such as lagged copy and single item recovery. Depending on how you choose to truncate logs has a direct impact on how much disk space you need to allocate for a given configuration.
Other important considerations for disk configuration are: partition type GUID Partition Table (GPT) vs. Master Boot Record (MBR), volume type (simple vs. dynamic), and File System—easy to remember because only the NTFS file system is supported for compression—which isn’t supported for Exchange database and log files. The other two features relate to the security of data on the disk. How should you secure database and log files from prying eyes in a highly secure environment? Two possibilities are Encrypting File System (EFS) and BitLocker. EFS isn’t supported for Exchange database and log files, while BitLocker is fully supported. The last feature to consider is file share support. NFS file systems are unsupported and shouldn’t be deployed to host database and log files. The Server Message Block (SMB) 3.0, introduced with Windows Server 2012, is supported only when configured in a virtualized environment. This configuration assumes SMB 3.0 file share is presented to a hypervisor host and a VHD disk is created on a given SMB volume. The VHD disk is attached to a virtualized Exchange server, and the disk is presented as block storage. It isn’t supported to present the SMB 3.0 share directly to an Exchange server, and host database and log files on it.
Planning mailbox role capacity and placement
Planning for the capacity of a mailbox role involves the consideration of a number of factors. These factors include the understanding of an existing messaging deployment if the planned deployment is a migration from a previous version, the understanding of user messaging profiles, and the desired mailbox size. The other factors to consider are desired resiliency and disaster recovery objectives, compliance and data retention requirements, data recovery objectives, Service Level Agreements (SLAs), organizational growth plans, and the use of third-party applications.
All of these factors help you determine the number of servers, server hardware utilization, server placement, and environmental dependencies, such as domain controller configuration and placement.
Real World: Domain Controller placement
When planning for an Exchange deployment, I learned that the customer environment consisted of an empty domain root and two child domains: Domain A and Domain B. Users of both domains were hosted on Exchange servers located in Domain A. Typically, you deploy a set of domain controllers in the same Active Directory site as Exchange servers for a given Active Directory domain, which is Domain A in this example. However, in this case, we needed to account for additional domain controllers to contain the Global Catalog of users from Domain B to provide the best possible user experience and resiliency. Without such a configuration, any time a user from Domain B logged in to their mailboxes, the Exchange servers would have to reach out to domain controllers located in a different site that belonged to Domain B and was connected through WAN links. As you’ll notice, the centralized Exchange server design had an impact on hardware and software requirements for the additional domain controllers.
The user profile is one of the most important factors when determining compute resources required by a mailbox server. A software development firm with a staff of developers and support professionals located in a different geographic region might depend more heavily on an email system than a company developing locomotives where design professionals might frequently communicate via email, while production and factory workers might need limited access to emails. How many emails are sent on average by a given user category is as important as how big an average email is for any given category. This helps you determine processing, storage, and network resources required by a given mailbox server.
Determining a user profile when migrating from an earlier version of Exchange server is relatively easy, because you can use Exchange Profile Analyzer if you’re migrating from Exchange 2007. You can leverage performance counters if you’re migrating from Exchange 2010 to obtain detailed per-user statistics.
Another important factor is mailbox database size. How big of a mailbox is desired for a given user profile? Each job profile may have different capacity requirements. Compliance requirements can change these requirements drastically, however, challenging your storage requirements assumptions.
Real World: Impact of legal hold on mailbox storage sizing
An organization had strict mailbox size requirements, deploying the smallest possible number of mailboxes for any given job profile. Storage design accounted for storage overhead for content indexing, as well as 20 percent free space for buffering. They had a requirement that when any person is involved in a legal action, the mailbox must be placed on indefinite legal hold and all data must be retained in the mailbox including deletions. The legal hold was removed from the mailbox only when legal action had concluded and the legal requirements no longer applied to the mailbox. This requirement meant a design consideration for a mailbox server with additional storage to accommodate for additional data when a mailbox is placed on legal hold and a business-process automation script. This script automatically moved mailboxes on legal hold from their mailbox server to a server designated for litigation; this server contained other similar mailboxes and had the additional storage required for such mailboxes.
Another important consideration in mailbox server design is high availability and site resiliency requirements. For example, you might be required to provide all users with uninterrupted mailbox access despite the failure of a single mailbox server. This requirement means accounting for additional mailbox servers hosting mailbox database copies of all users. You also have to reduce the usable capacity of a given server to account for failover capacity. In a two server configuration, this could mean up to 50 percent of capacity needs to be reserved to help mailbox failovers. Similarly, in a three mailbox server configuration with each server hosting active mailboxes, the minimum reserved capacity can be as much as 33 percent.
If a requirement dictates that all mailboxes must be available in case of disaster at the primary site where all active mailboxes are located, you need to create a DAG that spans multiple sites, and place a mailbox server containing copies of mailbox databases at a secondary site. This impacts the requirement of additional hardware, an additional datacenter location and space considerations, and network requirements to accommodate database replication traffic. Other requirements include active user traffic in case of a failover, or activation in case of a disaster or outage at the primary site.
What if existing IT standards or procurement contracts with the vendor dictate using specific server hardware profile for mailbox servers? This might mean you need to scale out by deploying more servers if the given hardware profile can’t accommodate all of the planned mailbox resources.
Should you migrate or deploy Public Folder databases? This might impact storage capacity planning and the location of mailbox servers in a distributed environment to account for resiliency and user experience.
When determining the scale out vs. the scale up model, you need to account for the number of database copies, resiliency requirements, and tolerance to failure domains. In a scale up configuration, you are planning to have more mailboxes per server, which means bigger servers with more processing power and storage capacity, as well as a higher number of mailboxes impacted during failures. The scale-out model requires the same account of total resources divided into smaller chunks, resulting in a larger number of smaller servers deployed to the account for the given environment. This increases the numbers of servers, but reduces the impact on the number of mailboxes affected for given failure. The cost for smaller servers can also provide a cost advantage. Conversely, a larger number of servers in the scale out model also means more management overhead for IT to license, install, monitor, and maintain a higher number of servers. The datacenter footprint is also affected directly by your choice of the scale up vs. the scale out model.
No single design can accommodate all of the possible variations and different requirements for an Exchange deployment. This is why every successful Exchange deployment considers each of these unique factors based on the given requirements to select the most effective model for deployment.
When designing for storage capacity, the size of the mailboxes is only one of many factors. You need to account for the space required for a mailbox for its given capacity, including the database whitespace, a recoverable items folder size, content indexing, log space (if logs are stored on the same disk as the database), and an additional—usually about 20 percent—buffer, because you can’t fill the disk at 100 percent capacity and expect the system to function with no triggered alerts.
Disk I/O is another important consideration. While the Exchange 2013 code improvements have reduced I/O requirements significantly, you still need to account for proper I/O calculations to ensure the given disk not only has sufficient capacity to host the planned number of mailboxes, but also that the I/O for the given disk is sufficient to address all read-and-write requirements for mailbox data and related tasks, such as content indexing.
When using external storage such as iSCSI or Fibre-Channel storage, plan for aggregate I/O capacity of each storage channel. When using iSCSI, network bandwidth consideration is crucial. Fibre-Channel SAN is limited by capacity of underlying Fibre-Channel fabric. And, don’t forget transport storage, because transport components are now part of the Mailbox role. Transport capacity planning needs to account for queuing for active emails, shadow queues, and a Safety Net. To account for failures, you have to account for poison queue messages, messages queued for delivery to unreachable targets (failed database copy or an inability to reach the Internet destination for outbound messages), and messages stored as part of the Safety Net mechanism for transporting high availability.
Planning for memory requirements includes accounting for database cache, which makes up for a significant portion of server memory, content indexing, and other exchange processes that provide vital functions, such as background maintenance, managed availability, and other agents. If you deploy multi-role servers, you must also account for the additional memory required for Front-End server role components also sharing resources on the same server hardware.
To perform actual calculations for a given mailbox profile and other factors, Microsoft has documented formulas that can be used if you want to size the mailbox role manually. For more information about those published formulas, see: http://blogs.technet.com/b/exchange/archive/2013/05/06/ask-the-perf-guy-sizing-exchange-2013-deployments.aspx. Using the Exchange 2013 role requirements calculator is recommended, in order to avoid errors and calculate for all scenarios based on the provided input.
Planning for virtualization
In today’s IT environments, it’s difficult to imagine a datacenter with no virtualization in use, no matter at how large or small a scale. Some environments use virtualization for some workloads, and physical servers for another. Then, there are environments that deploy virtualized workloads for nearly anything that can be virtualized!
When planning for an Exchange 2013 deployment, you’ll most likely face a question of whether the Exchange 2013 servers can be virtualized. That question has no simple answer. Look at the many variables that affect the decision to virtualize Exchange 2013 servers.
Because Exchange 2013 supports virtualizing all server roles, you don’t need to determine whether a given server role is supported when virtualized.
Exchange 2013 is supported on any version of Windows Server with Hyper-V technology, or a Hyper-V Server. It’s also fully supported to virtualize Exchange 2013 servers using any third-party hypervisor validated under Windows Server Virtualization Validation Program (SVVP). Some well-known virtualization platforms found on the SVVP validated list include VMware’s vSphere and ESX platforms, Citrix XenServer, and Oracle VM.
Important: Microsoft Azure and Exchange 2013
While it’s possible to virtualize Exchange 2013 server roles using Microsoft Azure VMs, the deployment of production Exchange servers on Microsoft Azure VMs is not supported. See http://support2.microsoft.com/kb/2721672 for a list of supported server software and roles on Azure VMs.
After determining the supported platform, the design discussions usually turn to features of the given virtualization platform to determine which features can be used in conjunction with Exchange server functionality to get the most out of the technology and platforms features being deployed.
The Live Migration of a virtual machine (VM) is a popular feature that every virtualization administrator wants to deploy and know if Exchange supports it. Live Migration enables administrators to move VMs from one hypervisor host to another to achieve better resource utilization and perform scheduled software or hardware maintenance. Exchange 2013 supports such functionality with Microsoft Hyper-V and other hypervisors.
The key to being supported when deploying such migration functionality is to ensure that the migration process for a VM doesn’t deploy snapshot-type functionality where a VM is saved to the disk and restored from it. The VM must remain online during the migration process, or the VM must shut down and perform a cold boot.
Another popular feature is snapshot functionality. Think of snapshot functionality as a point-in-time backup of your VM. For example, let’s say you’re planning to make significant changes to your environment and want to be able to revert to the current stable configuration in case of a failure. Your virtualization administrator may be happy to point out the ability to take snapshots and revert to them if needed. The virtualization administrator may not know the application specifics and complexities of using snapshots with Exchange. Exchange components, such as log shipping for database replication which are dependent on accurate time keeping and when the snapshot feature is used. The introduced time travel to the time passed by reverting to an older snapshot has undesired and unpleasant side effects. This can help understand why the snapshot feature isn’t supported for use with Exchange VMs. Using snapshots on Exchange VMs has some unexpected and most commonly undesired consequences. In most circumstances, these consequences can’t be undone, leaving you to deal with bigger issues than you bargained for.
While they aren’t a variation of the snapshot feature, differencing disks are a similarly interesting feature that promises to reduce disk space usage by creating a master or parent disk that contains common shared data, primarily the VMs operating system. By creating differencing disks, all changes are written to a differencing disk, which has its own issues. Take dependency on the parent disk, for an example. Even an accidental change to the parent disk invalidates the differencing disks that depend upon the parent disk. In the case of a change to the parent disk, you end up with Exchange servers that can’t boot anymore. While data might not be lost, the service to end users is certainly affected, at the very least. As you probably guessed by now, the snapshot feature is not supported with Exchange VMs.
Another great feature many modern hypervisors offer is guest replication. This feature replicates VMs to another host, local or remote, to provide the capability to start up replica VM if the hypervisor host with a primary VM copy fails. For Exchange 2013 VMs, the recommendation is to use DAG functionality, as well as other availability and disaster recovery features provided by Exchange server. Using hypervisor-based replication functionality with Exchange 2013 isn’t supported.
Maximizing resource usage with virtualization is a natural tendency. It often results in the oversubscription of processors, as well as memory overcommit using dynamic memory mechanisms. While modern hypervisors are continuously improving to provide better resource sharing, it cannot protect against intentional overcommit. When you have critical workloads, such as Exchange server roles in a VM, oversubscription usually has negative effects on such workloads. Unexpected behavior of Exchange server services is often observed when resource oversubscription is deployed.
Real World: Impact of dynamic memory on Exchange VM
While testing Exchange 2013 features in my lab environment, I was unable to perform the expected functions, and the errors weren’t descriptive enough to determine what the problem was. As I started looking into the issue, I noticed that some of the Exchange services were stopped. After spending many hours troubleshooting the issue, I noticed that default configuration was using dynamic memory when creating the VM. Like most personal labs, my hypervisor host was oversubscribed and, when multiple VMs ramped up resource demand, it started affecting resource availability to VMs. When the Exchange server lost some of its allocated memory, which is an expected behavior when dynamic memory is configured, the services using the memory crashed due to the loss of the resource they were depending on. The issue was fixed by setting the memory on Exchange VM to a static amount, which is a change that requires VM to be shut down and restarted.
Exchange 2013 code is optimized to strike a balance between the efficient use of memory and reducing the I/O footprint. To achieve these efficiencies, Exchange relies on a calculated cache for each database being hosted on the server, as well as the memory reserved for Exchange subsystems. When dynamic memory is in use, this can result in incorrect memory calculations and it can cause Exchange to start with less memory than is available. Not surprisingly, Microsoft doesn’t support the use of dynamic memory with Exchange VMs.
Processor oversubscription is supported, but the recommended ratio is 1:1, with a supported ratio of 2:1 over the subscription maximum. This means that for every physical processor core on a hypervisor host, no more than two virtual processors should be assigned to VMs running on the given host. This isn’t only limited to Exchange VMs running on the host, but it does include processors assigned to all VMs.
Hyperthreading is another advanced feature that can improve performance. An example of hyperthreading, as you can see in Figure 1–1, is when your system detects four logical processors when the system is configured with only one physical socket and two physical cores.

Hyperthreading is great for managing multiple workloads with the parallel execution of threads, but it isn’t designed to provide you more processing capacity than the system has. For example, the system referred to in Figure 1-1 has a CPU with a maximum speed of 2.4 GHz. The system has one socket, with two CPU cores and four logical processors. How much processing capacity does the system have? 2.4 GHz? 4.8 GHz or 9.6 GHz? The correct answer is 4.8 GHz, because the system has two physical cores, each capable of running at a maximum of 2.4 GHz. Four logical cores is an indication that hyperthreading is enabled on the system. This might allow four parallel threads to execute instead of two, making the system more efficient. But, as discussed earlier, it can’t provide more than 4.8GHz of maximum processing power.
When configuring processing capacity for virtualization environment and virtualizing Exchange servers, it’s supported to have hyperthreading enabled on the virtualization host. But, when sizing Exchange servers for your environment, you need to consider the actual processor cores available to the system and not the logical processor count.
When considering storage for VMs, the virtualization administrator has many options at their disposal to deploy appropriate storage for given VMs. Options include local storage, DAS, iSCSI storage, Fibre-Channel storage, NFS shares, and, beginning with Windows Server 2012, SMB 3.0 shares.
For Exchange VMs to be supported, the disks assigned to Exchange VMs must be a block storage. This means, you can’t map the NFS or SMB share to Exchange VM and store database and log files on it. The disk where Exchange related files are stored must be available to VM as a block-level storage disk. These disks must be visible through the disk management console or when you run Diskpart on the Exchange VM.
Hypervisors use different virtual disk formats to store data for VMs. These disks can be configured as fixed disks, taking up all of the allocated space on the host volume when they are created. For example, on a 500 GB host volume, a 50 GB fixed disk takes 50 GB of space on a host volume upon creation, leaving 450 GB of free space on the host volume, assuming nothing else is stored on it. This is true even though the disk isn’t initialized by the VM and no data is stored on it yet. Hypervisors also allow the disks to be configured as dynamically expanding disks. Dynamically expanding disks take little space upon creation and only expand in proportion to the actual data being stored on it. So, a dynamically expanding disk may only take 1 MB or less on the host volume upon creation. When the VM stores data on the disk, it expands to accommodate the data being written to it. While this might sound like the most efficient way to use disk space on host volumes, it comes with a performance penalty. When VM needs to store more data to a dynamically expanding disk, hypervisor needs to expand the virtual disk file as the data is being written to it, causing delays in responding to I/O calls from VM. The delays may be small and unnoticeable, or they can amount to noticeable thresholds, depending on the underlying storage architecture and the parallel I/O activity on the same host volume. This can have a detrimental effect on Exchange performance and is undesirable, so Exchange 2013 only supports fixed virtual disks.
Where you store these virtual disks it is also important for your deployment of Exchange servers to be supported. Virtualized Exchange 2013 supports virtual disks stored in the following scenarios:
![]() Local or directly attached storage
Local or directly attached storage
![]() Fibre-Channel storage presented as block-level volumes to the virtualization host
Fibre-Channel storage presented as block-level volumes to the virtualization host
![]() iSCSI storage presented as block-level storage to the virtualization host
iSCSI storage presented as block-level storage to the virtualization host
![]() iSCSI storage presented as block-level storage to the Exchange VM
iSCSI storage presented as block-level storage to the Exchange VM
![]() SMB 3.0 share mappe to virtualization host
SMB 3.0 share mappe to virtualization host
The virtual disks must be fixed virtual disks. When using SMB 3.0 share, it is not supported to map the share to Exchange 2013 VM and store database and log files directly to it.
Hypervisors such as VMware also support NFS shares to store virtual disks attached to VMs. But it isn’t supported to store virtual disks attached to an Exchange VM on NFS storage. While this might be a point of contention between Exchange administrators and virtualization administrators, it helps you understand why Exchange doesn’t support such storage.
Exchange requires various guarantees, such as Forced Unit Access, Write-Through, Write Ordering, and so on from storage, to maintain data integrity and system reliability. When storage is unable to provide such guarantees, the critical Exchange system and user data are at risk, which isn’t acceptable or desirable to any system administrator supporting such complex systems. NFS storage implementations, historically, haven’t met these guarantees, so it isn’t a supported solution for Exchange deployments.
The sum of all individual components makes up for a fully functioning system, but it doesn’t end there. What if the hypervisor host your Exchange VM is running on fails? The answer might sound as easy as deploying multiple instances of mailbox servers and creating DAG with each database having two or three replicas, providing there’s enough protection from failures. But, it’s just as important to account for all of the possible failure domains. Are your hypervisor hosts configured to have separate failure domains, so a failed router in one rack doesn’t affect a replica of your database? Are they in separate racks? Are they using separate phases of power, so a failure on one power line doesn’t affect all replicas at the same time? Are all disks used for all replicas separated, so single SAN failure doesn’t affect all the replicas of a given database? All these questions lead to one goal: failures are a fact of any IT infrastructure. Failures will happen, so account for all possible failure domains. Determine the cost of deploying a solution that can account for mitigating all possible failure domains, while staying within your design and budget guidelines. Strike the best possible balance to achieve highest possible availability by eliminating ill effects of single failures on your Exchange environment.
More Info: Virtualizing Exchange 2013
You can find current information and guidance for virtualizing Exchange 2013 here: https://technet.microsoft.com/en-us/library/jj619301.
Designing public folder placement strategy
In Exchange 2013, public folders were given special treatment. Instead of using dedicated public folder databases in previous versions, public folders are now hosted on regular mailbox databases. By moving public folders to mailbox database, Exchange can now provide better resiliency by leveraging the same DAG architecture that regular mailboxes have enjoyed since Exchange 2010.
Public folders still maintain a hierarchy, however, the hierarchy isn’t stored in a public folder mailbox, known as the Primary hierarchy mailbox. Primary Hierarchy Mailbox is the only writable copy of the public folder hierarchy in the entire Exchange organization. An Exchange administrator can create additional public folder mailboxes, and each of these secondary hierarchy mailboxes contains a read-only copy of the public folder hierarchy. Both Primary and Secondary hierarchy mailboxes can contain public folder content.
Creating new public folder mailboxes is a function now moved to New-Mailbox cmdlet. When creating a new public folder mailbox, use the PublicFolder parameter. This is different from creating a new public folder. Once a mailbox to host public folders is created, you can create a new public folder by using the New-PublicFolder cmdlet.
When you create multiple public folder mailboxes, Exchange server automatically distributes users equally across public folder mailboxes for load-balancing purposes. In large environments, restricting the new public folder from the serving hierarchy is important because when users access a new public folder mailbox, which isn’t excluded from serving hierarchy, they might only see an incomplete public folder structure until the hierarchy synchronization is complete. Use the IsExcludedFromServingHeirarchy parameter when creating a new public folder mailbox to exclude it from serving an incomplete hierarchy to its users.
When hierarchy synchronization completes, the value of the IsHeirarchyReady parameter on public-folder mailbox properties is set to $true. This helps the administrator determine when an exclusion set on the public folder can be removed. While users can access public folder hierarchy from any public folder mailbox, because only one writeable copy of hierarchy exists, any new public folder creation or deletion request is proxied to the primary hierarchy mailbox.
Unlike regular mailboxes, the public folder mailbox is a shared resource accessed by multiple users simultaneously. Activity on a public folder has a direct impact on the server where the public folder mailbox is located. To avoid client connectivity issues, consider having multiple public folder mailboxes in the environment. If a certain public folder in hierarchy is heavily used, create or move the public folder to a dedicated public folder mailbox. Also consider restricting a heavily used public folder mailbox from the serving hierarchy.
In a geographically dispersed environment, create public folder databases in the location nearest to the user that access the public folder contents stored in them. This reduces round trips to remote locations that might be connected with slower wide area network (WAN) links and can introduce excessive delays, resulting in a poor Outlook client behavior and user experience. When deploying public folder mailboxes in close proximity to user locations, also consider changing the DefaultPublicFolderMailbox property on user mailboxes, so users can use their closest public folder mailbox to retrieve the public folder hierarchy.
When deploying public folders on Exchange 2013 servers, it’s important to understand that because Exchange 2013 servers don’t support legacy public-folder databases, there’s no co-existence. When migrating from Exchange 2010 or Exchange 2007, the recommendation is not to create any modern public folder mailboxes on Exchange 2013 until after all the user mailboxes are migrated to Exchange 2013.
Migration from older versions of Exchange server to new public folder mailboxes is a one-way process in the sense that you can roll back to legacy public folders by deleting all public folder mailboxes on Exchange 2013, setting the PublicFolderMigrationComplete parameter to false on a previous version of Exchange server. But, any data changed or added to the new public folder mailboxes doesn’t synchronize with legacy public folders and is lost when public folder mailboxes on Exchange 2013 are deleted during the roll-back process. This is an important consideration during the migration planning process from legacy public folders to new public folder mailboxes on Exchange 2013.
With new public-folder mailbox functionality, you can easily move a rapidly growing public folder and its contents to a different public folder mailbox. Because of the separation that can happen from using different mailboxes for different public folders, it becomes complex to account for all of the subfolders that belong to the public folder being moved. If you need to keep the data of all subfolders with the parent public folder being moved, you need to use the Move-PublicFolderBranch.ps1 script, provided with the Exchange 2013 server installation.
With a new mailbox architecture, the public folder mailboxes now automatically inherit the size limits from the mailbox database that they belong to. You must carefully evaluate mailbox sizes, including warning, send, and receive quotas that a public folder mailbox might inherit and change it for a public folder mailbox, if necessary. When changing public-folder mailbox quotas from database defaults, it’s important that the underlying storage has enough capacity to account for those exceptions and additional storage that public folder mailboxes might consume because of non-default quotas configured on them.
Because modern public folders are now similar in architecture as mailboxes and use the same underlying mailbox databases, it’s natural to think mechanisms, such as mailbox audit logs that work with regular mailboxes, would also work with public folder mailboxes. But, currently, mailbox audit logs don’t work on public folder mailboxes. This is important when you define goals for meeting auditing requirements for each of the messaging components being deployed.
It is also important to distinguish mailbox audit logging from public-folder access permissions auditing. Assigning permissions is an administrative action that moved to role based access control (RBAC) in Exchange 2013. This allows for auditing administrative actions when permissions on public folders are changed.
Validating storage by running Jetstress
Even though the I/O requirements were significantly reduced in Exchange 2013 when compared to previous versions, performing validation using proper testing tools is still as important to ensure the success of any Exchange 2013 deployment. Jetstress is used to validate all of the hardware and software I/O components, including storage drivers, disk firmware, and many other storage-related components. While Jetstress doesn’t actually verify details, such as whether a particular firmware version is present for a given disk, a successful Jetstress result validates the storage stack that is configured optimally to meet your design requirements. While it might be obvious, it’s important to point out that as any other tool, Jetstress is going to test what it’s asked to test for. If the provided user profile information and other test parameters are incorrect, the passing result might not be an accurate reflection of your production requirements and a failing result might not mean much in reality.
The installation of Jetstress is dependent on ESE libraries that are going to be used on production Exchange 2013 server. Also, Jetstress is run before Exchange server is installed on the server to be tested. This means, required ESE libraries must be obtained manually from installation media of Exchange 2013 server version that are going to be used to install Exchange 2013 on a given server. Jetstress should never be run on a server that has Exchange 2013 already installed.
When validating storage using Jetstress, all of the factors affecting the given storage should be considered. If shared storage, such as SAN, is planned, all concurrent I/O profiles on shared storage should be tested or simulated to achieve accurate pass/fail results. Testing single LUN on new SAN with no load may pass the test with flying colors, but it doesn’t accurately reflect the reality under which the shared storage is performing when in production. If multiple databases are planned to be located on the same volume, the test should account for it. If shared workloads other than exchange are expected to have I/O impact on the same volume, expected I/O from other applications should also be simulated during Jetstress testing. Freely available tools, such as Iometer, can be leveraged to test shared I/O on the volume, if needed.
When testing RAID subsystems, accounting for disk failures is also important. When a disk in a RAID array fails, access to the data stored on the array is uninterrupted. Performance of the RAID array is degraded until the failed disk is replaced and rebuild process is complete. Jetstress tests should account for both healthy operation and performance degradation during the rebuild operation.
While required storage performance characteristics don’t change when Exchange 2013 servers are virtualized, the factors that can affect storage performance certainly do! Virtualized environments might mean a shared logical unit number (LUN) hosting virtual disks for many VMs. Each VM have its own I/O requirements. During peak usage periods, this can result in concentrated I/O causing degradation in storage performance. When host-based failovers are configured, a failed host might mean additional resource usage on surviving hosts due to additional VMs now running on it. This also requires additional I/O on shared spindles. When testing virtualized Exchange servers for storage system performance with Jetstress, accounting for these additional factors is important.
When running Jetstress, how much time you allocate for testing is an important factor to ensure that test results are accurate. The tuning of test parameters might be required before running extended tests, so the recommendation is to run initial short 15-minute tests to determine the number of simultaneous threads an underlying storage system can support. Once the appropriate level of disk latency and IOPs are achieved using tuned parameters in short tests, longer tests should be carried out. Strict mode tests should be carried out for durations from up to six hours, and lenient mode tests should be carried out for durations greater than six hours. The strict mode tests storage for stricter maximum read and write latencies of 100ms. The lenient mode, in contrast, tests the storage against the maximum read and write latency target of 200ms.
Before performing any testing, you should also ensure that the test systems are configured optimally for an underlying storage subsystem. Factors such as server BIOS, storage controller firmware and driver levels, and hard disk firmware have a direct impact on the outcome of Jetstress and should be at manufacture-recommended and -supported levels. When SAN- based storage is planned, the same considerations apply to Fibre-Channel HBA drivers, Fibre-Channel switch firmware, and SAN controller operating-system levels.
When Jetstress tests result in a failure, it usually means one of two factors. A natural tendency is to look at a storage subsystem and tune or reconfigure it to ensure the tests pass. But it might also be the result of misconfiguration of Jetstress test parameters. Starting with the validation of test parameters and storage driver/firmware levels is the best first step toward remediation. If further tests still fail, this almost always means the storage has failed to meet the test requirements and must be remediated. Putting the solution in production is detrimental, assuming the failure is of the tool testing the storage, because Jetstress is a simple tool that directly relies on the test parameters and the storage subsystem being tested.
For the test to be successful, all three criteria being evaluated must pass. The three criteria are database IOPS target, I/O database read averaged latency, and I/O log write averaged latency. Database I/O target is derived by using IOPS requirements calculated per storage-sizing guidance.
![]() Thought experiment: Exchange 2013 design considerations
Thought experiment: Exchange 2013 design considerations
1. What would be your recommendations for virtualization platform configuration to ensure Exchange 2013 deployment is supported?
2. Do you agree with the proposed storage configuration? Do you have any concerns to discuss?
3. How would you plan public folder deployment to address the requirement?
Objective summary
![]() Exchange 2013 storage doesn’t require fast disks. Optimal storage design for Exchange 2013 requires striking a careful balance of price, performance, and capacity.
Exchange 2013 storage doesn’t require fast disks. Optimal storage design for Exchange 2013 requires striking a careful balance of price, performance, and capacity.
![]() Deploying newer functionality can replace traditional practices, such as deploying lagged copies of database along with single item recovery, which can address backup requirements of an organization replacing traditional backups.
Deploying newer functionality can replace traditional practices, such as deploying lagged copies of database along with single item recovery, which can address backup requirements of an organization replacing traditional backups.
![]() What Exchange 2013 considers supported configuration may differ from what the vendor is willing to support. This applies to storage, as well as virtualization.
What Exchange 2013 considers supported configuration may differ from what the vendor is willing to support. This applies to storage, as well as virtualization.
![]() Placement of Exchange 2013 server roles isn’t always a strictly technical decision. Centralized deployments may work for a small company with a highly mobile workforce, but it might not be the best option for a large company with multiple international locations, each governed by different rules and compliance requirements.
Placement of Exchange 2013 server roles isn’t always a strictly technical decision. Centralized deployments may work for a small company with a highly mobile workforce, but it might not be the best option for a large company with multiple international locations, each governed by different rules and compliance requirements.
![]() While supported, not every environment can benefit from the high availability and resource management functionality modern virtualization platforms provide. Exchange 2013, when using database replicas, can ensure the integrity of data that HA provided by virtualization platform can’t due to lack of application awareness.
While supported, not every environment can benefit from the high availability and resource management functionality modern virtualization platforms provide. Exchange 2013, when using database replicas, can ensure the integrity of data that HA provided by virtualization platform can’t due to lack of application awareness.
Objective review
Answer the following questions to test your knowledge of the information in this objective. You can find the answers to these questions, and explanations of why each answer choice is correct or incorrect, in the “Answers” section at the end of this chapter.
1. Select supported disk configuration for Exchange 2013 deployment. The deployment must provide the best possible cost benefits for design consisting of large mailboxes for every user. The planned minimum mailbox size is 5 GB per user.
A. Dedicated RAID5 configuration of 10 SSD disks per server.
B. VHD files stored on 7,200 RPM 4 TB SATA disks, served by NFS storage array using dedicated 10 Gbps network.
C. Dedicated RAID5 volume consisting of 15,000 RPM 1 TB SCSI disks on fiber channel SAN storage array.
D. Dedicated RAID10 volume consisting of 15,000 RPM 1 TB SCSI disks on Direct Attached Storage.
2. You need to determine the user profile for the existing Exchange 2010 environment that will be used to determine server and storage sizing for planned Exchange 2013 deployment. Which tool should you use to minimize administrative effort and meet the requirement?
A. Exchange Profile Analyzer
B. Performance Counters
C. Transaction Log Files
D. Exchange Log Analyzer
3. You plan to create a new public folder mailbox on an Exchange 2013 server located at a remote site that’s connected to the main site using slower WAN links. You want to ensure users don’t get incomplete folder hierarchy. What should you do?
A. Create a new public folder mailbox using the New-Mailbox cmdlet. Exclude the new public folder from the serving hierarchy using the IsExcludedFromServingHeirarchy parameter.
B. Create a new public folder mailbox using the New-Mailbox cmdlet. Set the IsHierarchyReady parameter to $false to exclude the new public folder from the serving hierarchy.
C. Create a new public folder mailbox using the New-Publicfolder cmdlet. Set the IsHierarchyReady parameter to $false to exclude the new public folder from the serving hierarchy.
Objective 1.2: Configure and manage the mailbox role
Exchange 2013 setup is now greatly simplified, and it also accounts for installing operating system component prerequisites as a part of the setup, if selected. But this simplification doesn’t prevent the need to carefully plan the deployment of the mailbox server roles, taking into account the unique qualities of the environment where Exchange 2013 is being deployed. In this section, you learn the details of how to configure and manage mailbox role and related components.
This objective covers how to:
![]() Deploy mailbox server roles
Deploy mailbox server roles
![]() Create and configure Offline Address Book (OAB)
Create and configure Offline Address Book (OAB)
![]() Design and create hierarchical address lists
Design and create hierarchical address lists
![]() Create and configure public folders
Create and configure public folders
Deploying mailbox server roles
The first step to successfully deploy a mailbox server is to ensure that all of the prerequisites are met. Starting with authentication provider, you must be certain that at least one writeable domain controller exists in each Active Directory site where you plan to deploy an Exchange 2013 server. The supported operating system running on the Active Directory controller is Windows Server 2003 or later. Referencing mail-enabled objects is critical for Exchange server roles. For Exchange server to function properly, you must deploy at least one global catalog server in each Active Directory site where you plan to deploy an Exchange 2013 server.
The network infrastructure using the IPv6 protocol is supported only when IPv4 is also installed and enabled.
In small environments, it’s tempting to collocate Exchange 2013 server on a server that’s also a domain controller to reduce the number of servers required. While it is a supported to install Exchange 2013 on a domain controller, for security and performance reasons, the recommendation is to install Exchange 2013 server on a member server in a domain. If you choose to collocate an Exchange server with a domain controller, the server can’t later be demoted to a member server or promoted to a domain controller from a member server after Exchange server is installed.
Since the Resilient File System (ReFS) was introduced in Windows Server 2012, it hasn’t shared much of the limelight, despite the new features that offer a better integrity of data. Exchange 2013 supports storing database files, transaction log files, and content index files on partitions formatted with ReFS. But partitions storing Exchange binary files and diagnostics logging data generated by Exchange server must be formatted using the NTFS file system.
Windows Server Core installations reduce the management overhead and increase the security profile of the server by reducing the attack surface. Core installations, however, aren’t supported for Exchange 2013 server installations. If you have Windows Server 2012 or Windows Server 2012 R2, it’s possible to convert from a Core installation to a Full installation of the server. But if you have a Windows 2008 R2 Core installation, you must reinstall the operating system using the Full installation option. Windows Server 2012 R2 is only supported with Exchange 2013 Service Pack 1 or later.
Preparing the organization is one of the first steps that needs to be run before installing any Exchange 2013 server roles. In an environment where role separation is required, the Exchange administrator might not have the ability to modify the Active Directory schema. In such cases, the Active Directory administrator with Schema Admins and Enterprise Admins privileges needs to run the preparation steps before the Exchange administrator can install Exchange 2013 servers. In Active Directory forests with multiple domains, it’s also important to run Active Directory preparation steps from a computer in the same domain and site as the domain controller that is a Schema Master.
Because this first step requires access to Active Directory, tools that enable you to administer Active Directory are required on the server where the setup is being run. Remote Tools Administration Pack (RSAT) includes all of the required tools and must be installed if the computer is not a domain controller; it can be installed via server manager interface or by using PowerShell. If the server is running Windows Server 2008 R2, you can use the command line Add-WindowsFeature RSAT-ADDS. On Windows Server 2012 or later, run Install-WindowsFeature RSAT-ADDS instead. While the difference is subtle, note the cmdlet, which is different between the two versions, while the component being installed is the same.
When using setup.exe in unattended mode, which can also be used for unattended setup, you must also use the /IAcceptExchangeServerLicenseTerms switch for setup to succeed. No abbreviated aliases exist for the switch.
When preparing a schema, you must allow for the replication to complete from a schema master to all of the domain controllers in all of the domains of the forest. You need to do this before you can proceed to the next steps of preparing Active Directory and preparing domains where Exchange servers and Exchange server users are to be located. In an Active Directory forest with multiple domains, you must prepare every domain where Exchange server users reside, even if an Exchange server won’t be installed in that domain.
When extending the Active Directory schema, Exchange server setup adds and updates classes, attributes, and other items. In simple terms, this is how Active Directory is made aware of what Exchange objects are going to be made up of.
When preparing Active Directory, in new environments, an Exchange Organization is created using the name provided by the administrator. In existing environments, an existing Exchange organization is updated to include Exchange containers, objects, and attributes. When an Exchange server is installed, you’ll find that the corresponding Exchange server object is created within the Exchange organization container in Active Directory.
The last step in preparation of Active Directory is the preparation of domains. During this step, Exchange-related containers and security groups are created. Setup also assigns permissions to the containers, so the Exchange server can access them.
If the Exchange administrator also has required Active Directory permissions, the Exchange Setup Wizard can run all three Active Directory preparation steps automatically.
After the successful installation of Exchange servers, Exchange administrators with permissions to create objects can create new security principals, such as a user in Active Directory, before creating an Exchange mailbox if needed. This model of security might not be preferred in organizations with strict role separation requirements. In such environments, Active Directory administrators are unable to manage Exchange objects, such as mailbox creation, distribution group creation, and so on. Likewise, an Exchange administrator isn’t permitted to create a new user in Active Directory. To achieve such role separation, Exchange setup provides the capability to create Active Directory split permissions. This can be achieved during the setup or after Exchange servers are set up, by running setup.exe with the /ActiveDirectorySplitPermissions switch set to True.
When using the Setup Wizard, the Apply Active Directory split permission security model to the Exchange organization option is only available if you are setting up the first Exchange server in a new organization. In an existing organization, you must use setup.exe in unattended mode with the previously mentioned switch to change the existing permission model.
Exam Tip
It’s possible to change the Exchange server security model from Active Directory split permissions to shared permissions and vice versa. An Exchange administrator with the proper Active Directory permissions can run setup.exe with the /ActiveDirectorySplitPermissions switch set to true or false to implement or remove Active Directory split permissions, respectively.
When permissions are involved, larger environments tend to have separation of roles and duties that extend beyond just separation between Exchange and Active Directory administrators. For example, you can have an Exchange architect who is responsible for setting objectives for the Exchange server design and deployment. They might also serve as a subject matter expert and a point of escalation when needed. Daily management tasks might be further delegated to other Exchange administrators. Similarly, an organization might hire temporary staff to assist with time-bound, short-term needs where hiring a new person might not be warranted or possible.
Exchange setup accounts for such requirements where the person setting up an Exchange server might not be responsible for managing an entire Exchange organization and might only need limited permissions that enable them to successfully install new Exchange server roles.
For delegated setup to work, you must have at least one Exchange server installed in the organization. Next, the organization administrator must provision a new Exchange server in Active Directory. This can be achieved by running setup.exe from the command line and using the /NewProvisionedServer switch. If you’re provisioning a new server using a different computer to run the setup, you must also include the computer name of the server being provisioned with the /NewProvisionedServer switch. After provisioning a new server, the user who is performing an installation of Exchange server needs to be added to the Delegated Setup role group.
Exam Tip
While delegated setup permissions enable an administrator to install a new Exchange server, it doesn’t provide the ability to decommission an existing Exchange server. You need to be an Exchange administrator to successfully uninstall Exchange server from a computer.
Creating and configuring Offline Address Book
Address books are part of the functionality Exchange server offers to enable users to find other users easily. Address books are created and maintained by mailbox servers. The Offline Address Book (OAB) enables users to use Address Book functionality when they aren’t connected to Exchange server.
Address lists are a building block of OAB. Address lists represent a collection of recipients and other mail-enabled objects, such as contacts, groups, and room/equipment resources. When Exchange 2013 is installed, it automatically creates multiple default address lists that contain contacts, distribution lists, rooms, users, and public folders. The default Global Address List (GAL), which contains all mailbox-enabled or mail-enabled objects from the Active Directory forest where Exchange is installed, is also created.
You can also create custom address lists to contain mail-enabled objects from certain departments, geography, or any other organizational entity that can help users identify which address list is most likely to contain a user they want to find. Custom address lists tend to be a subset of objects contained in a global address list. New address lists can be created using the New-AddressList cmdlet or by using the Exchange Admin Center (EAC).
When creating a new address list, you can restrict which recipients should be included in the new address list by using built-in filter parameters, such as the ConditionalDepartment. This only selects users with a department attribute that matches a defined value of the parameter. Here’s an example of creating a new address list named Finance that includes all users with a department attribute set to Finance.
Create new address list
New-AddressList –Name Finance –IncludedRecipients AllRecipients –ConditionalDepartment
Finance
The same can be achieved using the Exchange Admin Center, as you can see in Figure 1–2.

When built-in filter parameters might not be sufficient to create a custom address list, you can create recipient filters using the OPATH filtering syntax. To create a custom address list using the recipientfilter parameter, you can’t use the Exchange Admin Center (EAC) and you must use the Shell. In the following example, let’s create a custom address list to include all users with a mailbox from finance or the sales department, based on their department attribute value.
Create new address list using recipient filter
New-AddressList –Name ""Finance-Sales"" –RecipientFilter {((RecipientType -eq
'UserMailbox') -and ((Department -eq 'Finance') -or (Department -eq 'Sales')))}
For the list of filterable properties that can be used with a recipient filter, see the article Filterable properties for the RecipientFilter parameter at http://technet.microsoft.com/en-us/library/bb738157(v=exchg.150).aspx.
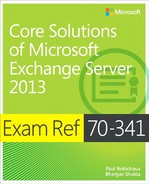
While default GAL contains all objects, when an organization is required to provide separation between different departments to achieve compliance or other business reasons, a single default GAL doesn’t serve the purpose. To address the requirement, you need to create additional global address lists and provide separation using Address Book policies. The process is also referred to as Global Address List (GAL) segmentation.
Each Address Book policy consists of four components:
![]() Address Lists
Address Lists
![]() Room Address List
Room Address List
![]() Global Address List
Global Address List
![]() Offline Address Book
Offline Address Book
When you create address lists, you use recipient address filters to create a logical separation between entities. For example, you can create two separate address lists, each containing employees and contacts from the Finance department and the Sales department, respectively. You also create separate room address lists to contain rooms and resources that should only be available to one department. A new GAL is then created to include custom address and room lists, as well as corresponding OAB objects containing their corresponding GAL objects. When this procedure is complete, you will have two Address Book policies separating two department Address Books.
The logical separation still isn’t achieved since user mailboxes need to be configured to start using their corresponding GALs and OABs. You can configure user mailboxes to use new GALs and OABs by using the Set-Mailbox cmdlet.
Note: Create GAL and OAB objects
Currently, EAC doesn’t provide an interface to create new GAL or OAB objects. You must use Shell to create GAL and OAB objects.
When creating Address Book Policies (ABPs), a room address list is required, even if you don’t have any room objects or shared resources to include in the list. In the following example, we create an empty room list to meet the requirement. The example assumes that no conference room mailboxes exist in the environment.
Let’s walk through this process.
GAL segmentation walk-through
#Create address lists for each department
New-AddressList –Name "Finance AL" –IncludedRecipients AllRecipients
–ConditionalDepartment Finance
New-AddressList –Name "Sales AL" –IncludedRecipients AllRecipients
–ConditionalDepartment Sales
#Create room address lists for each department
New-AddressList -Name "Finance Room AL" -RecipientFilter {(RecipientDisplayType
-eq 'ConferenceRoomMailbox')}
New-AddressList -Name "Sales Room AL" -RecipientFilter {(RecipientDisplayType
-eq 'ConferenceRoomMailbox')}
#Create Global Address Lists for each department
New-GlobalAddressList -Name "Finance Global Address List" -IncludedRecipients
MailboxUsers -ConditionalDepartment Finance
New-GlobalAddressList -Name "Sales Global Address List" -IncludedRecipients MailboxUsers
-ConditionalDepartment Sales
#Create Offline Address book objects for each department
New-OfflineAddressBook -Name "Finance OAB" -AddressLists "Finance Global Address List"
-VirtualDirectories "SERVER01OAB (Default Web Site)"
New-OfflineAddressBook -Name "Sales OAB" -AddressLists "Sales Global Address List"
-VirtualDirectories "SERVER01OAB (Default Web Site)"
#Create Address Book Policies (ABPs) for each department
New-AddressBookPolicy -Name "Finance ABP" -AddressLists "Finance AL" -OfflineAddressBook
"Finance OAB" -GlobalAddressList "Finance Global Address List" –RoomList "Finance
Room AL"
New-AddressBookPolicy -Name "Sales ABP" -AddressLists "Sales AL" -OfflineAddressBook "
Sales OAB" -GlobalAddressList "Sales Global Address List" -RoomList "Sales Room AL"
#Assign the ABPs for each mailbox
Set-Mailbox "FinUser1" –AddressBookPolicy "Finance ABP"
Set-Mailbox "SalesUser1" –AddressBookPolicy "Sales ABP"
So far, we’ve followed all of the logical steps to provide a separation between two departments. Notice how we only changed one mailbox for each department in the previous example. Obviously, in the real world, you have to change all of the mailboxes of each department to apply the correct ABPs to each.
Here’s one more item not covered yet: name resolution. When a user from Outlook types a name in the address bar, Outlook provides the capability to resolve the name from GAL. Despite the separation created using ABPs, name resolution continues to work across logical boundaries created by ABPs. This is because name resolution is an organizational function and, despite logical separation, the objects from both departments continue to exist in a single Exchange organization. To address this problem, two departments, when using ABPs, must be considered external to each other. The Address Book Policy routing agent provides this function.
The ABP routing agent must be manually installed and enabled to provide name resolution separation. Take a look at the process.
Install and enable ABP routing agent
#Install ABP routing agent
Install-TransportAgent -Name "ABP Routing Agent" -TransportAgentFactory
"Microsoft.Exchange.Transport.Agent.AddressBookPolicyRoutingAgent.
AddressBookPolicyRoutingAgentFactory" -AssemblyPath $env:ExchangeInstallPath
TransportRolesagentsAddressBookPolicyRoutingAgentMicrosoft.Exchange.Transport.Agent.
AddressBookPolicyRoutingAgent.dll
#Enable transport agent
Enable-TransportAgent "ABP Routing Agent"
#Restart transport service
Restart-Service MSExchangeTransport
#Enable ABP routing agent
Set-TransportConfig -AddressBookPolicyRoutingEnabled $true
After following these steps, name resolution across departments shouldn’t work and, along with configured Address Book policies, it provides the desired separation between two departments.
Figure 1–3 provides an example of a Sales user trying to resolve the display name of a Finance user (finuser1) while ABP separation is in place and the ABP routing agent is configured.

Now let’s look at more details of Offline Address Books. Because OABs are offline copies of address lists associated with an OAB, the files corresponding to the OABs need to be generated on Exchange servers. On Exchange 2013 servers, this is the function of the Microsoft Exchange OABGen service. The Microsoft Exchange OABGen service isn’t a schedule-based function. Instead, based on server resource availability, it’s throttled or paused as needed.
Exchange 2013 supports and produces OAB v4 files only. OAB v4 was introduced with the release of Exchange 2003 Service Pack 2 and is supported by Outlook 2007 and later. OAB v4 Unicode format allows client computers to receive differential updates, instead of full OAB downloads, as well as a reduction in file size.
Exchange 2013 uses web-based distribution, which Outlook clients use to download OAB files. In contrast to public folder-based distribution in previous versions, web-based distribution provides distinct advantages, such as the ability to support more concurrent clients for OAB distribution, a reduction in bandwidth usage, and more control over the distribution end point. Clients use Autodiscover to locate the OAB distribution point they should connect to, which, in turn, can be load-balanced end points providing better resiliency.
When Exchange server is installed, the OAB virtual directory is configured with an internal URL using a Fully Qualified Domain Name (FQDN) of the server. The external URL isn’t populated and is left empty. When external clients use Autodiscover to locate the OAB endpoint, they won’t find an OAB external URL in an Autodiscover response and they won’t be able to download OAB. This limits the clients’ ability to look up users, contacts, and other mail-enabled objects when offline or not connected to the Exchange server.
Another change in Exchange 2013 regarding OAB is generation. OAB generation is no longer associated with a particular mailbox server like in previous versions. When we created an example OAB in the previous ABP exercise, you may have noticed we didn’t specify a generation server. The OAB generation functionality is now associated with a specialized mailbox called the arbitration mailbox. When Exchange server is installed, multiple arbitration mailboxes are automatically created and are associated with different persisted capabilities, which define the purpose and function of an arbitration mailbox. An arbitration mailbox with persisted capability OrganizationCapabilityOABGen is responsible for OAB generation. The new functionality can now benefit from higher availability provided by a DAG when a mailbox is located on a database protected by DAG.
Because no generation server exists, changing the OAB generation server simply means moving the arbitration mailbox to a different database on a different server if the database isn’t protected by DAG. If a mailbox is located on a database copy protected by DAG, you can simply activate a different copy of the database on a different server to move the arbitration mailbox to a different server.
To provide close proximity to an OAB generation mailbox in a distributed environment, you can create additional arbitration mailboxes as needed. When creating an arbitration mailbox, specify the Arbitration parameter to the New-Mailbox cmdlet. After creating an arbitration mailbox in the desired location, enable OAB generation by using the –OABGen $True parameter with the Set-Mailbox cmdlet.
When an OAB download request is received by a client access server, it proxies the request to the mailbox server hosting an active arbitration mailbox in the same Active Directory site. If more than one mailbox server contains an active arbitration mailbox with an OAB generation capability, the client access server sends the requests using round-robin distribution. This could result in the frequent full download of OABs by the client and isn’t recommended.
Important: CU5 updates and its impact on OAB downloads
Cumulative Update 5 (CU5) introduces important changes to OAB generation logic and configuration options. After the CU5 update, you can assign the generation of an OAB to a specific mailbox. This addresses the issue that existed prior to CU5, resulting in a full OAB download. Detailed documentation about this change can be found on the Exchange team blog at http://blogs.technet.com/b/exchange/archive/2014/05/13/oab-improvements-in-exchange-2013-cumulative-update-5.aspx.
The OAB generation schedule configuration has also been changed in Exchange 2013. Schedule property on the OAB object is no longer affected when the OAB is generated. The OAB generation is now controlled based on the configuration of the OABGeneratorWorkCycle and the OABGeneratorWorkCycleCheckpoint properties of a mailbox server. The default values of these attributes are set to one day, resulting in the OAB generation taking place once every day. Values of these parameters can be changed using the Set-MailboxServer cmdlet.
If you need to manually force the generation of a particular OAB, you can use the Update-OfflineAddressBook cmdlet. You can also restart the mailbox assistant service, but it’s more impactful on the server resources and it isn’t the best or most preferred option when a better option exists.
Designing and creating hierarchical address lists
While GAL provides the ability to easily find recipients from an organization, it doesn’t reflect management or seniority relationships within recipients of the organization. The hierarchical address book (HAB) enables end users to look for recipients using an organizational hierarchy, thus providing an efficient method for locating internal recipients.
The HAB is enabled at the organization level by using the Set-OrganizationConfig cmdlet. When enabling HAB, you need to provide a distribution group to use as the root of HAB. You can create a separate organizational unit (OU) to store all HAB-related distribution groups or use an existing OU in Active Directory.
You also need to create more distribution groups, each corresponding to the hierarchy of the company. For example, HQ, designating company headquarters, locations, and departments.
The hierarchy is created by using a distribution group nesting. You need to add subordinate distribution groups to their parents as a member. For example, distribution group HQ is added to the root distribution group, and department distribution groups HR and Accounting are added to the distribution group HQ to represent a hierarchy.
Individual recipients show up in the HAB based on their distribution group membership. For example, the CEO of the company might be a member of distribution group HQ, whereas the Director of Human Resources might be added to the HR distribution group, and so on.
Once the distribution group for the HAB root is created and the HAB is enabled at the organization level, set the value of the IsHierarchicalGroup property on the distribution group to $true. You also need to repeat this step for all of the distribution groups that are members of the HAB.
When you have multiple members for a given location, such as HQ, in the HAB display, they are organized alphabetically in ascending order. It might be more desirable to show the members based on their seniority. HAB enables you to achieve that by setting the value of the SeniorityIndex attribute on the recipient or the distribution group. In HAB, objects are organized based on seniority index values from higher to lower.
Let’s take a look at the process of creating the HAB root distribution group and enabling HAB for Contoso, Ltd.
Enable Hierarchical Address Book
#Add OU for Hierarchical Address Book
dsadd ou "OU=HAB,DC=Contoso,DC=com"
#Create root Distribution group
New-DistributionGroup -Name "Contoso,Ltd" -DisplayName "Contoso,Ltd" -Alias
"ContosoRoot" -OrganizationalUnit "Contoso.com/HAB" -SamAccountName "ContosoRoot" -Type
"Distribution"
#Enable HAB using Contoso Distribution Group created for HAB root
Set-OrganizationConfig -HierarchicalAddressBookRoot "Contoso,Ltd"
#Designate distribution group as member of HAB
Set-Group -Identity "Contoso,Ltd" -IsHierarchicalGroup $true
At this point, you have an empty HAB, which would look similar to Figure 1–4 when using the Outlook client.
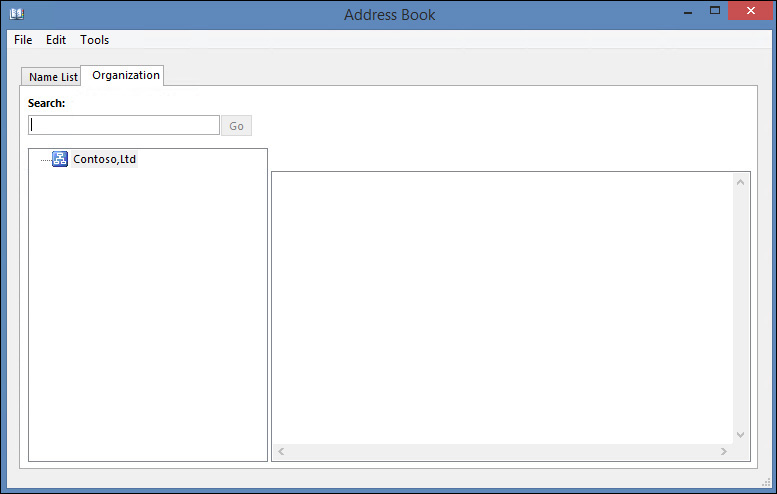
Now let’s create subordinate distribution groups HQ, New York, and London, and then add them to their relevant parent distribution groups. HQ also has HR and Accounting sub groups. We also set the seniority index of a few recipients and add them to the appropriate distribution groups in the hierarchy.
Create subordinate groups and configure hierarchy
#Create subordinate distribution groups
New-DistributionGroup -Name "HQ" -DisplayName "HQ" -Alias "HQ" -OrganizationalUnit
"Contoso.com/HAB" -SamAccountName "HQ" -Type "Distribution"
New-DistributionGroup -Name "HR" -DisplayName "HR" -Alias "HR" -OrganizationalUnit
"Contoso.com/HAB" -SamAccountName "HR" -Type "Distribution"
New-DistributionGroup -Name "Accounting" -DisplayName "Accounting" -Alias "Accounting"
-OrganizationalUnit "Contoso.com/HAB" -SamAccountName "Accounting" -Type "Distribution"
New-DistributionGroup -Name "New York" -DisplayName "New York" -Alias "New York"
-OrganizationalUnit "Contoso.com/HAB" -SamAccountName "NY" -Type "Distribution"
New-DistributionGroup -Name "London" -DisplayName "London" -Alias "London"
-OrganizationalUnit "Contoso.com/HAB" -SamAccountName "London" -Type "Distribution"
#Designate distribution groups as member of HAB
Set-Group -Identity "HQ" -IsHierarchicalGroup $true
Set-Group -Identity "HR" -IsHierarchicalGroup $true
Set-Group -Identity "Accounting" -IsHierarchicalGroup $true
Set-Group -Identity "New York" -IsHierarchicalGroup $true
Set-Group -Identity "London" -IsHierarchicalGroup $true
#Add distribution groups to appropriate parent
Add-DistributionGroupMember -Identity "ContosoRoot" -Member "HQ"
Add-DistributionGroupMember -Identity "ContosoRoot" -Member "New York"
Add-DistributionGroupMember -Identity "ContosoRoot" -Member "London"
Add-DistributionGroupMember -Identity "HQ" -Member "HR"
Add-DistributionGroupMember -Identity "HQ" -Member "Accounting"
#Add members to appropriate distribution groups
Add-DistributionGroupMember -Identity "HQ" -Member "Ray"
Add-DistributionGroupMember -Identity "HQ" -Member "Peter"
Add-DistributionGroupMember -Identity "HR" -Member "Mary"
#Assign appropriate seniority index to members
Set-Group -Identity "HR" -SeniorityIndex 100
Set-User -Identity "Ray" -SeniorityIndex 100
Set-User -Identity "Peter" -SeniorityIndex 99
After the completion of the previous steps, we now have an example HAB, complete with subordinate groups and their members. Because we also assigned seniority to Ray, he is displayed before Peter in the list, overriding the default alphabetical ordering. The same also applies to the HR department, which displays before Accounting in the hierarchy. Figure 1–5 represents the example HAB.
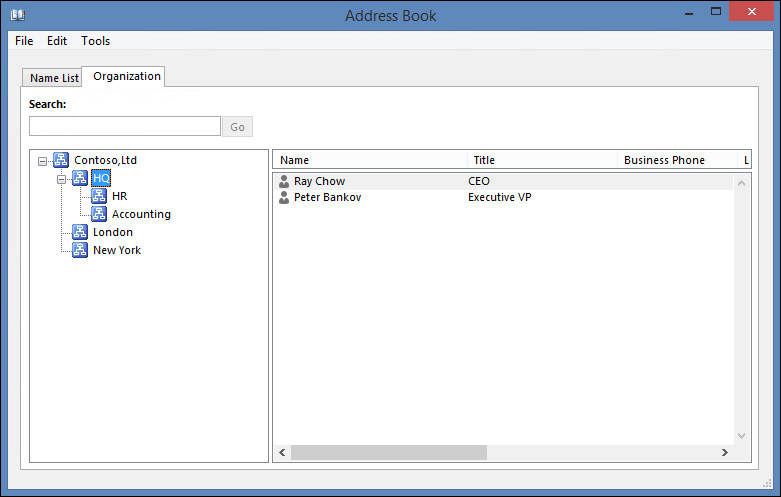
Notice how London is listed after HQ and before New York. Because we chose not to assign any seniority index to the locations, they’re displayed using default alphabetical display order. However, Ray is displayed before Peter and HQ is displayed before Accounting as defined by the seniority index.
The Name List tab still provides you with a nonhierarchical reference to all recipient objects, as shown in Figure 1–6.
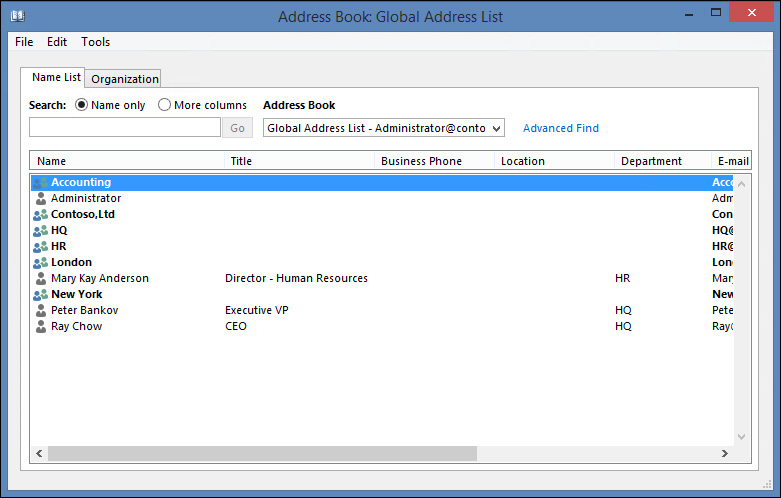
It’s important for you to understand that the effort involved in a large environment to enable HAB goes beyond the simple steps demonstrated here. In such an organization, you might need to create many distribution groups representing each leaf of hierarchy and then add DLs as needed. You also need to define each individual member’s seniority index where necessary, which in large environments can be daunting. It’s best to have a defined business process that mandates appropriate steps, either performed manually by the administrative staff or by scripting triggered on appropriate intervals to keep HAB updated according to changes occurring in the environment.
Creating and configuring public folders
Creating public folders in Exchange 2013 is a different process compared to previous versions. This is because public folders are now stored in public folder mailboxes. In a new installation where no public folders exist, the first step is to create a public folder mailbox. Because this is the first public folder mailbox in the organization, it contains public folder hierarchy information and becomes the primary hierarchy mailbox. The public folder mailbox can also contain public folder content.
The primary hierarchy mailbox is the only writeable copy of the hierarchy in the organization. All other public folder mailboxes created contain a read-only copy of the public folder hierarchy.
You can create a public folder mailbox using EAC or the Shell. Similar to any other mailbox, the cmdlet you use to create the public folder mailbox is New-Mailbox. To designate a mailbox as a public folder mailbox, use the PublicFolder parameter. There is no difference in the syntax for creating the first public folder mailbox containing the primary public folder hierarchy and secondary public folder mailboxes. Exchange server automatically creates the public folder with an appropriate copy of the hierarchy. To verify which mailbox contains the primary writeable copy of the public folder hierarchy, you can issue Get-OrganizationConfig | Format-List RootPublicFolderMailbox at the Shell.
After creating a public folder mailbox, you can now create a public folder that users see in the hierarchy and can store content in. To create a public folder, you can use New-PublicFolder cmdlet or EAC. You can specify a name for the folder being created, the path in the hierarchy where the folder is created and, optionally, the public folder mailbox where the content for the folder is stored. You don’t need to define the path if you’re creating a public folder in the root of the hierarchy.
When you create a public folder, it inherits the settings of its parent folder, which includes the permissions assigned to the parent public folder. To assign permissions to a public folder, you can use EAC or use the Add-PublicFolderClientPermission cmdlet. You can either choose to assign permissions such as ability to read, create or delete items, or assign a role, such as owner, editor, or author. Each role represents a combination of permissions on the public folder. For example, the Reviewer role enables the assignee permissions to see the public folder and its contents, but it has no ability to edit or delete them.
Public folders also allow the ability to submit content via email. To do so, you must mail-enable a public folder. Similar to other public folder-related procedures, you can use EAC to mail-enable a public folder, or you can use the Enable-MailPublicFolder cmdlet. When mail-enabling a public folder, you don’t need to provide an email address for the folder. You can, however, change the primary email address or assign additional email addresses to a mail-enabled public folder, if needed. If you use the Shell, you can use the Set-MailPublicFolder cmdlet to update an email address and other mailbox properties, such as the mailbox quota.
Another important consideration for when you mail-enable a public folder mailbox, is to ensure that only authorized users can submit content via email. You can choose to accept emails from individual recipients or members of a distribution group. Use the Set-MailPublicFolder cmdlet with the AcceptMessagesOnlyFrom, AcceptMessagesOnlyFromDLMembers, or AcceptMessagesOnlyFromSendersOrMembers parameters to assign appropriate sender restrictions.
Now that only one writeable copy of the public folder hierarchy exists, it’s critical that the public folder mailbox containing a writeable copy of the hierarchy is highly available. Ensure that the public folder mailbox is located on a database copy protected by DAG and has multiple database copies located in appropriate locations to provide protection against local and site failures. The same protection should also be applied to all public folder mailboxes that store critical public folder content.
If public folders are accessed by users located across multiple locations and regions connected via WAN or slower network links, you can improve the user experience when accessing a public folder hierarchy. You can also provide uninterrupted access in case of network failures between a client location and other sites. You do this by creating a public folder mailbox in close proximity to the client location where network connectivity between client and Exchange server is robust. After creating a public folder mailbox in such a location, you need to change all user mailboxes for a given office or regions to use the new public folder mailbox as their default access location for the public folder hierarchy. You can do so by using the Set-Mailbox cmdlet with the DefaultPublicFolderMailbox parameter.
While this provides users with uninterrupted access to the public folder hierarchy, uninterrupted access to the content can only be guaranteed if the public folder content is also stored on public folder mailboxes that are locally accessible. That is why locating public folder content requires careful planning and an understanding of the usage of public folders and the factors affecting it, such as a public folder containing regional data or a public folder containing company data that might be applicable to all public folder users.
Moving a public folder mailbox may be necessary due to organizational or infrastructure changes. If you need to move a public folder mailbox, you can do so by issuing a mailbox move request, similar to moving a regular mailbox. This enables you to move the public folder mailbox, including all of its content, including the primary or read-only copy of a public folder hierarchy, to a different database located on the same or a different server, which may or may not be a part of DAG. When you need to provide high availability to a public folder mailbox, you should move it to a database configured with multiple copies protected by DAG. If you’re using the Shell, you can use the New-MoveRequest cmdlet to move a public folder server.
When the organization grows, you might need to change where the public folders are stored. You might need to move a public folder to a different public folder mailbox to provide close proximity access to its primary user base. Or, you might need to move a public folder that exceeds the assigned mailbox storage quota. Moving a single public folder is as simple as issuing the New-PublicFolderMoveRequest cmdlet.
Note: Public Folder move requests
You can perform only one public folder move request at a time. Before creating another public folder move request, you must remove the completed public folder move requests, using the Remove-PublicFolderMoveRequest cmdlet.
If you need to move a public folder, including all of the public folders within its branch, you can’t use the New-PublicFolderMoveRequest cmdlet. While the cmdlet enables you to move multiple individual public folders to a different mailbox, it doesn’t move an entire branch of a selected public folder. To move the entire branch of a public folder, you must use the Move-PublicFolderBranch.ps1 script, which is included with an Exchange server installation.
The process of creating public folders in a new environment might seem relatively simple. Migrating public folders from a previous version of Exchange servers requires careful planning. This is because when the public folder data is migrated to Exchange 2013 servers, it doesn’t synchronize with a previous version of public folders.
Migrating from a previous version of public folders is a multi-step process. The supported version of Exchange servers for such a migration is Exchange Server 2007 SP3 RU10 and Exchange Server 2010 SP3 or later.
The first step in the migration process is to use public-folder migration scripts to create the public folder name to size mapping and the public folder to the proposed new public-folder mailbox mapping. The collection of statistics enables you to understand the impact on new Exchange 2013 servers. It also enables you to create the required public folder mailboxes according to the appropriate folder size mapping created by the scripts.
Before you proceed with migration, ensure that no public folder mailboxes exist on Exchange 2013 and that no public folder migration requests exist. You can verify any existing public-folder migration requests by running the Get-PublicFolderMigrationRequest cmdlet. If a migration request exists, you need to make sure no migration is in progress or you risk losing data when you remove the migration request to start the new migration.
After ensuring that starting a new public folder migration is appropriate, start the process by creating public folder mailboxes. When you create the first public folder mailbox, set the property of the HoldForMigration parameter to $true. Use the csv file created by the migration script PublicFoldertoMAilboxMapGenerator.ps1 to create additional public folder mailboxes.
After the successful creation of all required public folder mailboxes, you can start the migration request by using the New-PublicFolderMigrationRequest cmdlet. The time it takes to migrate the public folder data depends on the amount of data being migrated, the load on the source and destination servers, and other environmental factors, such as the network infrastructure.
When the migration is started, Exchange servers synchronize public folder data from a previous version of Exchange servers to the new public folder mailboxes created earlier. However, during the initial data synchronization process, users can continue using legacy public folders and make changes.
When the migration process reaches the status of autosuspended, you can lock the public folders on a legacy exchange server for final migration. To verify the status of the migration process, run the Get-PublicFolderMigrationRequest cmdlet. To lock down the legacy public folders for final migration, run Set-OrganizationConfig -PublicFoldersLockedForMigration:$true. After performing this step, users won’t be able to access public folders or make any changes. If public folder databases are distributed across multiple locations, it might take several hours for the change to converge. You can verify the status of public folder databases by verifying the PublicFoldersLockedForMigration flag.
Once all of the legacy public folders are locked for migration, you can set the PreventCompletion property on the public folder migration request to $false. This action allows the final synchronization of public folder data to take place. You also need to resume the public folder migration request by issuing the Resume-PublicFolderMigrationRequest cmdlet. The amount of time required for the final synchronization depends on the amount of changes made by users to the public folder data after the migration process reaches the autosuspended status, and before the legacy public folders are locked for migration.
Before you can enable public folders on Exchange 2013, you need to ensure that the migration is complete, which you can verify by running the Get-PublicFolderMigrationRequest cmdlet and ensuring that the status is Completed. Once complete, you can allow user access to migrated public folders on Exchange 2013 servers by setting the IsExcludedFromServingHierarchy property on the public folder mailboxes to $false. You also need to set the organization configuration property PublicFolderMigrationComplete to $true on legacy Exchange servers, and then set the PublicFoldersEnabled property of the organization configuration on Exchange 2013 servers to Local.
Users can access data from migrated public folders on Exchange 2013 after the successful completion of the previously shown process. But there might be times when a migration doesn’t complete successfully and you need to roll back the migration, so users can continue to access public folders from legacy exchange servers. To roll back the migration, you need to set the organization property PublicFoldersLockedForMigration on legacy Exchange servers to $false, remove all of the public folder mailboxes created on Exchange 2013 servers, and set the PublicFolderMigrationComplete flag on the organization property to $false from legacy Exchange servers.
Once the new public folders are deployed on the Exchange 2013 mailbox, you might need to address such issues as accidental deletions of a public folder or the deletion of a public folder mailbox. This can happen because of a user action, a failed public folder, or a public folder mailbox move. Because the public folder mailboxes are now similar to user mailboxes, restoring a deleted public folder mailbox is similar to restoring a deleted mailbox. Use the New-MailboxRestoreRequest cmdlet and provide the appropriate values for SourceStoreMailbox, SourceDatabase and TargetMailbox. If the public folder mailbox is intact, but a public folder is deleted instead, you can restore the public folder by using a similar process to the one previously mentioned. You also need to include the IncludeFolders parameter with the public folder path of the folder that needs restoring.
The process gets more involved when a deleted public folder or the public folder mailbox is past its retention period as defined on the mailbox and mailbox database properties.
The process to restore a public folder mailbox and public folders past their retention period requires recovering data using a recovery database. For more information on this topic, see Develop backup and recovery solutions for the mailbox role and public folders in Objective 1.5 later in this chapter, which covers this topic in detail. The process applies to both regular and public folder mailboxes. At a high level, the process involves creating a recovery database, restoring data from backups, mounting restored databases, and extracting the data from the recovery database. Extracted data can then be exported to a folder or merged into an existing mailbox.
![]() Thought experiment: Public Folders and GAL considerations
Thought experiment: Public Folders and GAL considerations
1. Recommend a solution to meet Litware’s goals to provide Address Book lookups.
2. What is the impact of public folder requirements proposed by Litware?
Objective summary
![]() Schema updates are required anytime you install an Exchange 2013 server, including when you apply updates. Plan for schema update dependencies, including OS components required, such as the Remote Tools Administration Toolkit to make schema updates.
Schema updates are required anytime you install an Exchange 2013 server, including when you apply updates. Plan for schema update dependencies, including OS components required, such as the Remote Tools Administration Toolkit to make schema updates.
![]() If you’re using the Setup Wizard and have appropriate permissions to make schema and domain changes, you don’t need to perform schema updates separately before running setup.
If you’re using the Setup Wizard and have appropriate permissions to make schema and domain changes, you don’t need to perform schema updates separately before running setup.
![]() When using the command line setup, if you run Prepare Domain before applying schema updates and before preparing Active Directory, setup tries to perform those steps automatically and it will succeed if the account running setup has required permissions.
When using the command line setup, if you run Prepare Domain before applying schema updates and before preparing Active Directory, setup tries to perform those steps automatically and it will succeed if the account running setup has required permissions.
![]() Address book segmentation allows logical separation between business units or different companies hosted on the same Exchange organization.
Address book segmentation allows logical separation between business units or different companies hosted on the same Exchange organization.
![]() HABs provides an organizational hierarchy view, making navigation and search of recipient easier compared to flat address-book structure provided by the default address-book view.
HABs provides an organizational hierarchy view, making navigation and search of recipient easier compared to flat address-book structure provided by the default address-book view.
![]() Public folder migration requires that careful planning and downtime is required. Rollback is possible, but it might involve data loss because no backward synchronization exists from Exchange 2013 public folders to legacy public folders.
Public folder migration requires that careful planning and downtime is required. Rollback is possible, but it might involve data loss because no backward synchronization exists from Exchange 2013 public folders to legacy public folders.
Objective review
Answer the following questions to test your knowledge of the information in this objective. You can find the answers to these questions and explanations of why each answer choice is correct or incorrect in the “Answers” section at the end of this chapter.
1. Contoso, Ltd. has deployed an Exchange 2013 environment in the child domain ny.contoso.com. The empty forest root domain is called consoto.com. Contoso, Ltd. later introduces a new domain, London.contoso.com. What should you do before enabling recipient objects in the domain London.contoso.com?
A. Run setup.exe /prepareschema.
B. Run setup.exe /preparead.
C. Run setup.exe /preparedomain.
2. When an Exchange server crashed, users complained their Address Books didn’t include recent new hires. You need to move the OAB generation to a different server. What should you do?
A. Run Move-OfflineAddressBook cmdlet.
B. Run Set-OfflineAddressBook cmdlet.
C. Run Move-Mailbox cmdlet.
D. Run Update-OfflineAddressBook cmdlet
3. Contoso, Ltd. has implemented a hierarchical address book (HAB). You need to ensure the company’s CEO is listed before other employees, regardless of the alphabetical order of names. What should you do?
A. Run Set-Mailbox cmdlet to change CEO’s mailbox.
B. Run Set-DistributionGroup to change the seniority index.
C. Run Set-OrganizationConfig –OrganizationSummary $true.
D. Run Set-AddressList cmdlet.
Objective 1.3: Deploy and manage high availability solutions for the mailbox role
When deploying a critical platform such as messaging, the assumption is that such systems are going to be available without interruptions. Maintaining such complex systems without any downtime is a real challenge, especially if the platform doesn’t provide native functionality to address maintenance and unexpected downtime scenarios. Exchange 2013 not only continues to provide native functionality, but it also has improved features providing high availability for the mailbox role. Improvements such as support for multiple databases per disk provide for better utilization of disk space, as well as disk IOPS by allowing to store active, passive, and lagged copies of different databases on the same disk. Enhancements, such as automatic log replay, ensure data integrity by allowing page patching on lagged copies.
This objective covers how to:
![]() Create and configure a Database Availability Group (DAG)
Create and configure a Database Availability Group (DAG)
![]() Identify failure domains
Identify failure domains
![]() Manage DAG networks
Manage DAG networks
![]() Manage mailbox database copies
Manage mailbox database copies
Creating and configuring a Database Availability Group
In Exchange 2013, DAG is an integral component for both high availability and site resilience. DAG is a group of up to 16 mailbox servers that hosts mailbox database copies and provides automatic database level recovery from failures.
You can host a mailbox database copy on any mailbox server that’s a member of DAG. You must ensure that at least two copies of a database are hosted on separate DAG members to provide high availability. DAG is a boundary for mailbox database replication. So, you can’t create a copy of mailbox database on a mailbox that’s a member of a different DAG.
Exchange 2013 makes deploying DAG easy because it leverages the concept of incremental deployment. The incremental deployment process enables you to install a mailbox server role without requiring a complex cluster setup. You can create DAG with a single Exchange server, and then add more Exchange servers when they are provisioned at a later date. While single server can’t provide high availability, it makes the process of building DAG easier by staging the DAG object and configuration in the environment.
A DAG is created by using the New-DatabaseAvailabilityGroup cmdlet. When creating a DAG, you’re required to provide the DAG name and, optionally, the witness server name and the location of the witness directory where the file share witness data is stored. DAG is created as an empty Active Directory object. When the first mailbox server is added as a DAG member, the directory object is used to store server membership information and DAG configuration settings.
While an administrator isn’t required to create and configure a cluster setup, Exchange 2013 DAG relies on failover clustering components and creates a failover cluster automatically when adding the first server to the DAG. The Cluster Network Object (CNO) is also created in the Active Directory. The CNO is identified with the same name as the name of the DAG you’re creating.
Exam Tip
If DAG members are running Windows Server 2012 or Windows Server 2012 R2, prestaging the CNO is required. Pre-staging the CNO isn’t required when creating DAG without a cluster administrative access point, as the following discusses.
If you need to pre-state a CNO for creating a new DAG, the process requires permissions in Active Directory to be able to create a computer object and assign necessary permissions to it. First, you must create a computer in Active Directory. Next, when you create the computer object, ensure the object name is the name of the DAG you plan to create. Then, for additional security, the recommendation is that you disable the CNO computer object. Finally, after you create the CNO, assign Full Control permissions to Exchange Trusted Subsystem on the CNO. Or, you can assign Full Control permissions only to the first node to be added to the DAG.
After the DAG is created, it’s given a network name and an IP address. The failover cluster-core resource group contains an IP address resource and a network name resource in the cluster core group. The name of the DAG is registered in DNS and is resolvable on the network.
With changes to the failover cluster in Windows Server 2012 R2 and Exchange 2013 Service Pack 1, DAG can be created without an administrative access point. When you create a DAG without an administrative access point, an IP address and a network name aren’t assigned to the cluster. The cluster-core resource group doesn’t contain an IP address and network name resource. A CNO isn’t created in Active Directory and the name of the cluster/DAG isn’t registered in DNS. You can’t use failover cluster administration tools to connect and manage the failover cluster, and you must use the Shell to manage a DAG without an administrative access point.
When creating a DAG with an administrative access point, if the DAG member servers are to be located across different IP subnets within an Active Directory site, or if the members are to be located across different Active Directory and physical sites for site resiliency, then you must provide multiple IP addresses for DAG configuration. You must provide one IP from each subnet the DAG members will be connected to. This allows for DAG to be managed, regardless of which DAG member owns the cluster-core resource group.
When creating a DAG, one of the design considerations is the configuration of a witness server. When using failover cluster, the decision of when to consider a node of cluster out of service relies on the number of votes. Each member of the DAG is considered one vote. When you have a DAG with an even number of nodes, this creates the possibility of a split number of votes, where half the DAG members might vote a node to be out of service and the other half might vote for it to be in service. This can happen when network connectivity between locations is affected and nodes are located across the affected link evenly. In such situations, a tie-breaker mechanism becomes essential. File witness provides that mechanism. When the vote achieves the majority among all failover cluster members, then it’s considered to have reached a quorum.
When a DAG is created, a file witness is required. The file witness might not be required when the DAG has an odd number of members, but failover clustering and DAG failover decision-making automatically accounts for the file witness when it’s necessary. If a file witness isn’t specified, the task of creating a DAG searches for a Client Access server in the local Active Directory site that doesn’t have a mailbox role installed. If one is found, it automatically creates a default directory and shares on that server to be used as a witness file share.
If you specify a witness server and the directory, the task tries to create a specified directory and share automatically. This can succeed if the server is Exchange 2013 server because the Exchange Trusted Subsystem object has required permission to create the directory and share on the server. If the witness server isn’t an Exchange 2013 server, you must add the Exchange Trusted Subsystem group to the local Administrators group on the witness server. If the witness server is the Active Directory domain controller, the Administrators group permissions equate to permissions assigned to domain administrators. To provide required functionality, while assigning the least privilege necessary to do so, it isn’t advisable to co-locate the file witness on the Active Directory domain controller. It is, however, a supported configuration.
The witness server can’t be a server that’s also a member of the same DAG. The witness server is required to be a Windows Server running any version of Windows Server 2003 or later. Using a single witness server for multiple DAGs is possible, but the witness directory must be unique for each DAG.
File witness location also plays an important role in ensuring availability of DAG members. In a single-site DAG configured to provide high availability to all users hosted on database copies protected by a given DAG, the file witness needs to be located into the same physical site location and Active Directory site.
When a DAG is designed to provide site resiliency in a configuration where all active users are located in a primary location, the file witness should be located at the primary site. This ensures that the majority is maintained at a primary site, even when the network link fails between primary and secondary sites.
If you have more than two locations available, Exchange 2013 also supports a locating file witness in a third location. This enables DAG members located in primary and secondary sites to participate in quorum, even when they’re unable to communicate to each other between a primary and secondary site. This design can only work if network links provide robust connectivity between primary/secondary sites to the site where the file witness is located.
Exam Tip
With Microsoft Azure Infrastructure as a Service offering, there’s a lot of interest in using a file server located in Azure as a file share witness. Even with VPN links from each datacenter to Azure, this configuration is currently not supported by Exchange 2013.
When extending DAG across multiple datacenters, you must account for outages and its effect on active users. Exchange administrators often prefer to optimize the use of compute resources available to them. They consider hosting active users from two separate locations on mailbox servers that are part of same DAG. The problem with this design is it can’t provide high availability to all users. When a network outage occurs between two locations, mailbox servers in only one of the two datacenters can achieve quorum. This means the active databases in the datacenter with lost quorum are dismounted and users experience service interruption. Overall design considerations, such as file share witness in the third datacenter, can affect the outcome as well. Without use of the third site for file share witness, it’s better to deploy two separate DAGs with the majority of mailbox servers for each DAG located where the majority of active users are located. This can ensure that a lost quorum at any site affects the least possible users.
Once the DAG is created, the next step is to add a server to the DAG. You can add a server to the DAG using EAC or by running the Add-DatabaseAvailabilityGroupServer cmdlet. When you add the first server to the DAG, the CNO computer account for DAG is automatically enabled.
Existing databases aren’t highly available until additional copies of the databases are created manually. You can use the EAC or run the Add-MailboxDatabaseCopy cmdlet to add copies to a database. A new database copy can be created on any mailbox server within the same DAG. A mailbox server can host only one active or passive copy of a database. Circular logging must be disabled before creating the first copy of the database. You can enable circular logging after adding the first copy of the database. Circular logging doesn’t need to be disabled when adding additional copies of the database.
Identifying failure domains
Any solution is as strong as its weakest component. To provide the best possible availability using DAG, you must account for all the components that affect it and how to remove the points of failure by providing redundancy. Another factor to consider when designing such highly available solutions is the cost. As you add more components and more redundancy to account for the failure of each component, the cost of the solution increases. Good designs always account for striking an optimal balance between availability and cost based on the available budget. Discussions of the cost benefit of a design is beyond the scope of this book. This section covers each failure domain and its impact on the high availability of Exchange 2013.
When looking at possible failures, you need to look at software, hardware, and environmental factors that can affect the operations of a component and the service itself. For example, the failure of a disk might affect only a database, while Exchange 2013 continues to function. Whereas, the failure of the Top of the Rack (ToR) router might affect more than one server in a given rack.
Starting at server level failures, the server hardware, such as the power supply, network, and disk, are the most common factors. Most of the modern server class hardware now supports and commonly ships with redundant power supplies and network cards. But they still need to be configured properly to provide resiliency against failures. If a power supply fails on a server equipped with two power supplies, the server continues to function. But what if both power supplies were connected to the same power feed? What if the feed itself fails?
The same concept applies to the network and disks. If your network adapters are teamed, you need to make sure they’re connected to separate switches and that the switches are configured properly. For storage, a common practice is to protect against disk failures by using different RAID levels.
As you might have noticed, to protect against failures, adding more components to provide redundancy also raises the cost of the solution.
Exchange 2013 is designed to provide the best cost efficiencies, while reducing the cost where possible. When DAG is configured and databases have multiple copies configured appropriately, a single power supply failure or a network card failure would affect the given server, but not the service to the user. This provides the administrator with the flexibility to fix the failed component, while the end user is provided with uninterrupted service.
With the use of spare disks and auto-reseed functionality, Exchange 2013 automates the process that the administrator would have to manually perform otherwise. When combined with at least three copies of a database, Exchange 2013 supports JBOD configuration, eliminating the need for RAID and extra disks needed for the RAID configuration, reducing the cost of the required hardware and providing automation with the automatic reseed functionality.
For a single datacenter deployment, it’s best to ensure that servers from the same DAG are located in different racks, have connectivity to different network switches, and are connected to a separate power feed. This ensures that any power, network or other rack-level failures, or human errors won’t affect the entire DAG and surviving components are sufficient to provide uninterrupted service to end users.
Another benefit of such a design is that, with proper capacity planning, Exchange administrators can remove a mailbox server from a service to perform required maintenance without interrupting service.
You also need to account for other external dependencies, such as file share witness. While it’s possible to configure alternate witness server and alternate witness directory, if witness server fails, DAG doesn’t automatically use alternate witness server and directory. Alternat the witness server and directory, if preconfigured, can only help speed site failovers, but not without manual intervention.
While a Distributed File System (DFS) might seem like a good solution to provide redundancy, it’s possible that the replication of the latest data hasn’t completed to the file-share witness copy that Exchange server might connect to. So, it isn’t supported to use DFS to host the file-share witness directory.
Managing DAG networks
In Exchange 2010, when you create a DAG, the initial DAG networks were created automatically based on the subnets enumerated by the cluster service. For environments where the interfaces for a specified network (MAPI or Replication network), were on multiple subnets, multiple redundant DAG networks were created and the administrator had to perform the procedure manually to collapse the networks into their appropriate function, such as MAPI or Replication network. The process was many times overlooked, resulting in unexpected DAG behavior, such as incorrect network being used for replication.
In Exchange 2013, network management is automated. For automatic DAG network configuration to work correctly, MAPI networks must be registered in DNS and, in a routed network with multiple subnets, must also have a default gateway assigned. Replication networks must not be registered in DNS and they must not have a default gateway assigned to the interface. If these prerequisites are met, DAG network configuration is performed automatically and collapsing DAG networks is no longer necessary.
DAG network management is also automatic in Exchange 2013 by default. DAG networks aren’t visible in EAC and can only be viewed using Shell. To view, edit, and otherwise manually manage DAG networks, you must configure DAG for manual network configuration. You can do so by checking the Configure Database Availability Group Networks Manually check box on the DAG object using EAC, or you can run the Set-DatabaseAvailabilityGroup cmdlet with the ManualDagNetworkConfiguration parameter set to $true.
Be default, DAG can use MAPI networks, not only for service client traffic, but also for replication traffic, if needed. If you create a dedicated replication network and want to force all of the replication to take place on a dedicated network when the link is operational, you can run the Set-DatabaseAvailabilityGroupNetwork cmdlet and set the value of the ReplicationEnabled parameter to $false on the MAPI network. This enables you to force replication traffic over a dedicated replication network, but this setting is ignored if DAG can’t replicate data over replication networks, and the only available replication path is the MAPI network.
When using a dedicated iSCSI networks for data storage, it is important to segregate the iSCSI traffic from MAPI and replication traffic. After a manual network configuration is enabled on DAG, you can set the IgnoreNetwork parameter to $true.
Managing mailbox database copies
After creating a DAG, the first step to provide high availability for a database is to add the passive copy of an existing database. For any given database, you can have up to 15 maximum passive copies due to the maximum of 16 servers limit per DAG.
After adding a database copy, DAG starts the initial copy of the database from the active copy. This process is known as seeding. While this automated process works for most environments, you might want the seeding process not to start automatically. When creating a database copy, you can set the value of the SeedingPostponed parameter to $true. This suspends the seeding operation on the creation of the database copy and you must explicitly seed the database copy.
Exam Tip
When creating a database copy, the mailbox server must not only be a member of the same DAG, but the database path used by the specified database must also match on the server where the copy is hosted. The creation of the database copy fails if the path to the directory or mount point where the original database is located isn’t available on the mailbox server where the copy is being created.
A database on DAG might have more than one copy. When a passive copy of the database needs to be activated, many factors are taken into account by the best copy selection (BCS) process. One of the factors is the activation preference parameter, which can be set by the administrator. You can set the value of the ActivationPreference parameter on a database copy with the value of 1 or higher. The value of this parameter can’t be more than the number of database copies of a given database.
While the activation preference helps define in which order a database copy is to be selected for activation, it’s by no means a binding order for the BCS process of Exchange 2013. BCS takes into account multiple factors, such as the replay queue length and protocol health to ensure that not only is the selected database copy healthy, but that the server where the database copy is hosted is also healthy to ensure that a failover operation doesn’t cause service interruption.
When creating a database copy, you can also opt to create a lagged copy of the database. A lag is defined by the ReplayLagTime and TruncationLagTime parameters. The maximum allowed lag time is 14 days. A lagged copy can be used as a backup. An administrator can roll back to a point in time within the configured lag window by manipulating log files that haven’t been played back into the lagged database copy.
Exchange 2013 also introduces logic to improve service availability. If the database has a bad page, Exchange 2013 plays forward the lagged database copy over the risk of losing data. The play forward logic also applies to copies of the database, which might not have enough space to keep all the logs or be the only database copy available for activation.
When a database without an additional copy is using circular logging, it uses JET circular logging. When a database with multiple copies on the DAG uses circular logging, it uses the continuous replication circular logging (CRCL) instead of JET circular logging. To account for this difference in the circular logging method, circular logging must be disabled on the database before creating another copy of the database. After creating a second copy of the database, circular logging can be enabled, which then uses CRCL. When you create subsequent copies of the database, you don’t need to disable circular logging because it’s already configured to use CRCL, not JET circular logging.
After a database copy is created, over its lifecycle, it can have one of many states. The Get-MailboxDatabaseCopyStatus cmdlet enables you to view whether the database copy is healthy and what state it’s in. For example, a newly created database copy can be in the Initializing state. While in this state, the system is verifying the database and log stream are in a consistent state. A database can also be in this state during the transition from one state to another.
Exam Tip
The healthy state of a database copy can sometimes be confused with the mounted state. Only an active copy of the database can have a copy status of Mounted. All other database copies, when they aren’t affected by failures or other conditions, have a copy status of Healthy.
When a database copy fails to activate, Exchange 2013 provides the ability to test the replication health for the given database by running the Test-ReplicationHealth cmdlet. This cmdlet performs tests against many components that can affect database replication health such as cluster service, replay service, and active manage. The Test-ReplicationHealth cmdlet is an important tool in an Exchange administrator’s troubleshooting toolbox.
Let’s take a look at some important mailbox database copy maintenance tasks.
Activate a mailbox database copy
When you’re performing maintenance on a server hosting an active copy of a database, you can initiate a switchover of the active database to another server by activating a passive copy. The database switchover process dismounts the current active database and mounts the database copy on the specified server. The operation succeeds if the database copy on the selected server is healthy and current. The following example moves the active database named DB1 to server Server2.
Activating database DB1 on Server2
Move-ActiveMailboxDatabase DB1 –ActivateOnServer Server2
Besides simply activating a database copy on a different server, the Move-ActiveMailboxDatabase cmdlet also enables you to override the AutoDatabaseMountDial setting, as well as skip one of the many health check requirements. These parameters allow the administrator to provide service at a degraded level, instead of taking the database offline if the requirements, the health checks, or the database mount dial aren’t met.
Activate a lagged mailbox database copy
Activating a lagged copy can be an operation preferred during times when a lagged copy is the only copy available, or a lagged copy can be activated when a point in time recovery is needed when other database copies are affected by database corruption.
If you want to activate a lagged copy simply to make it current, and activate it when all other database copies are unavailable, the operation is a simple process of replaying all the log files to make the database copy current. One important factor that must be considered for this operation is the time it takes to replay all of the log files into the database before the copy can be activated. The number of log files depends on the configured lag for the copy. If the database copy is configured for a 14-day lag, it can have up to 14 days of logs for a given database that must be replayed before the copy can be activated. The log replay rate is dependent on the storage architecture and the server resource configuration.
The process of activating a lagged copy and replaying all of the logs requires you to carry out the following steps.
![]() Suspend replication for the lagged copy being activated:
Suspend replication for the lagged copy being activated:
Suspend-MailboxDatabaseCopy DB1Server3 -SuspendComment "Activate lagged copy of
DB1 on Server3" -Confirm:$false
![]() Make a copy of the database copy and log files. While this is an optional step, it’s a highly recommended best practice because it protects you from losing the only lagged copy that might be needed if the next step of replaying log files fails.
Make a copy of the database copy and log files. While this is an optional step, it’s a highly recommended best practice because it protects you from losing the only lagged copy that might be needed if the next step of replaying log files fails.
![]() Activate lagged copy and replay all log files:
Activate lagged copy and replay all log files:
Move-ActiveMailboxDatabase DB1 -ActivateOnServer Server3 -SkipLagChecks
If a lagged copy needs to be activated for recovery to a certain point in time, the process is a bit different than activating copy to make it current. For example, a database copy is configured for a 14-day lag. For example, active copy of the database is found to be corrupt and it’s determined that the corruption caused data loss 10 days ago. In this case, the lagged copy only needs to account for four days of logs that need to be replayed.
The process of activating lagged copy to a specific point in time requires you to carry out the following steps.
1. Suspend replication for the lagged copy being activated:
Suspend-MailboxDatabaseCopy DB1Server3 -SuspendComment "Activate lagged copy of
DB1 on Server3" -Confirm:$false
2. Make a copy of the database copy and log files. While this is an optional step, it’s a highly recommended best practice because it protects you from losing the only lagged copy that might be needed if the next step of replaying log files fails.
3. Remove all log files past the determined point of recovery (all log files past the first four days in the previous example).
4. Delete the checkpoint file for the database.
5. Perform the recovery using eseutil. This process replays the log files into the database and can take a considerable amount of time. Many factors affect how long the process can take, such as the number of log files to be replayed, the hardware configuration of the server performing the replay operation, and the disk configuration, which can determine the speed at which the logs can be replayed. In the following example, eXX should be replaced with the actual log generation prefix, such as E00.
Eseutil /r eXX /a
6. After the log replay finishes successfully, the database is in a clean shutdown state, and it can be copied and used for a recovery purpose. The best practice for the recovery of lost data is to mount the database files in a recovery database created for the recovery purpose. You can create a recovery database using the New-MailboxDatabase cmdlet with the Recovery parameter.
7. You can extract recovered data by mounting the recovery database and using the mailbox restore request to export the data to a PST or merge into an existing mailbox.
8. After the recovery process is complete, resume replication for the database:
Resume-MailboxDatabaseCopy DB1Server3
Instances might occur when you need to activate a lagged database copy and request redelivery of missing emails from SafetyNet. This is similar—but improved—to the transport dumpster feature in Exchange 2013. By default, SafetyNet stores copies of the successfully processed messages for two days.
While the majority of steps to activate a lagged copy and request redelivery of messages from SafetyNet are similar to the previously mentioned process for point-in- time recovery, the following mentions certain differences.
![]() After suspending the lagged copy, you need to determine the logs required to bring the database to a clean shutdown state. You can determine these required logs by running eseutil and by inspecting the database header:
After suspending the lagged copy, you need to determine the logs required to bring the database to a clean shutdown state. You can determine these required logs by running eseutil and by inspecting the database header:
Eseutil /mh <DBPath> | findstr /c:"Log Required"
![]() Note HighGeneration number from the output. The HighGeneration number indicates the last log file required. Move all log files with a generation number higher than HighGeneration to a different location, so they’re not played back in the database when it’s activated.
Note HighGeneration number from the output. The HighGeneration number indicates the last log file required. Move all log files with a generation number higher than HighGeneration to a different location, so they’re not played back in the database when it’s activated.
![]() On the server hosting the active copy of the database, stop the Microsoft Exchange Replication service, so the logs don’t continue replicating to the lagged copy.
On the server hosting the active copy of the database, stop the Microsoft Exchange Replication service, so the logs don’t continue replicating to the lagged copy.
![]() Perform the database switchover and activate the lagged copy:
Perform the database switchover and activate the lagged copy:
Move-ActiveMailboxDatabase DB1 -ActivateOnServer Server3 -MountDialOverride
BestEffort -SkipActiveCopyChecks -SkipClientExperienceChecks -SkipHealthChecks
–SkipLagChecks
![]() After activation, the database automatically requests redelivery of the missing messages from SafetyNet.
After activation, the database automatically requests redelivery of the missing messages from SafetyNet.
Move the mailbox database path
After a database is created, if you need to move the database files from their current location to a new location, the actual steps might seem as simple as editing the database path using EAC or the Move-DatabasePath cmdlet.
But this is both a disruptive and a time-consuming operation. It’s disruptive because when the database path is changed, the database is automatically dismounted for the move operation and it’s mounted after files are copied to new location. The database is unavailable for the duration of the operation and users can’t connect to their mailboxes. You can’t change the database path on a replicated database. To move the database path of a replicated database, you must first remove all copies of the database, essentially bringing the database down to a single copy, then perform the move operation, and then add copies of the database.
For database copies, you need to create a new folder structure in the same path as the primary database’s new location and manually copy all the files from the old location to the new location before adding the database copies again. This saves time and effort because seeding isn’t required again. Only log files generated after removing the database copies need to be replicated.
Exam Tip
You can’t move a database path if circular logging is enabled on a database. You must first disable circular logging before moving the database path.
Update a mailbox database copy
Updating a mailbox database copy is essentially a seeding operation. The seeding process creates a baseline copy of the active database, which then continues replication of additional logs as they’re generated. When creating a database copy, you can suspend the initial seeding operation. This creates a database copy, but it doesn’t actually copy any data to create the baseline copy. A database copy that had its seeding suspended is eventually required to be updated before it can be considered a healthy copy that can be used as a switchover or failover target.
Updating to a database copy is also required when a database copy becomes diverged or is unrecoverable. Disk failure hosting a database copy is one such example where the database is unrecoverable and must be updated to create database baseline and resume replication. Other events requiring seeding of a database copy are corrupt log file that can’t be replayed into the passive database copy and when offline defragmentation is performed on any copy of the database, after the log generation sequence of database is reset back to 1.
Before you can update a database copy, you must suspend it. When starting an update, you can select which database copy should be used as a source. This is helpful in situations where a passive database copy is local to the copy being updated and might be a better option than seeding from the active copy, which could be hosted in a different datacenter. While passive copy can be used for seeding, after an update is complete, log replication always uses active copy as its source. It’s also possible to select which network should be used for seeding.
Here’s an example where a database copy for database DB3 needs to be updated. If you use Server3, which has a healthy copy of the database as a source, the command to update the database copy is as follows.
Update-MailboxDatabaseCopy -Identity DB3Server2 -SourceServer Server2
While using EAC or the previously mentioned cmdlet enables you to update a database copy online, you can also opt for an offline copy process to update a mailbox database copy. When you manually copy the offline database, you first need to dismount the copy of the active database. This results for in-service interruption for users hosted on the database. The process for the manual copy method is as follows:
![]() After you dismount the active copy of the database, copy the database and log files to a shared network location or an external drive.
After you dismount the active copy of the database, copy the database and log files to a shared network location or an external drive.
![]() Mount the database to restore service to users.
Mount the database to restore service to users.
![]() On the server that will host database copy, copy the database files from the shared network location or external drive to the same database path as the active database copy.
On the server that will host database copy, copy the database files from the shared network location or external drive to the same database path as the active database copy.
![]() Add the database copy with the SeedingPostponed parameter.
Add the database copy with the SeedingPostponed parameter.
Note: Circular Logging
When using the manual copy process, you must ensure that the database isn’t configured for circular logging.
![]() Thought experiment: DAG design considerations
Thought experiment: DAG design considerations
1. What are the considerations when deciding among a single DAG across two datacenters: two DAGs with mailbox servers distributed across two datacenters, or one DAG for each location with no mailbox servers from a DAG across site? Which design would you recommend? Why?
2. Based on your recommendation for your DAG layout, where should the file share witness be deployed?
Objective summary
![]() DAG provides high availability when multiple database copies are created for the database the mailbox is hosted on. Creating a DAG and adding a mailbox server to DAG doesn’t automatically provide redundancy to the databases located on the mailbox servers.
DAG provides high availability when multiple database copies are created for the database the mailbox is hosted on. Creating a DAG and adding a mailbox server to DAG doesn’t automatically provide redundancy to the databases located on the mailbox servers.
![]() Failovers or switchovers can cause resource overconsumption if the number of failures in a DAG aren’t accounted for in the design. For example, if a mailbox server is designed for 5,000 active users and two servers in the DAG fail, resulting in two databases from other servers, each containing 3,000 users, can result in the mailbox server going over its designed limit of resource usage. This can have adverse effects on the service levels from degraded performance and slow response times or worse.
Failovers or switchovers can cause resource overconsumption if the number of failures in a DAG aren’t accounted for in the design. For example, if a mailbox server is designed for 5,000 active users and two servers in the DAG fail, resulting in two databases from other servers, each containing 3,000 users, can result in the mailbox server going over its designed limit of resource usage. This can have adverse effects on the service levels from degraded performance and slow response times or worse.
![]() When a DAG is designed to stretch across multiple sites, the file-share witness location is critical to ensuring high availability. The best practice is to locate the majority of the mailbox servers on the primary site. If users are located across multiple sites evenly, you should separate DAGs for each major site.
When a DAG is designed to stretch across multiple sites, the file-share witness location is critical to ensuring high availability. The best practice is to locate the majority of the mailbox servers on the primary site. If users are located across multiple sites evenly, you should separate DAGs for each major site.
Objective review
Answer the following questions to test your knowledge of the information in this objective. You can find the answers to these questions and explanations of why each answer choice is correct or incorrect in the “Answers” section at the end of this chapter.
1. You are an Exchange administrator for Contoso, Ltd. You need to deploy a DAG without an administrative access point. What should you do?
A. Deploy mailbox servers on Windows Server 2008 R2.
B. Deploy mailbox servers on Windows Server 2012 R2.
C. Deploy mailbox servers on Windows Server 2012.
2. You are an Exchange administrator for Contoso, Ltd. You need to move databases from the system drive to a new data drive. Select the required steps to complete the task successfully.
A. Enable circular logging on the database.
B. Disable circular logging on the database.
C. Run Dismount-Database cmdlet.
D. Run Move-DatabasePath cmdlet.
3. You are an Exchange administrator for Contoso, Ltd. You need to configure DAG networks to exclude SCSI network from replication. Which steps must you take? Select all that apply.
A. Run Set-DatabaseAvailabilityGroup and set ManualDagNetworkConfiguration to $false
B. Run Set-DatabaseAvailabilityGroup and set ManualDagNetworkConfiguration to $true
C. Set-DatabaseAvailabilityGroupNetwork cmdlet and set IgnoreNetwork to $true
D. Set-DatabaseAvailabilityGroupNetwork cmdlet and set IgnoreNetwork to $false