Chapter 1
Design and implement Microsoft 365 services
Important
Have you read page xvii?
It contains valuable information regarding the skills you need to pass the exam.
Although it’s possible to simply start deploying Microsoft 365 once your organization has made the decision to adopt the technology, your organization will get more out of its Microsoft 365 deployment if some planning and design work has occurred before any Microsoft 365 services are configured. In this chapter you will learn about managing the Microsoft 365 domain namespace, how to plan a Microsoft 365 implementation, how to setup a Microsoft 365 tenancy and subscription, how to manage that subscription and tenancy’s health, and the steps that you’ll need to take to plan the migration and users from a traditional on-premises environment to a Microsoft 365 environment.
Skills in this chapter:
Skill 1.1: Manage domains
This section deals with managing domain name configurations for a Microsoft 365 tenancy. To master this skill you’ll need to understand how to configure a Microsoft 365 tenancy to use a DNS name managed by your organization. You’ll also need to know how to configure that domain name to work with a variety of Microsoft 365 services, as well as configure user names and email addresses to leverage the new domain name.
Add and configure additional domains
When you create a Microsoft 365 subscription, the subscription tenancy is automatically assigned a custom onmicrosoft.com domain. The tenant name is in the format name.onmicrosoft.com, where name is the name you want to assign to your organization’s tenancy. This name has to be unique, and no two organizations can share the same tenant name. When you initially create the tenancy, a check is performed against your proposed tenancy name. If a tenant already exists with that name, you’ll be alerted and required to select an alternative. While you’re unlikely to actually use the onmicrosoft.com domain name once you have fully configured your organization’s tenancy, it’s important to note that the tenant name cannot be changed after you configure your Microsoft 365 subscription. The tenant name chosen at setup remains with the subscription over the course of the subscription’s existence, and cannot be removed. Resist the temptation to assign an amusing name, because your organization will be stuck with it even if it isn’t the primary domain name used.
You can assign a domain name that you own to the tenant so that you don’t have to use the tenant name on a regular basis. For example, you might sign up to a Microsoft 365 subscription with the tenant name contoso.onmicrosoft.com. Any accounts you create will use the contoso.onmicrosoft.com email suffix for their Office 365 Exchange mailboxes. Once you’ve set up Microsoft 365, however, you can assign a custom domain name and have the custom domain name used as the primary email suffix. For example, assuming that you owned the domain name contoso.com, you could configure your tenancy to use the custom domain name contoso.com with the contoso.onmicrosoft.com tenancy.
Microsoft 365 supports the addition of up to 900 domains to a single subscription. You can use separate domain names with a subscription, such as contoso.com, or tailwindtraders.com. You can also associate subdomains of a domain name such as partners.tailwindtraders.com or australia.contoso.com.
Acquiring a domain name
If your organization wants to use a new domain name with its Microsoft 365 tenancy, it can procure one with a registrar. When you do this, you can choose to have the registrar host the name server records for the domain, or select your own name server records. The vast majority of organizations will have already procured a domain name and have it hosted either with a specific domain registrar, their ISP, or even on their own DNS servers. To use a domain with Microsoft 365, the DNS servers used as name servers for the domain need to support the following record types:
CNAME records To fully support Skype for Business online, the name server DNS servers need to be able to support multiple CNAME records in a DNS zone.
SPF/TXT records These records allow you to configure sender protection framework records, which can be used to combat unsolicited commercial email. TXT records are also one method of verifying domain ownership.
SRV records SRV records are used for Skype for Business Online IM and presence integration using the Outlook Web App as well as federation with Skype for Business Online users in different organizations including public Internet connectivity with Microsoft accounts.
MX records These records are used to route mail to Exchange Online mail servers.
Purchasing a domain through Microsoft 365
In some regions, you’re able to purchase a custom domain name from within Microsoft 365. When you do this, you’re limited to the following top level domains:
.biz
.com
.info
.me
.mobi
.net
.org
.tv
.co.uk
.org.uk
Purchasing a domain through Microsoft 365 has the advantage of meaning that the vast majority of DNS related operations will be performed automatically for you. You shouldn’t choose this option if your organization will continue to use email services outside Microsoft 365 because you won’t be able to modify the appropriate MX records.
Configuring a custom domain name
To configure Microsoft 365 to use a custom domain name, you need to add the name of the custom domain name to Microsoft 365. The account used to perform this action must be an Global Administrator of a business or enterprise plan.
To add a custom domain to Microsoft 365, perform the following steps:
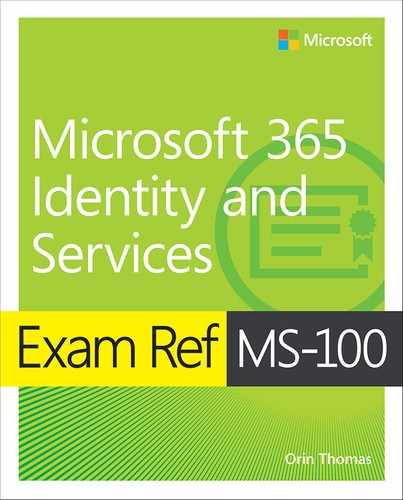
In the Microsoft 365 Admin Center, click Domains under Setup as shown in Figure 1-1.
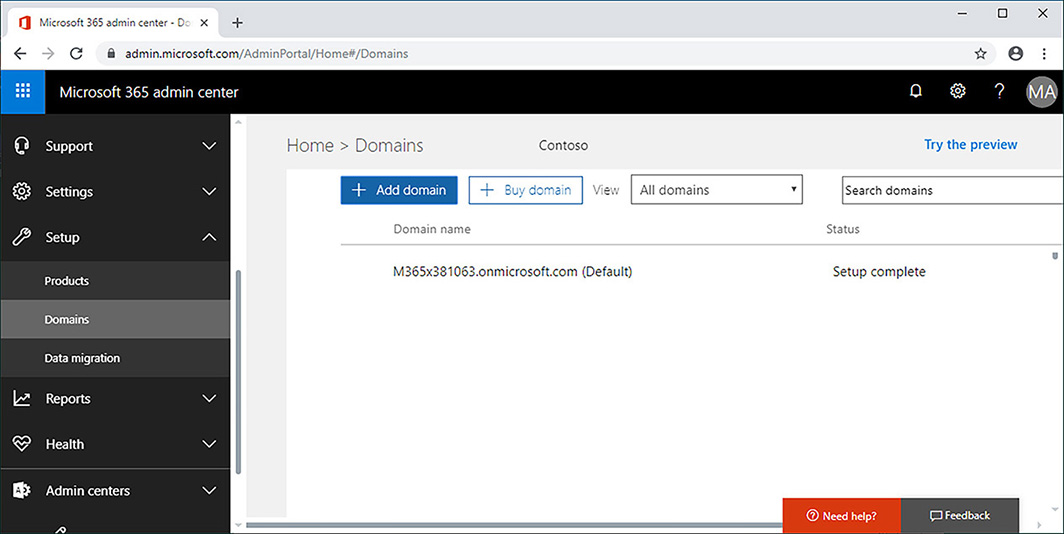
Figure 1-1 Domains node If your organization already has a domain, click Add A Domain. The alternative is that the console provides the option to buy a domain through Office 365 and GoDaddy. The advantage of buying through GoDaddy is that you can have the entire process of assigning a custom domain to Microsoft 365 occur automatically. If your organization’s domain is already hosted elsewhere, you’ll instead have to confirm ownership of that domain by configuring special TXT or MX records that can be checked by the setup process.
When you click Add A Domain, you are presented with the New Domain page. Enter the name of the existing domain you want to configure as shown in Figure 1-2 and click Next.
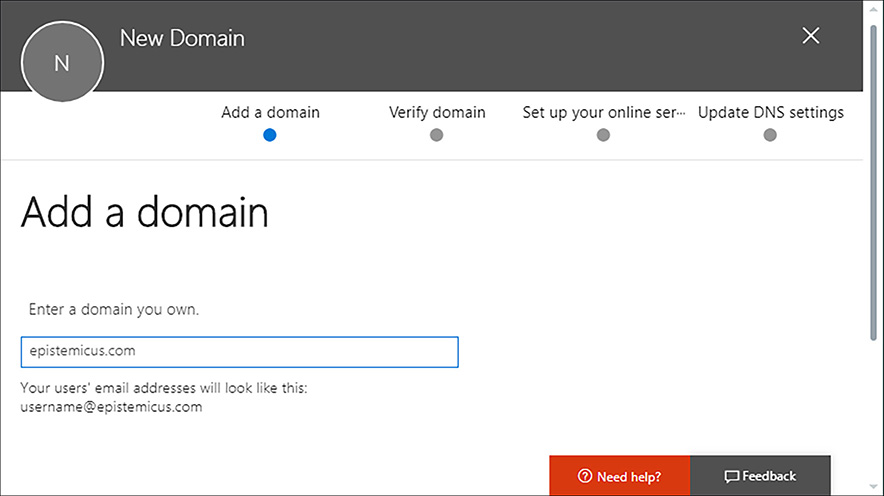
Figure 1-2 Add a new domain in Microsoft 365 This will begin the process of adding the domain, but you’ll need to confirm ownership before you can use the domain.
Verify custom domain
You can only use a custom domain name with Microsoft 365 if your organization owns the domain name. Microsoft requires that you perform a series of DNS configuration changes to the domain name that will prove that your organization controls and has ownership of the domain.
To confirm ownership of your organization’s domain, perform the following steps:
Once you’ve specified the domain you want to add, verify the domain on the Verify Domain page. This involves adding a TXT or MX record with the properties listed on the Verify Domain page show in Figure 1-3 to the DNS zone. You do this by configuring the DNS zone with the DNS provider.

Figure 1-3 Verify Domain Figure 1-4 shows the TXT record configured as part of the DNS zone, epistemicus.com, hosted in DNS on Microsoft Azure.

Figure 1-4 TXT record in Azure DNS Once you have added the record, click Verify. Microsoft 365 will then attempt to confirm the presence of the record. Depending on how DNS is configured, it may take up to 15 minutes before the verification process will successfully complete.
More Info Adding a Domain to Microsoft 365
You can learn more about topic at: https://docs.microsoft.com/office365/admin/setup/add-domain?view=o365-worldwide.
Configure workloads for new domain name
By configuring a custom domain’s purpose, you can choose how it will be used with a variety of Microsoft 365 services. For example, you might want to use one custom domain as an email suffix, and another custom domain for use with Exchange and Mobile Device Management for Office 365. You can only configure a domain purpose once you’ve verified the DNS zone. Microsoft 365 allows you to configure separate domains for the Exchange, Skype for Business, and Mobile Device Management for Office 365 workloads.
To configure domain purpose, continue the wizard after verifying the DNS zone and select which services you wish the zone to support. Once you have added the records to the DNS zone, you can verify that the records have been entered correctly by clicking Verify as shown in Figure 1-5.

Exchange Online related DNS records
When you provision Microsoft 365 for your organization, Microsoft takes care of ensuring that the DNS records for your organization’s tenant domain, which is the onmicrosoft.com domain, are configured properly so that email addresses that use the tenant domain as an email domain suffix have mail routed properly.
For example, if you provision a Microsoft 365 tenant, and the tenant domain is contoso.onmicrosoft.com, then email sent to users at this email domain, such as an email sent to [email protected], will arrive at the correct location because Microsoft 365 will provision the appropriate DNS records automatically when the tenancy is provisioned.
When you add a custom domain to Microsoft 365, you need to configure an appropriate set of DNS records to ensure that mail flows properly to Exchange Online mailboxes that use the custom domain. For example, if your custom domain is tailspintoys.com, you need to configure DNS so that email will function properly for Exchange Online mailboxes that are configured to use the tailspintoys.com email domain. When properly configured, the user associated with the Exchange Online mailbox [email protected] will receive email sent from other hosts on the Internet.
If your custom DNS zone is hosted by GoDaddy, Microsoft 365 can configure the appropriate DNS records for you automatically. If your custom DNS zone is hosted by another DNS hosting provider, you’ll have to manually configure DNS records.
You need to configure the following DNS records:
Autodiscover CNAME record for Autodiscover service
MX record for mail routing
SPF (Sender Policy Framework) record to verify identity of mail server
TXT record for Exchange federation
CNAME record for Exchange federation
These records are listed in Table 1-1. The specifics of records will be provided for you by the Microsoft DNS setup wizard. The MX record takes the form <customdnsname>.mail.protection.outlook.com, and will vary depending on the custom domain name being registered.
Table 1-1 Microsoft 365 Exchange DNS records
Type |
Priority |
Host name |
Value |
TTL |
MX |
0 |
@ |
<customdnsname>.mail.protection.outlook.com |
1 HR |
TXT |
- |
@ |
v=spf1 include:spf.protection.outlook.com -all |
1 HR |
CNAME |
- |
autodiscover |
1 HR |
MX Record
You need to configure an MX record in your custom domain to point to an Office 365 target mail server. The address of this target mail server will depend on the name of the custom domain and is described in the documentation as being in the form <mx token>.mail. protection.outlook.com. You can determine the value for MX token by performing the following steps:
In the Microsoft 365 Admin Center, navigate to the Domains node under Settings.
Select the Custom Domain; this will open the Domain Properties page.
Locate the MX record as shown in Figure 1-6.
Figure 1-6 TXT record in Azure DNS
To ensure that mail routes properly, you need to configure the MX priority for the record to be a lower value than any other MX records configured for the custom domain. When mail is being routed, a check is performed to determine which MX record has the lowest value for the priority field. For example, an MX record with a priority of 10 will be chosen as a destination for mail routing over an MX record with a priority of 20.
Figure 1-7 shows the MX record for the epistemicus.com domain configuration when the DNS zone is hosted in Azure DNS.

SPF Record
The Sender Protection Framework (SPF) record is a special TXT record that reduces the possibility of malicious third parties using the custom domain to send spam or malicious email. An SPF record is used to validate which email servers are authorized to send messages on behalf of the custom domain. The SPF record must be a TXT record where the TXT value must include v=spf1 include:spf.protection.outlook.com –all. The record should also be set with a TTL value of 3600. Only one TXT record for SPF should exist within a specific zone. If an SPF record is already present, append the Microsoft 365 values to the existing record rather than creating a new one. Figure 1-8 shows an SPF record for Exchange Online hosted in Azure DNS for the epistemicus.com domain.
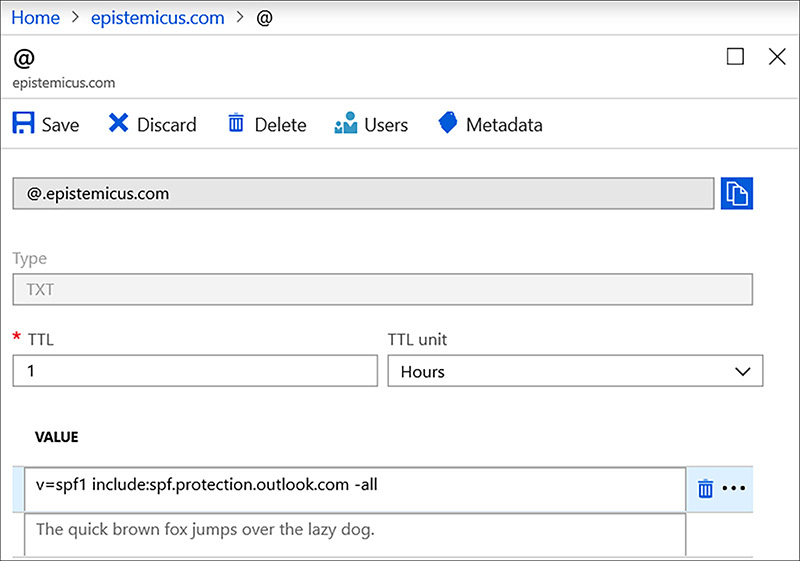
Autodiscover CNAME Record
You need to create a CNAME record that uses the Autodiscover alias to point to the hostname Autodiscover.outlook.com, so that Outlook clients have their settings automatically provisioned for Exchange Online. For example, if the custom domain you assigned to Microsoft 365 was tailspintoys.com, you would need to create the CNAME record Autodiscover. tailspintoys.com and have it point to Autodiscover.outlook.com. Figure 1-9 shows this type of record configured for the epistemicus.com domain using Azure DNS.

Exchange Federation Txt Records
If you are configuring federation between an on-premises Exchange deployment and Exchange Online, you need to create two special TXT records that will include a custom-generated domain-proof hash text.
The first record will include the custom domain name and the hash text, such as tailspintoys.com and Y96nu89138789315669824, respectively. The second record will include the name exchangedelegation, with the custom domain name and then the custom generated domain-proof hash text like exchangedelegation.tailspintoys.com and Y3259071352452626169.
Exchange Federation CNAME Record
If you are configuring federation, you need an additional CNAME record to support federation with Office 365. This CNAME record will need the alias autodiscover.service, and should also point to autodiscover.outlook.com.
More Info Exchange Online DNS Records
You can learn more about DNS records for Exchange Online at: https://docs.microsoft.com/office365/enterprise/external-domain-name-system-records#external-dns-records-required-for-office-365-core-services.
Skype for Business related DNS records
Skype for Business requires you to configure two types of DNS records if you have a custom domain. You need to configure two SRV records and two CNAME records to get Skype for Business working properly with a custom domain, as shown for the epistemicus.com domain in Figure 1-10.

Skype for Business Online CNAME Records
If you want to use Skype for Business with a custom domain, you also need to create two separate CNAME records. The first CNAME record uses the alias sip, and points to sipdir.online.lync.com. This CNAME record allows the client to find the Skype for Business service and assists in the process of signing in. The second CNAME record assists the Skype for Business mobile device client to find the Skype for Business service and also assists with sign-in. The alias for this record is lyncdiscover, and the record target is webdir.online.lync.com. These records are listed in Table 1-2.
Table 1-2 Microsoft 365 Skype for Business CNAME DNS records
Type |
Host name |
Value |
TTL |
CNAME |
sip |
sipdir.online.lync.com |
1 HR |
CNAME |
lyncdiscover |
webdir.online.lync.com |
1 HR |
Skype for Business Online SRV Records
Skype for Business Online requires two SRV records. The first record is used to coordinate the flow of data between Skype for Business clients. This record should have the following properties:
Service _sip
Protocol _TCP
Priority 100
Weight 1
Port 443
Target sipdir.online.lync.com
The second record is used by Skype for Business to share instant messaging features with clients other than Lync for Business by allowing SIP federation. This record should have the following properties:
Service _sipfederationtls
Protocol _TCP
Priority 100
Weight 1
Port 5061
Target sipfed.online.lync.com
These records are also listed in Table 1-3.
Table 1-3 Microsoft 365 Skype for Business SRV DNS records
Service |
Protocol |
port |
target |
name |
TTL |
_sip |
_tls |
443 |
sipdir.online.lync.com |
@ |
1 HR |
_sipfederationtls |
_tcp |
5061 |
sipfed.online.lync.com |
@ |
1 HR |
More Info Skype for Business DNS Records
You can learn more about DNS records for Skype for Business Online at: https://docs.microsoft.com/office365/enterprise/external-domain-name-system-records#external-dns-records-required-for-skype-for-business-online.
Mobile Device Management for Microsoft 365 DNS records
If you are using Mobile Device Management for Microsoft 365, you need to create two CNAME records, also known as Alias, so that devices can find the appropriate location to register with. These two records are listed in Table 1-4.
Table 1-4 Microsoft 365 Mobile Device Management DNS records
Type |
Host name |
Value |
TTL |
CNAME |
enterpriseregistration |
1 HR |
|
CNAME |
enterpriseenrollment |
enterpriseenrollment.manage.microsoft.com |
1 HR |
Verifying DNS settings
You can check DNS settings at any time by selecting the domain in the Microsoft 365 Admin Center, and clicking Check DNS, as shown in Figure 1-11. When you do this, Microsoft 365 will perform a query against the records required for the services you have chosen and validate that the results returned by the query match those that are required by Microsoft 365.

More Info Microsoft 365 Domains FAQ
You can learn more about configuring domains for Microsoft 365 at: https://docs.microsoft.com/office365/admin/setup/domains-faq?view=o365-worldwide.
Set default domain
Setting the default domain configures which domain suffix will automatically be used with Microsoft 365 user accounts. You can only select a default domain if you have configured Microsoft 365 with at least one custom domain.
To configure the default domain:
Sign into the Microsoft 365 Admin Center as a Global Admin.
Under Setup, click Domains and then click on the domain that you wish to configure as the default domain.
On the domain’s page, shown in Figure 1-12, click Set As Default.
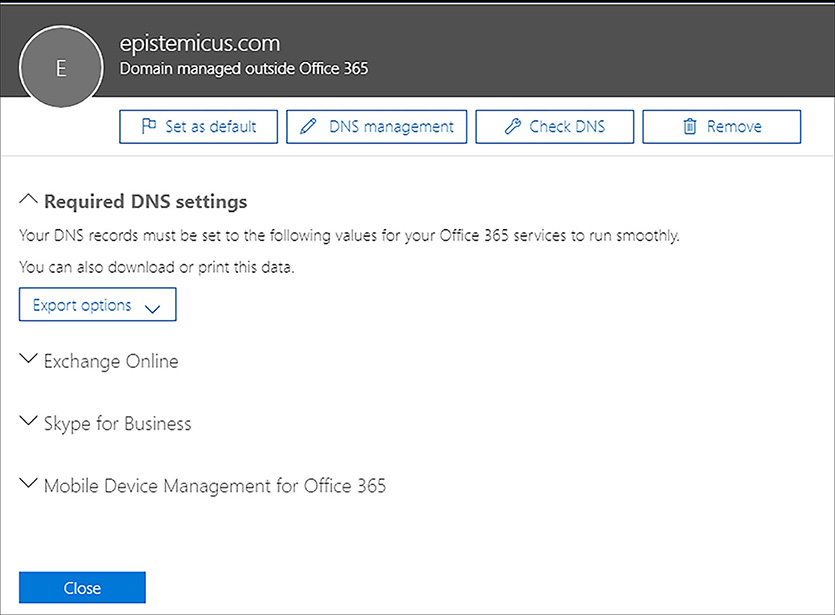
Figure 1-12 TXT record in Azure DNS
Set primary domain name
You can also set the primary domain name in Exchange Online. This works in a similar way to the default domain for Microsoft 365, although it is possible to have a primary domain name for Exchange Online that is different from the default domain for Microsoft 365. When you do this, the email address that a user has will default to the primary domain name, but the sign-in name for Microsoft 365 will use the default domain. To avoid confusion, it is simpler to set the default domain and primary domain to the same value.
To configure the primary domain type for Exchange Online, perform the following steps:
Sign into the Microsoft 365 admin center as a Global Admin.
Under Admin Centers, click Exchange. This will open the Exchange Admin Center.
Under Mail Flow, shown in Figure 1-13, click Accepted Domains.
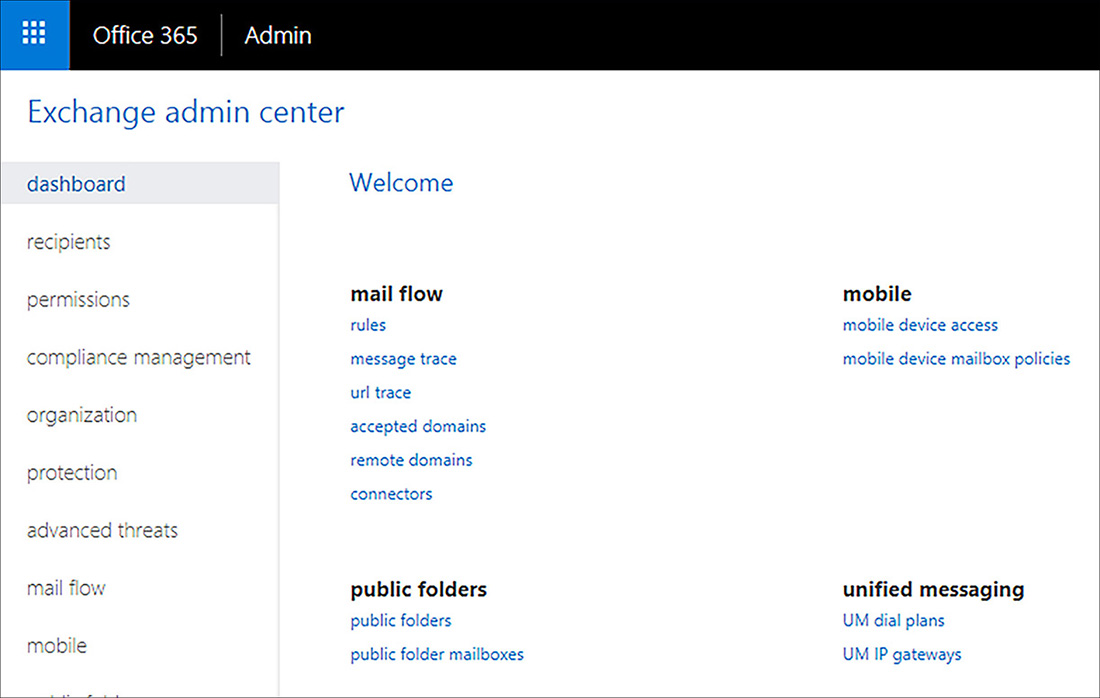
Figure 1-13 Accepted domains in Exchange admin center Set the domain that you wish to have become the primary domain and click the Pencil (Edit) icon.
On the Accepted Domain page, ensure that the domain is configured as Authoritative and that the domain is set to be the default domain as shown in Figure 1-14.

Figure 1-14 Configuring Default Domain
More Info Accepted Domains in Exchange Online
You can learn more about configuring accepted domains for Exchange Online at: https://docs.microsoft.com/exchange/mail-flow-best-practices/manage-accepted-domains/manage-accepted-domains.
Configure user identities for new domain name
When your Microsoft 365 organization adopts a new custom domain name, it will also be necessary to decide what steps you should take in terms of allowing users to leverage that domain name. For example, should all newly created user accounts be assigned that domain name for email and the UPN sign in? Should existing user accounts be modified so that they use the new domain name for email and UPN sign in? Should the new domain name simply be added as an alternative domain suffix to the existing organizational email address? In this section you’ll learn what steps you can take to modify the primary address so that it uses a new domain name.
Manage email address
The default address, also known as the primary address and as the reply-to address, is the address that users use to sign in to Microsoft 365 resources, including Office 365, and which recipients reply to when they receive an email message from a user. You can view the primary email address for a user in the Microsoft 365 Admin Center on the user’s properties page, as shown in Figure 1-15.

It’s possible to change the primary email address once you have added an additional email address to an Office 365 user. It is important to note that changing the primary email address also changes the user name. For example, the warning in Figure 1-16 indicates that by changing the primary email address associated with the Adele Vance user account, the user name will also be changed. The email suffix for the primary address must be configured as an accepted domain for the Office 365 tenancy.

You can perform a bulk email address update using PowerShell. You might choose to do this in the event that the organization renames itself. This step should be taken with extreme care because supporting a small number of users through a transition to a new email and logon address is relatively simple, whereas supporting every user in the organization through a transition to a new email and logon address is what might politely be termed “logistically complex.”
To update the email and logon domains of multiple users, perform the following steps:
In the Active Users node of the Microsoft 365 Admin Center, select all of the users whose email and logon domains you want to update, as shown in Figure 1-17.
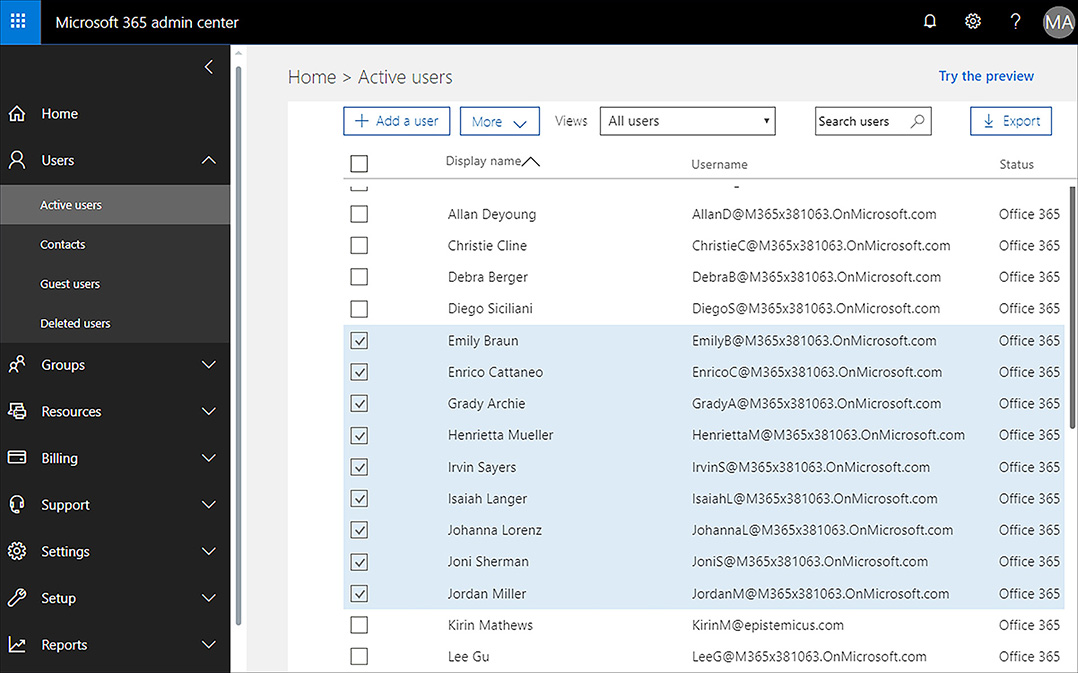
Figure 1-17 Select multiple users Once the users are selected, on the More drop down menu, click Edit Domains.
On the Edit Domains drop down, select one of the domains that has been added to Microsoft 365, as shown in Figure 1-18, and click Save. You will be presented with a warning that email addresses and usernames in apps associated with Microsoft 365 will need to be updated.

Figure 1-18 Select multiple users When the operation is complete, a confirmation dialog will be displayed as shown in Figure 1-19. Click Close to dismiss the dialog.

Figure 1-19 Confirmation dialog box
Additional email addresses
Additional email addresses allow mailboxes to receive messages from more than a single address. Also known as proxy or secondary addresses, they can take any format and can use any domain name associated with the organization’s Microsoft 365 tenancy. For example, Adele Vance’s user account could have the primary username and address as [email protected], but could also have the following addresses also associated with the same Exchange mailbox:
You can add additional email addresses to an Office 365 account’s Exchange Online mailbox using a variety of methods. To add an additional email address to an Exchange Online mailbox using Exchange Admin Center, perform the following steps:
Sign in to the Microsoft 365 Admin Center with a user account that has Tenant Administrator permissions.
In the Microsoft 365 Admin Center, click Exchange under Admin Centers, as shown in Figure 1-20.
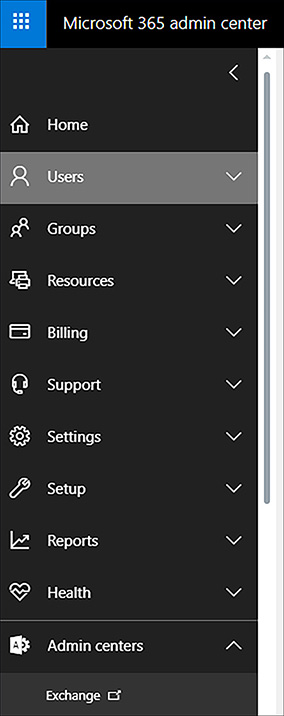
Figure 1-20 Locate Exchange Admin Center In Exchange Admin Center, click Recipients and then click Mailboxes. Select the recipient to which you wish to add an additional email address. Figure 1-21 shows the Adele Vance mailbox selected.

Figure 1-21 Recipients Click the Edit (Pencil) icon.
On the User Mailbox properties page, click Email Address, as shown in Figure 1-22.

Figure 1-22 Email addresses Click the Plus (+) icon.
On the New Email Address page, ensure that SMTP is selected, as shown in Figure 1-23, and then enter the new email address. You can also specify the new email address as the default reply-to address.

Figure 1-23 New Email Address Click OK to save changes
To add an additional email address to an Exchange Online mailbox using the Microsoft 365 Admin Center, perform the following steps:
In the Office Admin Center, select Active Users under Users.
Select the user for which you want to configure the primary email address. Figure 1-24 shows Debra Berger selected.

Figure 1-24 Debra Berger user account On the More menu, click Edit Email Addresses And Username.
In the Alias box, shown in Figure 1-25, type the new email address and click Add.

Figure 1-25 Edit Email Address To set the new email address as the new primary email address, as shown in Figure 1-26, click Set As Primary.

Figure 1-26 Other Email Addresses
You can use the Set-Mailbox cmdlet to add additional email addresses. For example, to add the email address [email protected] to Debra Berger’s Exchange Online mailbox, issue the following command using PowerShell as a global admin:
Set-Mailbox "Debra Berger" –EmailAddresses @{[email protected]}
More Info Secondary Email Address
You can learn more about adding an email address to a mailbox at: https://docs.microsoft.com/Exchange/recipients/user-mailboxes/email-addresses.
Design domain name configuration
As you learned earlier in this chapter, you can configure a Microsoft 365 subscription with up to 900 domain names, which can be completely different domain names and subdomains of a given domain name. Being able to associate up to 900 domain names with a single subscription gives your organization a substantial number of options when it comes to implementing a domain name design. For example, you can configure each of the services that are associated with a Microsoft 365 subscription with a different domain name. For example, you might choose to have the following configuration if your organization owned the contoso.com domain:
Contoso.com Domain name associated with Exchange Online. Each user signs into Microsoft 365 using an account with a contoso.com UPN suffix.
Skype.contoso.com Subdomain name associated with the Skype for Business services.
Mdm.contoso.com Subdomain name associated with mobile device management functionality for Microsoft 365.
You might also choose to configure separate subdomains and provide them as alternate email domains used with secondary addresses for Exchange Online mailboxes. For example, you might have [email protected] as the primary email address for a mailbox, but configure [email protected] as a proxy address, allowing the Adele Vance mailbox to receive email addressed to multiple addresses in the same mailbox.
 Exam Tip
Remember the types of DNS records that you can configure to verify ownership of a specific custom domain name.
Skill 1.2: Plan a Microsoft 365 implementation
This section deals with the steps that your organization needs to take to plan a Microsoft 365 deployment. This includes understanding what you’ll need to do to prepare the infrastructure for a brand-new deployment for a new organization, as well as what steps to take to integrate Microsoft 365 into an organization that already has an on-premises Active Directory and network infrastructure present. To master this skill, you’ll need to understand the types of planning steps that you’ll need to undertake to prepare your organization for Microsoft 365, and understand what the most appropriate identity and authentication solution is for your organization.
Plan for Microsoft 365 on-premises infrastructure
When planning a migration to Microsoft 365, or starting from scratch, “green-field,” or a brand-new deployment, you’ll have to make sure certain on-premises infrastructure prerequisites have been met. These on-premises infrastructure requirements relate to networking configuration, identity dependencies, client operating systems, deployment of Office 365 pro plus, as well as choices on strategy for mobile device management and information protection.
Networking
Traditional networks have provided users with access to data and applications hosted on datacenters owned and operated by the organization, and protected by strong perimeter defenses such as firewalls. In this traditional model, users primarily access resources from protected internal networks, over WAN links from branch locations, or remotely via VPN connections.
The M365 and O365 model shifts some, if not all, applications and data from locations on protected internal networks to locations hosted beyond the network perimeter in the public cloud. When moving from an environment where all resources are hosted on-premises, to where a substantial amount of infrastructure is hosted in the cloud, it is necessary to ensure that the on-premises networking environment is configured in such a way that M365 can function effectively and efficiently. Unless steps are taken to optimize the flow of traffic between users and M365 and O365 services, this traffic will be subject to increased latency caused by packet inspection, network hairpins, and possible inadvertent connections to geographically distant M365 and O365 service endpoints.
Understanding the networking requirements for M365 also allows you to make an assessment as to whether M365 is appropriate for a particular organization. For example, there are challenges around deploying M365 effectively at a scientific base in Antarctica where there is limited low bandwidth connectivity to the Internet.
Internet Connectivity for Clients
To use Office 365, clients need to establish unauthenticated connections over port 80 and port 443 to the Microsoft 365 and Office 365 servers on the Internet. On some networks, especially those configured for small businesses, you may run into the following network connectivity problems:
Clients configured with APIPA addresses If clients are configured with IP addresses in the APIPA range (169.254.0.0 /16), they most likely cannot make a connection to the Internet. This means they can’t interact with M365 and O365 resources. Clients configured with an APIPA address should be configured with IP addresses in the private range with an appropriate default gateway configured to connect either directly or indirectly to the Internet.
No default gateway Clients need to be configured with a default gateway address of a device that can route traffic to the Internet. The default gateway device doesn’t need to be directly connected to the Internet, but it needs to be able to route traffic to a device that eventually does connect to the Internet. Clients without a default gateway configured will not be able to connect to M365 and O365 resources.
Firewall configuration Clients require access to certain endpoints used by M365 and O365. The details of these endpoints will be outlined later in this chapter.
Proxy server authentication M365 and O365 will not function if an intervening proxy server requires authentication for connections. You’ll have to configure an authentication bypass for M365 and O365 endpoints, or disable proxy server authentication to Microsoft 365 and Office 365 endpoints on the Internet.
Managing Office 365 Endpoints
A Microsoft 365 or Office 365 endpoint is a URL or IP address that hosts a specific Microsoft 365 or Office 365 service, such as the addresses used when connecting an Outlook client to Exchange Online or a mobile device to an enrollment point. Organizations that have one or more office locations need to ensure that their network is configured to allow access to these endpoints.
Microsoft recommends that organizations optimize traffic for M365 and O365 endpoints by routing all traffic directly through the perimeter firewall and having that traffic be made exempt from packet level inspection or processing. Taking these steps will reduce latency to M365 and O365 resource endpoints. This configuration will also reduce the impact on those perimeter devices, which will ignore this traffic to known trusted locations.
Microsoft places each M365 and O365 endpoint into one of three categories. These categories allow you to deal with traffic to M365 and O365 endpoints in the most appropriate manner. The category endpoints that Microsoft uses are: Optimize, Allow, and Default. These endpoint categories have the following properties:
Optimize Endpoints with this classification are required for connectivity for every M365 and O365 service. Optimize classified endpoints will account for approximately 75% of bandwidth, volume of data, and individual connections. Endpoints with the Optimize classification cause the most problems when there are disruptions to network performance, latency, and availability.
Allow Endpoints with this classification are also required for connectivity for every M365 and O365 service, but differ from Optimize classified endpoints in that they are less problematic when there are disruptions to network performance, latency, and availability.
Default Endpoints with this classification don’t require any specific optimization and can be treated the same as other traffic bound for locations on the Internet.
Microsoft provides recommendations for how to configure traffic flow to endpoints. These recommendations are listed in Table 1-5.
Table 1-5 Endpoint optimization methods
Endpoint Type |
Recommendation |
Optimize, Allow |
Bypass or whitelist endpoints on network devices and services that perform TLS decryption, traffic interception, content filtering, and deep packet inspection. |
Optimize |
Bypass on-premises and cloud based proxy devices or services used for general Internet browsing. |
Optimize, Allow |
Treat these endpoints as fully trusted by network infrastructure and perimeter systems. |
Optimize, Allow |
Reduce or eliminate WAN backhauling. Facilitate direct distributed internet egress for endpoints from branch office locations. |
Optimize |
Configure split tunneling for VPN users to allow direct connectivity to these endpoints. |
Optimize, Allow |
Configure prioritization for endpoints when configuring SD-WAN to minimize latency and routing. |
Optimize, Allow |
Ensure DNS name resolution matches routing egress path for endpoints. |
In the past, Microsoft provided alternate guidance categories to the ones listed earlier. The prior guidance categories were Required and Optional, rather than the current categories of Optimize, Allow, and Default. Some documentation still refers to these earlier endpoint categories.
More Info Endpoint Categories
You can learn more about M365 and O365 endpoint categories at: https://docs.microsoft.com/office365/enterprise/office-365-network-connectivity-principles#new-office-365-endpoint-categories.
Outbound Firewall Ports
Clients, such as computers running Windows 10, need to be able to make connections to the M365 and O365 endpoints on the Internet using specific protocols and ports. If certain ports and protocols are blocked by a perimeter network firewall, clients will be unable to use specific M365 and O365 services. Table 1-6 lists the protocols and ports that need to be open for clients on an internal network to hosts on the Internet.
Table 1-6 Office 365 Outbound Port requirements
Protocol |
Port |
Used by |
TCP |
443 |
|
TCP |
25 |
Mail routing |
TCP |
587 |
SMTP relay |
TCP |
143/993 |
IMAP Simple Migration Tool |
TCP |
80/443 |
|
TCP |
995 |
POP3 secure |
PSOM/TLS |
443 |
Skype for Business Online: Outbound data sharing |
STUN/TCP |
443 |
Skype for Business Online: Outbound audio, video, and application sharing sessions |
STUN/UDP |
3478 |
Skype for Business Online: Outbound audio and video sessions |
TCP |
5223 |
Skype for Business mobile client push notifications |
UDP |
20000-45000 |
Skype for Business Online outbound phone |
RTC/UDP |
50000-59000 |
Skype for Business Online: Outbound audio and video sessions. |
The number of IP addresses and URLs that you need to configure for exclusion is substantial and a complete list is beyond the scope of this book. The URLs and IP address ranges that are associated with Microsoft and Office 365 are always changing, and it is possible to subscribe to a REST based web service that provides the list of endpoints, the current version of the list, and changes made to the list for use in configuring network perimeter devices including firewalls and proxy servers.
More Info Managing Office 365 Endpoints
You can learn more about Office 365 URLS and IP addresses at: https://docs.microsoft.com/office365/enterprise/urls-and-ip-address-ranges.
Egress Network Connections Locally
A method of reducing connection latency is to ensure that you configure branch office networks for local DNS and Internet egress, rather than forcing all DNS and Internet egress traffic to be routed over a WAN link to a head office before being routed to the Internet. Routing Internet bound branch office traffic across a WAN before allowing it to egress is also termed “WAN Backhauling,” and should be avoided when it comes specifically to M365 and O365 traffic that has the Optimize categorization.
M365 and O365 services run on the Microsoft Global Network. This network is configured with servers around the world. This means that there is likely to be a front end server in proximity to each branch office location and that routing traffic across a WAN rather than letting it egress directly from the branch office will introduce unnecessary latency. DNS traffic to M365 and O365 endpoints should also egress at the branch office, as this will ensure that DNS servers respond with the closest local frond end server. If DNS queries are relayed across WAN links and only egress through a single head office location, clients will be directed to front end servers closest to the head office location, rather than the branch office where the DNS query originated.
Avoiding Network Hairpins
Network hairpins occur when VPN or WAN traffic destined for a specific endpoint must first pass through an intermediate location, such as a security appliance, cloud-based web gateway, or cloud access broker, which may introduce a redirection to a geographically distant location. For example, if Tailwind Traders has an Australian branch office, but all traffic to M365 and O365 endpoints need to go through a cloud-based security device located in a Canadian cloud provider datacenter, then it’s likely that unnecessary latencies will be introduced. Even if branch office traffic is egressed locally, there will be a deleterious impact on performance if it is routed through a geographically distant intermediate location.
There are several methods that minimize the chance of network hairpins, including:
Ensure that the ISP that provides Internet egress for the branch office has a direct peering relationship with the Microsoft Global Network in proximity to that location.
Configure egress routing to send trusted M365 and O365 traffic directly to M365 and O365 endpoints rather than having them processed by intermediate services and devices.
Deploy SD-Wan Devices
Software Defined Wide Area Network (SD-WAN) devices are networking devices that can be configured automatically so that traffic is most efficiently routed to M365 and O365 Optimize and Allow endpoints. When configured, other network traffic, including traffic to on-premises workloads, general Internet traffic, and traffic to M365 and O365 default endpoints can be forwarded to appropriate locations including network security devices. Microsoft has a partner program for SD-WAN providers to enable automatic configuration of devices.
More Info M365 Network Connectivity Principles
You can learn more about M365 network infrastructure requirements at: https://docs.microsoft.com/office365/enterprise/office-365-network-connectivity-principles.
Recommend Bandwidth
There are many factors that influence the amount of bandwidth that an organization will require to successfully use Office 365. These factors include:
The specific Office 365 services to which the organization has subscribed.
The number of client devices connecting to Office 365 from a site at any point in time.
The type of interaction the client is having with Office 365.
The performance of the Internet browser software on each client computer.
The capacity of the network connection available to each client computer.
Your organization’s network topology.
Microsoft provides a number of tools that can be used to estimate the bandwidth requirements of an Office 365 deployment. These include:
Exchange client network bandwidth calculator This tool allows you to estimate the bandwidth required for Outlook, Outlook Web App, and mobile device users.
Skype for Business Online bandwidth calculator This tool allows you to estimate the amount of bandwidth you will require based on the number of Skype for Business users and the specific features those users will be leveraging.
OneDrive for Business synchronization calculator This tool provides network bandwidth estimates based on how users use OneDrive for Business.
More Info Bandwidth Planning
You can learn more about bandwidth planning for Office 365 at: https://docs.microsoft.com/office365/enterprise/network-and-migration-planning.
Windows 10 Enterprise
A Microsoft 365 Enterprise license includes a license for the Windows 10 Enterprise edition operating system. Part of the process of adopting M365 will involve ensuring that all Windows client computers are running this edition of the Windows 10 operating system.
Organizations that have an existing Windows 7 or Windows 8.1 deployment should perform an in-place upgrade using System Center Configuration Manager or Microsoft Deployment Toolkit. System Center Configuration Manger (Current Branch) provides organizations with the most automated method of upgrading and migrating existing computers from previous versions of the Windows client operating system to Windows 10.
Organizations that are deploying new computers that have Windows 10 Enterprise edition version 1703 or later can use Windows Autopilot to trigger the deployment and configuration process by signing in using their school or work credentials. Organizations running the Pro edition can also have those computers automatically updated to the Enterprise edition through Windows Autopilot.
More Info M365 and Windows 10 Enterprise
You can learn more about the relationship between M365 and Windows 10 Enterprise edition at: https://docs.microsoft.com/microsoft-365/enterprise/windows10-infrastructure.
Information protection
When planning your organization’s M365 information protection strategy, the first and perhaps most important step is to liaise with the organization’s legal and compliance teams to determine which compliance standards, such as the General Data Protection Regulation (GDPR) or Health Insurance Portability and Accountability Act (HIPAA) that the organization is subject to. Once you’ve determined the specific compliance standards, or regulation to which your organization must adhere, you will need to make determinations for the following questions:
What are the appropriate security and information protection levels for our organization?
What is an appropriate document classification schema for our organization?
What steps must be taken to ensure the appropriate security level is configured within M365 and O365?
Is it necessary to configure privileged access management for M365 and O365?
Security and Information Protection Levels
M365 allows organizations to develop their own security and protection levels. While it’s possible to create a bewildering number of information protection security levels, doing so increases complexity both for end users attempting to understand which level is appropriate, and for compliance staff who have to make a determination as to whether the appropriate level has been selected.
Microsoft recommends that organizations plan to use at least three separate information protection security levels. As information protection security levels increase, data becomes more protected, but it also becomes more cumbersome for users to interact with that data. Only accessing the most sensitive data should require a user to go through a multi-factor authentication process each time they open a document. Microsoft suggests the following levels:
Baseline Organizations should have a minimum standard for the protection of data, identities, and the devices used to interact with organizational data.
Sensitive This intermediate standard is appropriate for data that is considered sensitive, but for which the most stringent security controls are not appropriate.
Highly regulated This standard requires the most stringent security controls, and is likely to be appropriate only for a small amount of the organization’s data. For example, you may require that data only be accessed from a managed device for a limited amount of time after a user has performed multi-factor authentication.
Classification Schemas
Classification schemas allow you to assign an information protection level to specific information such as a document or email message. Microsoft 365 includes the following three classification schemas:
Sensitive information types for Office 365 Office 365 automatically recognizes specific information types, such as credit card or passport numbers. You can leverage Office 365 sensitive information types to automatically apply data loss prevention rules and policies so that this data has the appropriate level of protection.
Office 365 retention labels Office 365 retention labels allow you to determine how long specific data should be stored in Exchange, SharePoint Online, and OneDrive for Business. Office 365 retention labels can use the security and information protection levels outlined earlier: baseline, sensitive, highly regulated, or the custom information protection levels determined by the organization.
Azure Information Protection (AIP) labels and protection AIP provides another set of options for the classification and protection of documents and email messages. An advantage of AIP is that it can be used with documents stored beyond Office 365 locations such as Exchange Online, SharePoint Online, and OneDrive for Business. AIP labels of protection can be applied automatically based on rules and conditions defined by an administrator, manually by users, or in conjunction with automatic recommendations displayed to users.
Improving Security Levels
When planning your M365 information protection strategy, you’ll need to go beyond information classification, retention policies, and information protection. You’ll also need to enable additional M365 security technologies. These technologies include:
Threat management policies You can configure threat management policies in the Security & Compliance Center. Policies include ATP (Advanced Threat Protection) anti-phishing, anti-malware, ATP Safe Attachments, ATP Safe Links, Anti-Spam (Mail Filtering) and Email Authentication.
Exchange Online tenant wide settings You can improve security by implementing appropriate Mail Flow, also known as Transport Rules, and enabling modern authentication, which allows you to then use multi-factor authentication (MFA).
SharePoint tenant wide settings Security can be strengthened by configuring external sharing settings. Options include limiting sharing to authenticated external users, allowing anonymous access links, configuring anonymous access link expiration, and default link types.
Azure Active Directory settings You can enhance security by configuring named locations, which is part of conditional access, and to also block apps that don’t support modern authentication.
Cloud App Security Cloud App Security allows organizations to improve their security posture by providing evaluations of risk, and alerts against suspicious activity and automatic remediation actions. Cloud App Security requires an M365, O365 or EMS E5 plan.
Privileged Access Management
The effectiveness of an information protection strategy depends on how secure the administrative accounts used to manage that strategy are. If the accounts that can be used to configure and manage an information protection strategy aren’t properly secured, then the information protection strategy itself can be easily compromised.
Privileged access management allows you to configure policies that apply just-in-time administrative principles to sensitive administrative roles. For example, if someone needs access to configure an information protection policy, they would need to go through an approval process to temporarily gain access to that set of rights as opposed to having an Azure AD account that had permanently been assigned those rights.
More Info Information Protection Infrastructure
You can learn more about M365 information protection infrastructure at: https://docs.microsoft.com/microsoft-365/enterprise/infoprotect-infrastructure.
Plan identity and authentication solution
Identity providers are the primary source of authority and host user and group accounts. When you select a primary source of identity, that location is where authoritative changes to an account or group are made. For example, if you perform a password change, the password change isn’t understood to apply unless it applies at the primary source of identity. For example, in a hybrid scenario it’s possible to change the password of an account that is replicated from an on-premises directory to a cloud based Azure Active Directory. You might change the password of the account in the cloud, but that change may be overwritten the next time synchronization occurs from the primary identity source.
M365 and O365 use Azure Active Directory (Azure AD) as the user and group identity and authentication service. This means that Azure AD stores user, group, and device account objects and is also responsible for performing M365 and O365 authentication. When deploying M365 and O365 you can choose whether identity management is cloud only or whether a relationship exists between an on-premises identity provider such as Active Directory Domain Services (AD DS) and Azure AD.
Cloud authentication
When you select cloud authentication, authentication occurs against Azure Active Directory. How you implement cloud authentication depends on whether or not your organization has an existing on-premises Active Directory Domain Services deployment and what your plans are for that deployment in the future.
Cloud-Only
The cloud-only authentication model addresses management of user and group accounts that exist only from within M365. You can create and manage users in the M365 admin center shown in Figure 1-27, in the Azure Active Directory portal or blade, or by using the appropriate PowerShell cmdlets.

A cloud only identity and authentication solution is appropriate if:
Your organization has not deployed an on-premises Active Directory Domain Services environment.
Your organization has a very complex on-premises directory solution and wants to avoid attempting to integrate it.
Your organization has an on-premises Active Directory Domain Services environment, but wants to run a pilot or trial of M365 and will worry about integrating with the existing environment if the pilot or trial proves successful.
Password Hash SYNC with Single Sign-On
When planning an identity and authentication solution using password hash synchronization, your organization will synchronize on-premises AD DS user accounts with the Azure AD service used by M365 and O365. When you adopt this strategy, cryptographic hashes of on-premises user passwords are synchronized to Azure AD.
The cryptographic hashing operation is one way. This means that it’s not possible to run a reverse cryptographic operation on the hash to derive the password it was generated from, although there are techniques that iterate possible passwords to see if they match a cryptographic hash should one manage to be captured. The use of cryptographic hashes means that the user passwords aren’t stored in Azure AD. When authentication occurs, the password the user enters has the same cryptographic operation performed on it, and the hash of that password is then compared to the one stored in Azure AD. If the hashes match, the user is authenticated. If the hashes do not match, the user is not authenticated. If a password is changed in the on-premises account database, a new password hash is calculated and the new cryptographic hash is synchronized to and stored in Azure AD.
Choose this method when you want to have on-premises Active Directory Domain Services remain the authoritative source for user accounts and the regulations that your organization is subject to allow for cryptographic hashes of passwords to be stored in the cloud. This solution requires Azure Active Directory Connect, which you’ll learn about in Chapter 2, “Manage User Identity and Roles”.
Pass-Through Authentication with Single Sign-On
When you implement pass-through authentication with single sign-on, you install a software agent on one or more on-premises Active Directory Domain Services (AD DS) domain controllers. When a user authenticates against Azure Active Directory, the request is passed through to the on-premises Active Directory instance through the agent to determine whether the authentication request is valid.
This solution is appropriate when your organization is constrained from allowing any form of password synchronization to the cloud. This may include being restricted from allowing cryptographic hashes of passwords to be stored in the cloud. In this scenario, you would choose pass through authentication with single sign-on as an appropriate solution. It is also appropriate where on-premises account states, password policies, and logon hours must be enforced. You’ll learn more about configuring pass-through authentication with single sign-on in Chapter 2, “Manage User Identity and Roles”.
Federated authentication
Federated authentication is an alternative to cloud authentication, although it’s often substantially more complicated to configure and maintain. Most organizations use Azure AD Connect to synchronize identity information between on-premises Active Directory Domain Services and Azure AD. Organizations that want to allow additional authentication options, such as smart-card based authentication, or third-party multi-factor authentication such as an RSA token device.
Federated Identity with Active Directory Federation Services
When you use federated identity with Active Directory Federation Services (AD FS), you deploy servers hosting the AD FS role on your organization’s on-premises network and perimeter network. You then will need to configure federation between your on-premises AD FS instance and Azure AD. When you implement this identity and authentication technology, users use the same authentication options to access M365 and O365 resources as they do on-premises resources. This authentication method is generally chosen by organizations that have authentication requirements that are not natively supported by Azure AD.
Third-Party Authentication and Identity Providers
Organizations that use a non-active Directory on-premises identity provider can integrate that identity provider with Azure AD through federation as long as that third party identity provider’s federation solution is compatible with Azure AD. When this solution is implemented, users are able to access M365 and O365 resources using their on-premises identity provider username and password.
More Info Understanding M365 and O365 Identity
You can learn more about understand identity at: https://docs.microsoft.com/office365/enterprise/about-office-365-identity.
Exam Tip
Remember, the difference between password hash sync with single sign-on and pass-through authentication with single sign-on.
Skill 1.3: Setup Microsoft 365 tenancy and subscription
This section deals with configuring Microsoft 365 tenancy and subscription settings. To master this skill you’ll need to understand which specific roles are appropriate for certain M365 workloads. You’ll also need to be able to evaluate the appropriateness of M365 for an organization, to plan and create a tenancy, and to upgrade existing subscriptions to M365.
Configure subscription and tenant roles and workload settings
The principle of least privilege suggests that organizations will be more secure if privileged users are assigned the minimum amount of administrative rights required to accomplish their roles. For example, rather than giving every IT support technician the M365 Global Administrator role, users that were responsible only for changing passwords would be assigned the Helpdesk Administrator (Password Administrator) role and IT support technicians that are responsible for assigning licenses should be assigned the License Administrator role. In this section you’ll learn about the M365 administrative roles and how they can be used to manage specific workload settings.
Global administrator
Global administrators have the most permissions over a Microsoft 365 tenancy. A global administrator has the following permissions:
View organization and user information
Manage support tickets
Reset user passwords
Perform billing and purchasing operations
Create and manage user views
Create, edit, and delete users
Create, edit, and delete groups
Manage user licenses
Manage domains
Manage organization information
Delegate administrative roles to others
User directory synchronization
Users that have the global administrator role in the Microsoft 365 tenancy have the following roles in Exchange Online:
Exchange Online admin
Company admin
SharePoint Online admin
Skype for Business Online admin
Billing administrator
Members of the billing administrator role are responsible for making purchases, managing Microsoft 365 subscriptions, managing support tickets, and monitoring the health of Office 365 services. Members of the billing administrator role have the following permissions:
View organization and user information
Manage support tickets
Perform billing and purchasing operations
Members of this role do not have any equivalent roles in Exchange Online, SharePoint Online, or Skype for Business Online.
Dynamics 365 service administrator
Users that hold the Dynamics 365 service administrator role can manage Dynamics 365 instances, including performing backup and recovery operations. Users that hold this role can also perform Dynamics 365 copy and reset actions. They can open support tickets with Microsoft and are able to view the service dashboard and message center.
Customer Lockbox access approver
Members of the Customer Lockbox access approver role manage customer lockbox requests for the tenancy. They will receive email notifications for Customer Lockbox requests. Users that hold this role can approve or deny requests using the Microsoft 365 Admin center. Users that hold this role are also able to enable and disable the Customer Lockbox feature. Only users that hold the Global Administrator role are able to reset the password of users that hold the Customer Lockbox access approver role.
Exchange administrator
The Exchange administrator role is also known as the Exchange Online Administrator role. Users who have delegated the Exchange Online administrator role are able to manage mailboxes and anti-spam policies for their tenancy. This includes being able to:
Recover deleted items from mailboxes
Configure how long deleted items will be retained before permanent deletion
Configure mailbox sharing policies
Configure Send As and Send on Behalf of delegates for a mailbox
Configure anti-spam and malware filters
Create shared mailboxes
More Info Exchange Online Administrator
You can learn more about Exchange Online administrator role at: https://docs.microsoft.com/office365/admin/add-users/about-exchange-online-admin-role.
Helpdesk (Password) administrator
Members of the Helpdesk (password) administrator role are responsible for resetting passwords for non-privileged users and other members of the password administrator role. Members of this role are also able to manage service requests and monitor service health. Members of this role have the following permissions:
View organization and user information.
Manage support tickets.
Reset non-privileged user passwords as well as passwords of other password administrators. Cannot reset passwords of global administrators, user management administrators, or billing administrators.
Manage the Exchange Online Help Desk admin role.
Manage the Skype for Business Online admin role.
License administrator
Users assigned the License administrator role are able to add, remove, and update license assignments for users. They can also manage group based licensing, as well as configure the usage location for users. Users assigned this role are unable to purchase or manage subscriptions, create or manage groups, or modify users beyond configuring usage location.
Skype for Business administrator
Users delegated the Skype for Business administrator role are able to perform the following tasks:
Set up dial-in conferencing
Set up PSTN calling
Transfer phone numbers to Skype for Business Online
Enable Skype Meeting Broadcast
Allow users to contact external Skype for Business users
Allow users to add external contacts from Skype
Determine who is able to view online presence
Enable and disable mobile notifications
Create customized meeting invitations
View Skype for Business Online online activity reports
Message center reader
Users assigned the message center reader role are able to view all posts made to the Microsoft 365 message center. Users assigned this role are also able to share these message with other users by forwarding those messages through email. Users assigned this role also have read access to a subset of admin center resources including users, groups, domains, and subscriptions.
Power BI service administrator
Users assigned the Power BI admin role have access to Microsoft 365 and Office 365 Power BI usage metrics. Users assigned this role are able to manage the organization’s usage of PowerBI.
Reports reader
Users that hold the reports reader role are able to view all Microsoft 365 activity reports, as well as any reports that are published through the reporting APIs.
Service administrator
Members of the service administrator role are able to manage service requests and monitor the health of services. Before a global administrator can assign the service administrator role to a user, the user must be assigned administrative permissions to one of the Office 365 services, such as SharePoint Online or Exchange Online. Service administrators have the following permissions over the assigned service:
View organization and user information
Manage support tickets
SharePoint administrator
Also known as the SharePoint Online administrator. Users delegated the SharePoint Online administrator role are able to use the SharePoint Online admin center. They are able to perform the following tasks:
Create and manage site collections
Manage site collections and global settings
Designate site collection administrators
Manage site collection storage limits
Manage SharePoint online user profiles
More Info Sharepoint Online Administrator
You can learn more about the SharePoint Online administrator role at: https://support.office.com/article/About-the-SharePoint-Online-admin-role-f08144d5-9d50-4922-8e77-4e1a27b40705.
Teams Communications administrator
Users that hold this role are able to manage the calling and meeting features of Teams. This includes the assignment of phone numbers as well as meeting policies. Users that hold this role are also able to use call analytics tools and troubleshooting tools.
Teams Communications support engineer
Users that hold this role are able to troubleshoot communications issues in Teams. They can access call analytics tools as well as view call record information for all call participants.
Teams Communications support specialist
Users that hold this role are able to troubleshoot communications issues in Teams. This role differs from the support engineer role in that the specialist can only view call record information for a specific user rather than all call participants.
Teams service administrator
Users that hold this role are able to administer all aspects of Microsoft Teams, except the assignment of licenses. Users that hold this role are able to:
Manage calling policies
Manage messaging policies
Manage meetings policies
Use call analytics tools
Manage users and their telephone settings
Manage M365 groups
User management administrator
Members of the user management administrator role are able to reset some user passwords, monitor service health, manage some user accounts and groups, and service requests. Members of this role have the following permissions:
View organization and user information
Manage support tickets
Reset the passwords of all user accounts except those assigned the global administrator, billing administrator, or service administrator roles
Create and manage user views
Can create, edit, and delete users and groups except users that are assigned global administrator privileges
Can manage user licenses
Have the Skype for Business Online admin role
Delegated administrator
Delegated administrators are people outside the organization that perform administrative duties within the Office 365 tenancy. Administrators of the tenancy control who is delegated administrator permissions. You can only assign delegated administrator permissions to users that have Office 365 accounts in their own tenancy.
When you configure delegated administration, you can choose one of the following permission levels:
Full administration When you assign the full administration role to a delegated administrator, that administrator has the same privileges as a member of the global admin role.
Limited administration When you assign the limited administration role to a delegated administrator, that administrator has the same privileges as a member of the password admin role.
More Info Delegated Administrators
You can learn more about delegated administrators at: https://support.office.microsoft.com/article/Partners-Offer-delegated-administration-26530dc0-ebba-415b-86b1-b55bc06b073e.
Manage role membership
You can assign an administrative role on the Edit user roles page of a Microsoft 365 user’s properties as shown in Figure 1-28. When you assign an administrative role, you specify the role that you want to assign, and an alternate email address. This allows you to perform password recovery if necessary. You can only add Microsoft 365 users to a role. You cannot add a Microsoft 365 group to a role.
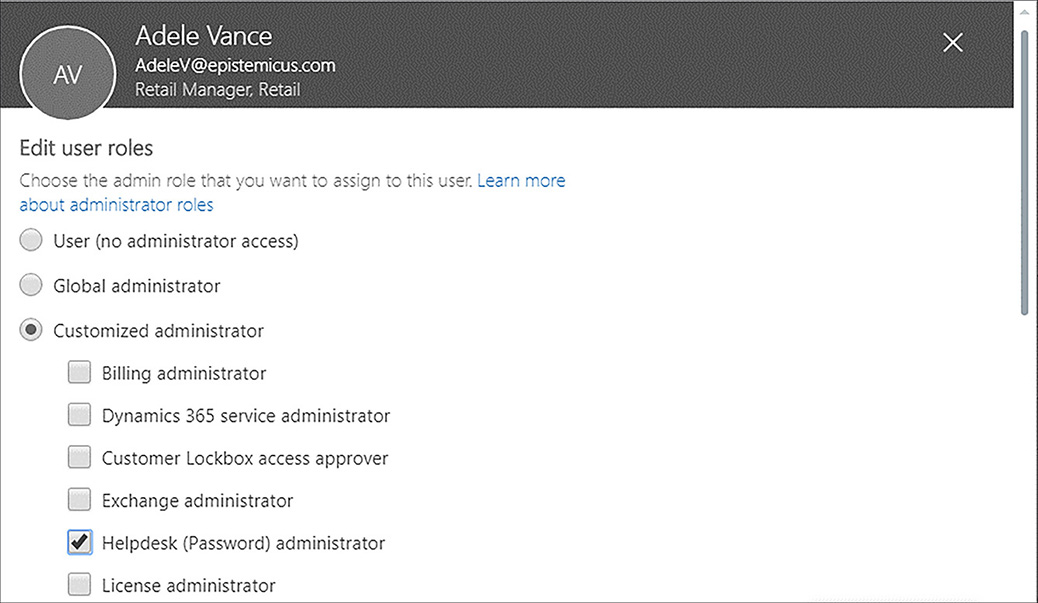
You can use this page of a user’s account to remove an assigned role. To do this, deselect the role that you want to remove and select the No Option and then click Save. You can view a list of users assigned a particular role by using the Active Users node in the M365 Admin Center and selecting the role whose membership you wish to view. Figure 1-29 shows the members of the Password Admins role.

Evaluate Microsoft 365 for organization
Organizations that are considering adopting Microsoft 365 can create a trial subscription which is available to existing O365 subscribers. A trial subscription allows the organization to create and use a Microsoft 365 tenancy as well as the associated Microsoft 365 services for a 30 day evaluation period. The trial period provides 25 licenses and the trial can be converted to a traditional Microsoft 365 subscription after the trial period is completed.
Prior to initiating the trial, an organization should perform some planning so that they will be able to use the 30 day evaluation period for maximum benefit. While the organization should approach the trial as a pilot that will eventually transfer into an ongoing subscription, certain actions, such as integrating the on-premises directory with Azure AD, should not be taken until the organization is satisfied that Microsoft 365 is appropriate and an ongoing subscription will be obtained.
You should ensure that you have done the following before initiating a Microsoft 365 trial:
Ensure that you have 25 users ready to participate in the trial. These users should be representative of how Microsoft 365 are used in your organization.
Provide the users with separate computers with trial versions of Windows 10 Enterprise edition installed. If your organization has no plans to migrate to Windows 10 in the near future, then Microsoft 365 might be less appropriate than separately adopting Office 365 and EMS. It is important to remember that Windows 7 falls out of support in January 2020 and that Windows 8.1 falls out of extended support in January 2023, so organizations cannot hold off adopting Windows 10 indefinitely. Microsoft 365 may be a less appropriate solution for an organization where all client computers run MacOS.
Ensure that meaningful workloads are run during the trial. It is important that a determination be made as to whether M365 is appropriate for your organization during the trial and that any potential hurdles are identified in the trial period rather than once full adoption of M365 has occurred.
Creating a test plan or use case involves developing a formal process to describe how the pilot will proceed and how the results of the pilot will be assessed. The test plan should involve the following general phases.
Deploying the Microsoft 365 tenancy that will be used for the pilot
Create user accounts for pilot users
Configure active use of email for pilot users
Deploy Office 365 ProPlus software
Enable pilot user access to Microsoft 365 services
Solicit pilot user feedback about the experience
Each organization’s plans will be slightly different. You need to ensure that pilot user feedback is recorded so that you can use it when evaluating how decisions made in the planning phase stack up against real-world outcomes, allowing you to make adjustments to the deployment phase.
It is possible to migrate the email accounts of a small number of users from your on-premises environment to Microsoft 365 while keeping the majority of your existing mailboxes in the on-premises mail solution. The method for doing this is termed Simple domain sharing for SMTP email addresses.
For example:
Your organization has provisioned the contoso.microsoftonline.com Office 365 tenancy.
Your organization has its own on-premises mail solution. It uses the contoso.com email suffix.
Your organization hosts its own DNS records on servers dns1.contoso.com and dns2.contoso.com.
An MX record in the contoso.com zone points to the host mailserver.adatum.com with a priority of 10.
An SPF record on in the contoso.com DNS zone the value v=spf1 mx include:contoso.com -all.
To configure Office 365 so that some pilot users are able to receive email through Microsoft 365, while others still use the on-premises solution, take the following steps:
Update the SPF record to “v=spf1 mx include:contoso.com include:spf.protection.outlook.com -all.
Confirm ownership within Microsoft 365 of the contoso.com DNS zone by configuring the appropriate TXT record.
Mark the domain as shared in Exchange Online. This is done from the mail flow node of Exchange Admin Center. Exchange Admin Center is available from the Microsoft 365 Admin Center by clicking the Exchange node under the ADMIN node.
You set the domain as an Internal Relay domain.
Configure the on-premises mail solution to configure mail forwarding of each pilot user account to the contoso.microsoftonline.com mail domain. For example, the on-premises mailbox for the [email protected] email account should forward all incoming email to [email protected].
Configure each pilot user’s account in Microsoft 365 to use the on-premises DNS zone mail domain. For example, Don Funk’s Microsoft 365 user account should be configured with a reply-to address of [email protected].
You can migrate the contents of pilot users’ on-premises mailboxes using Exchange Admin Center.
More Info Trial Microsoft 365
You can learn more about trialing Microsoft 365 if you have an existing O365 subscription at: https://docs.microsoft.com/office365/admin/try-or-buy-microsoft-365.
Plan and create tenant
The most important initial decisions that you make about your Microsoft 365 tenancy are the tenant name and the tenant region. You learned about tenant names and how the onmicrosoft.com domain you choose when creating the tenancy can never be removed, even if you add a custom DNS domain earlier in this chapter.
Tenant region determines which Microsoft 365 services will be available to the subscription, the taxes that will be applied as a part of the subscription charges, the billing currency for the subscription, and the Microsoft datacenter that will host the resources allocated to the subscription. For example, selecting United States for a region will mean that your organization’s Microsoft 365 tenancy is allocated resources in a United States datacenter. Selecting New Zealand currently means that your organization’s Microsoft 365 tenancy will be allocated resources in a datacenter in Australia because this is currently the closest Microsoft datacenter to New Zealand.
Unlike other Microsoft 365 settings, you cannot change the tenant region once you have selected it. The only way to alter a tenant region is to cancel your existing subscription and to create a new subscription. Selecting the correct tenant is very important from a compliance perspective and there are many stories of consultants in countries outside the US setting up US tenancies, only to find out later that they need to recreate the tenancy because customer data is stored outside the associated organization’s national borders.
More Info Where Tenancy Data is Stored
You can learn more about where tenancy data is stored at: https://products.office.com/where-is-your-data-located.
Upgrade existing subscriptions to Microsoft 365
Microsoft 365 is a combination of the following existing Microsoft products:
Office 365
Enterprise Mobility + Security (EMS)
Windows 10
An organization that already has Office 365 subscriptions for its users can upgrade those subscriptions to Microsoft 365, just as an organization that has Office 365 and EMS subscriptions can upgrade to Microsoft 365 licenses. You can purchase additional services in the Purchase Services node under Billing in the Microsoft 365 Admin Center, as shown in Figure 1-30. Once the appropriate licenses have been purchased, they can be assigned to users. If organizations need assistance, they can take advantage of Microsoft’s FastTrack for Microsoft 365 service, which provides information and advice on upgrading an existing deployment or performing a new deployment.

Monitor license allocations
You can manage Microsoft 365 tenant subscriptions from the Subscriptions node, which is under the Billing node, and is shown in Figure 1-31.

Assigning licenses
Microsoft 365 users require licenses to use Outlook, SharePoint Online, Skype for Business, and other services. Users who have been assigned the global administrator or user management administrator roles can assign licenses to users when creating new Microsoft 365 user accounts or can assign licenses to accounts that are created through directory synchronization or federation.
When a license is assigned to a user, the following occurs:
An Exchange Online mailbox is created for the user.
Edit permissions for the default SharePoint Online team site are assigned to the user.
The user will have access to Skype for Business features associated with the license.
For Office 365 ProPlus, the user will be able to download and install Microsoft Office on up to five computers running Windows or macOS.
You can view the number of valid licenses and the number of those licenses that have been assigned on the Licenses node, which is underneath the Billing node in the Microsoft 365 Admin Center.
More Info Assign Licenses
You can learn more about topic at: https://docs.microsoft.com/office365/admin/subscriptions-and-billing/assign-licenses-to-users.
Exam Tip
Remember that an Exchange Online mailbox is created for a user when an M365 license is assigned to that user.
Skill 1.4: Manage Microsoft 365 subscription and tenant health
This skill section deals with managing subscription and tenant health for an M365 deployment. To master this skill you’ll need to understand options when it comes to managing service health, how to create and manage service requests, how to create a health response plan, how to monitor service health, create and review reports, schedule and review security and compliance reports and schedule and review usage metrics.
Manage service health alerts
The Service Health dashboard allows you to view the health of all of the services related to your organization’s Microsoft 365 subscription. For example, the screenshot of the Service Health dashboard shown in Figure 1-32 shows that all services are in a healthy state.
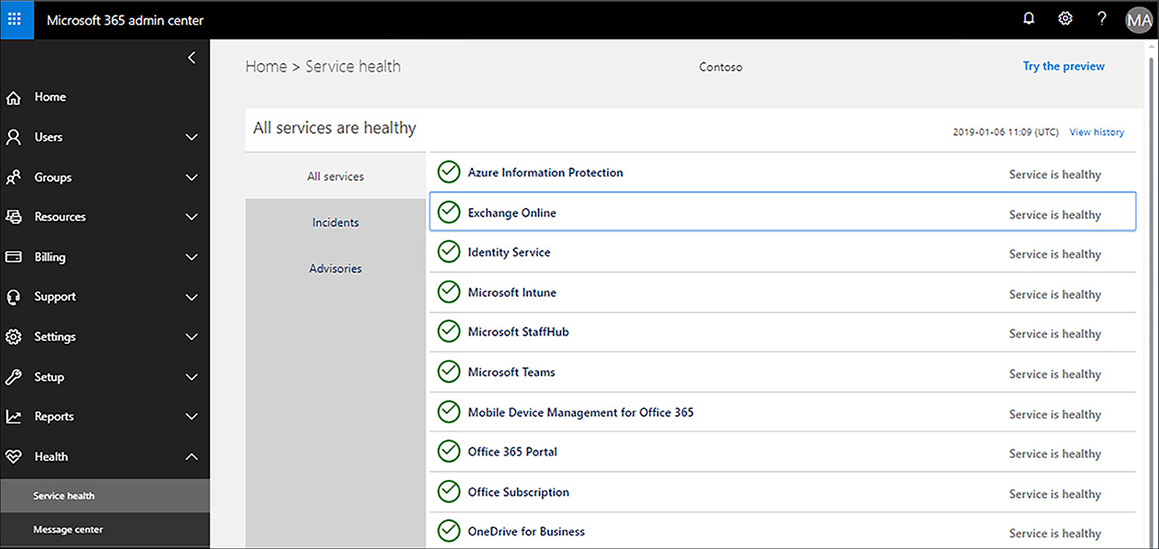
Services have the status definitions listed in Table 1-7.
Table 1-7 M365 Service Status Definitions
Status |
Definition |
Investigating |
Microsoft is aware of the issue and is conducting an investigation as to the cause and scope of impact. |
Service degradation |
Microsoft has confirmed that an issue is present in a specific M365 service or feature. This status is often assigned when a service is performing in a slower than normal state or when intermittent interruptions are occurring. |
Service interruption |
Microsoft is aware that significant disruption is occurring with the listed system. |
Restoring service |
Microsoft has determined the cause of the issue and is in the process of restoring full functionality. |
Extended Recovery |
Microsoft has restored full functionality for most users, but some users may require more time before the fix reaches them. |
Investigation suspended |
Microsoft has requested additional information from customers to determine the cause of a disruption. |
Service restored |
Microsoft has confirmed that remediation actions have resolved the problem and that the service is in a healthy state. View service issues to learn details of the disruption. |
Post-incident report published |
Microsoft has published a detailed post-incident report that includes root cause information and steps that have been taken to ensure that the issue does not arise again. |
More Info Microsoft 365 Service Health
You can learn more about checking Microsoft 365 service health at: https://docs.microsoft.com/office365/enterprise/view-service-health.
History
Service health history displays the status history of services over the past 30 days. Figure 1-33 shows history over the last 7 days. This may allow you to diagnose issues that may have occurred previously that you were not aware of, such as if you needed to provide an explanation to a user as to why they were unable to access specific functionality over the weekend. Clicking on each item provides further details.

Create and manage service requests
Service requests allow tenant administrators to contact Microsoft to resolve problems. You can create a service request online through the Microsoft 365 Admin Center, or by telephone. To create a service request online, perform the following steps:
Sign into the Microsoft 365 Admin Center with an account that has tenant administrator privileges.
In the left pane, click Support. Under Support click New Service Request.
On the Need Help page, shown in Figure 1-34, provide information about what you require help with and click Get Help.
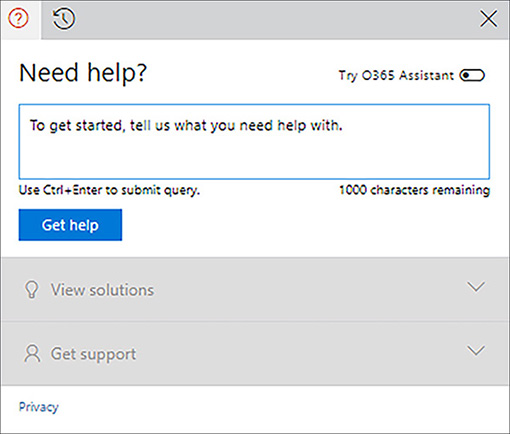
Figure 1-34 Get Help You’ll be provided with the results of a search query that may or may not actually help you resolve your problem. Under the query results, click New Service Request By Phone.
On the New Service Request By Phone Page, shown in Figure 1-35, verify your contact details. You will be provided with an estimated time before a M365 support representative will call you to address the service request. You can add attachments related to the support request. Click Call Me to enter the M365 telephone support call back queue.

Figure 1-35 Ask Microsoft to call you
More Info Service Requests
You can learn more about topic at: https://docs.microsoft.com/office365/admin/contact-support-for-business-products.
Create internal service health response plan
Microsoft provides a variety of methods for your organization to become aware that there is some form of service disruption beyond end users ringing the service desk to complain that they can’t get “the thing to work.” You can monitor these service communication channels so that you are aware of potential issues and take steps to notify users before they notice the impact of these events. Service communication channels include the following:
The Office 365 Admin App This app will provide M365 and O365 administrators with the ability to monitor service status from a mobile device. Tenant administrators are able to use the app to view service health information and maintenance status updates.
Office 365 Management Pack for System Center Operations Manager Organizations that use System Center Operations Manager to monitor their environment can install the O365 Management Pack so that alerts are visible within the Operations Manager console. The Management pack includes sections on Subscription Health, Service Status, Active Incidents, Resolved Incidents and Message Center. Figure 1-36 shows the Office 365 Monitoring Dashboard.

Figure 1-36 Office 365 Monitoring Dashboard Office 365 Service Communications API The O365 service communications API allows you to interact with O365 service communications in a manner that suits your organization. This API provides you with a method of connecting existing monitoring tools to O365 service communications. The API allows you to monitor real-time service health, message center communications, and planned maintenance notifications.
More Info Service Health Response
You can learn more about service health response at: https://docs.microsoft.com/office365/servicedescriptions/office-365-platform-service-description/service-health-and-continuity.
Monitor service health
M365 provides administrators with information about upcoming maintenance events through planned maintenance notifications. You can view planned maintenance events by navigating to the message center and setting the view to Plan For Change, as shown in Figure 1-37.
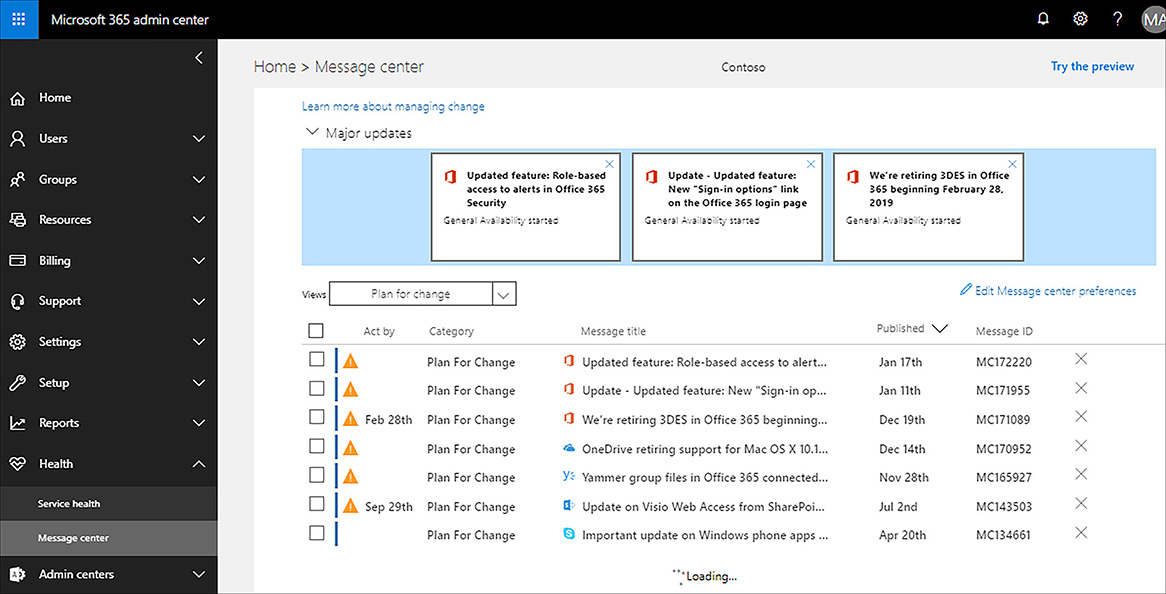
More Info Service Health Dashboard
You can learn more about the Service Health dashboard at: https://docs.microsoft.com/office365/enterprise/view-service-health.
Schedule and review security and compliance reports
Microsoft 365 security and compliance reports, shown in Figure 1-38, are split across four categories. These reports allow you to view how security and compliance rules and technologies are being used across your Microsoft 365 organization.
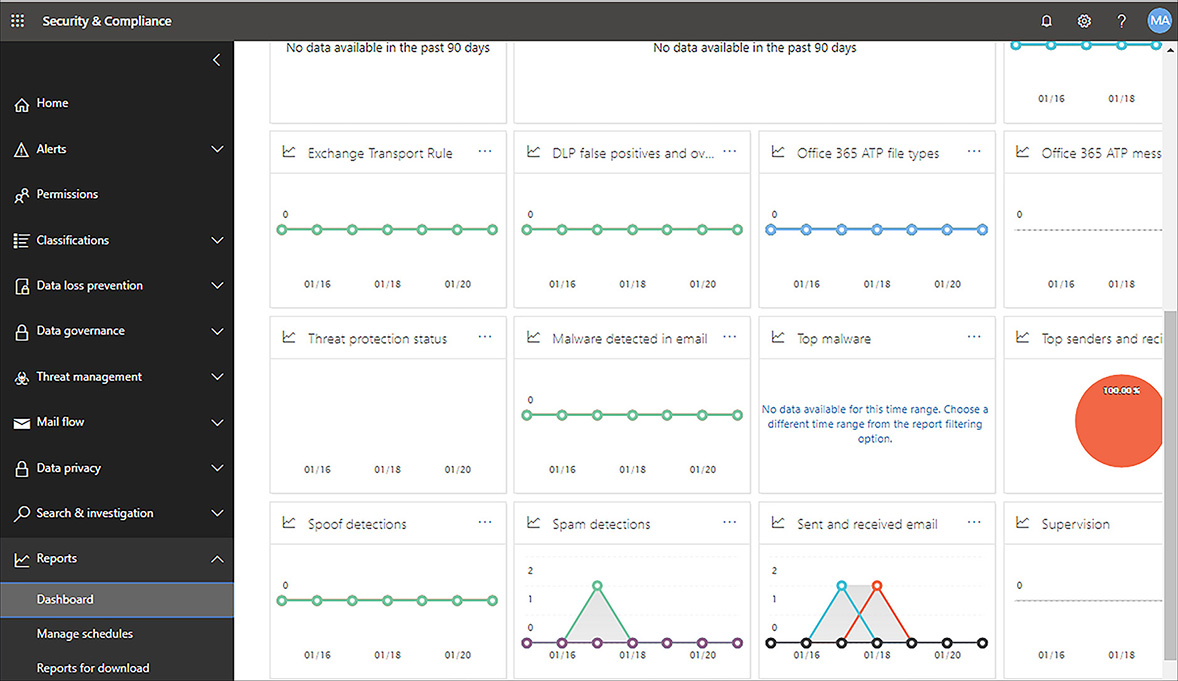
You need the following permissions to view reports in the Security and Compliance center:
You need to have been assigned the Security Reader Role in Exchange. This role is assigned by default to the Organization Management and Security Reader role groups.
You will need to have been assigned the DLP Compliance Management Role in Security & Compliance Center to view DLP reports and policies. This role is assigned by default to the Compliance Administrator, Organization Management, and Security Administrator role groups.
More Info Security and Compliance Reports
You can learn more about the Office 365 security and compliance reports at: https://docs.microsoft.com/office365/securitycompliance/reports-in-security-and-compliance.
Auditing reports
The following security and compliance reports are available through the Security and Compliance Center:
Office 365 Audit Log report View user and admin activity for the M365 organization including viewing changes made to administrator role groups.
Azure AD reports This option allows you to view Azure Active Directory reports including reports for unusual or suspicious sign-in activity. It requires a paid Azure Active Directory subscription.
Exchange Audit reports Use this report to search for mailboxes accessed by people other than their owners. Requires mailbox audit logging to be enabled.
Data Loss Prevention reports
The following Data Loss Prevention (DLP) reports are available through the Office 365 Admin Center:
Top DLP policy matches for mail Allows you to view the top DLP policy matches for sent and received email.
Top DLP rule matches for mail Allows you to view the top DLP rule matches for sent and received email.
DLP policy matches by severity for mail Allows you to track DLP policy matches by severity.
DLP policy matches, overrides, and false positives for mail Allows you to view DLP matches, overrides, and false positives for incoming and outgoing messages.
Protection reports
The following protection reports are available through the Office 365 Admin Center:
Top senders and recipients This report allows you to view the top mail senders, the top mail recipients, the top spam recipients, and the top malware recipients across the Office 365 subscription.
Top malware for mail This report shows the amount of malware received through e-mail for the reporting period.
Malware detections This report shows the amount of malware sent and received through the Office 365 subscription for the reporting period.
Spam detections This report shows the amount of spam on the basis of the content being filtered or the original sending host being blocked.
Sent and received mail This report shows the amount of sent and received mail categorized by good mail, malware, spam, and messages dealt with by rules.
Rules reports
The following rules reports are available through the Office 365 Admin Center:
Top rule matches for mail This report allows you to view the number of messages based on sent and received transport rule matches.
Rule matches for mail This report shows all rule matches for received and sent email.
Schedule and review usage metrics
Activity Reports, shown in Figure 1-39, allow you to view how users in your organization are using Microsoft 365 services. You can review reports over periods of 7 days, 30 days, 90 days and 180 days. Reports are not generated immediately, but become available after 48 hours.

Reports can be viewed by users who hold the following roles:
Office 365 global administrator
Exchange administrator
SharePoint administrator
Skype for Business administrator
Report reader
Teams Service Administrator
Teams Communications Administrator
Email Activity
The Email Activity report, shown in Figure 1-40, shows the number of send, receive, and read actions across the organization, with a per user breakdown. You can use this report to get high level information about email traffic at your organization, including the last activity date, the number of send actions, receive actions, and read actions. You can use this report to view email activity over the last 7 days, 30 days, 90 days and 180 days.

More Info Email Activity Report
You can learn more about the email activity report at: https://docs.microsoft.com/office365/admin/activity-reports/email-activity.
Mailbox Usage
The Mailbox Usage report, shown in Figure 1-41, shows the total number of mailboxes, the total number of active user mailboxes, the amount of storage used across all mailboxes, and the mailboxes by quota status (good, warning issued, send prohibited, and send/receive prohibited). You can also view the number of deleted items, the last activity date, and the number of items in each user’s mailbox. The report allows you to view data from the last 7 days, 30 days, 90 days and 180 days.
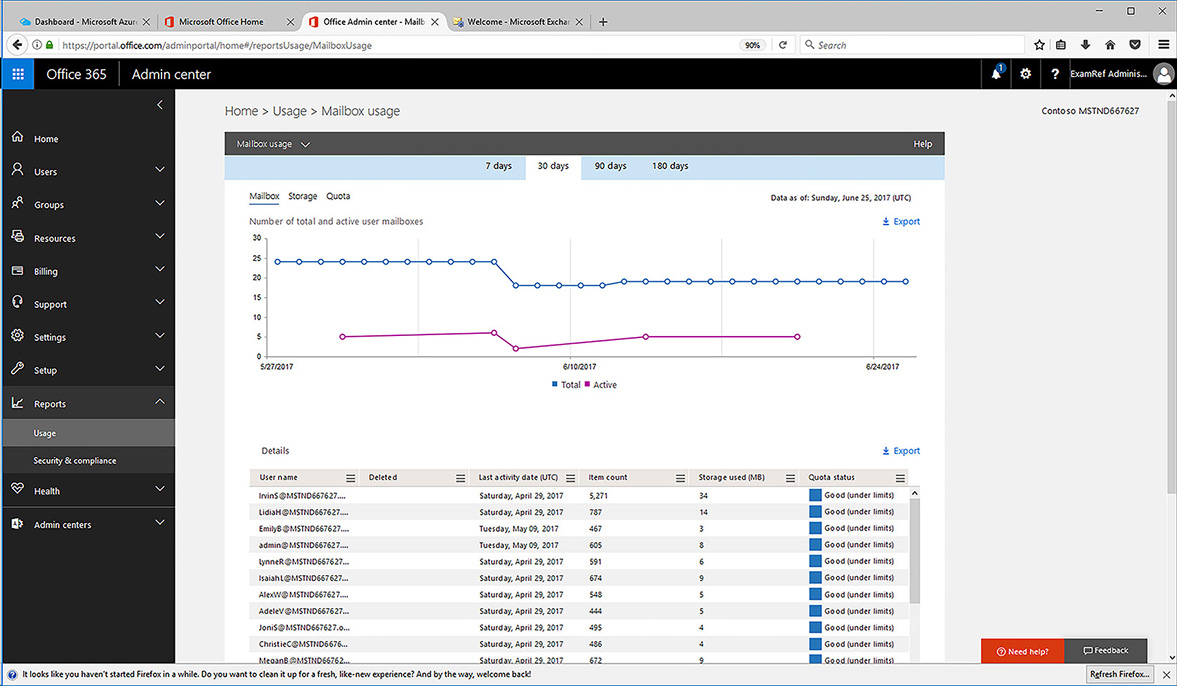
More Info Mailbox Usage Report
You can learn more about the mailbox usage report at: https://docs.microsoft.com/office365/admin/activity-reports/mailbox-usage.
Office Activations
The Office Activation report provides data on the users who have activated their Office 365 subscription on one or more devices. You can use it to determine activations for Office 365 ProPlus, Project, and Visio Pro for Office 365. You can also view activation information including whether the product was activated on a computer running Windows, macOS, or devices running the iOS or Android mobile operating systems. This report is displayed in Figure 1-42.
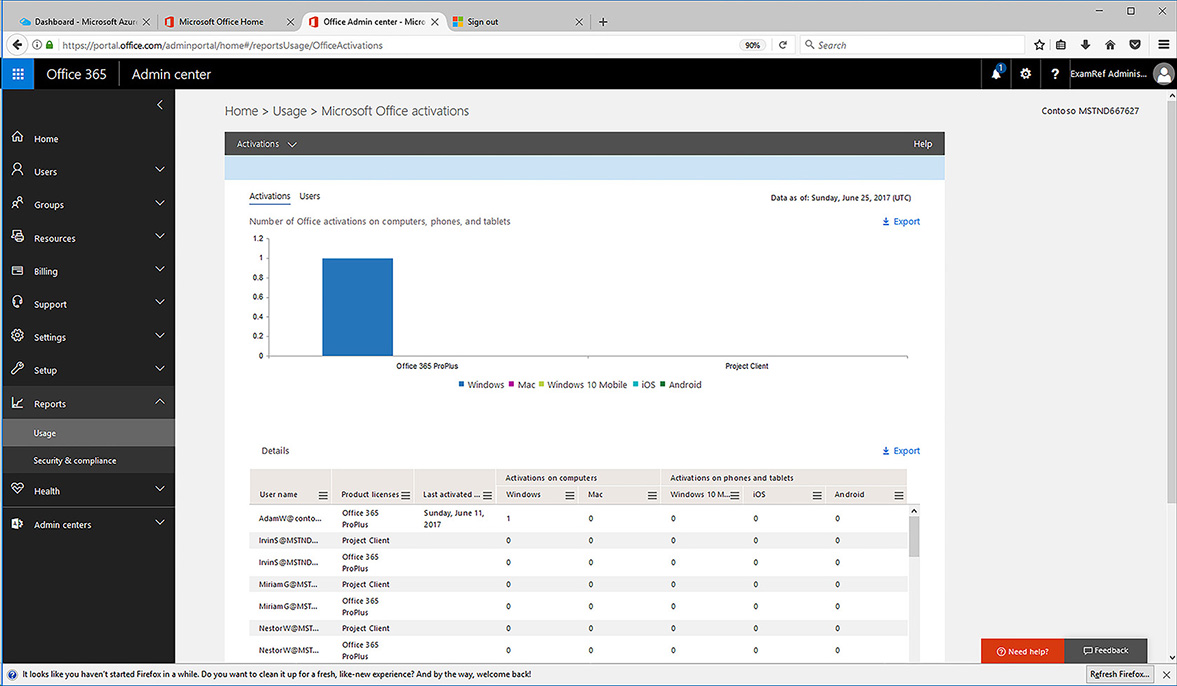
More Info Office Activations Report
You can learn more about the Activations report at: https://docs.microsoft.com/office365/admin/activity-reports/microsoft-office-activations?view=o365-worldwide.
Active Users
The Active Users report, shown in Figure 1-43, provides information on the number of licenses that are being used across your organization. It also provides you with information about the products licensed by specific users. You can use this report to determine which products are not fully being used.

More Info Active Users Report
You can learn more about the Active Users report at: https://docs.microsoft.com/office365/admin/activity-reports/active-users?view=o365-worldwide.
Email App Usage
The Email App Usage report provides information on the email app used by each user to access Exchange Online. Each app used to interact with Exchange Online is tracked, so you can determine the app usage profile of each user. This report tracks usage through Outlook on Windows, Outlook on Mac OSX, Outlook on the web, as well as mobile clients.
More Info Email App Usage Report
You can learn more about the Email App Usage report at: https://docs.microsoft.com//office365/admin/activity-reports/email-apps-usage.
OneDrive for Business User Activity
The OneDrive Activity report, also known as the OneDrive for Business Activity Report, allows you to view the activity of all Office 365 OneDrive for Business users. This report, shown in Figure 1-44, provides information on the following:
Last OneDrive for Business Activity
Files viewed or edited
Files synced
Files shared internally
Files shared externally
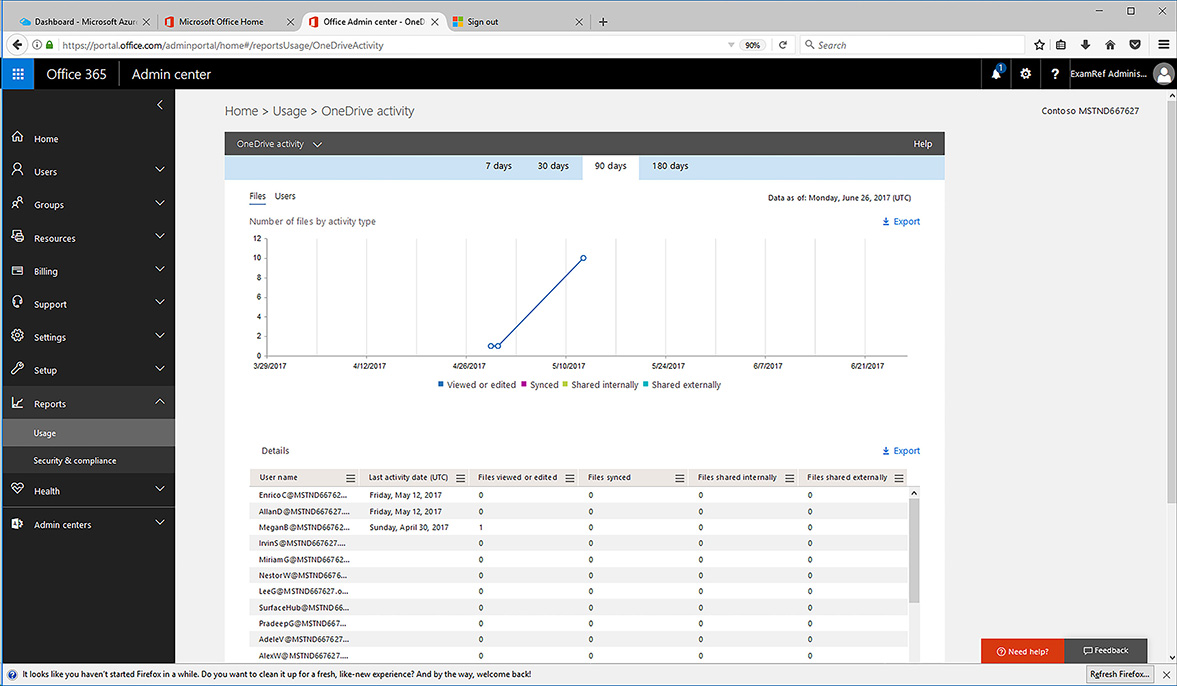
Figure 1-44 OneDrive for Business Activity Report
More Info Onedrive for Business Activity Report
You can learn more about the OneDrive for Business Activity report at: https://docs.microsoft.com/office365/admin/activity-reports/onedrive-for-business-activity.
OneDrive for Business usage
The OneDrive for Business usage report, provides a high-level overview of how files are used in your organization’s OneDrive for Business subscription. The report, shown in Figure 1-45, provides details of the following:
URL This is the file’s location within OneDrive for Business
Owner Office 365 account associated with the file
Last activity date (UTC) Last date that the file was accessed
Files Number of files associated with the user
Active files Number of user’s files being actively used
Storage used (MB) Storage consumed by the user’s files
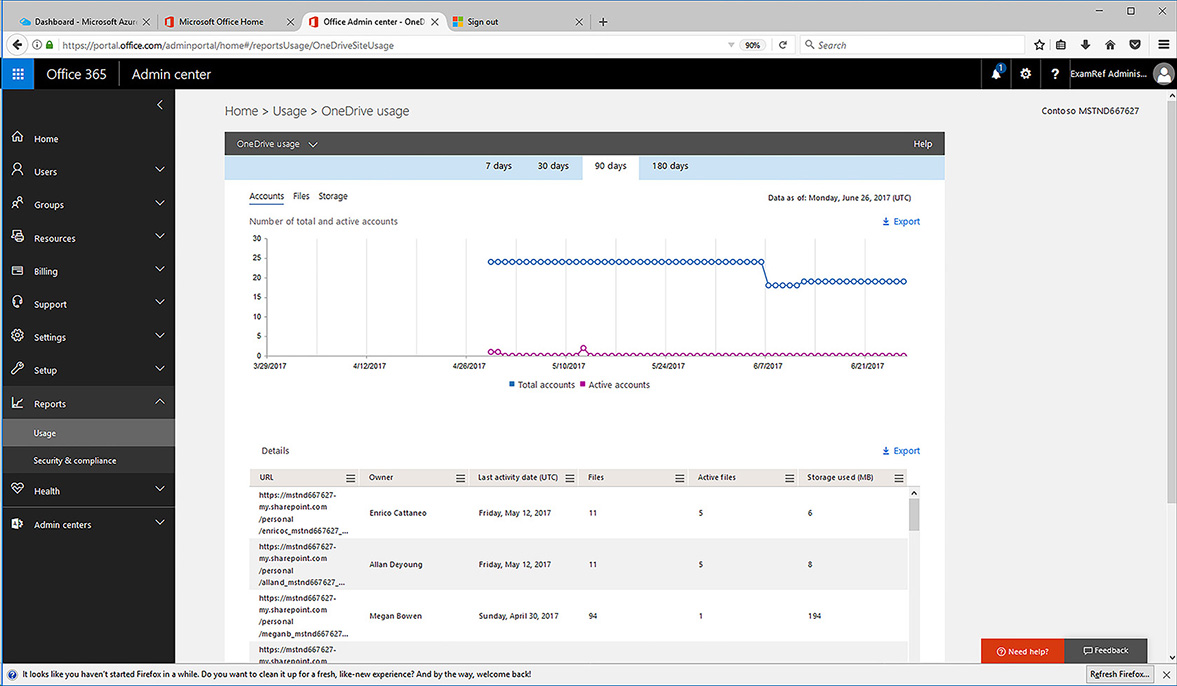
Figure 1-45 OneDrive Usage Report
More Info Onedrive for Business Usage Report
You can learn more about the OneDrive Usage report at: https://docs.microsoft.com/office365/admin/activity-reports/onedrive-for-business-usage.
SharePoint Activity
The SharePoint Activity report allows you to track how Microsoft 365 users in your organization interact with SharePoint Online. This report provides the following information on a per-user basis:
Last activity date The last time the user interacted with SharePoint Online.
Files viewed or edited This is the number of files that the user interacted with that were hosted on the organization’s SharePoint Online instance.
Files synced This is the number of files that have synchronized between the devices used by the user and SharePoint Online.
Files shared internally The number of files shared with other Office 365 users through SharePoint Online.
Files shared externally The number of files shared through Office 365 with external users.
More Info Sharepoint Activity Report
You can learn more about the SharePoint Activity report at: https://docs.microsoft.com/office365/admin/activity-reports/sharepoint-activity.
SharePoint Site Usage
The SharePoint Site Usage report, shown in Figure 1-46, provides information on how SharePoint sites in your organization’s SharePoint Online deployment, are used. This report provides you with the following information:
Site URL The address of the site within your SharePoint deployment
Site owner Microsoft 365 user assigned ownership of the site
Last Activity date Last time activity was recorded against the site
Files Number of files stored on the SharePoint online site
Files viewed or edited Files that have recently been viewed or modified
Storage used The amount of storage consumed by files on the site

Figure 1-46 SharePoint Site Usage Report
More Info Sharepoint Site Usage Report
You can learn more about the SharePoint Site Usage report at: https://docs.microsoft.com/office365/admin/activity-reports/sharepoint-site-usage.
Skype for Business Activity
The Skype for Business Activity report provides you with information on Skype for Business activity on a per-user basis across your Office 365 organization. This includes information on the following:
Last activity date
Peer-to-peer
Organized conferences
Participated in conferences
More Info Skype for Business Online Activity Report
You can learn more about the Skype for Business Online Activity report at: https://docs.microsoft.com/SkypeForBusiness/skype-for-business-online-reporting/activity-report.
Skype for Business Peer-To-Peer Activity
The Skype for Business Online Peer-To-Peer Activity report provides information about communication that occurs between individual Skype for Business users outside of Skype for Business conferences. This report tracks the following activity on a per-user basis:
Last activity date
Number of peer-to-peer Instant Messaging sessions
Number of peer-to-peer audio conferences
Number of peer-to-peer video conferences
Number of peer-to-peer application sharing sessions
Number of peer-to-peer file transfers
Number of minutes spent in peer-to-peer audio conferences
Number of minutes spent in peer-to-peer video conferences
More Info Skype for Business Peer-to-peer Activity Report
You can learn more about the Skype for Business Peer-to-Peer report at: https://docs.microsoft.com/SkypeForBusiness/skype-for-business-online-reporting/peer-to-peer-activity-report.
Skype for Business Conference Organizer Activity
The Skype for Business Conference Organizer Activity Report provides information about conferences initiated by your organization’s Skype for Business users. This report presents the following information over a 7 day, 30 day, 90 day, and 180 day time frame by username:
Last activity
IM sessions organized
Audio and Video sessions organized
Application sharing conferences organized
Web conferences organized
Dial-in/out – 3rd party conferences organized
Total audio/video minutes of conferences organized by this user
Total number of minutes where Microsoft functioned as the dial-in audio conferencing provider
Total number of minutes where Microsoft functioned as the dial-out audio conferencing provider
More Info Skype for Business Conference Organizer Activity Report
You can learn more about the Skype for Business Conference Organizer Activity report at: https://docs.microsoft.com/SkypeForBusiness/skype-for-business-online-reporting/conference-organizer-activity-report.
Skype for Business Conference Participant Activity
The Skype for Business Conference Participant Activity report provides information about Skype for Business from a participant, rather than an organizer perspective. This report includes the following information on a per-user basis:
Last activity date
Number of IM conferences the user participated in
Number of audio and video conferences the user participated in
Number of application sharing conferences that the user participated in
Number of web conferences that the user participated in
Number of Dial-in/out – 3rd party conferences that the user participated in using a 3rd party audio conferencing provider where Skype for Business was used for audio
Total audio and video minutes
More Info Skype for Business Conference Participant Activity Report
You can learn more about the Skype for Business Conference Participant Activity report at: https://docs.microsoft.com/SkypeForBusiness/skype-for-business-online-reporting/conference-participant-activity-report.
Yammer Activity
The Yammer Activity report provides information about how much users in your organization are interacting with Yammer. It provides information about the number of unique users posting to Yammer, how many read a specific message, how many like a specific message and the general level of interaction across the organization.
More Info Yammer Activity Report
You can learn more about the Yammer Activity report at: https://docs.microsoft.com/office365/admin/activity-reports/yammer-activity-report.
Yammer Device Usage
The Yammer Device Usage report provides you with data about the specific types of devices that are used to interact with the organization’s Yammer instance. The report provides information on:
Number of daily users by device type
Number of users by device type
Per user device usage
More Info Yammer Device Usage Report
You can learn more about the Yammer Device Usage report at: https://docs.microsoft.com/office365/admin/activity-reports/yammer-device-usage-report.
Yammer groups activity report
The Yammer Groups activity report provides information about how users in your organization interact with Yammer groups. The report will provide you with information on the number and identity of groups that are created as well as how much utilization those groups are receiving. Activity tracked includes:
Group name
Group administrator
Group type
Connection to Office 365
Last Activity Date
Members
Messages posted
Messages read
Messages liked
More Info Yammer Groups Activity Report
You can learn more about the Yammer groups activity report at: https://docs.microsoft.com/office365/admin/activity-reports/yammer-groups-activity-report.
Microsoft Teams User Activity
The Microsoft Teams User Activity report provides you with information about how users in your organization interact with the tenancy’s Microsoft Teams instance. Activities that are tracked by the report include:
Channel messages
Chat messages
Calls
Meetings
Other activities
More Info Microsoft Teams User Activity Report
You can learn more about the Microsoft Teams User Activity report at: https://docs.microsoft.com/office365/admin/activity-reports/microsoft-teams-user-activity.
Microsoft Teams Device Usage
The Microsoft Teams Device Usage report provides information about the specific devices that M365 users are using to interact with the tenancy’s Microsoft Teams instance. The report will track the following operating systems and devices:
Windows
Mac
Web
iOS
Android Phone
Windows Phone
More Info Microsoft Teams Device Usage Report
You can learn more about the Microsoft Teams Device Usage report at: https://docs.microsoft.com/office365/admin/activity-reports/microsoft-teams-device-usage.
Schedule Reports
You can use the Security & Compliance center to regularly generate reports according to a schedule. To complete this task, perform the following steps:
In the M365 Security & Compliance center, navigate to Dashboard under Reports.
Select the report that you wish to schedule.
Click the Create Schedule button. Figure 1-47 shows this button on the Sent and Received email report.

Figure 1-47 Sent and received email report On the Create Schedule page, shown in Figure 1-48, you can configure the report to be generated according to the default frequency by clicking Create Schedule. You can also click Customize Schedule to create a customized schedule for the report.
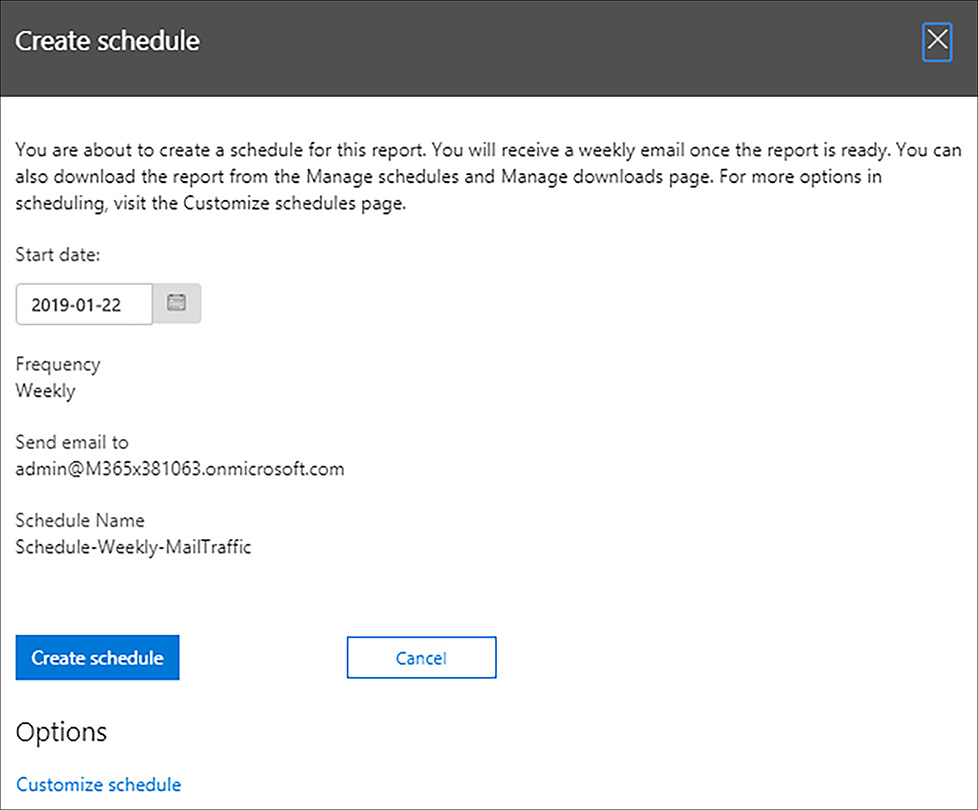
Figure 1-48 Create Schedule
More Info Schedule Reports
You can learn more about scheduling reports at: https://docs.microsoft.com/office365/securitycompliance/create-a-schedule-for-a-report.
Exam Tip
The best way to learn about the reports available in Microsoft 365 is to access them through your organization’s subscription or to create your own trial subscription and to investigate them there.
Skill 1.5: Plan migration of user and data
This section deals with migrating data from an existing on-premises deployment to Microsoft 365 and Office 365. To master this skill you’ll need to understand how to identify data that needs to be migrated, how to identify mailboxes to migrate, how to migrate them, how to migrate users and groups, and how to import PST files.
Identify data to be migrated and method
Each organization will have a different set of challenges when it comes to identifying which data should be migrated from their on-premises environment to Microsoft 365. This is because each organization’s data is unique and the data that is critical to one organization might be seen as trivial to another. When assessing which data needs to be migrated to Microsoft 365, consider the following questions:
What on-premises data is critical to the organization? Planning a migration to Microsoft 365 gives an organization a chance to assess whether all of the data that it retains actually needs to be retained.
What data needs to be moved from the on-premises environment to Microsoft 365? Not every file and folder needs to be migrated to Microsoft 365. For example, do files stored on file servers that haven’t been accessed for the last two years need to be migrated to Microsoft 365?
What data will remain on-premises? Moving to M365 doesn’t mean that all data must be removed from on-premises locations. There may be compliance reasons, especially in countries that do not have Microsoft datacenters, that dictate that certain types of data must remain within specific geographic boundaries that cannot be stored in Microsoft’s cloud.
Where is the data currently located? For example, does your organization use file shares? Do you want to move all file share data across to SharePoint Online or will you implement a solution such as Azure File Sync? Is the data located on end-user computers?
Once you’ve determined which data needs to be migrated to Microsoft 365, you can determine the appropriate method to perform that migration. You’ll learn about migration methods later in this chapter.
Moving Data to SharePoint Online
There are a variety of methods that you can use to migrate data from an on-premises environment to SharePoint Online. These methods are listed in Table 1-8.
Table 1-8 Data migration methods
Method |
Description |
SharePoint Migration Tool |
This tool allows you to migrate files from on-premises SharePoint document libraries, lists and regular file shares to SharePoint Online |
OneDrive sync client |
Allows you to drag and drop files on a client computer and have those files sync either with OneDrive for Business or SharePoint Online |
Manual upload |
Manually upload files one at a time to the SharePoint Online tenant |
More Info Migrating Data to Sharepoint Online
You can learn more about migrating SharePoint data to SharePoint Online at: https://docs.microsoft.com/sharepointmigration/migrate-to-sharepoint-online.
Migrating known local folders to OneDrive for Business
Many organizations have known folders such as the Documents folders directed to an on-premises file share. As part of a migration strategy to move these files to Office 365, you can redirect these folders from an on-premises file share to OneDrive for Business. This can be done through group policy for organizations where computers are members of Active Directory domains. In organizations where computers aren’t members of a domain, you will have to instead use more manual and intensive methods of moving files into folders used by OneDrive for Business. This process is manual because in non-domain environments where users have more freedom to configure computers as they see fit, rather than being subject to domain policy, users are more likely to store their files in idiosyncratic locations.
When redirection of known folders to OneDrive for Business is implemented, users continue to use folders such as the Documents folder in the normal manner. In the background, the contents of these known folders will automatically be synced with OneDrive for Business. When using this method, Group Policy will determine if the OneDrive for Business folder has been configured on the target computer. If the folder doesn’t exist, known folders, such as the Documents folder, will not be redirected. once the OneDrive for Business folder is present, because the sync client has been deployed.
When you have redirected known folders, shortcuts to those folders will point to the new location linked with OneDrive for Business. The existing folder structure will still be in place, and the contents of those folders will remain in the original location. Similarly, if known folders are currently redirected to network shares, you will need to migrate data from that location to OneDrive for Business after you redirect the known folders to OneDrive for Business. Microsoft recommends scripts that use XCopy or Robocopy to perform this task.
You can only use this strategy if OneDrive files are being stored in the default location, which is %userprofile%OneDrive - <TenantName>. If OneDrive for Business files are being stored in another location, you can’t use the known folder redirection strategy.
As mentioned earlier, the known folder redirection strategy requires that computers be members of an Active Directory Domain Services Domain. The other step to take is to download and install the OneDrive for Business Group Policy objects onto a Domain Controller. The ADML and ADMX files are located in the OneDrive installation directory, %localappdata%MicrosoftOneDriveBuildNumberadm, of a computer with the OneDrive client installed. Redirecting known folders to OneDrive involves the following steps:
Open the Group Policy Management Editor and edit the policy that will apply to users whose folders you will redirect to OneDrive for Business.
Edit the User ConfigurationPoliciesAdministrative TemplatesOneDrivePrevent users from changing the location of their OneDrive policy, and set it to enabled. This will block users from moving their OneDrive for Business folder.
Create a new environment variable using the User ConfigurationPreferencesWindows Settings edit the Environment item and create a new Environment Variable named OneDriveSync that has the value %userprofile%<SyncFolder>, where <SyncFolder> is the name of your default folder. An example is OneDrive – Adatum, as shown in Figure 1-49.

Figure 1-49 New environment setting On the Common tab of the New Environment Properties dialog box, select Item-level targeting, click Targeting, click New Item, and then click File Match. Choose the Folder that exists from the Match type drop down, and in the Path box type %userprofile%<SyncFolder>, where <SyncFolder> is the name of your OneDrive folder, as shown in Figure 1-50.
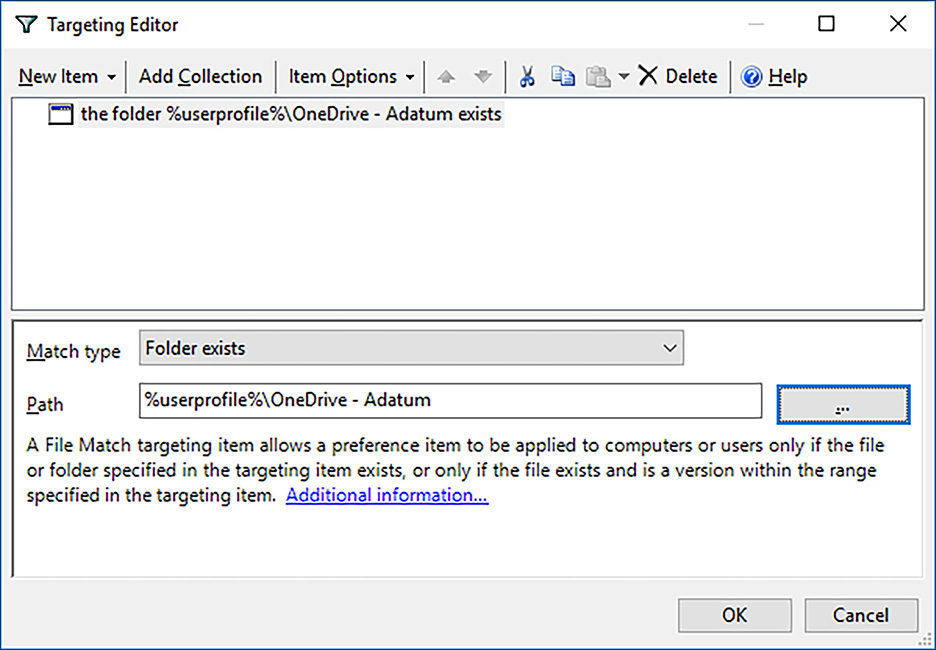
Figure 1-50 Folder targeting Click OK twice to close the Targeting Editor dialog box and the New Environment Properties dialog box.
Edit the properties of the User ConfigurationPoliciesWindows SettingsFolder RedirectionDocuments node, and choose Basic – Redirect Everyone’s Folder To The Same Location. Under Target Folder Location, choose Redirect To The Following Location. In the Root Path box, type %OneDriveSync%Documents option, as shown in Figure 1-51.
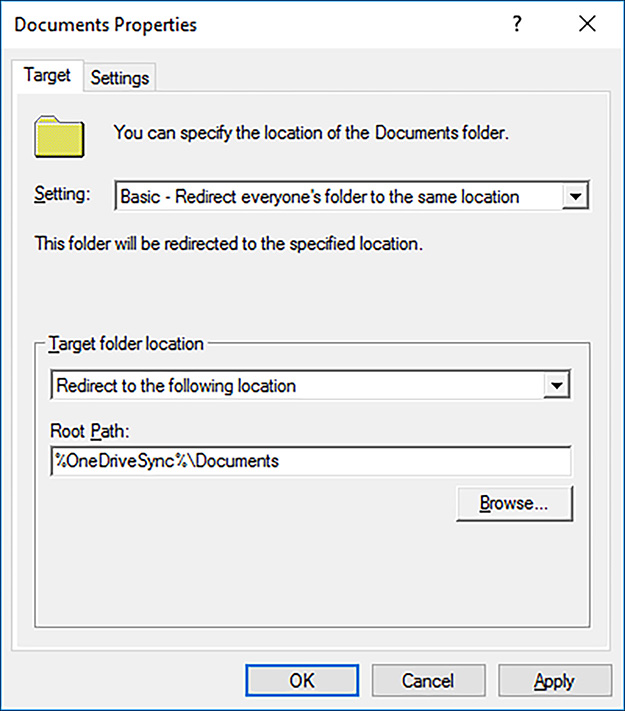
Figure 1-51 Document redirection policy In the Settings tab, clear the Move The Contents Of Documents To The New Location check box. The reason you do this is that if there are files in both locations with the same name, you may lose data. If there are no files in the new location, you can leave this setting enabled and files will be migrated without the need for scripts.
Use this same process to redirect other known folders such as Pictures, Music, Videos, Downloads, and others.
More Info Redirecting Folders
You can learn more about Redirecting known folders to OneDrive for Business at: https://docs.microsoft.com/onedrive/redirect-known-folders.
More Info Migrating Organizational Data to Office 365 Enterprise
You can learn more about migrating organizational data to Office 365 Enterprise: https://docs.microsoft.com/office365/enterprise/migrate-data-to-office-365
Identify users and mailboxes to be migrated and method
Adopting Microsoft 365 and Office 365 provides organizations with the ability to determine whether all of the users and mailboxes that exist in the on-premises environment will be required in the cloud hosted environment. As is the case with the migration of data, there may also be regulatory and compliance reasons why certain mailboxes in a hybrid deployment must be kept on on-premises Exchange Servers, since the data that they host may need to be kept within specific national boundaries. This is, something that can be a challenge when deploying Microsoft 365 in countries that do not have Microsoft datacenters. Which users and mailboxes can be migrated will depend on the organization and its needs. Organizations must also keep in mind that user mailboxes in an Office 365 Enterprise E1 subscription cannot exceed 50 GB in size and that user mailboxes in an Office 365 Enterprise E3 and E5 subscription cannot exceed 100 GB in size. The Office 365 Enterprise E3 and E5 subscriptions allow archive mailboxes of unlimited size. Organizations that have users whose mailboxes exceed 100 GB in size may have to migrate some data to online archive mailboxes as they migrate those users to Exchange Online.
More Info Migrating Mail Accounts to Office 365
You can learn more about migrating email accounts to Office 365 Enterprise: https://docs.microsoft.com/Exchange/mailbox-migration/mailbox-migration
Remote move migration method
You use a remote move migration when you have an Exchange hybrid deployment. A hybrid deployment is where you have coexistence between an on-premises Exchange deployment and an Exchange Online deployment. You have to use a hybrid deployment and use the remote move migration method when you need to migrate more than 2,000 Exchange Server 2010, Exchange Server 2013, or Exchange Server 2016 mailboxes to Exchange Online.
With a hybrid deployment, you get the following advantages:
User accounts are managed through your on-premises tools.
Directory synchronization connects your on-premises Exchange organization with Exchange Online.
Users are able to use single-sign on to access their mailbox whether the mailbox is hosted in the on-premises Exchange organization or Exchange Online.
Email is routed securely between the on-premises Exchange deployment and Exchange Online.
Free/busy calendar sharing between users with mailboxes hosted in the on-premises Exchange organization and mailboxes hosted in Exchange Online.
Prior to performing a remote move migration you need to ensure the following prerequisites are met:
A hybrid deployment has already been configured between your on-premises Exchange organization and Exchange Online.
You need to have been assigned the appropriate permissions. For mailbox moves in a hybrid deployment, this means that you need to have an account that is a member of the Organization Management, or the Recipient Management role groups.
You need to have deployed the Mailbox Replication Proxy Service (MRSProxy) on all on-premises Exchange 2013 or Exchange 2016 Client Access servers.
Once these prerequisites have been met, you can move mailboxes from your on-premises Exchange deployment to Exchange Online by performing the following steps:
Create migration endpoint Migration endpoints host connection settings for an on-premises Exchange server running the MRSProxy service.
Enable MRSProxy service The MRSProxy service is hosted on on-premises Client Access servers. This service can be enabled using the Exchange Administration Console by selecting the Client Access server, editing the properties of the EWS virtual directory, and ensuring that the MRSProxy Enabled check box is selected.
Move mailboxes You can move mailboxes using the Office 365 tab in EAC on the on-premises Exchange server by creating a new migration batch in Exchange Admin Console, or by using Windows PowerShell. When moving mailboxes, you move some, not all mailboxes, at a time in groups that are termed batches.
Remove completed migration batches Once the migration of a batch is complete, remove the migration batch using Exchange Administration Center, or Windows PowerShell.
Re-enable offline access for Outlook on the Web If users have been migrated from on-premises Exchange Server to Office 365, it is necessary to reset the offline access setting in their browser.
More Info Remote Move Migration
You can learn more about remote move migrations at: https://docs.microsoft.com/exchange/hybrid-deployment/move-mailboxes.
Staged migration method
In a staged migration, you migrate mailboxes from your on-premises Exchange organization to Office 365 in groups, termed batches. You select a staged migration in the following circumstances:
Your organization has more than 2,000 on-premises mailboxes hosted in Exchange 2007. You can’t use a staged migration to migrate Exchange 2010 or later mailboxes. It is also important to remember that Exchange 2007 is no longer publicly supported by Microsoft as of mid-2017, and requires a specific support agreement.
Your organization intends to completely move its messaging infrastructure to Office 365.
Your available migration period is in the timeframe of several weeks to several months.
After migration completes, you still manage user accounts using on-premises management tools and have account synchronization performed with Azure Active Directory.
The primary domain name used for your on-premises Exchange organization must be configured as a domain associated with the tenancy in Office 365.
Staged migration involves the following general steps:
You create a CSV file that includes a row for every user who has an on-premises mailbox that you want to migrate. This is not every user in the organization, just those who you will migrate in a particular batch.
Create a staged migration batch using Exchange Admin Center, or using Windows PowerShell.
Trigger the migration batch. Once the migration batch is triggered, Exchange Online performs the following steps:
Verify that directory synchronization is enabled and functioning. Directory synchronization migrates distribution groups, contacts, and mail enabled users.
Verify that a mail-enabled user exists in Office 365 for every user listed in the batch CSV file.
Convert the Office 365 mail-enabled user to an Exchange Online mailbox for each user in the migration batch.
Configure mail forwarding for the on-premises mailbox.
Once these steps have been completed, Exchange Online sends you a status report informing you of which mailboxes have migrated successfully and which mailboxes have not migrated successfully. Successfully migrated users can start using Exchange Online mailboxes.
Once migration is successful, you convert the mailboxes of successfully migrated on-premises users to mail-enabled users in the on-premises Exchange deployment.
You configure a new batch of users to migrate and delete the current migration batch.
Once all users have been migrated, the administrator assigns licenses to Office 365 users, configures MX records to point to Exchange Online, and creates an Autodiscover record that points to Office 365.
Decommission the on-premises Exchange deployment.
More Info Staged Migration Method
You can learn more about staged migrations at: https://docs.microsoft.com/exchange/mailbox-migration/what-to-know-about-a-staged-migration.
Cutover migration method
In a cutover migration, all mailboxes in an on-premises Exchange deployment are migrated to Office 365 in a single migration batch. Cutover migrations migrate global mail contacts as well as distribution groups. Cutover migrations are suitable when:
You intend all mailboxes to be hosted in Office 365 when the migration completes.
You intend to manage user accounts using Office 365 tools.
You want to perform the migration period in less than a week.
Your organization has less than 2,000 mailboxes.
Your on-premises messaging solution is Exchange Server 2010 or later.
The primary domain name used for your on-premises Exchange organization must be configured as domain associated with the tenancy in Office 365.
You can perform a cutover migration using the Exchange Admin Center or by using Windows PowerShell.
The cutover migration method involves the following general steps:
An administrator creates empty mail-enabled security groups in Office 365.
An administrator connects Office 365 to the on-premises Exchange deployment. This is also termed creating a migration endpoint.
An administrator creates and starts a cutover migration batch using Exchange Admin Center or Windows PowerShell.
Once the migration batch is triggered, Exchange Online performs the following steps:
The address book of the on-premises Exchange deployment is queried to identify mailboxes, distribution groups, and contacts.
New Exchange Online mailboxes are provisioned.
Distribution groups and contacts are created within Exchange Online.
Mailbox data, including email messages, contacts, and calendar items, are migrated from each on-premises mailbox to the corresponding Exchange Online mailbox.
Exchange Online forwards the administrator a report providing statistics including the number of successful and failed migrations. The migration report includes automatically generated passwords for each new Exchange Online mailbox. Users are forced to change passwords the first time they sign in to Office 365.
Incremental synchronization occurs every 24 hours, updating Exchange Online with any new items created in the on-premises mailboxes.
Once migration issues have been resolved, the administrator changes the MX records to point to Exchange Online.
Once mail flow to Exchange Online has been successfully established, the administrator deletes the cutover migration batch. This terminates synchronization between the on-premises mailboxes and Office 365.
Administrator performs post migration tasks, including assigning Office 365 licenses, creating an Autodiscover DNS record, and decommissioning on-premises Exchange servers.
More Info Cutover Migration
You can learn more about cutover migrations at: https://docs.microsoft.com/exchange/mailbox-migration/cutover-migration-to-office-365.
Minimal Hybrid or Express Migration
Minimal hybrid or express migration is appropriate for organizations that are running Exchange 2010 or later, have a migration timetable that is shorter than a few weeks, and where your organization does not intend to have an ongoing directory service configuration. For example, this method is appropriate, where your organization intends to retire its on-premises Active Directory Domain Services infrastructure after migration is complete.
Performing a minimal hybrid migration involves performing the following steps:
In the Microsoft 365 console, add the domain that you use for your on-premises Exchange organization by configuring a TXT record (or by signing into GoDaddy if your organization uses that registrar) and verify that the TXT record is properly configured.
Sign into the Microsoft 365 account using global admin credentials and start the Exchange Hybrid Configuration Wizard from the Data Migration page under Setup in the Microsoft 365 admin console and connect to the on-premises Exchange Server organization. Choose the Minimal Hybrid Configuration.
Select the option to synchronize users and passwords one at a time. You will be prompted to install Azure AD Connect with the default options. Synchronization will occur once and then be turned off.
Configure Office 365 licenses for migrated users and then begin migrating user mailbox data.
Update DNS MX records to point away from the on-premises Exchange deployment to Exchange Online.
More Info Minimal Hybrid Migration
You can learn more about minimal hybrid migrations at: https://docs.microsoft.com/exchange/mailbox-migration/use-minimal-hybrid-to-quickly-migrate.
IMAP migration
IMAP migrations use the IMAP protocol to move the contents of on-premises user mailboxes to Exchange Online. IMAP migrations are suitable where the on-premises mail server is not running Exchange Server, but is instead running an alternate mail server solution.
IMAP migration is supported for the following on-premises messaging solutions:
Courier-IMAP
Cyrus
Dovecot
UW-IMAP
IMAP migrations involve the following general steps:
A tenant administrator creates Office 365 user accounts and assigns them Exchange Online user licenses. This provisions the user accounts with Exchange Online mailboxes.
The tenant administrator creates a CSV file. This CSV file includes a row for each on-premises user who will be migrated to Exchange Online using IMAP. This CSV file needs to include the passwords used by each on-premises IMAP mailbox user. It is recommended that you reset user passwords for on-premises IMAP mailbox users to simplify this process.
The administrator creates and then triggers an IMAP migration batch. This can be done using the Migration dashboard, available in the Data Migration blade under setup and shown in Figure 1-52, or through Windows PowerShell.

Figure 1-52 Select data service Once the migration batch is initiated, the following occurs:
Exchange Online creates a migration request for each user in the CSV file.
Each migration request includes the credentials for the user in the on-premises IMAP messaging system.
Messages from each user’s IMAP mailbox are copied to the corresponding Exchange Online mailbox until all data is migrated.
Exchange Online provides a status email to the administrator informing them of the status of the migration. This email contains statistics about the number of mailboxes successfully migrated, how many could not be migrated, and any error reports.
Exchange Online and the IMAP messaging system are synchronized every 24 hours to move any new messages from the on-premises environment to Exchange Online.
Once all migration issues have been resolved, the administrator updates MX records to point to Exchange Online. Once mail is flowing to Exchange Online, the administrator deletes the migration batches.
More Info Imap Migrations to Exchange Online
You can learn more about IMAP migrations to Exchange Online at: https://docs.microsoft.com/exchange/mailbox-migration/migrating-imap-mailboxes/migrating-imap-mailboxes.
Migration comparison
Table 1-9 lists the difference between the different methods you can use to migrate from an on-premises messaging environment to Exchange Online.
Table 1-9 Migration type comparison
On-premises messaging environment |
Number of mailboxes |
Will user accounts be managed on-premises |
Migration method |
Exchange 2010 to Exchange 2019 |
Less than 2,000 |
No |
Cutover migration |
Exchange 2010 |
Less than 2,000 |
No |
Staged migration |
Exchange 2010 |
More than 2,000 |
Yes |
Staged migration or remote move migration in hybrid deployment |
Exchange 2010 or Exchange 2019 |
More than 2,000 |
Yes |
Remote move migration in hybrid deployment |
Non-Exchange on-premises messaging system |
No maximum |
Yes |
IMAP migration |
More Info Mailbox Migration
You can learn more about mailbox migration at: https://docs.microsoft.com/exchange/mailbox-migration/decide-on-a-migration-path.
Plan migration of on-prem users and groups
Most organizations already have an on-premises identity solution that hosts user and groups accounts. These user and group accounts are stored in on-premises Active Directory Domain Services. When planning the migration of on-premises users and groups, you need to come to a determination about the following:
Understanding user categories
Understanding groups
When bulk import is appropriate
It’s also important to recognize that migration is different to hybrid coexistence. In a hybrid coexistence scenario your organization retains its on-premises Active Directory environment. In a migration scenario, your organization is moving from an on-premises Active Directory environment to having Azure AD host accounts, with the on-premises Active Directory environment decommissioned. While it is possible to use Azure AD Connect to synchronize accounts to Azure AD and then decommission your on-premises environment, that technique will be covered in Chapter 2 where you’ll also learn more about Azure AD Connect and hybrid coexistence.
Understanding user categories
Not every user account in your organization’s on-premises Active Directory instance is the same. While the vast majority of on-premises user accounts are used to sign on to workstations and access resources, a small number of accounts are used for different purposes, the most straightforward example being service accounts. Prior to performing a migration of accounts you should make the following determination:
Is the user account still active? Unless your organization has an effective user deprovisioning strategy, it is likely that there will be accounts in Active Directory that are associated with people that are no longer employed by your organization. There is no reason to migrate inactive user accounts from an on-premises Active Directory environment to Microsoft 365.
Should the account be migrated to Microsoft 365? Some user accounts exist for specific purposes, such as being used as service accounts or as administrative accounts for specific services or workloads that will not be migrated to Microsoft 365. Service accounts and accounts used for specific on-premises workloads are unlikely to be required once your organization migrates to Microsoft 365.
Using the bulk import process
If your organization is planning to completely migrate to Azure AD as the primary identity provider and to decommission Active Directory, you might choose to perform a bulk import of user accounts rather than attempt manual creation. If the organization that you are migrating only has a small number of users, it may be simpler to manually create those users using the Microsoft 365 administration tools. If you need to migrate a larger number where the manual creation process is both laborious and tedious, you may instead choose to perform a bulk import.
The bulk import process allows you to import a list of users from a specially formatted CSV file into Microsoft 365. This CSV file must have the following fields in the first row:
User Name
First Name
Last Name
Display Name
Job Title
Department
Office Number
Office Phone
Mobile Phone
Fax
Address
City
State or Province
ZIP or Postal Code
Country or Region
Each of these fields must be on the first line and each must be separated by a comma. Both a sample and a blank CSV file can be downloaded from the Bulk Add Users page. Once you have populated the CSV file with the account information you want to import, complete this operation by performing the following steps:
In the Microsoft 365 Admin Center, click On The Active Users node under the Users node.
Click More and then click Import Multiple Users.
On the Select a CSV file page, shown in Figure 1-53, select the specially formatted file that has the user account information and click Next.
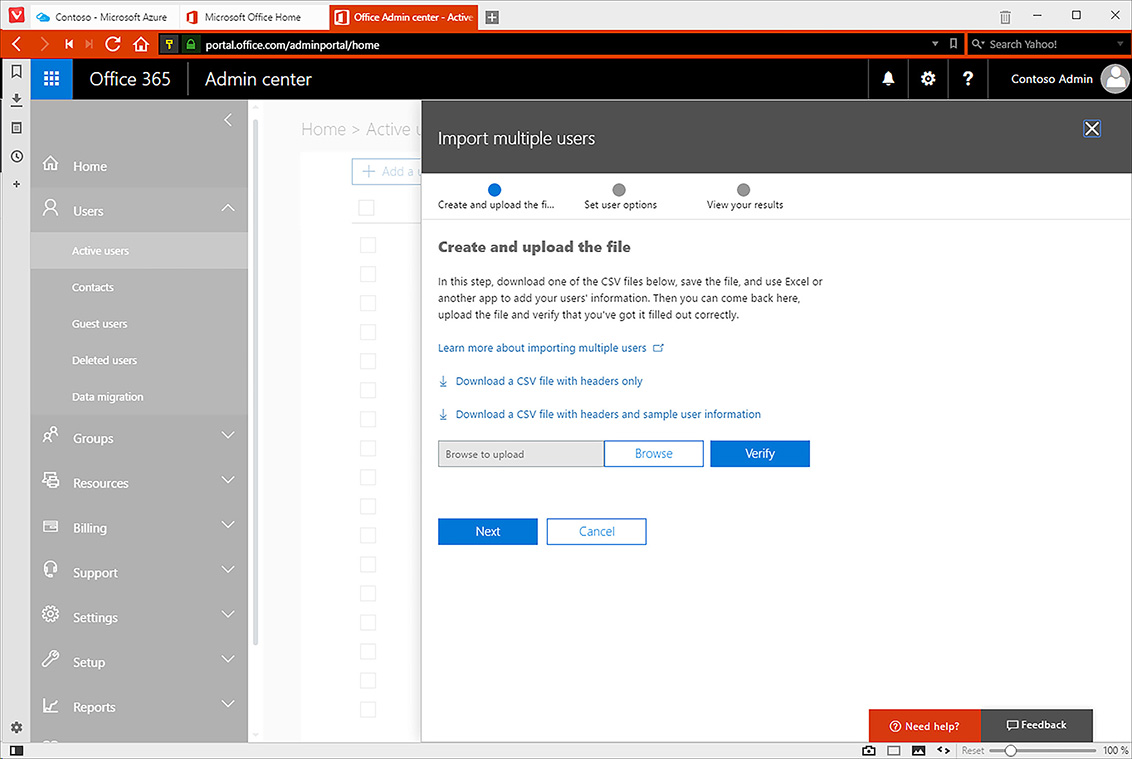
Figure 1-53 Select a CSV file On the Import Multiple Users page, specify whether the users are allowed to sign in and access services. You will also need to specify the user location on this page. Choose which licenses are assigned, as shown in Figure 1-54.

Figure 1-54 Import multiple users On the Results page, you will see a list of users created and a list of temporary passwords assigned.
Using soft delete
Some accounts that you migrate to Microsoft 365 may not be necessary. Similarly, there may be user accounts created during the trial or pilot Microsoft 365 deployment that are no longer appropriate once existing user accounts are migrated to Office 365. There are several methods that you can use to delete Microsoft 365 user accounts. Whether the user account is permanently deleted, termed a “hard delete,” or is moved to the Azure Active Directory Recycle Bin, termed a “soft delete,” depends on the method used to delete the account.
You can use the following methods to delete a Microsoft 365 user account:
Delete the user account from the Microsoft 365 admin portal. This involves navigating to the Users node, selecting the Active Users node, selecting the user that you want to delete, and selecting Delete User from the list of tasks associated with the user, as shown in Figure 1-55.

Figure 1-55 Delete a user from Microsoft 365 Admin Center Delete using the Remove-MsolUser cmdlet, located in the Azure Active Directory module for Windows PowerShell.
User accounts can be deleted through the Exchange Admin Center in Exchange Online.
If directory synchronization is configured, users can be deleted when removed from the on-premises Active Directory Directory Services instance.
You can view a list of soft deleted users in the Deleted Users section, under the Users area of the Microsoft 365 Admin Center as shown in Figure 1-56. Soft-deleted users remain visible for for 30 days and can be recovered during this period. After this period expires, the user account is deleted and is unrecoverable.
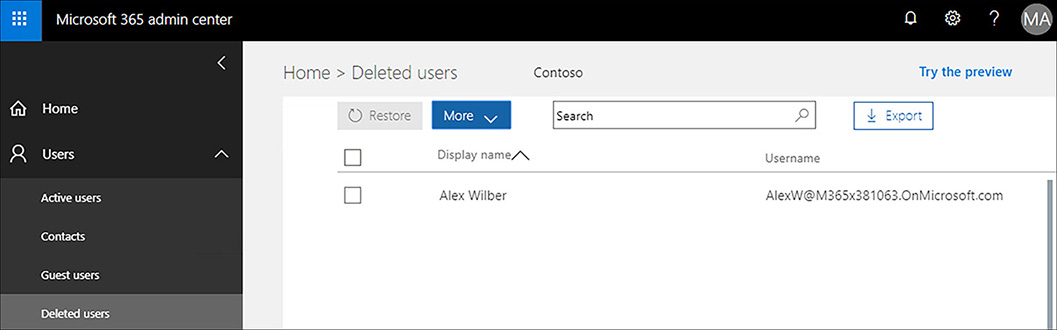
To recover a soft deleted user, select the user account in the Deleted Users node of Microsoft 365 admin console and click Restore. When you restore an account, you’ll be asked whether to auto-generate a new password for the user, assign a password yourself, and whether you want to have the user change their password when they sign on as shown in Figure 1-57.
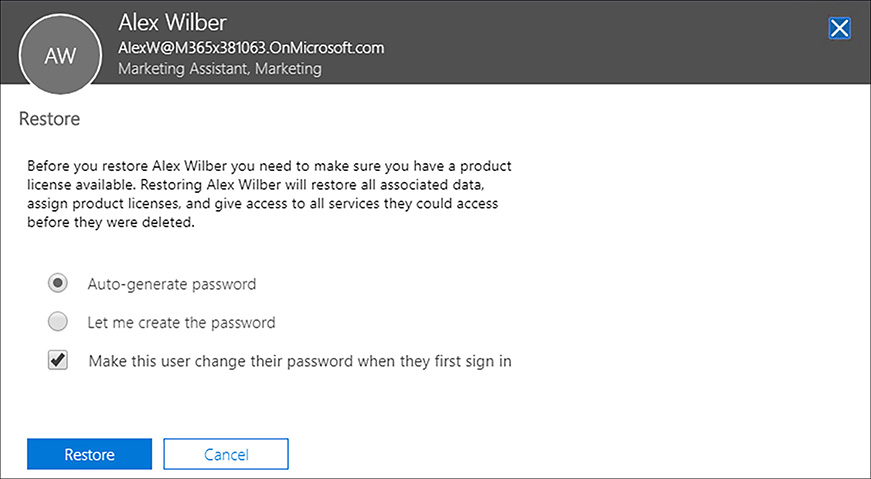
More Info Deleting User Accounts in Microsoft 365
You can learn more about deleting Microsoft 365 user accounts at: https://docs.microsoft.com/azure/active-directory/active-directory-users-delete-user-azure-portal.
Migrating Groups to Microsoft 365
On-premises groups come in a variety of types and scopes. For the purposes of migrating to Microsoft 365, group scope, which can include domain local, domain global, and universal, isn’t relevant. This is because if you’ve chosen to migrate users to Azure Active Directory and decommission your organization’s on-premises directory, you’re unlikely to be concerned whether a group is visible in other domains in an Active Directory forest, simply because you are intending to retire that particular security construct.
Office 365 groups allow you to set up a collection of resources that a set of users can share. Resources might include a shared calendar, SharePoint Online document library, or a shared Exchange Online mailbox. Groups can be configured as public or private. Content in a public group is visible to anyone who has an account in the tenancy. Content in a private group is only visible to members of that group.
There are three methods through which Office 365 groups can be provisioned. These are as follows:
Open The default method of provisioning O365 groups. Allows M365 users to create their own groups as needed.
IT-led Users are able to request a group from IT.
Controlled Group creation is limited to users that have been delegated the group creation role.
Each group can have one or more owners. Group owners have the ability to add or remove members as well as to perform basic group curation tasks. O365 groups have the following limits:
A group can have up to 100 owners.
A user can create up to 250 groups.
A tenancy can have up to 500,000 groups.
1000 users can access a group conversation concurrently, though it is possible for a group to have more members.
A user can be a member of 1000 groups.
A group can store up to 1 terabyte of data with an additional 10 GB per subscribed users. It is possible to purchase additional storage for a group.
A group mailbox has a size limit of 50 GB.
More Info Understanding Office 365 Groups
You can learn more about Office 365 groups at: https://support.office.com/article/learn-about-office-365-groups-b565caa1-5c40-40ef-9915-60fdb2d97fa2.
Import PST files
Importing PST files to Office 365 mailboxes provides a method of moving an organization’s existing email messages so that they are hosted in Exchange Online. The intelligent import feature allows you to filter which items stored in PST files will be imported into Exchange Online. Importing PST files also allows you to ensure that your organization is able to meet compliance obligations as organizational messages will be available for Discovery searches, something that is more challenging when email is stored on each person’s individual computer in a separate PST file. Importing PST files also ensures that a user has access to their existing messages no matter which device they use to interact with Exchange. If messages are stored in an offline PST file, and the user doesn’t have access to the computer that hosts that PST file, they will not have access to those messages. PST files from Outlook 2007 and later can be imported to Exchange Online.
Network upload allows you to import PST files into Office 365. This can be done either by directly uploading the files or by shipping encrypted hard drives to Microsoft and having them import data directly. When you ship an encrypted hard drive to Microsoft, Microsoft will upload the data to Azure within 10 days of receiving the hard drive before returning the physical device to you.
To import PST files, perform the following steps:
Ensure that the Organization Management group is assigned the Mailbox Import Export role in Exchange Online.
In the Data Governance section of the Security & Compliance center, use the Import section, shown in Figure 1-58, to create a Shared Access Signature (SAS) key, also known as the SAS URL. This key provides the necessary permission and location to upload PST files to an Azure storage location. This location in Azure will be in the same region as your Microsoft 365 organization.
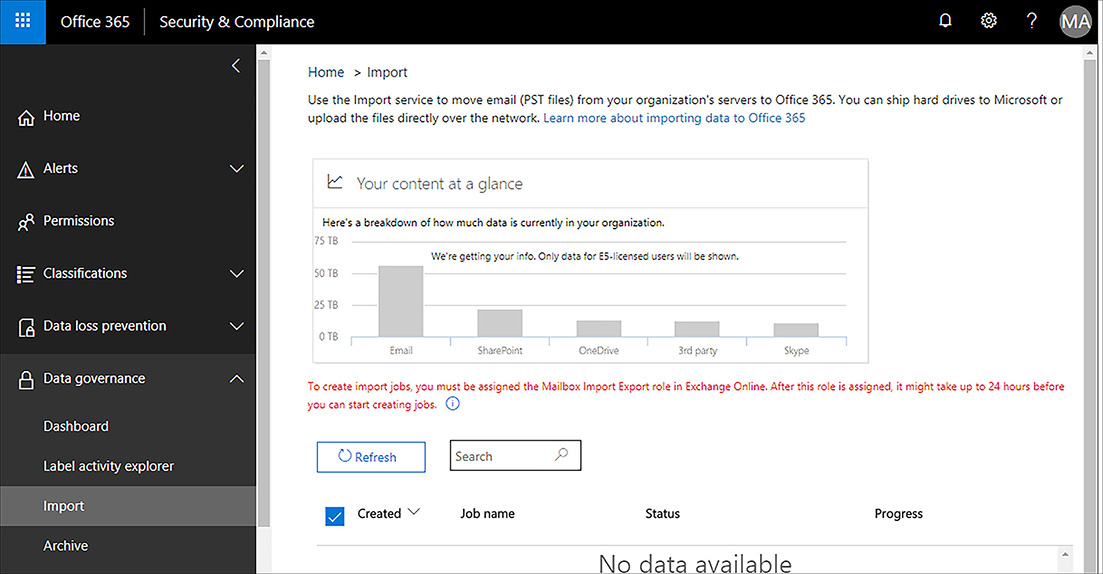
Figure 1-58 Import section of the Security and Compliance center Download and install the PST import tools. One of these tools is the Azure AzCopy tool. Use AzCopy with the SAS URL to upload one or more PST files to Azure.
Once uploaded, review the list of PST files that have been successfully transferred to Office 365. You can do this with Azure Storage Explorer.
Create a mapping file that maps uploaded PST files to Office 365 mailboxes. This file must be in CSV format.
Create a PST import job from the Import page of the Security & Compliance center. You specify the mapping file when creating this job. You will be provided with an opportunity to configure a filter to control, which data is actually imported into mailboxes.
Run the job to import the data into the appropriate Office 365 mailboxes.
The user account that will create the import jobs in the Office 365 import service must be assigned the Mailbox Import Export role in Exchange Online. This role can be added to the Organization Management role group or it’s possible to create a new role group and assign this role and then add user accounts to this group. In addition to having this role, the account used to perform this task must be assigned the Mail Recipients role in Exchange Online, available to the Organization Management and Recipient Management role groups, or be a global administrator for the Microsoft 365 organization.
PST files uploaded using the network upload method will be stored in an Azure blob container that is assigned the name ingestiondata. The PST files will remain in this blob storage for 30 days after the most recent import job has been created in the Security & Compliance Center. If you upload PST files using the network upload method, but do not create an import job within 30 days, the PST files will be deleted.
PST Import has the following additional caveats and characteristics:
PST import occurs at approximately 24 GB per day, but jobs run in parallel. For example, importing 5 24 GB PST files will take approximately the same amount of time as importing 20 24 GB PST files.
Multiple PST files can be imported to the same mailbox simultaneously.
If a PST file stores any mailbox items that exceed 150 megabytes in size, those individual large items will not be imported into the Office 365 mailbox. Items smaller than 150 megabytes in size will still be imported, even though the larger items are skipped.
Original message metadata isn’t modified during the import process.
Import is not supported where a PST files has more than 300 levels of nested folders.
PST files can be imported into online archive mailboxes.
PST files cannot be imported into Exchange Online public folders.
More Info Importing Pst Files
You can learn more about importing PST files into Office 365 mailboxes at: https://docs.microsoft.com/office365/securitycompliance/importing-pst-files-to-office-365
Exam Tip
Remember the process that is used to import PST files into Exchange Online mailboxes
Thought experiment
In this thought experiment, demonstrate your skills and knowledge of the topics covered in this chapter. You can find answers to this thought experiment in the next section.
You have been asked to provide some advice to Fabrikam, a small manufacturing business that migrated to Microsoft 365. Fabrikam needs your advice because the person responsible for Fabrikam’s IT recently left the company. During the process, they handed over the credentials of all their Microsoft 365 accounts to the CEO.
The CEO also reports to you that there have been license problems. The company initially purchased a 50-license subscription. Since then, 10 new users have been employed to replace 10 people who left the company over the last few months. The employees who departed still have Microsoft 365 accounts.
Fabrikam has signed up for a Microsoft 365 subscription and is currently using the tenant name Fabrikam.onmicrosoft.com. Fabrikam wants to assign their custom domain, Fabrikam.com, to Microsoft 365 and to have Microsoft DNS servers host this zone. With this information in mind, answer the following questions:
What kind of DNS record must be added to confirm ownership of the Fabrikam.com DNS zone?
Which DNS records must be modified to have Microsoft DNS servers host the Fabrikam.com DNS zone?
Describe the nature of at least one user account that will have global administrator rights for Fabrikam’s Office 365 subscription.
What methods can be used to resolve the license conflicts?
Thought experiment answers
This section contains the solution to the thought experiment. Each answer explains why the answer choice is correct.
A TXT record must be added to confirm ownership of the Fabrikam.com DNS zone.
The NS records for the zone must be modified to allow Microsoft to host the Fabrikam.com DNS zone.
The first user account created for a subscription will be assigned global administrator privileges. This will be the user account of the IT staff member who recently left and who set up Microsoft 365.
The license conflict can be resolved by either manually removing licenses from the 10 users who have left the organization, or by deleting their user accounts.
Chapter summary
When you create a Microsoft 365 subscription, the subscription tenancy is automatically assigned a custom onmicrosoft.com domain.
No two organizations can share the same tenant name.
The tenant name chosen at setup remains with the subscription over the course of the subscription’s existence.
You can assign a domain name that you own to the tenant so that you don’t have to use the onmicrosoft.com tenant name.
To use a domain with Microsoft 365, the DNS servers used as name servers for the domain need to support CNAME, SPF/TXT, SRV and MX Records.
You can confirm ownership of a domain by configuring special TXT or MX records.
Setting the default domain configures which domain suffix will automatically be used with Microsoft 365 user accounts.
Changing the primary email address also changes the user name.
You can perform a bulk email address update using PowerShell.
Additional email addresses allow mailboxes to receive messages from more than a single address and can use any domain name associated with the organization’s Microsoft 365 tenancy.
A Microsoft 365 endpoint is an URL or IP address that hosts a specific Microsoft 365 or Office 365 service.
Microsoft places each M365 and O365 endpoint into one of three categories: Optimize, Allow, and Default. Optimize requires minimum disruptions caused by latency and availability. Allow endpoints are less problematic, and Default endpoints do not require optimization.
Privileged access management allows you to configure policies that apply just-in-time administrative principles to sensitive administrative roles.
Cloud authentication occurs against Azure Active Directory. Use it with a password hash with a single sign-on and pass-through authentication with single sign-on.
Federated authentication can occur using AD FS or a third party authentication provider.
Mail reports allow you to view how Office 365 mailboxes are used.
Usage reports allow you to view information about browsers, operating systems, and license consumption.
Skype for Business reports allow you to see how Skype for Business is being used in the organization.
SharePoint reports allow you to see how SharePoint is being used with the Office 365 subscription.
Auditing reports allow you to view information about auditing of mailboxes, and mailbox litigation holds.
Data Loss Prevention reports allow you to view how Data Loss Prevention rules, and policies are being applied to message traffic.
The Service Health Dashboard is available from the Microsoft 365 Admin Center, allowing you to determine the status of the various elements of Microsoft 365, including fault history and planned maintenance.
Users assigned the global administrator role have access to all administrative features.
Users assigned the billing administrator role are able to make purchases, manage subscriptions, manage support tickets, and monitor service health.
Users assigned the Helpdesk administrator (password administrator) role are able to reset the passwords of most Office 365 user accounts (except those assigned the global admin, service admin, or billing roles).
Users assigned the service administrator role are able to manage service requests and monitor service health.
You can assign and remove licenses by editing an Office 365 user’s properties.
Deleting a user removes all licenses assigned to that user.
Pilot users should provide a representative sample of your organization.
You can use the SharePoint Migration Tool to migrate on-premises SharePoint document libraries, lists and regular file shares to SharePoint Online.
The OneDrive client you to drag and drop files on a client computer and have those files sync either with OneDrive for Business or SharePoint Online.
You can use the bulk import method to import a CSV file of user identities into Azure AD.