Chapter 4
Plan Office 365 workloads and applications
Before they existed in the cloud, many Office 365 workloads were hosted on-premises in organizational datacenters. Some customers still have some Office 365 workload servers deployed on-premises, whilst other workloads are in the cloud, and some even exist in a hybrid state, with servers on-premises working in conjunction with servers in the cloud. Similarly, deployment of Office 365 applications has changed. Whereas you might have deployed previous versions of Office, such as Office 2007, from a CD-ROM drive or network share, today you’re likely to deploy Office 365 applications either directly from Office 365 or through other automated tools. In this chapter you’ll learn how to plan for Office 365 server workload deployments and to plan how to deploy the Office applications that interact with those server workloads.
Skills covered in this chapter:
Skill 4.1: Plan for Office 365 workload deployment
This skill section deals with Office 365 workloads including Exchange, SharePoint, and Skype for Business. In this section, you’ll learn how to identify the requirements that exist when you are running an on-premises and cloud deployment, how you configure connectivity and data flow for each workload, and the steps that you would take to migrate these workloads from an on-premises environment to the cloud.
Identify hybrid requirements
Hybrid deployments have some components located on-premises and other components located in the cloud. For example, with a hybrid Exchange deployment, you may host some mailboxes in your on-premises datacenter and other mailboxes in the Office 365 cloud. The three main Office 365 workloads, Exchange, SharePoint Server, and Skype for Business, all have their own separate hybrid requirements.
Hybrid Exchange
Before an organization that has an on-premises only Exchange deployment can shift to a hybrid deployment, it will need to meet certain prerequisites. The first requirement is that an organization needs to have Exchange 2007 or later on-premises. So, If your organization has Exchange 2003 deployed, you won’t be able to deploy Exchange in a hybrid configuration.
The version of Exchange that you have deployed determines the type of hybrid deployment that is available (see Table 4-1).
Table 4-1 Hybrid deployment options
On-premises deployment |
Hybrid deployment options |
Exchange 2007 |
|
Exchange 2010 |
|
Exchange 2013 |
|
Exchange 2016 |
|
Exchange 2019 |
|
When selecting a hybrid deployment option, you should choose the most modern version available for your organization. For example, if your organization has Exchange 2013 deployed, your preference should be to configure an Exchange 2019 based hybrid deployment.
Hybrid deployments require that the on-premises Exchange systems have the most recent cumulative update or update rollup deployed. Generally, the release prior to the most recent cumulative update or update rollup will also work, but older cumulative updates or update rollups will not be supported. Cumulative updates and update rollups are generally released on a quarterly basis.
You need to have specific roles deployed within the on-premises Exchange organization. Which roles are deployed depends on the hybrid deployment option you are choosing. These requirements are as follows:
Exchange 2010 hybrid deployment A minimum of one Exchange 2010 server with the Mailbox, Hub Transport, and Client Access server roles installed. You can also meet the prerequisite requirements by deploying these Exchange 2010 roles on separate servers. Autodiscover public DNS records for existing SMTP domains point at on-premises Client Access server.
Exchange 2013 hybrid deployment A minimum of one server with the Mailbox and Client Access roles installed. The prerequisites can also be met by deploying these roles on separate servers. Autodiscover public DNS records for existing SMTP domains point at on-premises Client Access server.
Exchange 2016 hybrid deployment A minimum of one server with the Mailbox server role installed. Autodiscover public DNS records for existing SMTP domains point at on-premises Mailbox server.
Exchange 2019 hybrid deployment A minimum of one server with the Mailbox server role installed. Autodiscover public DNS records for existing SMTP domains point at the on-premises Mailbox server.
Hybrid Exchange deployments have the following additional requirements:
Azure AD Connect are configured to synchronize on-premises Active Directory with Azure Active Directory.
Custom domains are registered with your organization’s Azure AD tenancy.
Connect the Office 365 organization to the Exchange Admin Center. You must do this prior to running the Hybrid Configuration Wizard.
Install valid digital certificates purchased from a trusted CA on the IIS instance on Exchange servers configured in the hybrid deployment. The Exchange Web Services external URL and the Autodiscover endpoint specified in your organization’s public DNS records must be listed in the Subject Alternative Name (SAN) section of these certificates.
If your organization’s Exchange deployment uses Edge Transport servers and you want to configure those servers for hybrid secure mail transport, you will need to ensure that EdgeSync is configured prior to running the Hybrid Configuration Wizard.
If Unified Messaging enabled mailboxes are present in the on-premises Exchange deployment, and you want to migrate them to Office 365, the following conditions must be met prior to migrating these mailboxes:
You must have deployed Lync Server 2019, Lync Server 2013, or Skype for Business Server 2015 or later, and integrated it with your organization’s on-premises telephony system. Alternatively, you have Skype for Business Online integrated with your organization’s on-premises telephony system.
You have Unified Messaging mailbox policies created in Exchange Online that have names that reflect the Unified Messaging mailbox policies used with the on-premises deployment.
More Info Hybrid Exchange Deployment Prerequisites
You can learn more about hybrid exchange deployment prerequisites at: https://docs.microsoft.com/exchange/hybrid-deployment-prerequisites.
Hybrid SharePoint
Beyond the basics of having a functional on-premises Active Directory instance, and a configured Microsoft 365 tenancy, you will need to have a functional on-premises SharePoint Server farm. This SharePoint Server farm must be configured so that all services are running locally on the farm as farms that leverage federated services and are not supported in a hybrid configuration.
You will need to configure the SharePoint primary web application on the on-premises SharePoint farm to use a certificate from a trusted public third party CA for Transport Layer Security (TLS), also known as Secure Sockets Layer (SSL) communication. Microsoft recommends using the default SharePoint Security Token Services (STS) certificate when configuring hybrid workloads and it is not necessary to have a new certificate for this service issued by a public third party CA.
You will need to configure a reverse proxy device to support inbound connectivity for your hybrid SharePoint deployment if you want to support the following services:
Inbound hybrid search
Hybrid Business Connectivity Services
Hybrid Duet Enterprise Online for Microsoft SharePoint and SAP
The certificate used for authentication and encryption between the reverse proxy device and SharePoint Online must be configured either as a wildcard certificate, or have an appropriate Subject Alternative Name. It must also be issued by a trusted public third party certification authority.
More Info Hybrid for Sharepoint
You can learn more about Hybrid for SharePoint Server requirements at: https://docs.microsoft.com/sharepoint/hybrid/install-and-configure-sharepoint-server-hybrid.
Hybrid Skype for Business
When configuring Skype for Business in a hybrid configuration with Skype for Business Online, you will need to ensure that the following steps are taken:
Skype for Business Online must be enabled in the Microsoft 365 tenancy.
On-premises servers must all run either Skype for Business Server 2019, Skype for Business Server 2015, or Lync Server 2013. A deployment that has a mixture of servers is also supported, as long as that mixture is limited to two different versions of Skype for Business Server or Lync Server. You cannot configure a hybrid deployment if all three servers are present in the on-premises environment.
You must federate the on-premises environment with Microsoft 365. While federation is more complicated than the default Azure AD Connect identity synchronization option, you can use Azure AD Connect to configure federation. Doing so will require the deployment of Active Directory Federation Services servers in your on-premises environment, although Azure AD Connect makes this process easier.
You need to configure the on-premises environment to share SIP address space with Skype for Business Online. This will allow Skype for Business Online to host user accounts for the same set of SIP domains as the on-premises environment. It will also allow messages to be routed within the hybrid environment.
You must enable the share SIP address space for Skype for Business Online. Configuring this shared address space is the second element in ensuring that messages can be routed between the on-premises and cloud environments.
Microsoft also recommends that you configure OAuth between Exchange on-premises and Skype for Business Online if you have both Exchange and Skype for Business in a hybrid configuration.
More Info Skype for Business Hybrid
You can learn more about configuring Skype for Business Hybrid at: https://docs.microsoft.com/skypeforbusiness/hybrid/configure-federation-with-skype-for-business-online.
Plan for Microsoft 365 workload connectivity and data flow
Each Microsoft 365 workload has different requirements when it comes to network connectivity. These requirements generally involve ensuring that the appropriate DNS records are configured in publicly resolvable zones, but in some cases it involves the configuration allowing inbound traffic on an external firewall.
Exchange hybrid connectivity
The ports, protocols, and endpoints listed in Table 4-2 need to be configured to allow the appropriate connectivity in an Exchange hybrid deployment.
Table 4-2 Exchange hybrid ports, protocols, and endpoints
Protocol |
Upper level protocol |
Hybrid functionality |
On-premises endpoint |
TCP 25 (SMTP) |
SMTP/TLS |
Hybrid mail flow |
|
TCP 443 (HTTPS) |
Autodiscover |
Autodiscover |
|
TCP 443 (HTTPS) |
EWS |
Free/busy, MailTips, Message Tracking |
|
TCP 443 |
Autodiscover, EWS |
When using OAuth |
|
More Info Exchange Hybrid Ports, Protocols, and Endpoints
You can learn more about Exchange hybrid ports, protocols, and endpoints at: https://docs.microsoft.com/exchange/hybrid-deployment-prerequisites#hybrid-deployment-protocols-ports-and-endpoints.
SharePoint Server hybrid connectivity
In a SharePoint Server hybrid configuration, you need to make sure the following networking requirements are met:
Ensure that the publicly resolvable DNS record for the SharePoint primary site points at the external endpoint for the reverse proxy device, which publishes the primary site to the Internet.
Ensure that the SharePoint primary site has a binding for a TLS certificate from a publicly trusted certificate authority.
Choose an appropriate site collection strategy. Options include host-named site collection, path-based web application with alternate access mappings, or path-based web application without alternate access mapping.
Configure split DNS so that internal clients connect to the internal IP address of the SharePoint primary site, and external clients connect to the external endpoint of the reverse proxy device.
More Info Sharepoint Server Hybrid Connectivity
You can learn more about SharePoint Server Hybrid Connectivity at: https://docs.microsoft.com/sharepoint/hybrid/configure-inbound-connectivity.
Skype for Business hybrid connectivity
In a hybrid configuration, all Skype for Business external DNS records must point to on-premises servers. There are specific DNS resolution requirements for the following records:
DNS SRV record for _sipfederationtls._tcp.<sipdomain.com> must resolve to the Access Edge external IP addresses. This record must be resolvable by Edge servers in the hybrid configuration.
DNS A record or records for Edge Web Conferencing Service must resolve to the Web Conferencing Edge external IP addresses. This record or records must be able to be resolved by any user’s computers on the organization’s internal network.
Your organization’s firewall needs to be configured to accept incoming traffic from Office 365 domain names:
*.lync.com
*.teams.microsoft.com
*.broadcast.skype.com
*.skypeforbusinesss.com
*.sfbassets.com
*.skype.com
More Info Skype for Business Hybrid Connectivity
You can learn more about Skype for Business hybrid connectivity at: https://docs.microsoft.com/skypeforbusiness/hybrid/configure-hybrid-connectivity.
Plan migration strategy for workloads
The migration strategy that you choose will depend on the workload. Exchange mailboxes require a different approach to the strategy you’ll use to move SharePoint connectivity or Skype for Business services.
Exchange migration strategy
How you migrate Exchange mailboxes from an on-premises deployment to Exchange Online will depend on the nature of your existing deployment. The approach you use with Exchange 2007 may be different to your approach if you have Exchange 2019, but will depend on the number of mailboxes that need to be moved. Table 4-3 lists the difference between the different methods you can use to migrate from an on-premises messaging environment to Exchange Online.
Table 4-3 Migration type comparison
On-premises messaging environment |
Number of mailboxes |
Will user accounts be managed on-premises |
Migration method |
Exchange 2007 to Exchange 2019 |
Less than 2,000 |
No |
Cutover migration |
Exchange 2007 |
Less than 2,000 |
No |
Staged migration |
Exchange 2007 |
More than 2,000 |
Yes |
Staged migration or remote move migration in hybrid deployment |
Exchange 2010, to Exchange 2019 |
More than 2,000 |
Yes |
Remote move migration in hybrid deployment |
Exchange 2010 or later with no ongoing directory synchronization |
No maximum |
No |
Minimal Hybrid / Express Migration |
Non-Exchange on-premises messaging system |
No maximum |
Yes |
IMAP migration |
More Info Choosing a Migration Path
You can learn more about choosing a migration path at: https://docs.microsoft.com/exchange/mailbox-migration/decide-on-a-migration-path.
IMAP Migration
IMAP migrations use the IMAP protocol to move the contents of on-premises user mailboxes to Exchange Online. IMAP migrations are suitable where the on-premises mail server is not running Exchange Server, but is instead running an alternate mail server solution.
IMAP migration is supported for the following on-premises messaging solutions:
Courier-IMAP
Cyrus
Dovecot
UW-IMAP
IMAP migrations involve the following general steps:
A tenant administrator creates Office 365 user accounts and assigns them Exchange Online user licenses. This provisions the user accounts with Exchange Online mailboxes.
The tenant administrator creates a CSV file. This CSV file includes a row for each on-premises user who will be migrated to Exchange Online using IMAP. This CSV file needs to include the passwords used by each on-premises IMAP mailbox user. It is recommended that you reset user passwords for on-premises IMAP mailbox users to simplify this process.
The administrator creates and then triggers an IMAP migration batch. This can be done using the Migration dashboard, available from the Microsoft 365 console.
Once the migration batch is initiated, the following occurs:
Exchange Online creates a migration request for each user in the CSV file.
Each migration request includes the credentials for the user in the on-premises IMAP messaging system.
Messages from each user’s IMAP mailbox are copied to the corresponding Exchange Online mailbox until all data is migrated.
Exchange Online provides a status email to the administrator informing them of the status of the migration. This email contains statistics about the number of mailboxes successfully migrated, how many could not be migrated, and any error reports.
Exchange Online and the IMAP messaging system are synchronized every 24 hours to move any new messages from the on-premises environment to Exchange Online.
Once all migration issues have been resolved, the administrator updates MX records to point to Exchange Online. Once mail is flowing to Exchange Online, the administrator deletes the migration batches.
More Info IMAP Migrations to Exchange Online
You can learn more about IMAP migrations at: https://docs.microsoft.com/exchange/mailbox-migration/migrating-imap-mailboxes/migrating-imap-mailboxes.
Import Service
Network upload allows you to import PST files into Office 365. This can be done either by directly uploading the files to Azure blob storage or by shipping hard drives to Microsoft and having them import data directly.
To import PST files, perform the following steps:
In the Data governance section of the Security & Compliance center, use the Import section to create a Shared Access Signature (SAS) key, also known as the SAS URL. This key provides the necessary permission and location to upload PST files to an Azure storage location.
Download and install the Azure AzCopy tool. Use AzCopy with the SAS URL to upload one or more PST files.
Once uploaded, review the list of PST files that have been successfully transferred to Office 365. You can do this with Azure Storage Explorer.
Create a mapping file that maps uploaded PST files to Office 365 mailboxes. This file must be in CSV format.
Create a PST import job from the Data governance section of the Security & Compliance center. You specify the mapping file when creating this job.
Run the job to import the data into the appropriate Office 365 mailboxes.
More Info Import Service
You can learn more about the import service at: https://docs.microsoft.com/office365/securitycompliance/use-network-upload-to-import-pst-files.
SharePoint Server migration strategy
While it’s possible to directly upload one file at a time to a SharePoint online tenant, or install the OneDrive sync client and have that content automatically synchronize to either OneDrive or SharePoint online, most organizations that are migrating from an on-premises SharePoint Server deployment to SharePoint online will use the SharePoint Migration Tool.
The SharePoint Migration Tool (SPMT) allows for the migration of files from on-premises SharePoint Server document libraries to SharePoint Online. You can also use the SPMT to migrate existing file shares to SharePoint Online. To allow web parts to be migrated, 24 hours prior to performing a migration with the SPMT, you need to configure the following settings in the SharePoint Admin Center:
Allow users to run custom script on personal sites
Allow users to run customer script on self-service created sites
When running the tool, you have the option of specifying a migration either from a SharePoint on-premises deployment or from a file share. When migrating a SharePoint on-premises site, you’ll need to specify the site location, the credentials to access that site, and the specific document library that you wish to migrate. If you are migrating an on-premises file share to SharePoint online, you’ll need to specify the file share location, the URL of the SharePoint Online site that is the destination for the migrated files, and the document library within that site that will host the files.
After you perform a migration, you have the option of saving the migration job so that it can be run at a different time. This allows you to migrate any files that were modified or created after the last migration from the source location to the destination SharePoint online site.
More Info Sharepoint Migration Tool
You can learn more about the SharePoint migration tool at: https://docs.microsoft.com/sharepointmigration/how-to-use-the-sharepoint-migration-tool.
Skype for Business migration strategy
You can move users from an on-premises deployment to the cloud by either using the Skype for Business Admin Control panel or the Move-CsUser PowerShell cmdlet. Both tools are used in the on-premises environment. It’s also possible to use these tools to move users from Skype for Business Online to an on-premises host when Skype for Business Online is in a hybrid configuration. You can move a user from Skype to Business Online directly to Teams only if Skype for Business Server 2019 or Skype for Business Server 2015 with cumulative update 8 or later is deployed in the on-premises environment.
When migrating users from an on-premises environment to the cloud, the user performing the migration must have the CSServerAdministrator role in the on-premises Skype for Business Server deployment and must be either the Microsoft 365 Global Administrator role or have both the Microsoft 365 Skype for Business Administrator and Microsoft 365 User Administrator roles.
More Info Skype for Business Migration
You can learn more about Skype for Business migration at: https://docs.microsoft.com/skypeforbusiness/hybrid/move-users-between-on-premises-and-cloud.
 Exam Tip
Remember the different options for Exchange migration.
Skill 4.2: Plan Office 365 applications deployment
This objective deals with the deployment of Office 365 applications to client computers. In the past you might just bake Office 365 applications into a deployment image, however, with Office 365 applications you are more likely to leverage the online nature of the product and to use Office 365, rather than a local deployment share, as the installation source for the product. This is especially true for those Microsoft 365 organizations that have no on-premises infrastructure beyond client computers. To master this objective you’ll need to understand how to manage Office 365 download, plan for Office 365 apps, including updates and connectivity, as well as plan for Office online and the deployment of Office 365 Pro plus.
Manage Office 365 software downloads
Depending on the policies of your organization, you might want to allow users to install software directly from the Microsoft 365 portal, to restrict this ability entirely, or to allow users to install some applications but restrict them from installing others. Office 365 ProPlus is the version of Microsoft Office that is available to appropriately licensed users in a Microsoft 365 tenancy. Office 365 ProPlus includes the following software products:
Access
Excel
InfoPath
OneNote
Outlook
PowerPoint
Publisher
Word
Depending on the Microsoft 365 subscription associated with a tenancy, the Skype for Business, Project, and Visio, and other applications might also be available.
To configure which Office software users are able to install from the portal, perform the following steps:
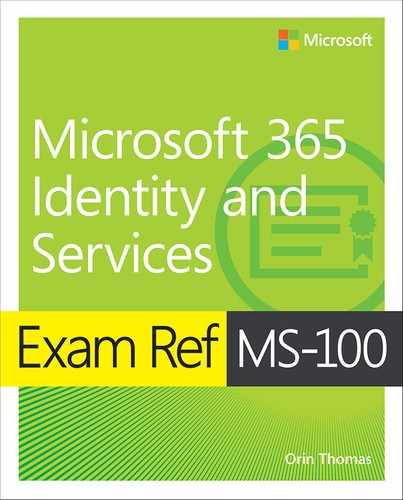
When signed in to Microsoft 365 with a user account that has Administrator permissions, open the Microsoft 365 Admin Center, click Software Download Settings under Office Software as shown in Figure 4-1.

Figure 4-1 Manage User Software To restrict users from deploying software from the Office 365 portal, switch the slider next to the listed software as shown in Figure 4-2.
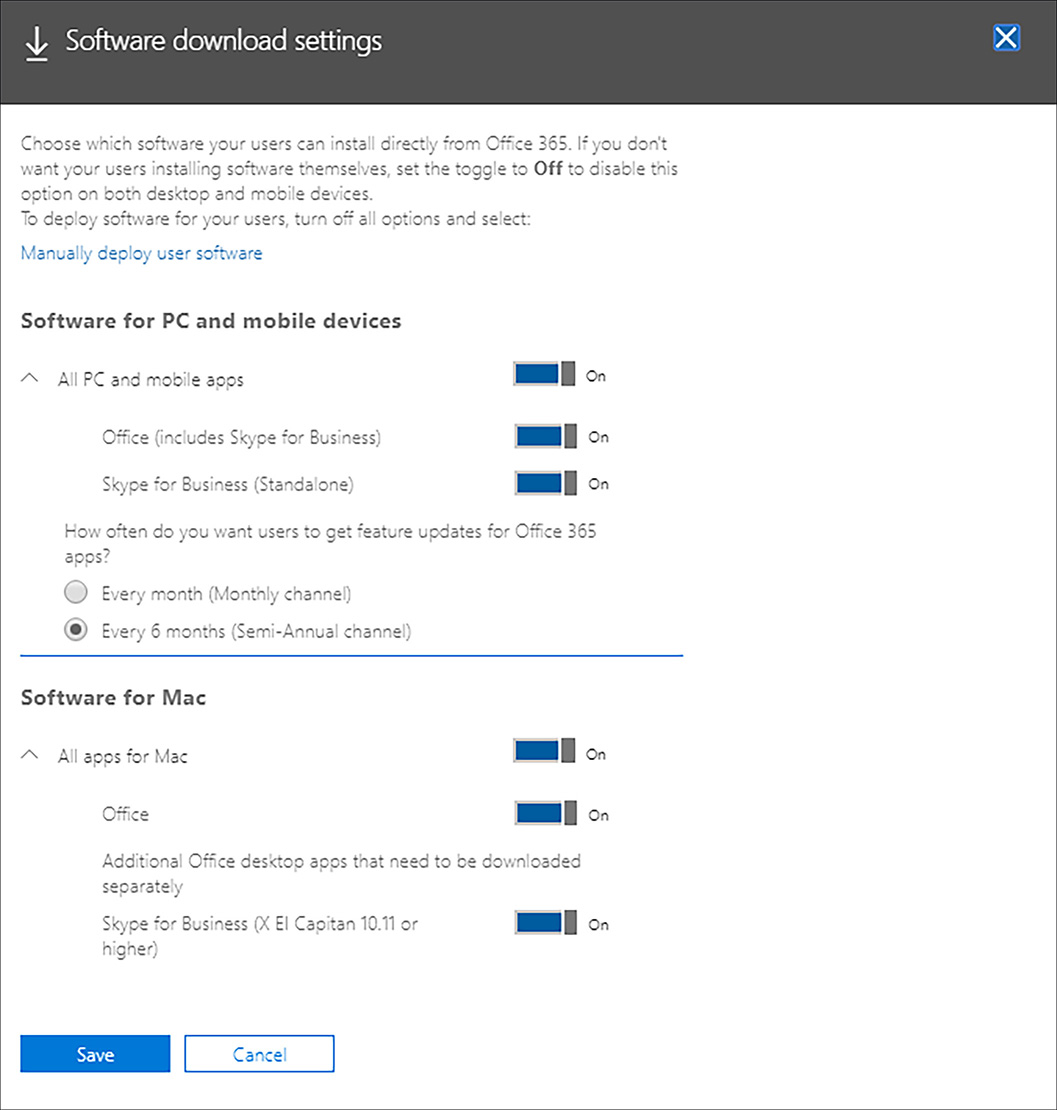
Figure 4-2 Allowing only Office and Skype for Business
The software that users will be able to install depends upon the type of Microsoft 365 subscription. Different Microsoft 365 subscriptions have different software options. It is also likely that software options will change over time.
While you can make Office 365 software available to users through the Microsoft 365 portal, this doesn’t mean that users will automatically be able to successfully install this software. When allowing users to self-provision software from the Microsoft 365 portal, keep the following in mind:
To successfully run Office 365, users will need an Office 365 license.
For users to be able to install the software they downloaded from the Office 365 portal, they will need to have local administrator privileges on their computer. This means that self-provisioning of software through the Office 365 portal is a suitable strategy in Bring Your Own Device (BYOD) scenarios where the user is the owner of the computer and is responsible for its configuration. Self-provisioning of software is less of a concern for most environments where each user is assigned a computer with a Standard Operating Environment (SOE), as users in these environments rarely have local administrator credentials.
If you do not make Office software available to users, they will see a message that informs them that Office installations have been disabled when they navigate to the Software page in the Office 365 portal.
Office 365 ProPlus is only run on the following operating systems:
Windows 7
Windows 8
Windows 8.1
Windows 10
Windows Server 2008 R2
Windows Server 2012
Windows Server 2012 R2
Windows Server 2016
Windows Server 2019
More Info Control Which Software Users Can Install from the Portal
You can learn more about controlling the Office software users can install from the Office 365 portal at: https://docs.microsoft.com/DeployOffice/manage-software-download-settings-office-365.
By default, if a user installs Office 365 ProPlus from the Microsoft 365 portal, all programs included with Office 365 ProPlus (Access, Excel, InfoPath, OneNote, Outlook, PowerPoint, Publisher, and Word) will also install. Administrators can configure deployments so that only some, not all, of these programs will install. You can configure which programs are excluded from Office 365 ProPlus using the Office Deployment Tool. You will learn more about configuring the Office Deployment Tool later in this chapter.
More Info Exclude Programs From Office 365 Proplus
You can learn more about excluding programs from Office 365 ProPlus at: https://docs.microsoft.com/DeployOffice/configuration-options-for-the-office-2016-deployment-tool.
Plan for Office 365 apps
Microsoft has made Word, Excel, Outlook, PowerPoint, and OneNote apps available for the iOS and Android mobile platforms. There are several ways that you can install these apps on these devices.
The first is to navigate to the Microsoft 365 portal using the mobile device on which you want to install each application. From here you can click Install Office as shown in Figure 4-3.

Clicking Get Office Apps will open a page on Microsoft’s website that will provide a link to the app’s page in the appropriate vendor’s app store. Figure 4-4 shows the Apple App Store page that opens when the Excel link on the Microsoft 365 portal is opened. The application can then be downloaded from the App Store and installed on the device.

These applications can also be installed directly from each mobile device operating system vendor’s app store. To use all the available features of each app, such as accessing documents in OneDrive for Business that are associated with your organization’s Microsoft 365 subscription, it will be necessary to sign in to the app using your Microsoft 365 user account credentials. Premium features include:
The ability to track changes, change page orientation, insert chart elements, and add WordArt and picture effects in the Word app.
Use Pivot Tables, add and modify chart elements in the Excel app.
Use Presenter View with speaker notes, perform audio and video edits, and use picture styles in the PowerPoint app.
Technical support options from Microsoft.
Select the Sign In option of an app, shown in Figure 4-5, to connect the app to a Microsoft 365 subscription.

More Info Office 365 and Mobile Devices
You can learn more about deploying at: https://support.office.com/article/Office-365-mobile-setup---Help-7dabb6cb-0046-40b6-81fe-767e0b1f014f?CorrelationId=93e770bc-f158-40da-8052-f27b45564eee.
Plan for Office 365 Pro plus apps updates
Office 365 provides new features and updates to Office programs on a regular basis. Depending on your organization, you can choose between an update channel that provides new features as they become available, or you can choose an update channel that provides new features less frequently. The following Office 365 update channels are available:
Monthly channel This channel provides users with the most recent features. Updates occur on a monthly basis.
Semi-annual channel This channel provides users with new features on a less frequent basis. Updates occur in January and July.
Semi-annual channel (targeted) Use this channel for pilot users and compatibility testers when you are using semi-annual channel. This allows these users to test updates and changes before they are released in the semi-annual channel. Updates to this channel occur in March and September.
You configure which update channel is used by editing the configuration.xml file for the Office Deployment Tool or by configuring the Update Channel group policy setting under Computer ConfigurationAdministrative TemplatesMicrosoft Office 2016 (Machine)Updates when the Office 2016 group policy template files are installed. You can also configure release channel settings in the Microsoft 365 Admin Center through Software Download Settings as shown in Figure 4-6.
More Info Office 365 Update Channels
You can learn more about Office 365 Pro plus app updates at: https://docs.microsoft.com/deployoffice/overview-of-update-channels-for-office-365-proplus.
Plan for Office 365 ProPlus connectivity
Network connectivity for Office 365 ProPlus depends on how you have determined you want to install updates. If you want to manage the update deployment from a location on your organization’s internal network, then client computers will only need to be able to access the location on the network that hosts the updates. The majority of Office 365 ProPlus deployments are more likely to use the default option of obtaining updates from Microsoft over the Internet. To obtain Office 365 ProPlus updates over the Internet, client computers will require access to the Office Content Delivery Networks.
The Office Content Delivery Networks (CDNs) are used not only for the deployment of Office 365 ProPlus updates, but also improve the performance of SharePoint Online pages by hosting cached versions of static assets in locations more proximate to the organization’s users. Access to the Office 365 CDNs is over the HTTP/2 protocol. This maximizes compression and improves download speeds when clients access content that the CDNs host. Office 365 CDNs are hosted with Akamai. To ensure the best performance and minimize latency, ensure that traffic from Office 365 ProPlus clients to the Office CDNs is not routed through proxies and instead can pass directly from the client to the Office CDN. Office 365 ProPlus also requires Internet connectivity for activation and reactivation.
More Info Office 365 Content Delivery Networks
You can learn more about Office 365 content delivery networks at: https://docs.microsoft.com/office365/enterprise/content-delivery-networks.
Plan for Office online
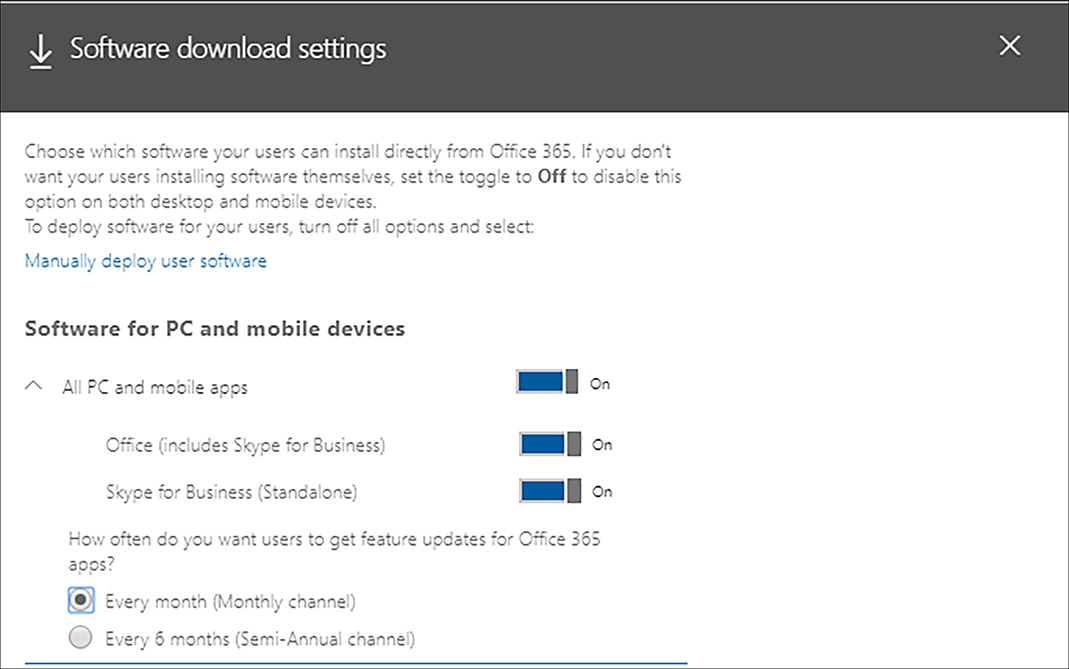
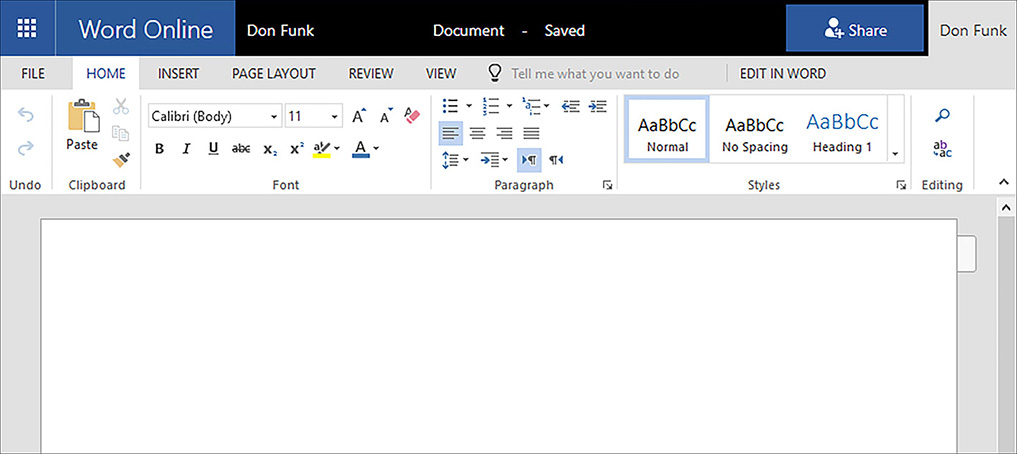
Office Online allows you to access the basic functionality of a variety of Microsoft Office applications through a supported web browser. You can open Word Online, Excel Online, PowerPoint Online, and OneNote Online directly from the Microsoft 365 portal, as shown in Figure 4-7.

People with Microsoft 365 User Accounts will be able to access documents stored in organizational locations such as OneDrive for Business and SharePoint Online. Documents will also be able to be opened directly from the Outlook Web App. Figure 4-8 shows the interface of the Word Online Office Web App.
More Info Office Online
You can learn more about Office Online at: https://support.office.com/article/Get-started-with-Office-Online-in-Office-365-5622c7c9-721d-4b3d-8cb9-a7276c2470e5.
Plan Office 365 Pro plus deployment
You can use a number of methods to deploy Office 365 ProPlus on a computer. In this section you’ll learn about manual deployments, centralized deployments, the Office Deployment Tool, the configuration.xml file, and click-to-run versus MSI.
Manual deployment
The typical method of deploying Office 365 ProPlus on a computer is for a user to access the installation files from the Microsoft 365 portal. You can install Office 365 ProPlus on a computer by performing the following steps:
Sign in to the computer with a user account that is a member of the local administrators group.
Open a web browser and sign in to the Office 365 portal at https://portal.office.com. You can click Install Office if you want to install using the default, or click Other Installs if you want to choose between the 32 bit and the 64 bit option.
If you want to install the 64-bit version of Office ProPlus, select the language and click Advanced as shown in Figure 4-9.
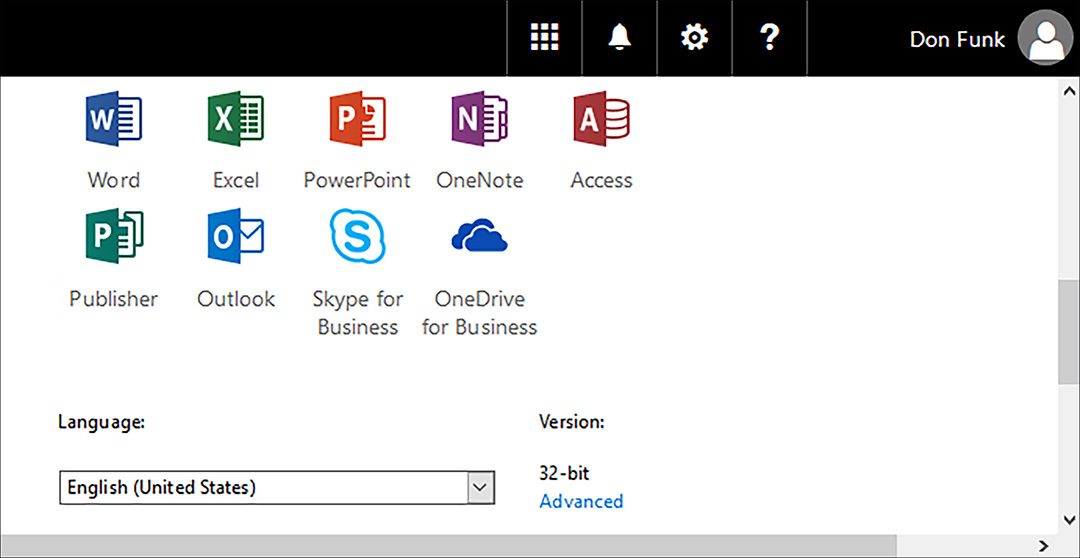
Figure 4-9 Install Office On Your PC Once you click Advanced, you can select between the 32-bit and the 64-bit option. Once you’ve selected the appropriate option, click Install. This will begin the download of the Office 365 ProPlus installer Click-to-Run setup file.
Choose to Save or Run the installation file. It’s often sensible to save the file and then run it as this simplifies the process of running the installer again should something interrupt the installation process.
Once the Click-to-Run installer has downloaded, double click on it to initiate installation. On the User Account Control dialog box, verify that the Program name is set to Microsoft Office, as shown in Figure 4-10, and then click Yes. The installation process will commence.
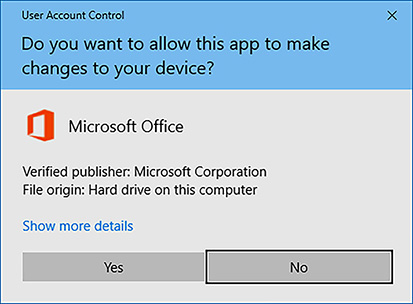
Figure 4-10 User Account Control On the “You’re all set!” page, shown in Figure 4-11, click Close.

Figure 4-11 Office is installed Open one of the Office ProPlus applications. The first time you run one you’ll be presented with the “Office is almost ready” screen shown in Figure 4-12. Click Accept and start Word, or whichever Office ProPlus application you selected to run first.

Figure 4-12 Office is almost ready On the Word Recent page shown in Figure 4-13, click “Sign in to get the most out of Office.”

Figure 4-13 Word Recent page On the Sign In page, shown in Figure 4-14, enter the email address of your Office 365 account and click Next.

Figure 4-14 Sign In On the Work or school account page shown in Figure 4-15, enter the password and click Sign In.

Figure 4-15 Enter work or school account credentials Once you have signed in, your account will be listed on the Recent page as shown in Figure 4-16 and documents stored in Office 365 will be available.
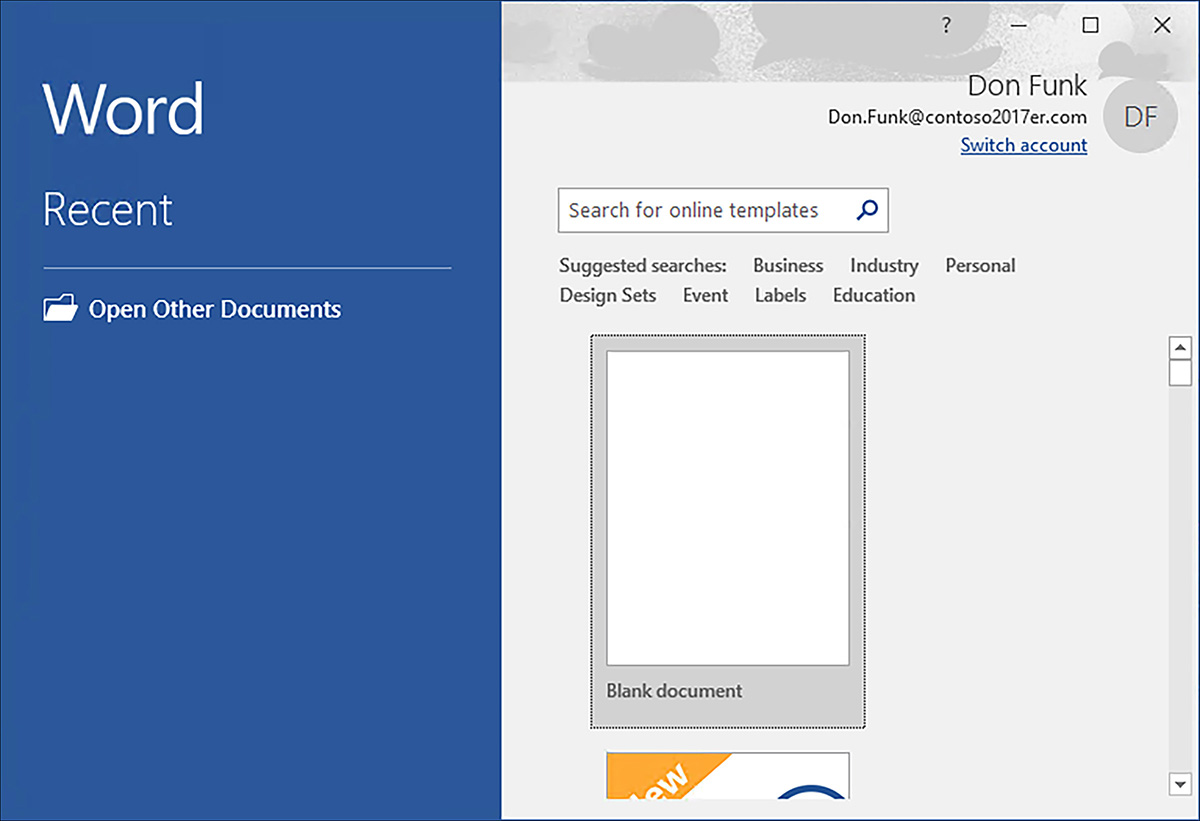
Figure 4-16 Signed in to Office 365
More Info Manually Installing Office 365 Proplus
You can learn more about installing Office 365 ProPlus at: https://support.office.com/article/Download-and-install-Office-using-Office-365-for-business-on-your-PC-or-Mac-72977511-dfd1-4d8b-856f-405cfb76839c.
Central deployment
With special preparation, Office 365 ProPlus can be downloaded to a local shared folder and then deployed centrally. To use this central deployment method, the IT department must use the Office Deployment Tool to download the Office 365 ProPlus software from Microsoft servers on the Internet. While it is possible to deploy Office 365 ProPlus centrally, successful installation of Office 365 ProPlus requires the ability for the software to activate against Microsoft Office 365 servers on the Internet. You can’t use a volume licensing activation solution, such as a Key Management Services (KMS) server, to activate Office 365 ProPlus even when you are deploying it centrally.
Office Deployment Tool
The Office Deployment Tool allows IT departments to perform the following tasks:
Generate a Click-to-Run for Office 365 installation source This allows administrators to create a local installation source for Office 365 rather than requiring that the files be downloaded for each client from the Internet.
Generate Click-to-Run for Office 365 clients This allows administrators to configure how Office 365 ProPlus is installed. For example, blocking the installation of PowerPoint.
Creating an App-V package Allows administrators to configure Office 365 ProPlus to work with application virtualization.
To install the Office Deployment Tool, perform the following steps:
On the computer on which you want to deploy the Office Deployment Tool, open a web browser and navigate to the following address: https://www.microsoft.com/download/details.aspx?id=49117.
On the Office Deployment Tool For Click-To-Run webpage, shown in Figure 4-17, click Download.

Figure 4-17 Office Deployment Tool For Click-To-Run Save the installer file to a location on the computer. Figure 4-18 shows the file downloaded to the Downloads folder.

Figure 4-18 Office Deployment Tool setup file. After the deployment tool has downloaded, double-click the self-extracting executable file to start the deployment tool setup.
On the User Account Control dialog box, click Yes.
On the Microsoft Software License Terms page, select the Click Here To Accept The Microsoft Software License Terms option and click Continue.
On the Browse For Folder page, select the folder in which to store the files associated with the tool. While these files can be extracted anywhere, you will need to interact with the tool frequently so you should create a folder in the root folder of a volume.
Four files will be extracted as shown in Figure 4-19.

Figure 4-19 Deployment Tool folder
The Office Deployment Tool is a command line utility that provides administrators with three general options:
The download mode allows administrators to download the Click-to-Run installation source for Office 365 ProPlus, as well as language pack files to a central on-premises location.
The configure mode allows for the configuration and installation of Click-to-Run Office products and language packs.
The packager mode allows for the creation of an App-V package from downloaded Click-to-Run installation files.
The customize mode allows you to apply new application settings to computers that already have Office 365 ProPlus installed.
The Office Deployment Tool must be run from an elevated command prompt in the / configure and /packager modes. To run the Office Deployment tool in download mode against a configuration file stored in the c:ClickToRun folder, use the syntax:
Setup.exe /download c:ClickToRunconfiguration.xml.
To run the Office Deployment Tool in configure mode, when the tool is hosted on the share \SYD-DeployO365 and the configuration file is stored on the share \SYD-DeployConfigs, run the command:
\SYD-DeployO365Setup.exe /configure \SYD-DeployConfigsConfiguration.xml.
More Info Office Deployment Tool
You can learn more about the Office Deployment Tool at: https://docs.microsoft.com/deployoffice/overview-of-the-office-2016-deployment-tool.
Configuration.xml
The deployment tool ships with three example Configuration.xml files: Configuration-Office365-x64.xml, Configuration-Office365-x86.xml and Configuration-Office2019Enterprise.xml. You use these Configuration.xml files to perform the following tasks:
Add or remove Office products from an installation.
Add or remove languages from the installation.
Specify display options, such as whether the installation occurs silently.
Configure logging options, such as how much information will be recorded in the log.
Specify how software updates will work with Click-to-Run.
Figure 4-20 shows one of the example Configuration.xml files that is available with the Office Deployment Tool.
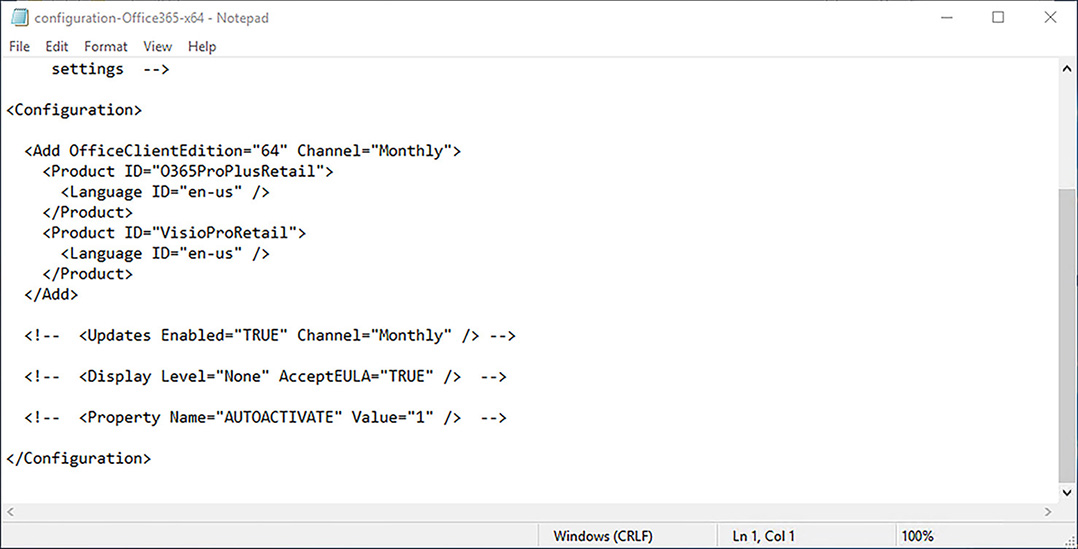
Important attributes include:
SourcePath When you run the tool in download mode, the SourcePath attribute determines the location where the Click-to-Run files will be stored. When you run the tool in configure mode, the SourcePath attribute determines the installation source.
OfficeClientEdition This value is required and either must be set to 32 or 64. This determines whether the x86 or x64 version of Office applications are retrieved or installed.
Version If this element is not set, the most recent version of files will be either downloaded or installed. If a version is set, then that version of the files will either be downloaded or installed.
Display The display element allows you to specify what information the user sees during deployment. The options are:
Level=None The user sees no UI, completion screen, error dialog boxes, or first run UI.
Level=FULL The user sees the normal Click-to-Run user interface, application splash screen, and error dialog boxes.
AcceptEULA=True The user does not see the Microsoft Software License Terms dialog box.
AcceptEULA=False The user will see the Microsoft Software License Terms dialog box.
ExcludeApp You use this element to exclude applications from being installed. Valid values of this attribute are as follows:
Access
Excel
Groove (used for OneDrive for Business)
InfoPath
Lync (used for Skype for Business)
OneNote
OneDrive
Outlook
PowerPoint
Project
Publisher
SharePointDesigner
Visio
Word
Language ID This element allows you to specify which language packs are installed. For example, you have en-us for US English. You can have multiple Language ID elements, one for each language that you wish to install.
Logging This element allows you to disable logging, enable logging, and specify the path where the log file is to be written.
Product ID This element allows you to specify which products to install. The available options are:
O365ProPlusRetail Office 365 ProPlus
VisioProRetail Visio Pro
ProjectProRetail Project Professional
SPDRetail SharePoint Designer
Remove If this element is set ALL=TRUE then all Click-to-Run products are removed.
Updates The updates element allows you to configure how updates are managed and includes the following options:
Enabled When set to true, Click-to-Run update system will check for updates.
UpdatePath If this element is not set, updates will be retrieved from Microsoft servers on the Internet. If the element is set to a network, local, or HTTP path, then updates will be sourced from the specified path.
TargetVersion Allows you to have updates applied to a specific Office build version. If not specified, the most recent version is updated.
Deadline Specifies the deadline by which updates must be applied. You can use Deadline with Target Version to force Office applications to be updated to a specific version by a specific date. The Deadline will only apply to a single set of updates. To ensure that Office applications are always up-to-date, it is necessary to revise the deadline when new updates are available.
More Info Configuration.Xml
You can learn more about the format of Configuration.xml at: https://docs.microsoft.com/deployoffice/configuration-options-for-the-office-2016-deployment-tool.
Click-to-Run vs. MSI
Click-to-Run and MSI are two different formats through which Office applications can be distributed to users. Click-to-Run offers the following features:
Streaming installation Streaming installation allows an application to be run before installation has completed. When the installation of an application is streamed, the first part of the application installed provides the minimum functionality necessary to get the application running. This allows the user to begin working with the application while installation completes.
Slipstreamed Servicing The Click-to-Run functionality of Office 365 ProPlus means that updates are included in the installation. Rather than installing Office in a traditional manner and then running a Windows Update check to locate and install any relevant updates, relevant updates are already included within the Click-to-Run installation files. Slipstreamed Servicing means that end users have the most secure and up-to-date version of the application immediately, rather than having to wait for the post-deployment update cycle to complete.
User-based licensing User-based licensing means that the Office 365 ProPlus license is associated with the Office 365 user account, not the computer that the user is signed on to. Depending on the type of license associated with the user and the tenancy, the user is able to install Office 365 ProPlus on up to five different computers as well as tablets and phones. It is possible to remove licenses from computers that have had Office 365 ProPlus installed on them at an earlier point in time.
Retail activation Office 365 ProPlus is activated using retail rather than volume license methods. Activation occurs over the Internet. This means that the computer must connect to the Internet every 30 days, otherwise Office ProPlus will enter reduced functionality mode.
SKU-level application suites Unless an administrator configures an appropriate configuration file, Office 365 ProPlus installs all products in the suite. The products that are installed will depend on the specifics of the Office 365 subscription, but this usually means Access, Excel, InfoPath, OneNote, Outlook, PowerPoint, Publisher, and Word. The products that are installed will be installed to all users in the tenancy. It is not possible to choose to install the PowerPoint program to some users but not to others when all users are using the same Click-to-Run installation file and configuration file. It is possible to have separate sets of applications deployed to users, but this requires separate configuration files for each set of applications.
MSI files are a method through which applications are packaged. MSI files allow organizational IT departments to automate the deployment applications, such as Office, using tools such as Microsoft Intune and System Center Configuration Manager. MSI files are appropriate for organizations that have a managed desktop environment and are less suitable for the types of “Bring Your Own Device” scenarios in which Click-to-Run products, such as Office 365 ProPlus, are suitable. MSI files offer the following features:
Classic installation MSI files can be installed by double-clicking on the installer file, can be deployed using Group Policy, Microsoft Intune, System Center Configuration Manager, or third-party application deployment products. The application is not available to the user until the installation of the application is complete. This differs from the Click-to-Run method’s streaming technology which allows a user to begin using an application with a reduced set of features before the installation of the application completes.
Layered servicing MSI files represent the application at the time that it was packaged as an MSI file. This means that after deployment it will be necessary for the IT department to apply any necessary software updates to the application. Depending on the age of the MSI file and the number of software updates that have been released since the application was first packaged, it can take quite some time for the application to be updated to the current patch level after the application is deployed. This substantially increases the amount of time between an application being deployed and the user being able to use the application to perform their job role. IT departments can update MSI files with the latest updates and patches, but this is a complex, usually manual, process which requires deploying the application to a reference computer, updating the application, and then performing a technique known as a capture that creates the new updated MSI file. With Click-to-Run technology, the application updates are slipstreamed into the application by Microsoft, meaning that the application is current with updates as soon as it is deployed.
Volume licensing The versions of Office that you can deploy from an MSI file, including Office 2016 and Office 2019, have editions that support volume licensing. Volume licensing gives you the option of using a volume license key. Volume licensing is not something that is automatically supported by the MSI format and depends on the properties of the deployed software. Volume licensing is only available to organizations that have volume licensing agreements with Microsoft.
Volume activation Like volume licensing, volume activation is not a property of an MSI file, but a feature that is supported by some versions of Office that use this packaging format. Volume activation allows large numbers of products to be activated, either through use of a special activation key used each time the installation is performed, or through technologies such as a Key Management Services (KMS) server on the organization’s internal network. Volume activation is only available to organizations that have volume-licensing agreements.
Selective application installation Rather than deploying all products in the Office suite, the MSI-based deployment method makes it simple for organizations to deploy individual products in the suite. For example, it is possible to choose to deploy Word and Excel to some users, and PowerPoint to others.
Scenario limitations Unlike Click-to-Run Office 365 ProPlus, which uses retail activation, the volume-licensed versions of Office 2016 and Office 2019 can be used on Remote Desktop Services servers, can be deployed on Windows To Go USB devices, and can be deployed on networks that do not have Internet connectivity.
While there are differences between the Click-to-Run Office 365 ProPlus and MSI-based Office 2019, there are also certain similarities:
Both can be configured through Group Policy.
Both provide telemetry visible through the Telemetry Dashboard.
Extensions designed for the Office 2019 version of a product will work with the Office 365 version of that product.
More Info Click-to-Run Versus MSI
You can learn more about Click-to-Run versus MSI at: http://blogs.technet.com/b/office_resource_kit/archive/2013/03/05/the-new-office-garage-series-who-moved-my-msi.aspx.
Exam Tip
Remember the different elements used in the Configuration.xml files.
Thought experiment
In this thought experiment, demonstrate your skills and knowledge of the topics covered in this chapter. You can find answers to this thought experiment in the next section.
There are an increasing number of iPad and Android tablet users at Contoso who want to use these mobile devices to perform work tasks. Several of the users of Android tablets have already installed apps from the Google Play Store, but are unable to access documents stored in SharePoint online. Some of the iPad users have heard that Office apps are available, but don’t know where to start when it comes to obtaining them. For your desktop computers, you are interested in centrally deploying Office 365 ProPlus using Click-to-Run files.
Don Funk is a user at Contoso. Don has just purchased a new consumer laptop for use at home and wants to set up Outlook and Skype for Business. Don signs in to his domain joined work computer using the contosodon.funk user name. Don signs in to Office 365 using the [email protected] user name. Single sign-on is configured with Office 365.
With this information in mind, answer the following questions:
What instruction should you give to iPad users about locating Office apps?
What instruction should you give to Android tablet users who have already installed apps from the Google Play Store?
Which tool should you use to obtain the Office 365 ProPlus Click-to-Run files from the Microsoft servers on the Internet?
Which file should you edit to retrieve a specific version of the Office 365 ProPlus Click-to-Run files?
Thought experiment answers
This section contains the solution to the thought experiment. Each answer explains why the answer choice is correct.
You should tell the iPad users to sign in to the Microsoft 365 portal. This will allow them to view the available Office 365-related apps for iPad. It will also provide them with direct links to those apps in the app store.
You should instruct them to sign in to their Microsoft 365 accounts in each app so that they can gain access to documents stored in enterprise locations.
You should use the Office Deployment Tool, also known as the Office Deployment Tool for Click-to-Run, to obtain the Office 365 ProPlus Click-to-Run files from the Internet.
You must edit the appropriate configuration.xml file to specify a specific version of the Office 365 ProPlus files.
Chapter summary
Exchange hybrid deployment requires Exchange 2007 or later on-premises.
The version of Exchange that you have deployed determines the type of hybrid deployment that is available. When selecting a hybrid deployment option, you should choose the most modern version available to your organization.
The SharePoint primary web application on the on-premises SharePoint farm must use a certificate from a trusted public third party CA.
A Skype for Business hybrid deployment requires federation.
You use a remote move (also known as a batch) migration when you have an existing Exchange hybrid deployment.
In a staged migration, you migrate mailboxes from your on-premises Exchange organization to Office 365 in groups, termed batches.
In a cutover migration, all mailboxes in an on-premises Exchange deployment are migrated to Office 365 in a single migration batch.
Network upload allows you to import PST files into Office 365.
Most organizations that are migrating from an on-premises SharePoint Server deployment to SharePoint online will use the SharePoint Migration Tool.
An activated copy of Office 365 ProPlus must be able to communicate with Microsoft servers on the Internet every 30 days. If this communication does not occur, Office 365 ProPlus will enter reduced functionality mode.
The Office Deployment Tool is a command line utility used if you want to centralize the deployment of Office 365 Click-to-Run files from a location on your local area network.
You can use the Office Deployment Tool to download the Office 365 Click-to-Run files and language pack files from Microsoft servers on the Internet.
You use the Office Deployment Tool in download mode to retrieve files from the Microsoft servers on the internet.
You use the Office Deployment Tool in configure mode to install Office 365 using an installation source on the local area network.
The configuration.xml file is used with the Office Deployment Tool in both download and configure mode. In download mode it allows you to specify which files are downloaded. In configure mode it allows you to specify how Office Click-to-Run applications and language packs are installed and how updates are applied.