
In the next recipe we will create a report based on NAV data, but not connected to the NAV server or client in any way. Server-side reports, as the name implies, are rendered on the server and published on a web portal through IIS server. Users can access these reports simply in a web browser from any computer connected to the corporate network.
The process of developing a server-side report is very similar to creating a client-side one, except that the source dataset is provided by an SQL query instead of a NAV server instance.
In source files: folder NAV Report, Visual Studio solution NAVReport.sln.
Download and install SQL Server Data Tools for your version of Visual Studio. The SSDT package is available on MSDN.
Internet Information Services must be installed and running on the computer that the report is going to be deployed on.
The report developed in the recipe shows the top 5 customers generating the highest income.
- Start Microsoft Visual Studio. Run the application with administrator privileges.
- Start a new project - select the New option in the File menu, then choose Project.
- In the list of installed templates, select the Business Intelligence group, then choose the Reporting Services subgroup. Select the Report Server ProjectWizard template. Enter the name of the project, NAV Report, and select the Create directory for solution option.
- The first step of the report wizard will ask you to configure the datasource connection. Leave the datasource type default (Microsoft SQL Server) and click the Edit button to set up the connection string.
- In the Connection Properties window, enter the database server name:
localhost
avdemo
. In thelogonparameters, leave the default option Use Windows Authentication. Select the database name from the drop-down list:Demo Database NAV (9-0). Click OK - the connection string will be constructed based on the entered parameters. - In the next step, you will be prompted to enter the SQL query that will retrieve data for the report. You can either enter the query text manually or construct it using the query builder. The following is the query text on which the recipe is based:
SELECT TOP 5 cust.No_ as "No.", cust.Name as Name, SUM(dle.[Amount (LCY)]) as Amount FROM [CRONUS International Ltd_$Customer] cust JOIN [CRONUS International Ltd_$Detailed Cust_ Ledg_ Entry] dle ON dle.[Customer No_] = cust.No_ GROUP BY cust.No_, cust.Name ORDER BY SUM(dle.[Amount (LCY)]) DESC, cust.Name ASC - Move to the next step - report type selection. Choose the tabular presentation form.
- In the next wizard step, you can choose how the fields are going to be grouped. Move all three available fields, No_, Name, and Amount, to the Details part. This report is a simple table without groups.
- Move to the selection of the report style. This part is left completely to your taste. The report color scheme can be changed here.
- Other configuration parameters will retain their default values, so just click Next to skip to the Completing the Wizard step. Enter the report name, here, Top Customers, and finish the report wizard. A report layout will be created. You can edit it manually before deploying it to the report server if you are not satisfied with the look:
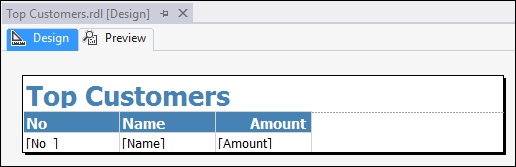
- Right-click on the text box that refers to the Amount field. Select Text Box Properties from the drop-down menu, choose the Number tab, and select Number in the Category list.
- In the main menu, select the Build group and run
Deploy NAV Report. - Run your web browser under administrator privileges and open the address
http://localhost/Reports: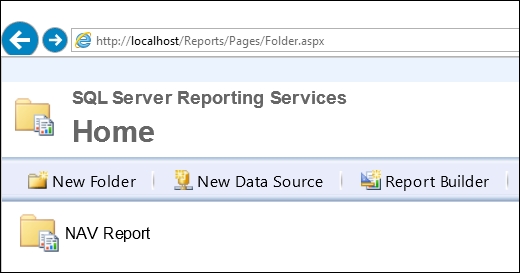
- Enter the
NAV Reportfolder. There is one report now located in this folder - Top Customers. Click on the report name to run it: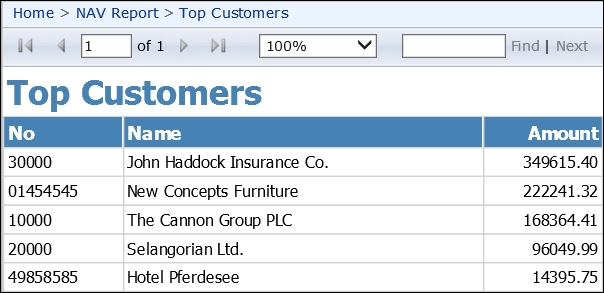
When we developed client-side reports in the previous recipes of this chapter, the first steps always included running the NAV development environment and configuring the report dataset there. Now the report is based on an SQL query that feeds data to the reporting services.
Writing a query for a report requires a deeper knowledge of the SQL language. If you are not familiar with SQL queries, just copy and paste the query text from Step 6 into the Query string window. After copying the text, you can push the Edit button and view the result. Table relations and aggregations will be reverse-engineered from the query. Simple queries can be designed in a visual interface of the query builder, although more complex queries still have to be written manually.
After the initial configuration is completed, the report wizard generates a layout for the report that can be further fine-tuned manually. Editing the layout of a server-side report is identical to the development of a client-side report. To add controls to the layout, open the Toolbox from the View menu and drag and drop report elements to the editor area.
Server-side reports can be previewed at any time during the development. Click the Preview button located above the report designer to see what it's going to look like.
The final step in the development part (Step 13 of the walk-through) is the deployment of the report. The default catalog for the report server location is localhost/ReportServer. You can view and modify these settings in the project properties. To access properties, open NAV Report Properties from Project menu.