
In Chapter 3 we showed you an example of how we can execute a few simulated pipeline stages in a Docker container to create a pipeline that can be ported to any CI server. In this chapter we’re going to take it a step further and create a pipeline that can clone, build, test, archive, and deploy a set of working applications. Then, we’ll show you how to take the pipeline you’ve created and move it from your desktop to two popular CI platforms.
An Overview of Our Applications
- 1.
Spring Boot applications written in Java, using Maven as a build automation tool
- 2.
ASP.NET Core Web APIs written in C#
- 3.
Angular applications leveraging TypeScript and Node.js
We’ve created three sample projects, each using one of these technologies. These projects include everything you need—code, configuration files, Dockerfiles, etc.—to follow along for the rest of the chapter. The next three sections provide a brief overview of what these sample applications do and the commands we execute to build, test, and run them. We won’t go into detail on how each of the sample applications work—there are other books better suited for that. These are barebones implementations and aren’t meant to be used as a model for writing high-quality applications.
Spring Boot
Note
You can find the source code for this project at https://github.com/Apress/generic-pipelines-using-docker
The first application is an API written in Java using the Spring Boot framework, and using Maven to build, test, and package the project. It’s based off the quick start example on the Spring Boot homepage and works with any relatively recent version of Java and Maven. For the purposes of this book, we’re using JDK 8 and Maven 3.
Note
If you want to learn more about the Spring Boot framework and how this project works, check out the quick start guide at https://projects.spring.io/spring-boot/#quick-start .

The Spring Boot application
ASP.NET Core Web API
Note
You can find the source code for this project at https://github.com/Apress/generic-pipelines-using-docker .
The second application is also an API, but this time written on top of ASP.NET Core Web API. It has a single endpoint that returns an array containing two values. It’s based off of the ASP.NET Core Web API project template generated by Visual Studio.

The .NET Core application
Angular 5
Note
You can find the source code for this project at https://github.com/Apress/generic-pipelines-using-docker .
Our last sample project is a web application built using Angular 5, TypeScript, and Node.js and relies on Chromium to run its test suite. It’s based on the Angular Quick Start example.
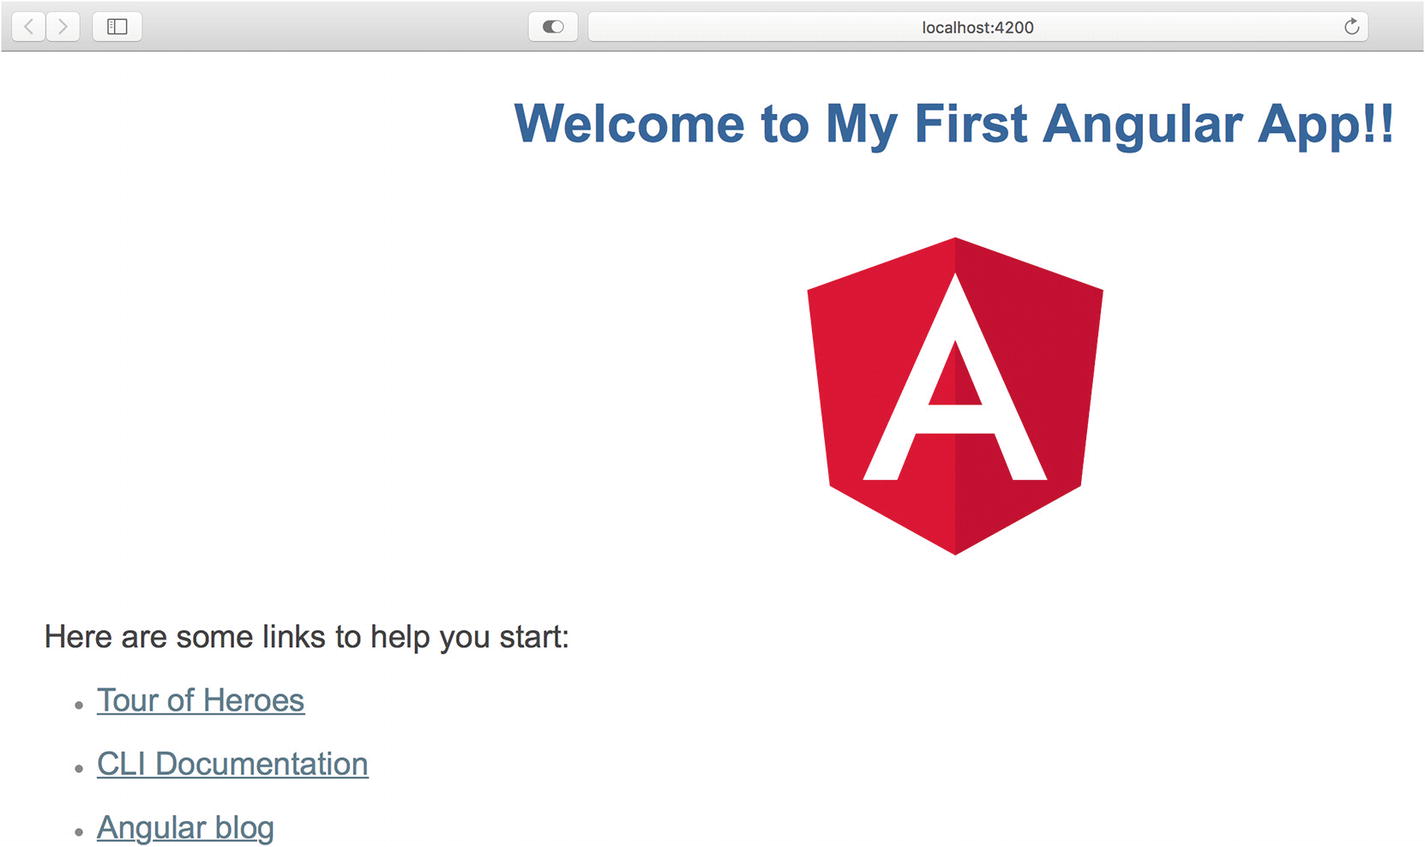
The Angular 5 application
A Deep Dive into the Pipeline
Note
You can find the source code for this project at https://github.com/Apress/generic-pipelines-using-docker .
Now that you’ve got a high-level overview of the sample projects we’re dealing with in this chapter, it’s time to explore the pipeline itself. In the following sections, we explore the configuration file that drives the behavior of the pipeline. Then we take a close look at each of the five stages of our pipeline: clone, build, test, archive, and deploy. Finally, we take a peek inside the build containers where all this takes place.
The Pipeline Configuration File
The Pipeline Configuration File for the Sample Java Project
The Pipeline Configuration File for the Sample .NET Core Project
The Pipeline Configuration File for the Sample Node Project
Our pipeline configuration file is broken into four sections: application , build, test, and archive. Some provide information about the application, while others provide fine-grained control over specific stages in the pipeline. Let’s take a closer look at each section.
The application section stores high-level information about the project. We use it to store the name and type of the application. In this book we deal with three types: node, java, and netcore. It’s up to you to decide what application types you want to support and what identifiers to assign them. Supporting a greater number of tech stacks will give your developers more flexibility but will require more work on their end. If a new version of the .NET Core framework is released and maintains backwards compatibility, netcore1, netcore2, and netcore3 applications can all share a single build image. This is a useful trick for keeping the number of images you have to maintain to a minimum.
The build section contains two elements: path and outputPath. The path element is used to let the pipeline know where the applications code can be found when it pulls it from source control. For most projects the source code is located in the root of the repository, but we’ve found some teams appreciate the flexibility to put it elsewhere. The outputPath element lets the pipeline know where to put the compiled output of the build command.
The test section contains configuration settings for the test stage of the pipeline. The first property, enabled, is used to determine whether this stage is run at all. As your pipeline becomes more robust with additional stages and features, you’ll likely find yourself adding this property to other sections too. It can be very useful to turn portions of the pipeline on and off due to unusual situations or for nonstandard projects. The path property in this section tells the pipeline where the tests are located relative to the project’s root directory.
Caution
If the enabled property is setting off alarm bells, that’s a good thing! This is useful for teams who don’t yet have unit tests or need to temporarily disable the stage while working through an issue. This has the potential to be used as a crutch!
The archive section lets the pipeline know where the build artifacts—in our case the Docker image containing one of our sample applications—should be stored. The registry property indicates which Docker registry will store the image. In this case, we’ll be storing the image on Docker Hub (Docker’s public registry). If your organization is hosting their own internal registry, you’d put that here instead. The repository property is the name of the image and should not include any tags; the pipeline will handle all of the tagging automatically. Your organization may require you to store application binaries and images separately. In that case you can modify this section to represent an array of artifact repositories.
The Clone Stage
The Clone Stage Shell Script
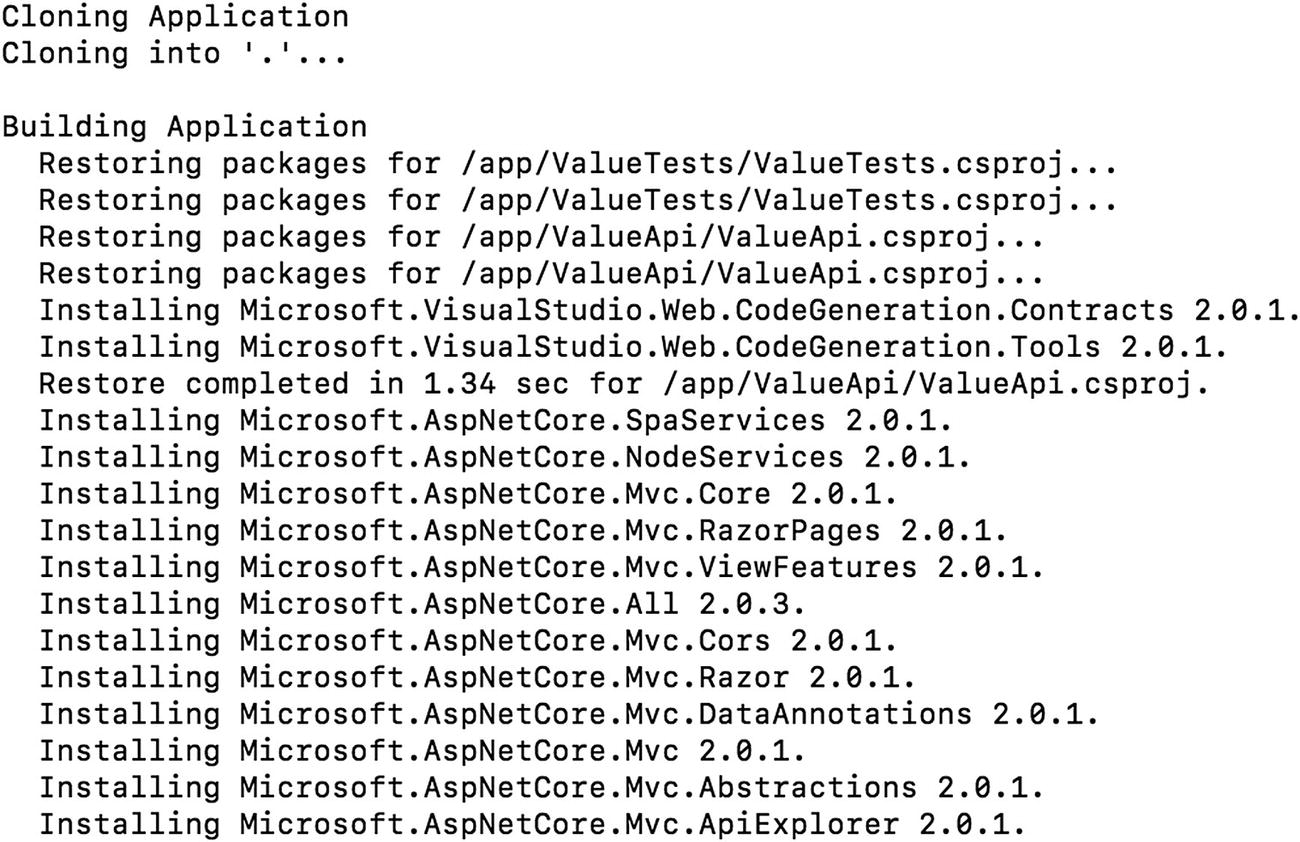
There’s not much happening in this stage. The script starts by outputting a brief description of the stage and then performing a git clone, which will place the application’s source code in the current working directory. Notice we’re using an environment variable here—GITHUB_URL . This—and others like it in subsequent stages—are expected to exist wherever the pipeline is running. Stages will also source information from the pipeline.json file. You’ll see an example of this in the next stage. We’ll cover the pipeline.json file in detail later in this chapter.
The Build Stage
The Netcore Build Stage Shell Script
This script uses jq to pull the value of application.type out of the pipeline.json file and assign it to application_type. This should be set to either java, netcore, or node if the pipline.json file is configured correctly. If application_type doesn’t equal one of these values, the script terminates with exit code 1.
Note
jq is a fantastic tool that’s packed with functionality! You can find a great tutorial on the official website at https://stedolan.github.io/jq/ .
For java applications, we’ll use Maven to clean the workspace, which ensures there aren’t any cached or outdated files lying around, and then compile the application. It’s important to remember that we require all java apps that come through the pipeline to support Maven.
If the application_type is netcore, we’ll use the .NET Core CLI to perform a NuGet package restore by issuing the command dotnet restore app. Then, we’ll call dotnet build app -c Release to compile the source code using the Release configuration.
Finally, if application_type is set to node, we’ll use the Node Package Manager to download and install any required dependencies. After that, we issue the npm run build command to compile everything.
The Test Stage
The Test Stage Shell Script
The test stage uses the same pattern as our build stage, with one exception. Before kicking off any tests, it checks the test .enabled property in the pipeline configuration file. If it’s set to false, the stage is skipped.
Assuming the stage is enabled in the configuration file, application_type is evaluated and the appropriate command is executed to run the test suite. As in the build stage, unknown application types cause the stage to fail with error code 1.
Using our sample projects, implementing this stage turns out to be fairly trivial. In our experience though, it tends to grow in complexity and even spawn completely new stages. For example, your organization may want to report on code coverage or require a certain percentage of tests to pass. Perhaps your teams have various suites of tests in several different repositories. If your teams write both unit tests and end-to-end tests, it might make sense to keep them in separate stages.
The Archive Stage
The Archive Stage Shell Script
Like the build and test stages, the archive stage starts off by pulling some information out of the pipeline configuration file. We get the registry and repository values and then combine them to get the desired name of the image containing the application. For now, we’re just applying the latest tag, but in the next chapter we’ll discuss versioning your artifacts so they won’t be overwritten and can be uniquely identified later.
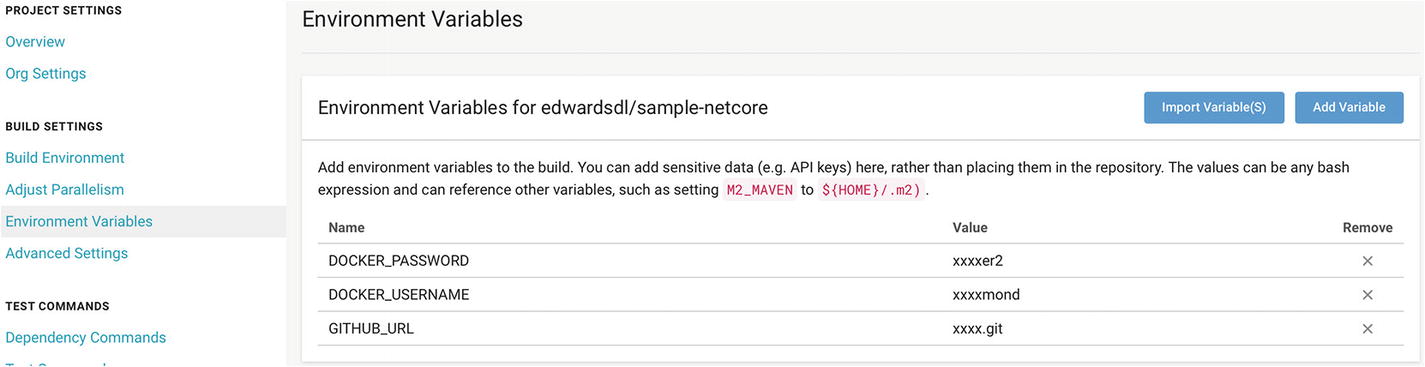
Now that we have a name, we can build and push the image. The first step is to log in to the registry specified in the pipeline configuration file. Like GITHUB_URL, the DOCKER_USERNAME and DOCKER_PASSWORD variables will be passed into the container as environment variables. Because these are credentials and thus sensitive information, they shouldn’t be stored in the pipeline configuration file.
Assuming we were able to login successfully, the next step is to build the image. Like we mentioned earlier, each of our sample applications is designed to be deployed inside a container, so each of them has an associated Dockerfile. Our pipeline expects each application’s Dockerfile to be located in the project’s root directory. Of course, you could always offer more flexibility by introducing a new docker.dockerfilePath variable in your pipeline configuration file. In our experience, however, that hasn’t proved to be necessary. To kick off the build, we issue the docker build command passing the name of the image and the build context.
The Deploy Stage
The Deploy Stage Shell Script
As mentioned before, each of our example apps are designed to be deployed inside a container. To do that, we need a few pieces of information from the pipeline configuration file: archive.registry, archive.namespace, and archive.repository. We put these together to form an image name, for example, docker.io/edwardsdl/sample-netcore:latest. This is the image we created in the archive phase. Next, we execute the command docker run -dp "${container_port}:${container_port}" "${image}". This runs the latest version of the image containing our application in “detached” mode—meaning in the background—and publishes the port the application is listening on. Once this is done, the deploy script terminates, which, since it is the last of the stage scripts, causes the pipeline container to exit.
Tip
While containerizing your applications isn’t necessary to create a generic pipeline, it certainly makes things easier. If your organization hasn’t explored the idea of containerized applications, I highly recommend doing so.
A Look at Our Build Containers
One of the key features of our pipeline is that it executes entirely inside a Docker container. This allows us total control over our build environment. We can add or update dependencies easily, set environment variables as needed, or install software in custom locations—all without interfering with other applications’ build environments or workflows. Of course, in order to have a build container you must have a Dockerfile. In this section we’ll take a look at the three Dockerfiles we use for each of our three tech stacks.
The Dockerfile for the Java Build Container
The Dockerfile is relatively simple. We use maven:3-jdk-8 as our base image because it comes out of the box with both the Java 8 JDK and Maven 3. Admittedly this base image makes the container a little bloated, but in our experience these containers tend to get fairly large anyway, so it’s not worth worrying about a few extra megabytes.
Next, we install Docker inside the container. That probably sounds strange—it did to us the first time too! The reason is simple: our applications are designed to be deployed as containers and thus have Dockerfiles themselves. That means we need to issue docker build and docker push commands from inside our build containers.
Caution
We chose to install Docker using this method because it’s concise and easy to understand. However, it’s never a good idea to run scripts without examining them first. You can find a more secure method for installing Docker at https://docs.docker.com/install/ .
Note
Using Docker inside of Docker is becoming a very common scenario. However, if you are new to this concept you can learn more here: https://blog.docker.com/2013/09/docker-can-now-run-within-docker/ .
The third line of our Dockerfile installs two packages: jq and zip . The first, jq, is a command line tool that’s great for parsing and transforming JSON data. It’s used extensively inside our stage scripts, as you saw earlier in the chapter. The second is zip. I’m sure you can guess what that does.
Next, we copy the pipeline stages into the container. Be aware: by copying your code in now, you’ll be required to recreate your build images when your stage scripts change. In your implementation you may decide to clone your stages into your container when it starts up. You’ll always be running the latest code, but it’s more difficult to determine which version of the pipeline created a given artifact.
Finally, we set our working directory to /app. The pipeline will use this as its primary workspace. Application code will be cloned, built, tested, and packaged all within this directory.
The Dockerfile for the .NET Core Pipeline Image
The Dockerfile for the Angular Pipeline Image
Running the Pipeline
Now that we’ve gone over the sample applications, stage scripts, and Dockerfiles, it’s time to run our pipeline. To begin, we’ll run it locally. Afterwards we’ll show you how to port it to several popular CI tools.
Before you move on, we suggest you fork one of our sample projects. These applications have been thoroughly tested, and with a few simple modifications you’ll be able to run them through the pipeline locally and in the cloud. In addition, as part of the sign-up process, both Travis CI and CircleCI will request access to your GitHub account in order to streamline the setup process and start builds when new code is committed to a linked repository. In the end, we think it’ll be easier for you to use one of our applications than build your own.
For the rest of the chapter we’ll be using our sample .NET Core project. You can find it at https://github.com/Apress/generic-pipelines-using-docker . If you’re using GitHub, forking our sample projects is easy! Just navigate to its repository on GitHub and click the “Fork” button in the top right. This will create a copy of the repository in your account.
Using the Command Line
Building and Running the Pipeline
Running the pipeline from the command line

Inspecting the deployed application
Using IntelliJ IDEA CE
If you’re more comfortable using an IDE, Intellij IDEA has wonderful support for building Docker images. You can use the “Docker Integration” plugin, which is incredibly helpful. Setup is a little more involved, but once you’re done you have a powerful development environment at your fingertips.
Tip
If you run into trouble when adding new Docker configuration profiles, check out JetBrains’ help page at www.jetbrains.com/help/idea/run-debug-configuration-docker.html .

Creating a new configuration
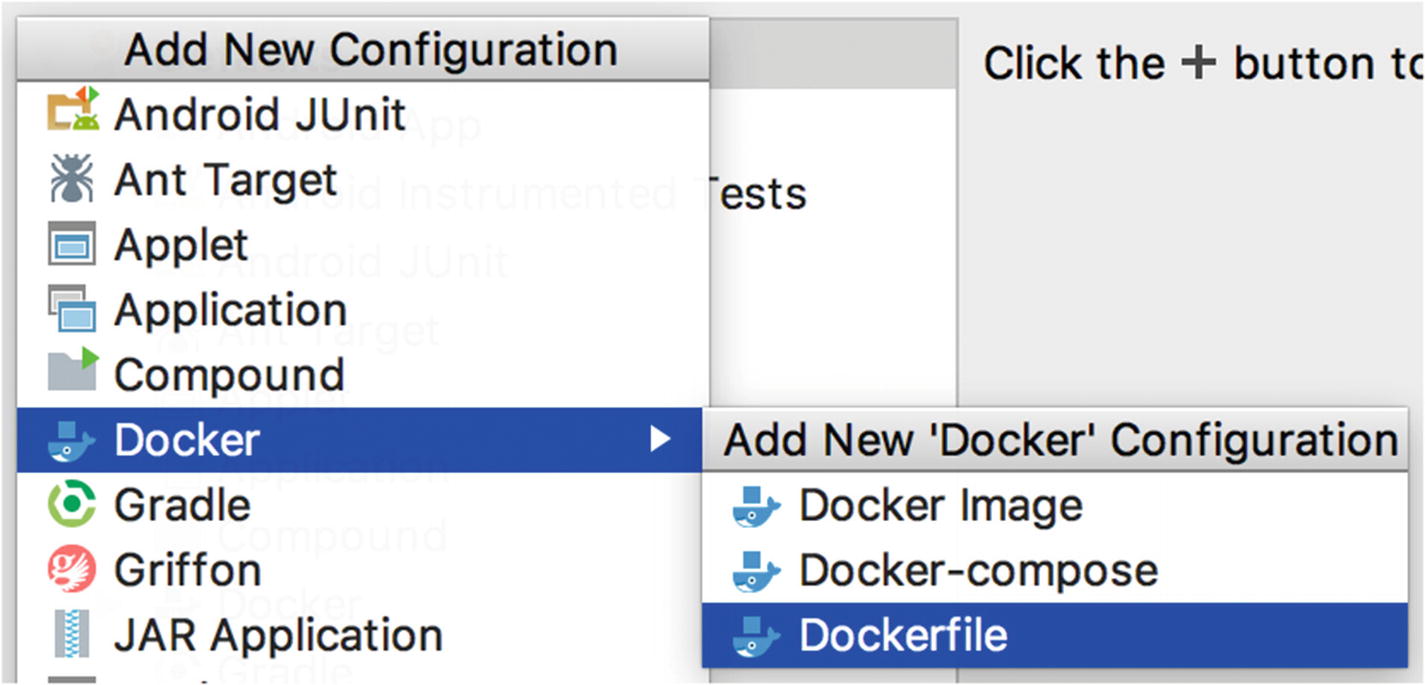
Adding a new Dockerfile configuration
The first configuration we’ll create will allow us to run the .NET Core pipeline. We’ll name this new configuration, “Run .NET Core Pipeline.” In the Dockerfile drop-down box, select “Dockerfile.netcore.” Now, select the checkbox labelled “Run built image” and set the container name to netcore-pipeline. Next, in the executable section, set the command to /stages/00_run.sh.

Mounting the Docker socket
Tip
If you want to learn more about the history of issuing Docker commands inside a container and mounting the Docker socket, Jérôme Petazzoni has written an excellent blog post at https://jpetazzo.github.io/2015/09/03/do-not-use-docker-in-docker-for-ci/ .
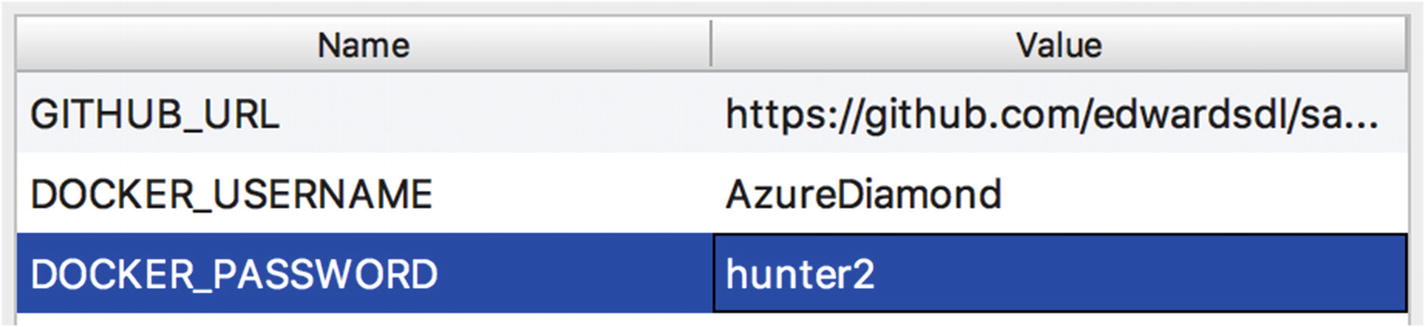
Adding environment variables
Note
If you have forked the sample GitHub repo, remember to use your GITHUB_URL in these examples!

Adding the Run .NET Core Pipeline configuration
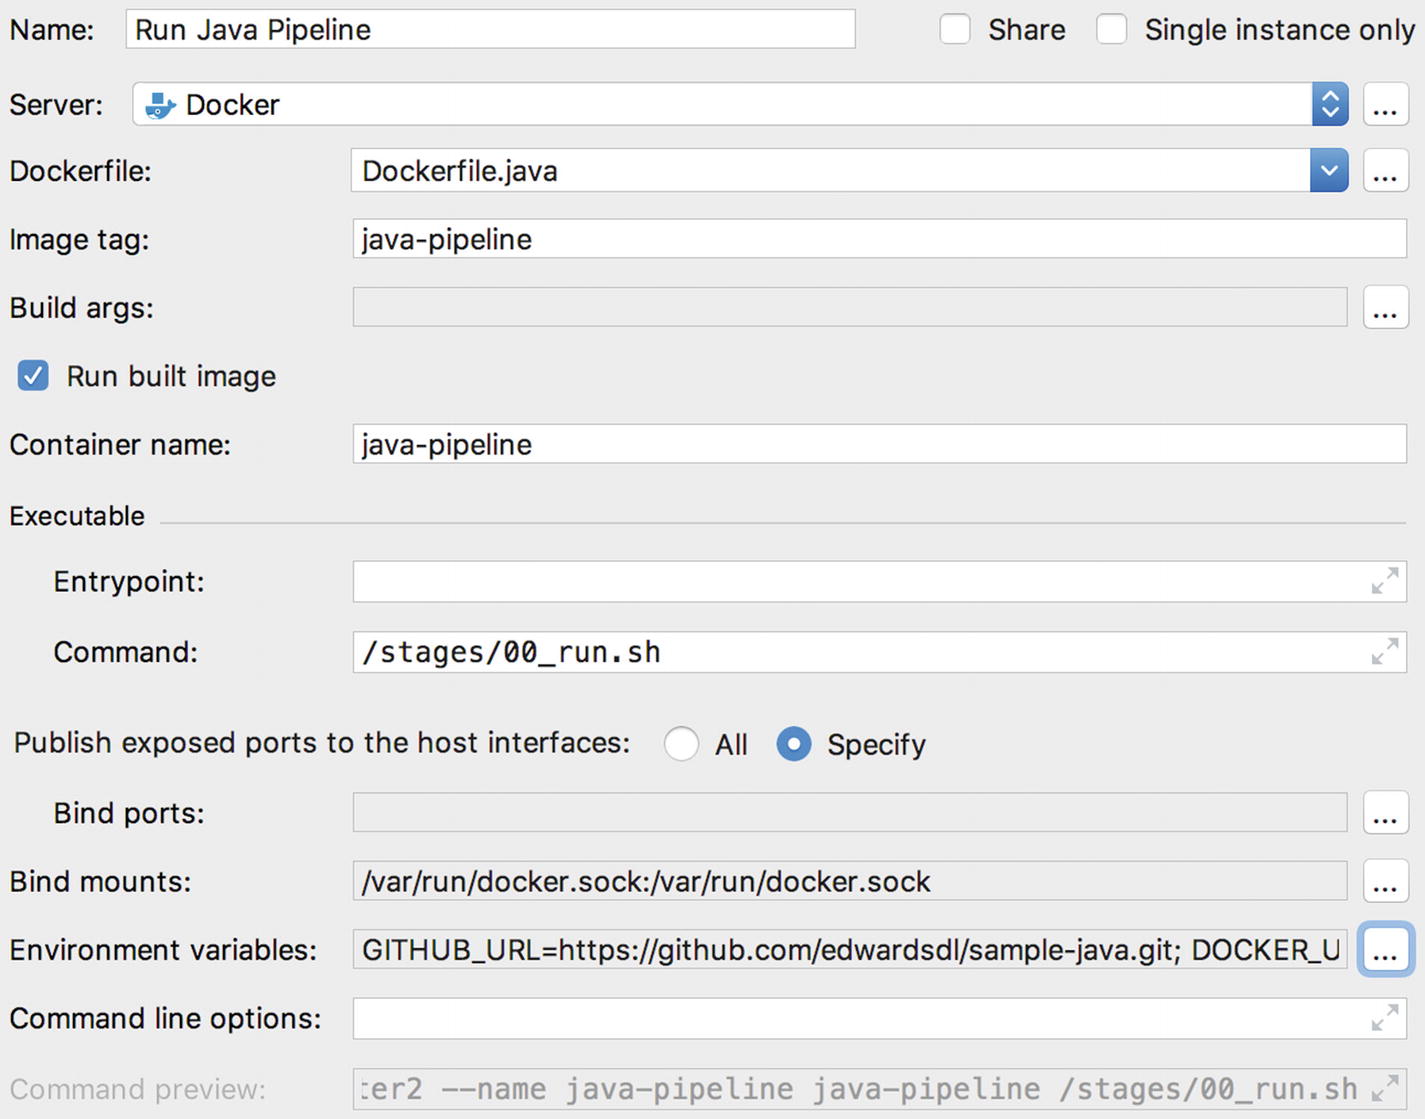
Adding the Run Java Pipeline configuration
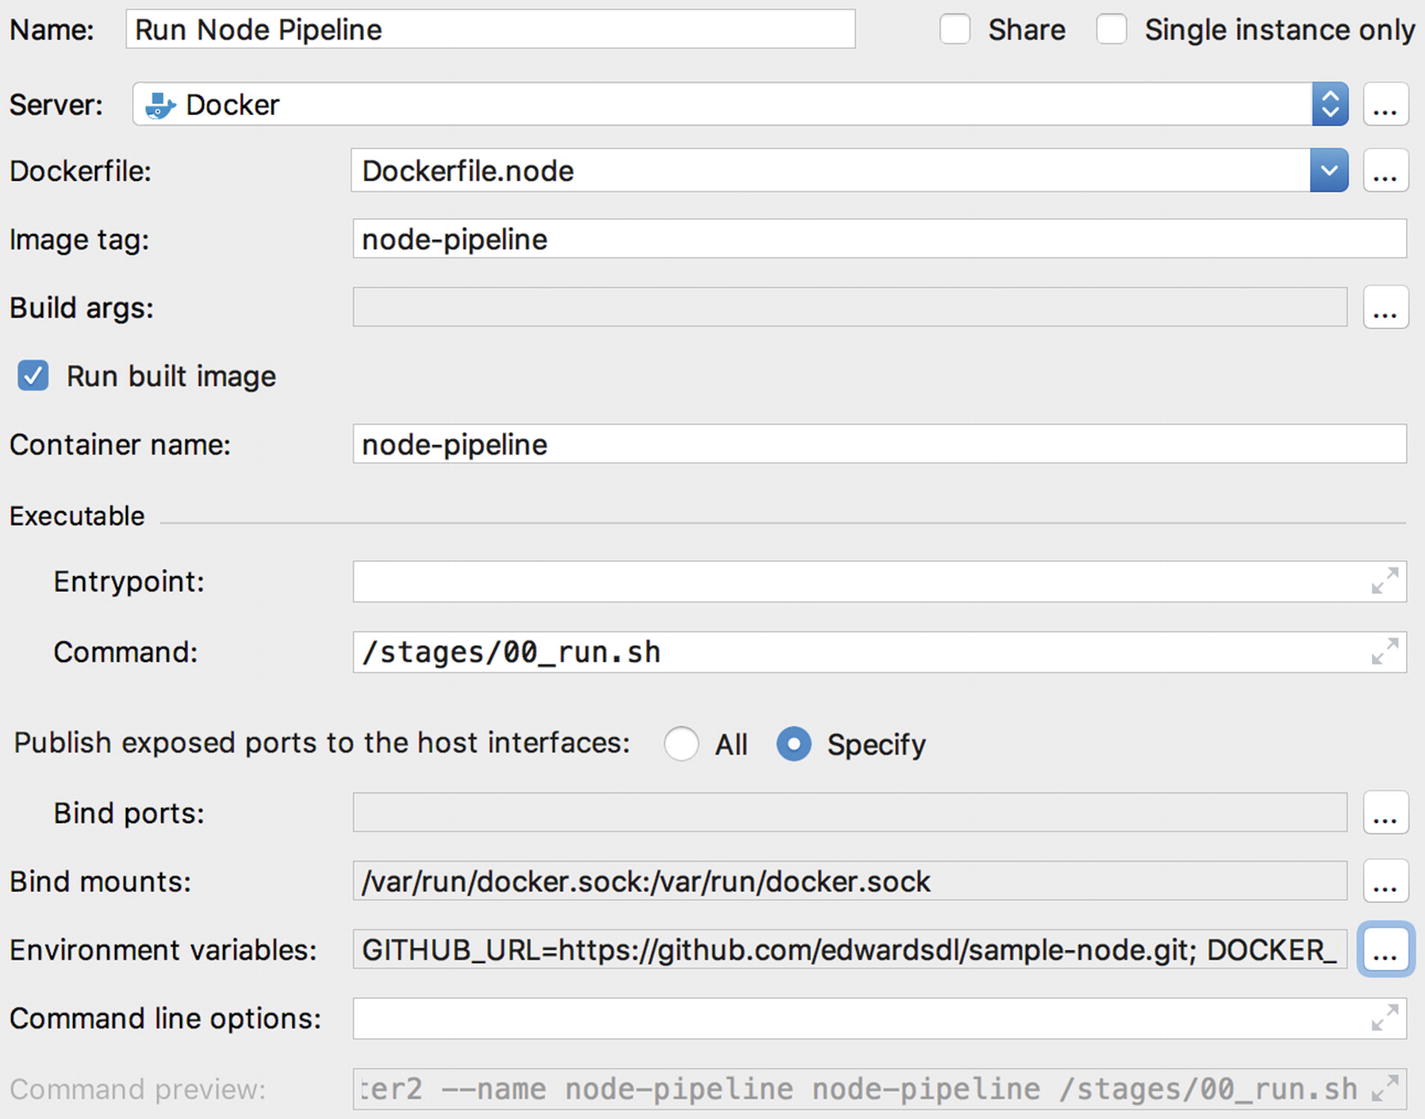
Adding the Run Node Pipeline configuration
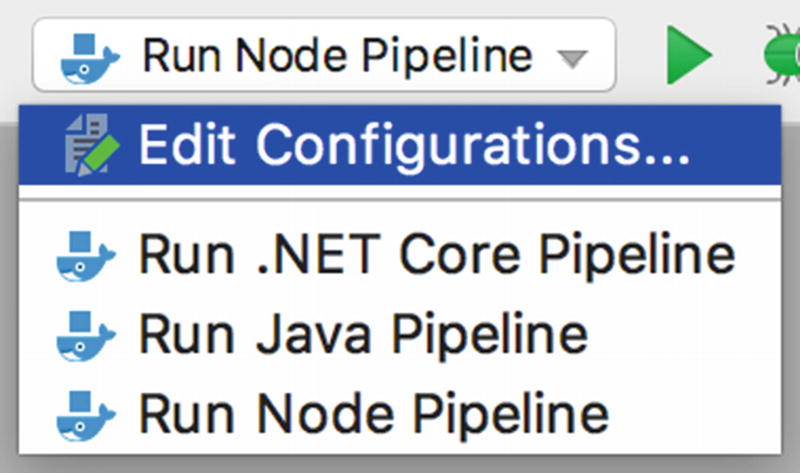
Listing the newly created configuration profiles
Moving to the Cloud
Now that we’ve seen the pipeline work on our local machine, it’s time to get it working using a real continuous integration tool. We’ll start by forking one of our sample projects in GitHub. Next, we’ll show you how to run our pipeline in Travis CI by converting the 00_run.sh script to a .travis.yml file. Finally, we’ll walk you through porting our pipeline from Travis CI to CircleCI.
Moving the Pipeline to Travis CI
As mentioned, we’ll be showing you how to use the pipeline with two continuous integration platforms. Up first, we’ll be looking at Travis CI.
Travis CI was one of the first—if not the first—CI/CD SaaS offering. It provides an intuitive interface, free accounts for open source projects, good documentation, and a large number of integrations. Because of this, Travis CI is wildly popular, especially amongst open source projects.
Creating a Travis CI Account
Before we can move our pipeline to Travis CI, we’ll need to create a new account. If you don’t need help, skip ahead to the next section.
Open a browser and navigate to https://travis-ci.org , then click the button labeled, “Sign Up” (Figure 4-14). If prompted, enter your GitHub username and password. If you are already signed in to GitHub, you won’t be asked to do so again.
Caution
Check that top-level domain! You want https://travis-ci.org not https://travis-ci.com . The latter is for paid projects only!

The Travis CI homepage
Grant Travis CI access to your email address and permission to add new webhooks to your repositories. The service will use this to help you set up new builds, to trigger builds when new code is committed to your repositories, and notify you when things go wrong.
After granting Travis CI access, you’ll be dropped on a “Getting Started” page. Take a minute to read through this page. It details the steps required to add a new repository and start building it.
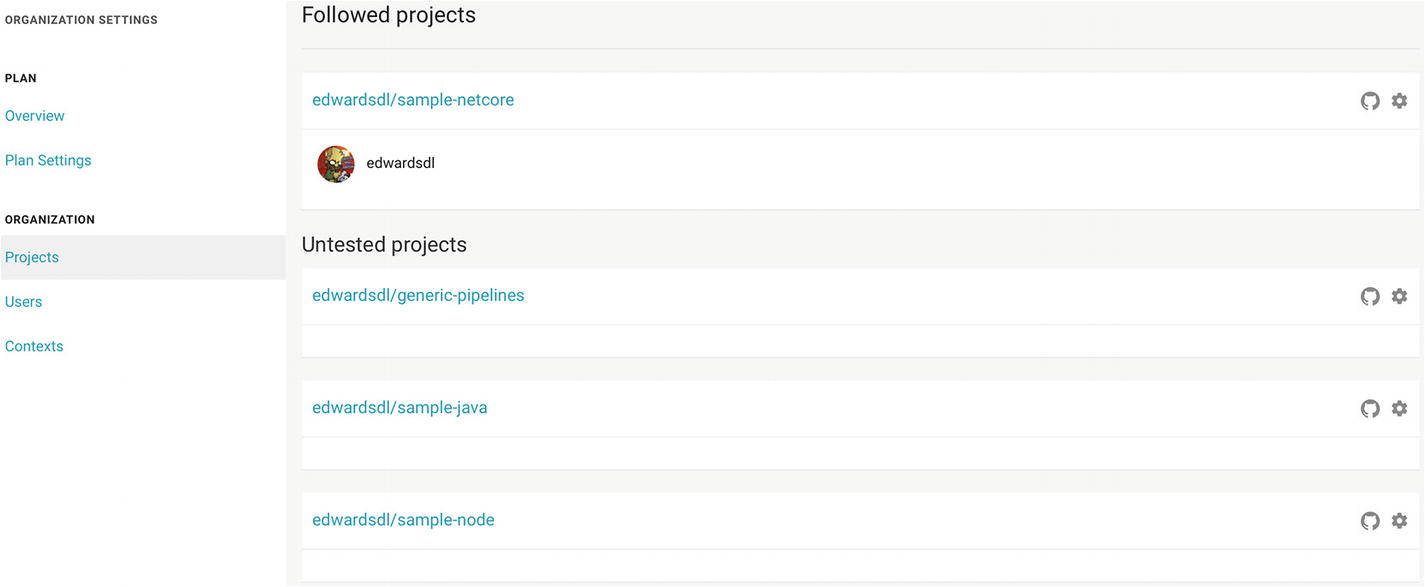
Adding a New Repository
Now that your account has been created, you’re ready to add a new repository to Travis CI. This is where it all comes together. Once you’re done setting up the repository, you’ll get to see the generic pipeline in action.
The “Getting Started” page

Adding the .NET Core sample repository to Travis CI

Adding environment variables to the build
Caution
Make sure to toggle the “Display value in build log” switch to the OFF position for the DOCKER_PASSWORD environment variable. You don’t want your password showing up in the build log!
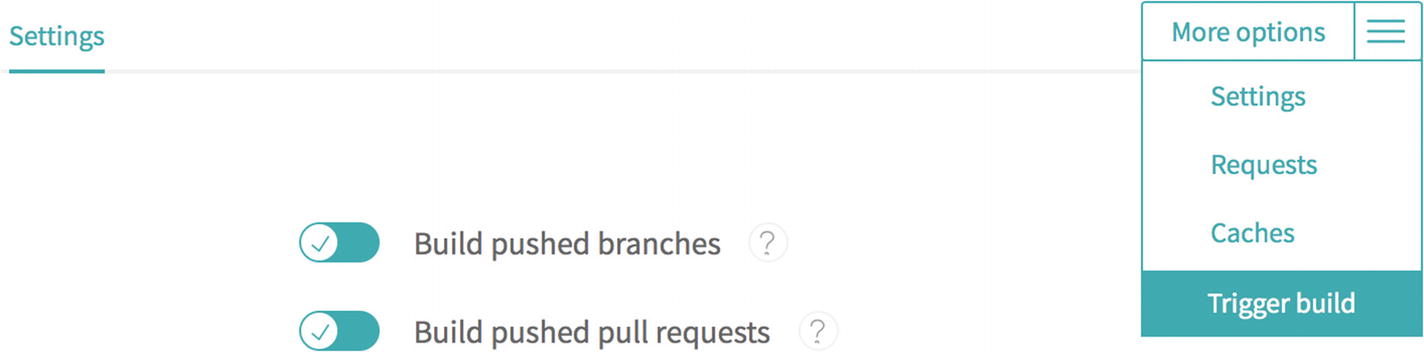
Triggering the first build
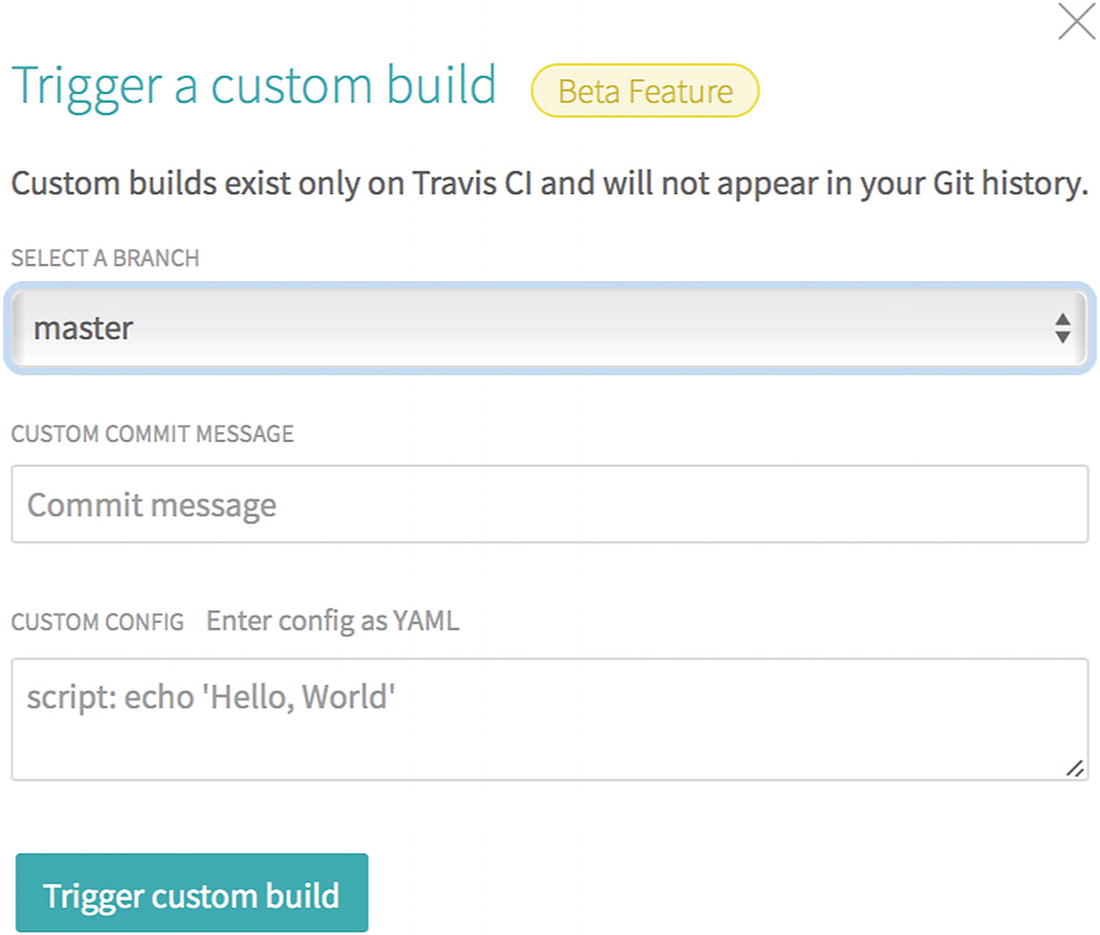
Triggering a custom build
Note
For more information about this feature, check out the blog post announcing its release at https://blog.travis-ci.com/2017-08-24-trigger-custom-build .
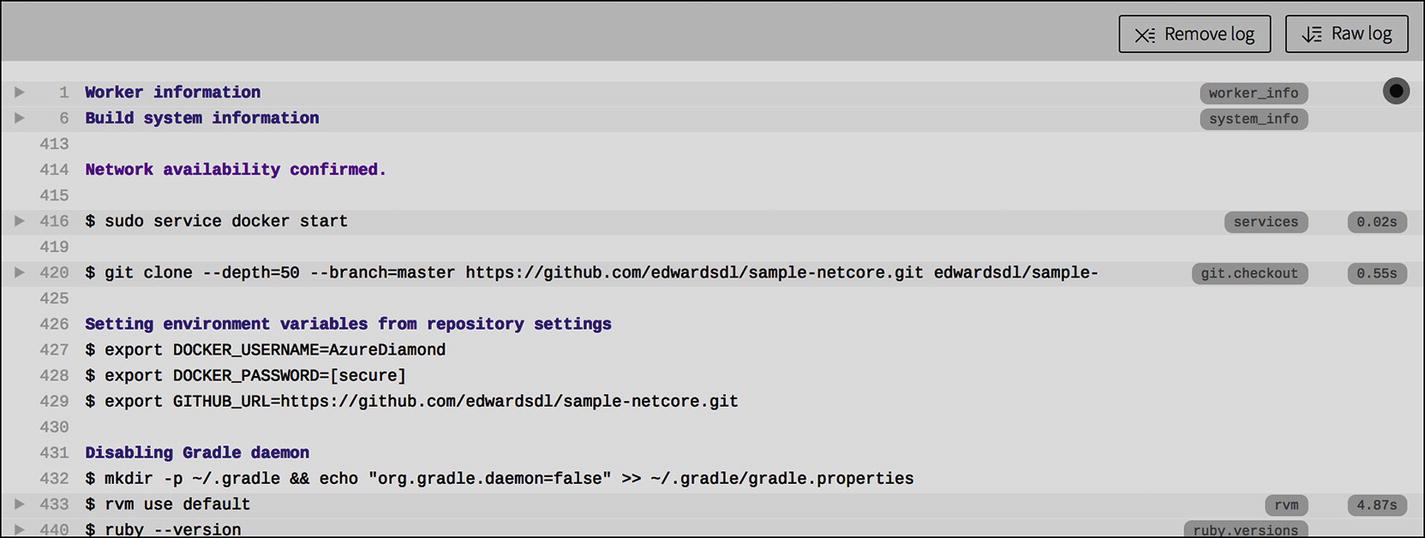
Running the pipeline in Travis CI
A Look at the Travis CI Configuration File
The Travis CI Configuration File
It turns out the configuration file looks pretty similar to our 00_run.sh script. That’s by design! One of the primary benefits of this architecture is the ease with which you can move from one CI platform to another.
The services section describes any custom services—like MongoDB, Memcached, or RabbitMQ—your build requires. Travis CI will include these in your build environment. In our case, we ask that Docker be installed.
The before_script section lets us run any last-minute commands before the build really gets started. We’ll use it to pull and run the latest version of the netcore-pipeline Docker image. Just like when we ran it locally, we mount the Docker socket and pass the DOCKER_USERNAME, DOCKER_PASSWORD, and GITHUB_URL environment variables to the container.
Note
You may have noticed our docker run command is preceded by a vertical bar (|). This is called the literal block scalar style and it allows our command to span multiple lines. If you’re fascinated by formal language grammars, check out the YAML specification at http://yaml.org/spec/1.2/spec.html#id2795688 .
The script section is where we instruct Travis CI to run the stages we’ve included inside the container. Starting at 01_clone.sh, we simply work our way through each script until we’re done. If any stage fails, Travis will stop execution and mark the build as failing.
Note
For more information about configuring your Travis CI build, visit https://docs.travis-ci.com/user/customizing-the-build/ .
Running the Pipeline in CircleCI
It’s not unusual for organizations to transition from one CI/CD platform to another. Even upgrading from one version to another can be a huge undertaking. In this section, we’ll see what it takes to move our pipeline from Travis CI to CircleCI.
CircleCI is one of the world’s most popular CI/CD platforms. Like Travis CI, CircleCI is hosted in the cloud, offers free accounts, and is very easy to get up and running. On top of all that, it’s arguably an even better fit for our pipeline than Travis CI, as it was built with containerized pipelines in mind!
Creating a CircleCI Account
Tip
For more information about getting started with CircleCI, visit the 2.0 documentation page at https://circleci.com/docs/2.0/ .
This section will guide you through the process of creating an account. The process is fairly straightforward and very similar to that of Travis CI. If you’ve got experience working with CircleCI or are confident you don’t need help, feel free to skip to the next section.
The CircleCI home page

Signing up with CircleCI
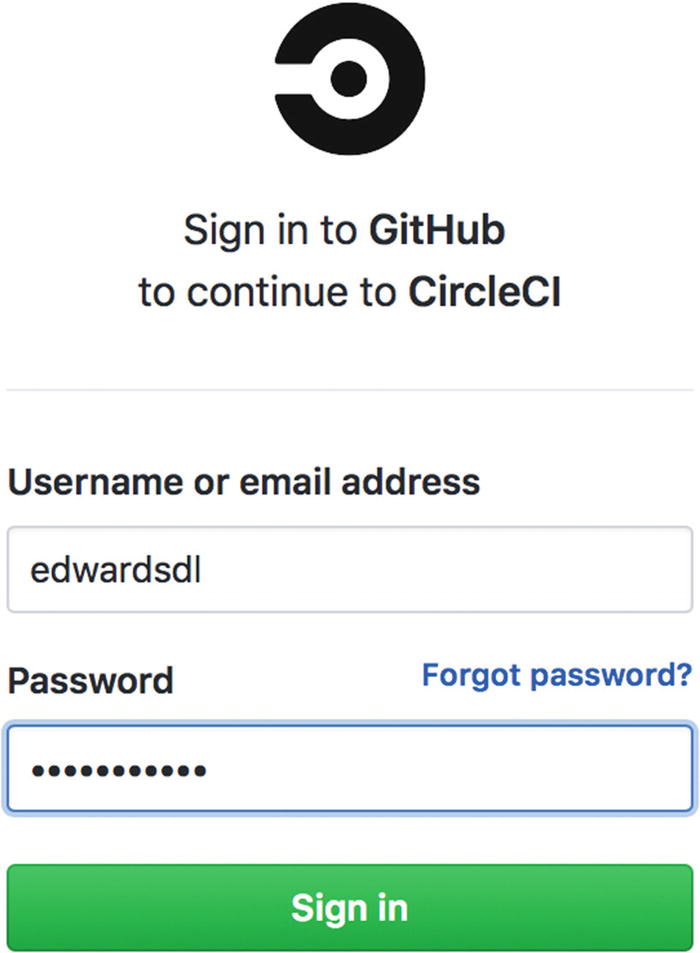
Signing up using GitHub
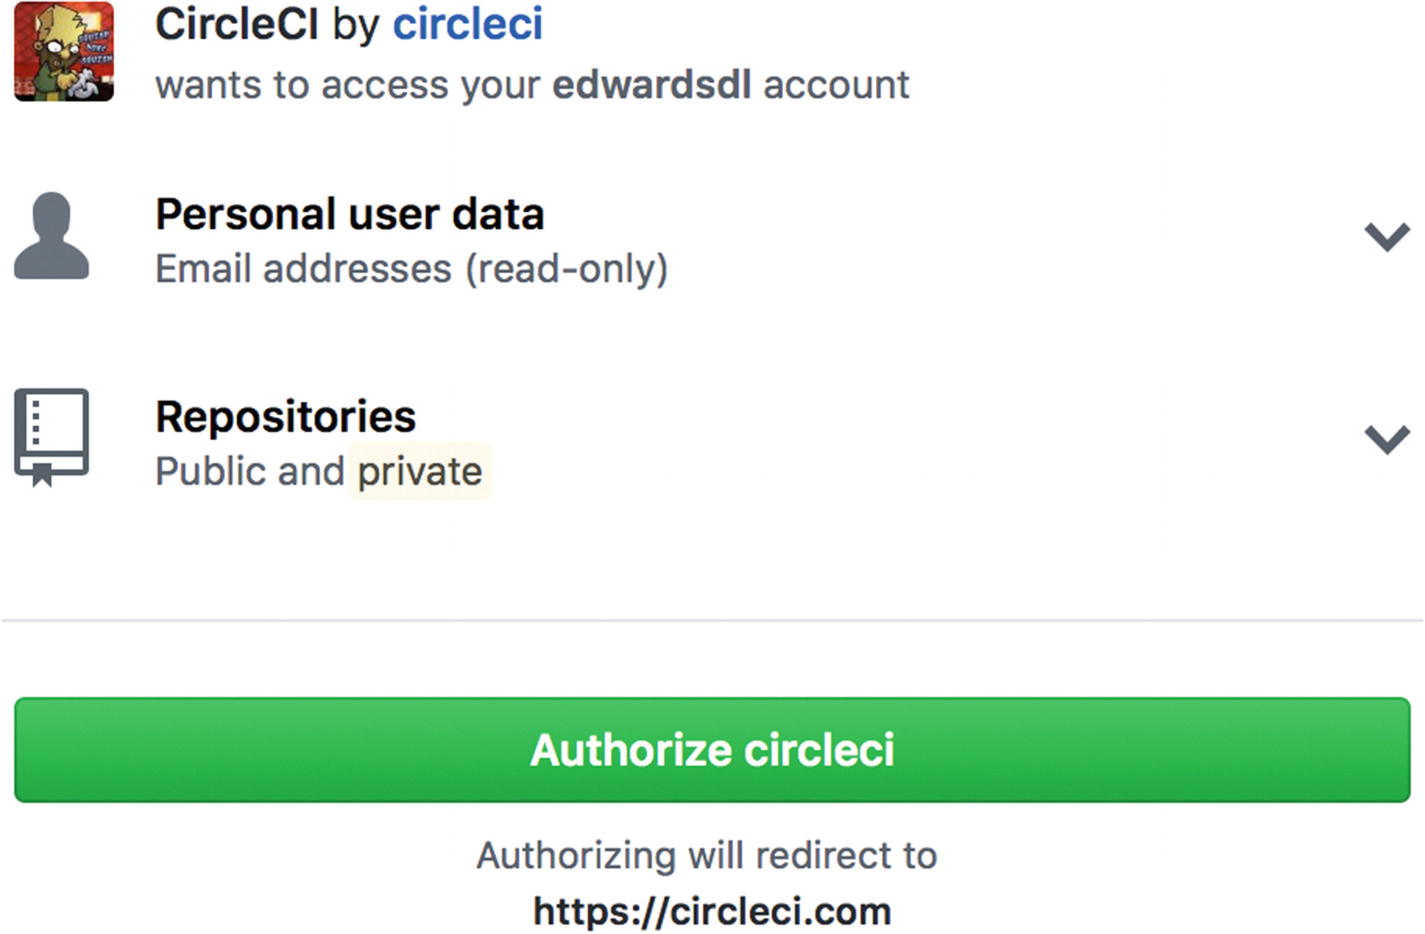
Authorizing CircleCI to access GitHub repositories
Creating a New CircleCI Project

The builds screen
To begin, click the blue “Add projects” button in the center of the page. This will take you to a list of all the repositories in your GitHub or BitBucket account.

Adding a new project
Tip
Make sure the “Show Forks” checkbox is selected, otherwise your repository won’t show up in the list.
Setting up the sample .NET Core project
After configuring the project, click the “Start building” button to create the CircleCI project and start a build.
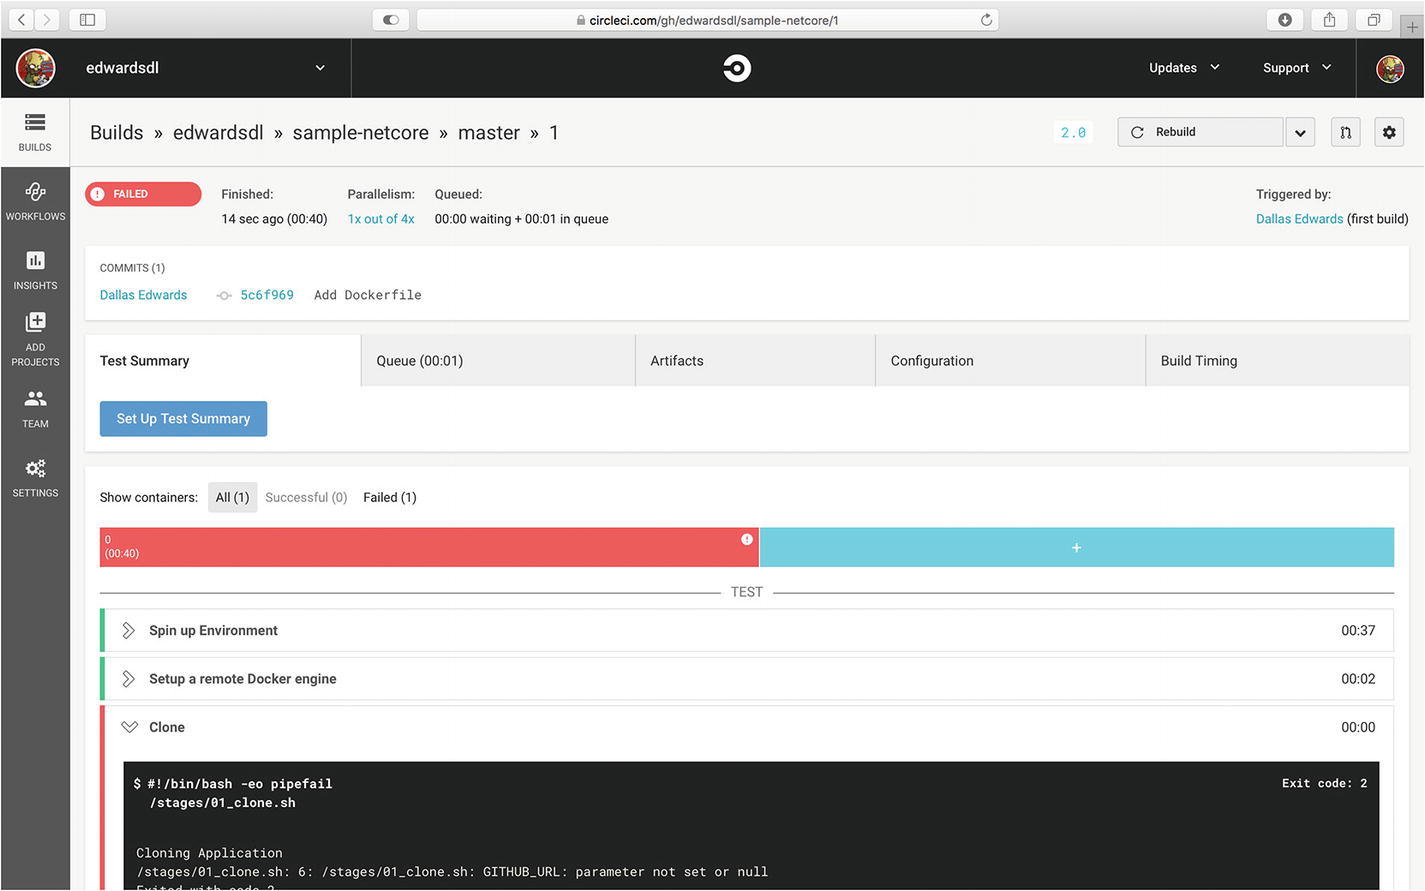
The first build of the sample .NET Core project
Projects page in Circle CI
Adding environment variables

Rebuilding the project

Running the job a second time
A Look at the CircleCI Configuration File
The sample-netcore config.yml File
The file starts by specifying the Docker image to use when executing the pipeline steps. Those steps are defined in the next section. Most of this should look familiar—the clone stage is run first, followed by the build, test, and archive stages. The setup_remote_docker step is new though. This is what allows us to run Docker commands inside our container.
Note
You can find more information about CircleCI’s config.yml file at https://circleci.com/docs/2.0/configuration-reference/ .
Overview
In this chapter we took a deep dive into all the components necessary to build a simple, albeit fully functional, generic pipeline. We gave examples of several critical pipeline stages: clone, build, test, archive, and deploy. We then took a look at the Dockerfiles we use to create our build environments.
We then put it all together and used our pipeline to build and deploy several sample applications on our local machines. Taking it one step further, we showed you how easy it is to migrate the pipeline from your local machine to Travis CI and then to CircleCI.
In the next chapter, we cover more advanced topics and show you how to tackle some of the problems that tend to show up in real-world implementations.