
Chapter 6. The Google Toolbar
It’s a fact: Google is fast. But if you have to pull up its home page every time you run a search, you’re wasting valuable seconds. True pros use Google from a toolbar you can install directly in your browser, and from the Google deskbar, which sits in the corner of your screen and lets you run a search without even opening your browser. This chapter covers the must-have toolbar; Chapter 7 covers the deskbar and a batch of other efficiency features and tricks.
The Google Toolbar: Search Faster
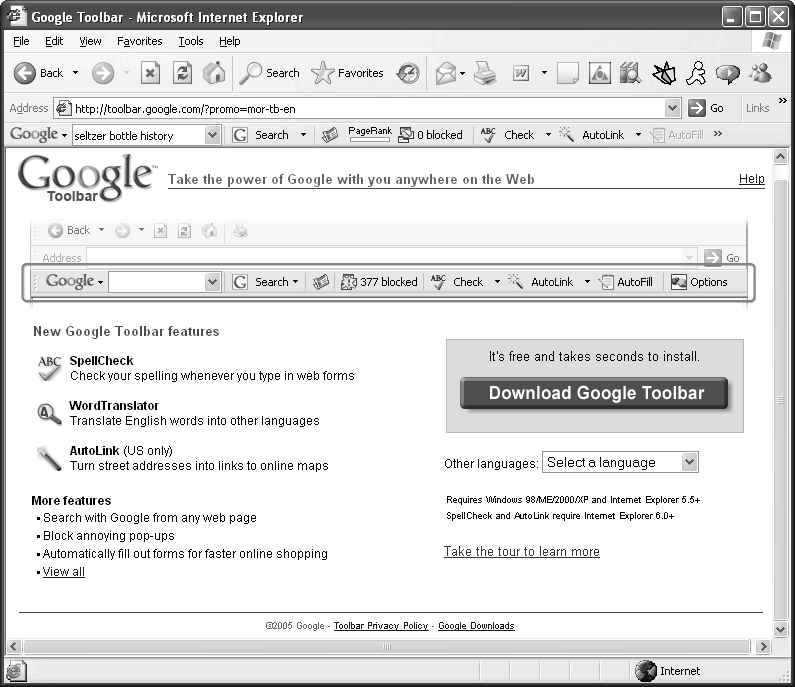
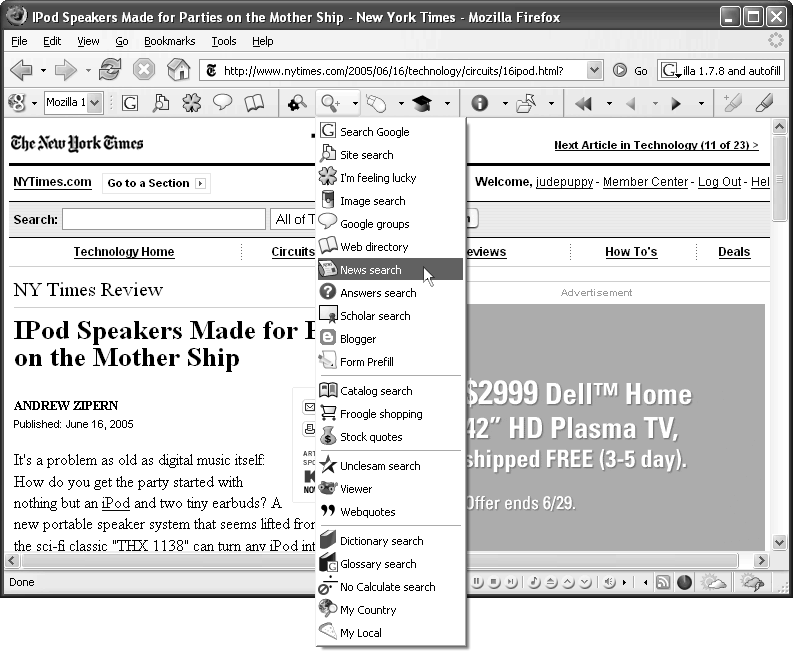
The Google toolbar, shown in Figure 6-1, can change your life. Easy to download and install, it sits at the top of your browser and lets you run a search without opening Google’s home page. Simply type your search words into the blank search box, press Enter or click Search Web, and your browser takes you directly to the page of Google search results. No muss, no fuss.
But wait—there’s more! The toolbar also lets you search a single site and run special Google searches (like News or Directory) without going to those pages first. And it adds some browser-type features that are more about surfing than searching: things like blocking pop-up windows, automatically filling in forms with your name and address, and a mess of other cool stuff.
If you take just one thing from this book, then, make it the Google toolbar.
The catch is that Google’s toolbar requires Microsoft Windows 95, 98, ME, NT, 2000, or XP, and Internet Explorer 5.0 or later (to use the pop-up blocker, make that Internet Explorer 5.5 or later). Alternatively, a beta (still-imperfect) version of the Google toolbar is available for Firefox 1.0, regardless of whether you’re using it on a Windows, Mac, or even Linux machine.

Note
To find out what version of Internet Explorer you have, choose Help → About Internet Explorer. In the dialog box that opens, you’ll see your version number. (If you’re using Firefox, choose Help → About Mozilla Firefox.)
Fortunately, if you’re on the Mac, you can use Apple’s Safari browser, which has a simple Google search bar built right in. And several other browsers, such as Mozilla and Netscape, have their own GoogleBox that runs a lot like the official Google toolbar. (For more information, see “Other Browsers with Google Features” in Section 6.1.4.19.)
Note
Firefox users actually have a choice: whether to use the official Google search bar or the GoogleBox. Both toolbars are fast and free. The only advantage of Google’s own toolbar is that it lets you view a page’s PageRank (importance), as described in Section 6.1.4.3.
Installing the Google Toolbar
If you’ve got the right operating system and browser, here’s how to download and install the Google toolbar:
Click over to http://toolbar.google.com/, shown in Figure 6-2 .
You can also get to the installation page from Google’s home page by clicking Services & Tools, or by clicking the same link at the bottom of any results page. Then scroll down the Services & Tools page and click the link for Google Toolbar.
If you want Google to use an interface language other than English (so Google gives you instructions in French, for example), choose one from the menu on the right, and then click the giant Download Google Toolbar button.
In Internet Explorer, a dialog box appears asking if you want to save or open the file; click Open. When the file is done downloading, Google automatically opens a wizard for installing the toolbar. (If you’re using a Mac, double-click the file once you’ve downloaded it.)
The first page of the wizard asks you to agree to its terms of use.
Scroll down to read them, and then click then click Agree to continue.
The next page of the wizard asks you to choose your configuration.
By configuration, Google means you can choose between what it calls “advanced features” and “no advanced features.” Choosing “advanced features” lets Google collect and display a bunch of additional information about Web pages you visit, such as:
PageRank info is Google’s system for gauging results’ relevance (Section 6.1.4.3).
A Page Info button can show you similar pages, backwards links, a cached version of your current page, and an English translation of the page if it’s in another language.
Word Translator displays the translation of an English word on a Web page into a language of your choice.
SpellCheck catches and cleans up your spelling mistakes and typos in Web forms.
AutoLink scans a Web page for street addresses and automatically links to maps of the location.
Of course, these options are nice to have, but when you sign on for them, you agree to let Google’s computers see information about the pages you’re visiting. After all, if the system doesn’t know what page you’re on, it can’t, for example, show you the version of that page it cached two weeks ago. If you choose “no advanced features,” your privacy will be fully protected, because Google won’t look at the sites you’re visiting. Instead, it just spits out search results when you ask for them.
However, if you do sign on for the advanced features, you’re not divulging that much to Google. When you let Google’s computers learn about the pages you’re visiting, the company says it doesn’t pay attention to your name or your email address, so they don’t actually track you. Put another way, Google learns about the pages you’ve asked for, but it doesn’t even know that you’re the person who’s looking at those pages.
Tip
If you install the advanced features now and become seized with a bout of paranoia later, you can turn off the features whenever you want (Section 6.1.4). From that time on, Google stops receiving information about the sites you visit.
If you want to go the advanced-features route, the configuration page of the wizard lets you select “Enable advanced features.” If, however, you wish to keep your site visits entirely private, simply select “Disable advanced features.”
Tip
To learn more about Google’s privacy policy for the toolbar, visit http://toolbar.google.com/privacy.html.
The last page of the wizard asks you to choose three settings.
The first setting is the Google site you want to use for your searches (Section 2.4). Leave it at Google.com, or scroll down and select the site you want.
The next setting is whether you want to use Google to as your default search engine. If you choose this—and it’s not a bad idea—you can run Google searches from the address bar and sidebar (Section 7.1.3 and Section 7.1.2, respectively).
Finally, Google asks whether you want it to automatically close all Internet Explorer windows to finish up the toolbar installation. If you have some windows open that you don’t want to lose, select “Don’t close…”; otherwise, leave the first choice turned on. Click Next.
Reopen Internet Explorer.
If you let Google close Internet Explorer, it does so now, and then reopens it automatically, too. If you didn’t ask Google to take this step for you, go ahead and close all your Internet Explorer windows, then reopen one.
That’s it: The toolbar should be sitting near the top of your browser.
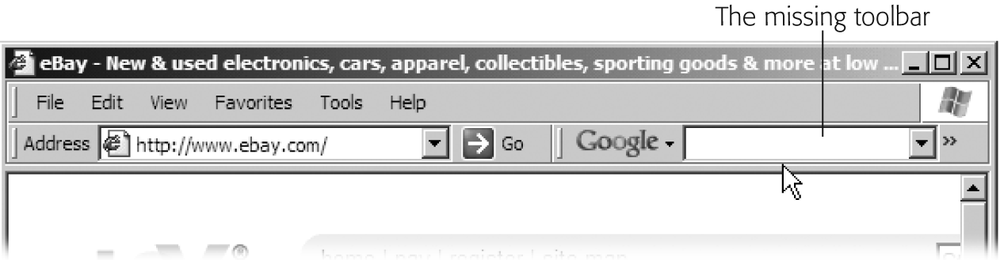
If it’s not, choose View → Toolbars (or right-click an existing toolbar), and then select Google from the list. If the Google checkbox is on and you still don’t see the toolbar, it might be smushed over to the right, as shown in Figure 6-3.
Note
Older versions of Internet Explorer list extra toolbars as “Radio.” If you see two Radio options, select the second one.
Working with the Search Box
Once you’ve got it installed, the Google toolbar is ready to go. Just type your search words into the blank box, press Enter or click the Search Web button, and savor the results Google delivers in your current browser window.
If you’d rather your results appear in a new window just this once, press Shift+Enter. If you want your results to appear in a fresh window every time, open the Toolbar Options dialog box, click the Options tab, and turn on “Open a new window to display results each time you search.”
Instead of typing words into the search box, you can also highlight and drag text from a Web page directly into the search box. (When you drag text, you might at first see the universal forbidden sign—the circle with a slash through it. The green light you’re looking for—the plus-box sign—doesn’t appear until your text is right over the search box.) This trick also works with text from a lot of word processing programs; highlight a word or two and try dragging the selection to the search box. If it works, great! If not, you’ve done no damage.
The Two Toolbar Buttons You Can’t Get Rid Of
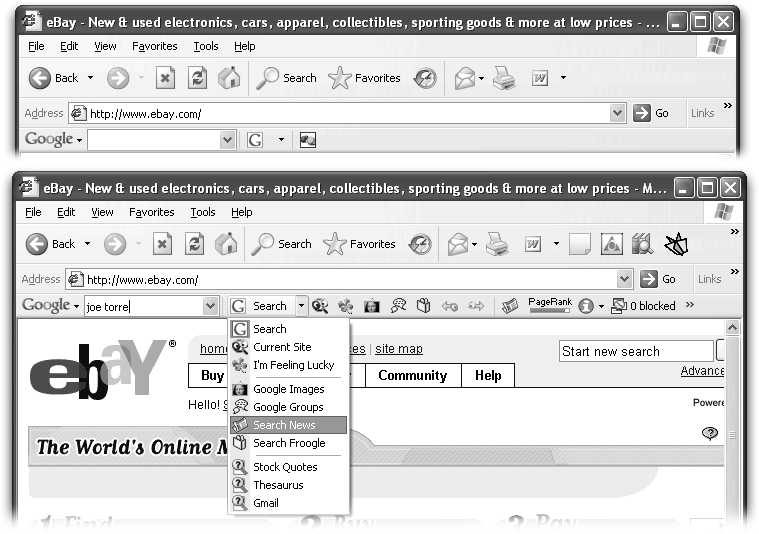
In addition to the search box, the toolbar comes loaded with a lot of features, all of which you can see at the bottom of Figure 6-4. But if you never use the optional stuff, or if you don’t have room for the extra buttons, you can remove everything but the search box and two essential buttons, as shown at top in Figure 6-4.
Tip
You can also change the size of the search box, making it just a few characters wide or nearly as wide as the whole screen. If you often search for phrases or lots of keywords at once, try a longer search box to see all your terms together. Simply mouse over the bar to the right of the search box until it turns into a two-headed arrow and then drag it right or left.
The two buttons you can’t get rid of are Search Web and the Google menu.
Search
Once you’ve typed some words in the search box, you can press Enter or click the Search button (the one with the G for Google) to begin your search. But the down arrow on the right end of the Search button is the gateway to a handful of other searches Google can perform (Figure 6-4)—things like searching Google’s image library and directory (both explained in Chapter 3). Just type in some terms, click the arrow, and select the special search you want to run.
Note
You can add Google’s special subject searches (for Linux, BSD Unix, the U.S. Government, Apple Macintosh, and Microsoft, described in Section 2.2.1.7) to the Search Web menu. Google provides no individual buttons for these searches, so it’s good to add them to the menu if you use them a lot. Open the Toolbar Options dialog box, go to the More tab, and turn on “Include special searches on search menu.”
Google menu
The Google button to the left of the search box contains a menu of links to Google’s home page and its other search services (Advanced Search, Google Images, Google Groups, and so on)—most of which you can also get to via optional buttons on the toolbar, described in the next section. The menu also includes a choice for Options, which brings up the dialog box shown in Figure 6-5.
The Google menu has one feature—Clear Search History—that you can’t get to any other way, and it’s useful. Here’s the story: The toolbar keeps a list of your searches, which you can find by clicking the down arrow on the right end of the search bar. That way, if you want to rerun a search, you don’t have to retype your terms. Instead, you can just open the list to find and select your original search; you don’t even have to press Enter to run it.
Note
If you want to use the history as a reference rather than a menu of choices, it may annoy you that Google runs a search automatically when you click in your search history. Happily, you can kill this feature. Open the Toolbar Options dialog box (to do so, click the Options button), choose the More tab, and turn off “Automatically search when you select from the search history.”
But if you’re trying to plan a surprise birthday party for your wife, and you don’t want her to see you’ve been searching for "novelty cakes" and "SpongeBob party favors“, you can wipe clean the list of searches. Simply choose Google → Clear Search History. (You might also consider clearing the browser’s history, which is a list of all the sites you’ve visited recently. In Internet Explorer, choose Tools → Internet Options, and on the General tab, click the Clear History button. To prevent it from ever storing the sites you’ve visited, set “Days to keep pages in history” to zero. [Other browsers work similarly; use their help files if you can’t find where the Clear History button is.])
Tip
Ordinarily, the toolbar saves a list of your last searches—up to 20—when you close the browser. If you want it to clear this history every time you shut down the browser, open the Toolbar Options dialog box, click the More tab, and turn off “Save the search history across browser sessions.”
Alternatively, you can stop the toolbar from keeping a list of your searches at all by opening the Toolbar Options dialog box, clicking the Options tab, and then turning off “Drop-down search history.”
Finally, the Google menu gives you five links to Google help pages:
Help takes you to Google’s Toolbar help page, which includes links to Frequently Asked Questions, information about its features, and a page For Geeks Only—a history of revisions to the toolbar’s features.
Privacy Information opens up a dialog box that describes how Google’s toolbar ensures your privacy. It also lets you turn off the advanced features, described above, which pass certain information about the sites you visit back to Google.
Contact Us gives the email address for Google’s toolbar team. You can use it if you have a problem with the toolbar that you can’t resolve through the help pages. But keep in mind that Google doesn’t respond to many people personally.
Uninstall takes you to a page with a button that automatically removes the toolbar from your browser. If you find the toolbar takes up too much room or is otherwise not to your liking, uninstalling it is a snap. The uninstall page also includes a blank box where you can type comments to Google about why you’re nixing the toolbar. If you’ve got a serious complaint—like the toolbar seemed to unexpectedly translate all Web pages into Korean—let ‘em know.
About the Google Toolbar opens a small window with the version number of the toolbar, and a treat for dead-language aficionados: the Latin De parvis grandis acervus erit, which translates loosely as “Out of small things a great heap will be formed.”
The Optional Toolbar Buttons
This section explains the Google toolbar’s additional buttons and features, from left to right across the toolbar. Some of these buttons and features don’t appear on the toolbar at first, and some come turned on. You can, however, add or remove any of these features and buttons, and in some cases, you can change their behavior, too.
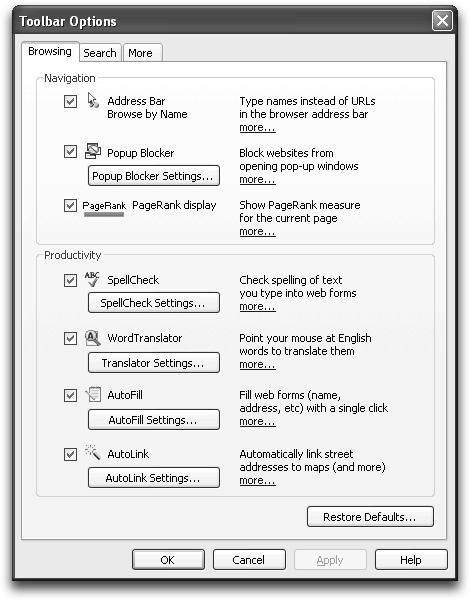
To customize the toolbar, click the Options button toward the right end of the toolbar, which opens the Toolbar Options dialog box, shown in Figure 6-5. This dialog box is command central for the toolbar. You can also click the Google logo button all the way on the left end of the toolbar and then choose Options to get the same dialog box.
Note
This dialog box has three tabs, each of which lets you control different features and buttons. If you don’t see the item you’re looking for on the first tab, try the other two.
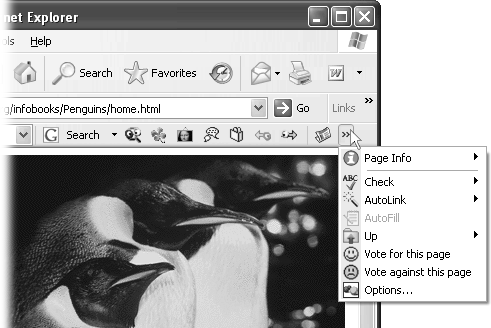
If your monitor is small, or if you keep a ton of buttons on your Web browser’s toolbar, some of the features can fall off the right end of the screen, leaving behind the little double arrow shown in Figure 6-6. Click the arrow to see the hidden stuff, and then select the button or feature you want to access.
Note
A few of the features, like AutoFill and the Previous and Next (arrow) buttons, stay grayed out when you’re on a page where they aren’t applicable.
Search Site
Use this button when you want to find your search terms just on the pages of the current site open in your browser, rather than on the whole Web. For example, if you’re on HBO.com and the site won’t let you search for pages that mention Sarah Jessica Parker without Kim Cattrall, try the Google site search, which lets you construct any Google search for that site alone.
I’m Feeling Lucky
This button works just like the button on Google’s home page (see Section 1.3). It bypasses the results page altogether, which is a nice way to eliminate a few clicks when you suspect Google’s first instinct will be the page you want to visit.
Search Images, Search Groups, Search Directory, and Search Froogle
These buttons run your search in Google’s alternate universes, described in detail in Chapters 3, 4, and 5. To use them, simply type your search terms into the blank box, and then click the button for the area you want to search. For example, to search for pictures of wildfires, type in the word and click the Images button. Instead of running your search on the whole Web—which could bring up definitions of wildfires, instructions for putting them out, and other flotsam—Google runs your search only in its listing of images.
Next and Previous results
These buttons are a huge timesaver. Suppose you’ve just run a Google search and, from the results page, you clicked through to a certain Web site. If, once you’re there, you find you want to go to the next or previous page on your list of results, simply click the appropriate button—no need to return to the page of Google results. Even better, the buttons work after you’ve clicked deeply into a site.
So, for example, if you search for movies, your top results include Movies.com, The Internet Movie Database, Hollywood.com, and Yahoo Movies. If you click through to The Internet Movie Database and surf around the site for ten minutes, winding up on an obscure page that shows whether Cary Grant ever collaborated with Keanu Reeves, you can jump directly to Movies.com or Hollywood.com without backing up to your results page or running the movies search again. Just click Previous or Next, and Google takes you directly to that result.
News
The News button takes you directly to http://news.google.com/, Google’s news culling service, described in Section 3.2.
PageRank
PageRank is Google’s system for determining the importance of every page it records (Section 3.2.1). This toolbar icon displays a green bar that fills in to show you how Google ranks the site you’re on right now. If you mouse over the icon, a small box appears, telling you what rank—on a scale from 1 to 10—Google gives the current page.
Checking PageRank is really a geek activity, of greatest interest to people who run Web sites and want to know how Google is rating them. For more on PageRank and Webmastering, see Chapter 8.
Tip
If you find PageRank isn’t filling in the green bar for your results, and you know you’re reaching the Internet from behind a firewall (software and/or hardware designed to deter hackers) and a proxy server (a computer that directs traffic between an intranet and the Internet), your network may be blocking the feature. To get PageRank back in order, you can try an experimental solution Google has devised. Open the Toolbar Options dialog box, click the More tab, and then turn on “Fix PageRank through proxies.”
Page Info menu
The Page Info button opens a menu with four choices to see more information about the page you’re currently on. It’s a quick way to dig deep without returning to your results page (or creating one in the first place) or heading to the Advanced Search form (Section 2.2). Here’s what you can get:
Cached Snapshot of Page lets you see the way the page looked when Google last recorded it. (For more on caching and when it’s useful, see Section 1.4.1.4.)
Similar Pages gives you listings for pages with similar content. (For more on this feature, see Section 1.4.1.8.)
Backward Links gives you a list of pages that link to the page you’re on. (For more on viewing links, see Section 2.2.1.7.)
Translate into English is handy, of course, if you’re viewing a page that’s not in English.
Pop-up blocker
Pop-up ads—the little advertisement windows that sprout like mushrooms in a damp basement—are a real impediment to productivity, forcing you to spend half the day closing them. Better to use a pop-up blocker, which prevents these annoyances from opening as you surf the Web. The Google toolbar has a built-in pop-up blocker that provides relief from this perpetual pest.
Note
Blocking pop-ups isn’t strictly a search function; it’s really a surf aid. But Google has endowed the toolbar with a handful of surfing features that make it easier to reach the things you want to find. If your browser doesn’t have its own pop-up blocker (like older versions of Internet Explorer), the Google toolbar proves a nice stand-in.
When Google blocks a pop-up window, your cursor briefly displays a little Pow! symbol, the browser makes a noise, and the toolbar button tells you how many pop-ups Google has blocked. (You can turn off the counter if it annoys you. In the Toolbar Options dialog box, go to the More tab, and choose “Hide popup blocker count.” You can also squelch the noise by turning off “Play a sound when blocking pop-ups.”)
Tip
If you want to see how many pop-ups occur on a single site, you can reset the counter to zero by pressing Shift+Alt while clicking the pop-up button.
But not everybody wants to block pop-ups all the time. Some pop-ups aren’t ads at all—in fact, they’re an important part of certain Web pages. They can be coupons you want, forms you have to complete, or even email messages on a Web-based email system. To preserve these friendly pop-ups, you have two choices. You can tell Google to let all the pop-up windows through on a specific Web site. (Do so by clicking the pop-ups button while you’re on that site.) Or you can allow pop-ups on a case-by-case basis: Leave the pop-up blocker on and Ctrl-click the link or button for a pop-up you want to see. (You’ll know which link or button to Ctrl-click because, if you have pop-up blocking turned on, nothing will happen when you first try to click through.)
SpellCheck
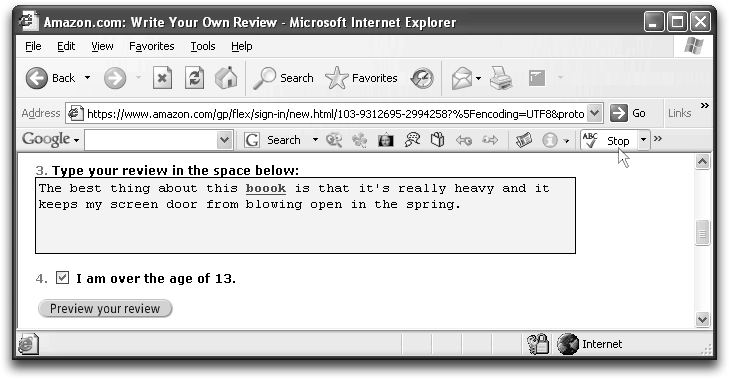
Even in this crazy world of point-and-click, you still have to do a fair bit of typing on the Web—think of your Web-based email program, your Amazon.com reader reviews, your Google Group discussions (Section 4.1). If you’ve ever wished there were a way to check your online typing for typos and spelling errors, Google has heard your wishes and bestowed a spell checker in the latest version of the Toolbar.
As shown in Figure 6-7, after you click the “Check” button on the Toolbar, Google scans your text for errors and highlights any suspect words. To correct misspelled words automatically, click the green arrow next to the SpellCheck button in the Toolbar and choose AutoFix. If AutoFix is feeling neurotic about a word it doesn’t recognize, it leaves it highlighted for you to deal with.
AutoLink
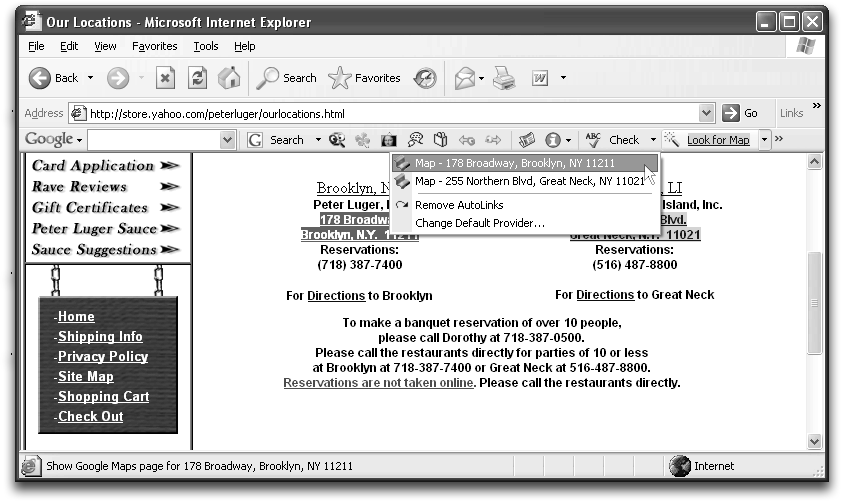
Wouldn’t it be great if all companies had a map of their location on their Web sites so you wouldn’t have to go mucking around on a map site? For those Web sites that are map-free, the Toolbar comes to the rescue with its AutoLink function. When you click the AutoLink button, the Toolbar scans the page for U.S. street addresses and then presents you with a link to click through for a map to the exact location.
AutoLink works for more than just finding that new Burmese restaurant in town—you can also use it to hunt down books, car information, and tracking and delivery info from FedEx and UPS. You just need to be on a Web page where a book’s ISBN number, a car’s VIN number, or a package-tracking number is displayed. Click the AutoLink button to see those numbers available as links, as shown in Figure 6-8. When you select one of those links, the Toolbar pops open a window of relevant information—the book’s page on your favorite online bookstore, for example.
By default, AutoLink goes to Amazon.com for its book info, CarFax for its vehicle identification data, and Google Maps for its maps, but you can change these settings. To change the source where AutoLink gets its information, click the arrow next to the AutoLink button and then choose Change Default Provider. Use the drop-down menus to change the place that AutoLink uses for reference.
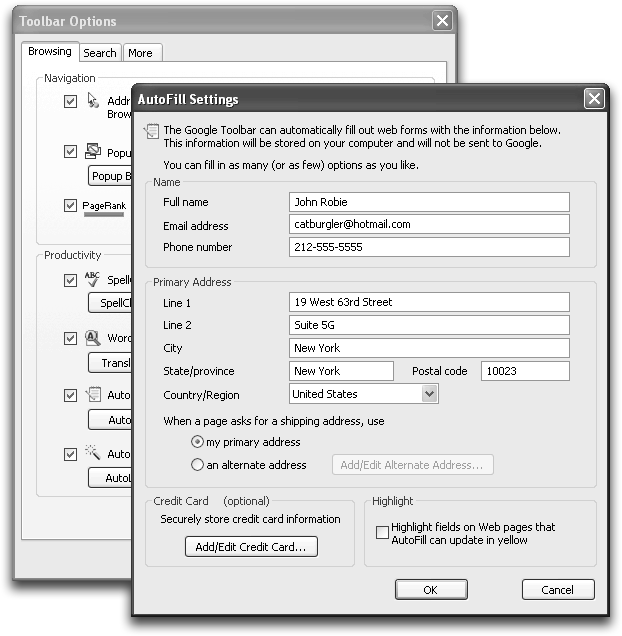
AutoFill
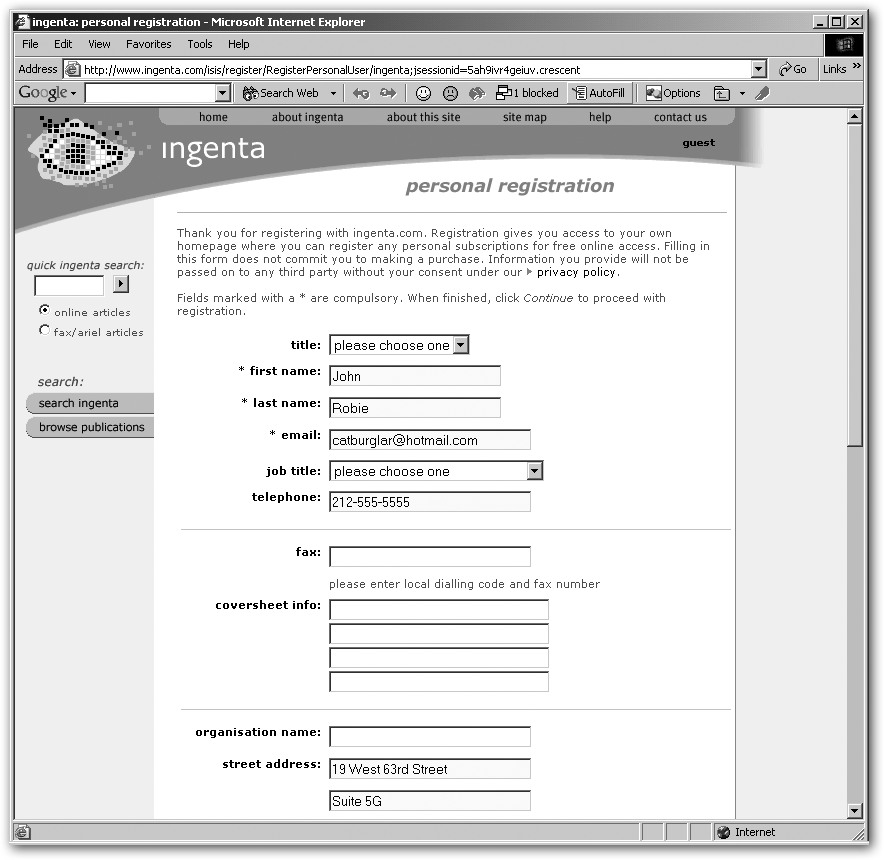
If you’re the type who can’t make it through the day without buying something online, AutoFill can save you scads of time filling out order forms and other pages on the Web. The feature lets you store your name, address, and other information in one place on your computer. Then, when you visit sites with blank forms, Google highlights in yellow the spaces it recognizes; when you press the AutoFill button, the yellow spaces fill in with your info (Figure 6-9). You could take an annual weeklong cruise with the time you save pecking through forms.
To set up AutoFill, open the Toolbar Options dialog box and click the Browsing tab (Figure 6-10). Click the AutoFill settings button and fill in as much of the form as you’d like. AutoFill stores your information on your computer—not on Google’s, so the company never sees what you’ve written down. When you’re ready to use AutoFill, simply click the AutoFill button to work the magic. Bear in mind, though, that anyone else who uses your computer can see whatever you’ve typed on the AutoFill form.
The exception is credit card information, which AutoFill lets you store in a way that nobody else can see or use without a password. This is fortunate, of course, because it prevents your 4-year-old from buying Barney CDs online without your permission. Here’s how it works: After you fill out the credit card info, press Set Password to bring up a dialog box that lets you create a password. Once you’ve done so, you can’t use or edit the credit card info without the password. And—cleverly—if you forget your password, AutoFill deletes the credit card number instead of prompting you (or a snooping family member) with a not-so-top-secret hint like “mother’s maiden name” or “favorite pet.”
The downside to storing credit card info on your computer is that it may be vulnerable to hackers. Although AutoFill encrypts your data when it saves it on your hard drive, and Google claims it’s safe, some privacy experts believe it’s smarter to keep your computer free of truly sensitive numbers. You’ll have to let your tolerance for risk—and inconvenience—guide your decision.
Note
If you don’t want AutoFill to highlight the spaces it can fill in (a reasonable desire if you share your computer with a lot of people and you don’t want them to know how you’ve set AutoFill), open the Toolbox Options dialog box, click the More tab, and then turn off “Automatically highlight fields that AutoFill can fill.”
Voting
The yellow and blue smiley and frowny faces are what Google calls voting buttons. If you particularly like or dislike a set of results from Google or a Web page you’re visiting, you can tell Google by clicking one of these buttons. Weirdly, when you do so, nothing seems to happen—except for maybe a note’s appearing at the bottom of your browser saying that Google has recorded your vote. So what does Google do with your votes? A company spokesperson says, “We use this information in aggregate to help us improve the overall quality of search results.” The Pentagon gives more direct answers. Vote at your discretion.
BlogThis!
If you’ve never heard of a blog and suspect it’s some kind of stain, see the box in Section 6.1.4.16. But if you have a blog—whether hosted by the Google-owned Blogger service or any other blogging site—this button is a big old blogging bonus.
When you’re visiting a Web page that you want to note on your blog, click BlogThis! to automatically create a new post that includes a link to the current page. Or highlight text on a Web page and click BlogThis! to create a new post that includes the whole selection. In either case, clicking the button opens a small window for your new post with its fresh link and/or text, ready to edit or publish directly.
Options
The Options button opens the Toolbar Options dialog box. It’s handy to keep on the toolbar if you like to change your toolbar configuration often. Otherwise, you can open the dialog box from the menu under the Google button.
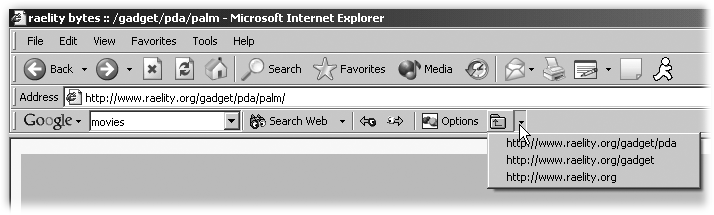
Up
The Up button lets you move through the levels of the site you’re on, which means you can jump from a page deep within a site to a page closer to the home page without running a new search.
To understand the usefulness of this feature, it helps to think of the structure of a Web site like a family tree. At the top is the mother of all pages on that site (called the home page), and under it are a couple of branches that contain the other pages on the same site. Under those pages are branches filled with even more pages. In a URL (for example, www.raelity.org/gadget), the levels of a site are separated by slashes (/). That’s why some Web addresses look like this:
http://www.raelity.org/gadget/pda/palm/
(That site has tips on updating the memory on a certain PalmPilot.)
If your Google results take you to such a page, you could find yourself wondering what else the site has to say about gadgets or just what the raelity.org site is, exactly. Click the Up button to move through a site’s levels one at a time. In this case, you’ll move next to:
http://www.raelity.org/gadget/pda
and then to:
http://www.raelity.org/gadget
and then to:
http://www.raelity.org
Or click the arrow on the right side of the button to get a list of the current site’s levels, as shown in Figure 6-11, and then select one to jump to that page.
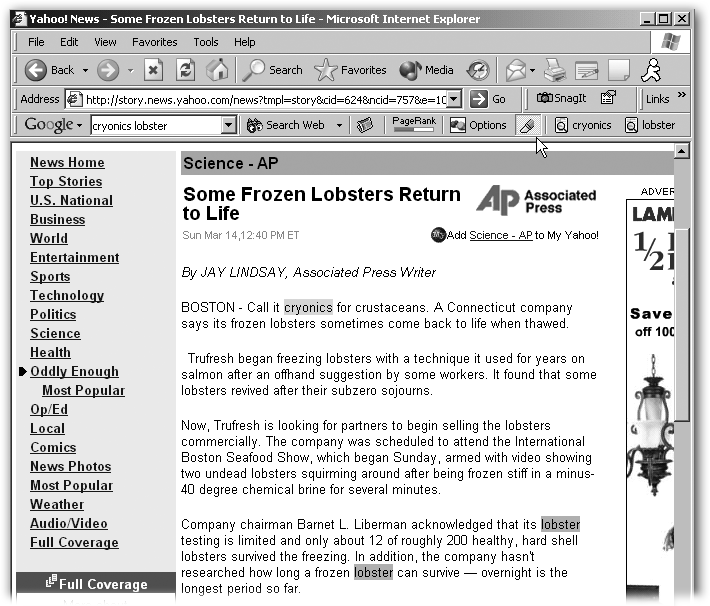
Highlight
Sometimes, it’s handy to highlight all the instances of a word or phrase on a page, making them easier to find or count. For example, if you’re on a very long, text-heavy page, and you want to find any mention of lobster or cryonics, you could burn out your eyeballs scrolling through the text. Instead, use the Highlight button to have Google block out your terms in hard-to-miss colors, as if it had hit them with an electronic highlighter pen. (Google highlights each word or quoted phrase in a different color, as shown in Figure 6-12.) The cool thing about this highlight feature is that you don’t need to run a search to use it. Just type the words you want to find into the search box—but instead of hitting Enter, click the Highlight button. (To turn off the highlighting, click the button again.)
Word Find
Like the Highlight button, the Word Find buttons help you locate instances of a word or phrase on the current Web page. Instead of coloring them, however, these buttons, shown in Figure 6-13, jump to the terms. Also, like the Highlight button, you don’t have to run a search to use the word buttons. Just type the words you want to find into the search box, but instead of hitting Enter, click the appropriate word button. Each time you click a button, you move to the next instance of that word or phrase. To go backwards, hold down Shift while clicking a button.
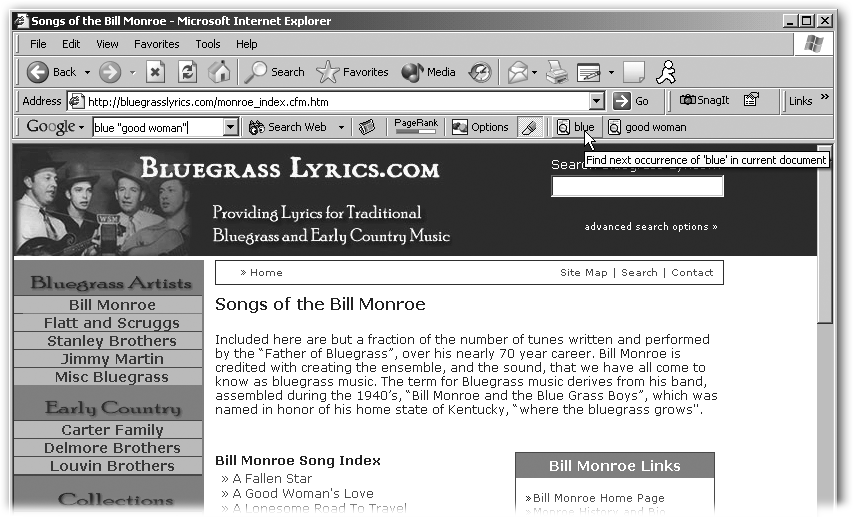
In fact, the Word Find feature is really useful in combination with highlighting. If you first highlight your terms and then use Word Find to skip to them, they’re even easier to find.
If you want to search for exact word matches only—say, punk but not spunky—press Ctrl when you click the punk button to have Google skip any words that contain punk along with other stuff.
Tip
If you’ve turned on the Word Find buttons, but you don’t see them, they might have slipped off the edge of the screen (like the ones in Figure 6-6). Click the arrows on the right edge of the page to see the hidden buttons.
Search by Country
If you often use one of Google’s internationally based search sites (Section 2.4), you can add a toolbar button to run searches from the Google site of your favorite country. For example, if you do a lot of business in Brazil and you frequently want to search for pages from Brazilian sites, this button can save you a lot of clicking.
Warning
Unfortunately, when you add a country button, Google changes the interface language for all your results pages to match the country you’ve added—which means things like the cached link and all the buttons come out in Brazilian Portuguese. There’s a workaround you can use to get back to an English interface, though, as described in Section 2.1.1.
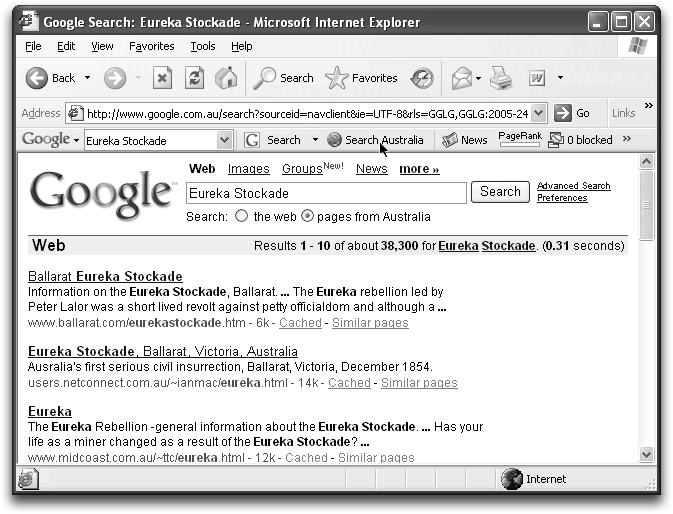
Setting up the button is a quick two-part process. First, open the Toolbar Options dialog box. At the bottom of the Search tab, pull down the “Use Google site” menu and pick a country. (For this example, say you picked Australia.) Second, under the “Add Google Search buttons to your Toolbar” area just above, turn on the “Search Australia” button that just appeared.
Now Google doesn’t automatically restrict searches to the country you’ve chosen unless you click the country button you’ve just added. If you type in search terms and press Enter or Search Web, you get results from Google’s regular site (which searches Web sites from anywhere in the world). But when you run a regular search, at the top of your results page, Google includes an option to run your search again and limit it to pages from the country you’ve specified—or pages in the language of that country (Figure 6-14).
The workaround for getting your results back in English is simple: Head to Google’s Preferences page and change your interface language to English, and then click Save Preferences (or Salvar Preferencias, if Google is speaking to you in Portuguese). The only problem with this solution is that your results pages now omit the option to run your search again on the alternate Google site. Still, the toolbar keeps your last search in the search box, so you can simply click the country button if you don’t find what you want in a regular search.
WordTranslator
If English isn’t your first language (or it is your first language and you’re trying to learn a second one), Google Toolbar’s WordTranslator feature beats the heck out of thumbing through a dictionary or leaping in and out of Google’s Language Tools page (Section 2.4) to look up words.
To turn on the translator, click the Options button on the Toolbar (Section 6.1.3) and then, on the Browsing tab, turn on the checkbox for WordTranslator. Click the Translator Settings button and select the language you want to see onscreen when you point the mouse at an unfamiliar English word. Your tongue choices here include French, German, Spanish, Italian, Japanese, Korean, and both simplified and traditional Chinese.
WordTranslator doesn’t exist as a Toolbar button—it just hitches along for the ride as you surf along and leaps into action when you hover the mouse over an unfamiliar word. Figure 6-15 shows you an example of WordTranslator at work.
Other Browsers with Google Features
Although Google makes its toolbar only for Firefox and Internet Explorer for Windows, several other browsers have noteworthy Google features.
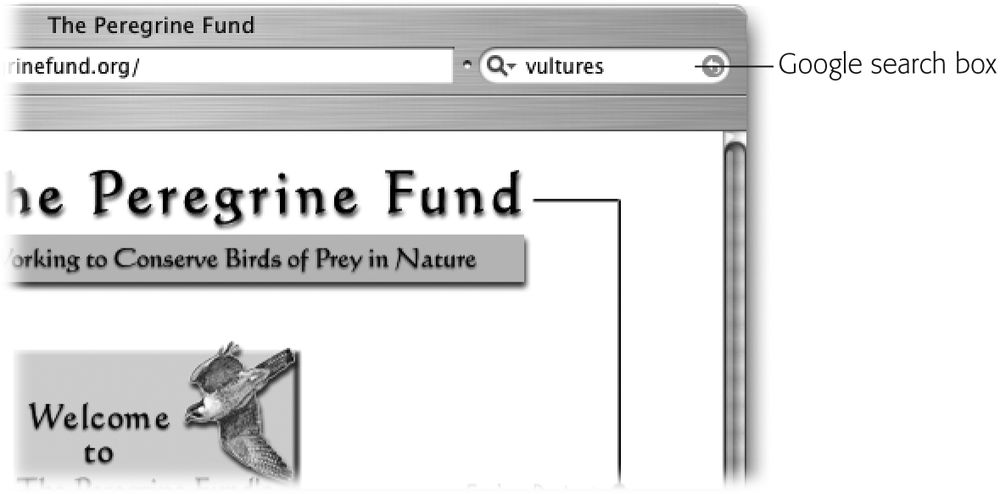
Safari
The speedy Safari browser comes with Mac OS X, and it has a Google search box right on the main toolbar, as shown in Figure 6-16.
Note
If you have an earlier version of Mac OS X that doesn’t include Safari, you can download the browser from www.apple.com/downloads/macosx/apple/safari.html. (The most recent versions of Mac OS X—Panther (10.3) and Tiger (10.4)—both include Safari.)
If you’re still using Mac OS 9 and your inner geek is hankering for a little hacking, you can set Internet Explorer 5 to use Google as its search engine, allowing you to run Google searches from the Search Pane. Google doesn’t provide directions, but it does semi-officially endorse the trick by pointing to the instructions at www.visakopu.net/ie5google/.
The Safari search box doesn’t have all the features of the Google toolbar, but it does work beautifully for its essential purpose: running a Google search from anywhere on the Web. When you type in your terms and press Return, your Google results appear in the main browser window, just as with the Google toolbar.
Tip
If you’ve turned on tabbed browsing in Safari—which lets you open multiple Web pages within one browser window—you can open your Google search results in a new tab by pressing ⌘-Return after typing your search terms.

The minimalist Safari search box has a couple of cool tricks up its sleeve:
Search history. The search box keeps a history of your recent searches; to get to them, click the magnifying glass on the left end of the box (it looks like a “Q”). When you select the search you want, Google runs that search again.
Note
You can clear the search history list (which you might want to do if you’ve been surfing, say, Gamblers Anonymous sites on your grandmother’s Mac) by selecting the last line—Clear Recent Searches.
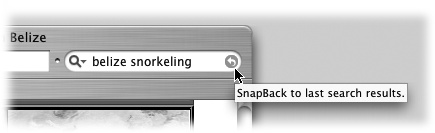
Figure 6-16. The search box runs Google searches within Safari. If you’d like to run your searches from outside your Web browser, though, you can use a program like SimpleSearch (http://www.chimoosoft.com/simplesearch.html).SnapBack. After you’ve run a search and clicked through to one of your results pages, you can return directly to your Google search results without bushwhacking back through all the pages you’ve searched. Just click the SnapBack icon—the orange button with a white arrow at the right edge of the search box (Figure 6-17)—which takes you to the results page for the last search you ran. (It appears as a gray “x” when you’re on a results page.)
Sizability. If you’d prefer a longer or shorter search box, you’re in luck. Mouse over the little dot directly to the left of the box. When it becomes a two-headed arrow, you can drag the edge of the box left or right to resize it.
Two additional Safari features
Safari itself incorporates a couple of handy features that are part of the Google toolbar:
A pop-up blocker that you can turn on by choosing Safari → Block Pop-Up Windows (or by pressing ⌘-K). The same process turns the blocker off.
AutoFill, a button that automatically fills in forms on Web pages. You can turn on AutoFill by choosing Safari → Preferences → AutoFill and then selecting the place—such as your Address Book card—from which you’d like Safari to grab your personal information. Then, to add an AutoFill button to your toolbar, choose View → Customize Address Bar, and drag the Autofill button wherever you want on your toolbar.
Mozilla, Firefox, and Netscape
Like Goldilocks and the Three Browsers, Mac fans, Linux geeks, and PC people with an aversion to Microsoft all have other free options: Mozilla (www.mozilla.org), Netscape (http://channels.netscape.com/ns/browsers/download.jsp), and Firefox, which is a friendlier version of Mozilla (http://mozilla.org/products/firefox/). All three browsers are based on the same stable technology, known as Gecko.
They’re all very fine programs, but perhaps the coolest thing about them is that you can download a feature for them called the Googlebar, shown in Figure 6-18. It emulates Google’s official toolbar nicely, right down to the Search Site button and the highlighter feature (neither of which is available in Safari). If you’ve recently made the switch from a PC to the Mac and you’re lamenting the loss of the Google toolbar, you could try one of these browsers.
Note
Mozilla, Firefox, and Netscape all include an option for tabbed browsing, a configuration that lets you open multiple Web pages within one browser window—a major screen-space conservation initiative. They block pop-ups, too, so the Googlebar doesn’t have to.
Mozilla vs. Netscape
Mozilla 1.7.8 and Netscape 8.0—the latest versions of each, as of this writing—look similar and act nearly the same. The most obvious difference is that Mozilla installs with different themes. (A theme describes the way a program looks—things like the colors and shape of the buttons, icons, and other interface elements.) But the two browsers are typically used by different types of people.

Mozilla is popular with programmers and other geek types because it comes with a seemingly infinite number of settings you can tweak, and because it always has a test version that’s slightly more advanced than Netscape’s latest version. Netscape, on the other hand, is owned by AOL. So while it comes with the same basic features Mozilla has, it includes AOL Instant Messenger, a shopping button, and a few other extras that make it appealing to civilians.
But Netscape also has a few notable problems. It harbors windows that crop up regularly, exhorting you to join the Netscape Network—an unnecessary distraction. And Netscape installs extra programs (like Rediscover AOL) and desktop icons, even if you don’t ask for them.
On the bright side, AOL has made an effort to get Netscape up to speed in today’s world; version 8.0 has self-configured settings that make it safer from the get-go, along with security features that warn you against spyware that might be trying to jack your system. The new version also comes with a Passcard Manager function that remembers your user names and passwords, just like AutoFill.
Firefox
If Mozilla is too complicated and Netscape is too clogged up with AOL clutter, a third option, Firefox, might be juuuust right. Unlike Mozilla and Netscape, which come loaded with an email program, a Web page composer, chat tools, and tons of features that many people don’t use, Firefox is a standalone browser that incorporates only the most popular tools and settings. Not only does this arrangement make Firefox easier for the average person to use, but it also means the program is speedier and takes up less room on your hard drive. (If you want a automatic weather report in your browser window, a built-in dictionary, or many other tasty features that let you do other things in your Web browser, Firefox offers dozens of extensions, otherwise known as add-ons, that you can easily install. For a list, check out http://extensionroom.mozdev.org/main.php/Firefox). The Autofill extension (http://autofill.mozdev.org) is a popular one for people who covet the Google Toolbar’s time- and type-saving feature.
In addition to its lightweight configuration, Firefox has a sleek interface, state-of-the-tech security, pop-up blocking, tabbed browsing, and many other nifty features, including a built-in Google search box (which also lets you search for a term on the page you’re currently viewing). For fancier features, you can add the Googlebar—or regular Google toolbar—to Firefox. And if you type a search term into the address bar, it automatically runs a Google I’m Feeling Lucky search.
Firefox, which suffers from far fewer security holes and exploitable issues than Microsoft’s dominant Internet Explorer, saw an uptick in popularity when its first official version was released. The underlying technology is the same as Mozilla’s, and there are a few problems, like the occasional misspelled menu item or a cookie setting that includes the observation, “Cookies are delicious delicacies,” inserted by an engineer with a raging sense of humor.
Note
If you like the look and feel of Firefox, check out Mozilla’s free email program, Thunderbird, at www.mozilla.org/products/thunderbird/. It’s available for Mac OS X, Linux, and most Windows systems and comes with a Junk Mail filter to weed out annoying spam from your real messages.
For a nice set of answers to frequently asked questions about Firefox, see www.mozilla.org/support/firefox/faq. To download it, head over to www.mozilla.org/products/firefox/, choose your operating system, and let ‘er rip.
Tip
In a hurry to get those Google results? Google itself helps you out by using a special feature called prefetching in recent versions of Firefox, Mozilla, and Netscape. Prefetching automatically load pages that turn up in search results, invisibly and in the background. That means that most of the page has already downloaded to your computer by the time you click its link. The downside? If you opt not to click on a prefetched page’s link, you still have all its parts taking up a little piece of your hard drive space.
The Googlebar
The Googlebar works with Firefox, Mozilla, and newer versions of Netscape (7.0 or later). Installing it is a snap: Just visit http://googlebar.mozdev.org/installation.html, scroll down past the experimental version to the first version below that (currently 0.9.5), and click Install. Your browser handles the installation and then prompts you to restart the browser. That’s it.
Tip
If the Googlebar doesn’t appear after you install it and restart your browser, press Ctrl+F8 (⌘-F8 on a Mac), which turns the Googlebar on and off. Since Firefox has no menu item for turning the Googlebar on and off, this shortcut can be important.
You run a search from the Googlebar by typing your terms into the blank box and then pressing Enter; your browser shows you regular Google results as if you’d searched from the Google home page. If you have tabbed browsing set up (Section 6.1.4.19), you can open a search in a new tab by pressing Ctrl (or, if you use a Mac, ⌘) when you press Enter or click on any button on the Googlebar.
If your first search seems to yield results in Spanish or some other language you didn’t choose, your Googlebar installed itself with a twist. To fix it, click the button at the left edge of the toolbar, marked “G,” to open a menu of choices for Google pages. Toward the bottom of the menu is a choice called “Gooblebar options,” which opens a dialog box that lets you adjust settings on the Googlebar. Open the dialog box and then click the tab labeled “Google Sites.” Change the first item, “Select international version of Google Search,” to the United States (or wherever you’d like) and then click OK.
Note
On the “G” menu, the choice for Help takes you to a help page for the Googlebar, not to Google’s help pages. To get to Google’s help pages, you have to first hit the home page and then click the link for About Google, which takes you to a page with several help options.
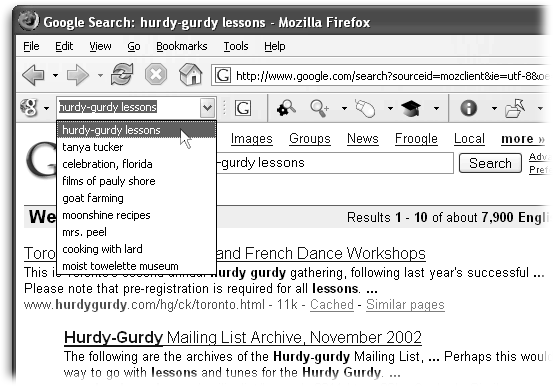
To see a history of your searches, click the arrow on the right end of the search box, as shown in Figure 6-19, or click in the search box and press the down arrow on your keyboard.
Tip
The keyboard shortcut for jumping to the search box is Ctrl+F12 (on a Mac, ⌘-F12). Memorize this shortcut to save wear on your mouse and your wrist.
In most respects, the Gooblebar works just like the regular old Google toolbar, and it includes nearly all the same features listed in Section 6.1.4. For example, to search any of Google’s special sections, like Images or the Directory, you type your terms and click the appropriate button (if you mouse over a button, a little box appears telling you what it does). You can choose which buttons appear on the Googlebar by right-clicking anywhere along it to bring up a contextual menu, as described in Figure 6-20.
The Googlebar has a few features that aren’t on Google’s own toolbar, including buttons for Catalog search (Section 5.2.1), Google Answers (Section 4.2), and computer and university searches (Section 2.2.1.7). If you regularly search any of these offbeat areas, the Googlebar can save you precious clicks.
Tip
To make the search box smaller or bigger, drag the dotted line next to the right edge of the search box as far left or right as you’d like.
So what’s missing from the Googlebar? A few buttons: PageRank, BlogThis!, AutoFill, the voting buttons, and the PopUp Blocker. If you really need those features, switch to Google’s own toolbar—but keep in mind that you’ll have to switch to a new browser, too, unless you’re already using Firefox.
Two More Browsers Worth Mentioning
Truth be told, nearly everyone in the world uses Internet Explorer, and a handful of renegades use Safari or Mozilla and friends. An even smaller group of rebels uses other browsers, two of which have Google search features that make them worth a few paragraphs.
OmniWeb
OmniWeb, which works on Mac OS X only, lets you run a Google search from the address box. You can type directly into it, but you have to preface your search with the word google, like this:
google poker equipment
Press Return to run your search and get a Google listing of gambling supply sites.
OmniWeb has a reputation for fast browsing, and the latest version features ad blocking and versatile tabs that come with a thumbnail view of the tabbed page. It’s free to try for 30 days (and $30 to buy after those 30 days are up). You can download it from www.omnigroup.com/applications/omniweb.
Opera
The Opera browser, which works on every major operating system in the world, has a built-in search bar with options for Google and a slew of other search engines. You can even search for video clips, MP3s, and other goodies—and Opera has tons of cool customization features. You can download it for free from www.opera.com.